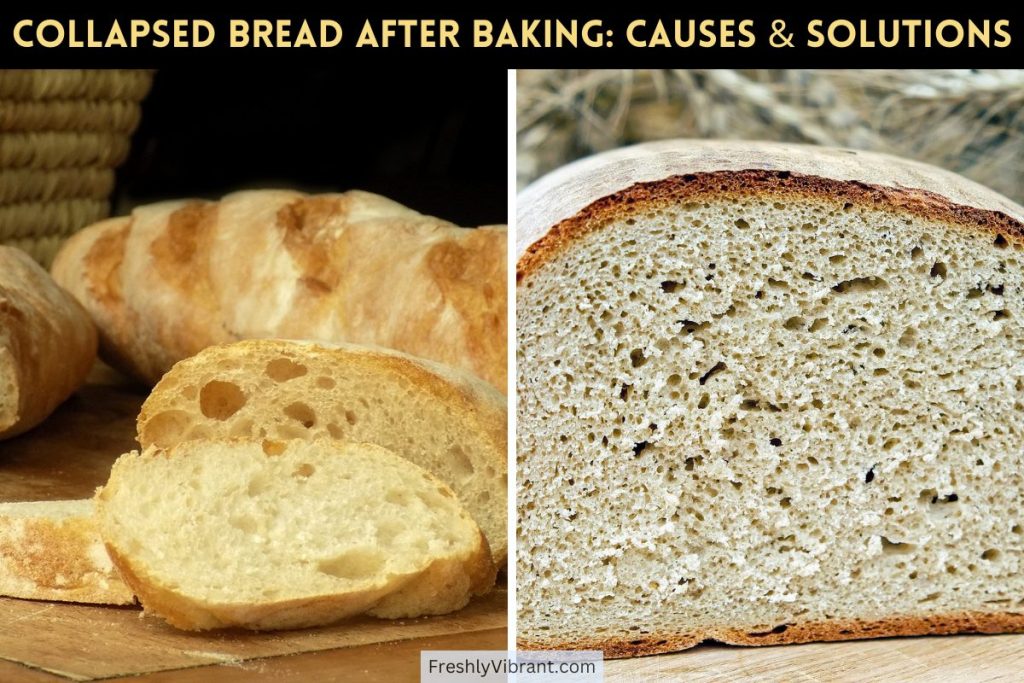
Bread Collapse After Baking: Causes, Prevention, Fixes
Have you ever pulled a freshly baked loaf of bread from the oven, only to watch it collapse right before your eyes? Bread collapse after baking is one of the most frustrating things to see, especially after you’ve put in the time and effort. But you’re not alone—bread collapse is a common problem.
In this article, we’ll explore the science behind collapsing loaves, break down the common causes, and offer practical fixes so you can bake with confidence.
Why is Your Bread Collapsing After Baking?
Oh man, the first time I watched a gorgeous loaf of sourdough deflate like a balloon after baking, I just stared at it like it betrayed me. You put in all this effort—the kneading, the rising, the careful bake—and bam, it caves in like a bad tent.
I’ve learned (the hard way) that bread collapse isn’t usually caused by one big mistake. It’s a stack of little things, and if you’re like me, you’ve probably hit more than one of these at once.
Over-proofing the Dough
This one got me a lot when I first started baking during the whole “quarantine bread craze.” I’d let the dough rise too long, thinking bigger was better.
But nope—over-proofed dough is like a balloon that’s been blown up just a bit too far. It loses strength. You poke it, it doesn’t spring back, and when you bake it, it puffs up fast and collapses even faster. Now I use the “poke test”—a gentle press with a floured finger.
If it springs back slowly but not all the way, it’s ready. Too fast? Needs more time. Doesn’t bounce back at all? Over-proofed, my friend.
Excess Moisture
High-hydration doughs are fun to work with—until they aren’t. I made this beautiful ciabatta-style loaf once, and the dough was so wet it felt like batter. Looked great in the oven… until it cooled. It just sank. Turns out, when there’s too much water, the crumb gets weak and soggy.
Then as it cools, moisture travels from the inside to the crust and boom—collapse. I’ve learned to dial back the water by 5–10% if things feel too sticky or soupy.
Insufficient Salt
One time, I straight-up forgot the salt. The dough tasted like sadness and rose like crazy. Without salt, the gluten structure doesn’t form right, and the yeast goes wild. It was like watching bread on fast-forward—puffy, airy, and then… flat.
Always double-check your salt. It’s not just for flavor—it’s for structure and yeast control. No salt = sad, deflated loaf.
Inadequate or Weak Flour
I tried using regular all-purpose flour once because I ran out of bread flour. Big mistake. The loaf looked fine until it started cooling—and then it just drooped like a tired eyelid.
Bread needs strong flour, especially anything with height. Bread flour or high-protein blends give you that essential gluten structure.
If I’m low on bread flour now, I add a tablespoon or two of vital wheat gluten to all-purpose. Game changer.
Overusing Yeast
In my early days, I thought more yeast = faster bread. And it did rise fast… until it didn’t. Too much yeast made the dough gassy and floppy.
It would rise like crazy during proofing, then collapse like a souffle out of the oven. Moderation is key. I stick to about 1 to 2 teaspoons per 500g of flour unless I’m doing a quick-rise recipe. Any more, and I’m inviting disaster.
Underbaking
Oh, underbaking. My old nemesis. I used to pull loaves out as soon as they looked golden. But inside? Still wet. A wet crumb can’t support itself. I’ve since learned to use a thermometer—bread’s gotta hit around 88–99°C (190–210°F) inside before it’s fully done.
Now I wait until the crust feels firm and taps hollow, and I check that internal temp just to be sure.
Handling Issues & Poor Shaping
There was a time I didn’t think shaping mattered much. I’d plop dough into pans and hope for the best. But rough handling knocks out gas, and if you don’t create surface tension when shaping, the loaf won’t hold up during oven spring.
Now I gently degas, tuck and pull the dough tight before the final rise. It’s like giving it a little structure armor.
Improper Cooling
Don’t do what I did and leave your loaf in the pan for an hour. Trapped steam = soggy crust = collapse. I also used to stack hot loaves to save space.
Bad move. Always cool on a wire rack, give it room to breathe, and let that crust set. Moisture is sneaky—let the bread vent!
Crumb-Crust Chain Reaction
This one’s subtle but real. Even if your crumb is perfect, if too much moisture escapes during cooling, it can soak into the crust and weaken it from the outside in. It’s like the crust turns into a sponge and pulls the structure down with it.
I’ve had good-looking loaves wrinkle up an hour later. It’s wild. Best fix? Bake a little longer and make sure that cooling setup is on point.
Every collapsed loaf has taught me something. Whether it’s tweaking hydration, adjusting proofing times, or just giving the bread space to cool properly, all the little details matter.
And yeah, it’s frustrating when things flop—but man, when you nail it? Totally worth it.
How to Prevent Bread Collapse During and After Baking
Preventing bread collapse isn’t about being perfect—it’s about knowing what actually matters and what doesn’t. I used to obsess over every tiny crack in the crust, thinking that was the issue.
Turns out, I was ignoring the real culprits—hydration, proofing, and structure. After way too many deflated loaves (and a few tears if I’m honest), I finally cracked the code on what actually helps.
Use Proper Proofing Techniques
Let’s start with proofing—because I messed this up more times than I care to admit. I’d let the dough rise till it was almost bursting out of the bowl, thinking that was a win. But no, that’s how you get over-proofed dough.
Now, I go by feel. I do the “poke test”—gently press the dough with a finger. If it springs back slowly and leaves a slight dent, it’s ready.
If it collapses, it’s gone too far. Also, watch the volume—not the clock. Dough that doubles (or almost doubles) is usually proofed just right.
Control Dough Hydration
Hydration is another sneaky one. I used to follow high-hydration recipes to the letter and wonder why my soft breads kept caving in.
If your dough feels like wet slime, it probably won’t hold shape. For softer loaves, I aim for 65–70% hydration max.
If it’s too sticky to handle without adding loads of flour on the bench, I know I need to dial it back next time.
Bake for Longer
Underbaking was my biggest issue early on. I used to pull bread out when it looked done—golden crust, smelled amazing. But the inside was still wet. That moisture kills the structure as the bread cools.
Now, I bake until the internal temperature hits at least 190°F (that’s around 88°C) for enriched loaves, and up to 210°F (99°C) for crustier types. I use a digital thermometer—cheap and worth every penny.
Use High-Protein Flour
If you’re using all-purpose flour for everything, you’re missing out. Bread flour changed my life. The higher protein content helps the gluten network develop properly, and that means a sturdier loaf.
If I’m using softer flours or mixing in whole grains, I toss in a tablespoon or two of vital wheat gluten to boost the structure. It makes a huge difference, especially for free-form loaves.
Knead Properly and Sufficiently
Kneading isn’t just busy work—it actually builds the gluten web that holds everything together. I used to do the bare minimum, like, 3 minutes in the stand mixer and call it good. Big mistake.
Now, I go for the windowpane test—stretch a small piece of dough. If it stretches thin without tearing, it’s ready. If it rips? Keep kneading.
Measure Yeast and Salt Accurately
I eyeballed salt once. Never again. Not only did the bread taste bland, but it collapsed during cooling because there wasn’t enough structure.
Salt slows fermentation and strengthens gluten—it’s essential. And yeast? Less is more. Too much and your dough rises too fast and collapses. I stick to 1 teaspoon yeast per 500g flour for most bakes, unless it’s a fast recipe.
Shaping Techniques Matter
I didn’t think shaping was a big deal until I saw my first attempt at a boule turn into a pancake. If you don’t create surface tension when shaping, the dough won’t rise properly in the oven.
Now I always take time to fold and tighten the dough into a taut ball or log before final proofing. It feels like a small thing, but it’s huge for oven spring and preventing collapse.
Use the Right Bakeware
Once I switched to a Dutch oven, it was like a lightbulb went off. The steady heat and steam made the crust set quicker and the loaf rise taller. Before that, I was using flimsy glass pans that barely held heat.
Metal loaf pans are my go-to now for sandwich loaves. For anything rustic, a baking stone or Dutch oven gives way better results.
Avoid Sudden Temperature Changes
One time, I opened the oven mid-bake just to “check” on my bread. Big mistake. The sudden drop in temperature stalled the rise and the loaf flattened out like a sad tire.
Now, I preheat for at least 30 minutes, keep the oven door shut during the first half of baking, and avoid drafts in the kitchen. Stability = happy bread.
Cool Bread Properly
And for the love of carbs, don’t trap your bread in a hot pan or wrap it up while it’s still warm. I used to toss a towel over the loaf because I thought it would keep it soft. Instead, the crust turned rubbery and sank.
Now I cool every loaf on a wire rack, uncovered, for at least an hour (two if I can stand it). Letting the steam escape gives the crust a chance to firm up—and your bread stays tall.
Honestly, most of these things I learned by screwing them up first. But that’s the thing with baking—it’s part science, part intuition, and part learning to laugh when your “perfect” loaf turns into a pancake.
The more you bake, the more second nature these little habits become. And once you stop collapsing loaves? You start feeling like a real bread wizard.
Simple Fixes for Collapsing Bread
Let’s be honest—sometimes bread just collapses. Even when you think you did everything right. But the good news? It doesn’t always mean you have to toss the whole loaf (or your sourdough dreams).
Over the years, I’ve found a few simple tricks that can either save a loaf in progress—or help make sure the next one holds up like a champ.
Re-shape and Re-proof
One time, I noticed my dough starting to spread out like a pancake before it hit the oven. I almost gave up and baked it as-is, but decided to try reshaping. I gently degassed it, gave it a tighter round shape, and let it rise again—but only for 30 minutes this time.
That extra tension saved the loaf. If your dough looks over-proofed or weak before baking, you can usually reshape and give it a short second rise. Just don’t overdo it—it’s a second chance, not a full do-over.
Increase Oven Temperature Slightly
With softer, wetter doughs, a hotter oven can be your best friend. I used to bake everything at 375°F (190°C), but my high-hydration loaves kept caving. Now I start those around 425°F (220°C), at least for the first 15 minutes.
That higher temp helps the crust set faster, giving the dough some much-needed structure. Just keep an eye on it so it doesn’t burn—every oven’s got its quirks.
Adjust Hydration
If your dough feels more like thick batter than something you can shape, it’s probably too wet. Been there. It’s tempting to stick to recipe measurements exactly, but flour absorbs water differently depending on brand and humidity.
If the dough is unmanageable, don’t be afraid to add a tablespoon or two of flour at a time during mixing. I aim for dough that’s tacky, not sticky. That little tweak can mean the difference between a proud loaf and a flat one.
Improve Cooling Conditions
So, picture this: you nail the bake, pull out a beautiful loaf, leave it in the pan for “just a minute”… and come back to a soggy, collapsed mess. That was me. Now I transfer bread immediately to a wire rack with good airflow underneath.
No stacking, no towels, no traps for steam. Let it cool in peace for at least an hour. If you’ve got ceiling fans or a breezy window, even better.
Use Dutch Oven or Baking Stone
This one changed everything for me. My first successful, no-collapse sourdough came out of a preheated Dutch oven, and I’ve been hooked ever since. The trapped steam creates a perfect environment for oven spring, and the thick walls keep the heat consistent. No Dutch oven?
A baking stone (or even an upside-down sheet pan) helps too—just get that base heat nice and strong.
Related Problem: Wrinkled Bread Crust
Okay, so maybe your bread didn’t collapse, but the crust shriveled up like a raisin an hour after baking. That’s wrinkled crust—and while it’s mostly cosmetic, I totally get how frustrating it is. Especially when you’re going for that Instagram-worthy finish.
Usually, wrinkling happens when soft bread cools too fast—or too wet. The moisture inside keeps steaming out after baking, and if it hits a soft crust, the whole thing caves inward like a vacuum seal.
I’ve had milk breads and sandwich loaves look perfect one minute, and then get all shriveled up like old balloons.
Prevention Tips
Let bread cool fully before covering. Seriously. Don’t put it in a bag, don’t toss a towel over it, don’t tuck it into a bread box while it’s warm. It needs to breathe. Otherwise, trapped steam turns your crust into mush, and wrinkles will follow.
Bake a little longer. If your crust feels too soft right out of the oven, give it 5 more minutes. Sometimes I even pop a loaf back in the oven—out of the pan—for a dry-out session. Just 5–8 minutes can firm things up and stop the dreaded shrink-wrap effect.
Use high-protein flour. Fluffier loaves like brioche or Japanese milk bread are especially prone to wrinkling. High-protein flour gives a stronger gluten structure and holds shape better as it cools. I even add 1–2 teaspoons of vital wheat gluten to my soft bread recipes just to help.
Bang the tray lightly post-bake. I learned this from an old-school bakery demo—when you pull your loaf out of the oven, give the bottom of the tray a little tap on the counter. It sounds weird, but it helps the crust contract just a little and sets it in place. Not a miracle cure, but it makes a difference.
At the end of the day, collapsing bread and wrinkled crusts are just bumps in the road. Annoying? Yeah. Fixable? Absolutely. With each loaf, you learn more about your dough, your oven, and how those little tweaks can take your bread from “meh” to magical.
When to Troubleshoot and Seek Help
Tried all the usual fixes and your bread still collapses? Yep, I’ve been there. That’s when it’s time to dig a little deeper.
Persistent Collapse
Sometimes it’s not your technique—it’s your ingredients. I once struggled with flat loaves for weeks before realizing my flour was too weak. Switched to a stronger bread flour (at least 12% protein), and boom—better rise.
Old or expired yeast can also cause weird fermentation and weak structure. If nothing’s working, start fresh with new yeast and better flour.
And don’t underestimate recipe quality. Some are just too wet or poorly written. If the same recipe keeps giving you headaches, ditch it and try one with clearer hydration ratios and proofing steps.
Advanced Techniques
When you’re ready to step it up, autolyse (resting flour and water before mixing) helps gluten form naturally. Cold fermentation in the fridge adds flavor and strength—plus it makes the dough easier to handle.
And those fancy “stretch and folds”? Not just for pros. Doing a few gentle folds during bulk rise can seriously boost dough structure, especially for wetter recipes.
Also, don’t skip proper shaping. Creating surface tension makes a huge difference in final height and oven spring.
Still stuck? Ask for help in a bread forum or group—bakers love solving mysteries!
FAQs
Should I cover bread with a towel?
Yes, but only after it’s completely cool. Covering it too early traps steam, and that softens the crust (or even makes it wrinkle). I let mine cool on a rack at least an hour before wrapping.
Why do cinnamon rolls shrink after baking?
Usually it’s because the dough or butter was too cold. If the butter is stiff, it resists expansion in the oven. Use soft, room-temp dough and softened butter—your rolls will stay fluffier and taller.
Why does no-knead bread collapse?
No-knead bread is awesome, but it’s easy to underdevelop gluten. That structure’s everything. Try letting it ferment in the fridge overnight or use stretch-and-folds every 30 minutes during bulk rise to strengthen the dough. Even lazy bread needs a little love.
Why does baked bread sink in the middle?
Nine times out of ten, it’s underbaked or too wet. I’ve had gorgeous loaves that looked done outside but were basically pudding inside. Always check internal temp—it should be around 190–210°F depending on the type of bread. And if your dough was super sticky, cut back on the water next time.
Conclusion
Bread collapse after baking can be disheartening, but it’s often due to a combination of small, fixable factors. By understanding hydration, proofing, flour strength, and baking time, you can gain control over your loaves. Every failed loaf is a chance to learn, so keep baking, tweaking, and improving!