11 Canned Goods Pantry Organization Ideas That Feel Simple and Useful
Canned goods are pantry staples, but they can quickly turn into a chaotic jumble. You know the drill: you buy a can of tomatoes only to find three more hiding in the back.
The good news is you don't need a fancy remodel or expensive bins to get things under control. With a little creativity and some low-cost tricks, you can turn your canned food stash into a neatly organized system that makes meal prep faster and your pantry look better.
These 11 ideas are all about being smart with your space and your budget, so you can finally find what you need without digging through a mountain of cans.
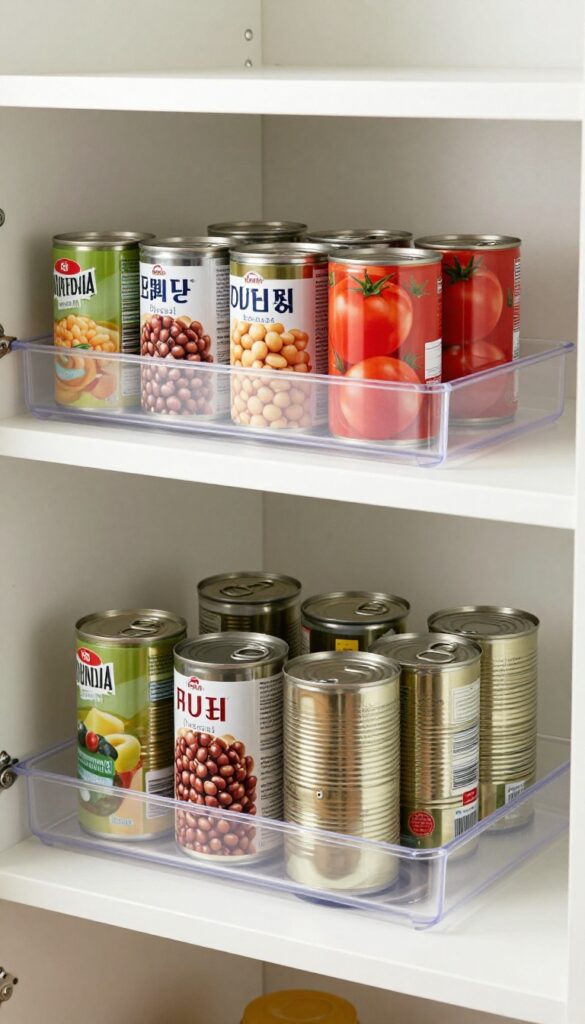
1. Use Tiered Can Racks for Instant Visibility
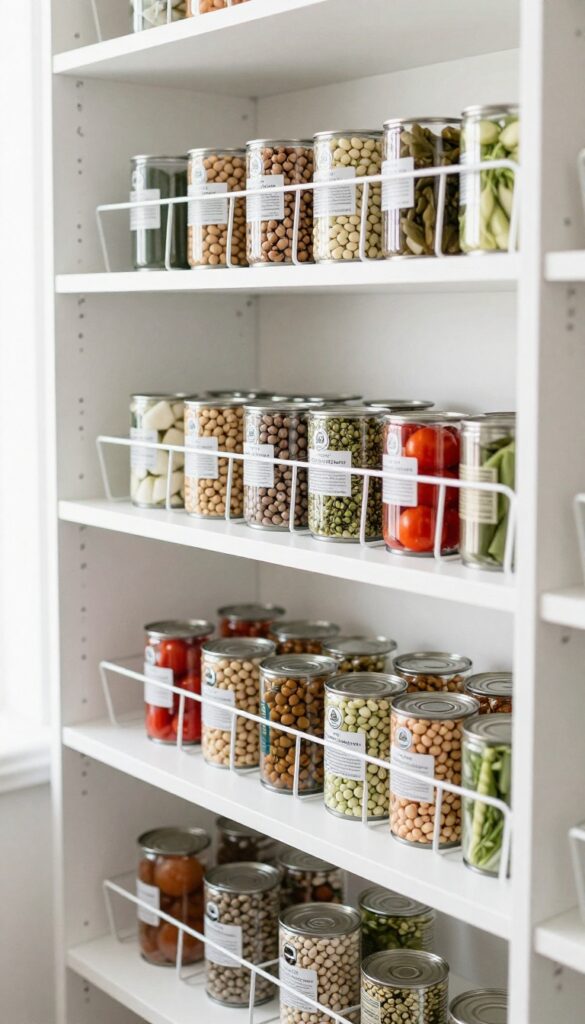
Deep shelves have a way of hiding your canned goods, making you buy duplicates or forget what you have. Tiered can racks solve that by angling every can forward so you can see labels at a glance. The best part?
They’re budget-friendly and instantly make your pantry feel more organized without a major overhaul.
Why It Works
These racks create a stadium effect, so each can is visible and accessible. No more digging to the back or playing pantry Tetris. Expandable options fit different shelf widths, making them a versatile solution for any pantry size.
Best For
Deep pantry shelves where cans tend to get lost. Also great for renters who want a non-permanent upgrade that can move with them.
Styling Tip
Group similar cans together—beans on one rack, tomatoes on another—to create visual order. For a cohesive look, choose racks in a neutral finish like white or black that blend with your shelves.
2. Repurpose Cardboard Boxes as DIY Dividers
Before you toss that Amazon box, think about cutting it into custom dividers. A few strategic cuts and you have free shelf organizers that keep canned goods upright and separated. Cover them with contact paper or wrapping paper for a polished look.
It's a zero-cost way to create order.
Why It Works
Cardboard dividers are completely customizable to your shelf dimensions and can sizes. They prevent cans from rolling into each other and make it easy to grab what you need without disturbing the rest. Plus, they cost nothing and can be replaced whenever you want a fresh look.
Best For
This idea is ideal for renters or anyone on a tight budget who still wants a tidy pantry. It works especially well on deep shelves where cans tend to get lost in the back.
Styling Tip
Use a neutral contact paper like marble or linen texture to make the dividers blend in. If you prefer a pop of color, choose a fun patterned wrapping paper and seal it with clear packing tape for durability.
3. Install a Tension Rod for a Makeshift Shelf
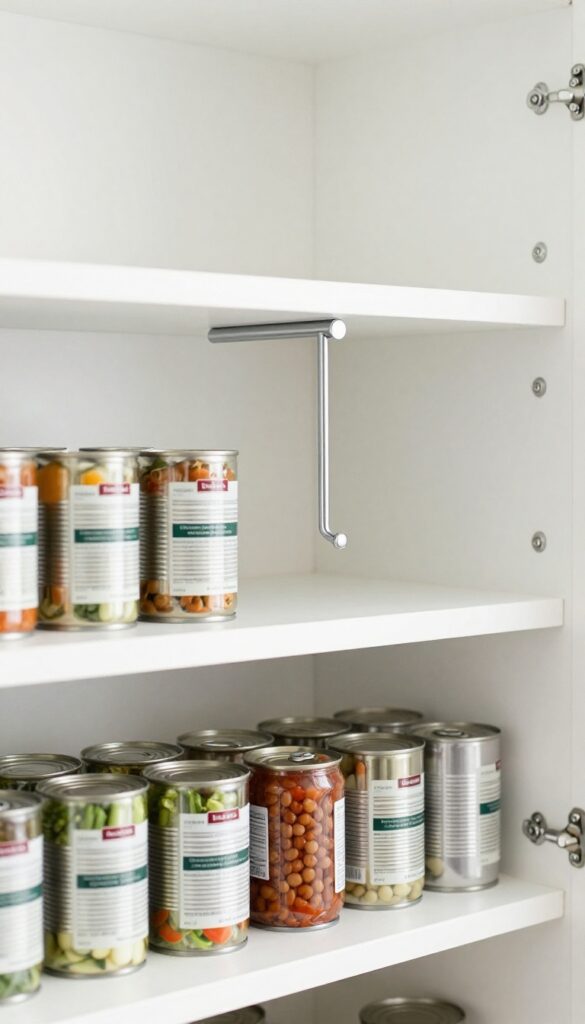
Pantry shelves often have wasted vertical space between stacked cans. A tension rod can transform that gap into a second level for smaller items like tomato paste or tuna. It's a clever, low-cost hack that instantly doubles your shelf space without any tools or permanent changes.
Why It Works
Tension rods are adjustable and require no drilling, so you can install them in seconds. They create a stable platform for lightweight cans, keeping them visible and accessible. The rod can be repositioned or removed anytime, making it a flexible solution for changing storage needs.
Best For
This works great for deep pantry shelves where cans get buried. It's also ideal for renters or anyone who wants a temporary, damage-free organization fix. Use it for small cans, spice jars, or even snack packs.
Styling Tip
Choose a white or silver tension rod to blend in with most shelves. Place the rod about 4–6 inches above the shelf so cans sit upright without toppling. For a cohesive look, group similar cans together and face the labels forward.
4. Group Cans by Meal Type in Clear Bins
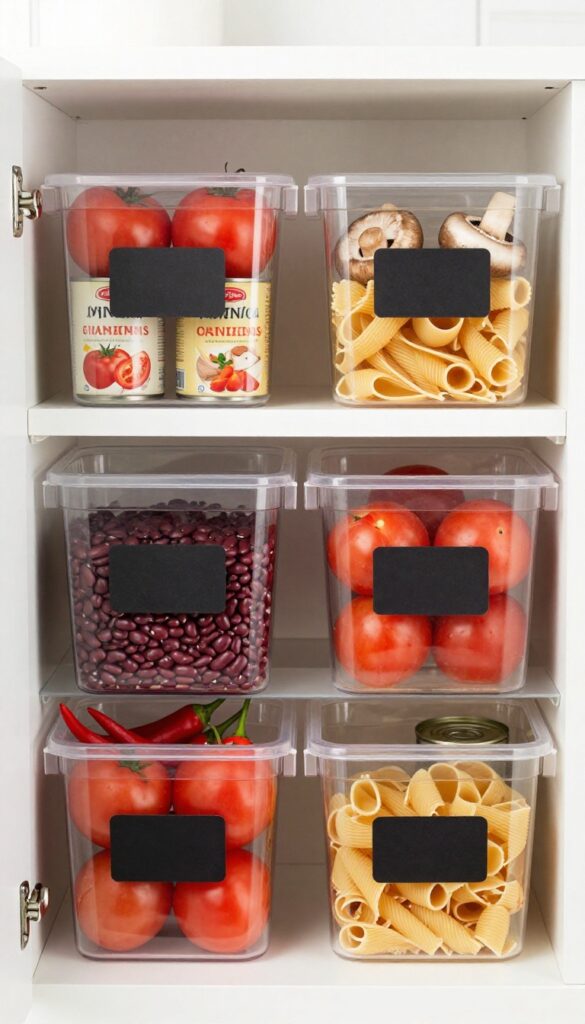
Clear bins are a budget-friendly way to bring order to a chaotic pantry without spending much. By sorting your canned goods into meal-specific groups, you turn a jumble of cans into a logical system that practically runs itself. One bin holds everything for soup night, another for chili, and a third for pasta—so when you're planning dinner, you grab the whole bin and go.
The transparency means you can see exactly what's inside without lifting a lid, and a chalk marker lets you relabel whenever your meal rotation changes.
Why It Works
This system saves time because you're not hunting through stacks of cans every time you cook. It also keeps your pantry from becoming a disorganized mess where items get buried and forgotten. The clear bins cost just a few dollars each, making this one of the most affordable organization tricks out there.
Best For
This idea shines in medium to large pantries where you have enough shelf space to dedicate a bin to each meal type. It's also perfect for families who rotate through the same set of recipes and want to keep prep fast and easy.
Styling Tip
Stick with clear, stackable bins to maximize vertical space and keep the look uniform. Use a chalk marker or removable labels so you can switch up the categories without leaving residue. For a cleaner aesthetic, choose bins with smooth sides rather than wire or mesh, which can catch dust.
5. Hang a Shoe Organizer on the Pantry Door
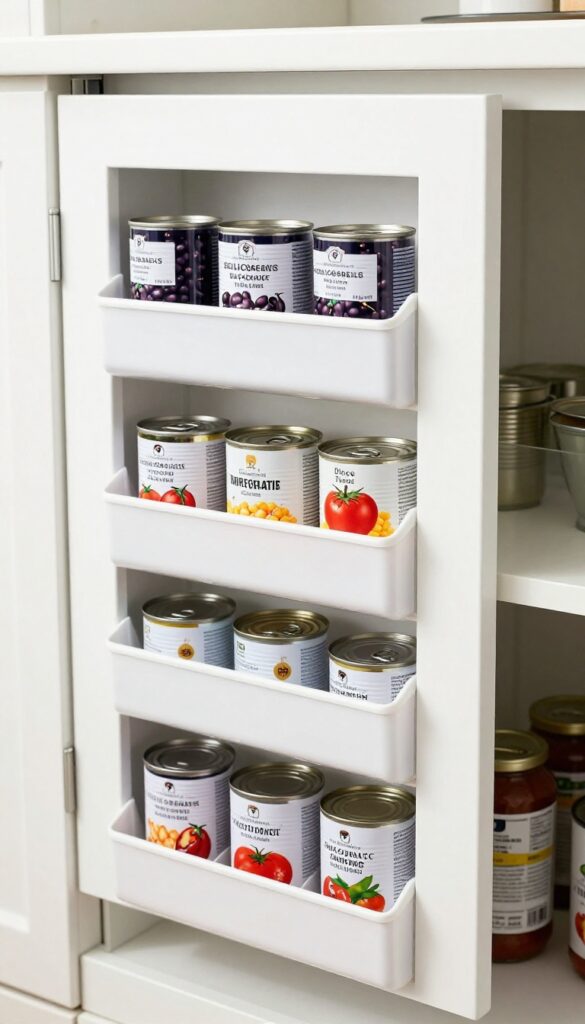
The back of your pantry door is prime real estate that often goes unnoticed. A clear over-the-door shoe organizer turns that wasted vertical space into a neat, visible home for canned goods. It’s a budget-friendly trick that keeps small cans from getting lost in the depths of your shelves, and the clear pockets make it easy to see what you have at a glance.
The look is clean and practical—no fancy hardware or permanent installation required.
Why It Works
Each pocket holds one or two cans, keeping them separated and easy to grab. It uses space that would otherwise sit empty, and the clear material lets you spot your black beans or diced tomatoes without rummaging. Plus, it’s a low-cost solution that can be set up in minutes.
Best For
Small pantries where shelf space is tight, or for anyone who wants a quick, no-drill solution for organizing lightweight canned goods like beans, corn, or tomato sauce.
Styling Tip
Choose an organizer with deep pockets so cans don’t slip out when the door swings. Arrange cans with labels facing forward, and use the bottom pockets for heavier items like broth or coconut milk to keep the organizer balanced.
6. Stack Cans with DIY Lazy Susans
Deep cabinets and corner pantries have a way of hiding your canned goods in the back. A lazy Susan solves that instantly, and making your own keeps the cost under $5. All you need is a small turntable base from a craft store and a cheap plastic tray—glue them together, and you've got a spinning organizer that fits any shelf.
It's a five-minute project that makes grabbing a can of tomatoes or beans feel effortless.
Why It Works
A lazy Susan eliminates the need to dig through stacks of cans. With a quick spin, everything is visible and reachable, so you use what you have and avoid buying duplicates. The DIY version is fully customizable to your shelf size and can be made with materials you probably already own.
Best For
This idea is perfect for corner cabinets, deep pantry shelves, or any spot where cans tend to get lost in the back. It's also great for renters who can't install permanent shelving but want a smart, removable solution.
Styling Tip
Use a clear plastic tray so it blends into the shelf, or choose a neutral color like white or beige for a clean look. Group similar cans together—like beans on one side, tomatoes on the other—to make spinning even more efficient.
7. Use Magazine Holders for Tall Cans
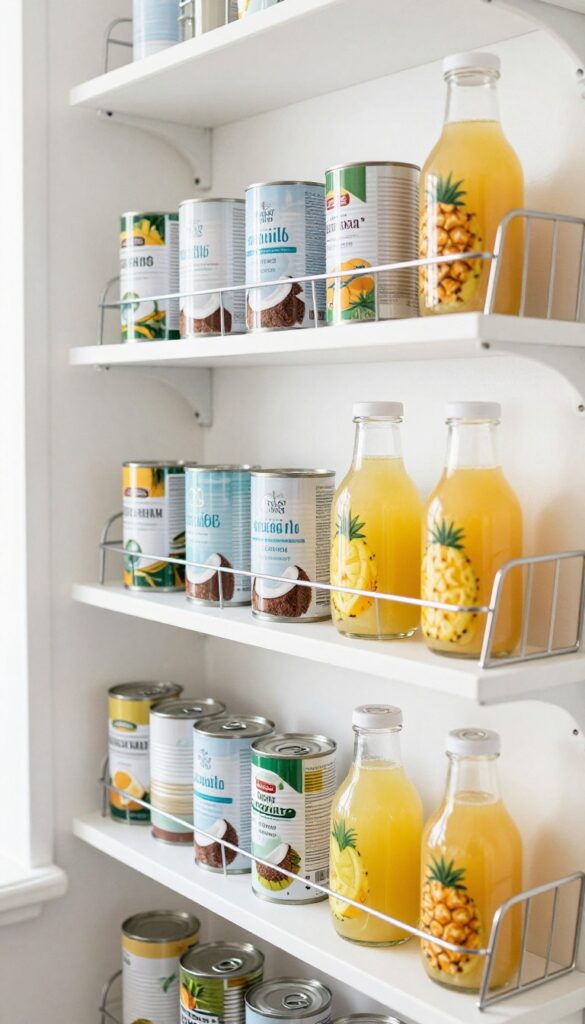
Magazine holders are one of those underrated organizational tools that pull double duty without trying. When you turn one on its side, it becomes a perfect little cubby for tall cans like broth, coconut milk, or pineapple juice. The upright shape keeps them from rolling around, and the open front makes it easy to grab what you need.
It’s a small tweak that brings order to a chaotic shelf, and it costs next to nothing if you pick up wire or plastic versions at the dollar store.
Why It Works
Tall cans are awkward to stack and tend to topple over when you reach for one. A magazine holder cradles them snugly, so they stay upright and visible. The open design also lets you slide cans out without disturbing the rest, which keeps your shelf neat and saves time.
Best For
This idea shines in deep pantries or cabinets where cans get buried. It’s also great for renters who can’t install permanent shelving, since magazine holders are lightweight and easy to rearrange.
Styling Tip
Stick to wire or clear plastic holders to keep the look airy and avoid visual clutter. If your pantry is open shelving, choose holders in a neutral color like black or white so they blend in. Group several together for a uniform, boutique-like display.
8. Label Shelf Edges with Chalk Tape

Chalk tape is one of those small tweaks that makes a big difference in how your pantry functions. Stick a strip along the front edge of each shelf, grab a piece of chalk, and write exactly what belongs there—beans, tomatoes, soup, whatever. The best part?
You can erase and rewrite whenever your stock changes. It’s a simple, low-cost system that keeps everyone in the household on the same page, and it adds a charming, rustic vibe that feels intentional without being fussy.
Why It Works
Labels remove the guesswork. When each shelf has a clear category, cans go back where they belong, and you never have to dig around to find what you need. Chalk tape is also completely removable and won’t damage your shelves, so it’s perfect for renters or anyone who likes to change things up.
Best For
Deep or tall shelves where cans tend to get pushed to the back and forgotten. It’s also great for households with multiple people who might not remember where everything goes, and for anyone who wants an affordable, low-commitment labeling solution.
Styling Tip
Use a white chalk marker instead of traditional chalk for a cleaner, smudge-proof look. Pair the tape with uniform glass jars or matching baskets on the same shelves to create a cohesive, curated feel. Keep the chalk or marker in a small dish nearby so relabeling is easy.
9. Create a 'Use First' Basket for Expiring Cans
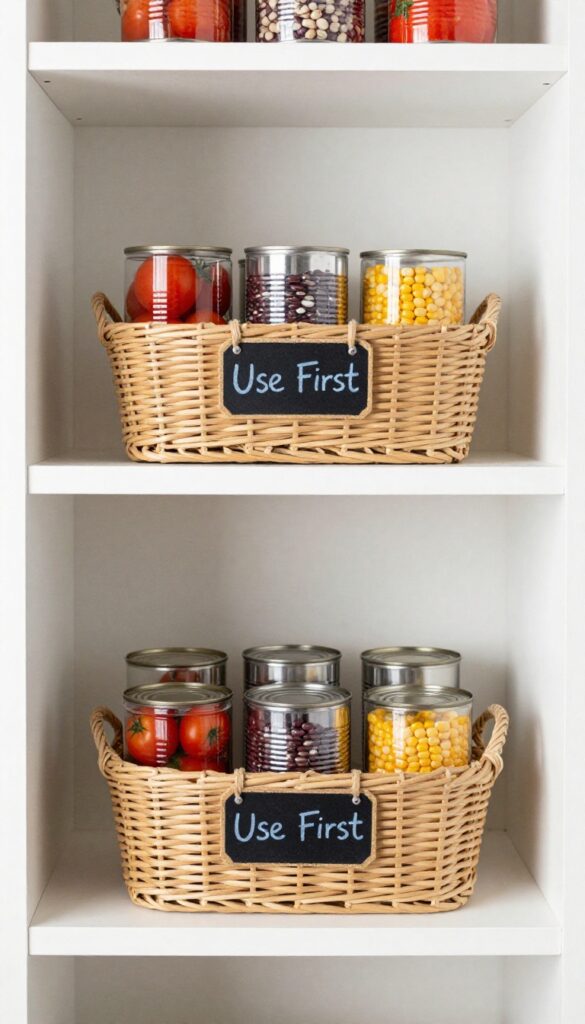
We've all been there—a can of black beans hides in the back of the pantry until months after its prime. A small basket or bin dedicated to cans nearing their expiration date is a smart, budget-friendly way to cut down on food waste. Place it at eye level or on the counter so you grab those items first, and rotate it weekly to keep things moving.
It's a tiny habit that saves money and clears space.
Why It Works
This system prevents forgotten cans from turning into wasted food and money. By making expiring items the most visible, you naturally use them before they go bad. It also keeps your pantry organized and clutter-free, since you're constantly cycling through stock.
Best For
Anyone with a deep pantry or multiple shelves where cans tend to get lost. It's especially useful for families who buy in bulk or for those who want to reduce kitchen waste without a major overhaul.
Styling Tip
Choose a basket that contrasts with your pantry—like a woven seagrass bin against white shelves or a sleek wire basket in a rustic space. Keep it small enough to stay tidy but large enough to hold a week's worth of expiring cans. Label it with a simple tag or chalkboard sticker that says 'Use First' for a polished look.
10. Stack Cans in a DIY PVC Pipe Organizer
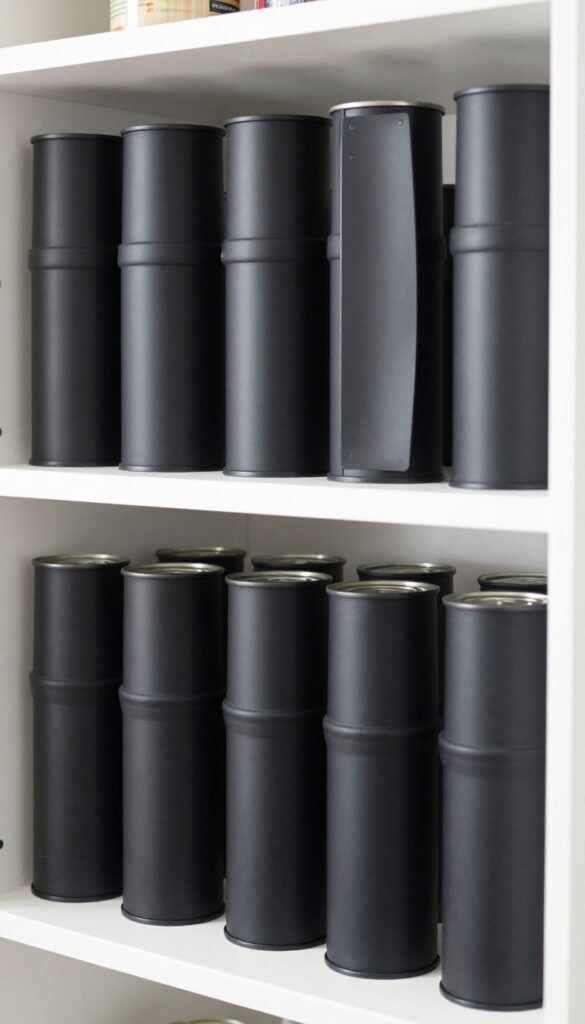
PVC pipes might sound like something from a plumbing aisle, but cut into short sections and glued together, they become surprisingly sleek can holders. Arrange them in a honeycomb pattern, slide the whole thing onto a shelf, and each tube cradles one can upright. It’s a weekend project that costs under $10 and looks modern, not makeshift.
The clean lines and uniform circles add a subtle geometric touch to your pantry, making it feel intentional rather than thrown together.
Why It Works
Each can gets its own slot, so nothing gets buried or forgotten. The vertical walls keep labels visible at a glance, and the honeycomb structure maximizes every inch of shelf depth. Plus, the pipes are lightweight and easy to pull out for cleaning or rearranging.
Best For
Deep pantry shelves where cans tend to roll into a jumbled mess. Also great for narrow cabinets where standard organizers don’t fit, since you can customize the width by adding or removing tubes.
Styling Tip
Spray-paint the PVC pipes matte black or white to blend with your shelves, or leave them unpainted for an industrial vibe. For a pop of color, paint the inside of each tube a different pastel shade—just make sure the paint is fully cured before adding cans.
11. Use Binder Clips to Keep Cans Together
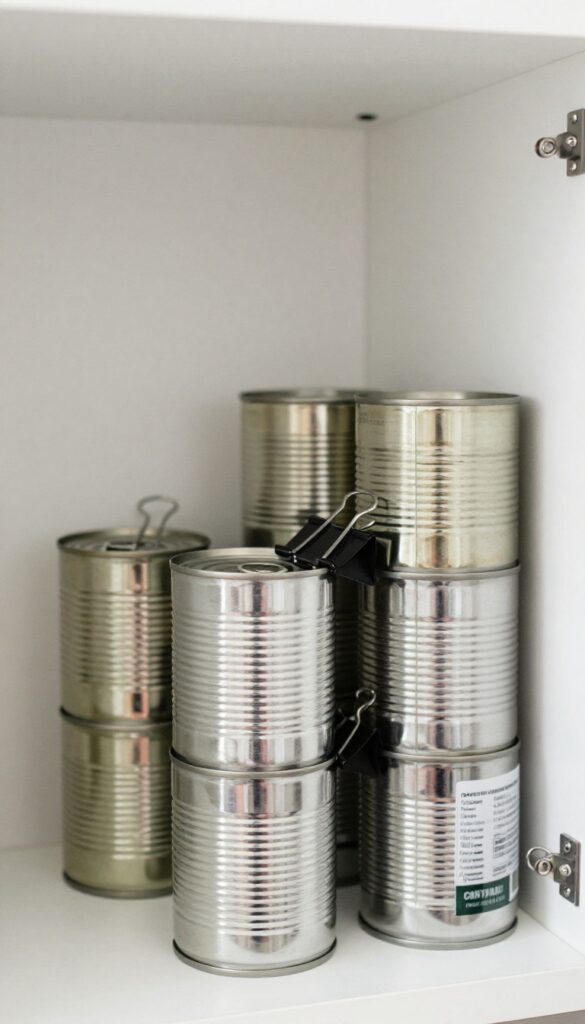
If your pantry shelves are too narrow for stacking cans the usual way, binder clips offer a surprisingly clever fix. Clip one onto the rim of a can, then balance a second can on top—the clip holds them together so they don't wobble or tip. It's one of those zero-cost tricks that feels like a secret weapon, especially when you're trying to maximize every inch of a tight shelf.
Why It Works
Binder clips create a stable bridge between two cans, preventing the top one from sliding off. This doubles your vertical storage without needing any special racks or adhesives. It's especially effective for cans with similar diameters, like tomato sauce, beans, or coconut milk.
Best For
Narrow pantry shelves where cans can't sit side by side, or for stacking cans in a deep cabinet where you want to use vertical space without investing in tiered shelves.
Styling Tip
Stick with large binder clips in black or silver so they blend in. Arrange stacks by category—like all diced tomatoes together—and keep the labels facing forward for easy identification. The clip itself becomes a subtle visual anchor that makes the stack look intentional.
FAQ
What is the best way to organize canned goods on a budget?
The best budget-friendly method is to use items you already have, like cardboard boxes or binder clips. Tiered racks and tension rods are also affordable and effective for maximizing space.
How do I keep canned goods from rolling around?
Use dividers like magazine holders, PVC pipe organizers, or small bins to keep cans upright. Even a simple cardboard box cut to size can prevent rolling.
Should I remove cans from their packaging before storing?
Yes, removing cans from cardboard boxes saves space and lets you see exactly what you have. Just make sure to check expiration dates first.
How can I organize canned goods in a small pantry?
Use vertical space with over-the-door organizers or tension rods. Group cans by meal type in clear bins to make the most of limited shelf space.
What is the best way to label canned goods?
Chalk tape on shelf edges is a cheap and adjustable option. You can also use removable labels or a chalk marker directly on the shelf.
Conclusion
Organizing your canned goods doesn't have to be expensive or complicated. With a few simple tricks like repurposing household items or buying cheap organizers, you can create a system that saves time and reduces stress. The key is to think about your space and your habits, then pick the ideas that fit best.
Start with one or two changes, and you'll be amazed at how much easier meal prep becomes. Your pantry will look better, and you'll actually use what you have. Happy organizing!