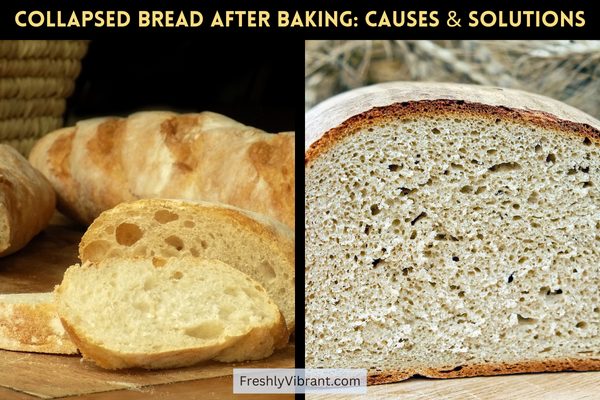
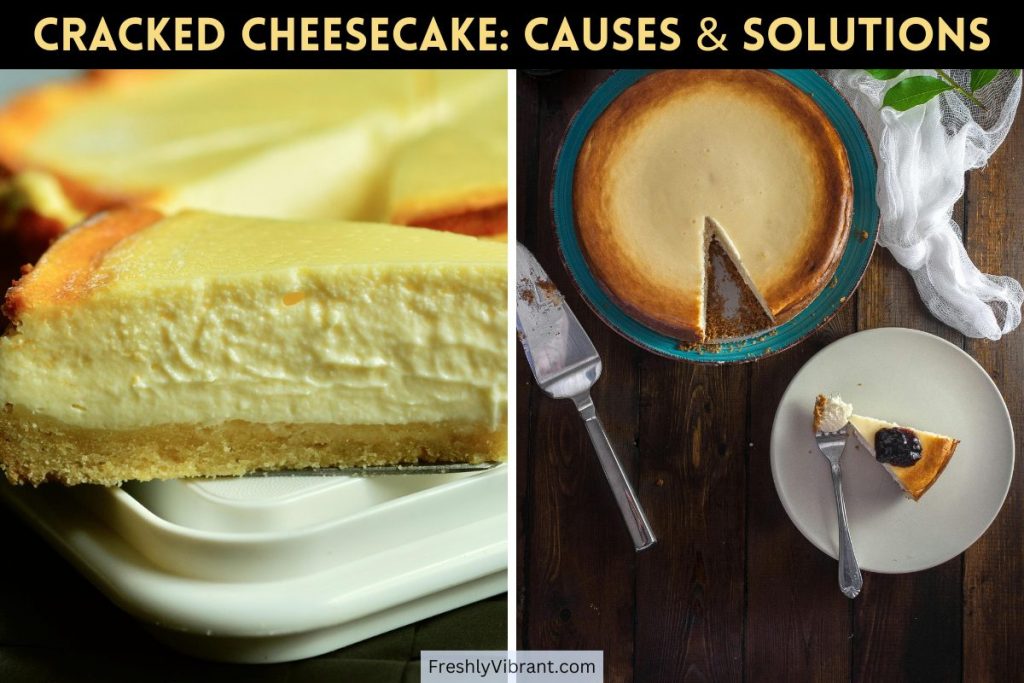
Top Causes of Cracked Cheesecake & Easy Fixes
Ever pulled a cracked cheesecake out of the oven and thought, “Ugh, what did I do wrong this time?” You’re not alone. Cheesecake looks simple, but it’s a fussy little thing. One small misstep—overmixing, a sudden temperature drop, skipping the water bath—and boom, it splits like the desert floor.
The good news? Cracks aren’t the end of the world. Even better news? You can totally prevent them. I’ve made more cracked cheesecakes than I care to admit, but along the way, I’ve picked up a bunch of foolproof tips (some from pros, some from personal disasters).
In this guide, I’ll walk you through what causes those annoying cracks—and exactly how to avoid them. Let’s make your next cheesecake the smoothest, silkiest one yet.
Why Cheesecakes Crack (Common Causes + the Science)
Let me tell you a story about my first “fancy” cheesecake. I was so proud—used real vanilla bean, full-fat cream cheese, even splurged on a springform pan.
Pulled it out of the oven like it was a golden trophy… only to watch it crack wide open like the Grand Canyon while it cooled. I stood there, devastated, wondering what I did wrong. Turns out, I did everything wrong.
1. Overbaking
This one got me bad. I used to think cheesecakes had to be firm in the center before taking them out. Nope. If your cheesecake looks fully set in the oven, it’s probably already overbaked.
What happens is the proteins in the eggs and cream cheese tighten up too much, forcing moisture out. That leaves you with a dry, dense top that splits apart as it cools.
Visual cue? Look for puffiness and golden brown edges—both red flags. The center should jiggle slightly like Jell-O, not wobble like soup, but definitely not firm either.
Once I started trusting the jiggle and using a thermometer (150–155°F in the center), my crack rate dropped fast.
2. Sudden Temperature Changes
Oh boy. One time, I took a cheesecake out of the oven and—get this—put it straight into the fridge. Instant fault line.
Rapid cooling causes the outer edges to contract faster than the middle, so boom: stress crack. I learned the hard way that cheesecake needs a gradual cooldown.
Now, I turn off the oven, crack the door open, and let it chill (literally and figuratively) for an hour before moving it to the counter, then the fridge.
3. Overmixing the Batter
If you’ve ever seen your cheesecake puff up in the oven and collapse like a sad balloon after, chances are you whipped too much air in. Been there.
When you overmix, especially after adding the eggs, you trap air bubbles that expand in the heat and then deflate—leaving crater-like cracks behind.
Tip? Use room-temperature ingredients (especially the cream cheese). They blend faster and smoother, so you don’t have to beat the heck out of the batter. And once the eggs go in, mix just until combined. No more, no less.
4. Skipping the Water Bath
I used to skip the water bath because, let’s be honest, wrapping foil and boiling water sounds like a pain. But wow, it makes a difference. The steam from the water bath keeps the oven humid and the cheesecake baking nice and evenly.
Without it, the edges cook faster than the center, causing cracking and weird textures.
Now I wrap the pan in two layers of heavy-duty foil and place it in a larger pan of hot water. It’s worth every extra dish.
5. Not Greasing the Pan Sides
This one surprised me. I assumed the cheesecake didn’t need grease since it wasn’t “sticking” per se. But what really happens is the cake clings to the pan as it cools and contracts, which creates tension. That tension? You guessed it—more cracking.
Now, I lightly grease the sides or run a knife around the edge right after baking. The cake releases clean, and I don’t get those annoying edge cracks anymore.
6. Skipping the Chill
Last but absolutely not least: chilling. Cheesecake keeps baking even after it leaves the oven, and it continues to set in the fridge. If you slice it too soon or don’t let it fully cool, you risk cracks forming as it finishes tightening up.
I leave mine overnight in the fridge, covered lightly with foil, and only slice once it’s totally chilled.
Not only does it look better, but the texture is dreamier too—creamy, dense, and smooth like a proper cheesecake should be.
Cracks used to drive me nuts, but once I started paying attention to these small steps, my cheesecakes actually started turning out Instagram-worthy. If I had to boil it down: be gentle, go slow, and don’t skip the steam. Your cheesecake will thank you (and so will your dinner guests).
How to Prevent Cheesecake Cracks — Step-by-Step
Alright, real talk—cheesecake is not the place to be impatient. I used to think baking one was like throwing together brownies: mix, bake, boom. But nope. Cheesecake has its own vibe. It’s delicate. It’s picky. But once you get the hang of it, it’s so worth it. These step-by-step tricks seriously changed my cheesecake game. I learned them mostly from messing up—a lot. So here’s what I’ve picked up the hard way:
1. Use Room-Temperature Ingredients
I used to pull cream cheese straight from the fridge and wonder why my batter had lumps the size of marbles. Big mistake. Cold cream cheese resists mixing, so you end up overmixing just trying to smooth it out, which adds too much air. And air bubbles? Yeah, they rise and pop and leave cracks behind.
Now, I leave my cream cheese, sour cream, and eggs out for at least an hour. The batter comes together like a dream, and I don’t feel like I’m fighting it with a mixer. It’s smoother, silkier, and way less risky in terms of texture issues.
2. Mix with Care
Once upon a time, I thought more mixing = better. Spoiler: nope. Especially after you add the eggs, you gotta mix just until combined. No aggressive beating. Otherwise, you’re whipping in air, and that’ll puff your cheesecake up like a soufflé… only to have it collapse and crack like a dropped plate.
These days, I use a paddle attachment and mix on low. I even tap the bowl on the counter before pouring it into the crust to pop any sneaky air bubbles.
3. Use a Water Bath (Bain-Marie)
I avoided water baths at first because I thought they were extra. Then I baked a cheesecake without one and got cracks and a rubbery texture. Lesson learned.
Now I wrap my springform pan in two layers of heavy-duty foil, put it in a larger pan, and pour boiling water around it until it hits halfway up the sides. The steam creates this cozy, humid environment that keeps the cheesecake baking evenly and gently. Totally worth the extra step.
4. Don’t Overbake
This one took me forever to get right. I was always so worried about underbaking that I’d let it go “just five more minutes”—which turned into 10, then boom, cracks. A perfect cheesecake should have a little jiggle in the center. Like a soft wobble, not soup. That’s your signal to stop.
I also started using a thermometer—once the middle hits around 150–155°F (65–68°C), it’s done. I trust the science more than my instincts now.
5. Bake Low and Slow
My old oven ran hot, and I didn’t realize how badly that messed up my bakes. A high temp cooks the outer edges fast while the center lags behind. That uneven baking leads to stress and cracking.
Now I go low and slow—usually 300°F (about 150°C) for the win. Sometimes 325°F if I’m in a hurry, but never higher. It’s not fast food, it’s cheesecake.
6. Cool Gradually
This might be the most underrated tip out there. If you yank your cheesecake from the hot oven into the cold air, it’s gonna freak out and crack. That rapid temp change is brutal.
I turn the oven off, crack the door, and let it chill for about an hour in there. Then onto the counter for another hour. Then the fridge. It’s like a cheesecake spa day.
7. Run a Knife Around the Edge
Once the cheesecake comes out, I grab a thin knife and run it gently around the inside of the springform pan. Why?
Because as it cools, it shrinks a bit. If it’s stuck to the pan, the sides hold it back and—bam—cracks. This takes five seconds and saves me a world of heartache.
8. Let It Chill Completely
This is where patience is everything. I’ve rushed it before—trying to slice it after just a few hours—and regretted it every single time. It’s soft, kinda goopy, and honestly just doesn’t taste as good.
Now, I give it a full overnight chill. At least 6–8 hours. Ideally more. That’s when it firms up into that perfect, creamy texture you want. Plus, it slices beautifully.
If you follow these steps, I must say that your cheesecake odds go way up. You’ll still mess one up occasionally—I mean, it’s baking, not brain surgery, but it is fussy. But hey, even cracked cheesecake tastes amazing.
These days, I mostly bake crack-free, but if one sneaks in? I just cover it with berries and pretend it never happened.
Bonus Tips from the Pros
I’ve been baking cheesecakes for years now—sometimes nailing it, sometimes crying over a split top—and I’ll tell you this: the little things matter so much. And sometimes, it’s the pro tips you pick up along the way that really make the difference between a “meh” bake and a total showstopper. These aren’t flashy tricks, but they’re game-changers.
Springform Pan with a Tight Seal? Don’t Skimp.
One time I spent three days planning a cheesecake for my friend’s birthday. Vanilla bean, lemon zest, graham cracker crust, the whole nine. Popped it into the water bath… and halfway through the bake, I smelled something off. Water had leaked in through the bottom of the pan. The crust was soggy. Whole thing ruined.
Lesson learned: invest in a high-quality springform pan with a tight seal. Not the bargain-bin kind that warps after one use. I use a 9-inch pan that locks tight, then double-wrap it in heavy-duty foil before the water bath. No leaks, no soggy disasters, just solid cheesecake.
Add a Little Cornstarch or Flour
Okay, this one came from a pastry chef I met during a cooking class—and it blew my mind. Adding just 1 to 2 tablespoons of cornstarch or flour to the batter helps stabilize everything. It’s like giving the cheesecake a little backbone.
You won’t taste it, promise. But it keeps the structure nice and firm without making it dry. I’ve been doing this with every cheesecake since, and honestly, my crack rate dropped way down.
Cover Minor Imperfections Like a Pro
Look, sometimes cracks just happen. Even if you do everything right. But the magic of cheesecake is—you can totally hide them. I’ve topped cracked cheesecakes with sour cream glaze (sweetened with a touch of vanilla), fresh fruit, chocolate ganache, even a pile of whipped cream.
No one ever knows. In fact, people usually compliment me on the “beautiful presentation.” I just smile and say thank you—no need to explain that it’s crack camouflage.
A Cracked Cheesecake Can Still Be Gorgeous
At the end of the day, don’t stress too much. Cheesecake isn’t about perfection—it’s about flavor. A rustic crack or two doesn’t mean you failed. If anything, it adds a homemade vibe, which people honestly love. Dress it up, slice it confidently, and serve it with a story. Trust me, nobody complains when they’re eating cheesecake.
What to Do If Your Cheesecake Still Cracks
Let’s be real: even with all the prep, all the hacks, and all the patience, cheesecake cracks sometimes. It just does. The good news? Cracks are 100% cosmetic. They don’t affect the taste, the texture, or the love that went into baking it. And there are plenty of easy, creative ways to save the day.
1. Chill and Repair the Crack
Before attempting any fixes, ensure your cheesecake is thoroughly chilled. A cold cheesecake is firmer and less prone to further damage during the repair process. Once chilled, gently press the crack together using clean fingers.
Then, dip an offset spatula into hot water, wipe it dry, and use it to smooth over the crack. Repeat this process as needed until the surface appears uniform.
2. Repurpose It into Something New
Okay, I’ve done this more than I’d like to admit—taking a cracked or not-quite-perfect cheesecake and turning it into something else entirely. Crumble it into parfaits with layers of whipped cream and fruit. Cut it into bars and drizzle them with chocolate. Mash it up and make truffles. Honestly, it feels like cheesecake got a second life.
People go nuts over cheesecake trifle, by the way. Just saying.
3. Apply a Topping to Conceal Imperfections
If repairing the crack isn’t sufficient or feasible, consider adding a topping to mask the imperfections. Options include fresh fruit, whipped cream, chocolate ganache, or sour cream mixed with sugar and vanilla. These not only cover cracks but also enhance the flavor and presentation of your cheesecake.
4. Embrace the Rustic Look
Remember, a cracked cheesecake remains as delicious as a flawless one. Embracing the rustic appearance can add a homemade charm that many find appealing. Serving it proudly as is, perhaps with a story of the baking journey, can make the experience more relatable and enjoyable for your guests.
Takeaways
Cracked cheesecake? Been there. But now, you’ve got the insider secrets to beat the bake and serve up silky-smooth slices every time. Remember: low heat, slow cool, and gentle hands. With a little patience and these pro tips, your next cheesecake will be as flawless as it is delicious. Now go make that creamy magic happen — and send pics!