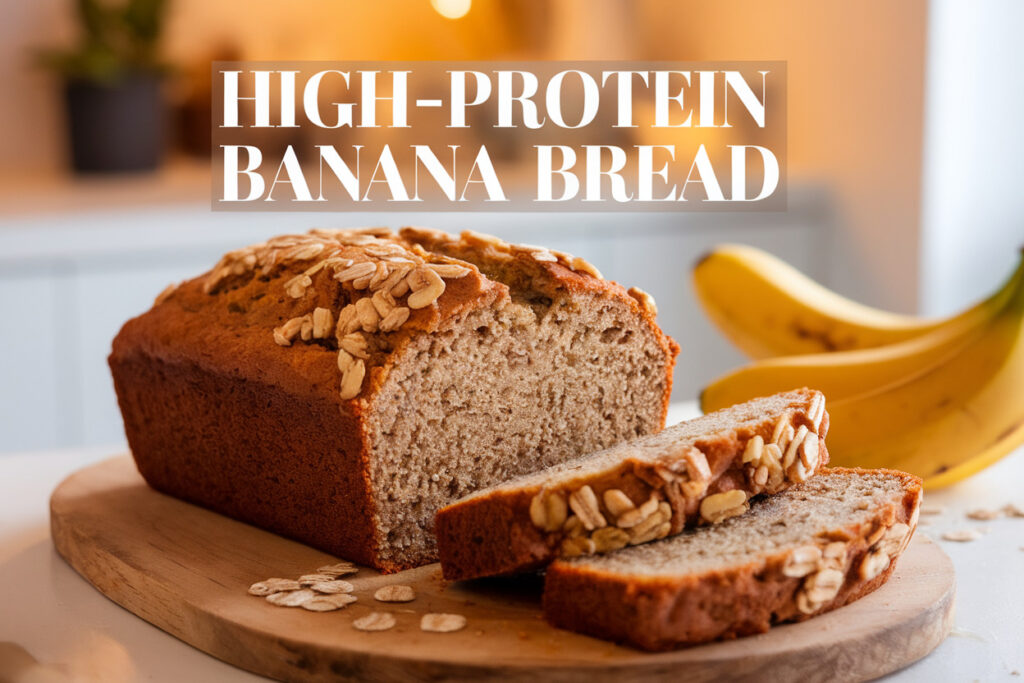
Moist and Filling High Protein Banana Bread
Protein-packed baked goods often turn out dry, dense, or weirdly rubbery, which is exactly why most people stop trying after one bad batch.
Banana bread shouldn’t feel like a compromise or a fitness food you tolerate. It should taste like something you actually want to eat again tomorrow.
This version fixes the usual issues without turning the recipe into a science experiment. It stays soft, holds moisture for days, and feels filling without being heavy.
The best part is that it still tastes like real banana bread instead of a protein bar in loaf form.

Ingredients
Method
- Preheat oven to 350°F (175°C) and grease or line a loaf pan.
- In a large bowl, mash bananas until mostly smooth.
- Add eggs, yogurt or cottage cheese, honey, oil, and vanilla extract. Mix until smooth and creamy.
- In a separate bowl, combine flour, protein powder, baking powder, baking soda, and salt.
- Add dry ingredients to wet ingredients and gently mix until just combined.
- Fold in optional mix-ins if using.
- Pour batter into prepared loaf pan and smooth the top.
- Bake for 45 to 55 minutes until a toothpick inserted comes out with a few moist crumbs.
- Cool in the pan for 15 minutes, then transfer to a rack to cool completely before slicing.
What Makes This Recipe Shine
This recipe works because it balances protein with moisture instead of forcing one to dominate the other.
A lot of high-protein banana breads load up on powder and forget that bananas need fat and structure to stay tender. Here, every ingredient plays a role, and nothing feels like filler.
I’ve tested versions that were too dry, too eggy, or oddly spongy, and this one finally landed in the sweet spot. It slices clean, doesn’t crumble, and stays soft even after a couple days in the fridge. That’s not luck, that’s balance.
Another thing I love is how forgiving it is. You can tweak the protein source, adjust sweetness, or swap flours without wrecking the loaf. That flexibility matters when you’re baking regularly and don’t want to run to the store for one missing item.
Most importantly, it feels like real food. You can eat it for breakfast, as a snack, or after a workout without feeling like you’re choking down something “healthy.” That’s the goal every time.
Ingredients You’ll Need
- Ripe bananas, mashed well for moisture and natural sweetness
- Eggs to add structure and help the loaf rise properly
- Greek yogurt or cottage cheese for protein and tenderness
- Protein powder, preferably unflavored or vanilla
- All-purpose flour or oat flour for structure
- Baking powder and baking soda for lift
- Salt to balance sweetness
- Honey or maple syrup for natural sweetness
- Vanilla extract for flavor depth
- Neutral oil or melted butter for moisture
If your bananas aren’t very ripe, the flavor will fall flat, so don’t rush that part. Spotty, almost-black bananas give the best results and save you from adding extra sweetener. The yogurt or cottage cheese also matters more than you’d think, so use full-fat if you want the best texture.
Step-by-Step Instructions
Step 1: Prep the Wet Ingredients
Start by mashing the bananas in a large bowl until mostly smooth, leaving just a little texture. Add the eggs, yogurt or cottage cheese, sweetener, oil, and vanilla, then whisk until the mixture looks creamy and unified. This step sets the tone for the whole loaf, so take a minute to make sure everything blends well.
If you rush this part, you’ll end up with uneven pockets or a dense center later. A smooth base helps the protein powder blend in without clumping. The mixture should look thick but pourable when you’re done.
Step 2: Combine the Dry Ingredients
In a separate bowl, mix the flour, protein powder, baking powder, baking soda, and salt. Stir it well so the leavening agents distribute evenly throughout the mix. This helps the bread rise evenly instead of forming weird air tunnels.
Using a whisk here makes a difference, especially with protein powder involved. Some brands clump more than others, and breaking those up now saves texture issues later. Keep it light and don’t overthink it.
Step 3: Bring Everything Together
Pour the dry ingredients into the wet mixture and gently fold until just combined. You want to stop as soon as you no longer see dry streaks. Overmixing is the fastest way to end up with tough banana bread.
The batter should look thick but scoopable, not stiff or dry. If it feels too thick, a splash of milk or almond milk fixes it easily. Trust your eyes more than the measuring cups here.
Step 4: Transfer and Bake
Pour the batter into a lined or greased loaf pan and smooth the top lightly. If you want, add a few banana slices or chocolate chips on top, but keep it simple. Bake until a toothpick comes out mostly clean with a few moist crumbs.
Let the loaf cool in the pan for about 15 minutes before transferring it to a rack. Cutting too early will cause it to crumble, even if it smells amazing. Patience pays off here.
Step 5: Cool and Slice
Once fully cooled, slice with a sharp knife for clean edges. The texture settles as it cools, which makes each slice hold together better. Store leftovers wrapped tightly to keep moisture locked in.
The flavor actually improves after a few hours, which makes this great for meal prep. You’ll notice it tastes even better the next day.
Common Mistakes to Avoid
One of the biggest mistakes is using too much protein powder. It’s tempting to add more for extra protein, but that usually leads to dry, chalky bread. Stick to the amount listed and let the other ingredients do their job.
Another issue is under-mashing the bananas. Large chunks can create soggy spots and uneven texture. Mash them until smooth with just a little texture left for flavor.
Overbaking is another common problem. Protein-based batters continue cooking after you pull them out of the oven. If you wait for the top to look fully done, the inside will end up dry.
Finally, skipping fat entirely can ruin the texture. Even a small amount of oil or butter makes a huge difference in moisture and mouthfeel. This isn’t the place to go completely fat-free.
Alternatives & Substitutions
If you don’t have Greek yogurt, blended cottage cheese works just as well and adds a nice protein boost. I’ve used both, and honestly, the difference is minimal once baked. Just make sure it’s smooth before mixing.
For flour, oat flour gives a slightly heartier texture, while all-purpose keeps it lighter. A mix of the two works great if you want something in between. Almond flour can work, but you’ll need to reduce the liquid slightly.
Protein powder choice matters more than people think. Whey tends to give the softest texture, while plant-based powders can make the loaf denser. If using plant-based, add an extra tablespoon of yogurt to compensate.
Sweetener is flexible too. Honey, maple syrup, or even a mix of both work well. If you prefer less sweetness, reduce it slightly and let the bananas carry the flavor.
FAQ
Can I make this banana bread without protein powder?
Yes, you can leave it out and replace it with a bit more flour. The texture will still be good, but you’ll lose the protein boost. If you’re just baking for flavor, that’s totally fine.
How do I store high protein banana bread?
Wrap it tightly and store it in the fridge for up to five days. It also freezes well if you slice it first and store pieces individually. A quick microwave warm-up brings it back to life.
Can I make this recipe gluten-free?
You can, but results vary depending on the flour blend. A good 1:1 gluten-free baking mix works best here. Avoid single-ingredient flours unless you’re comfortable adjusting liquids.
Why is my banana bread dense?
This usually happens from overmixing or too much protein powder. Dense texture can also come from baking too long. Pull it out while it still looks slightly soft in the center.
Can I add mix-ins like chocolate chips or nuts?
Absolutely, and they work really well here. Just keep additions to about half a cup so the loaf doesn’t get weighed down. Chocolate chips, walnuts, or chopped pecans are all solid choices.
Is this good for meal prep?
Yes, it’s one of my go-to meal prep recipes. It holds up well in the fridge and stays moist for days. You can even freeze slices for quick breakfasts.
Can I make this into muffins instead?
You can, and they bake faster too. Just reduce the baking time and start checking around the 18–20 minute mark. The texture stays just as good.
Final Thoughts
This banana bread hits that rare balance of being filling without feeling heavy or dry. It works as breakfast, a snack, or even a post-workout bite without tasting like diet food. That alone makes it worth keeping in your regular rotation.
Once you make it a couple times, you’ll probably start tweaking it to your own taste, which is kind of the fun part. It’s flexible, reliable, and actually satisfying, which is more than most “healthy” baked goods can say.