Sourdough Discard Focaccia Bread Recipe
Most sourdough discard recipes feel like a compromise between “use it up” and “actually tastes good.” This focaccia isn’t one of those half-hearted discard projects that you forget about after one bite.
It turns leftover starter into something you’ll want to make on purpose.
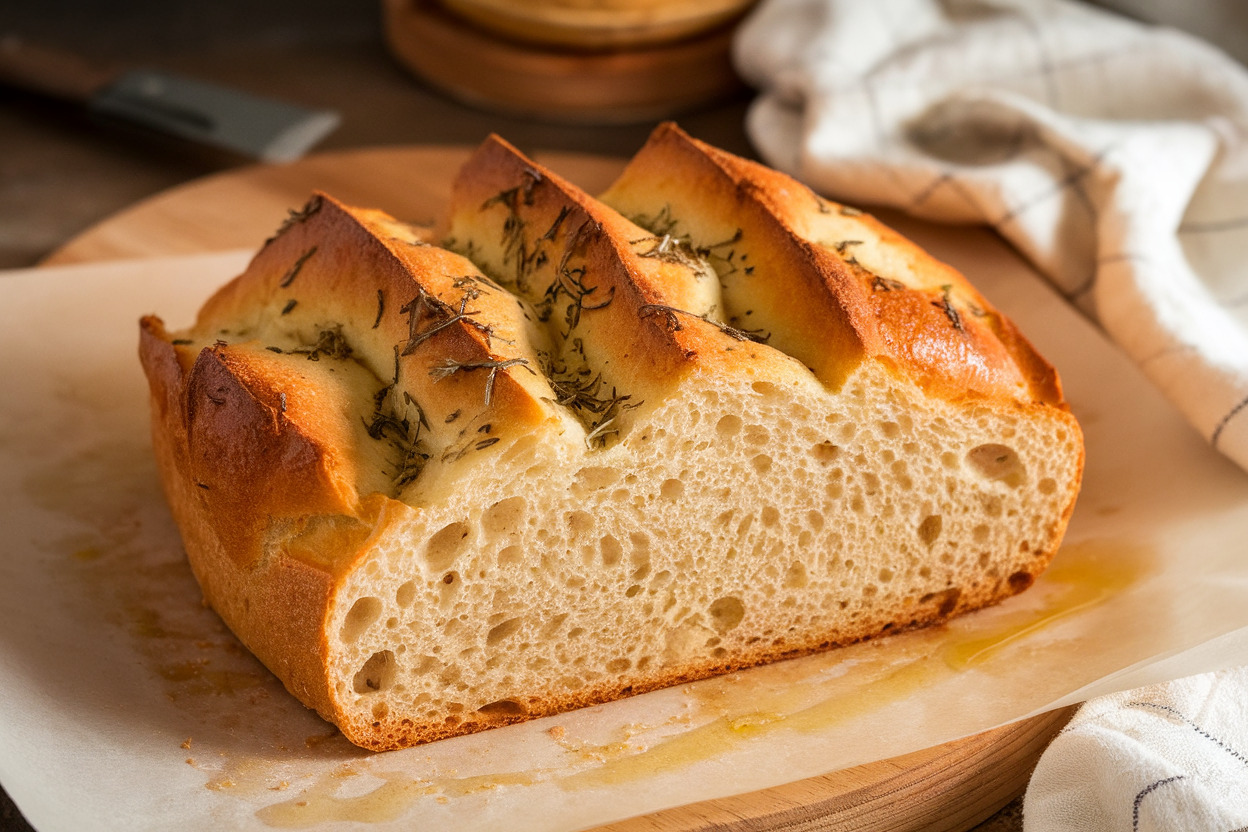
It’s fluffy inside, crisp on the bottom, and soaked with olive oil in the best possible way. And yes, it’s ridiculously forgiving, which is basically focaccia’s love language.
Ingredients
Method
- In a large bowl, mix warm water, honey, and yeast. Let sit for 5 minutes until foamy.
- Add sourdough discard and stir until smooth.
- Add flour and salt, mixing until a shaggy dough forms.
- Add 2 tablespoons olive oil and mix until the dough becomes sticky and elastic.
- Transfer dough to a lightly oiled bowl, cover, and let rise for 60 to 90 minutes until doubled.
- Pour 2 tablespoons olive oil into a baking pan and transfer the dough into the pan.
- Gently stretch the dough toward the edges. Let rest for 30 to 45 minutes.
- Preheat oven to 425°F (220°C).
- Drizzle remaining olive oil over the dough and press dimples across the surface with your fingers.
- Sprinkle with rosemary, flaky salt, and optional toppings.
- Bake for 22 to 28 minutes until golden brown.
- Let cool slightly before slicing and serving.
What Makes This Recipe Shine

This recipe works because focaccia doesn’t demand perfection the way sourdough loaves do. You don’t need perfect shaping skills, you don’t need fancy scoring, and you don’t need to sit there whispering motivational quotes to your dough like it’s a nervous puppy.
You just mix it, let it rise, and bake it in a pan like a normal person.
The sourdough discard adds a subtle tang that makes the bread taste deeper and more “bakery-style,” even if you’re using basic ingredients. It’s not overpowering, but it gives the focaccia a personality.
Without discard, focaccia can taste kind of one-note, like fluffy bread that’s just hanging out with olive oil. With discard, it suddenly feels like it belongs next to a charcuterie board.
Another reason this recipe shines is the texture. Focaccia should have that chewy, airy interior with uneven bubbles, and the discard helps with that because it brings natural fermentation flavor.
Even if your discard is older and more sour, it still works beautifully here. I actually like using discard that’s been sitting in the fridge for a few days because it gives the bread more attitude.
And the crust situation? That’s the best part. The bottom gets golden and almost fried from the olive oil, and the top gets those crispy dimples where the salt and herbs collect.
It’s the kind of bread where you “test a piece” and suddenly half the pan is gone. Not saying I’ve done that. But I’ve done that.
Ingredients You’ll Need
- Sourdough discard (1 cup / 240g) – unfed discard works perfectly, straight from the fridge is fine
- Warm water (1 cup / 240g) – warm, not hot, unless you enjoy killing yeast for sport
- Instant yeast (2 teaspoons) – discard isn’t strong enough to rise the dough quickly on its own
- All-purpose flour (3 cups / 360g) – bread flour works too, but AP keeps it soft and airy
- Salt (2 teaspoons) – don’t skip or reduce too much, focaccia needs bold flavor
- Olive oil (6 tablespoons total) – use a decent one because you will taste it
- Honey or sugar (1 tablespoon) – helps yeast wake up and adds a slight balance
- Garlic powder (optional, 1 teaspoon) – adds a subtle savory boost without overpowering
- Dried rosemary or Italian seasoning (1–2 teaspoons) – classic focaccia flavor
- Flaky sea salt (for topping) – this is what makes it taste like real focaccia
- Optional toppings – cherry tomatoes, sliced onions, olives, parmesan, or chopped garlic
Step-by-Step Instructions
Step 1: Wake Up the Yeast and Build the Dough Base
Grab a large mixing bowl and add your warm water, honey, and yeast. Stir it around for a few seconds and let it sit for about 5 minutes until it looks foamy. If it doesn’t foam, your yeast is probably dead, and no amount of hope will fix that.
Once the yeast looks alive, stir in your sourdough discard until the mixture turns smooth. It won’t look pretty, but it should blend easily. This is the point where you can already smell that sourdough tang starting to show up.
Now add your flour and salt, then mix until a shaggy dough forms. Don’t overthink it, because focaccia dough is supposed to be sticky and messy. If you’re expecting a neat dough ball, you’re in the wrong recipe.
Step 2: Mix Until Sticky and Strong
Drizzle in about 2 tablespoons of olive oil and start mixing again. If you’re using a stand mixer, use the dough hook and mix for 5–7 minutes. If you’re doing it by hand, stir hard with a wooden spoon and pretend you’re building upper body strength.
The dough should look stretchy and sticky, almost like thick batter. It should pull away slightly from the sides but still cling like it has attachment issues. That texture is exactly what gives focaccia those gorgeous air pockets later.
If it feels too dry, add a tablespoon of water and mix again. If it feels like soup, add a tablespoon of flour, but don’t go wild. A wetter dough makes better focaccia, and I’ll die on that hill.
Step 3: First Rise (The Easy Part)
Grease a large bowl with olive oil, then scrape the dough into it. Turn the dough once so the top gets coated in oil. This keeps it from drying out and also helps flavor soak into the dough.
Cover the bowl with plastic wrap or a damp towel and let it rise for about 60–90 minutes. You want it to double in size, looking puffy and slightly jiggly. If your kitchen is cold, it might take longer, and that’s totally fine.
During this rise, the dough starts building flavor and structure. This is also when you should resist the urge to poke it every 3 minutes. Let it live its life.
Step 4: Prepare the Pan and Stretch the Dough
Pour about 2 tablespoons of olive oil into a 9×13 baking pan. Tilt the pan around until it’s coated, including the corners. This oil layer is what creates that crispy bottom crust, so don’t be stingy.
Transfer the dough into the pan and gently stretch it outward. It probably won’t reach the edges at first, and that’s normal. If it snaps back, let it rest for 10 minutes and try again.
Once it spreads closer to the edges, cover it again and let it rest for another 30–45 minutes. This second rise is where the focaccia really gets that airy texture. The dough should puff up like it’s proud of itself.
Step 5: Dimple Like You Mean It
Now comes the fun part. Drizzle another 2 tablespoons of olive oil over the dough. Then press your fingers into the dough firmly, making deep dimples all across the surface.
Don’t be gentle here, because the dimples are what make focaccia focaccia. They hold oil, salt, herbs, and toppings, which basically means they hold happiness. If you only make shallow dents, you’ll miss out on the texture and flavor payoff.
Sprinkle your rosemary, flaky sea salt, and any other toppings over the top. If you’re using tomatoes or onions, press them lightly into the dough so they don’t fall off later. This is the part where it starts looking like bakery bread even before baking.
Step 6: Bake Until Golden and Crispy
Preheat your oven to 425°F (220°C). Bake the focaccia for 22–28 minutes, depending on your oven. You want a deep golden top and slightly darker edges.
When it’s done, the top should look crisp and the bottom should sound hollow if you tap it. If the top browns too quickly, you can loosely cover it with foil for the last few minutes. But honestly, a darker focaccia top tastes better, so don’t panic too fast.
Let it cool in the pan for about 10 minutes before removing it. If you cut it too early, the inside can turn gummy. Give it a little patience, even though it smells like torture.
Common Mistakes to Avoid
One of the biggest mistakes is adding too much flour because the dough feels sticky. Focaccia dough is supposed to be sticky, and that’s what gives you those dramatic bubbles and soft interior. If you keep dusting flour until it behaves, you’ll end up with dense bread that tastes like a sandwich bun.
Another common issue is rushing the rise time. Yeast needs time to create gas, and the dough needs time to relax. If you bake too early, you’ll get a flatter focaccia that still tastes okay but won’t have that airy, chewy texture that makes it special.
People also forget that olive oil isn’t optional here. Focaccia isn’t “healthy bread,” it’s “bread that swims in olive oil and tastes incredible.” If you skimp on oil in the pan, the bottom won’t crisp properly, and you’ll lose the best part.
Overbaking is another sneaky one. A little extra color is good, but if you bake it until it’s dry, it turns into bread jerky. Keep an eye on it after the 20-minute mark, especially if your oven runs hot.
And finally, don’t go overboard with toppings. I love toppings as much as the next person, but too many wet ingredients can weigh the dough down. A focaccia covered in 47 tomatoes sounds fun until it bakes into a soggy mess.
Alternatives & Substitutions
If you want a chewier focaccia, swap half the all-purpose flour for bread flour. I do this sometimes when I want a more “restaurant focaccia” vibe. The texture gets a little sturdier, which is great if you plan to use it for sandwiches.
You can also skip the honey and use plain sugar instead. Honey adds a tiny bit of flavor, but honestly the difference is subtle. If you’re out of both, you can leave it out completely, but the yeast may take slightly longer to rise.
If you don’t have instant yeast, active dry yeast works too. Just make sure you proof it properly in the warm water before mixing everything together. Instant yeast is easier, but active dry is still totally reliable if it’s fresh.
For flavor variations, I’m a huge fan of garlic and parmesan focaccia. Add minced garlic to the olive oil topping and sprinkle parmesan over the top before baking. It smells insane in the oven, and you’ll suddenly feel like you run a fancy Italian bakery.
If rosemary isn’t your thing, try thyme, oregano, or even everything bagel seasoning. That one feels a little chaotic, but in a good way. You can also go sweeter and make a honey focaccia by skipping herbs and brushing the top with honey butter after baking.
And if you want to make it dairy-free, you’re already there. Focaccia doesn’t need butter or milk, and olive oil does the heavy lifting. That’s one reason I love this recipe so much.
FAQ
Can I make this focaccia with discard straight from the fridge?
Yes, and I do it all the time. Cold discard works fine because the yeast is doing most of the rising work here. The discard mainly adds flavor and helps with texture.
Just make sure your water is warm enough to wake up the yeast. Don’t use boiling water unless you want to sabotage your own bread.
How long can I let the dough rise?
You can let it rise longer if you want more flavor. If your kitchen is cool, you might need up to 2 hours for the first rise. The dough should look doubled and airy, not just slightly puffed.
If you let it rise too long in a hot kitchen, it can overproof and collapse. It’s not the end of the world, but the texture won’t be as nice.
Can I make this recipe without yeast?
You technically can, but it becomes a completely different recipe. Without yeast, you’d need a strong active sourdough starter and a much longer fermentation time, usually overnight or more. Discard alone won’t give you enough lift.
If you want a true no-yeast version, you’ll need to plan ahead. This recipe is designed to be quick and reliable.
Why is my focaccia dense instead of airy?
Most of the time, the dough didn’t rise enough or you added too much flour. Dense focaccia usually comes from a dough that’s too stiff. The wetter the dough, the more bubbles you’ll get.
Also, don’t skip the second rise in the pan. That step is where the dough relaxes and builds those airy pockets.
Can I store this focaccia and still keep it soft?
Yes, but focaccia is best the day it’s baked. Store leftovers in an airtight container or bag at room temperature for up to 2 days. After that, it starts drying out.
To bring it back to life, warm it in the oven at 350°F for about 8 minutes. It crisps right back up like magic.
Can I freeze sourdough discard focaccia?
Absolutely, and it freezes better than people think. Let it cool completely, then wrap slices tightly in plastic wrap and store in a freezer bag. It’ll keep well for about 2 months.
When you want it, thaw at room temp and reheat in the oven. Avoid microwaving unless you enjoy chewy, sad bread.
What toppings work best without ruining the texture?
Dry toppings and light toppings work best. Rosemary, olives, parmesan, thin onion slices, and roasted garlic are all solid choices. Cherry tomatoes work too, but don’t overload the dough with them.
If you want something heavier like mushrooms or thick veggies, roast them first. Raw toppings release water and can make the focaccia soggy.
FINAL THOUGHTS
This sourdough discard focaccia is one of those recipes that feels almost unfair because it’s so easy but tastes like you worked hard. The crust comes out crisp, the inside stays soft and airy, and the flavor has that subtle sourdough edge that makes it addictive.
If you’ve been collecting discard in your fridge and feeling guilty about it, this is your fix. Make it once, and you’ll start saving discard on purpose just to bake this again.