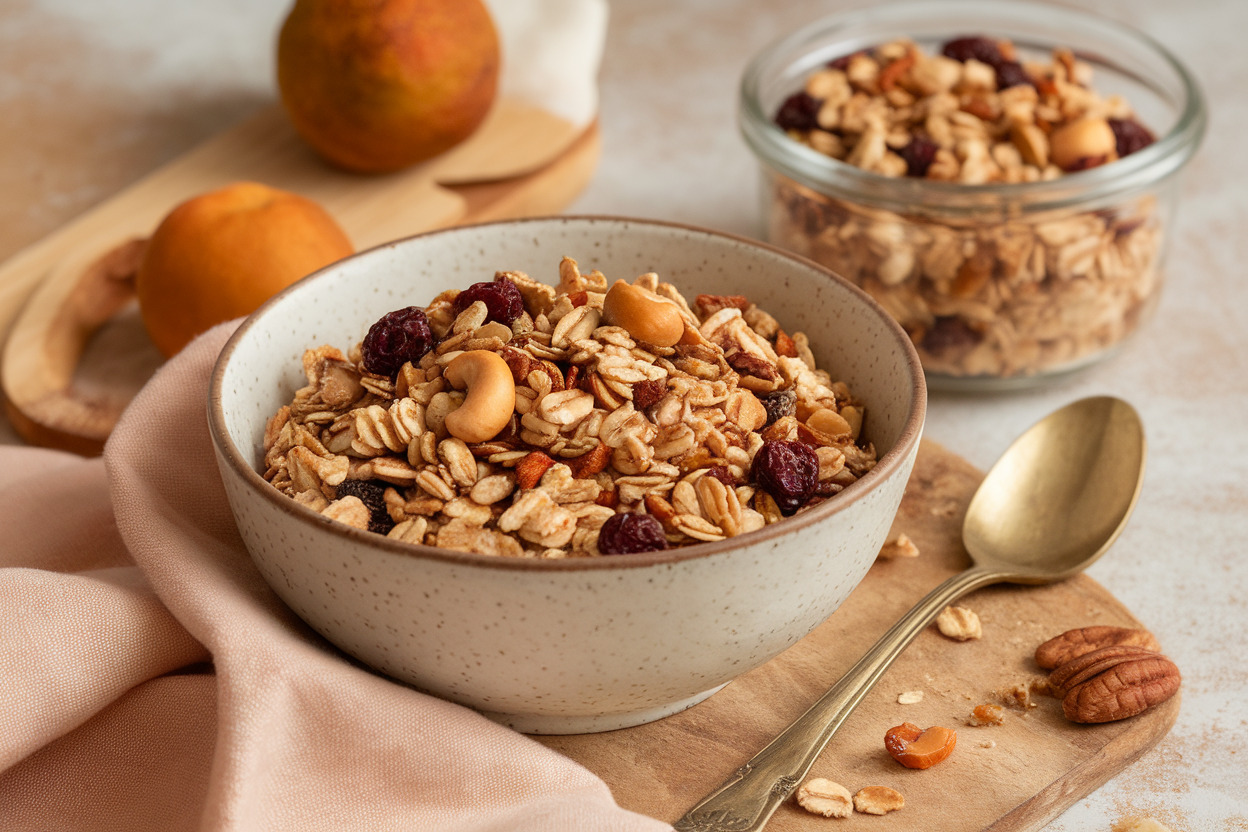
Crunchy Sourdough Discard Granola Recipe
Most granola recipes fall apart because they don’t have a strong enough binder to hold the oats and nuts together.
This one fixes that problem using sourdough discard, which gives you better crunch, better clusters, and a flavor that doesn’t taste flat.
It also solves the annoying “what do I do with all this discard?” issue without turning your kitchen into a sourdough bakery production line.
Plus, it’s honestly just a fun recipe to keep in your back pocket when you want something homemade that feels a little fancy.
Ingredients
Method
- Preheat oven to 325°F (163°C) and line a baking sheet with parchment paper.
- In a bowl, mix sourdough discard, honey or maple syrup, oil, vanilla, and brown sugar until smooth.
- Add oats, nuts, seeds, cinnamon, and salt. Stir until everything is evenly coated.
- Let the mixture sit for 5 minutes to absorb moisture.
- Spread the mixture evenly on the baking sheet and press down firmly.
- Bake for 35 to 45 minutes until golden brown, rotating the pan halfway through.
- Remove from oven and let cool completely without stirring.
- Break into clusters and mix in dried fruit.
- Store in an airtight container at room temperature.
What Makes This Recipe Shine

The biggest reason this granola works so well is the sourdough discard acting like a natural glue. It helps everything stick together in those chunky little clusters that make store-bought granola addictive.
You know the kind where you accidentally eat half the jar before it even touches yogurt.
The flavor is also way more interesting than basic honey-oat granola. Sourdough discard has that slight tang, and when you bake it low and slow, it mellows into this subtle toasted flavor.
It doesn’t scream “bread,” but it does taste deeper and more complex than your average cinnamon oat situation.
Texture-wise, it’s got the perfect balance. Crunchy oats, crisp nuts, and chewy dried fruit if you add it at the end. And unlike a lot of homemade granola that turns dusty after two days, this stays crispy if you store it right.
Another thing I love is how flexible it is. You can make it peanut-buttery, maple-heavy, chocolatey, or super seedy depending on your mood. It’s basically a blank canvas, but one that still tastes good even when you freestyle it.
And let’s be honest, it feels satisfying to use something people usually throw away. Sourdough discard can pile up fast, and turning it into crunchy snack food feels like a small kitchen victory.
Ingredients You’ll Need
- Old-fashioned rolled oats (this is the base, don’t use quick oats unless you like softer granola)
- Sourdough discard (unfed discard works best, straight from the fridge is fine)
- Honey or maple syrup (honey gives better clusters, maple gives lighter crispness)
- Brown sugar (optional, but adds caramel flavor and deeper crunch)
- Neutral oil or melted coconut oil (helps crisp everything up evenly)
- Vanilla extract (makes it taste like it came from a fancy café)
- Ground cinnamon (classic, but not required)
- Salt (don’t skip it unless you enjoy bland sadness)
- Chopped nuts like almonds, pecans, or walnuts (for crunch and richness)
- Seeds like pumpkin seeds, sunflower seeds, or flax (optional but great)
- Dried fruit like raisins, cranberries, or chopped apricots (add after baking)
- Optional extras: shredded coconut, chocolate chips, cacao nibs, or spices
Step-by-Step Instructions
Step 1: Preheat and Prep Your Pan
Set your oven to 325°F (163°C) and let it fully preheat before you start baking. Granola needs steady heat, not that “warming up as it goes” thing. That’s how you get uneven crunch.
Line a large baking sheet with parchment paper. Don’t skip the parchment unless you want to scrape caramelized oats off metal like it’s your new hobby. A rimmed sheet pan works best because granola loves to wander.
Use a big pan, not a small one, because crowding the mixture makes it steam instead of bake. Steaming granola is how you end up with chewy oat clumps that taste like regret. Give it room to breathe.
Step 2: Mix the Wet Ingredients First
Grab a large mixing bowl and add your sourdough discard, honey (or maple syrup), oil, vanilla, and brown sugar if you’re using it. Stir until it looks smooth and evenly combined. You want everything to blend before the oats go in, otherwise the coating gets patchy.
If your discard is super thick, warm it slightly for about 10 seconds in the microwave. Don’t cook it, just loosen it up. Thick discard can still work, but it takes more effort to mix and you might over-stir the oats.
Taste the mixture if you want to be sure it’s sweet enough. It should taste slightly sweeter than you want the final granola to be. Baking dulls sweetness a little, so you need a stronger flavor going in.
Once it smells like vanilla-cinnamon goodness, you’re ready for the dry ingredients. This is the part where it starts looking like real granola instead of pancake batter’s weird cousin.
Step 3: Add the Dry Ingredients and Coat Everything
Pour in your rolled oats, nuts, seeds, cinnamon, and salt. Stir slowly but thoroughly until every oat looks glossy and coated. If you see dry patches, keep mixing until it looks uniform.
Use a sturdy spoon or spatula because this mixture gets thick fast. It’s not hard, but it’s heavy. The oats soak up the discard and syrup, which is exactly what you want.
If it feels too wet, add a small handful of oats. If it feels too dry and crumbly, add a drizzle of honey or a spoon of discard. This recipe forgives you as long as you don’t go wild.
Once it’s coated, let the bowl sit for about 5 minutes. That short rest helps the oats absorb the wet ingredients, and it leads to better clusters. It’s a small step, but it makes a big difference.
Step 4: Spread and Press It Down
Dump the granola mixture onto your lined baking sheet. Spread it out into an even layer using a spatula. Try to keep the thickness consistent so it bakes evenly.
Now press it down firmly. I mean it, actually press it. This is how you get those crunchy granola chunks instead of loose toasted oats. You’re basically compacting it into one giant granola cookie.
Make sure you don’t spread it too thin. Thin granola tends to burn faster and crumble into tiny bits. You want a solid layer that bakes slowly and holds together.
If you want extra-big clusters, press it down again after you flatten it. It feels dramatic, but it works. This is one of those “trust me” steps.
Step 5: Bake Low and Slow
Bake the granola for 35–45 minutes, depending on your oven. Start checking at the 30-minute mark. It should look golden and smell toasted, not burnt.
Halfway through baking, rotate the pan so it browns evenly. Don’t stir it unless you want smaller pieces. Stirring breaks up clusters, so leave it alone if you’re team chunky granola.
If the edges brown faster, gently push the outer granola toward the center without mixing everything. This keeps the corners from turning into crunchy charcoal. Some ovens are just dramatic like that.
Once the top looks dry and golden, you’re close. The granola will crisp up even more as it cools, so don’t wait until it’s rock hard in the oven. That’s how you end up with tooth-breaking granola bricks.
Step 6: Cool Completely Before Breaking It
This is the step people mess up the most, because the granola smells amazing and you want to grab a handful immediately. Don’t. Let it cool on the pan for at least 30–45 minutes.
Cooling is what sets the clusters. While it cools, the sugars firm up and the oats dry out fully. If you break it too early, it crumbles into loose bits.
Once it’s fully cool, break it into chunks with your hands. Make them as big or small as you like. I usually go for a mix, because giant clusters feel like a reward.
After you break it up, stir in any dried fruit or chocolate chips. Never bake dried fruit or chocolate unless you want sad chewy raisins and melted chocolate streaks everywhere.
Step 7: Store It Like You Actually Want It to Stay Crunchy
Transfer the cooled granola into an airtight container. A glass jar works great, but any sealed container is fine. Just don’t use a bag unless you like crushed granola dust.
Store it at room temperature for up to 2 weeks, assuming it lasts that long. In my house, it mysteriously disappears within days. It’s basically snack bait.
If your kitchen is humid, toss in a small silica packet from a snack bag if you have one. It sounds extra, but it works. Crunchy granola hates moisture.
And yes, you can freeze it too. Freeze it in a sealed container and it stays crunchy when thawed, which feels like sorcery but it’s real.
Common Mistakes to Avoid
One big mistake is using quick oats and expecting the same crunch. Quick oats bake faster and turn more powdery, which makes the granola feel less “snackable.” Rolled oats give you that solid, toasty bite that actually feels satisfying.
Another common issue is not pressing the granola down before baking. If you skip that step, you’ll still get granola, but it won’t cluster properly. It ends up more like toasted oats with nuts, which is fine, but not the vibe you’re probably aiming for.
Overbaking is also sneaky because granola looks soft in the oven but hardens as it cools. People keep baking until it looks crispy right away, and then it turns bitter and overly dark. If it looks golden and smells nutty, pull it out and trust the cooling process.
Using too much sweetener can also backfire. It sounds like a good idea until it starts burning on the edges while the center stays pale. Granola needs balance, not a sugar flood. If you want it sweeter, add dried fruit after baking instead of dumping in extra honey.
And please don’t add dried fruit before baking. It dries out, hardens, and tastes like it’s been through emotional trauma. Add it later, and it stays chewy and sweet like it should.
Finally, don’t store it warm. Warm granola trapped in a container creates steam, and steam makes it soft. Let it cool completely, then seal it up. Crunch is fragile, treat it with respect.
Alternatives & Substitutions
If you don’t want to use honey, maple syrup works beautifully. It makes the granola slightly lighter and less sticky, but still crisp. I personally like honey when I want thick clusters and maple when I want a more delicate crunch.
For oil, coconut oil gives the best flavor if you like that subtle coconut note. If you don’t, use avocado oil, vegetable oil, or even melted butter. Butter adds richness, but it can brown faster, so keep an eye on it.
If you’re avoiding nuts, go heavy on seeds. Pumpkin seeds and sunflower seeds give a great crunch and they toast up beautifully. Hemp hearts also work, but add them after baking because they’re more delicate and can taste bitter if over-toasted.
Want a chocolate version? Add cocoa powder to the dry ingredients and use maple syrup instead of honey for a deeper flavor. Then stir in chocolate chips after it cools. It turns into a snack that feels slightly dangerous, in the best way.
You can also add spices beyond cinnamon. Cardamom makes it taste fancy, nutmeg gives it warmth, and a pinch of ginger makes it feel cozy without being overwhelming. Just don’t dump in every spice you own unless you want granola that tastes like a candle aisle.
If your discard is very sour, balance it with a little extra sweetener or vanilla. I actually like the tang, but some people want a smoother taste. You can control the flavor more than you think.
And if you want extra protein, mix in a scoop of protein powder, but keep it small. Too much powder makes the granola dry and chalky. A little goes a long way unless you enjoy chewing flavored drywall.
FAQ
Can I use sourdough discard straight from the fridge?
Yes, and honestly that’s what I do most of the time. Cold discard mixes fine, it just takes a little more stirring. If it’s super thick, warm it slightly so it blends more easily.
The fridge discard flavor also gives the granola that nice subtle tang. It won’t taste like sour bread, but it will taste more interesting than plain oats.
Does this granola taste sour?
Not really, unless your discard is extremely sharp. Baking mellows the sourness and turns it into a toasted, almost caramel-like flavor. You get depth, not punchy sour.
If you’re worried, use a little extra vanilla and cinnamon. Those flavors smooth everything out fast.
How do I get bigger crunchy clusters?
Press the mixture down firmly before baking and don’t stir it while it cooks. That’s the secret sauce. Stirring breaks the clusters apart, so leave it alone like it’s doing important work.
Also let it cool fully before breaking it. Cooling is basically cluster-building time.
Can I make this recipe gluten-free?
Yes, but only if you use gluten-free oats and your sourdough discard is from a gluten-free starter. Regular wheat discard obviously won’t be gluten-free. The granola itself doesn’t magically cancel gluten, sadly.
If you do use gluten-free starter discard, the recipe works the same way. The texture stays crunchy and satisfying.
Why did my granola turn out soft?
Usually it’s one of three things: you underbaked it, you stored it while it was still warm, or your oven ran cooler than expected. Granola needs time to dry out properly. If it still feels soft after cooling, bake it for another 8–10 minutes.
Humidity can also mess with crunch. If your kitchen feels like a tropical vacation, granola will absorb moisture faster.
Can I reduce the sugar and still get crunchy granola?
Yes, but don’t reduce it too much. Sweetener helps with browning and crispness, not just taste. If you cut it drastically, the granola will toast but it won’t get that “snappy” crunch.
A good compromise is using less syrup and adding extra nuts or coconut for texture. It still tastes great without being overly sweet.
What’s the best way to eat this granola?
Yogurt is the obvious move, but I also love it on smoothie bowls. It adds crunch without turning soggy too fast. It’s also dangerously good eaten straight from the jar, which is how most of it disappears.
If you want a dessert vibe, sprinkle it over vanilla ice cream. That combo feels unfairly good for something made from discard.
Final Thoughts
This crunchy sourdough discard granola is one of those recipes that makes you feel weirdly productive. You use up discard, you get a snack that tastes better than most store-bought options, and your kitchen smells like toasted oats and victory.
Make a big batch, stash it in a jar, and you’ll suddenly have an easy breakfast, a yogurt upgrade, and a lazy snack all in one. If you like crunchy clusters, this one seriously delivers.