11 Budget-Friendly Kitchen Closet Organization Ideas for Hidden Storage
Kitchen closets are often the forgotten catch-all for mismatched containers, old appliances, and random pantry overflow. But with a little creativity and a small budget, that same closet can become one of the most functional spots in your kitchen.
You don't need a custom renovation to make it work—just smart, affordable solutions that hide the mess and keep your daily essentials easy to grab.
These 11 ideas focus on practical, low-cost ways to turn your kitchen closet into a hidden storage hero, no contractor required.
1. Repurpose a Shoe Organizer for Pantry Items
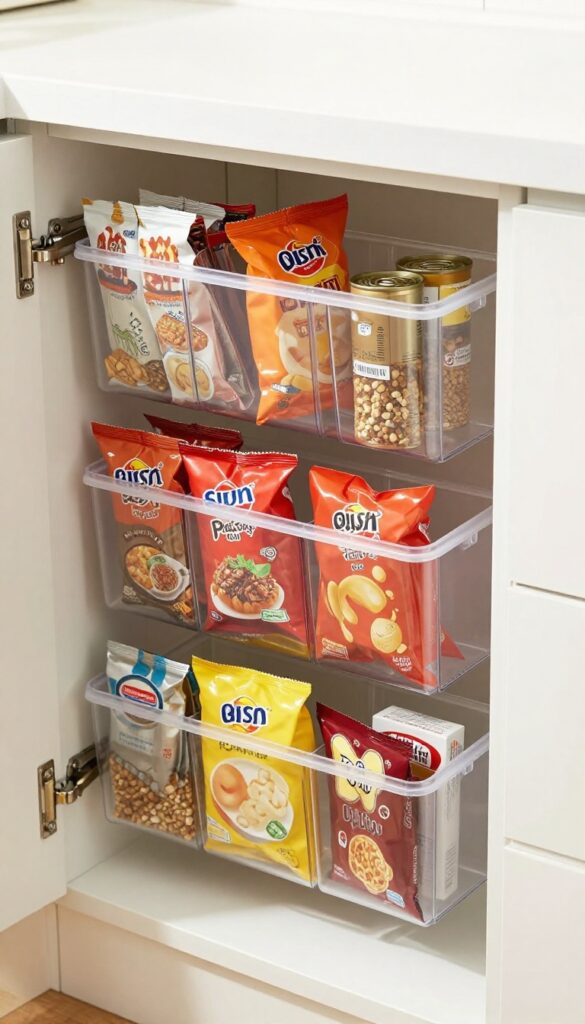
You know those clear over-the-door shoe organizers that cost next to nothing? They're not just for sneakers. Hang one on the inside of your pantry or closet door, and suddenly you have a spot for all those small items that usually get lost in the shuffle—spice packets, snack bags, even little canned goods.
It's a budget-friendly hack that takes five minutes to set up and instantly doubles your storage without taking up any shelf space.
Why It Works
It uses vertical space that's usually wasted, keeps everything visible so you can grab what you need without digging, and costs under $15. The clear pockets make it easy to see inventory at a glance, which helps you avoid buying duplicates.
Best For
Small kitchens with limited pantry space, renters who can't install permanent shelving, and anyone who wants to organize snacks, spices, or baking supplies without spending much money.
Styling Tip
Group similar items together—all tea bags in one row, snack packs in another—for a clean look. Use small baskets or clip-on labels if you want to hide packaging that doesn't match your aesthetic.
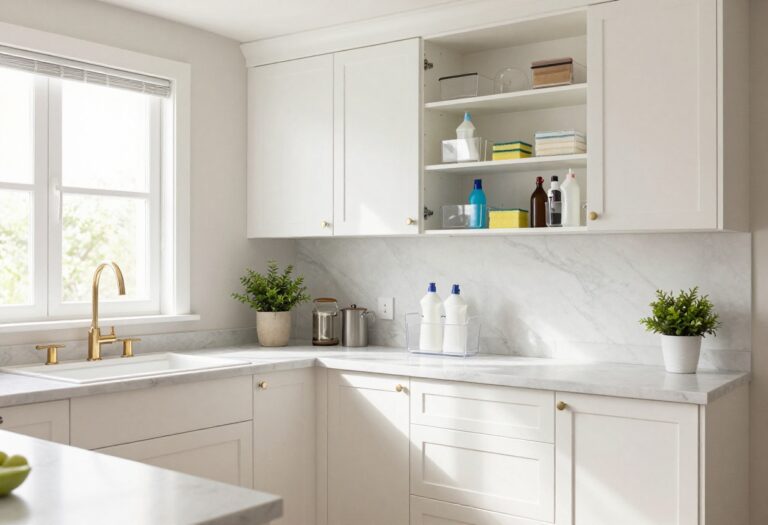
2. Install Tension Rods for Spray Bottles
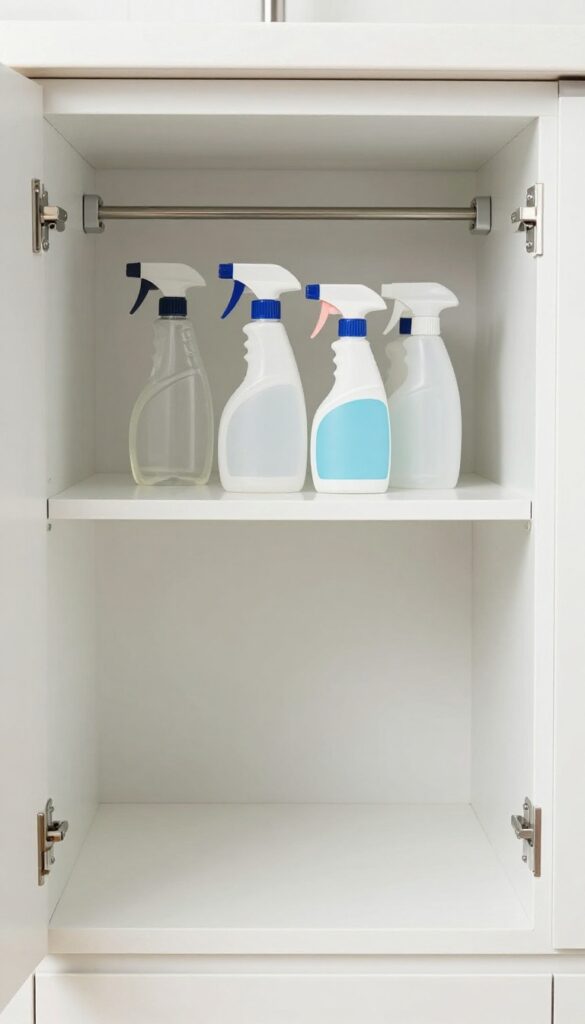
You know those spray bottles that always seem to take over your under-sink cabinet? Instead of letting them roll around or clutter the shelf, try this clever trick: a tension rod mounted horizontally inside the closet. You simply hang the bottles by their triggers, and suddenly they're neatly lined up and easy to grab.
It's a budget-friendly fix that costs just a few dollars and makes a huge difference in how tidy that space feels.
Why It Works
Tension rods are incredibly cheap and require no tools or permanent installation. By hanging bottles vertically, you reclaim valuable shelf space for other items. Plus, you can see every bottle at a glance, so no more digging around to find the all-purpose cleaner.
Best For
This idea is perfect for under-sink cabinets in the kitchen or bathroom, especially if you have multiple spray bottles for cleaning supplies. It also works great in a laundry room or any closet where you store spray bottles.
Styling Tip
Choose a tension rod with a non-slip surface so the bottles stay put. For a cohesive look, transfer your cleaning solutions into matching spray bottles with simple labels. It adds a touch of order that makes even a utilitarian space feel more intentional.
3. Use Binder Clips to Hang Measuring Cups
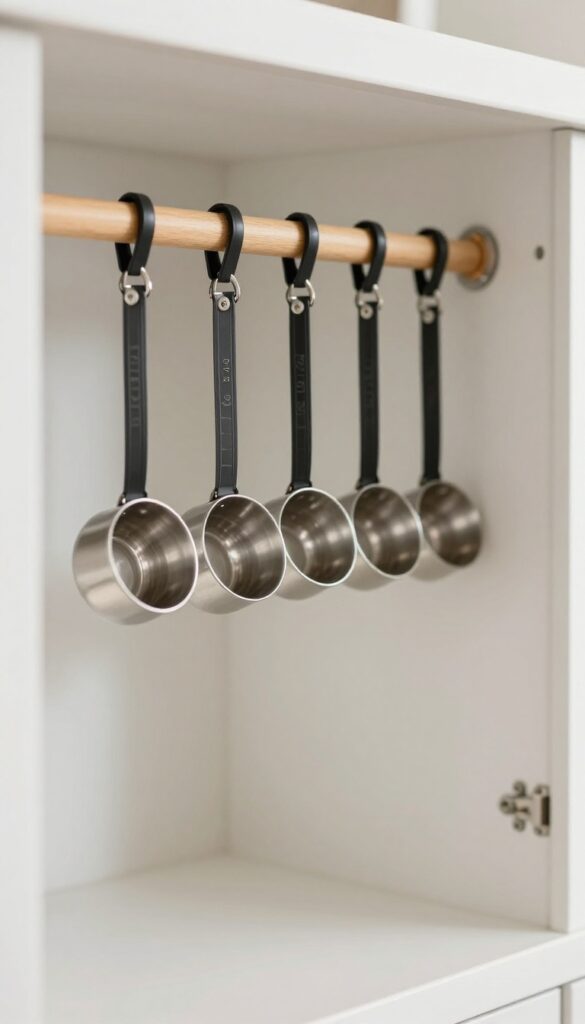
Measuring cups and spoons have a way of cluttering drawers or getting lost in the depths of a cabinet. But with a simple pack of binder clips and a small dowel, you can turn them into a hanging display that's both functional and charming. This zero-cost hack keeps your most-used tools within arm's reach while freeing up valuable drawer space.
It's the kind of clever solution that makes you wonder why you didn't think of it sooner.
Why It Works
Binder clips are strong enough to hold metal or plastic measuring cups without slipping, and they create a neat, uniform row that's easy to grab. Because the cups hang vertically, they dry faster after washing and stay visible at a glance. Plus, you can adjust the spacing to fit your collection, making it a flexible system for any kitchen.
Best For
This idea shines in small kitchens where drawer space is tight, but it's also great for rental kitchens where you can't make permanent changes. If you have a narrow strip of wall or the side of a cabinet, you can mount the dowel without drilling by using adhesive hooks. It's also perfect for RV kitchens or tiny apartments where every inch counts.
Styling Tip
For a cohesive look, use matching binder clips in a neutral color like black or silver, and choose a dowel that complements your cabinet hardware. If your measuring cups are mismatched, consider spray-painting them in a single accent color—like matte copper or sage green—to create a unified, intentional display. Hang the dowel just above your prep area so the cups are always within reach when you're cooking.
4. Add a DIY Pegboard Wall
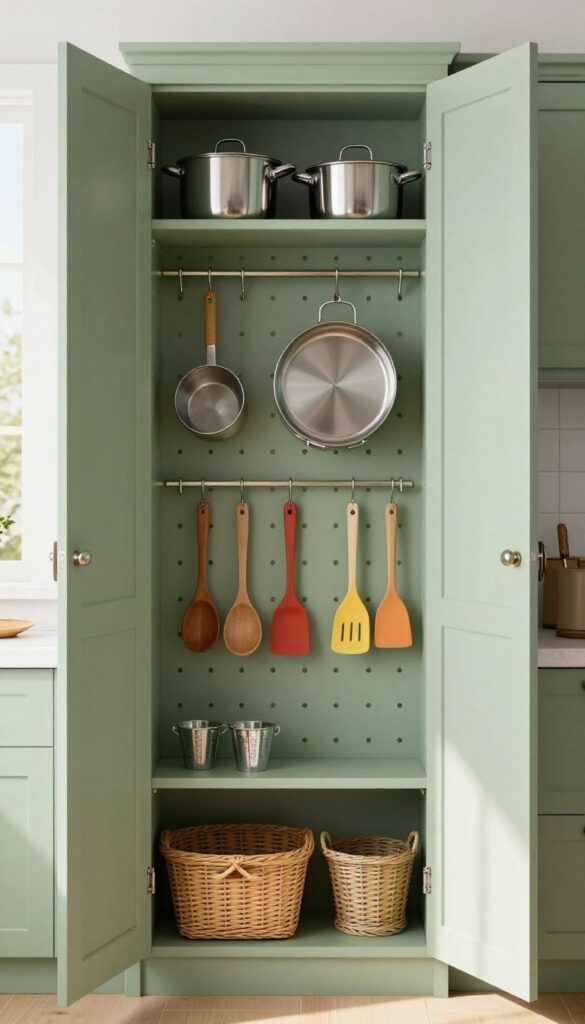
Pegboards aren’t just for garages and workshops. When you mount one inside a kitchen closet, it becomes a flexible storage wall that keeps your most-used tools right where you can grab them. The best part?
A basic pegboard kit costs around $20, and you can paint it any color to blend in or stand out. It’s one of those budget-friendly projects that makes you wonder why you didn’t try it sooner.
Why It Works
Pegboards make use of vertical space that often goes empty in a closet. Hooks and shelves can be rearranged anytime, so the system adapts as your cookware collection changes. It keeps heavy pots and pans off shelves, freeing up cabinet space for other items.
Best For
This works great for anyone with a small kitchen who needs to maximize every inch of storage. It’s also perfect for renters because pegboards are easy to install and remove without damaging walls.
Styling Tip
Paint the pegboard the same color as your closet walls for a seamless look, or choose a bold accent color to make your cookware pop. Use a mix of hooks, small shelves, and baskets to hold everything from spatulas to measuring cups.
5. Stack with Tiered Shelf Risers
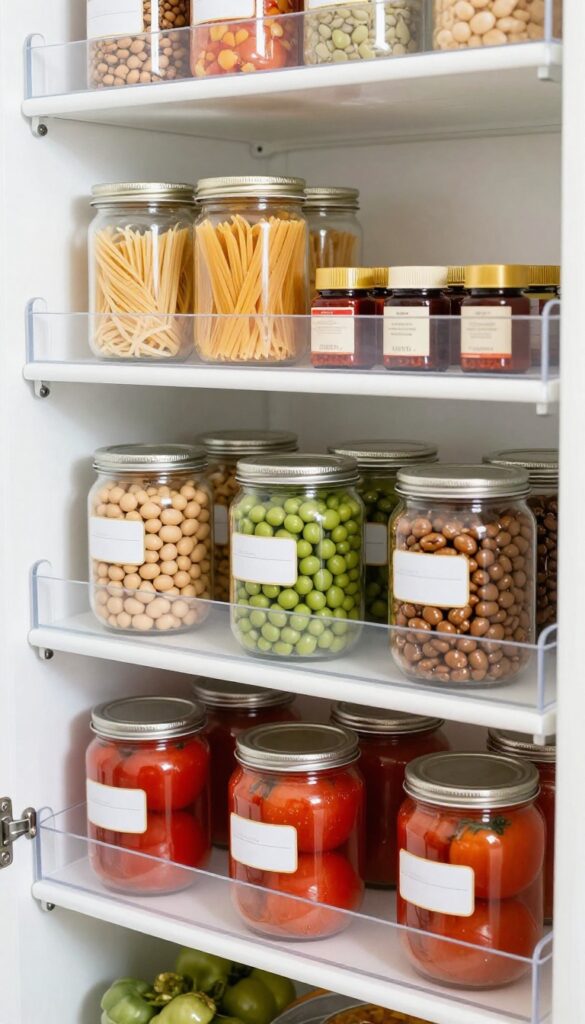
You know those moments when you're digging through a closet shelf and a can of tomatoes comes flying out? Tiered shelf risers put an end to that chaos. For just a few dollars each, these little plastic or wire steps create two levels of storage where you used to have one.
Suddenly, every can of beans and jar of pasta sauce is visible at a glance, and you're not playing Jenga every time you need a can of corn. It's one of those small upgrades that makes your kitchen feel instantly more organized without costing much or requiring any DIY skills.
Why It Works
By elevating items in the back, risers prevent the common problem of things getting lost behind taller containers. You can see every label without pulling everything out, and you're less likely to buy duplicates of things you already have. The vertical space that was previously wasted becomes usable, effectively doubling your shelf capacity.
Best For
This idea is perfect for pantry closets or kitchen cabinets with deep shelves where items tend to stack up in messy piles. It's especially useful for storing canned goods, spice jars, small condiment bottles, or baking supplies like vanilla extract and food coloring.
Styling Tip
Stick with clear acrylic risers for a clean, uniform look that blends into any shelf. If your closet is more rustic, bamboo risers add a warm natural touch. Group similar items together on each tier—canned vegetables on the bottom, sauces on top—so you always know where to reach.
6. Repurpose a Magazine File for Cutting Boards
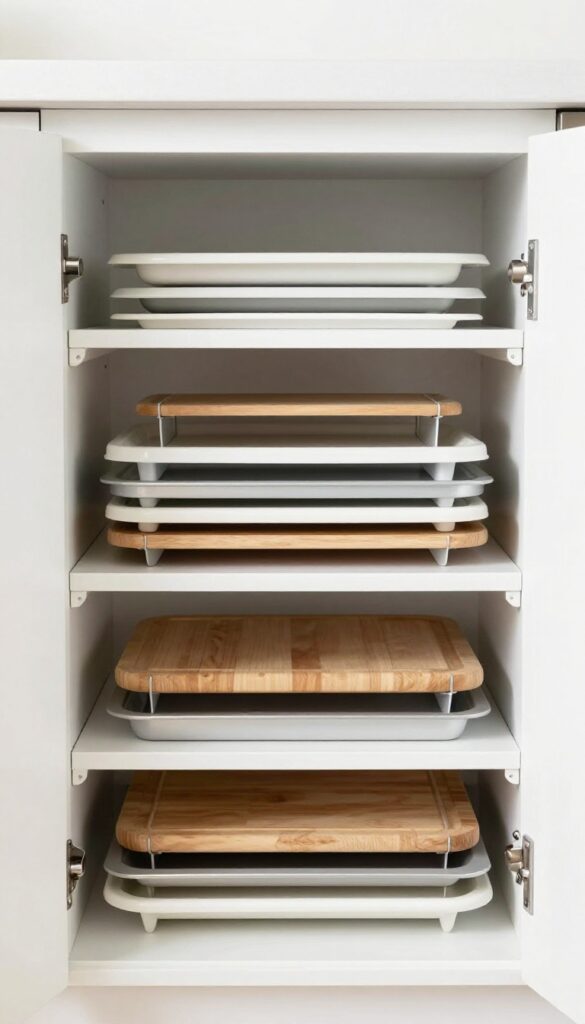
You know that awkward moment when you open a cabinet and a cutting board slides out like it's making a break for it? A simple magazine file box can put an end to that chaos. Slide your boards and baking sheets upright into one, and suddenly your cabinet feels orderly and intentional.
It's a small, budget-friendly tweak that makes a big difference in how your kitchen functions day to day.
Why It Works
Standing cutting boards vertically prevents them from shifting around and keeps them visible at a glance. No more shuffling through a stack to find the right size—just pull out the one you need. The magazine file acts like a mini shelf, corralling everything neatly without any installation or permanent changes.
Best For
This hack is ideal for shallow cabinets where stacking boards leads to toppling piles. It's also great for renters or anyone who wants a quick, no-drill storage fix. If you have a collection of odd-sized boards or lightweight baking sheets, this keeps them accessible and tidy.
Styling Tip
Choose a magazine file in a material that complements your kitchen—wire for an airy look, wood for warmth, or acrylic for a modern touch. If your cabinet is deep, place the file near the front so you can grab boards easily. Group similar-sized items together for a clean, uniform appearance.
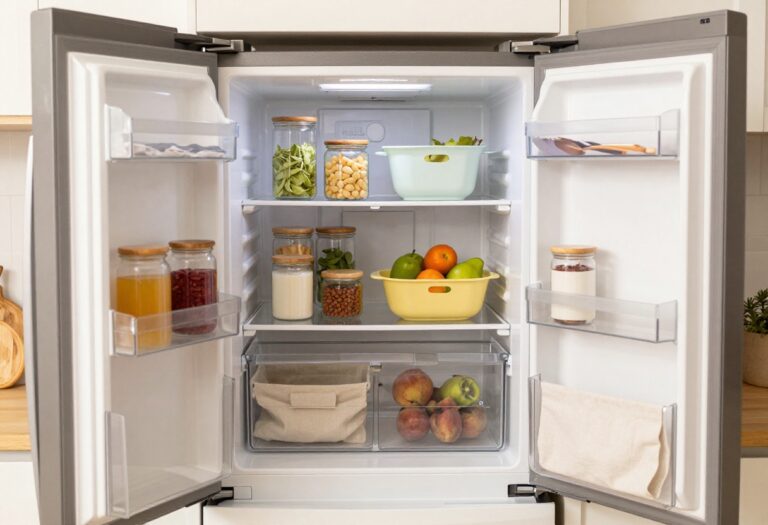
7. Hang a Wire Basket for Produce
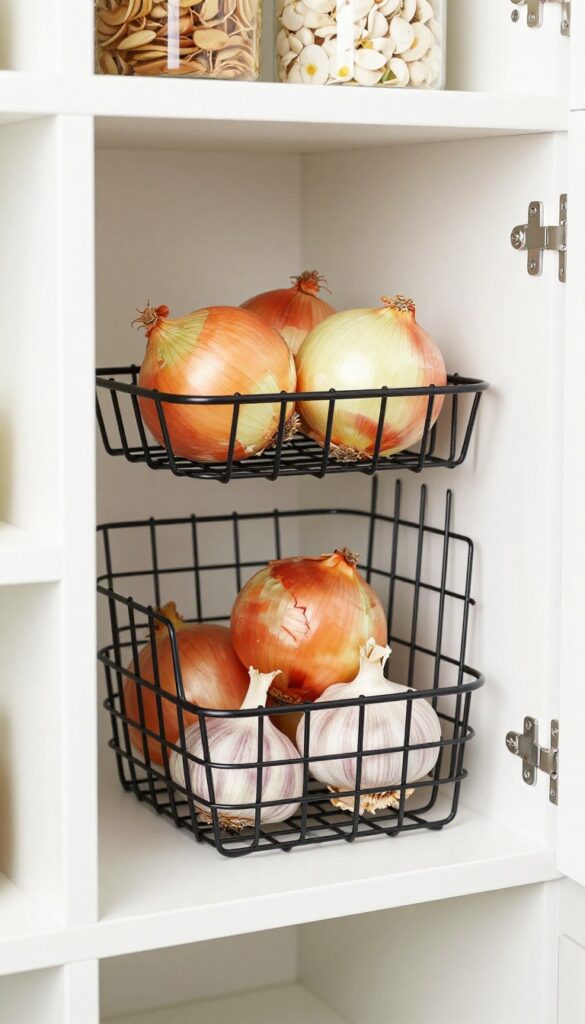
That bag of onions rolling around in the corner of your pantry? It’s time to give them a proper home. Attaching a simple wire basket to the inside of a closet door keeps root vegetables visible, ventilated, and out of the way.
It’s one of those small tweaks that costs next to nothing but makes your kitchen feel instantly more organized.
Why It Works
The open weave of a wire basket allows air to circulate, which helps onions, garlic, and potatoes stay fresh longer. Plus, mounting it on the door uses wasted vertical space and keeps these everyday ingredients within arm’s reach without cluttering your countertops.
Best For
This idea is perfect for small kitchens or any pantry where counter space is precious. It’s also great for renters since you can install the basket with just a couple of screws or even strong adhesive hooks that won’t damage the door.
Styling Tip
Choose a basket with a slightly rustic finish—black or galvanized steel works well with most cabinet hardware. Keep it minimal: just one or two types of produce at a time so the basket doesn’t get overloaded or look messy.
8. Use Command Hooks for Mugs and Utensils

Command hooks are the unsung heroes of budget-friendly organizing. Stick a few on the inside of your closet door or on a wall, and suddenly your mugs are on display instead of buried in a cabinet. Measuring spoons, kitchen towels, even small strainers can hang within easy reach.
The best part? They're removable, so you can rearrange without damaging the paint.
Why It Works
Command hooks are incredibly versatile and cost just a few dollars for a pack. They let you use vertical space that often goes wasted, like the back of a door or a narrow wall. Since they're easy to move, you can experiment with layouts until you find what works best for your kitchen flow.
Best For
This idea is perfect for small kitchens or anyone on a tight budget. It's also great for renters who can't drill holes or make permanent changes. If you have a collection of colorful mugs or mismatched utensils, this is a fun way to show them off while keeping them handy.
Styling Tip
For a cohesive look, stick to one type of hook finish—white blends in, while black or brass adds a subtle accent. Group mugs by color or size for a mini gallery wall effect. Use larger hooks for towels and smaller ones for utensils to keep everything organized.
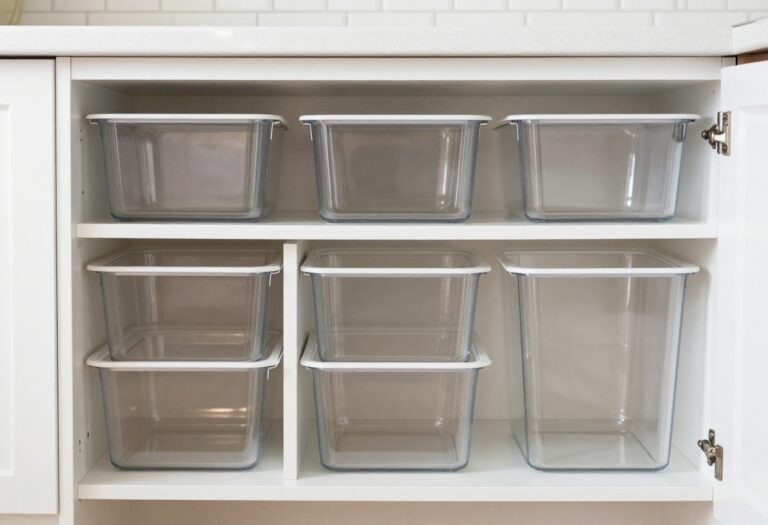
9. Label Bins for Bulk Items
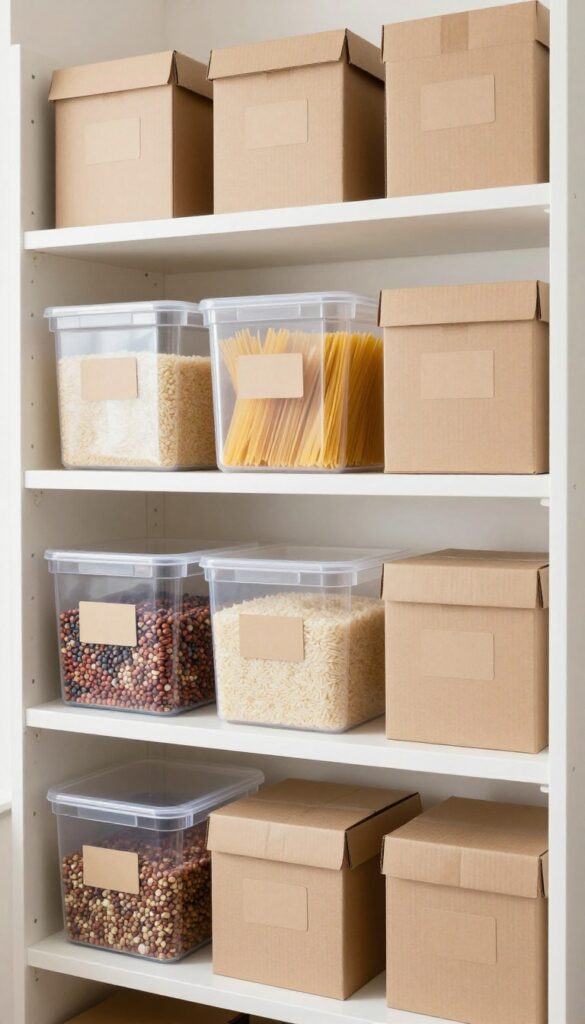
Bulk bins don’t have to look chaotic. Clear plastic bins or repurposed cardboard boxes let you see exactly what you have, while simple labels keep everything tidy. It’s a budget-friendly way to turn a jumble of pasta bags and snack pouches into a calm, organized system.
Plus, when you’re cooking, you can grab what you need without digging through a pile.
Why It Works
Labels eliminate guesswork. You don’t have to open every bin to find the rice or check if you’re out of black beans. Clear bins show the contents at a glance, and uniform labels create a cohesive look that feels intentional—even if the bins themselves are mismatched repurposed containers.
Best For
Deep cabinets or pantry shelves where you store dry goods in bulk. It’s especially handy for families who buy in larger quantities or for anyone who likes to stock up on sale items without losing track of what’s hiding in the back.
Styling Tip
Stick to a consistent label style—handwritten chalk labels, printed adhesive tags, or even washi tape with a marker. For a cohesive look, choose bins in the same color family (all clear or all neutral). If you’re using repurposed boxes, cover them with kraft paper or contact paper first.
10. Install a Slim Rolling Cart
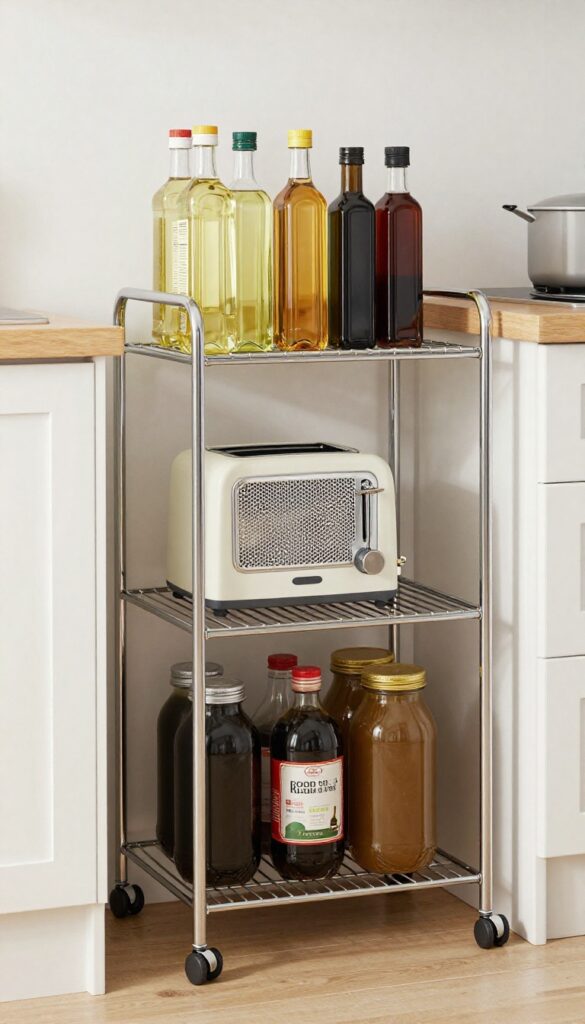
A narrow rolling cart might be the most flexible addition to your kitchen closet. It slides into tight gaps—between shelves, beside a stack of bins, or next to the door—and gives you instant extra surface space. Because it moves, you can pull it out to reach whatever is behind it, then tuck it back in.
It’s a low-cost, high-reward trick that keeps your closet from feeling like a dead end.
Why It Works
Rolling carts make every inch of your closet usable. Instead of shoving things to the back and forgetting them, you can store frequently used items on the cart and roll it forward when needed. The slim profile means it won’t eat up much room, and the wheels let you reconfigure your storage in seconds.
Best For
This idea shines in deep closets where items get lost behind taller stacks. It’s also great for renters who can’t add permanent shelving—just wheel the cart in and out as needed.
Styling Tip
Choose a metal cart with a simple, open design so it doesn’t feel bulky. Load the top shelf with everyday oils and vinegars in clear bottles, the middle with a small appliance like a toaster, and the bottom with heavier jars. Keep the look cohesive by sticking to a neutral palette or adding a few matching baskets.
11. Hang a Curtain to Hide Clutter
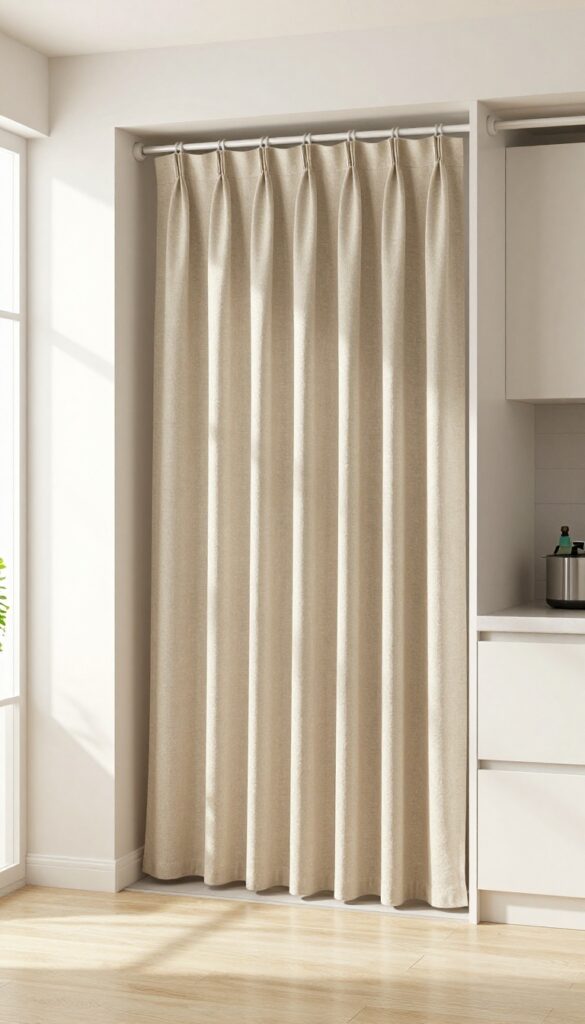
A simple curtain can transform a chaotic kitchen closet into a streamlined, almost invisible storage zone. Instead of staring at a jumble of cleaning supplies, small appliances, and random pantry items every time you walk by, you get a soft fabric panel that blends right into the room. It's one of those quick fixes that feels like a decor upgrade without requiring a single power tool.
Why It Works
- Tension rods are incredibly easy to install—no drilling, no measuring, no permanent hardware. You just twist it into place inside the closet frame, slide on a curtain, and you're done. The fabric instantly hides visual noise, making the whole kitchen feel calmer and more put together.
- Plus, you can swap the curtain out seasonally or whenever your style shifts.
Best For
This is perfect for open shelving or glass-front cabinets that you'd rather keep private, as well as for deep pantries or broom closets that tend to collect miscellaneous items. It's also a lifesaver in rental kitchens where you can't make permanent changes but still want a polished look.
Styling Tip
Choose a fabric that complements your kitchen's color palette—a linen or cotton blend in a neutral tone works beautifully. For extra texture, try a subtle stripe or a soft gingham. Make sure the curtain is wide enough to gather slightly when closed, and hem it so it just skims the floor or sits an inch above for a clean line.
FAQ
What is the best way to organize a small kitchen closet on a budget?
Start by decluttering and grouping similar items. Use free or low-cost solutions like tension rods, binder clips, and repurposed containers to maximize vertical space and keep things accessible.
Can I organize my kitchen closet without buying anything new?
Absolutely. Repurpose items you already have, like shoe organizers, magazine files, or cardboard boxes. Even binder clips and old curtain rods can become clever storage tools.
How do I keep my kitchen closet organized long-term?
Label everything and stick to a system where each item has a designated spot. Regularly purge expired food or unused gadgets to prevent clutter from building up again.
What are the best containers for hidden kitchen closet storage?
Clear bins or baskets work well because you can see what's inside. For a uniform look, choose containers in the same color family, but mixing repurposed containers is fine too.
How can I make my kitchen closet look stylish while staying budget-friendly?
Add a simple curtain, use matching labels, and stick to a cohesive color palette for bins and baskets. Even small touches like a pretty hook or a painted pegboard can elevate the look.
Conclusion
Your kitchen closet doesn't have to be a black hole of clutter. With a few smart, budget-friendly tweaks, it can become a hidden storage asset that makes your daily routine smoother and your kitchen feel more spacious.
Start with one or two ideas that speak to your biggest pain points, and build from there. Small changes add up to a big difference, and your wallet will thank you.