10 Budget-Friendly Walk-In Pantry Ideas That Are Both Practical and Stylish
A walk-in pantry is a dream for any home cook, but keeping it organized can feel overwhelming. The good news? You don't need a big budget to make it both functional and beautiful.
With a few smart choices and a little creativity, you can turn your pantry into a space that actually makes meal prep easier. These 10 ideas focus on real-life solutions that won't cost a fortune. Think repurposed items, simple DIY projects, and clever layouts that maximize every inch.
Whether you're starting from scratch or just need a refresh, these tips will help you create a pantry that feels simple, useful, and totally you. Let's dive into practical, budget-friendly ways to organize your walk-in pantry—no fancy systems required.
1. Use Clear Containers You Already Own
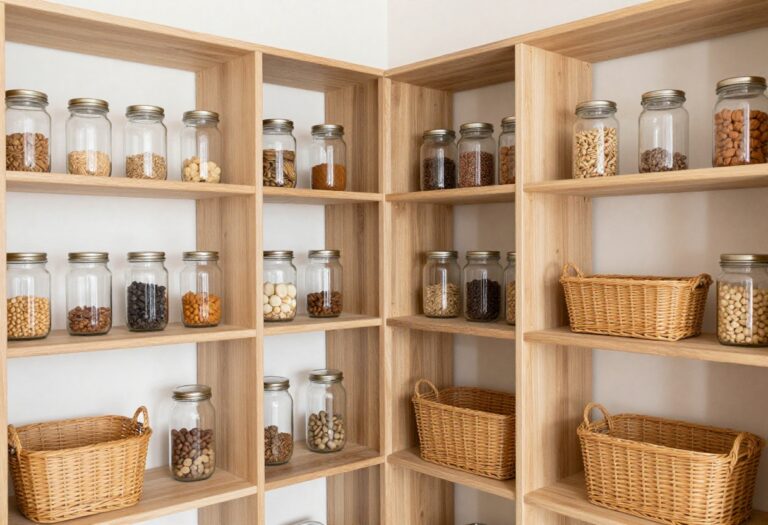
You don't need to spend a dime on fancy organizers to get your pantry in shape. Raid your kitchen cabinets for glass jars, plastic containers, and even clean takeout containers—anything clear works. Seeing your supplies at a glance cuts down on forgotten items and makes grabbing ingredients effortless.
Group similar foods together, then add simple labels with washi tape for a unified, intentional look that feels both thrifty and polished.
Why It Works
Clear containers eliminate the guesswork of rummaging through opaque bags and boxes. You instantly see when you're running low on rice or how many cans of beans you have, which reduces overbuying and food waste. It's a zero-cost upgrade that makes your pantry feel organized without any special shopping trip.
Best For
This idea is perfect for anyone on a tight budget or just starting their organization journey. It's especially useful for small pantries where every inch counts, and for households that want to cut down on single-use packaging. If you have a collection of mismatched jars already, this is your easiest win.
Styling Tip
For a cohesive look, stick to one type of label—like white washi tape with black marker—and arrange containers by height. Place taller jars in back, shorter ones up front, and keep frequently used items at eye level. A row of identical glass jars (even if they're repurposed pasta sauce jars) creates a clean, café-worthy shelf.
2. Install DIY Wire Shelving for Extra Rows
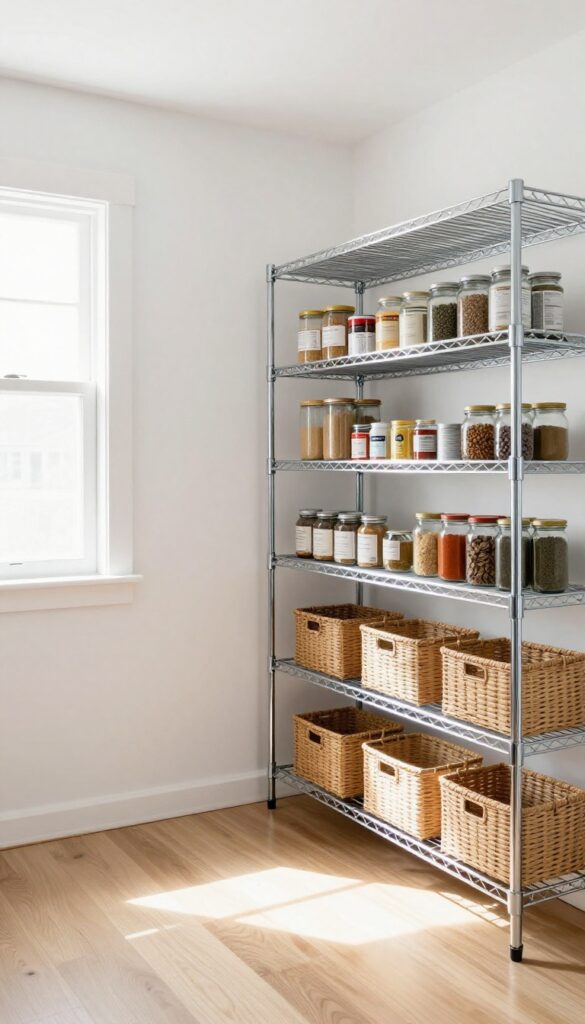
If your pantry feels cramped but you're not ready for a full renovation, wire shelving can be a game-changer. These inexpensive units are easy to cut to size and can double your vertical storage without eating up floor space. Because they let light pass through, they keep the pantry feeling open and airy rather than cluttered and dark.
Why It Works
Wire shelving is budget-friendly and incredibly versatile. You can install additional rows between existing shelves or on unused walls, instantly creating spots for canned goods, spices, and overflow items. The open design improves visibility, so you're less likely to forget what you have in the back.
Best For
This solution is ideal for renters or anyone who wants a quick storage boost without a major commitment. It works especially well in narrow pantries where every inch counts, and for organizing lightweight, stackable items like canned vegetables, jars, and snack packs.
Styling Tip
For a cohesive look, stick to one finish—chrome or white is classic—and use matching baskets or bins on the shelves. Place frequently used items at eye level and reserve the top rows for seasonal or bulk buys. A small label maker can help keep everything tidy.
3. Repurpose a Shoe Organizer for Snacks
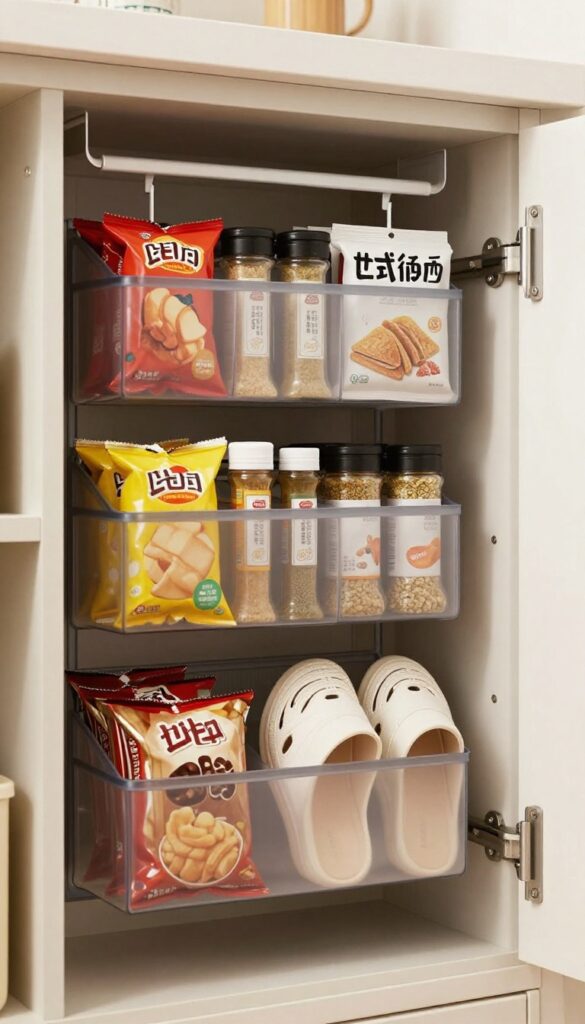
A clear over-the-door shoe organizer is one of those budget hacks that looks surprisingly intentional. When hung on the inside of your pantry door, each pocket becomes a tiny stage for snacks, seasoning packets, or small bottles. The transparency keeps everything visible at a glance, so you never lose a granola bar to the abyss again.
It’s an instant upgrade that costs next to nothing and feels like a smart, stylish solution.
Why It Works
Shoe organizers are designed to hold weight and fit snugly over a door, making them perfect for lightweight pantry items. The clear pockets let you see every item without rummaging, which cuts down on clutter and impulse buys. Plus, they’re easy to remove and wash when spills happen.
Best For
This idea shines in small pantries where every inch counts. It’s ideal for households with kids who need easy access to snacks, or for anyone who wants to free up shelf space for larger staples. Works great in rental kitchens where you can’t install permanent shelving.
Styling Tip
Group similar items together—all granola bars in one column, tea bags in another—and use small binder clips to seal open bags. For a cohesive look, stick to snacks with neutral or pastel packaging. If the organizer is visible when the door is open, choose one with a clean, modern frame (avoid garish logos).
4. Add Tension Rods for Spray Bottles
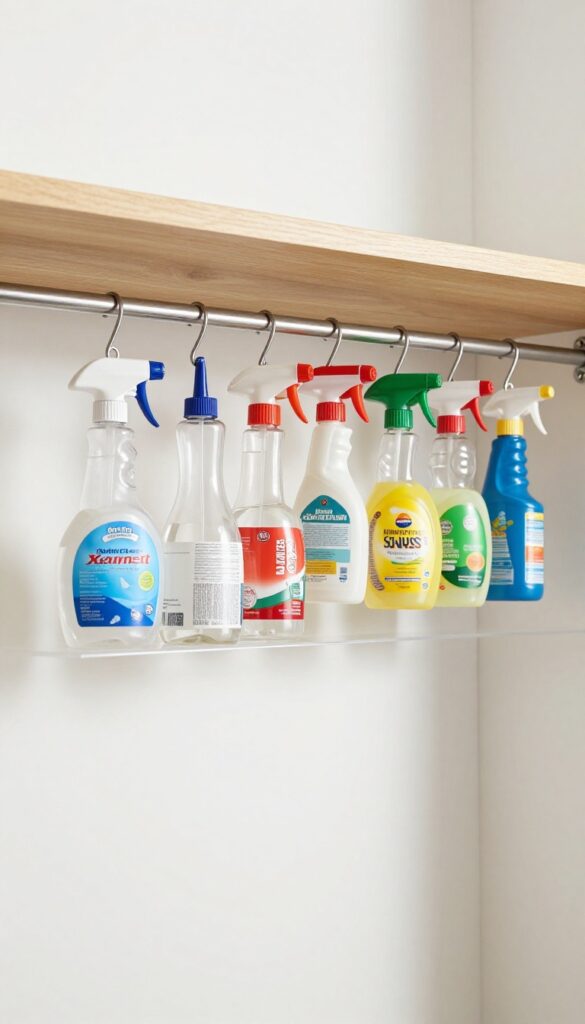
That jumble of spray bottles under the sink or tucked into a pantry shelf can be a real headache. They tip over, leak, and take up way more space than they should. A simple tension rod—yes, the same kind you use for curtains—can turn that chaos into a tidy, accessible row of bottles.
It's one of those budget-friendly hacks that feels almost too easy, but once you try it, you'll wonder why you didn't do it sooner.
Why It Works
Tension rods create a dedicated spot for spray bottles without any drilling or permanent hardware. By wedging the rod horizontally under a shelf, you can hang bottles by their triggers, freeing up valuable shelf space below. The tension holds the rod securely, and the bottles stay upright and within easy reach.
Best For
This trick is perfect for under-sink cabinets, pantry shelves with awkward vertical space, or even in a laundry room. It's especially useful for storing cleaning supplies, cooking oils, or vinegars in a way that's both organized and visually tidy.
Styling Tip
Choose a tension rod with a non-slip coating or rubber ends to keep it firmly in place. For a cohesive look, group bottles by function—like all cooking oils together—and use matching spray bottles if you can. A clear or white rod blends in best and keeps the focus on your neatly lined-up bottles.
5. Group Items by Meal Type in Baskets
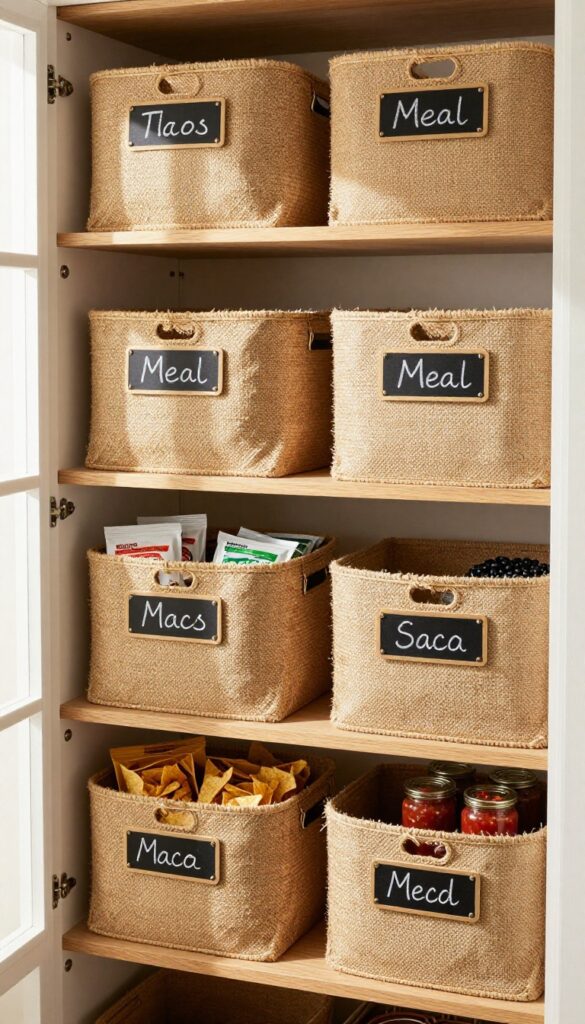
Imagine opening your pantry and seeing a basket labeled “Taco Tuesday” with everything you need—seasoning, shells, salsa, and beans. That’s the kind of convenience this idea brings. By grouping ingredients by meal type in inexpensive baskets or bins, you turn a chaotic shelf into a streamlined system where each basket is a ready-to-grab recipe kit.
It feels organized without looking sterile, and the baskets themselves add a cozy, collected texture.
Why It Works
Grouping by meal type eliminates the mental load of hunting for each component. When you’re in a rush, you just grab the basket and go. It also prevents buying duplicates because you can see exactly what you have for each meal at a glance.
Best For
This works beautifully for families who cook recurring meals like taco night, pasta night, or breakfast-for-dinner. It’s also great for anyone who wants to simplify meal prep without overhauling their entire pantry.
Styling Tip
Stick to a uniform basket color or material—like all natural seagrass or all galvanized metal—to keep the look cohesive. Mixing too many colors can feel chaotic. Use small chalkboard tags or clip-on labels to identify each basket clearly.
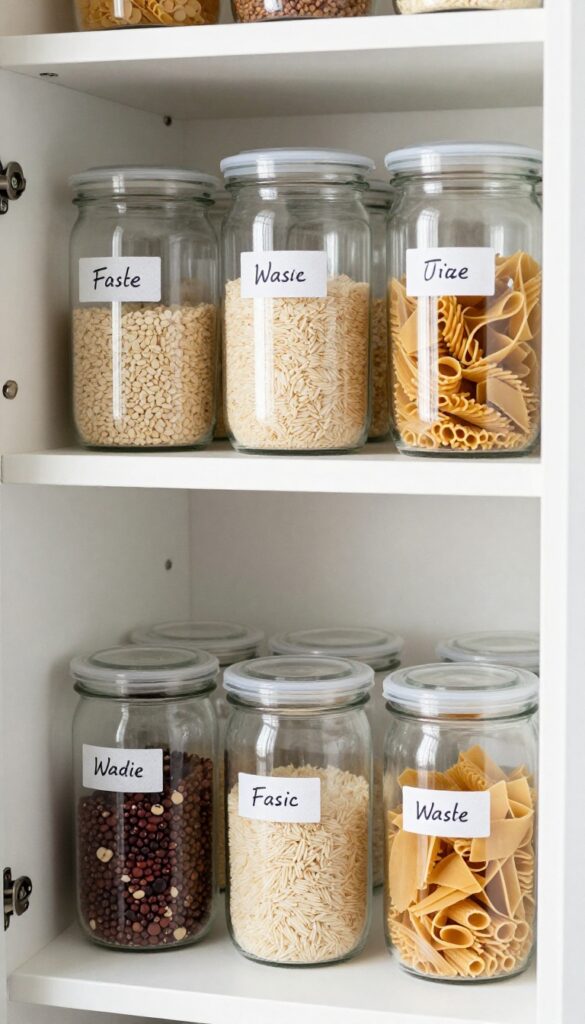
6. Label Everything with Chalkboard Stickers
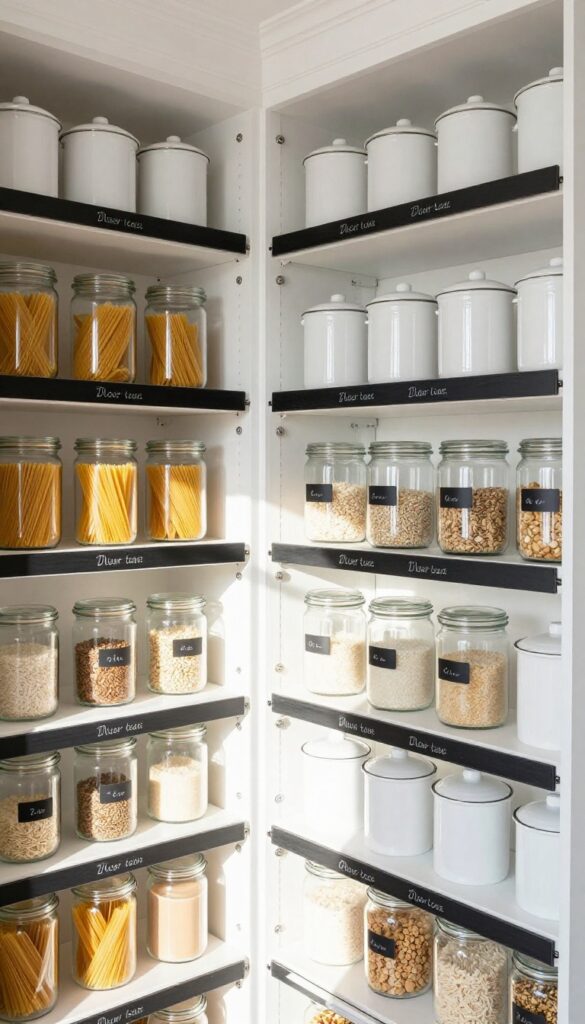
Labels are the unsung heroes of an organized pantry, but they don't have to be boring or permanent. Chalkboard stickers bring a cozy, café-inspired vibe while keeping your system flexible. They're cheap, reusable, and instantly make a row of clear containers look intentional and styled.
Plus, when you switch out pasta for rice, just erase and rewrite—no peeling or waste.
Why It Works
Chalkboard labels create a uniform look that ties together different container shapes and sizes. Because they're reusable, you can change labels as your pantry evolves without buying new supplies. The matte black or dark gray finish adds a subtle contrast against clear glass or white bins, making the pantry feel curated rather than cluttered.
Best For
This idea shines in pantries with lots of bulk bins, canisters, or clear storage jars. It's also great for families who rotate snacks or baking ingredients often, because labels can be updated in seconds. If you have open shelving where containers are visible, chalkboard labels keep the look cohesive and photo-ready.
Styling Tip
Stick labels at the same height on every container for a clean, grid-like effect. Use a white chalk marker for crisp lettering that pops against the dark background. For a softer look, opt for round labels on square jars—it adds a playful touch without sacrificing order.
7. Use Lazy Susans for Corner Shelves
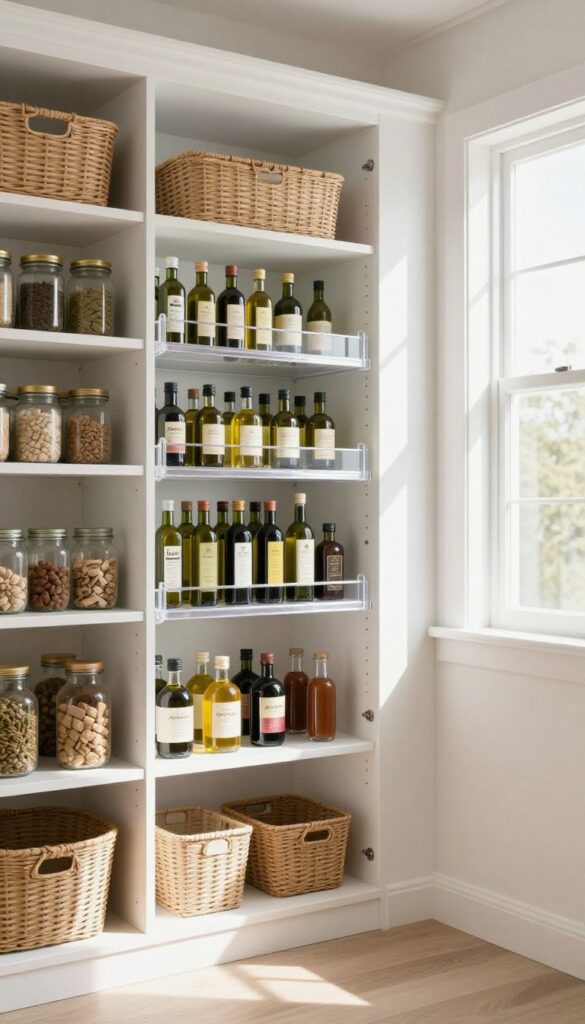
Corner shelves in a pantry often become a black hole for half-used bags and forgotten cans. A lazy Susan changes that entirely, turning an awkward spot into one of the most functional areas in your kitchen. The spinning motion makes everything visible and reachable, so you can actually use what you have without playing pantry archaeology.
Budget-friendly versions are easy to find, and the payoff in daily convenience is huge.
Why It Works
A lazy Susan eliminates the need to dig or stretch into dark corners. With a simple spin, every item comes to the front, making it easy to grab what you need and see what's running low. This reduces food waste and keeps your pantry feeling orderly without constant rearranging.
Best For
Deep corner shelves, upper cabinets that are hard to reach, or any spot where items tend to get lost in the back. It's especially useful for storing oils, vinegars, spices, canned goods, and condiment bottles.
Styling Tip
Stick to two or three lazy Susans per shelf to avoid a cluttered look. Group similar items together—like all oils on one turntable and all spices on another. Clear or neutral-toned turntables blend in best, but a bamboo or wood finish adds warmth if your pantry has open shelving.
8. Create a Snack Station with a Tiered Stand
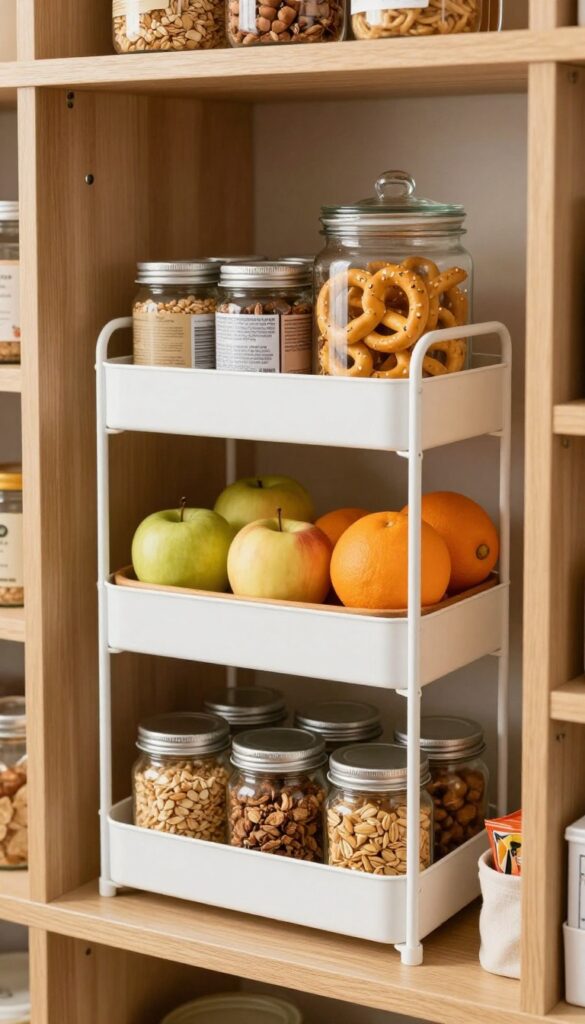
We all have those afternoons when hunger strikes and the pantry becomes a free-for-all. A tiered stand—either a pretty metal one from the thrift store or a set of stacked boxes—turns a corner of your shelf into a dedicated snack station. It’s like giving your pantry its own little convenience store, but way cuter and way more organized.
Plus, when healthy options are front and center, you’re more likely to grab a granola bar than a bag of chips.
Why It Works
The vertical design uses shelf space efficiently, keeping snacks visible and accessible. No more digging through bags or forgetting what you bought. The clear separation also helps with portion control and makes restocking a breeze.
Best For
This idea is perfect for families with kids who need quick after-school snacks, or for anyone trying to eat healthier by keeping nutritious options in plain sight. It works on any pantry shelf with at least 12 inches of vertical clearance.
Styling Tip
Stick to a color palette—like warm wood tones or all-white containers—to keep the stand looking intentional. Use small glass jars or cloth bins for loose items, and leave a little breathing room between tiers so nothing feels crammed.
9. Hang a Pegboard for Utensils and Tools
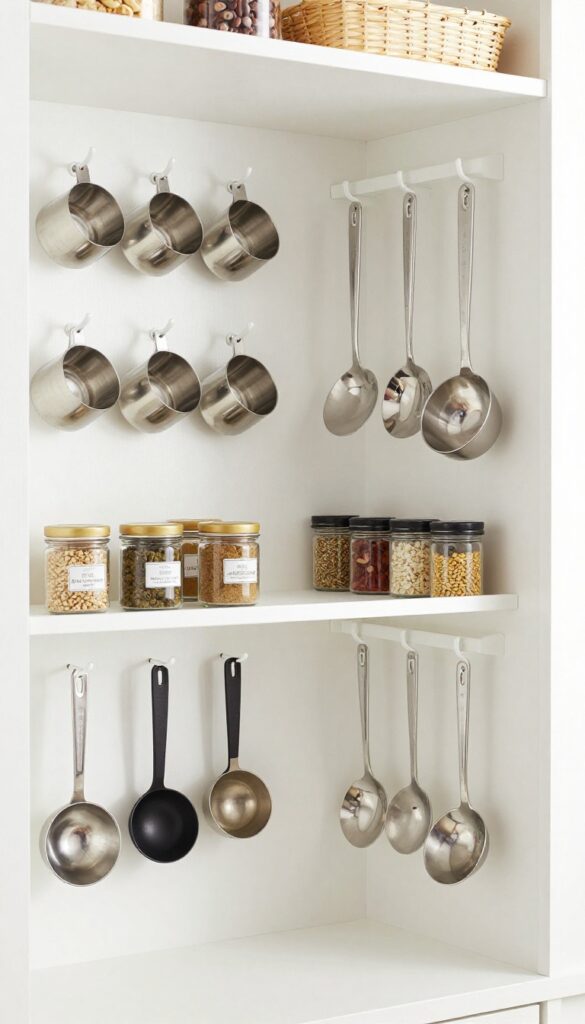
Picture this: an empty wall in your pantry suddenly becomes the most organized spot in the room. A small pegboard is the secret to keeping measuring cups, spoons, and kitchen tools off shelves and within easy reach. It’s a budget-friendly fix that adds a dash of industrial charm, and you can paint it to match your pantry’s palette—think soft sage or crisp white for a cohesive look.
Why It Works
Pegboards let you see everything at a glance, so you’re not digging through drawers for that 1/4 cup measure. They also free up shelf space for dry goods and canned items, making your pantry feel twice as functional. Plus, the hooks and bins are easy to rearrange as your needs change.
Best For
This idea shines in small pantries where wall space is limited but vertical storage is plentiful. It’s also perfect for renters or anyone on a tight budget, since pegboard kits are inexpensive and require no permanent installation.
Styling Tip
Paint the pegboard the same color as your pantry walls for a seamless look, or choose a contrasting shade like charcoal for a bold accent. Use a mix of hooks, small shelves, and bins to store not just utensils but also spice jars or tea bags.
10. Use Binder Clips to Seal and Organize Bags

Binder clips aren't just for office paperwork—they're a pantry hero in disguise. With a few of these inexpensive clips, you can seal open bags of chips, pasta, or frozen veggies in seconds. Clip them to the edge of a shelf or a wire rack to keep bags upright and visible, so you never lose track of what's open.
It's a tiny hack that makes a big difference in reducing clutter and keeping your pantry feeling tidy without spending a dime.
Why It Works
Binder clips create a tight seal that keeps food fresh longer, and they're reusable and cheap. By clipping bags to a shelf, you eliminate the mess of half-open packages falling over or getting buried. It's a zero-cost solution that instantly makes your pantry look more organized and intentional.
Best For
This trick works wonders for any pantry with open bags of snacks, dried goods, or frozen items. It's especially useful for small pantries where every inch counts, or for households that buy in bulk and need to keep multiple open bags tidy.
Styling Tip
Use black or silver binder clips for a clean, uniform look. Group clipped bags together on a single shelf or wire basket to create a cohesive display. For extra style points, label the clips with a permanent marker or washi tape so you know what's inside at a glance.
FAQ
How can I organize my walk-in pantry on a tight budget?
Start by using what you already have—repurpose containers, baskets, and jars. Add inexpensive solutions like tension rods, binder clips, and shoe organizers. Focus on grouping items and labeling to create a system that works without spending much.
What are the best containers for pantry storage?
Clear containers are best because you can see contents at a glance. Glass jars work well for dry goods, while plastic bins are great for larger items. Look for uniform shapes to stack easily, and always label them.
How do I maximize vertical space in a walk-in pantry?
Use tall shelving units, add hooks or pegboards on walls, and hang over-the-door organizers. Tension rods can hold spray bottles or lightweight items. Stackable bins and tiered stands also help use vertical space efficiently.
Should I label everything in my pantry?
Yes, labeling helps everyone in the household find and return items to the right place. Use chalkboard stickers or simple adhesive labels. It keeps the pantry organized and reduces the chance of clutter building up.
How often should I reorganize my pantry?
Aim for a quick tidy-up every month and a deeper reorganization every season. Regular maintenance prevents clutter from accumulating and helps you keep track of expiration dates. Adjust your system as your needs change.
Conclusion
Organizing your walk-in pantry doesn't have to be expensive or complicated. With a little creativity and these budget-friendly ideas, you can create a space that's both practical and stylish. The key is to focus on what works for your family and to keep things simple.
Start with one or two ideas that resonate with you, and build from there. Before you know it, your pantry will be a place you actually enjoy stepping into—and that's a win for any home cook.