Chicken Salad Chick Grape Salad Recipe for Garden Bites
There’s something about a cool, creamy grape salad that feels like a hug in a bowl. It’s the kind of dish that disappears at every picnic, potluck, or garden gathering.
I first tasted a version at Chicken Salad Chick, and I knew I had to recreate it at home. This recipe captures that same sweet-tangy creaminess, with a crunchy pecan streusel that adds just the right texture.
It’s simple enough for a weekday snack but special enough for a celebration. Whether you’re hosting a garden party or just want a comforting bite, this grape salad delivers.
Let’s dive in.
Why You’ll Love This Recipe
This grape salad has a way of surprising everyone who tries it. It walks the line between side dish and dessert so gracefully that you’ll find yourself serving it at barbecues, potlucks, and holiday tables alike.
The best part? There’s zero oven time. You just mix a creamy, tangy dressing, fold in fresh grapes, and top it with a buttery pecan crumble.
The contrast between the cool, juicy grapes and the sweet, crunchy topping is absolutely addictive. It’s also incredibly forgiving—you can make it a day ahead, and the flavors only get better as they sit. Whether you need a quick dish for a gathering or a comforting treat for yourself, this recipe delivers without any fuss.
Ingredients You’ll Need
Let’s gather everything before we start. The ingredient list is short and sweet, but each one plays a role in that signature creamy, crunchy, sweet-tart balance.
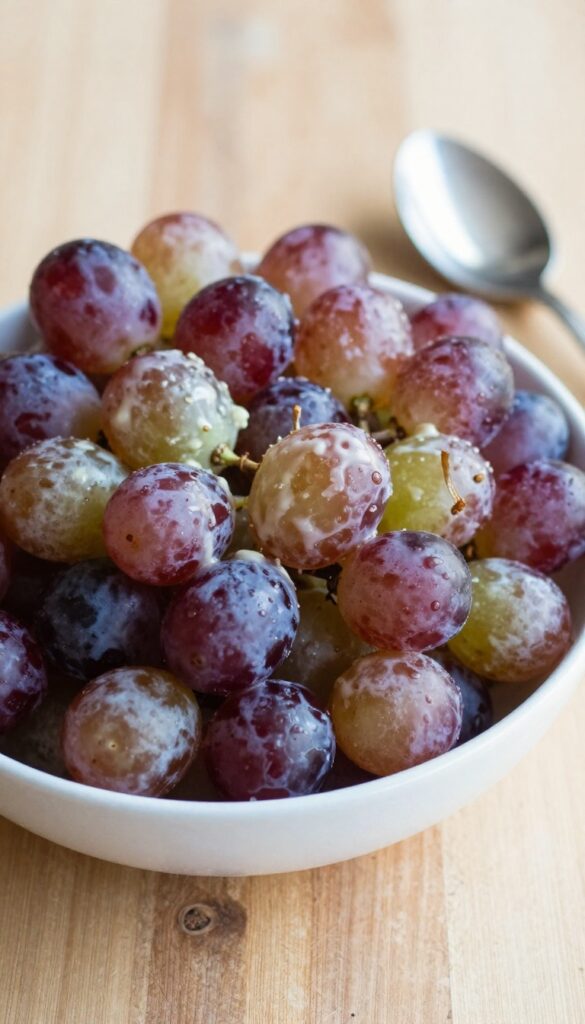
The grapes are the star here, so use good-quality red seedless grapes—they’re sweeter and firmer than green ones. Halving them makes each bite easier and helps the dressing cling. For the dressing, make sure your cream cheese is truly softened to room temperature; otherwise you’ll end up with lumps.
The pecan topping is where the magic happens: cold butter is key to getting that crumbly, streusel-like texture. If pecans aren’t your thing, you can swap in chopped walnuts or even slivered almonds. And if you’re out of brown sugar for the topping, a tablespoon of maple syrup mixed with a bit of granulated sugar works in a pinch.
Step-by-Step Instructions
Let’s walk through this easy, no-bake recipe. The process is straightforward, but a few gentle touches make all the difference in texture and flavor.
Step 1 – Make the Creamy Base
In a large bowl, combine the softened cream cheese, sour cream, granulated sugar, and vanilla extract. Use an electric hand mixer or a sturdy whisk to beat everything together until the mixture is completely smooth and lump-free. This should take about 1 to 2 minutes.
Scrape down the sides of the bowl as needed. The base should feel thick and velvety—this is what will coat each grape beautifully.
Step 2 – Fold in the Grapes
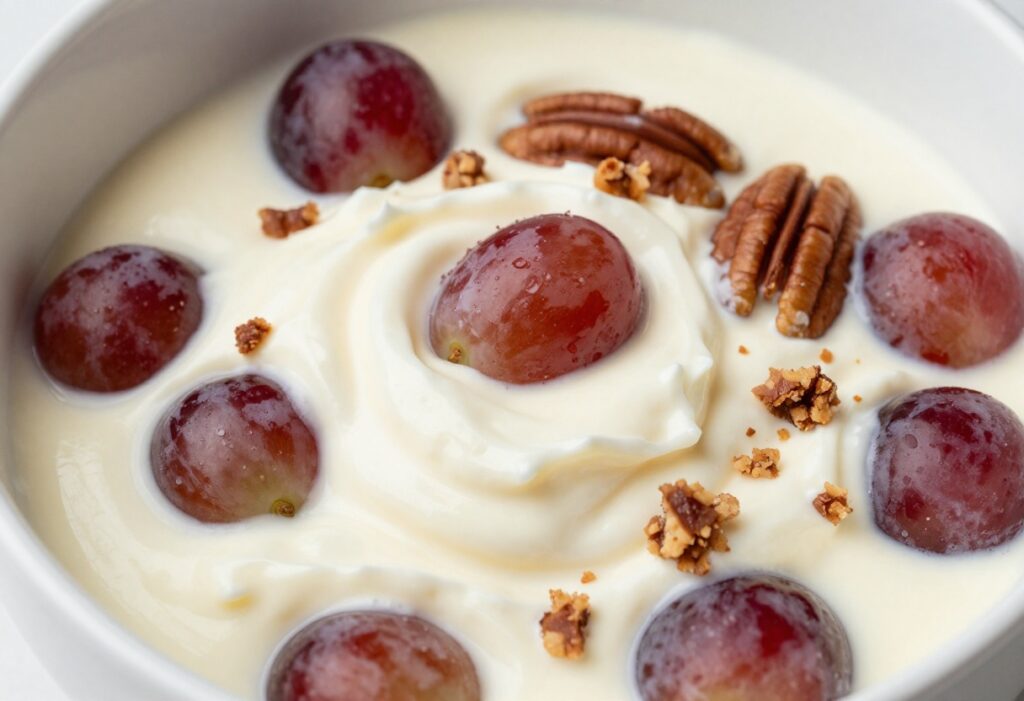
Add the halved red seedless grapes to the bowl. Using a rubber spatula, gently fold them into the cream cheese mixture. Be careful not to crush the grapes; you want them to stay intact so every bite has a juicy pop.
Fold just until every grape half is evenly coated. The dressing should cling to the fruit without pooling at the bottom.
Step 3 – Prepare the Pecan Topping
In a small bowl, combine the chopped pecans, brown sugar, and cold cubed butter. Use a pastry cutter, two forks, or your fingertips to work the butter into the dry ingredients until the mixture looks like coarse crumbs with some small butter pieces still visible. If using your hands, work quickly so the butter stays cold—this ensures a crumbly, not greasy, topping.
Step 4 – Assemble and Chill
Sprinkle the pecan crumble evenly over the grape mixture. Do not stir it in; the topping should stay on top for a pleasant crunch. Cover the bowl with plastic wrap or a lid and refrigerate for at least 1 hour, or up to overnight.
This resting time is essential—it lets the flavors meld and the cream cheese mixture firm up slightly. Serve chilled directly from the fridge.
Tips for the Best Results
A few small choices can make a big difference in this grape salad. Here are some tips to ensure every bite is as good as it can be.
Use cold grapes for a refreshing crunch. Soften cream cheese to room temperature for a lump-free dressing. Don’t skip the chilling time—it allows flavors to meld.
For extra crunch, toast the pecans before mixing into the topping.
Common Mistakes to Avoid
- Using grapes that are not fully chilled: Warm grapes will make the dressing runny and dilute the flavor. Always start with cold, just-washed grapes.
- Overmixing the dressing: Once you fold in the grapes, stir gently. Overmixing can break the grapes and turn the salad mushy.
- Skipping the chilling time: The salad needs at least an hour in the fridge to set. Serving it right away will result in a loose, less flavorful dish.
- Not toasting the pecans: Raw pecans are soft and lack depth. Toasting them in a dry pan or oven brings out their nutty flavor and adds a satisfying crunch.
Easy Variations and Substitutions
If you want to switch things up a bit, this grape salad is very forgiving. You can tweak the nuts, the dressing, or even the topping to suit what you have on hand or your dietary needs.
Swap pecans for walnuts or almonds if you prefer a different crunch. For a tangier, lighter dressing, use Greek yogurt instead of sour cream. A pinch of cinnamon stirred into the brown sugar topping adds a subtle warmth that pairs beautifully with the grapes.
For a dairy-free version, substitute vegan cream cheese and use coconut cream in place of the sour cream—just make sure both are well chilled before mixing.
How to Store and Reheat
Grape salad is best enjoyed cold and fresh, but leftovers keep well for a few days. Proper storage helps maintain the creamy texture and crunchy topping as much as possible. Since this is a no-cook recipe, reheating isn't needed—just pull it from the fridge and serve.
How to Store It
Transfer any leftover grape salad to an airtight container and press a piece of plastic wrap directly onto the surface before sealing the lid. This prevents the topping from absorbing moisture and getting soggy too quickly. Refrigerate for up to 3 days.
The topping will soften over time, but the salad will still taste delicious. Do not freeze—grapes have high water content and will turn mushy when thawed, ruining the texture.
How to Reheat It
No reheating required. This salad is meant to be served cold, straight from the fridge. If you prefer a slightly less chilly temperature, let it sit on the counter for 10 to 15 minutes before serving.
Avoid microwaving or warming, as the cream cheese dressing will separate and the grapes will become soft and unappetizing.
Frequently Asked Questions
Can I use red grapes instead of green?
Absolutely. Red grapes work just as well and add a slightly sweeter flavor. Just make sure to halve them for easier eating.
How long does this grape salad keep in the fridge?
It stays fresh for up to 3 days when stored in an airtight container. The texture is best within the first 24 hours.
Can I make this dairy-free?
Yes. Use a dairy-free cream cheese and sour cream substitute. Just note the texture may be slightly less creamy.
Do I need to toast the pecans?
Toasting brings out their flavor and adds crunch, but it's optional. If you skip toasting, the nuts will be softer in the salad.
Can I freeze grape salad?
Freezing is not recommended. Grapes become mushy and the creamy dressing separates when thawed.

Chicken Salad Chick Grape Salad
Ingredients
Method
- In a large bowl, beat cream cheese, sour cream, granulated sugar, and vanilla extract until smooth and creamy.
- Gently fold in the halved grapes until evenly coated with the dressing.
- In a small bowl, combine chopped pecans, brown sugar, and cold butter. Use a pastry cutter or your fingers to mix until the mixture resembles coarse crumbs.
- Sprinkle the pecan topping evenly over the grape mixture.
- Cover and refrigerate for at least 1 hour before serving to allow flavors to meld. Serve cold.
Conclusion
This grape salad is everything I love about simple, comforting food. It’s creamy, crunchy, and bursting with sweet grape flavor. Every time I bring it to a gathering, someone asks for the recipe.
I hope you enjoy making it as much as I do. Whether it’s for a garden party or a quiet afternoon treat, this dish never fails to bring a smile. Happy cooking!