13 Aesthetic Small Kitchen Ideas You Can Recreate Over a Weekend
Small kitchens don't have to feel cramped or cluttered. With a few thoughtful updates, you can turn yours into a space that's both functional and visually pleasing. The best part?
Most of these changes can happen over a single weekend, no contractor required. Whether you're renting or own, these ideas focus on what's achievable with basic tools and a bit of creativity.
From swapping out hardware to adding a touch of greenery, each suggestion is designed to make your kitchen feel larger, brighter, and more personal. Let's dive into 13 small kitchen ideas that aesthetic homes can recreate without a major renovation.
1. Swap Out Cabinet Hardware for Something Sleeker
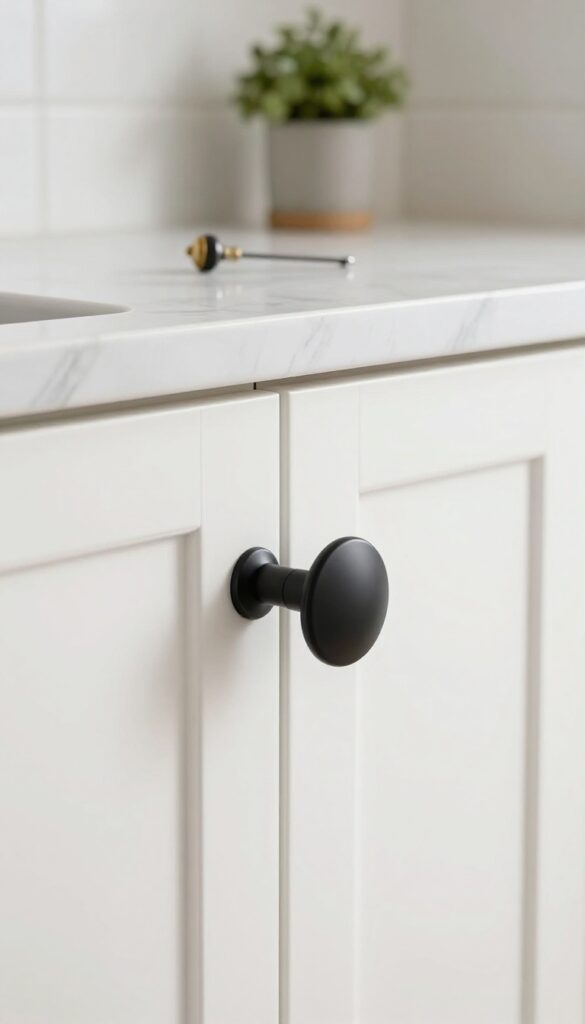
Old, dated cabinet knobs can instantly age a kitchen, even if the cabinets themselves are in great shape. Swapping them out for modern, minimalist hardware is one of the quickest and most affordable ways to give your small kitchen a fresh, polished look. Think matte black, brushed brass, or sleek nickel—these finishes catch the light and add a subtle touch of sophistication without overwhelming the space.
The beauty of this update is that it requires almost no skill or time. All you need is a screwdriver and a few hours on a Saturday afternoon. Remove the old knobs and pulls, then screw in the new ones.
The holes will likely line up, but if they don't, a little wood filler and a fresh coat of paint can solve that easily. This small change makes a surprisingly big impact, instantly making your cabinets look custom and intentional.
Best Finishes For Small Kitchens
- Matte black is a top choice for a modern, grounded look that hides fingerprints well. Brushed brass or champagne gold adds warmth and pairs beautifully with white or light wood cabinets. Brushed nickel offers a timeless, cool-toned option that works with almost any style.
- Avoid overly shiny or ornate hardware—it can make a small kitchen feel cluttered and busy.
Size And Shape Matters
- For a streamlined aesthetic, choose slim, rectangular bar pulls or simple round knobs in a size proportional to your cabinet doors. On upper cabinets, consider knobs instead of pulls to keep the sightline clean. On drawers, a single long pull can create a continuous horizontal line that visually expands the space.
- Test a few samples on your cabinets to see what feels best in hand and looks balanced.
Finishing Touch: Consistency Is Key
To keep the look cohesive, use the same finish for all hardware in the kitchen, including faucets, lighting, and towel bars. This creates a unified, intentional design that feels curated rather than haphazard. If you're on a tight budget, focus on the most visible cabinets first—the ones around the sink and stove—and replace the rest later.
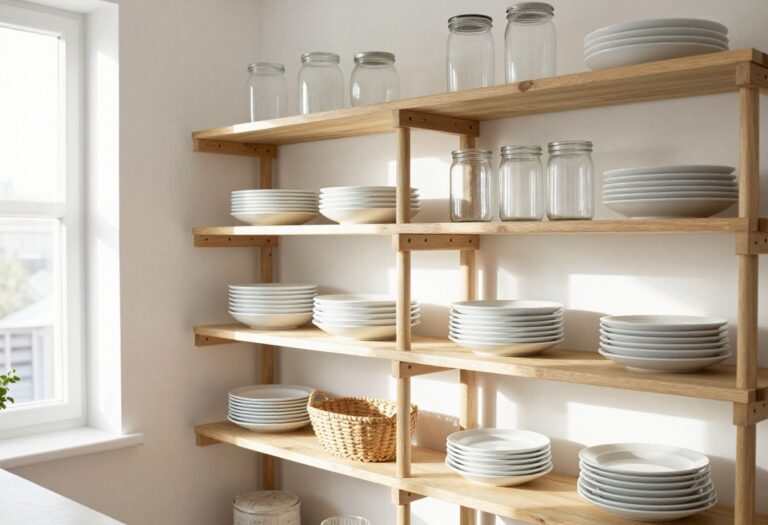
2. Install Open Shelving Above the Counter
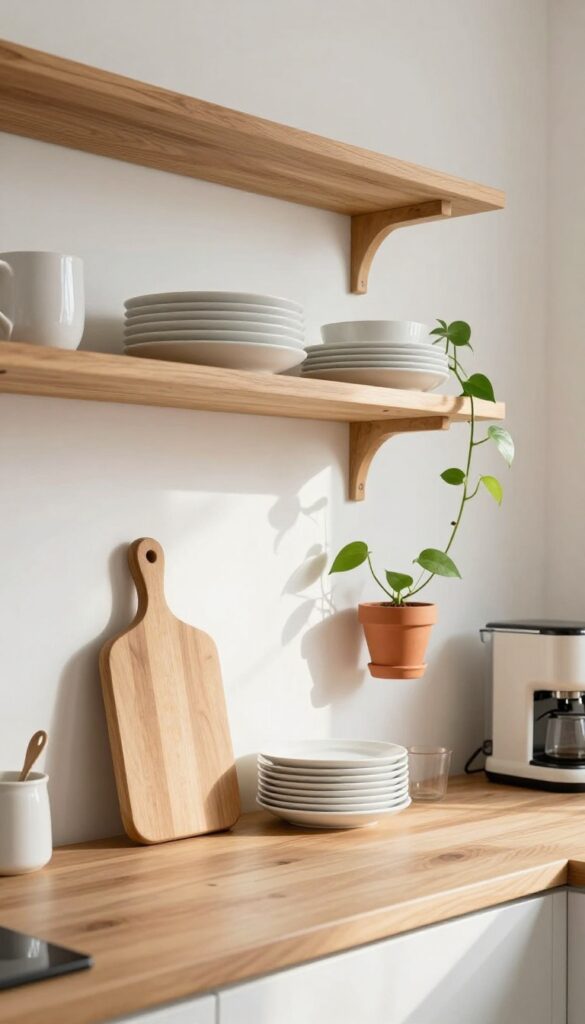
Swapping out a few upper cabinet doors for open shelves can instantly transform a cramped kitchen into one that feels light and curated. It’s a weekend-friendly project that doesn’t require a full renovation, just a drill and some floating shelves. The result is an airier space where your favorite dishes and glassware become part of the decor.
Open shelving above the counter is one of the quickest ways to make a small kitchen feel bigger and more personal. By removing cabinet doors or installing floating shelves, you create visual breathing room and a chance to style a vignette that reflects your taste. The key is to keep it intentional—mix everyday items like white plates with a few plants or ceramic pieces for a clean, lived-in look.
This idea works especially well in galley kitchens or L-shaped layouts where upper cabinets can feel heavy. For a cohesive feel, stick to a neutral palette with one or two accent colors, like sage green or terracotta, repeated across your displayed items.
Shelf Styling Tip
Group items in odd numbers and vary heights. Stack plates on a wooden stand, lean a cutting board, and add a small trailing plant like pothos. Leave some empty space so the shelf doesn’t look cluttered.
Best Materials
Warm wood like oak or walnut adds texture against white or light-colored walls. For a more modern feel, go with black metal brackets and thick white shelves. Match the shelf finish to your hardware or countertop for a seamless look.
Layout Tip
Install shelves about 18 inches above the counter to leave room for appliances and prep work. Keep frequently used items within arm’s reach and store lesser-used pieces on higher shelves.
3. Add a Peel-and-Stick Backsplash
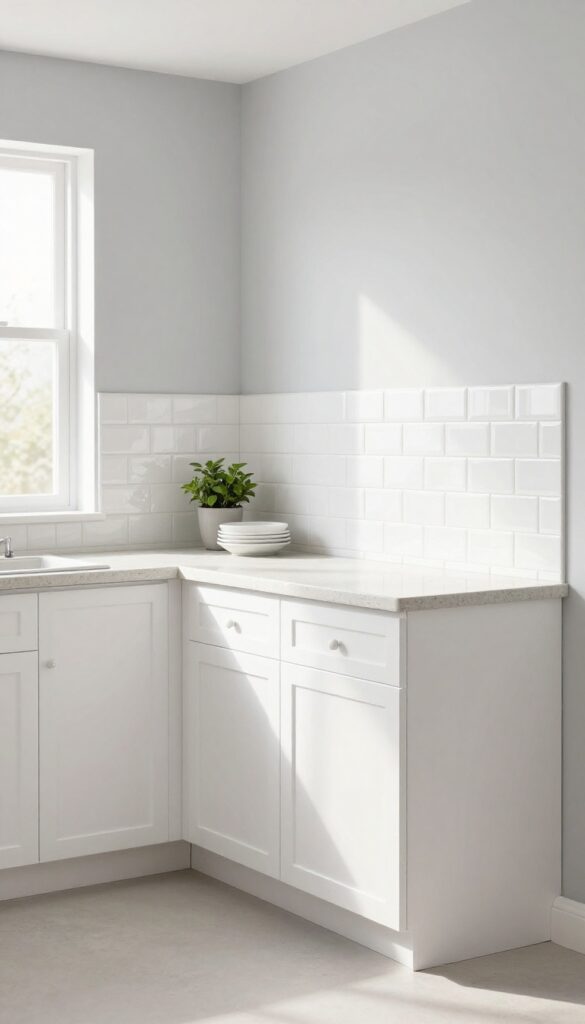
A blank wall above your counter is a missed opportunity. Peel-and-stick backsplash tiles give you that high-end look without the mess or commitment. In a small kitchen, even a narrow strip behind the stove becomes a focal point that pulls the whole room together.
Peel-and-stick tiles come in everything from classic subway to trendy hexagon and marble patterns. They're renter-friendly, easy to cut with a utility knife, and can be installed in an afternoon. The adhesive is strong enough to stay put but removes cleanly when you move out.
For a weekend refresh, this is one of the highest-impact changes you can make. Stick with a light color to keep the space airy, or go bold with a geometric pattern for personality. Either way, you'll wonder why you didn't do it sooner.
Best Patterns For Small Kitchens
- Subway tiles in white or soft gray keep things classic and bright. If you want texture, try a herringbone layout. Hexagon tiles add a subtle modern twist without overwhelming the space.
- Marble-look tiles work well for a luxe feel, especially in kitchens with neutral cabinets.
Installation Tips
- Make sure the wall is clean and smooth before you start. Measure twice, cut once, and use a utility knife with a straightedge for clean edges. Start from the bottom and work your way up, pressing firmly to avoid air bubbles.
- A small roller helps the adhesive bond evenly.
Finishing Touch
Seal the edges with a clear silicone caulk where the backsplash meets the countertop and cabinets. This gives a professional finish and prevents moisture from seeping behind the tiles. Choose a caulk that matches your grout color for a seamless look.
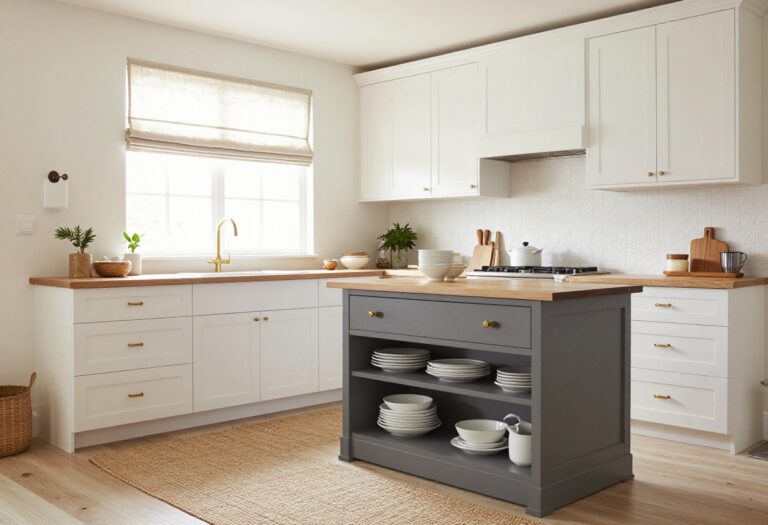
4. Paint the Island a Contrasting Color

A kitchen island is often the centerpiece of the room, but in smaller kitchens, it can blend into the background. Giving yours a contrasting color instantly makes it a focal point, adding depth and personality without taking up extra space. Deep navy, sage green, or charcoal are especially forgiving in busy kitchens and pair beautifully with white or light wood cabinetry.
A pop of color on the island breaks up the monotony of matching cabinets and countertops, creating visual separation that makes the kitchen feel larger and more intentional. The key is to choose a shade that complements your existing palette while offering enough contrast to stand out. For a weekend-friendly refresh, stick with a satin or semi-gloss paint that wipes clean easily and holds up to daily use.
This small change delivers big impact, turning your island into a design statement that anchors the whole room.
Best Colors For Contrast
- Navy blue is a top contender because it reads as neutral yet bold, working with brass, chrome, or black hardware. Sage green offers a softer contrast that feels calming and organic, especially with butcher block or marble countertops. Charcoal gray is another versatile option—it’s modern, hides smudges well, and pairs with nearly any backsplash.
- Avoid overly bright or trendy colors that might feel dated quickly; stick with hues that have a bit of depth and sophistication.
Finishing Touch: Hardware Upgrade
Once the paint dries, swap out standard hardware for something that pops against the new color. Brushed brass or matte black knobs and pulls add a polished finish and tie the island into the rest of the kitchen’s details. Even a simple bar pull in a contrasting metal can elevate the look from a basic paint job to a custom feature.
Durability Tip
Kitchen islands take a beating, so choose a paint with a satin or semi-gloss finish—these are more scrubbable and resist chipping better than flat or matte paints. Apply a primer first, especially if you’re painting over a darker color or raw wood, and let each coat dry fully before adding another. For extra protection, consider a clear water-based polyurethane topcoat on high-contact areas.
5. Hang a Statement Pendant Light

A single pendant light can completely change the feel of a small kitchen. It draws the eye upward, making the ceiling feel taller, and adds a sculptural element that basic flush mounts just can't match. Whether you go for a sleek metal cone, a warm rattan shade, or a clear glass globe, swapping out that builder-grade fixture is one of the quickest weekend upgrades you can make.
Replacing a basic overhead fixture with a single pendant or a small cluster of mini pendants instantly elevates the room. The key is choosing a design that complements your style—glass, rattan, or metal—and hanging it at the right height to define the work area. In a compact kitchen, a pendant hung 30 to 36 inches above the counter or island creates a focal point without overwhelming the space.
It also frees up counter space by eliminating the need for task lighting. This is a weekend-refresh friendly project that doesn't require rewiring if you stick with the existing ceiling box.
Best Materials For Small Kitchens
- Rattan and woven shades add warmth and texture, making a white kitchen feel cozier. Glass pendants—clear, ribbed, or frosted—keep the look airy and reflect light around the room. Metal finishes like brass, black, or chrome work well in modern or industrial kitchens.
- Avoid overly bulky shades that visually crowd the space.
Hanging Height Matters
For a kitchen island or peninsula, hang the pendant 30 to 36 inches above the countertop. If your ceiling is low (under 8 feet), consider a flush-mount pendant or a semi-flush design that still offers style without dropping too low. Over a sink, a mini pendant adds focused light without interfering with movement.
Budget-Friendly Swap
- You don't need an electrician for this upgrade if you're using the existing ceiling box. Many stylish pendants cost under $100. Look for options with adjustable cords or chains so you can customize the drop length.
- A dimmer switch adds flexibility for different moods and tasks.
6. Use a Rolling Cart for Extra Storage
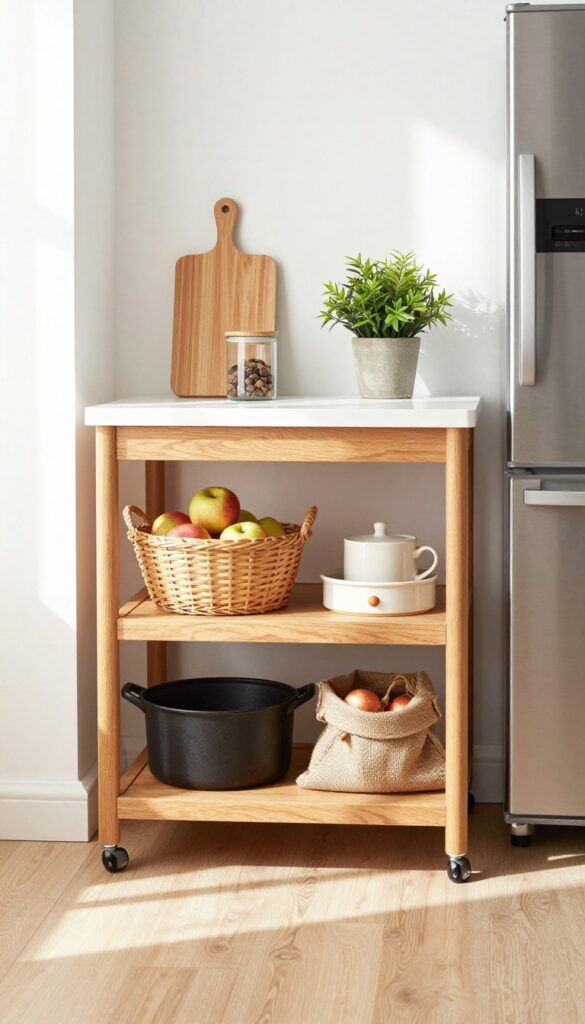
A rolling cart is one of those pieces that feels like a secret weapon in a small kitchen. It slides into tight spots—between the counter and the fridge, beside the stove, or even under a window—and gives you instant storage and counter space. The best part?
You can wheel it wherever you need it, whether that's prepping dinner or serving drinks. It's a weekend-friendly upgrade that doesn't require drilling or permanent changes.
A slim rolling cart in wood or metal can fit between cabinets or next to the fridge. Use it for storing produce, cookbooks, or bar tools. It adds counter space when needed and can be moved out of the way easily.
The key is choosing a cart that matches your kitchen's style—warm wood for a cozy feel, sleek metal for a modern touch. Place it near your prep zone for easy access to frequently used items, and top it with a small cutting board or a plant to make it feel intentional.
Best Materials
Wood carts add warmth and work well in farmhouse or Scandinavian kitchens. Metal carts with wire shelves feel airy and industrial, perfect for modern or minimalist spaces. For a budget-friendly option, look for a bamboo cart—it's lightweight, durable, and brings a natural texture that blends with most styles.
Storage Tip
Use the top tier for items you grab daily, like oils, spices, or a knife block. The middle shelf can hold produce baskets or a small appliance, and the bottom is great for heavier items like pots or bags of onions. Add a few hooks on the side for hanging towels or measuring cups.
Layout Tip
Measure the gap where you plan to park the cart—ideally, leave a few inches of clearance so it doesn't feel cramped. If you're using it as a mobile island, position it near your main work area and pull it out when you need extra prep space. When not in use, tuck it against a wall or next to the fridge to keep the pathway clear.
7. Add Under-Cabinet Lighting
Cooking in a small kitchen often means working in your own shadow. Overhead lights cast shadows onto countertops, making prep areas feel dim and cramped. Battery-operated LED strip lights change that instantly.
Stick them under upper cabinets to flood your workspace with warm, even light. The result is a kitchen that feels bigger, cleaner, and far more polished—especially during evening hours.
Under-cabinet lighting is one of those weekend upgrades that delivers maximum impact with minimal effort. You don’t need an electrician or any wiring skills. Peel-and-stick LED strips come in various lengths and color temperatures, so you can choose a soft warm white for a cozy vibe or a cool daylight tone for precise meal prep.
The lights are motion-sensor or touch-activated, making them easy to turn on without fumbling. They also eliminate harsh shadows, making your countertops look more spacious and your backsplash details stand out. This simple addition instantly elevates the kitchen’s mood, turning a functional space into a stylish one.
Best Placement
Focus on the areas where you prep food most—near the sink, stove, or main counter. Stick the strips close to the front edge of the cabinet so the light spreads evenly across the counter. Avoid placing them too far back, or you’ll end up with a spotlight effect that misses the workspace.
Lighting Tip
Choose LED strips with a color rendering index (CRI) of 90 or higher. This ensures your ingredients and cookware look true to color, which is especially helpful when you’re checking the doneness of meat or the ripeness of produce. Warm white (2700K–3000K) works best for a cozy, residential feel.
Budget-Friendly Swap
If you’re on a tight budget, opt for rechargeable stick-on puck lights instead of strips. They’re slightly less seamless but still provide targeted task lighting. Place them every 12 to 18 inches along the cabinet underside for consistent brightness.
8. Display a Collection of Cutting Boards
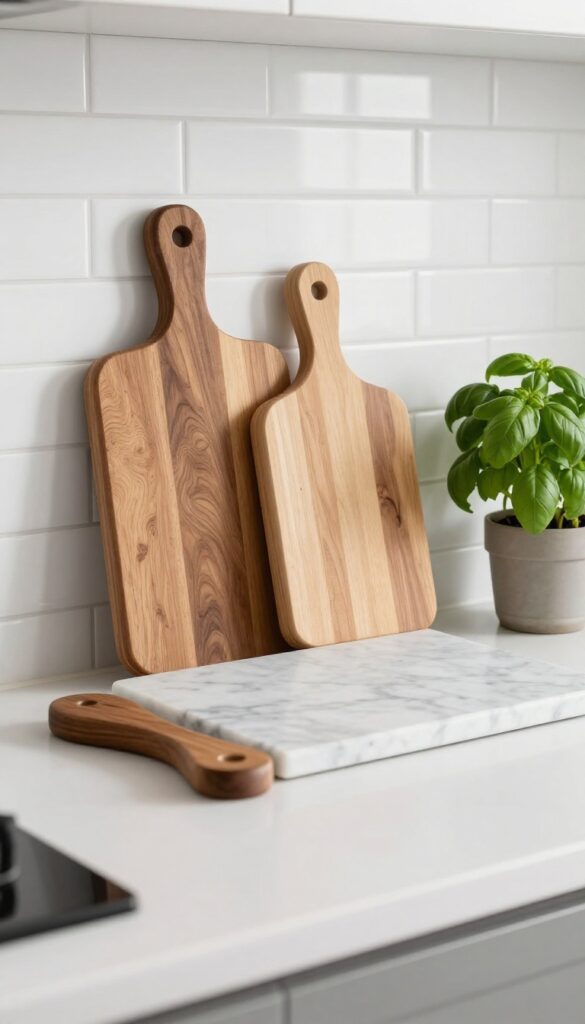
Lean a few wooden or marble cutting boards against the backsplash or prop them on the counter. They add warmth and texture while being functional. Mix sizes and shapes for a curated look.
Cutting boards are one of those kitchen items you probably already own several of, so why not put them on display? Instead of hiding them in a drawer, lean a few against the backsplash or prop them up on the counter. The layered look instantly adds warmth and texture, making your kitchen feel more inviting.
Go for a mix of materials—wooden boards bring a natural, rustic feel, while marble or acrylic options keep things modern and sleek. Varying the sizes and shapes (round, rectangular, with or without handles) creates visual interest without looking cluttered. This trick works especially well in small kitchens where every surface counts, turning a practical item into a design feature.
Best Materials
Wooden boards in acacia, walnut, or bamboo add warmth and pair well with almost any kitchen style. For a more contemporary look, choose marble or slate boards—they're heat-resistant and double as serving platters. Acrylic or plastic boards in muted tones can work too, especially if your kitchen leans minimalist.
Arrangement Tip
Lean the largest board at the back and layer smaller ones in front, slightly overlapping. If you have open shelving, stack a few flat and prop one upright against a jar or cookbook. Keep the colors cohesive—stick to warm wood tones or a monochrome palette for a polished finish.
Finishing Touch
Add a small potted herb or a salt cellar next to the boards to complete the vignette. This makes the display feel intentional and lived-in, not just a storage solution. The greenery softens the hard edges and ties the whole look together.
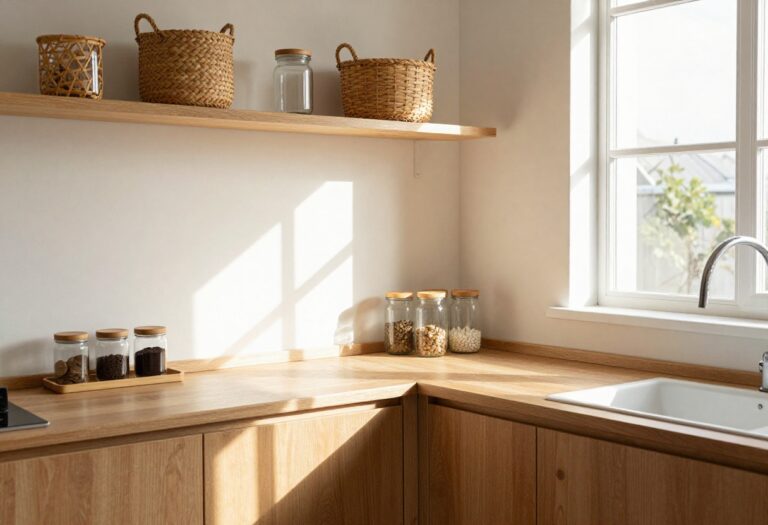
9. Incorporate a Small Herb Garden

Bringing fresh herbs into your kitchen is one of the easiest ways to add life, color, and a subtle fragrance to the space. A few pots of basil, mint, or rosemary on a sunny windowsill or a floating shelf instantly make the room feel more vibrant and intentional. It’s a small addition that pulls double duty—greenery for the eyes and fresh ingredients for your cooking.
You don’t need a sprawling garden or even a balcony to enjoy the benefits of homegrown herbs. A compact windowsill or a narrow shelf near a window is enough to support a tiny herb garden. Choose uniform pots in a neutral tone like matte white, terracotta, or soft gray to keep the look cohesive and uncluttered.
Group them together on a small tray or a wooden board to define the area and make watering easy. This setup works especially well in kitchens where counter space is limited but vertical or window-adjacent spots are available. The visual effect is fresh, organized, and effortlessly stylish—like a mini farmer’s market corner in your own home.
Best Herbs To Start With
- For a low-maintenance kitchen garden, stick with herbs that thrive indoors and are used frequently in cooking. Basil, mint, chives, parsley, and rosemary are excellent choices. They grow well in small pots, don’t require intense sunlight, and add distinct textures and shades of green.
- Avoid sprawling herbs like dill or cilantro unless you have ample space, as they can get leggy quickly.
Pot And Placement Tips
- Use pots with drainage holes to prevent waterlogging, and place a saucer or a small tray underneath to catch excess water. Group the pots on a windowsill that gets at least four to six hours of indirect sunlight daily. If your kitchen lacks natural light, consider a small grow light clipped to a shelf above the herbs.
- Keep the pots evenly spaced so each plant gets air circulation, and rotate them every few days to encourage even growth.
Styling For A Clean Look
- To keep the herb garden looking intentional, choose pots that match your kitchen’s existing color palette. Matte finishes work well in modern kitchens, while glazed ceramic adds a touch of warmth. Label each herb with a small wooden tag or a piece of chalkboard tape for a charming, organized feel.
- Tuck a small pair of kitchen shears nearby for easy snipping—this turns the garden into a functional, everyday tool rather than just decor.
10. Replace the Faucet with a Modern One
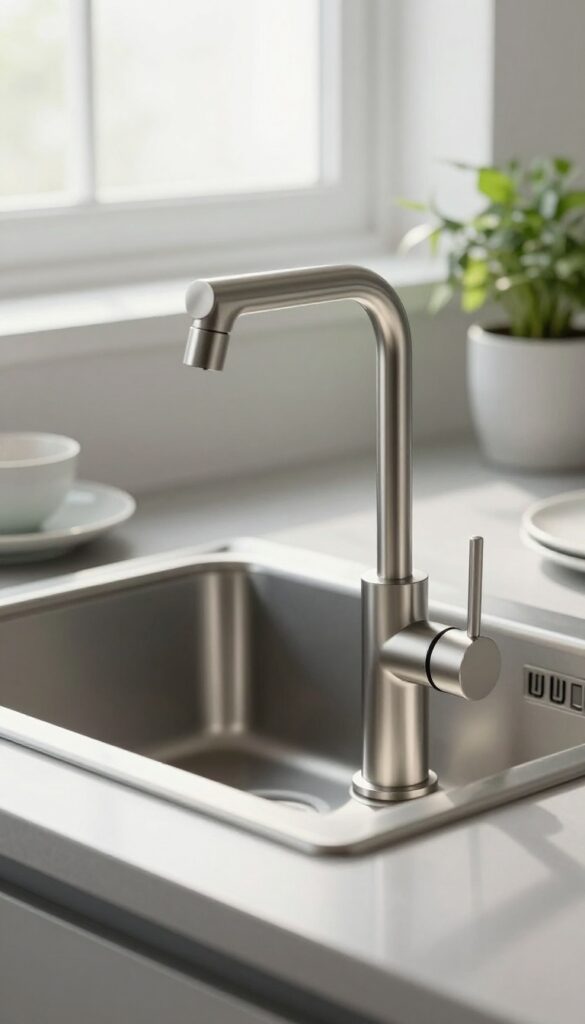
A new faucet might not be the first thing you think of when planning a kitchen refresh, but it's one of those details that instantly catches the eye. Swapping out an old, dated faucet for a sleek gooseneck or pull-down model in a finish that matches your hardware can transform the entire sink area. It's a bit more involved than swapping a rug, but still a doable weekend project that delivers a surprisingly big visual payoff.
The sink is a focal point in any kitchen, and the faucet is its crown jewel. A modern faucet not only looks better but often functions better too, with features like pull-down sprayers and magnetic docking. Choose a finish that coordinates with your cabinet pulls and lighting fixtures—brushed nickel, matte black, or polished chrome are all timeless options.
The key is to pick something that feels intentional and cohesive, not like an afterthought.
Best Materials & Finishes
- Brass and matte black are trending for a reason—they add warmth or edge without screaming for attention. Brushed stainless steel remains a reliable workhorse that hides fingerprints well. If your hardware is mixed, stick to one finish for the faucet to keep the look unified.
- Avoid shiny chrome if your other metals are brushed; the mismatch can feel accidental.
Installation Tips
- Before buying, measure your sink holes and countertop thickness. Most faucets fit standard three-hole setups, but some require a single large hole. Turn off the water supply before starting, and use plumber's tape on threads to prevent leaks.
- If you're unsure, watch a tutorial or call a handyman—it's a small investment for a polished result.
Styling The Sink Area
- Once the new faucet is in, let it shine by clearing the counter around it. Add a simple soap dispenser in the same finish and a small plant or dish brush for a curated look. Keep the area clutter-free so the faucet remains the star.
- A matching cutting board or a ceramic tray can anchor the space without competing.
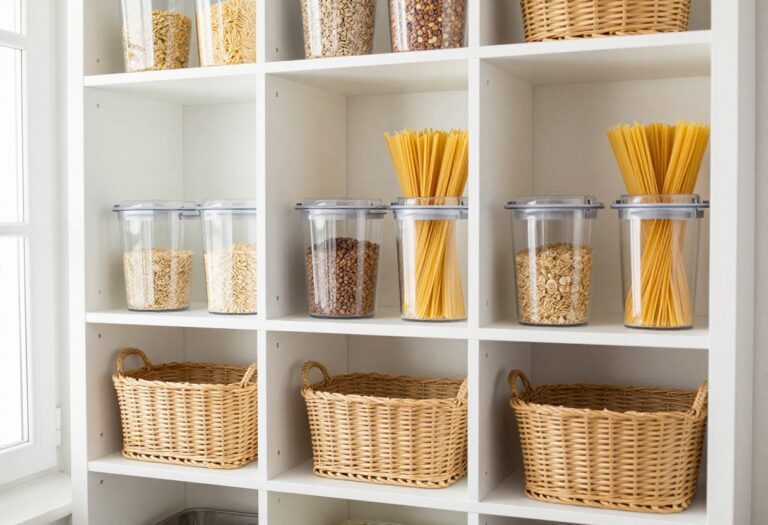
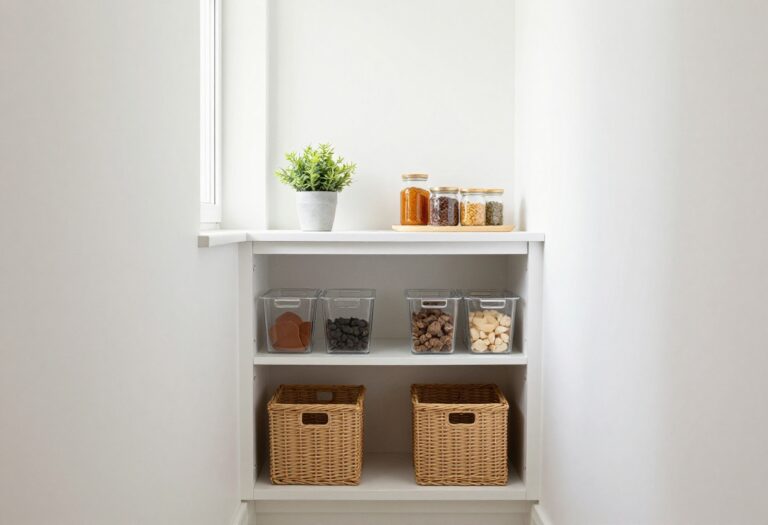
11. Use Clear Containers for Pantry Staples
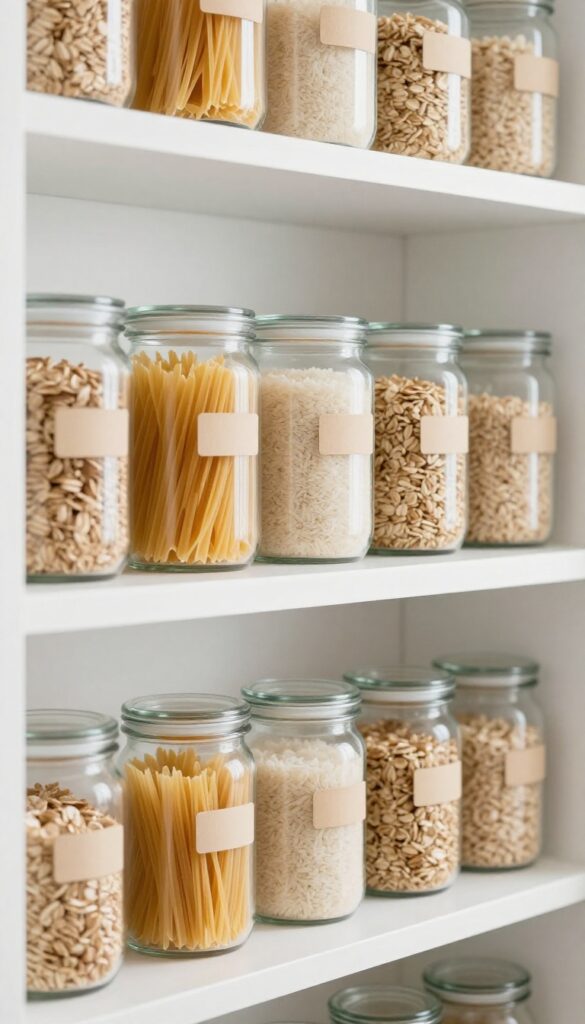
A cluttered pantry can make even the most spacious kitchen feel chaotic. By transferring pasta, rice, and snacks into clear glass or acrylic containers with airtight lids, you instantly create a streamlined, intentional look. This simple swap reduces visual noise and turns everyday staples into a display of organized beauty.
Plus, it's a weekend-friendly project that delivers immediate satisfaction.
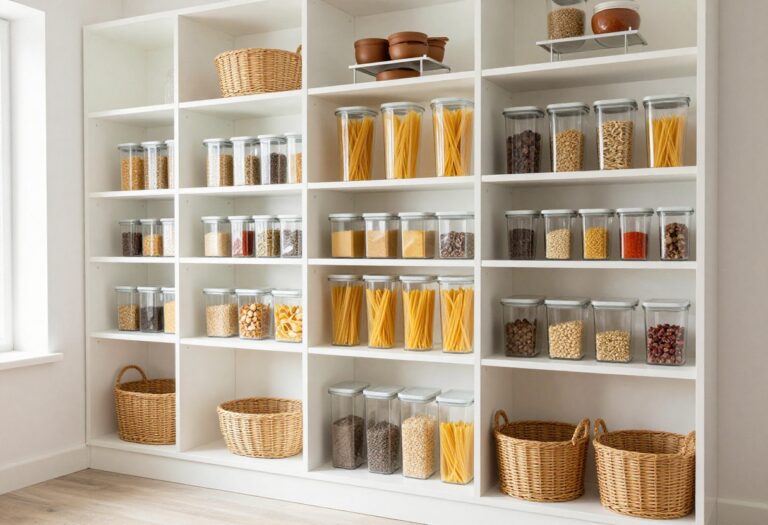
Clear containers are a game-changer for small kitchens because they make the most of every inch while keeping things visually calm. When everything is visible, you can quickly spot what you need and what's running low, cutting down on overbuying and wasted space. The uniformity of matching containers creates a cohesive, almost spa-like pantry vibe that feels both luxurious and practical.
For best results, choose containers with clean lines and airtight seals to keep food fresh longer. Label each one with simple tags—chalkboard labels or minimalist stickers work beautifully—so the whole family can find and return items easily. This idea works especially well in open shelving or glass-front cabinets, where the containers become part of the decor.
Even if your pantry is behind closed doors, opening it to a neatly organized row of clear jars feels like a small daily win.
Best Materials
- Glass containers are the top choice for their durability, clarity, and eco-friendliness. They don't stain or retain odors, and they look elegant on any shelf. Acrylic is a lighter, shatter-resistant alternative that's great for families with kids.
- Avoid plastic containers that can warp or become cloudy over time. Look for options with bamboo or metal lids for a natural, modern touch.
Storage Tip
Group similar items together—pasta with pasta, grains with grains—and arrange them by frequency of use. Keep everyday staples like rice and oats at eye level, and store less-used items like specialty flours on higher or lower shelves. Use tiered risers or small bins to maximize vertical space and prevent containers from getting lost in the back.
Finishing Touch
Add a small tray or mat beneath your container grouping to define the space and catch any stray crumbs. A woven seagrass tray or a simple wooden board adds warmth and texture, balancing the sleekness of the glass. This tiny detail makes the arrangement feel curated rather than just functional.
12. Hang a Pegboard for Utensils and Tools
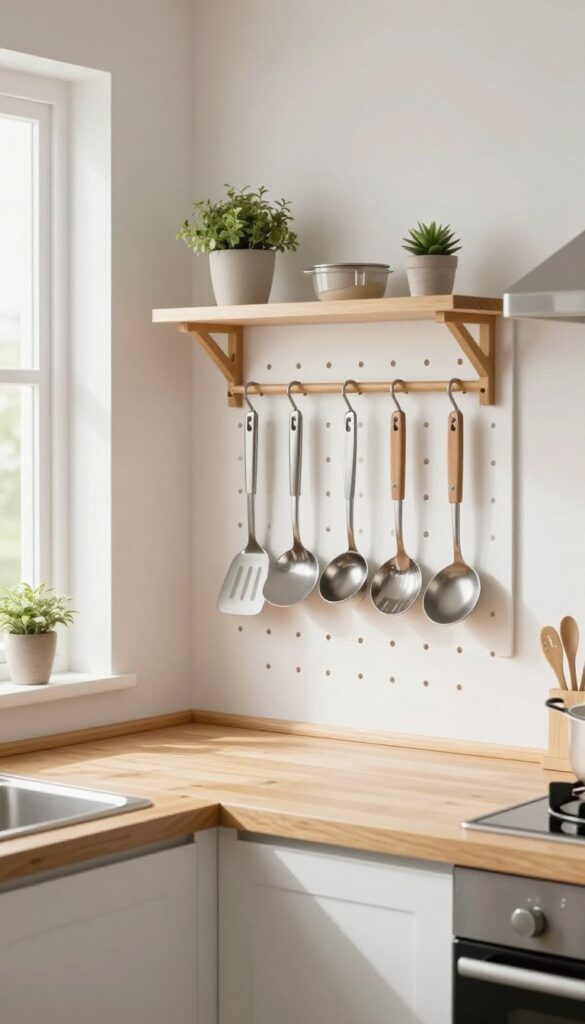
Pegboards aren't just for garages. In a small kitchen, they're a smart way to free up drawer space while adding a bit of industrial charm. Mount one on an empty wall or even inside a cabinet door, and you've got instant storage that's also a conversation starter.
The best part? You can rearrange the hooks anytime your tool collection grows.
A pegboard turns vertical space into a functional display. Hang your most-used utensils—spatulas, measuring cups, tongs—on hooks for easy grab-and-go access. Pots and pans can hang too, freeing up cabinet real estate.
The look is clean and slightly workshop-inspired, which pairs well with wood counters or open shelving. For a weekend refresh, paint the pegboard to match your cabinets or go for a bold accent color.
Best Placement
The ideal spot is near your prep area, so you can reach for tools without moving. If wall space is tight, mount the pegboard inside a cabinet door or on the side of a cabinet. In a galley kitchen, a narrow strip above the backsplash works wonders.
Styling Tip
Keep it from looking cluttered by grouping similar items—all spatulas together, all measuring spoons on one hook. Leave some negative space. Add a small shelf on top for a jar of wooden spoons or a tiny plant to soften the industrial vibe.
Budget-Friendly Swap
Instead of buying a new pegboard, repurpose an old one from a hardware store or thrift shop. A coat of spray paint in a matte finish gives it a fresh look. Use S-hooks from the dollar store to keep costs down.
13. Add a Slim Console Table Against a Wall
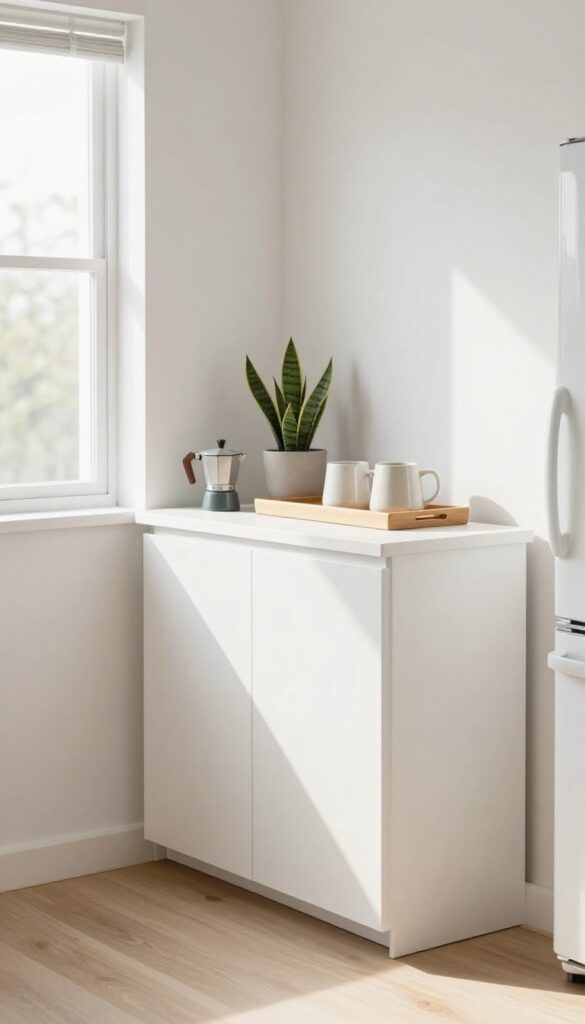
That narrow strip of wall beside the fridge or between the counter and doorway often ends up as wasted real estate. But with a slim console table, you can turn that awkward gap into a functional coffee station or a spot to drop keys and mail. The trick is choosing a table that’s just 30–40 cm deep so it doesn’t block the walkway.
A sleek wooden or metal frame keeps the look light and airy, while a tray on top corrals your essentials and adds a polished finish.
A slim console table is a weekend-friendly project that instantly adds purpose to dead space. Start by measuring the gap to find a table that fits without sticking out. Style it with a tray holding your coffee maker or a small kettle, a couple of ceramic mugs, and a low-maintenance plant like a snake plant or pothos.
The table itself can be a simple IKEA hack or a thrifted find painted to match your kitchen’s palette. This setup works especially well in galley kitchens or L-shaped layouts where every inch matters.
Best Colors And Materials
- Stick with light or neutral tones to keep the area feeling open. A white or pale wood console blends into the wall, while a black or dark metal frame adds contrast without visual weight. For a warm, inviting look, go for a natural oak or walnut finish.
- If your kitchen has open shelving, match the console’s material to the shelves for a cohesive feel.
Layout And Styling Tip
Place the console against a wall that’s at least 60 cm wide so you have room for a tray and a few items. Keep the surface clutter-free: a tray, one plant, and a small bowl for odds and ends. Hang a narrow shelf above for extra storage, like a spice rack or extra mugs, but leave enough space so the console doesn’t feel cramped.
Finishing Touch
Add a small mirror or a piece of art above the console to draw the eye upward and make the kitchen feel taller. A simple framed print or a round mirror works beautifully. For a cozy touch, place a woven basket under the table to store tea towels or napkins.
FAQ
Can I do these updates if I'm renting?
Absolutely. Many ideas like peel-and-stick backsplashes, rolling carts, and under-cabinet lighting are renter-friendly and can be removed without damage. Always check your lease for painting or hardware restrictions.
How much time should I budget for a weekend refresh?
Most projects take 2–4 hours each. If you plan two or three changes over a weekend, you'll have plenty of time. Painting or faucet replacement may take a full day, so prioritize what matters most.
What if my kitchen has no natural light?
Focus on lighting upgrades like under-cabinet strips and a bright pendant. Use mirrors or glossy backsplashes to reflect light. Stick to a light color palette for cabinets and walls to keep the space feeling open.
Do I need special tools for these projects?
Most ideas require basic tools like a screwdriver, level, measuring tape, and utility knife. For painting, you'll need brushes, painter's tape, and drop cloths. No power tools are necessary for the listed updates.
How do I choose a cohesive color scheme?
Start with one neutral base (white, beige, or grey) and add one or two accent colors through hardware, textiles, or decor. Keep the palette simple to avoid a busy look. Use the 60-30-10 rule: 60% dominant, 30% secondary, 10% accent.
Conclusion
A small kitchen can still feel spacious, stylish, and personal with the right updates. The key is to focus on changes that are both impactful and doable over a weekend, so you can enjoy the results without a long renovation.
Whether you swap out hardware, add open shelving, or bring in a pop of color, each idea helps you create a kitchen that looks and feels thoughtfully designed. Pick two or three that resonate with your style and start small.