13 Budget-Friendly Pantry Organization Ideas for a Tidy Home
A cluttered pantry can make meal prep feel like a chore. But you don't need a big budget to turn it into an organized, inviting space.
With a little creativity and some smart choices, you can transform your pantry without spending much. These 13 budget-friendly ideas focus on practical solutions that look great and work hard.
Whether you have a walk-in or a small closet pantry, you'll find tips that fit your space and your wallet.
1. Use Clear Containers You Already Own
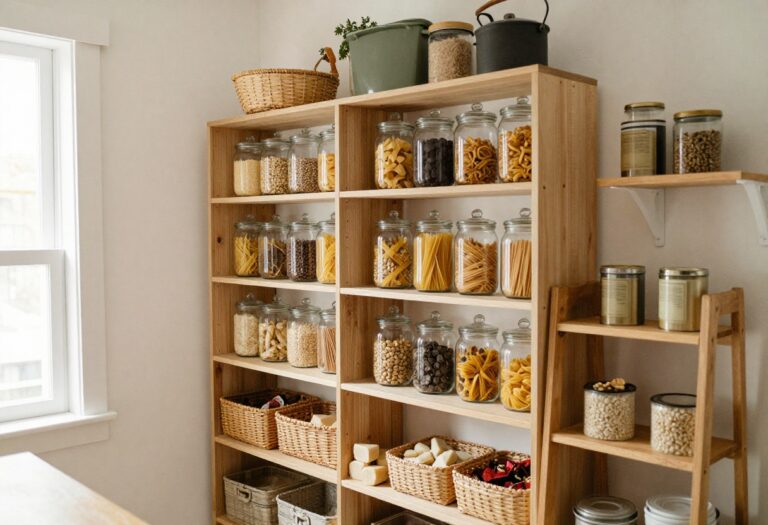
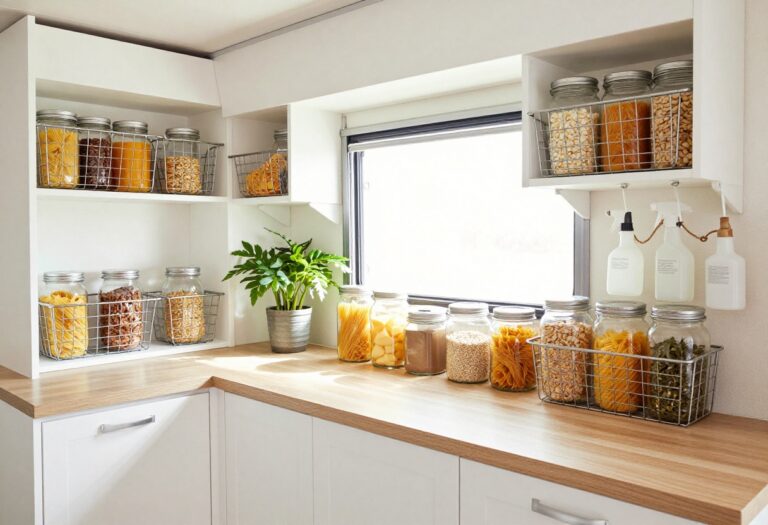
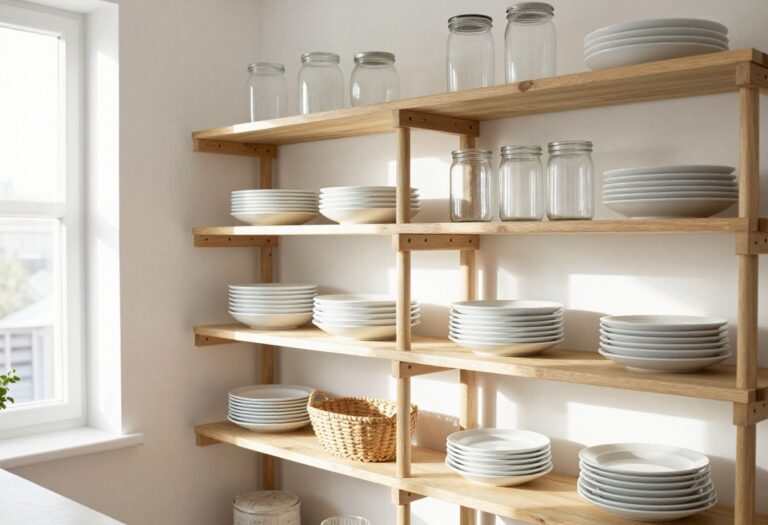
Before you buy a single matching bin, take a look around your kitchen. Those empty pasta sauce jars, pickle jars, or takeout containers with lids? They're already perfect for pantry storage.
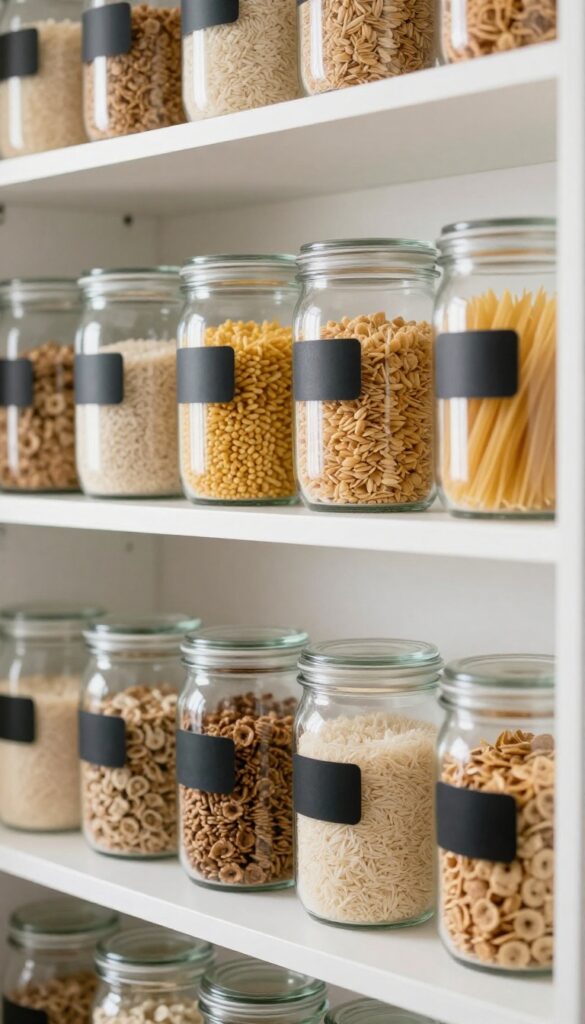
Clear containers let you see exactly how much rice, pasta, or cereal you have left, so you never buy duplicates or run out unexpectedly. Plus, when they're all the same shape and size (or close to it), your shelves instantly look more pulled together without spending a dime.
Why It Works
Clear containers make your pantry functional and visually calm. You can spot what you need in seconds, and the uniform look ties everything together without matching labels or expensive bins. It's a zero-cost upgrade that reduces food waste and saves time.
Best For
This idea works well for any pantry, but it's especially great for renters or anyone on a tight budget who wants an organized space without permanent changes. It's also perfect for small pantries where every inch counts and you need to see everything at a glance.
Styling Tip
Stick to one type of container, like all glass mason jars or all round deli containers, for a cohesive look. Remove any labels and wash them well. If you want a little extra polish, add simple chalk labels or a piece of washi tape with the contents written on it.
2. Add Tension Rods for Vertical Storage
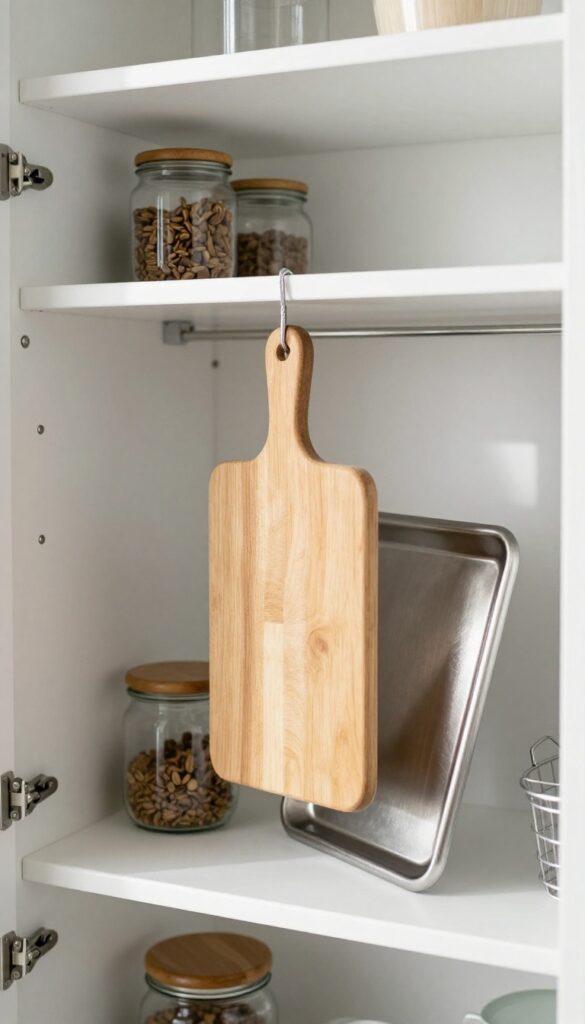
That awkward gap between shelves? It's prime real estate for tension rods. I'm talking about the kind you'd use for a shower curtain—except here they become instant vertical dividers.
Slide one in, and suddenly your cutting boards, baking sheets, and even spray bottles stand at attention instead of toppling over. It's one of those cheap fixes that makes you wonder why you didn't try it sooner.
Why It Works
Tension rods create custom compartments without drilling or permanent changes. They grip snugly between shelves, so you can rearrange them as needed. By forcing items to stand upright, you reclaim flat shelf space and keep everything visible and easy to grab.
Best For
Deep pantry shelves where flat items like cookie sheets and cutting boards tend to get buried. Also great for organizing spray bottles or tall spice jars that usually lean and fall over. If you have a narrow gap between shelves, this is your solution.
Styling Tip
Choose slim, rust-proof tension rods (the kind meant for closets work well) and position them an inch or two apart depending on what you're storing. For a cohesive look, keep all your baking sheets on one rod and cutting boards on another. Bonus: add a small adhesive hook to the rod for hanging measuring cups.
3. Label Everything with Chalkboard Stickers
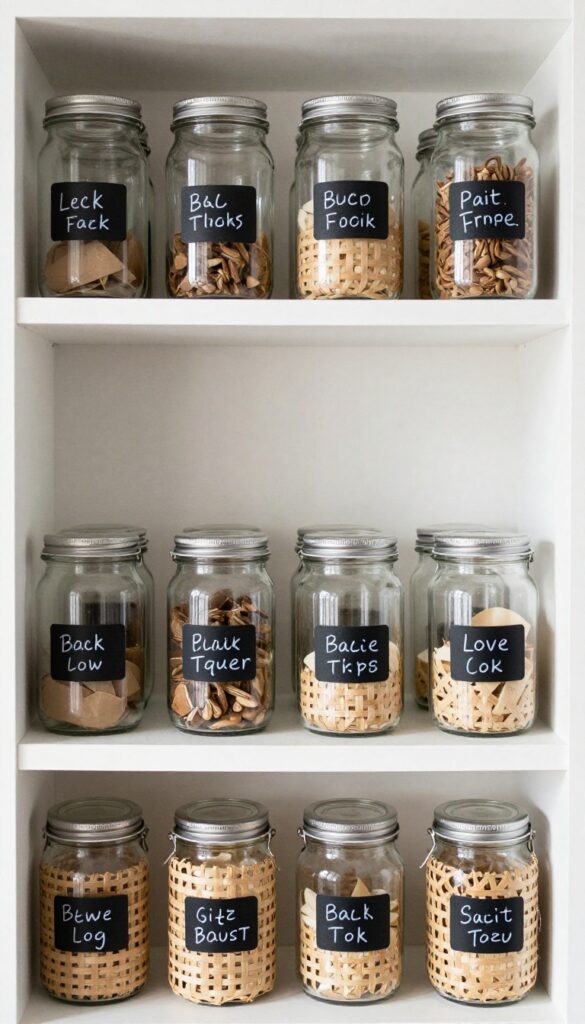
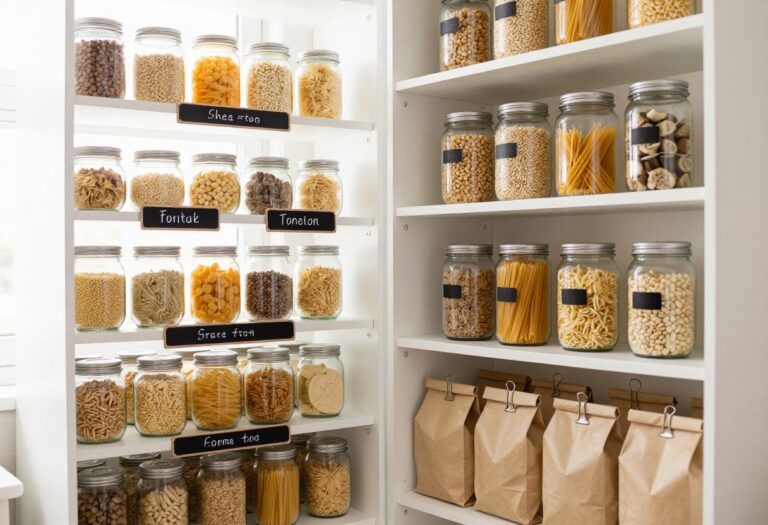
Chalkboard stickers are one of those tiny upgrades that make a huge difference in how your pantry feels. They’re cheap, easy to apply, and instantly turn any jar or bin into a clearly labeled storage piece. Plus, you can change the labels whenever you switch up your snacks or bulk goods, so nothing ever feels permanent or messy.
Why It Works
Labels remove the guesswork when you’re reaching for ingredients, especially in a crowded pantry. Chalkboard stickers let you write in your own handwriting, which adds a personal, handmade touch. And because you can erase and rewrite, your system stays flexible as your pantry evolves.
Best For
This works well for anyone who likes to buy in bulk or rotate seasonal items. It’s also great if you have a mix of clear and opaque containers and want a uniform label look without buying a label maker.
Styling Tip
Stick the chalkboard labels on glass jars, woven bins, or even plastic containers. Use a white chalk marker for a crisp, clean look that’s easy to wipe off. Group similar containers together on one shelf to create a cohesive, boutique-style display.
4. Repurpose Shoe Boxes as Shelf Bins
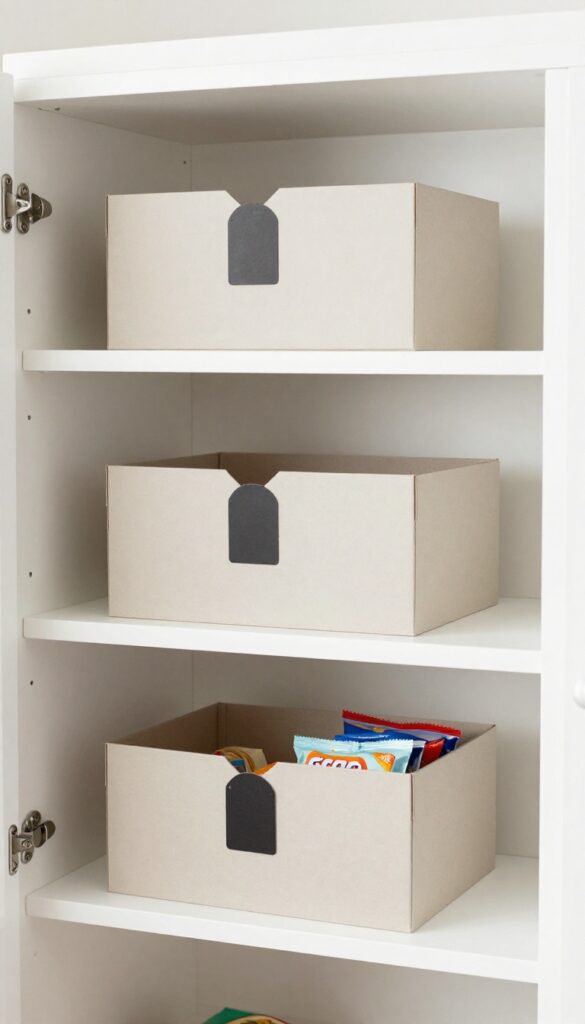
Before you toss those empty shoeboxes into the recycling bin, take a second look. With a little wrapping paper or contact paper, they transform into custom storage bins that look like they cost a pretty penny. The best part?
They're completely free, so you can stock up without guilt. This budget-friendly hack lets you organize snacks, packets, and small items in a way that feels intentional and personal.
Why It Works
Shoeboxes are the perfect size for standard pantry shelves, fitting neatly without wasted space. Covering them with paper not only makes them visually cohesive but also reinforces the cardboard, so they hold up better over time. You get a uniform look without spending a dime on expensive containers.
Best For
These bins are ideal for corralling small, loose items like seasoning packets, tea bags, snack bars, or baby food pouches. They also work great for categorizing baking supplies, such as sprinkles, liners, and extracts, keeping everything tidy and easy to grab.
Styling Tip
Choose a wrapping paper that complements your pantry's color scheme—maybe a subtle pattern or a solid that ties into your wall color. For a cleaner look, use adhesive contact paper in a matte finish. Label each bin with a simple tag or chalk sticker so everyone in the family knows where things go.
5. Install a Pegboard on the Door
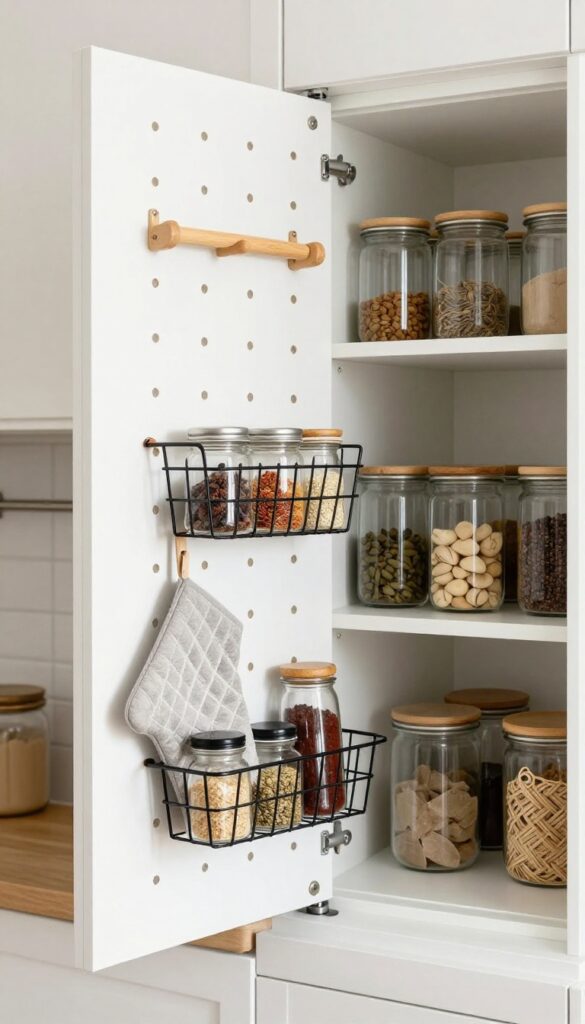
Pantry doors are prime real estate that often gets ignored. A small pegboard mounted on the inside instantly turns that blank slab into a handy organizer. It’s a low-cost, high-reward tweak that feels custom without the custom price tag.
Why It Works
Pegboards let you reconfigure hooks and shelves on a whim, so you’re never locked into one layout. They keep frequently used items visible and within reach, cutting down the time you spend digging through drawers or bins.
Best For
This trick is a lifesaver in small pantries where every inch counts. It’s also perfect for renters, since pegboards can be installed with adhesive strips or removable hooks that won’t damage the door.
Styling Tip
Paint the pegboard the same color as your pantry walls or door to make it blend in. Use a mix of small hooks for measuring spoons and deeper hooks for oven mitts or a lightweight basket for packets and spice jars.
6. Use Tiered Shelves from Dollar Store Finds
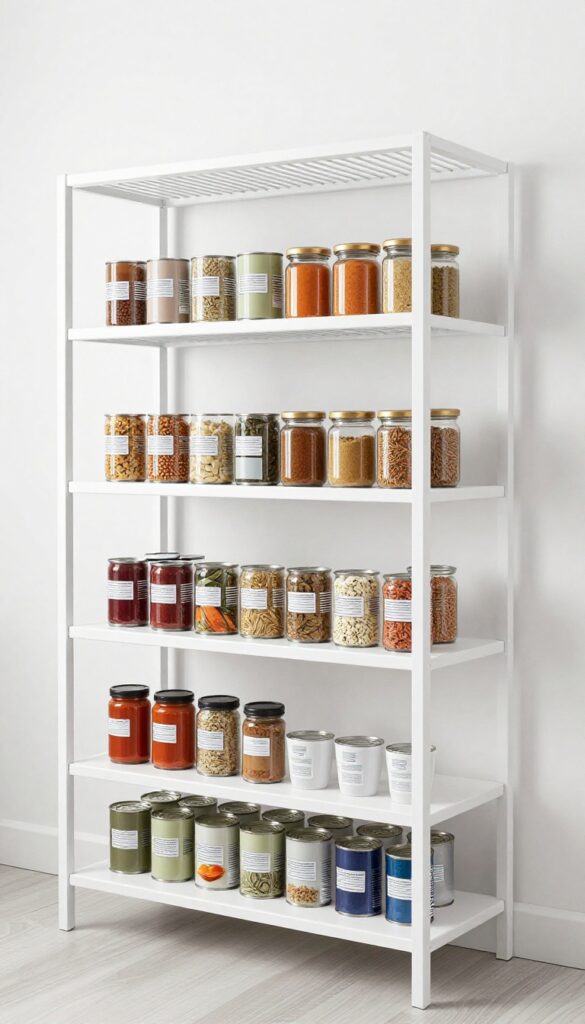
You don't need fancy organizers to make your pantry look like a magazine spread. A quick trip to the dollar store for a few wire racks or plastic risers can transform a cluttered shelf into a neatly tiered display. Stack them in rows so cans, spices, and jars sit at different heights—everything becomes visible at a glance, and you never have to dig through a pile to find that can of black beans again.
It's a low-cost fix that instantly adds order and a little visual rhythm to your pantry.
Why It Works
Tiered shelving uses vertical space efficiently, so you can see every item without pulling things forward. Because the risers are inexpensive and lightweight, you can adjust the layout as your pantry changes—no drilling or permanent commitment required.
Best For
This trick works wonders in deep pantries where items tend to hide behind one another, and it's especially helpful for organizing canned goods, spice jars, and small condiment bottles. If you have a narrow shelf or a corner cabinet, tiered risers make the most of every inch.
Styling Tip
Stick to one color for your risers—white or clear keeps the look clean and cohesive. Group similar items together (all soups on one tier, all spices on another) and face the labels forward for a tidy, uniform appearance.
7. Group Items by Category with Baskets
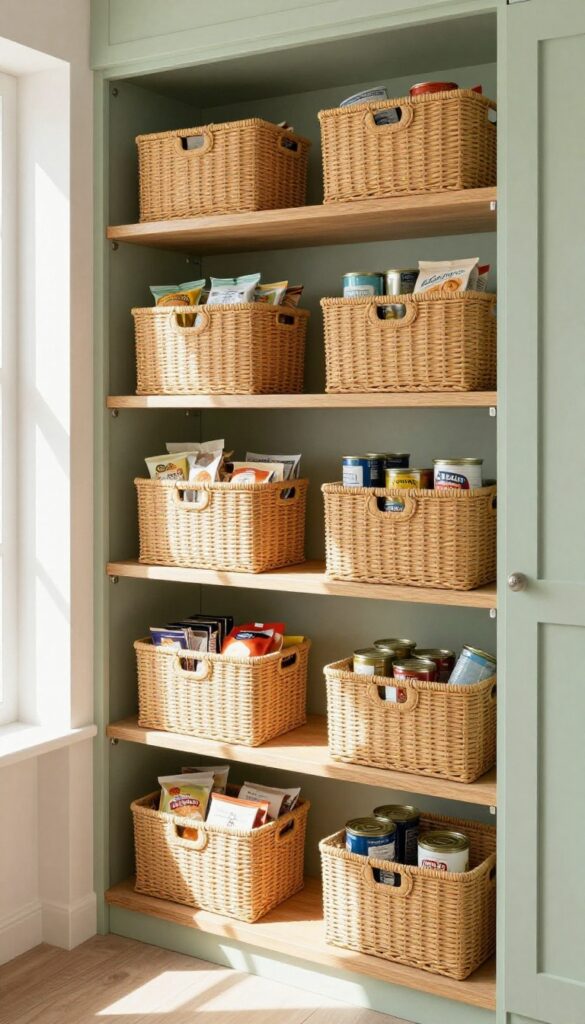
Thrift stores and garage sales are gold mines for mismatched baskets that just need a little love. Grab a mix of sizes and shapes, then spray-paint or stain them in a unified color—think soft sage, warm terracotta, or classic cream. Suddenly, that jumble of snacks, baking mixes, and canned goods becomes a neatly organized gallery of everyday essentials.
Why It Works
Baskets corral loose items into tidy, grab-and-go groups. When everything has a designated basket, you stop digging through piles to find the taco seasoning. Plus, the cohesive color scheme tricks the eye into seeing a curated collection rather than a random assortment of boxes and bags.
Best For
Pantries with open shelving or glass-front cabinets where you want the contents to look intentional. It's also a lifesaver in deep cabinets where small items tend to get lost in the back.
Styling Tip
Line each basket with a fabric liner or a small piece of contact paper to catch crumbs and spills. For a relaxed look, leave the basket handles peeking over the shelf edge—it adds texture and makes pulling them out easier.
8. Hang a Tension Rod for Clips and Bags
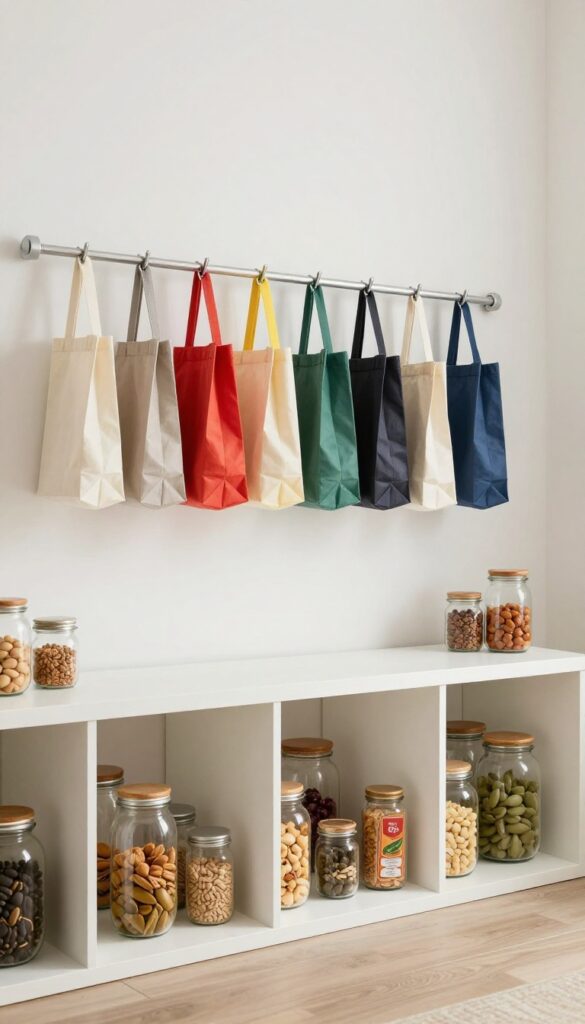
That awkward gap near the top of your pantry can actually become one of the most useful spots in the room. A simple tension rod, the kind you’d normally use for a shower curtain, turns that empty space into a handy home for all those loose clips and lightweight bags. It’s a five-minute fix that costs next to nothing and instantly clears up shelf clutter.
Why It Works
Tension rods are adjustable and require zero hardware, so you can install one in seconds without damaging your walls or shelves. By hanging clips and small bags, you free up shelf space for actual food items and keep frequently used tools within easy reach. It also prevents chip clips from migrating to random drawers or getting lost in the back of a cabinet.
Best For
This trick is perfect for renters who can’t drill holes or for anyone with a narrow pantry where every inch counts. It works especially well in small pantries with a tall, unused gap between the top shelf and the ceiling. If you have a collection of bag clips or reusable produce bags that always seem to disappear, this solves that problem neatly.
Styling Tip
Choose a tension rod with a matte black or brushed nickel finish to match your other hardware. For a cohesive look, group clips by color or size and hang them in a neat row. You can also slide a few small S-hooks onto the rod for hanging lightweight measuring spoons or a kitchen timer.
9. DIY Shelf Risers from Cardboard
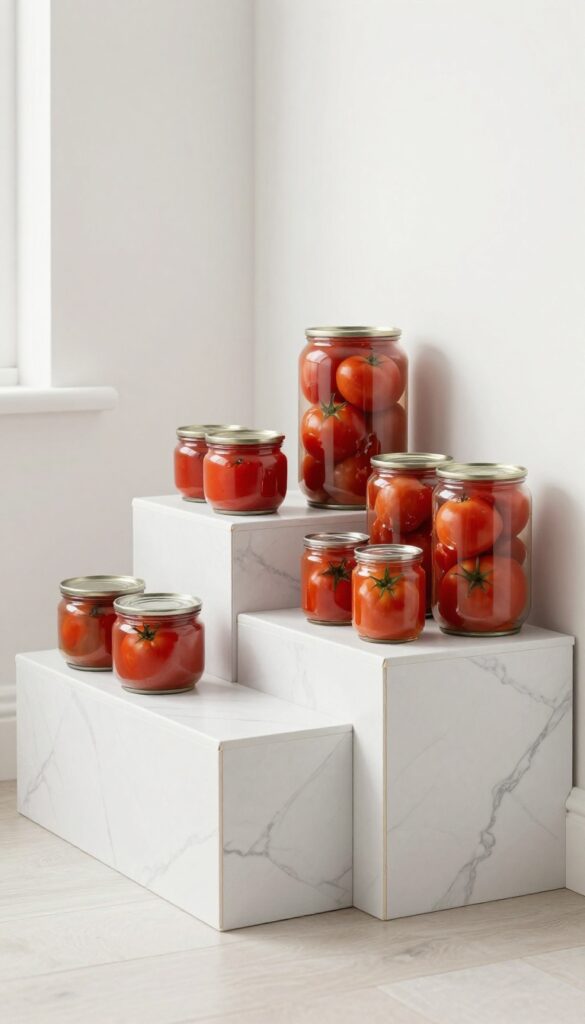
You don’t need to buy expensive acrylic risers to see what’s hiding in the back of your pantry. Grab a few sturdy cardboard boxes, some contact paper, and a pair of scissors, and you can make custom risers in about ten minutes. The result is a neat, layered look that makes every can and jar visible at a glance.
Plus, it’s completely free if you already have the materials around the house.
Why It Works
Cardboard risers add vertical dimension to flat shelves, so you can store smaller items in front and taller ones behind without creating a jumble. The contact paper gives them a clean, uniform finish that blends into your pantry, so they don’t look like a craft project gone wrong. And because you can cut them to any size, they fit perfectly on narrow or deep shelves.
Best For
This hack is ideal for deep pantry shelves where cans and jars tend to get lost in the back. It’s also a great solution for renters who want to improve storage without drilling or buying permanent fixtures. If you’re on a tight budget or just love a good DIY, these risers are a no-brainer.
Styling Tip
Choose a contact paper that matches your shelf color or adds a subtle pattern, like a light marble or linen texture. Keep the risers low—about two to three inches tall—so they don’t steal too much vertical space. Group similar items on each riser, like all canned tomatoes or spice jars, for a tidy, organized look.
10. Use Command Hooks for Mops and Brooms
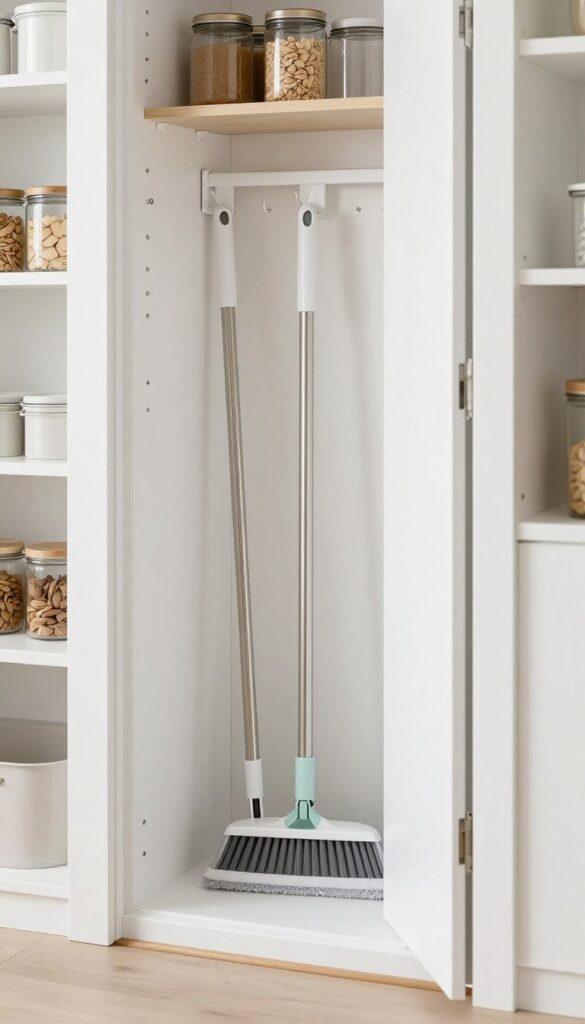
Cleaning tools like mops and brooms can be awkward to store—they clatter around in closets and take up floor space. But the inside of your pantry door is prime real estate that's often overlooked. A few Command hooks turn that blank surface into a tidy home for your lightweight cleaning essentials, keeping them accessible yet out of sight.
Why It Works
Command hooks are a renter's best friend because they stick securely but remove cleanly without damaging paint or wood. They're also cheap and easy to reposition, so you can experiment with placement until it feels just right. For mops and brooms, the large or heavy-duty hooks provide enough grip to hold them snugly against the door.
Best For
This idea shines in small pantries where every inch counts, especially if you're short on closet space. It's also perfect for renters or anyone who doesn't want to commit to permanent wall mounts. If your pantry door swings open into a hallway or kitchen, you'll love how it keeps cleaning tools handy but hidden.
Styling Tip
Stick to matching hooks—clear or white blends into most doors. Hang mops and brooms with handles facing the same direction for a neat, uniform look. If you have a few smaller tools like dustpans or brushes, add a small basket or adhesive caddy nearby to corral them.
11. Store Lids in a Magazine File
Pot lids have a way of turning into a chaotic pile that crashes down every time you open the cabinet. A simple magazine file or a slim box can change that. By storing lids vertically, you keep them separated and easy to grab without the noise.
Why It Works
Vertical storage prevents lids from sliding around and clattering together. It also makes it easy to see each lid at a glance, so you're not digging through a stack to find the right size.
Best For
This trick works great for deep cabinets where lids tend to get lost in the back. It's also perfect for small pantries where every inch of shelf space counts.
Styling Tip
Choose a magazine file in a neutral tone like linen or light wood to keep the look clean. If your pantry is open or glass-fronted, a matching set of files adds a tidy, cohesive feel.
12. Add a Small Rug for Warmth

Pantries are often treated like utility closets, but a simple rug can change that instantly. Tossing a budget-friendly runner or mat on the floor adds a hit of color and texture that makes the space feel intentional. It’s amazing how something so small can make grabbing a snack feel a little cozier.
Why It Works
A rug softens the hard surfaces of a pantry, making it feel more like part of the home. It also defines the area, especially if your pantry is a walk-in or a reach-in with open shelving. Plus, it’s an easy way to introduce pattern without committing to a full remodel.
Best For
This works well in any pantry, but it’s especially great for narrow or galley-style pantries where a runner can visually lengthen the space. It’s also perfect for renters who can’t change flooring but want to add personality.
Styling Tip
Stick with low-pile or flat-weave rugs so they don’t catch crumbs or get in the way of sliding bins. A dark or patterned option hides spills better than a light solid color. If your pantry sees heavy foot traffic, go for an indoor-outdoor rug that’s easy to wipe clean.
13. Use a Spice Rack on the Wall
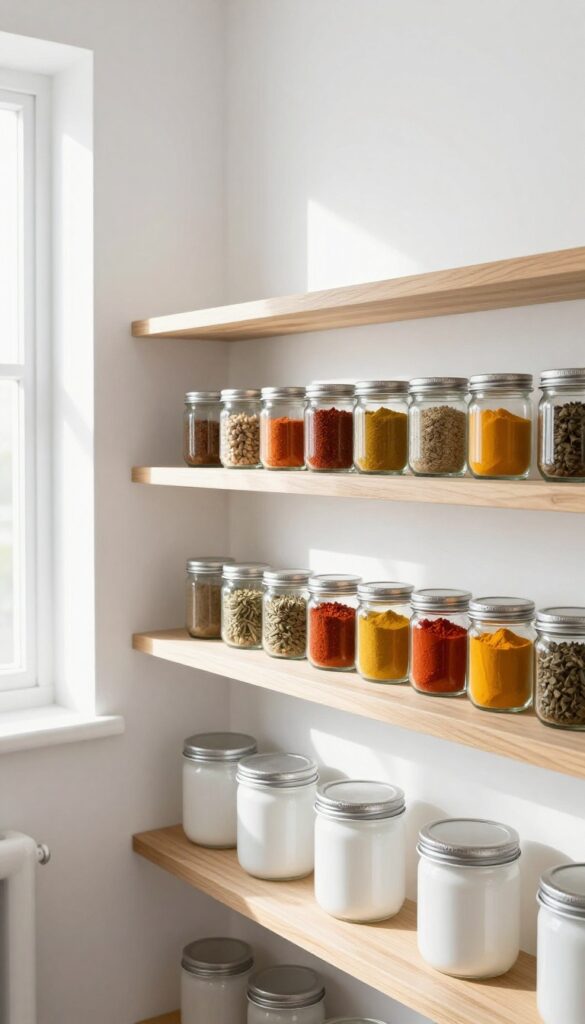
Wall space in a pantry is prime real estate that often sits bare. A simple magnetic strip or a slim shelf turns that blank wall into a functional spice station. It keeps your most-used seasonings within arm's reach while adding a bit of visual interest to the room.
Why It Works
Spices are small and easy to lose in cabinets or drawers. By putting them on the wall, you reclaim shelf space for bigger items and cut down on digging through cluttered containers. Plus, seeing everything at a glance makes cooking faster.
Best For
This idea shines in small pantries where every inch counts, or in any pantry where you cook often and want quick access to spices. It's also great for renters since magnetic strips and small shelves are easy to install and remove.
Styling Tip
Stick to a uniform set of small jars or tins for a clean, cohesive look. Arrange them by color or frequency of use. If you go with a magnetic strip, make sure the jars have metal lids or attach a metal disc to the bottom.
FAQ
What is the cheapest way to organize a pantry?
The cheapest way is to repurpose items you already have, like glass jars, shoeboxes, and cardboard. Use free materials like tension rods and Command hooks to add storage without spending much.
How do I organize a small pantry on a budget?
Maximize vertical space with tension rods and pegboards. Use clear containers to see contents, and group items in baskets or bins. Label everything to maintain order.
Can I organize my pantry without buying anything?
Yes, you can use items you already own, like jars, boxes, and baskets. Repurpose cardboard for risers and use washi tape for labels. A good declutter session also helps.
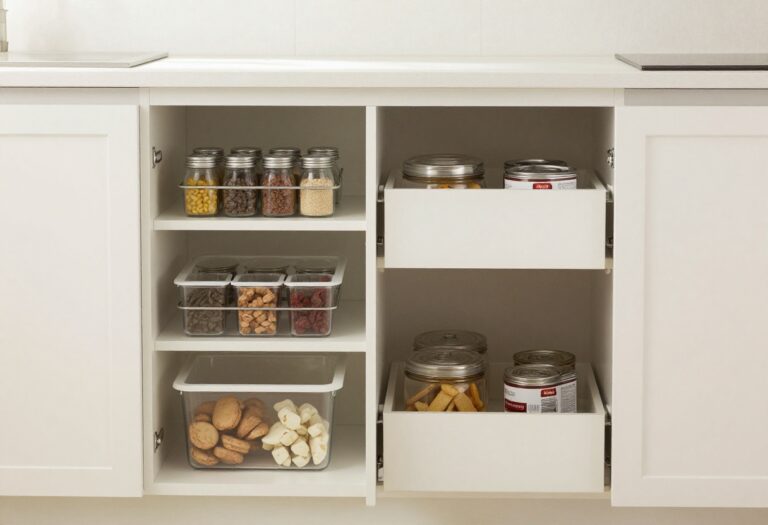
What are the best containers for pantry organization?
Clear, airtight containers are best for dry goods. You can use repurposed glass jars or affordable plastic containers from dollar stores. They keep food fresh and visible.
How do I keep my pantry organized long-term?
Maintain a system by grouping similar items, labeling everything, and doing a quick tidy-up weekly. Avoid overstocking and regularly check expiration dates.
Conclusion
Organizing your pantry doesn't have to be expensive or complicated. With a little creativity and some everyday items, you can create a space that's both functional and inviting. Start with one or two ideas that feel doable, and build from there.
Your pantry will soon become a place you enjoy opening every day. Remember, the goal is progress, not perfection. Small changes add up, and your tidy pantry will make meal prep easier and your home feel more put together.