10 Budget-Friendly Kitchen Counter Ideas for a Clean, Styled Surface
Your kitchen counter is the hardest-working surface in the house. It's where you prep meals, drop mail, and sometimes even eat breakfast.
But keeping it looking clean and styled doesn't have to cost a fortune. With a few smart swaps and simple habits, you can create a counter that feels both functional and beautiful.
These ten ideas are designed to work with any budget, so you can start fresh without the stress.
1. Start with a Clear-Off Routine
A clean counter starts with a clean slate. Before you think about decor or storage solutions, commit to a daily five-minute clear-off. This simple habit resets your surface, making everything else easier.
It’s the budget-friendly foundation for a styled kitchen.
The most effective way to achieve a clean counter is to remove everything that doesn’t belong. Set a timer each evening and whisk away mail, keys, and random gadgets. Store them in designated spots so the surface stays bare.
This routine costs nothing and instantly transforms your kitchen’s look. Once you clear the clutter, you’ll see the counter’s true potential. It becomes a canvas for intentional styling rather than a dumping ground.
The Five-minute Reset
Pick a consistent time—right after dinner or before bed—and spend exactly five minutes clearing the counter. Grab a basket or tray to collect stray items, then return them to their homes. This daily habit prevents buildup and keeps the surface ready for cooking or display.
Where To Store The Overflow
Designate a drawer or cabinet near the counter for items that tend to migrate onto the surface. Use small bins or dividers to keep mail, chargers, and daily essentials organized. Having a specific home for each item makes the clear-off routine quick and automatic.
Styling The Empty Space
Once the counter is clear, add one or two intentional decor pieces—like a wooden cutting board or a small vase. Keep it minimal so the routine stays easy. This approach highlights your counter’s material and keeps the kitchen feeling open and airy.
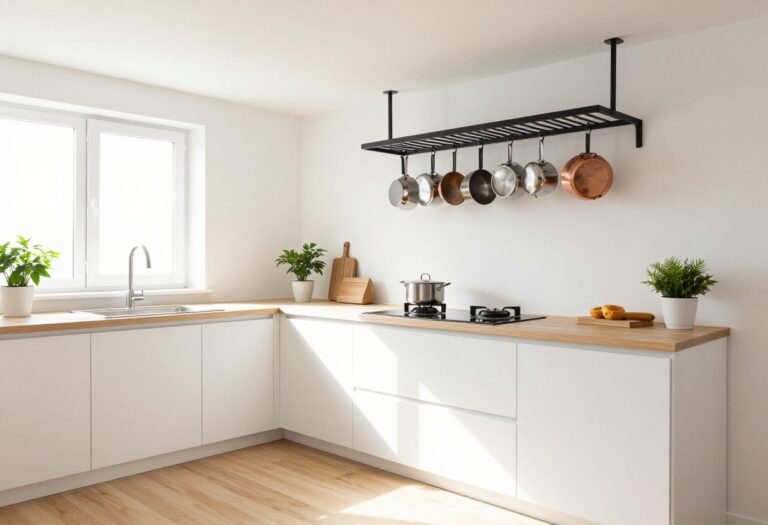
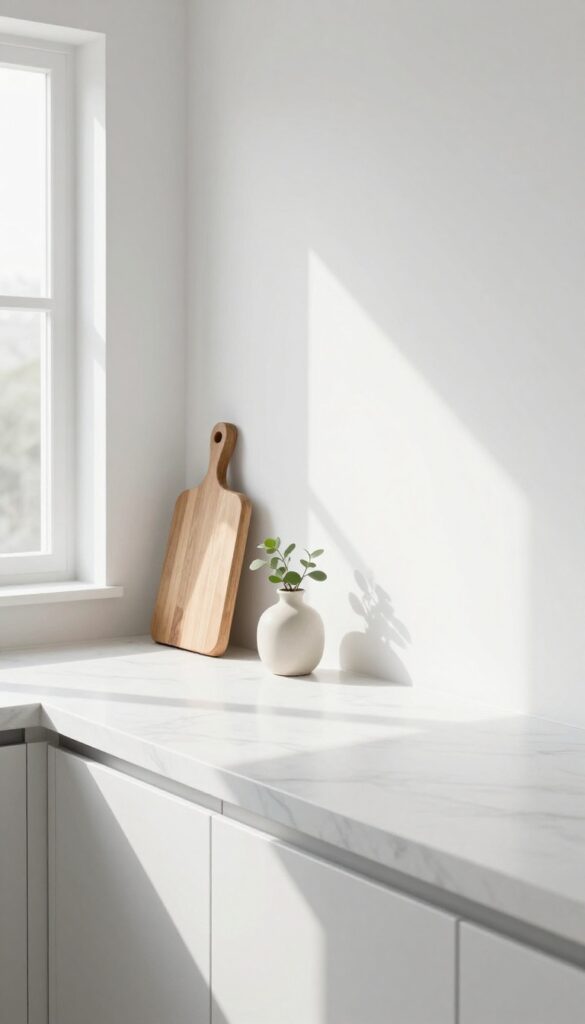
2. Use a Large Wooden Cutting Board as a Centerpiece
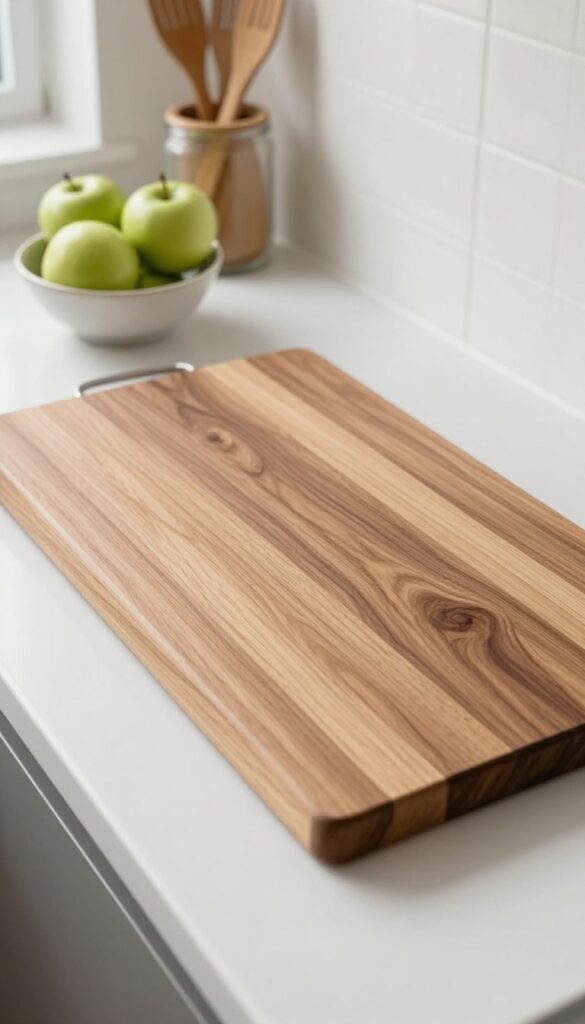
A big wooden cutting board does more than just sit on your counter. It brings warmth, texture, and a natural focal point that instantly makes the space feel grounded and inviting. Unlike plastic boards, wood has a soft, organic look that softens the hard edges of tile and stainless steel.
And the best part? It's a budget-friendly upgrade you probably already own or can find for cheap at a thrift store.
Place a large wooden cutting board in the center of your counter, either flat against the backsplash or angled slightly for a relaxed feel. Leave it out all the time—it's practical for quick chopping and doubles as a serving board for bread, cheese, or snacks. This one swap makes your kitchen feel styled without trying too hard.
Best Wood Choices
Look for acacia, teak, or maple—they're durable and have beautiful grain patterns. Avoid light pine or bamboo if you want a richer tone. A darker wood like walnut adds contrast against white counters, while a lighter beech keeps things airy.
Styling It Right
- Keep the board clean and dry. Add a small bowl of fruit or a jar of utensils on top for a styled vignette. Don't overcrowd it—let the wood's natural texture shine.
- If your counters are busy, place the board alone as a simple anchor.
Budget-Friendly Swap
Skip expensive designer boards. Visit a local home goods store or check online for unfinished end-grain boards under $30. Sand and oil it yourself with food-safe mineral oil for a custom look that costs pennies.
3. Add a Slim Canister Set for Staples
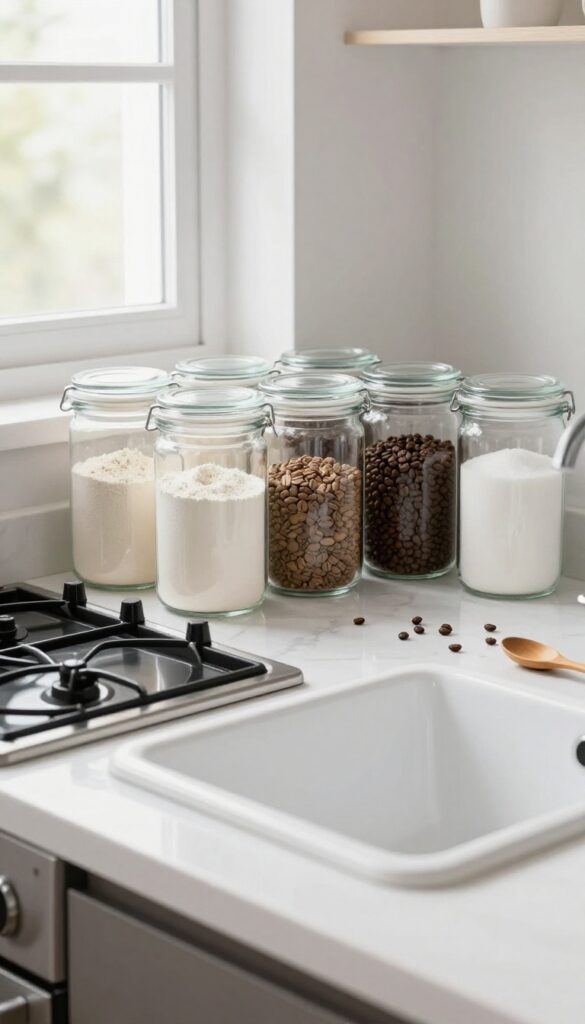
Clear glass or ceramic canisters keep flour, sugar, and coffee within reach. They look tidy and make cooking easier. A slim set fits neatly between the stove and sink, turning a narrow gap into a functional station.
A slim canister set is a budget-friendly way to organize kitchen staples without sacrificing counter space. Choose clear glass for a light, airy look or ceramic for a pop of color. Arrange them in a row or stagger heights for visual interest.
Keep the most-used items like sugar and coffee in front for easy access. This simple swap instantly makes your counters look intentional and clean.
Best Materials
Clear glass with airtight lids lets you see contents at a glance, perfect for flour and pasta. Ceramic canisters add warmth and hide messier staples like oats. For a budget win, repurpose matching jars from the thrift store—just ensure lids seal tightly.
Layout Tip
Place canisters near the coffee maker or prep area so you grab them without reaching. Keep them in a straight line along the back of the counter to maximize workspace in front. If your counter is narrow, choose slim, tall canisters that use vertical space.
Budget-Friendly Swap
Skip expensive designer sets and buy individual glass jars from discount stores. Use chalk labels or a permanent marker to identify contents—no special tools needed. This approach costs under $20 and looks custom.
4. Incorporate a Small Plant or Herb Pot
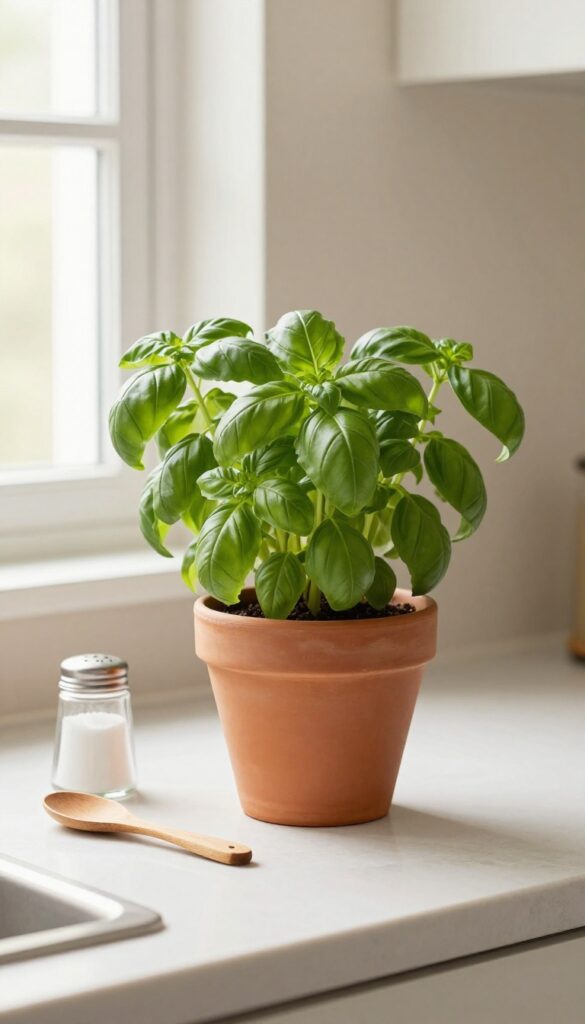
A tiny pot of basil or a succulent brings life to the counter without breaking the bank. This simple addition adds a pop of green that instantly freshens up the space, making it feel more inviting and alive. Plus, it's an easy way to introduce natural texture and a subtle scent into your kitchen.
Adding a small plant or herb pot is one of the most budget-friendly ways to style your counter. It doesn't require a big investment—just a small pot and a plant that thrives indoors. The key is choosing a container that complements your existing decor, like a simple terracotta pot for a rustic look or a sleek ceramic one for a modern vibe.
Place it near a window where it gets enough light, and you'll have a living decor piece that also serves a purpose if you pick herbs like basil, mint, or rosemary.
Best Container Styles
- For a clean, cohesive look, stick with neutral-toned pots like white, beige, or soft gray. If you want a bit of contrast, a matte black pot can anchor the greenery. Avoid overly ornate or busy patterns that might clash with your counter's surface.
- A simple, smooth finish keeps the focus on the plant itself.
Plant Choices That Last
- Succulents and snake plants are nearly indestructible and need minimal care—perfect for busy kitchens. If you prefer herbs, basil and mint are forgiving and grow quickly. Just ensure the pot has drainage to prevent water damage on your counter.
- A small tray underneath can catch any drips.
Placement And Styling Tip
Group the plant with other small items like a salt cellar or a wooden spoon holder to create a mini vignette. Keep it away from the stove or sink to avoid heat or moisture stress. If your counter is narrow, tuck it into a corner or beside the coffee maker for a natural focal point.
5. Install a Peel-and-Stick Backsplash Behind the Counter
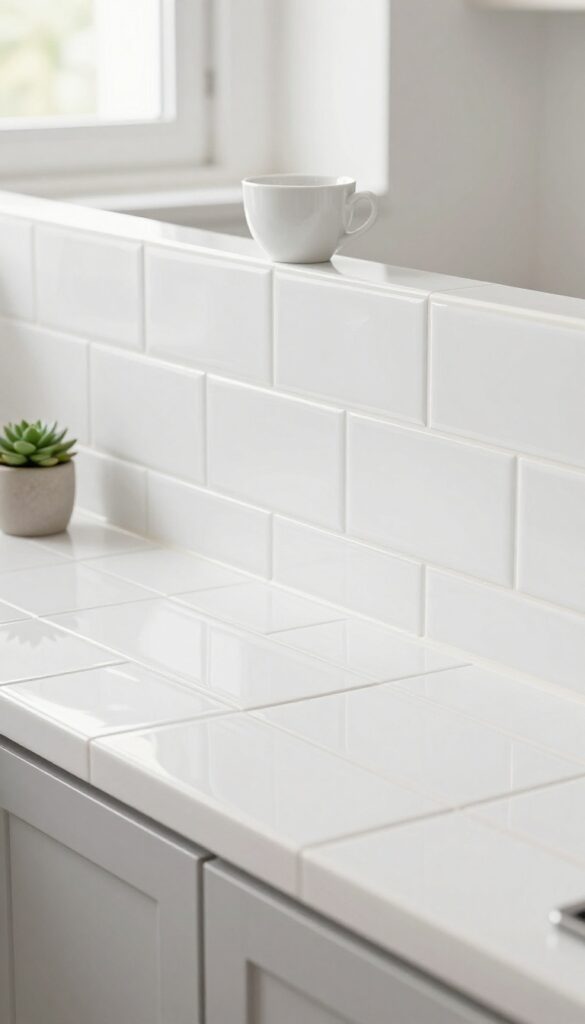
A bare wall behind your counter can feel unfinished, but a full tile job isn't always in the budget—or the timeline. Peel-and-stick backsplash panels give you that polished, tiled look without the mess or commitment. They're perfect for renters or anyone who likes to refresh their space often.
These adhesive tiles come in everything from classic subway tile to bold geometric patterns. Installation takes an afternoon, and if you decide you want a different color next year, they peel right off without damaging the wall. It's a low-risk way to add texture and personality exactly where you need it most.
Best Materials
Look for real metal or thick vinyl options that mimic ceramic or stone. Thin, flimsy stickers won't hold up behind a stove, so choose panels rated for heat and moisture. Brands like Smart Tiles and RoomMates offer durable styles that look surprisingly authentic.
Budget-Friendly Swap
Instead of covering the entire backsplash, create a focused statement behind the main cooking area. A 2-foot by 3-foot section costs under $30 and still makes a visual impact. Pair it with a simple white countertop to let the pattern shine without overwhelming the room.
Finishing Touch
Seal the edges with matching caulk or trim pieces for a built-in look. This prevents moisture from sneaking behind the panels and gives the installation a professional finish. A little extra effort here makes the difference between 'temporary' and 'intentional.'
6. Display a Stack of Neutral Dish Towels
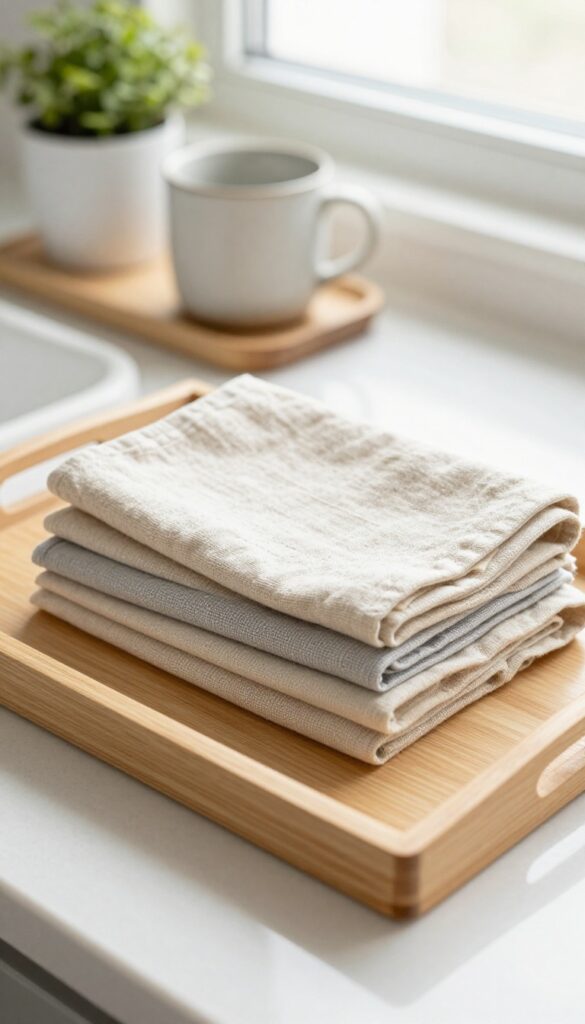
A tidy stack of folded dish towels does more than just sit there waiting for spills. It brings a soft, layered texture to your countertop that balances out all the hard surfaces in a kitchen. Neutral tones keep it calm and cohesive, so it blends right in without shouting for attention.
Pick two or three towels in shades like oatmeal, linen, or soft gray. Fold them into neat rectangles and stack them on a small wooden or ceramic tray near the sink or coffee station. The tray catches any drips and gives the stack a defined home, so it never looks like clutter.
This little arrangement adds warmth and makes your counter feel styled without spending a dime on new decor.
Best Colors And Fabrics
Stick with solids or subtle textures like waffle weave or herringbone. Avoid busy patterns or bright colors that compete with your other kitchen decor. Linen and cotton blends look crisp and soften with washing, which adds to the lived-in charm.
Tray Styling Tip
Use a tray that contrasts slightly with your countertop material. A light wood tray on dark granite or a dark slate tray on white quartz creates visual interest. Keep the tray small enough that it doesn't crowd the counter, just large enough to hold the folded towels.
Budget-Friendly Swap
Skip expensive designer towels and grab a pack of basic bar mops from a home goods store. They're affordable, absorbent, and come in neutral shades. Fold them the same way and they'll look just as polished as pricier options.
7. Use a Tiered Stand for Oils and Spices
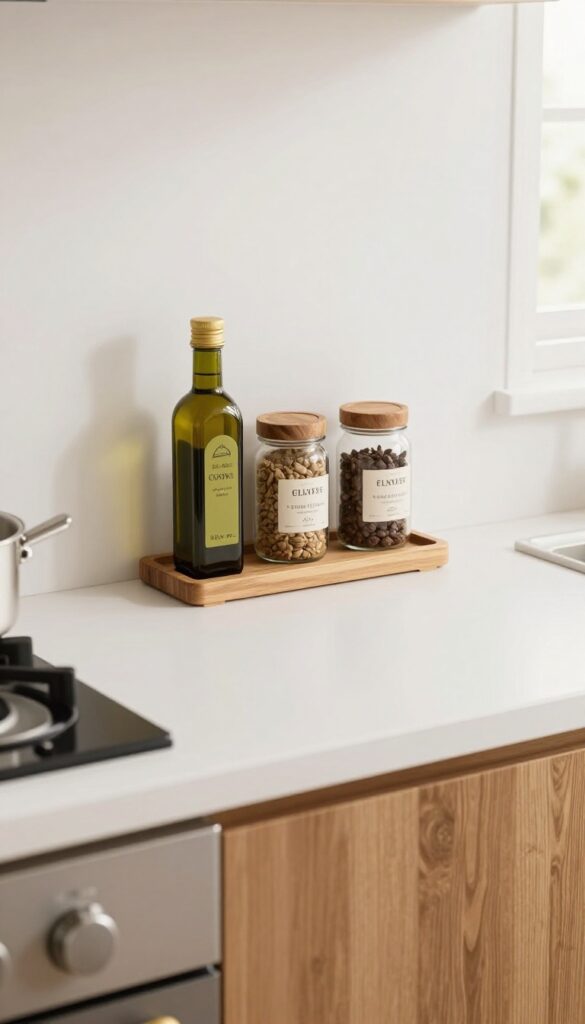
A small tiered stand is a budget-friendly way to keep your everyday oils and spices within arm's reach without cluttering the counter. The stepped design lets you see everything at a glance, so you're not digging through a drawer mid-recipe. It's a simple swap that makes your kitchen feel more organized and intentional, especially if you're working with limited space.
A tiered stand turns a jumble of bottles into a tidy, accessible display. Place it near the stove or prep area so your most-used ingredients are always handy. The vertical layers maximize counter space while adding a clean, structured look.
Choose a stand that fits your style—wood for warmth, metal for modern, or acrylic for a barely-there feel. This idea works in any kitchen, from tiny apartments to spacious layouts, and it's an easy way to introduce a little visual order without spending much.
Best Materials For A Clean Look
For a budget-friendly option, bamboo or acacia wood stands bring natural warmth and are widely available at affordable prices. If your kitchen leans modern, a slim metal stand in matte black or stainless steel adds an industrial edge without overwhelming the counter. Clear acrylic is another smart choice—it blends into the background and keeps the focus on your colorful spice jars or oil bottles.
Layout Tip: Zone Your Stand
- Group items by frequency of use. Place your go-to olive oil, salt, and pepper on the top tier for quick grabs. Reserve the lower levels for secondary oils, vinegars, or less common spices.
- This simple zoning keeps your cooking flow smooth and prevents the stand from becoming a catch-all. If you have a two-tier stand, use the bottom for taller bottles and the top for smaller jars.
Budget-Friendly Swap
- You don't need to buy a fancy organizer. Repurpose a small wooden spice rack or even a narrow bookshelf riser from a dollar store. Spray-paint it in a color that matches your kitchen for a custom look.
- Another thrifty idea: use a small wire fruit basket turned upside down as a makeshift tiered stand. It's a clever way to achieve the same effect for next to nothing.
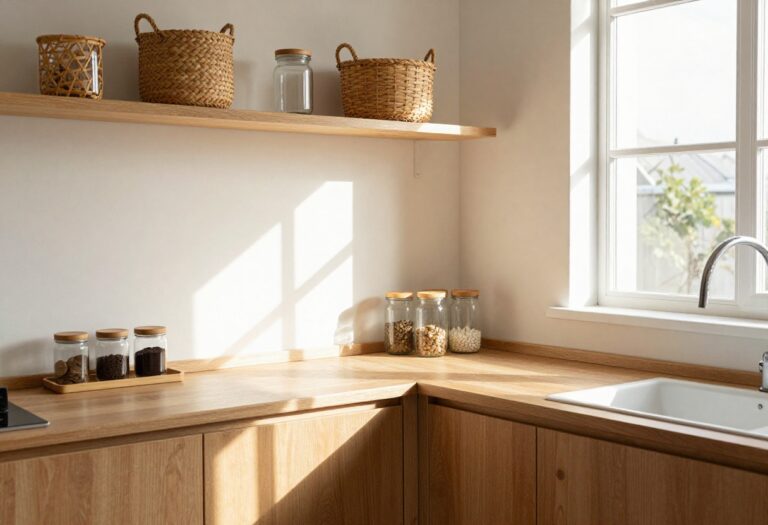
8. Add a Slim Shelf Above the Counter
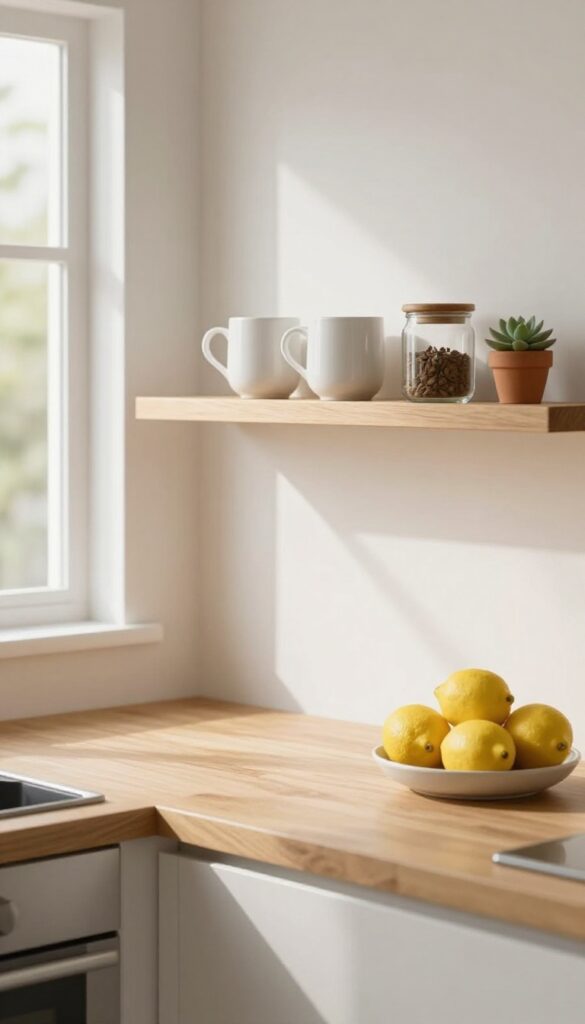
If your counter feels crowded but the wall above it is bare, a slim floating shelf is a simple fix. It adds storage without eating into your workspace, and it gives you a spot to show off everyday items like mugs, small jars, or a tiny plant. The key is keeping it narrow—just deep enough for a coffee cup or a spice jar—so it doesn't feel bulky or make the counter feel closed in.
This trick works especially well in rental kitchens where you can't change cabinets, and it costs under $30 if you go with a basic wood or metal shelf.
A floating shelf above the counter holds jars, mugs, or small decor. It draws the eye up and reduces clutter below. This is one of those budget-friendly upgrades that instantly makes your kitchen feel more styled without a renovation.
The shelf itself can be as simple as a painted pine board or a sleek metal bracket shelf—both options are affordable and easy to install. Because it's slim, you're forced to edit what goes up there, which naturally keeps things tidy. Think of it as a mini display zone for the stuff you use daily: a few matching mugs, a salt cellar, a tiny succulent.
The visual effect is a cleaner counter and a more intentional look overall.
Best Materials For A Budget Shelf
- For a truly budget-friendly version, look for a basic floating shelf in pine or MDF—both can be painted to match your trim or cabinets. If you want something with a bit more character, a reclaimed wood shelf (even a DIY one from a scrap board) adds warmth without costing much. Metal shelf brackets with a wooden top are another affordable option, especially if you prefer an industrial vibe.
- Avoid glass or heavy marble here; they're pricier and harder to install securely. Stick with lightweight materials that you can mount into drywall anchors or studs.
Shelf Styling Tip: Edit, Don't Fill
- The biggest mistake with a shelf above the counter is overcrowding it. Because the shelf is slim, every item has visual weight. Stick to three or four pieces max: a stack of two small plates, a single mug, and a tiny vase or spice jar.
- Keep the color palette tight—maybe all white ceramics with one wood accent—so the shelf feels cohesive, not messy. Leave a little breathing room between items. This minimalist approach makes the shelf feel like a deliberate design choice, not just extra storage.
Placement And Height
Mount the shelf about 12 to 18 inches above the counter—high enough that it doesn't interfere with appliances or prep work, but low enough that you can easily reach what's on it. If you have a backsplash, consider aligning the shelf with the top of the tile or the bottom of the upper cabinets for a clean line. In a small kitchen, a single long shelf above the sink or stove can be a game-changer, holding oils, salt, and a small plant while keeping the counter completely clear.
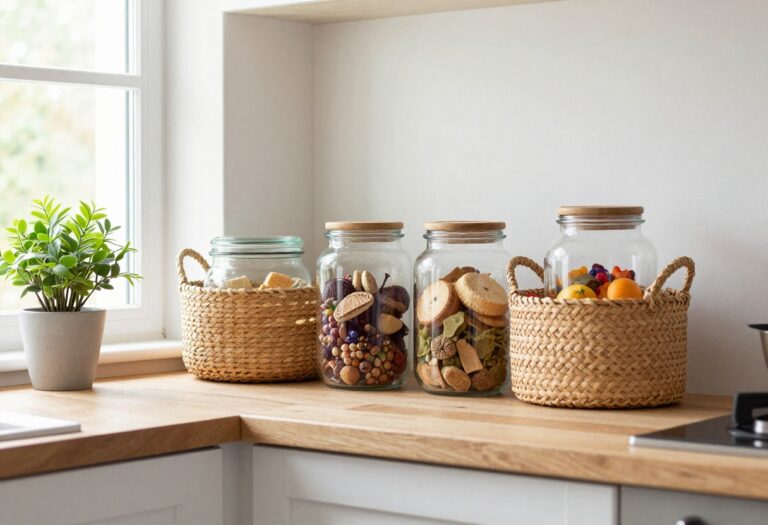
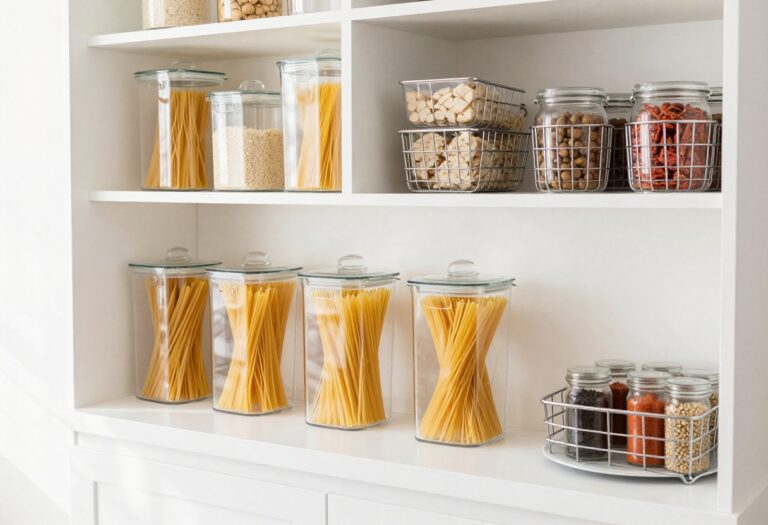
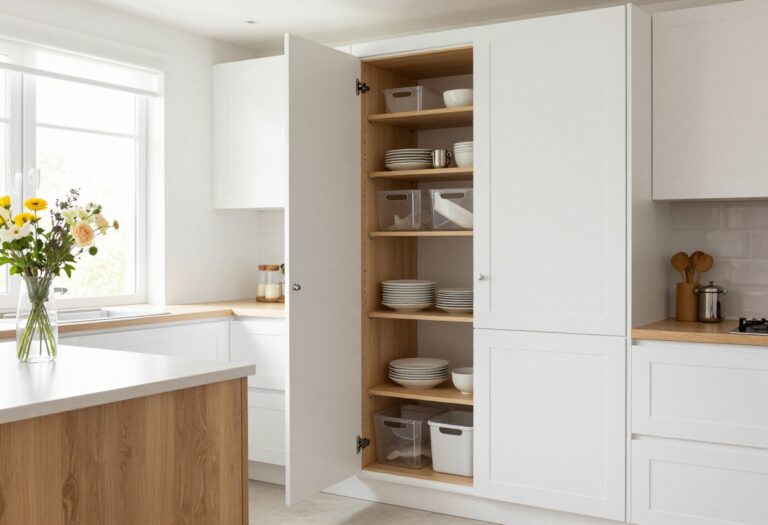
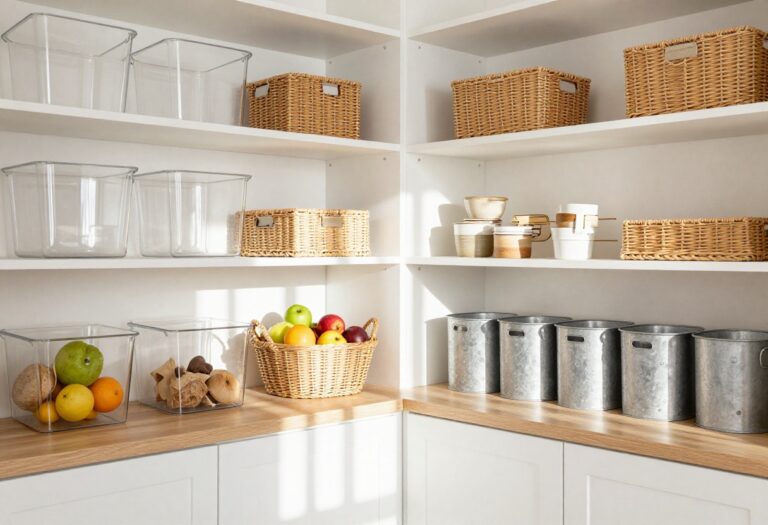
9. Swap Out Plastic Containers for Glass Jars
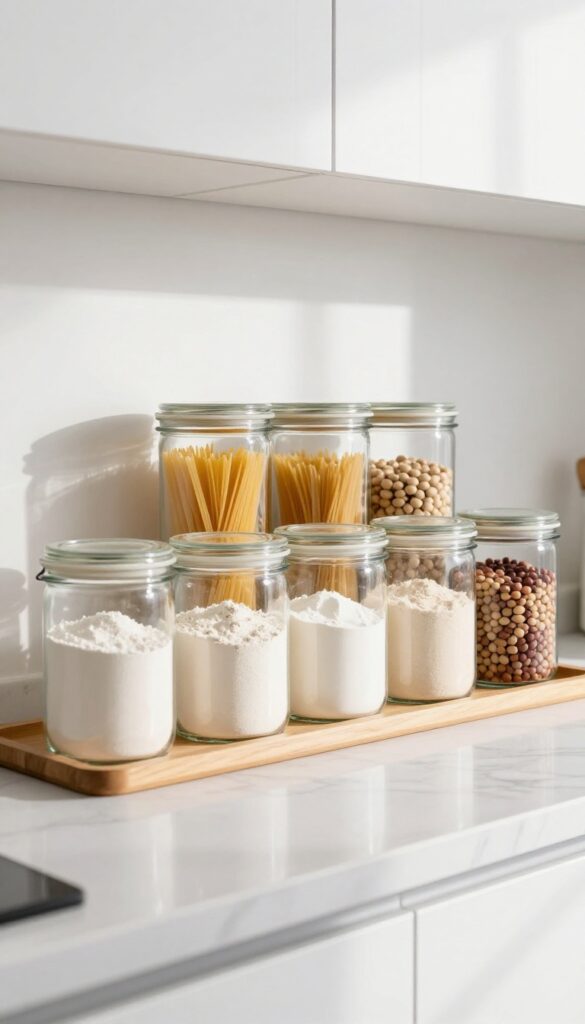
Plastic containers can look messy and feel cheap over time. Glass jars bring a clean, uniform look to your countertops while keeping pantry staples fresh. This budget-friendly swap instantly upgrades your kitchen's visual flow without a major renovation.
Matching glass jars create a streamlined, open-shelf aesthetic that feels intentional and calming. They also seal better than most plastic containers, extending the shelf life of dry goods. Plus, glass is easy to clean and won't stain or hold odors.
Best Materials
Choose clear glass jars with airtight lids—either clamp-top or screw-top. Look for uniform shapes and sizes to create a cohesive look. Avoid colored or patterned glass if you want a minimalist vibe.
Storage Tip
Group jars by category: baking supplies, grains, snacks, or spices. Label each jar with a simple chalk label or vinyl sticker for easy identification. Arrange them on a countertop tray or a dedicated shelf to keep the area tidy.
Budget-Friendly Swap
You don't need to buy expensive sets. Repurpose pasta sauce or pickle jars—just remove labels and wash thoroughly. For a uniform look, collect jars of the same size and shape over time.
10. Finish with a Simple Fruit Bowl
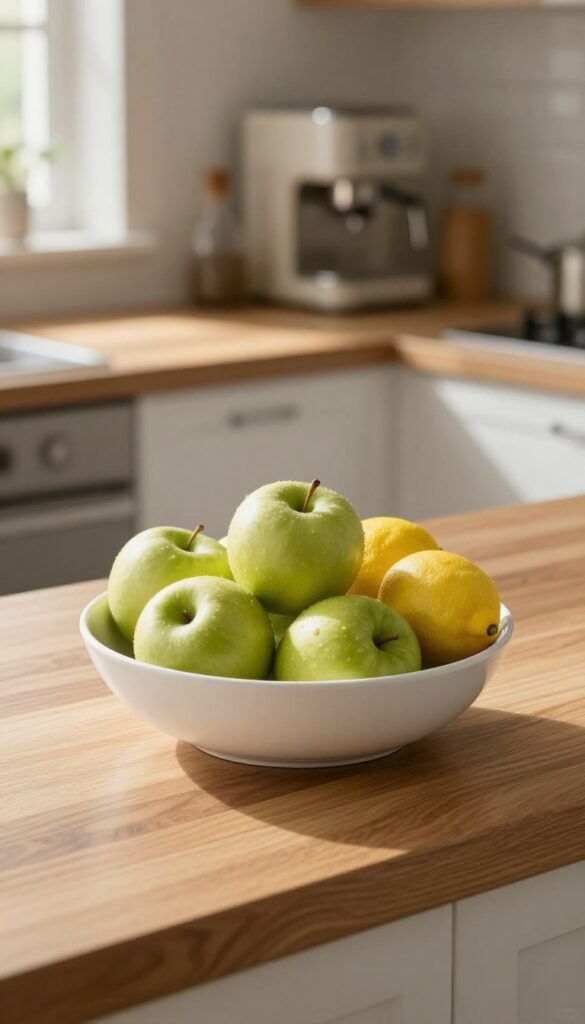
A bowl of fresh fruit is one of the easiest ways to add natural color and a healthy vibe to your kitchen counter. It's functional decor that doesn't try too hard—just a simple ceramic or wood bowl filled with apples, lemons, or oranges. The best part?
It works with any budget and instantly makes the space feel lived-in and inviting.
A fruit bowl does double duty: it keeps your daily snacks within reach while acting as a living centerpiece. The key is to keep it simple. Overly ornate bowls or too many types of fruit can look cluttered.
Stick to one or two fruit varieties in complementary colors—like green apples and yellow lemons—and let the natural shapes and hues do the work. Place the bowl near your coffee station or prep area so it's both practical and pretty. For a budget-friendly approach, skip the trendy designer bowls and pick up a plain ceramic or wooden bowl from a thrift store or big-box retailer.
The goal is clean, not fussy.
Best Materials
Ceramic and wood are the top choices for a clean look. A white ceramic bowl keeps things bright and neutral, while a light wood bowl adds warmth. Avoid glass or metal unless your kitchen has a very modern vibe—they can feel cold or too reflective for a relaxed, everyday feel.
Fruit Selection Tip
- Choose fruits that last well on the counter and don't bruise easily. Apples, oranges, lemons, and pears are great options. Bananas work too but should be eaten quickly.
- For a pop of color, mix green apples with bright oranges or lemons. Keep the bowl filled but not overflowing—leave a little breathing room so it looks intentional.
Placement And Styling
- Place the fruit bowl where you'll see it often but not where it gets in the way. A corner of the counter near the sink or coffee maker works well. Avoid putting it next to hot appliances or in direct sunlight, which can cause fruit to spoil faster.
- For a finishing touch, tuck a small cloth napkin under the bowl for a soft, layered look.
FAQ
How can I keep my kitchen counters clean on a budget?
Stick to a daily clear-off routine, use trays to corral items, and avoid storing too many appliances on the counter. Simple habits cost nothing.
What are some cheap ways to style kitchen counters?
Add a wooden cutting board, a small plant, or glass jars for staples. These items are affordable and instantly elevate the look.
Should I keep appliances on the counter?
Only keep the ones you use daily. Store the rest in cabinets to maintain a clean, uncluttered surface.
How do I choose a color scheme for my counter decor?
Stick to neutral tones like white, beige, wood, and green. They create a calm, cohesive look that's easy to maintain.
Can I style my counter if I have limited space?
Absolutely. Use vertical storage like floating shelves, slim canisters, and tiered stands to maximize every inch.
Conclusion
A clean, styled kitchen counter doesn't require a big budget or a complete renovation. Small changes like a daily clear-off, a few well-chosen accessories, and smart storage can make a huge difference. The goal is to create a surface that feels calm and inviting, where you actually enjoy spending time.
Start with one or two of these ideas and build from there. Your kitchen will thank you.