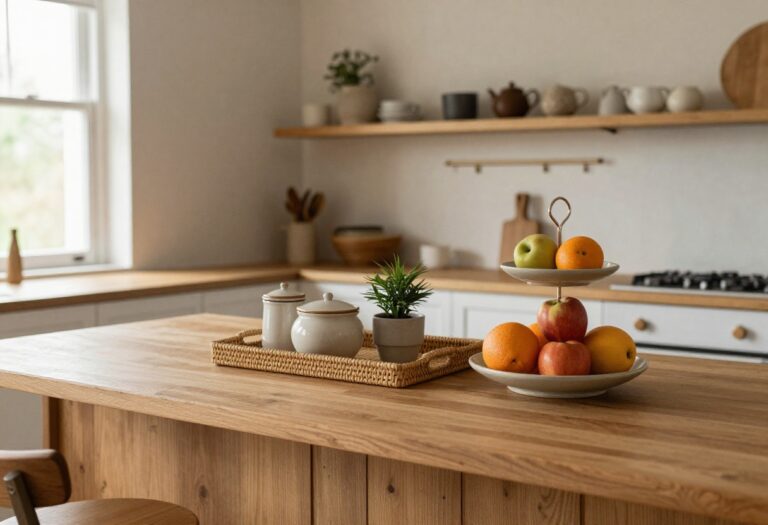
13 Kitchen Blank Wall Ideas That Add Purpose and Style (On a Budget)
That empty stretch of kitchen wall might look like a design problem, but it's actually an opportunity. A blank wall can become a spot for extra storage, a place to show off your style, or a functional zone that makes cooking easier.
The best part? You don't need a big budget to make it work.
With a little creativity and some smart choices, you can turn that bare space into something both practical and eye-catching. These 13 ideas prove that stylish kitchen walls don't have to cost a fortune.
1. Pegboard Power: Customizable Storage That Costs Pennies
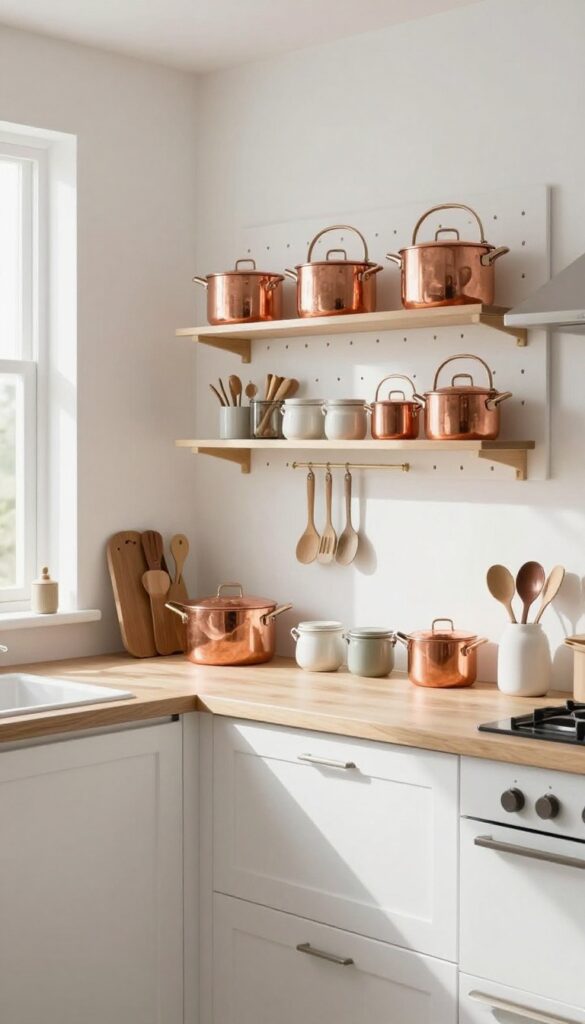
If your kitchen has a blank wall that's just begging for something useful, a painted pegboard might be the smartest upgrade you never considered. It's affordable, endlessly flexible, and surprisingly stylish when done right. Think of it as a functional art piece that holds your most-used tools within easy reach.
A pegboard wall is the ultimate budget-friendly solution for small kitchens or awkward wall spaces. Start with a standard hardware-store pegboard, cut it to size, and paint it to match your cabinets or go bold with a contrasting color. Mount it with furring strips for an air gap behind the board, then add hooks, shelves, and bins to hold pots, pans, utensils, and even small jars of spices.
The best part? You can rearrange the layout whenever your needs change—no drilling new holes or patching drywall. For a polished look, frame the edges with simple wood trim painted the same color.
This idea works especially well on a narrow wall between cabinets and a counter, or above a prep station where you want tools at arm's reach.
Best Colors
White or light gray keeps the pegboard feeling clean and airy, while a deep navy or charcoal adds drama and hides stains. If your kitchen has warm wood tones, try a sage green or muted terracotta for a cohesive look. Stick with matte or eggshell finishes to minimize glare.
Storage Tip
Use a mix of hook types: short double hooks for utensils, long single hooks for pots, and small shelf brackets for spice jars or oil bottles. Group items by frequency of use—keep everyday tools at eye level and less-used gadgets higher up.
Finishing Touch
Add a narrow wooden shelf on top of the pegboard for a row of cookbooks or a small plant. This breaks up the grid and gives the wall a layered, curated feel without adding clutter.
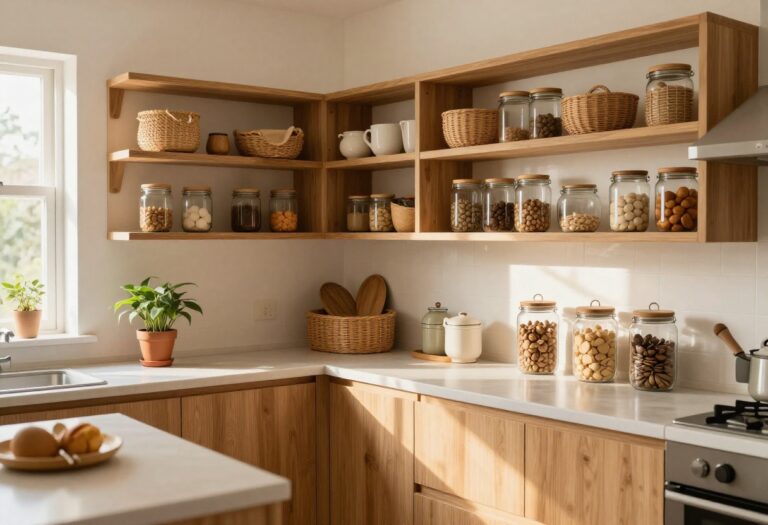
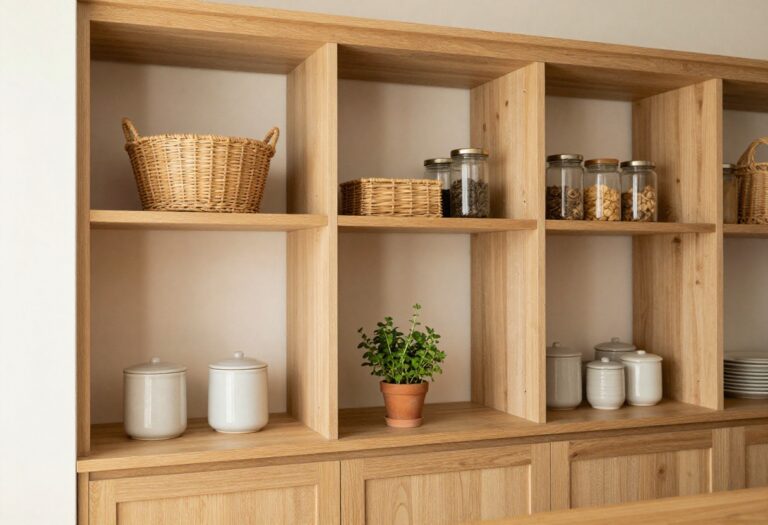
2. Open Shelving with a Thrifted Twist
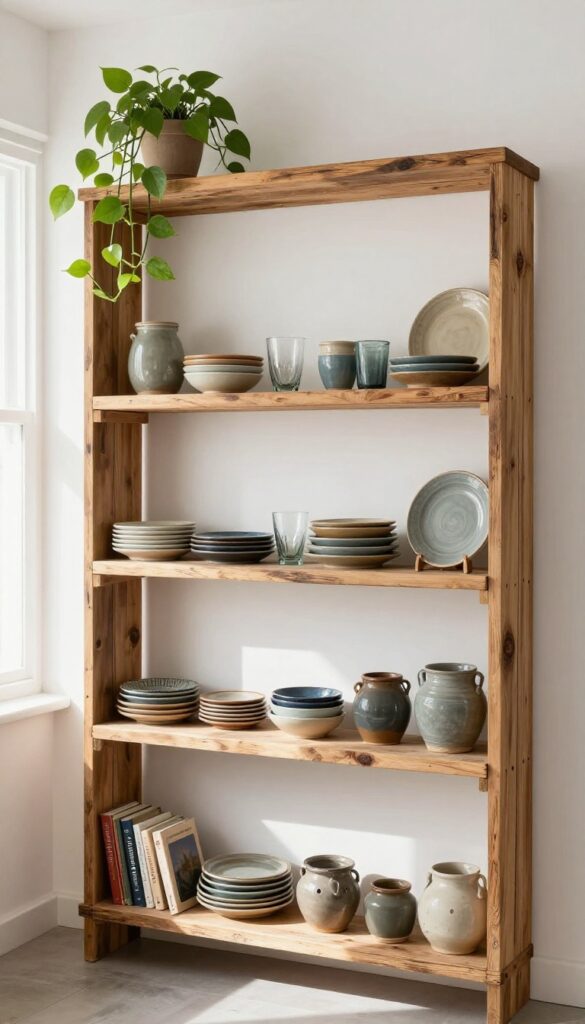
Open shelving is a go-to for blank kitchen walls, but buying all new shelves and matching dish sets can get pricey fast. The thrifted twist keeps the look warm, personal, and budget-friendly. Mixing reclaimed wood shelves with secondhand finds creates a collected-over-time feel that’s both practical and stylish.
Start with shelves made from reclaimed wood or repurposed boards—check salvage yards, flea markets, or even old furniture pieces. The natural wear and patina add instant character. Mount them at varying heights for visual interest, and keep the arrangement functional by storing everyday dishes within easy reach.
Thrifted items like mismatched ceramic plates, vintage glassware, and stoneware jars bring texture and color without costing much. Stick to a loose color palette—earthy tones, whites, and muted blues—to keep the mix cohesive. The key is to edit as you go: leave some breathing room between objects so the wall doesn’t feel cluttered.
Shelf Styling Tip
Group items in odd numbers and vary heights using stackable plates, small vases, or cookbooks. Lean a few pieces against the wall for a relaxed, casual look. Don’t forget negative space—it helps each thrifted treasure stand out.
Budget-Friendly Swap
If you can’t find reclaimed wood, use basic pine boards and stain them in a dark walnut or weathered gray finish. You can also paint them to match your cabinets for a more uniform look. Thrifted brackets add extra charm.
Finishing Touch
Add a small trailing plant like pothos or ivy on the top shelf. The greenery softens the wood and brings life to the display. A simple woven basket on the bottom shelf can hold linens or fruit, tying the whole look together.
3. Magnetic Knife Strip with a DIY Frame
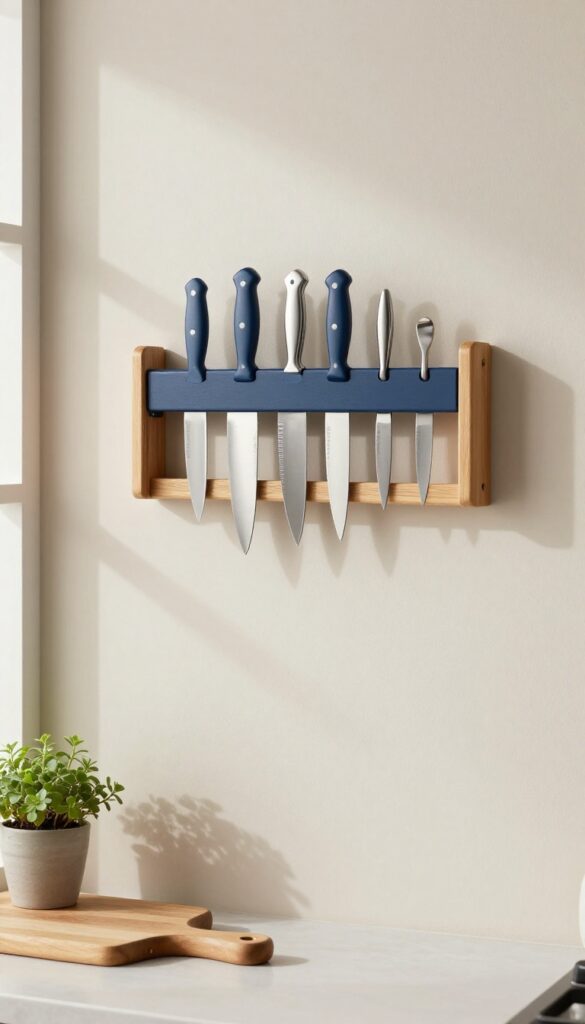
A bare wall above the counter can feel like a missed opportunity. Instead of leaving it blank, turn it into a functional display with a magnetic knife strip that looks more like intentional decor than a utilitarian tool. By adding a simple wooden frame around the strip, you get the convenience of keeping knives within arm's reach while giving the wall a polished, built-in feel.
It's a budget-friendly upgrade that blends practicality with style, perfect for kitchens where every inch counts.
This idea works especially well on a narrow wall between cabinets or next to the stove. The frame softens the industrial look of the magnetic strip and helps it feel like part of the kitchen's design rather than an afterthought. Plus, it frees up drawer space and keeps your most-used knives visible and accessible.
You can customize the frame color to match your cabinets or go for a contrasting shade for extra visual interest.
Best Materials
- Choose a strong magnetic strip rated for heavy knives—look for one with neodymium magnets. For the frame, use inexpensive pine or poplar trim from a hardware store. Paint or stain it to match your kitchen's existing wood tones or go with a bold color like navy or black for contrast.
- A simple miter saw and wood glue are all you need to assemble the frame.
Installation Tip
Mount the magnetic strip directly onto the wall studs for security, then attach the frame around it using adhesive or small nails. Leave about a quarter-inch gap between the strip and the frame so knives slide on and off easily. For a seamless look, caulk the edges and paint over them.
Styling The Wall Around It
- Keep the area clean—let the knives be the focal point. Add a small shelf above the strip for a cookbook or a tiny plant, but avoid clutter. The frame itself acts as a visual anchor, so you don't need much else.
- A matte black strip with a white frame feels modern; a brass strip with a walnut frame leans warm and classic.
4. Chalkboard Wall for Menus and Notes
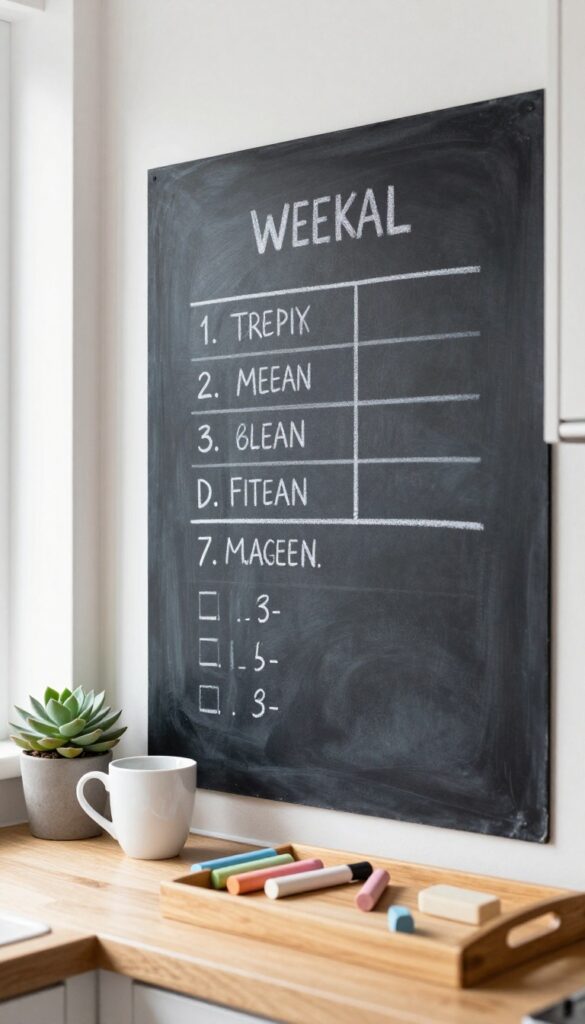
A chalkboard wall is one of those ideas that feels both nostalgic and totally fresh. It turns a blank kitchen wall into a living, changing feature that actually helps you stay organized. Whether you use it for weekly meal planning, a running grocery list, or letting the kids doodle while you cook, it adds personality without costing a fortune.
The best part? You can erase everything and start over whenever the mood strikes.
Paint a section of your wall with chalkboard paint to create a functional, fun feature that doubles as decor. It works especially well on an empty wall between cabinets or near the breakfast nook. Use it for weekly menus, grocery lists, reminders, or even a rotating gallery of kids' art.
The matte black or dark green finish adds a nice contrast against lighter walls, and the ever-changing content keeps the space feeling alive. Plus, it's one of the most budget-friendly upgrades you can make—just a can of paint and some chalk, and you're set.
Best Colors And Placement
- Classic black is the go-to, but don't overlook deep charcoal, navy, or even a rich forest green. These darker hues create a striking focal point without screaming for attention. For placement, think about where you naturally pause in the kitchen—next to the coffee station, beside the pantry, or on the wall facing the dining area.
- A vertical strip between upper and lower cabinets can also work well if you're short on wall space.
Styling And Finishing Touches
Keep a small tray or magnetic strip nearby to hold chalk, an eraser, and maybe a piece of felt for wiping. Add a frame of molding around the chalkboard area to make it feel intentional and polished rather than like a schoolroom. For a softer look, use chalk markers instead of traditional chalk—they write more cleanly and come in pastel colors that feel more homey.
Budget-Friendly Swap
- If you're renting or want to test the look first, try a large chalkboard decal or a sheet of chalkboard contact paper. They stick right onto the wall and peel off without damage. Another option is to buy a large framed chalkboard from a thrift store and hang it like art.
- Either way, you get the same functionality for under $20.
5. Gallery Wall of Vintage Kitchen Prints
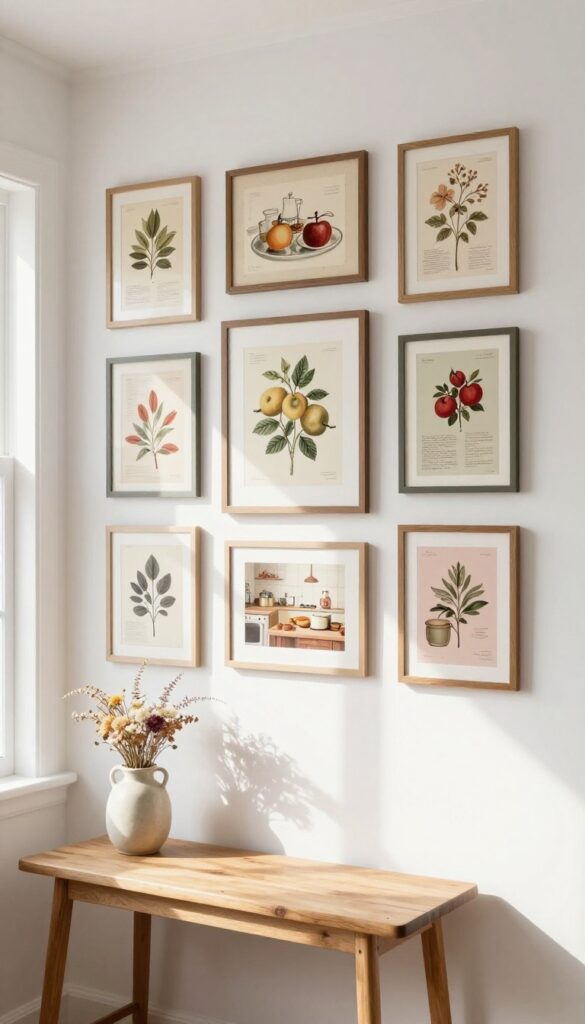
A blank kitchen wall is the perfect spot to tell a story without saying a word. A gallery wall of vintage kitchen prints brings charm, warmth, and a collected-over-time feel that instantly makes the space more inviting. The best part?
It’s incredibly budget-friendly when you use thrifted frames and affordable prints. This idea works especially well in eat-in kitchens, breakfast nooks, or above a small console table, adding personality without taking up any counter space.
Start by gathering a mix of vintage-style prints—think old recipe cards, botanical illustrations of fruits and vegetables, or retro kitchen scenes. You can find free downloads online or buy inexpensive postcard sets. Then hit up thrift stores or garage sales for mismatched frames; a little wear and tear adds to the charm.
Arrange them in a casual grid on the floor first to get the spacing right—about 2 to 3 inches apart works well. Use a level and painter’s tape to mark the wall before hanging. The result is a low-cost focal point that feels curated and personal, not store-bought.
Best Colors
Stick with muted, faded tones for an authentic vintage look. Cream, sepia, soft sage, and dusty rose keep the gallery wall feeling cohesive even with mismatched frames. If your kitchen has white or light cabinets, the warm tones will pop beautifully without clashing.
Layout Tip
- A casual grid—where frames are aligned but not perfectly symmetrical—feels relaxed and approachable. Start with the largest print in the center and build outward. Mix in a few small prints or a round mirror for variety.
- Keep the outer edges straight for a tidy finish.
Budget-Friendly Swap
Skip expensive custom framing. Instead, use thrifted frames as-is or spray-paint them all one color (like matte black or antique gold) for a more uniform look without losing the vintage vibe. You can also clip prints onto mini clotheslines for a zero-cost alternative.
6. Spice Rack from a Picture Ledge
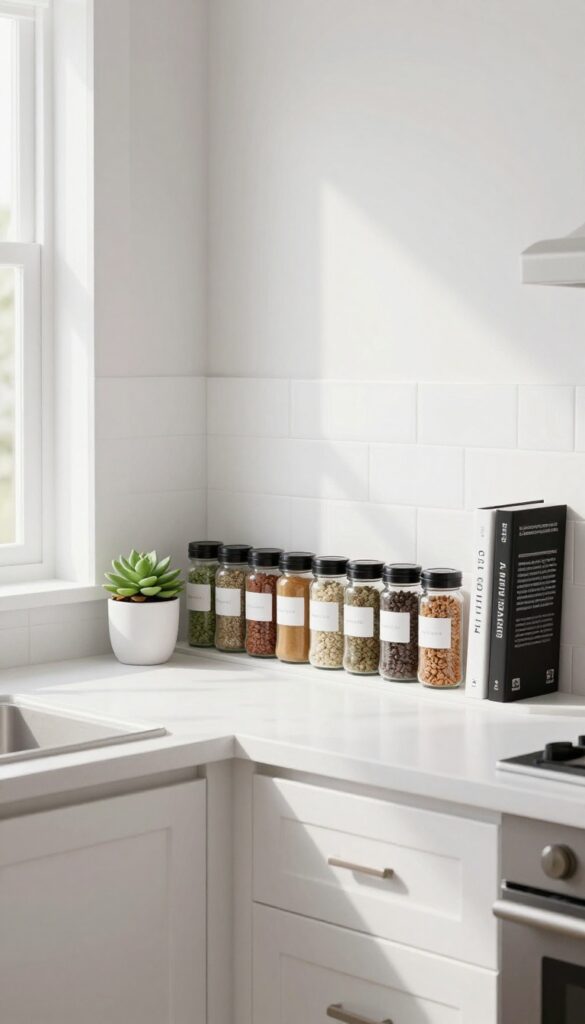
Picture ledges aren’t just for frames and art. Install a narrow one on a blank kitchen wall, and you’ve got an instant spice rack that’s both functional and decorative. Spices sit in neat rows, easy to grab while cooking, and the ledge itself adds a clean, architectural line.
It’s a budget-friendly swap that turns a bare wall into a purposeful display.
A picture ledge spice rack keeps your most-used seasonings visible and within arm’s reach without taking up precious counter space. The narrow depth (usually 4 to 6 inches) is perfect for standard spice jars, and the open design means you can see every label at a glance. Plus, it’s an easy DIY project—just mount a ready-made ledge or build one from a simple board.
The result feels intentional, not cluttered, and works especially well in galley kitchens or above a prep zone.
Best Placement
Hang the ledge near your stove or main prep area so spices are handy while cooking. Avoid placing it directly over a burner to keep jars away from steam and heat. A spot between the counter and upper cabinets is ideal—about 12 to 18 inches above the countertop.
Shelf Styling Tip
- Group spices by size or color for a tidy look. Use matching jars or label them with a consistent font to create a cohesive display. Leave a little breathing room between jars so the ledge doesn’t feel overcrowded.
- Add a small plant or a slim cookbook on one end for a finishing touch.
Budget-Friendly Swap
- Skip expensive pre-made spice racks and repurpose a basic picture ledge from a home store. You can paint it to match your trim or cabinets for a custom look. Total cost: under $20.
- If you want extra storage, stack two ledges vertically with about 6 inches of space between them.
7. Hanging Herb Garden in Repurposed Tins
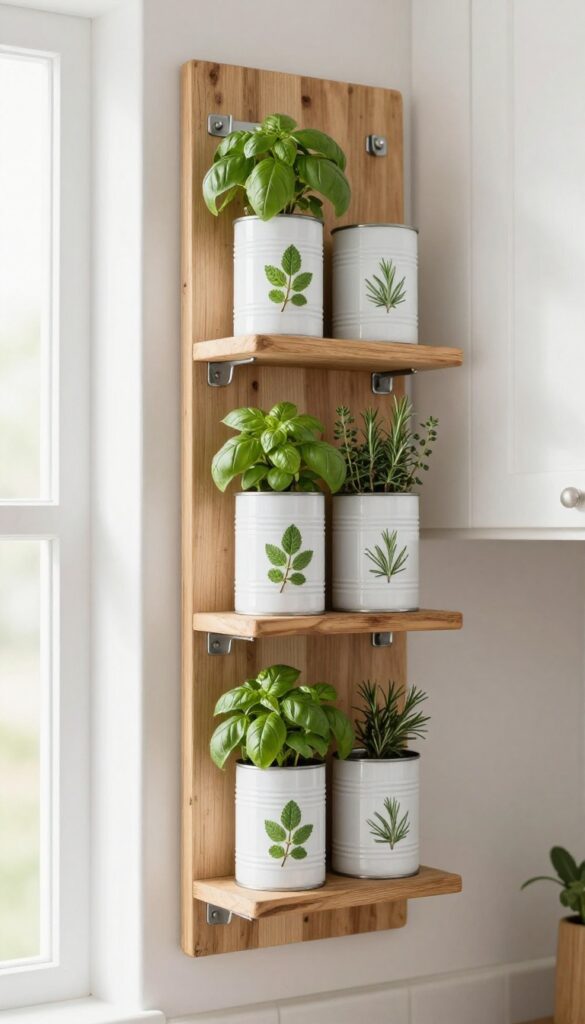
A blank wall in the kitchen can feel like a missed opportunity, especially when you're working with a tight budget. Instead of leaving it bare, turn it into a living, breathing feature that's as practical as it is charming. A hanging herb garden made from repurposed tins brings fresh greenery right where you cook, and it costs next to nothing to put together.
Attach small tin cans or mason jars to a wooden board and plant herbs. Fresh greenery adds life to the kitchen and costs very little to set up. This idea works especially well on a narrow wall between cabinets or beside a window where herbs can get some light.
The mix of metal, wood, and green leaves creates a rustic, lived-in look that feels intentional without being fussy.
Best Herbs To Grow
Stick with compact, high-use herbs like basil, thyme, rosemary, and mint. They're forgiving for beginners and will save you money at the grocery store. Basil loves sunlight, so place it near a bright window; thyme and rosemary do well with less direct light.
Budget-Friendly Swap
Skip expensive planters and use clean, empty tin cans from beans or tomatoes. Remove the labels, sand off any sharp edges, and paint them with a single coat of matte spray paint for a uniform look. Or leave them as-is for an industrial vibe that costs absolutely nothing.
Installation Tip
Mount a reclaimed wood board or a simple pine plank onto the wall using heavy-duty wall anchors. Attach the tins to the board with metal hose clamps or strong magnetic strips if the tins are metal. Space them about six inches apart so herbs have room to grow without crowding.
8. Floating Shelf with a Built-In Towel Bar
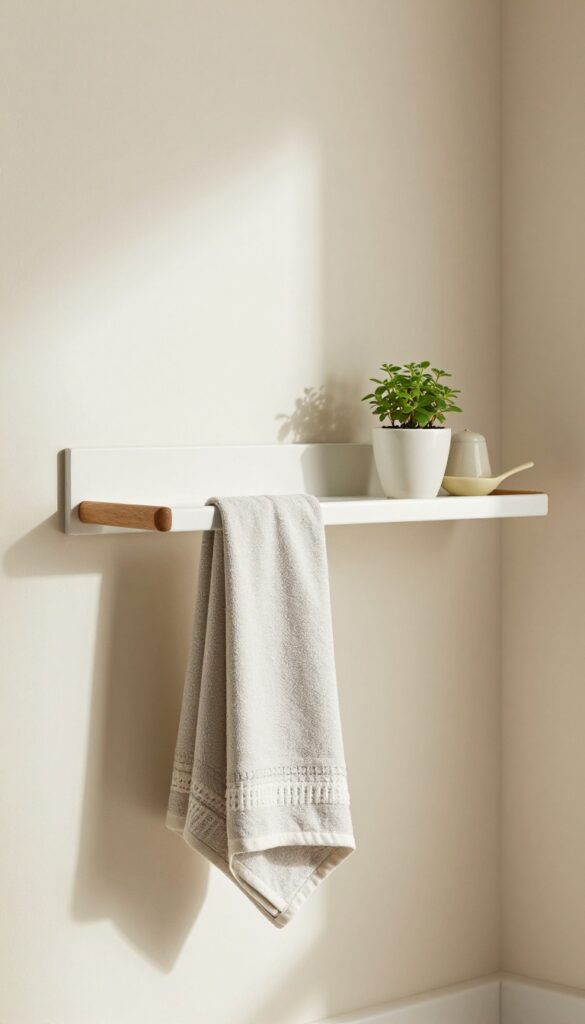
A floating shelf with a dowel tucked underneath is the kind of clever detail that makes you wonder why every kitchen doesn't have one. It keeps dish towels within arm's reach without taking up counter space or cluttering cabinet doors. The look is clean and intentional, with the towels becoming part of the decor rather than an afterthought.
This idea works especially well on a narrow blank wall between countertops and upper cabinets, or beside the sink where you need a towel most. The shelf itself can hold a few small jars, a plant, or your daily coffee mugs, while the dowel below keeps one or two towels neatly draped. It's a budget-friendly project whether you DIY it from a pine board and a wooden dowel or buy a ready-made version from a home goods store.
The key is to keep the shelf slim—around 6 to 8 inches deep—so it doesn't protrude too far into the walkway. Finish it with a matte paint or stain that coordinates with your cabinets or hardware, and you've added storage and style in one compact move.
Best Materials
For a budget-friendly build, use common pine or poplar boards and a 1-inch wooden dowel. Paint or stain to match your existing kitchen trim. If you prefer a ready-made option, look for a solid wood or bamboo shelf with a metal towel bar—these often cost under $40 and install in minutes.
Shelf Styling Tip
Keep the shelf styling minimal so the towel bar remains the focal point. A small potted herb, a salt cellar, and a single ceramic spoon rest are enough. Avoid overcrowding—you want the towels to be easy to grab and the shelf to look airy.
Finishing Touch
Choose towels in a color that complements your kitchen palette—like a muted olive or warm terracotta—and fold them neatly over the dowel. A crisp white towel also works for a classic, clean look. Rotate them regularly so they stay fresh and decorative.
9. Fabric Wall Hanging as Art
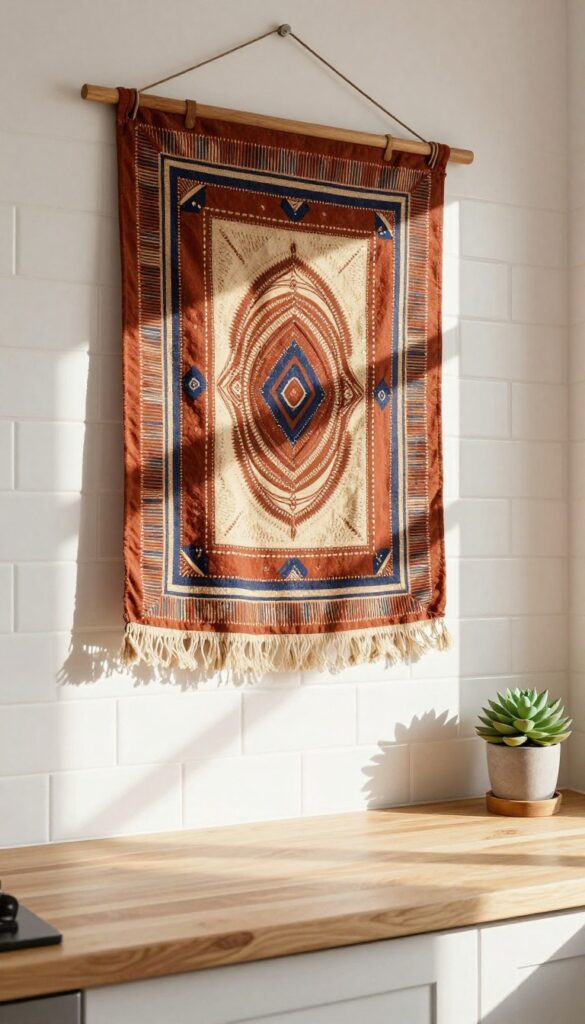
Blank kitchen walls don't need expensive framed art to feel finished. A simple fabric wall hanging—whether it's a vintage scarf, a piece of African mudcloth, or a bold cotton print—adds softness, color, and texture without breaking the bank. It's an especially smart move for renters or anyone who wants to change up the look seasonally without committing to permanent decor.
The fabric drapes naturally, creating a relaxed, collected vibe that feels more approachable than a stiff gallery wall.
Fabric wall hangings are a budget-friendly way to bring pattern and warmth into your kitchen. They soften the hard surfaces of tile, stainless steel, and countertops, and they're easy to swap out whenever you crave a new look. Plus, you can often find beautiful scarves or fabric pieces at thrift stores or online for a fraction of the cost of framed art.
The key is to hang the fabric on a simple wooden dowel or a decorative curtain rod, letting it fall loosely for a casual, effortless effect.
Best Fabrics For The Kitchen
- Cotton, linen, and lightweight wool work best because they drape nicely and are easy to clean. Avoid heavy or textured fabrics that might trap cooking odors or grease. A vintage silk scarf can add a touch of elegance, but make sure it's not too delicate for the space.
- For a more durable option, look for washable cotton prints or even a flatweave tablecloth that you can repurpose as wall art.
Hanging Hardware Made Simple
- You don't need anything fancy. A basic wooden dowel from a craft store, a piece of twine, and a small nail or adhesive hook are all it takes. If you want a more polished look, use a thin brass or black curtain rod with finials.
- For a no-damage option, try command hooks or a tension rod inside a shallow recess. Just make sure the fabric is evenly distributed and hangs straight.
Styling Around The Hanging
- Keep the surrounding area simple so the fabric remains the focal point. A single small shelf with a few white dishes or a simple vase of greenery can complement the hanging without competing. If the fabric has a busy pattern, balance it with solid-colored accessories.
- For a cohesive look, pull one of the colors from the fabric into a nearby dish towel or countertop accessory.
10. Wall-Mounted Cutting Board Storage
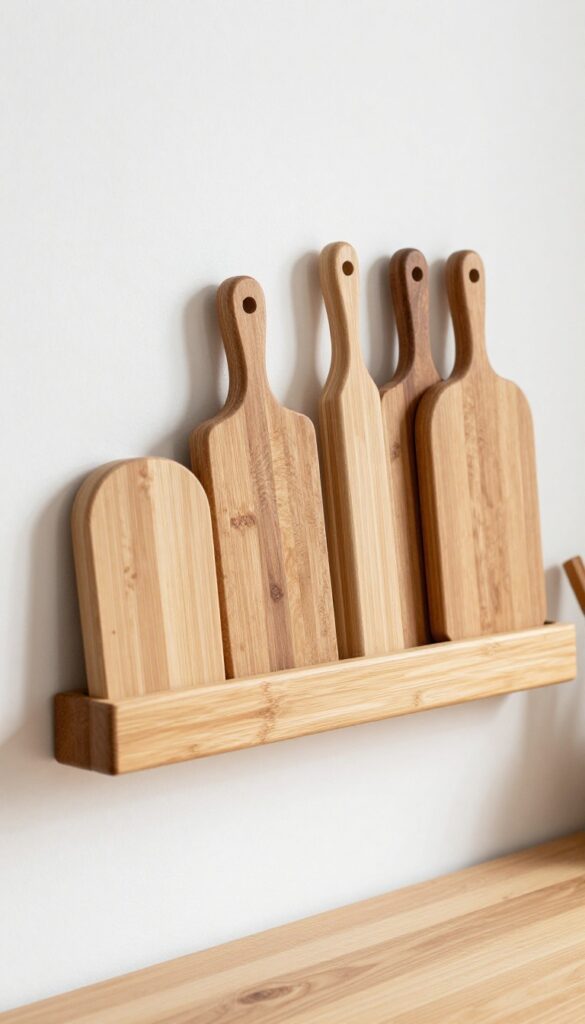
If your cutting boards are currently stacked inside a cabinet or leaning awkwardly against the backsplash, you're missing out on a simple, budget-friendly upgrade. Mounting them on the wall not only frees up drawer and counter space but also turns everyday tools into a warm, functional display. A row of wooden boards in varying sizes instantly adds texture and a chef-kitchen feel without costing much.
This idea works especially well on a narrow wall next to the stove or above a prep area where you need quick access. The visual effect is clean and intentional—boards become part of the kitchen's layered look rather than clutter. Because cutting boards come in natural wood tones, they blend easily with almost any color scheme and add warmth to sterile white or gray kitchens.
Best Materials
Go with a simple wooden dowel or a slim peg rail in a finish that complements your hardware. For the boards themselves, mix end-grain butcher block, acacia, and bamboo for variety. Avoid plastic boards here—they don't have the same visual weight and can look cheap.
Layout Tip
Space the dowels or pegs about 6 to 8 inches apart to accommodate boards of different sizes. Place the rail at a height where you can easily grab the most-used board without stretching. If you have a small wall, stagger two short rails instead of one long one for a more dynamic look.
Budget-Friendly Swap
Instead of buying a fancy rail system, use a standard wooden curtain rod with simple brackets. Sand it lightly and apply a coat of mineral oil or wax to match your kitchen's wood tones. It costs under $10 and holds boards securely.
11. DIY Cookbook Shelf with a Lip
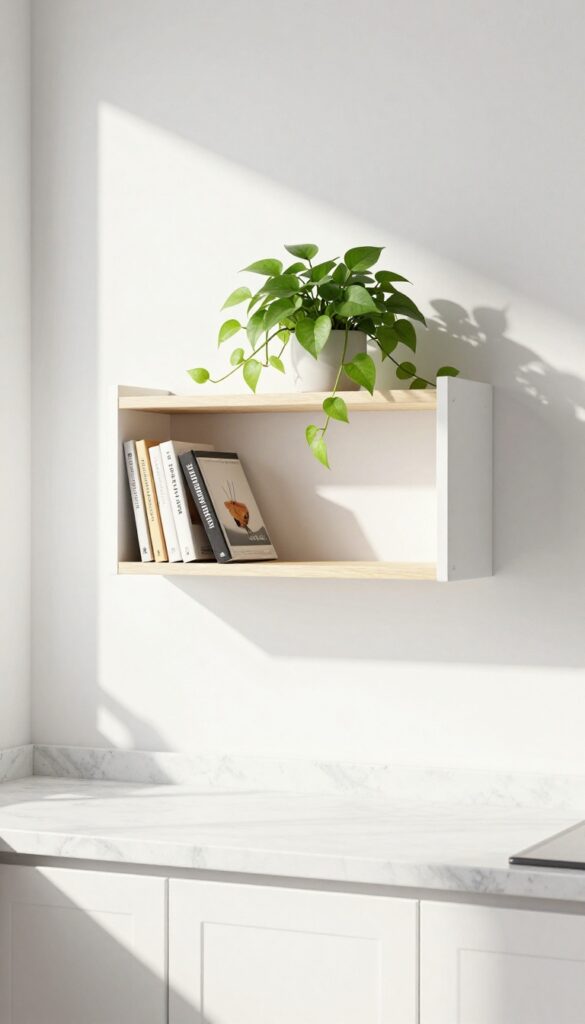
If you love cooking but hate digging through a stack of cookbooks every time you need a recipe, a dedicated shelf can be a game-changer. This shallow shelf with a front lip keeps your favorite cookbooks upright and within arm's reach, turning a blank wall into a functional focal point. It's a budget-friendly project that adds both storage and personality to your kitchen.
Building a cookbook shelf with a lip is surprisingly simple and uses basic materials like a pine board, a small strip of wood for the lip, and some brackets. The lip prevents books from sliding off, so you can safely display them without worrying about accidents. Paint or stain the shelf to match your existing cabinets or go for a contrasting color to make it pop.
Place it near your prep area for easy access while cooking, and add a small plant or a favorite trinket on top for a touch of personality. This idea works especially well on narrow walls between cabinets or above a countertop where you need extra storage without taking up valuable workspace.
Best Materials
- Use a solid wood board like pine or oak for durability. A 1×4 or 1×6 board works well for most cookbooks. The lip can be a 1×2 strip attached with wood glue and finishing nails.
- For a budget-friendly option, use reclaimed wood or paint MDF for a smooth finish.
Shelf Styling Tip
Arrange cookbooks with their spines facing out for easy reading, but mix in a few with the cover facing forward to break up the pattern. Leave a little space for a small plant, like a trailing pothos, or a ceramic utensil holder to keep the shelf from feeling cluttered.
Finishing Touch
Add a thin bead of clear silicone along the back edge of the shelf where it meets the wall to prevent books from slipping behind. This small detail keeps everything tidy and reduces dust buildup.
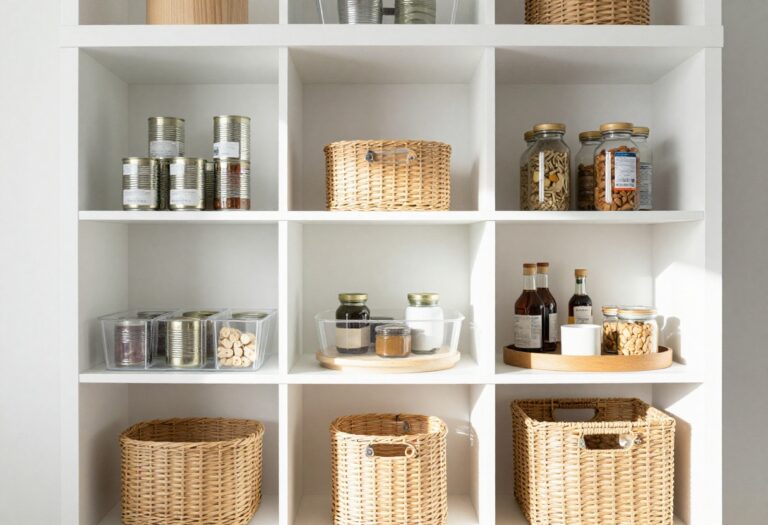
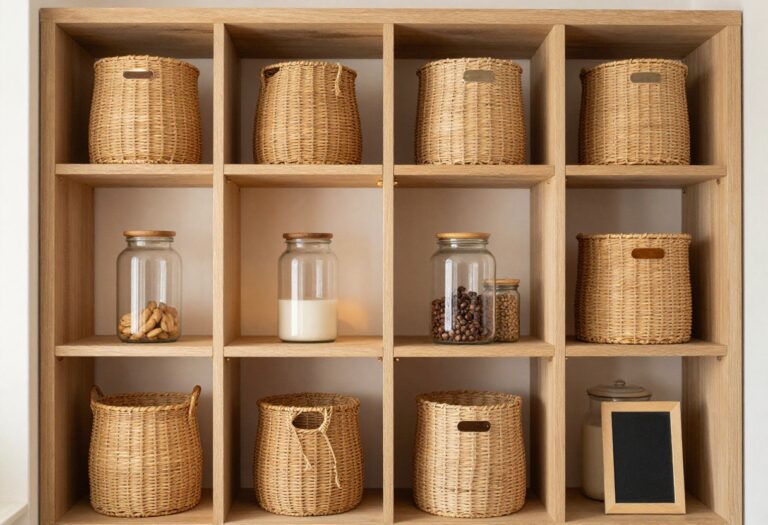
12. Basket Wall for Light Storage
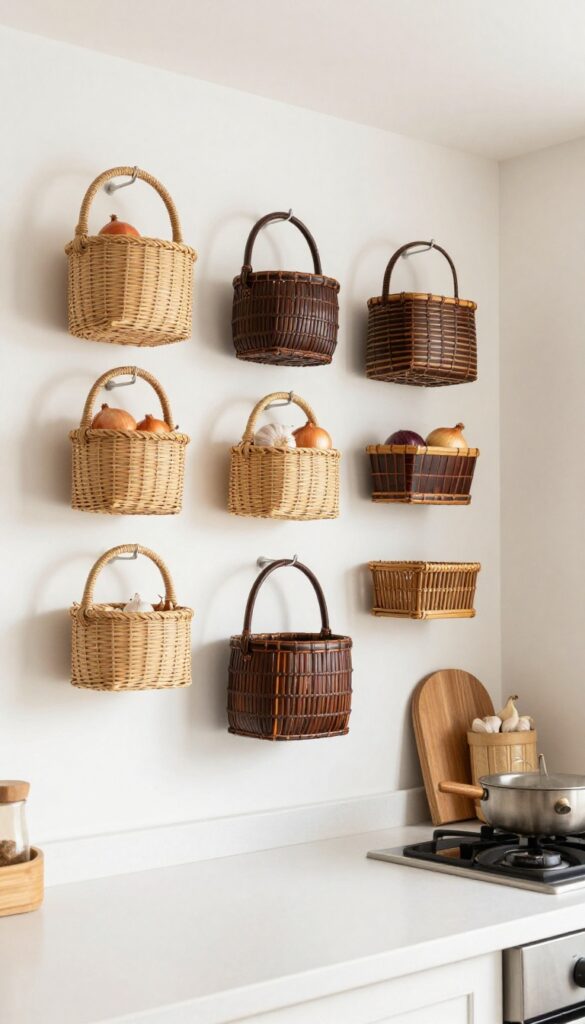
Woven baskets aren’t just for laundry or farmer’s market hauls. Group a few on a blank kitchen wall and they become a warm, textural feature that also holds everyday essentials. The trick is to keep them light—both visually and literally.
Think small to medium baskets hung on individual hooks or a slim peg rail, spaced so each one breathes. This setup works especially well near the stove or prep zone, where you can grab an onion or a garlic clove without opening a drawer.
A basket wall solves two problems at once: that empty stretch of drywall and the need for quick-access storage. Because baskets are open, you see what’s inside, so nothing gets forgotten. And unlike closed cabinets, they add softness and depth.
The key is choosing baskets with enough variation in weave or color to feel curated, not random. Stick to natural tones—seagrass, rattan, or dark bamboo—so they blend with most kitchen palettes. Hang them at different heights for a casual, collected look, or line them up neatly if your style leans more orderly.
Best Materials
- Natural fibers like rattan, seagrass, and water hyacinth bring warmth and a slight organic texture that contrasts nicely with sleek countertops or tile. For a more polished look, try dark-stained bamboo or woven leather baskets. Avoid anything too shiny or synthetic—it can feel out of place in a kitchen.
- If you’re worried about dust, choose baskets with a tighter weave.
Storage Tip
- Use baskets for produce that doesn’t need refrigeration: onions, garlic, shallots, or small potatoes. The open weave allows air circulation, which helps them last longer. You can also stash tea towels, wooden spoons, or even small jars of dried herbs.
- Keep heavier items in lower baskets to prevent sagging over time.
Budget-Friendly Swap
- Skip expensive designer baskets and hit up thrift stores, flea markets, or big-box home stores for affordable options. A set of three similar baskets often costs less than a single high-end piece. If they’re a mismatched bunch, spray-paint them all the same neutral color for a cohesive look.
- A simple wooden peg rail costs under $20 and makes hanging and rearranging a breeze.
13. Mounted Paper Towel and Wrap Dispenser
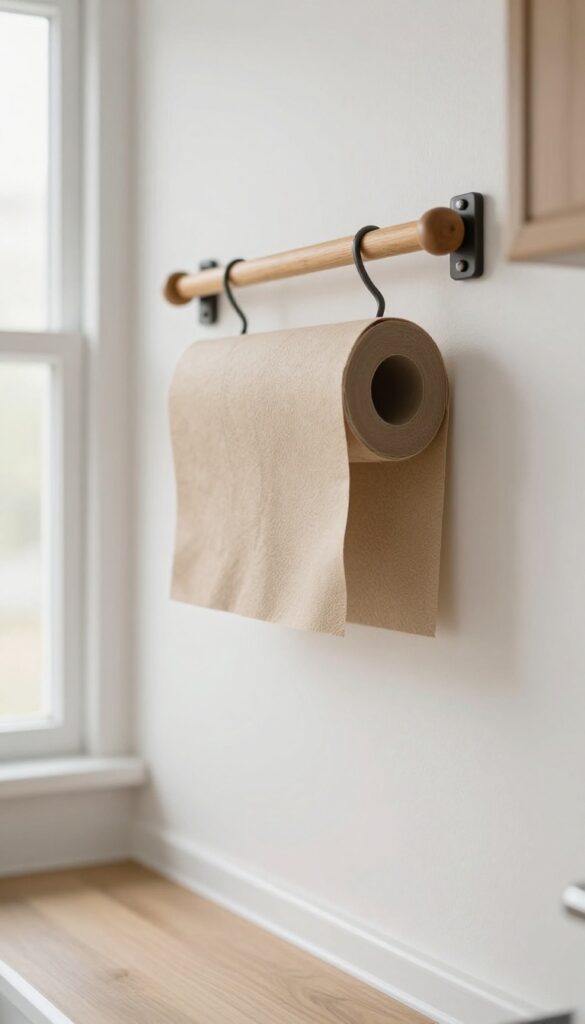
If your kitchen counters are constantly cluttered with rolls of paper towels and boxes of plastic wrap, a mounted dispenser can be a game-changer. This simple DIY project uses a wooden rod or a repurposed curtain rod to hold paper towels and wrap right on the wall, freeing up valuable counter space. It’s one of those budget-friendly fixes that instantly makes your kitchen feel more organized and intentional.
A mounted paper towel and wrap dispenser is not only practical but also adds a touch of rustic or modern style, depending on the materials you choose. By placing it on a blank wall near your prep area, you keep essentials within reach without sacrificing counter space. The look is clean and purposeful, and the cost is minimal—often under $10 if you use items you already have.
This idea works especially well in small kitchens or rental spaces where you want to avoid permanent fixtures.
Best Materials
- For a warm, farmhouse feel, use a wooden dowel or a salvaged branch with brackets. For a more modern look, go with a sleek metal curtain rod or a chrome towel bar. You can also repurpose an old wooden rolling pin or a closet rod.
- The key is to choose a material that complements your existing hardware and cabinet finishes.
Installation Tip
- Mount the rod about 12–18 inches from the countertop so you can easily tear off sheets. Use sturdy brackets that can support the weight of multiple rolls. If you’re renting, consider using adhesive hooks or a tension rod inside a cabinet or between two walls to avoid drilling.
- For a polished finish, add decorative finials to the ends of the rod.
Styling Note
- Keep the area around the dispenser uncluttered to let it shine as a functional accent. You can stack a couple of spare rolls on a small shelf above or store them in a basket nearby. Choose paper towels with a subtle pattern or a neutral color to blend with your decor.
- A small plant or a ceramic dish for rings can soften the look.
FAQ
What is the cheapest way to decorate a blank kitchen wall?
Pegboard is one of the most affordable options. A sheet costs around $10, and you can paint it to match your kitchen. It's also highly functional for storing utensils and pots.
Can I use temporary solutions if I rent my kitchen?
Absolutely. Command hooks, removable adhesive strips, and lightweight fabric hangings work well. You can also use a tension rod inside a cabinet or on the wall for hanging items.
How do I make open shelving look organized without spending much?
Stick to a simple color palette using items you already own. Group similar items together, and use baskets or jars to hide smaller clutter. Thrifted dishes add character without breaking the bank.
What kind of paint works best for a chalkboard wall?
Look for actual chalkboard paint, which is available at most hardware stores. It's affordable and comes in colors beyond black. Just make sure to season the surface before first use.
Are these ideas safe for a kitchen with high humidity?
Most are fine with proper installation. For metal items like knife strips, choose stainless steel to avoid rust. Wood shelves should be sealed, and fabric should be washable or easily replaced.
Conclusion
A blank kitchen wall doesn't have to stay empty or become an expensive project. With a little creativity and some budget-friendly materials, you can add storage, style, and personality to your cooking space.
Whether you choose a pegboard, open shelving, or a simple fabric hanging, each idea brings something useful to the room. Start with one idea that fits your needs and see how much a single wall can change the feel of your kitchen.