10 Minecraft Small Kitchen Ideas for Tiny Creative Builds
Building a small kitchen in Minecraft can be tricky—you want it to look good without feeling cramped. But with a little creativity, even the tiniest space can become a cozy, functional hub for your virtual home.
Whether you're working with a starter house or a compact base, these ideas are perfect for a weekend refresh.
Let's dive into 10 small kitchen builds that balance style and practicality, all while keeping things relaxed and fun.
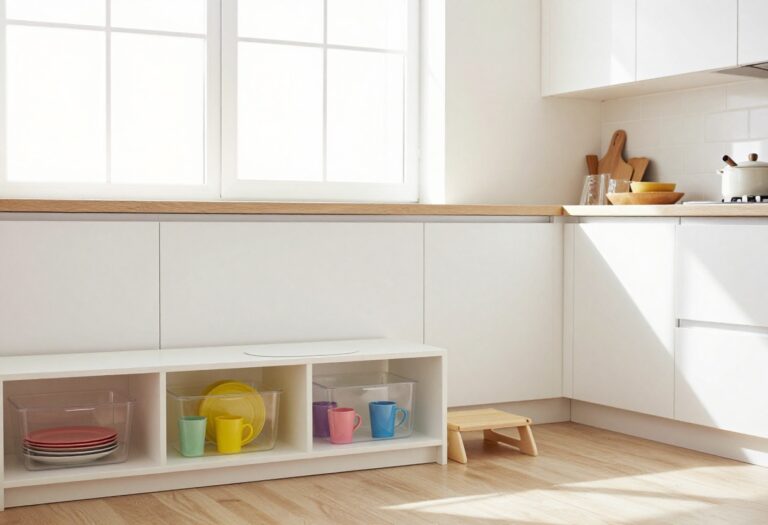
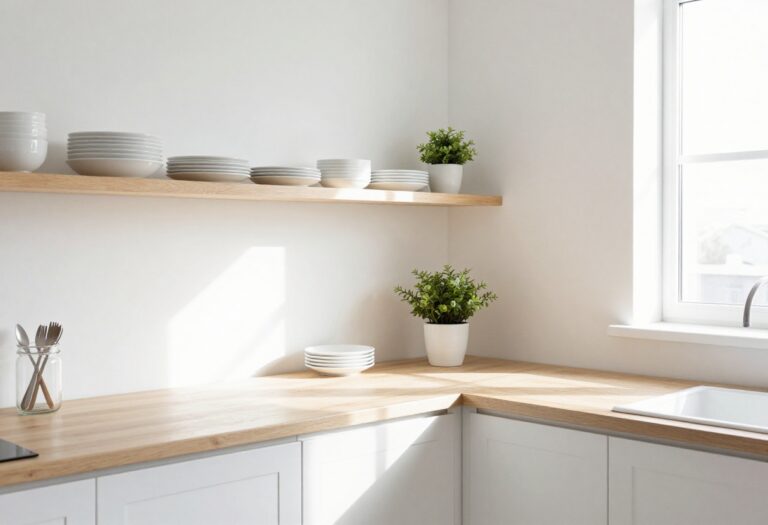
1. Open Shelf Pantry with Barrels
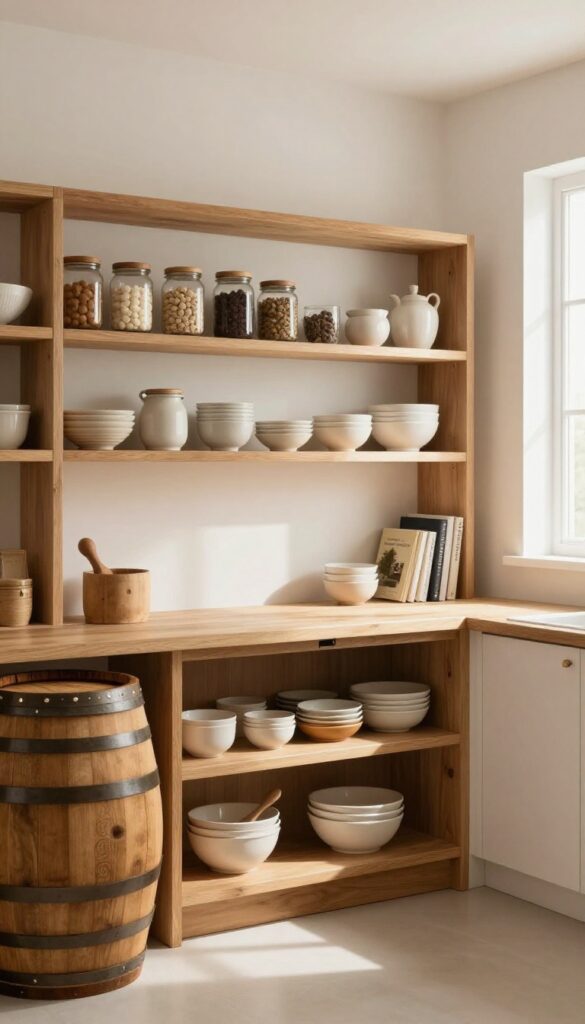
If your tiny kitchen feels cramped with bulky cabinets, swapping them for open shelving can make a surprising difference. Using slabs and trapdoors, you can create a simple, airy storage wall that keeps everything visible and within reach. Barrels add a rustic touch while holding dry goods like flour, rice, or oats—they blend in naturally and keep things organized without looking cluttered.
This idea works especially well in small spaces because it eliminates the visual weight of upper cabinets. The open shelves give you a chance to show off pretty jars, dishes, or cookbooks, while the barrels provide concealed storage for pantry staples. Item frames with food items—like a loaf of bread or a stack of cookies—add a lived-in, cozy feel that makes the kitchen feel welcoming.
It's a weekend-friendly project that instantly opens up your kitchen and adds character.
Shelf Styling Tip
Keep your open shelves from looking messy by grouping similar items. Use a mix of tall jars, short bowls, and a few cookbooks to create visual rhythm. Leave some breathing room between groups—about a hand's width apart—so each piece stands out.
Best Materials
Stick with warm woods like oak or spruce for the shelves and trapdoors to keep the look cohesive. Barrels should be untreated or lightly stained to match. Avoid glossy finishes—they can feel too polished for this rustic, relaxed style.
Small-space Fix
If your kitchen is extra tight, mount the shelves only on one wall and keep the opposite side clear. This prevents the room from feeling boxed in. Use barrels that are short enough to fit under the lowest shelf without blocking your counter workspace.
2. L-Shaped Counter with Hidden Furnace
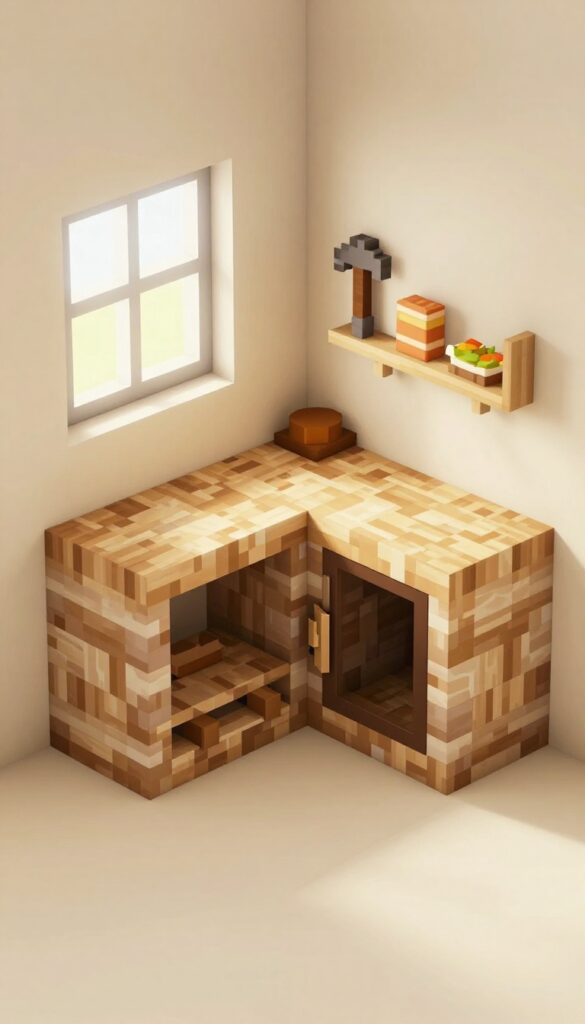
Corners often go to waste in tiny kitchens, but with a little planning, they can become the most functional spot in the room. An L-shaped counter made from stone bricks and spruce planks gives you extra prep space without eating up the center of the room. The real trick is tucking a furnace under one end and hiding it behind a trapdoor—suddenly you have a clean, streamlined look that still lets you cook up a storm.
This setup works especially well in a galley or single-wall kitchen where every inch counts. The L-shape naturally defines a cooking zone while leaving the rest of the area open for movement. Use stone bricks for the countertop to add durability and a rustic touch, then pair them with spruce planks for the cabinets and trim.
The contrast between the cool gray stone and warm wood keeps the space from feeling too heavy. For the hidden furnace, install a spruce trapdoor that matches your cabinetry. When you need to use the furnace, just flip it open; when you are done, close it and the kitchen looks tidy again.
Add a couple of item frames on the wall above with your favorite tools or ingredients to make the area feel lived-in.
Best Materials
- Stick with stone bricks for the countertop—they resist heat and give a solid, grounded feel. Spruce planks work well for the cabinets and the trapdoor because their color is warm but not too dark. If you want a lighter look, swap spruce for birch.
- Avoid using too many different block types; the goal is a cohesive, uncluttered appearance.
Layout Tip
Place the L-shaped counter in a corner that is close to your main crafting area or chest storage. That way, you can grab ingredients, cook, and store finished meals without crossing the room. Leave at least one block of walking space between the counter and any opposite wall or furniture to keep the kitchen feeling open.
Finishing Touch
Add a lantern hanging from the ceiling above the counter to create a cozy work light. You can also place a flower pot with a rose bush on the counter for a pop of color. A small rug in front of the counter in a complementary shade like deep red or brown helps define the zone and adds texture.
3. Window Sill Herb Garden
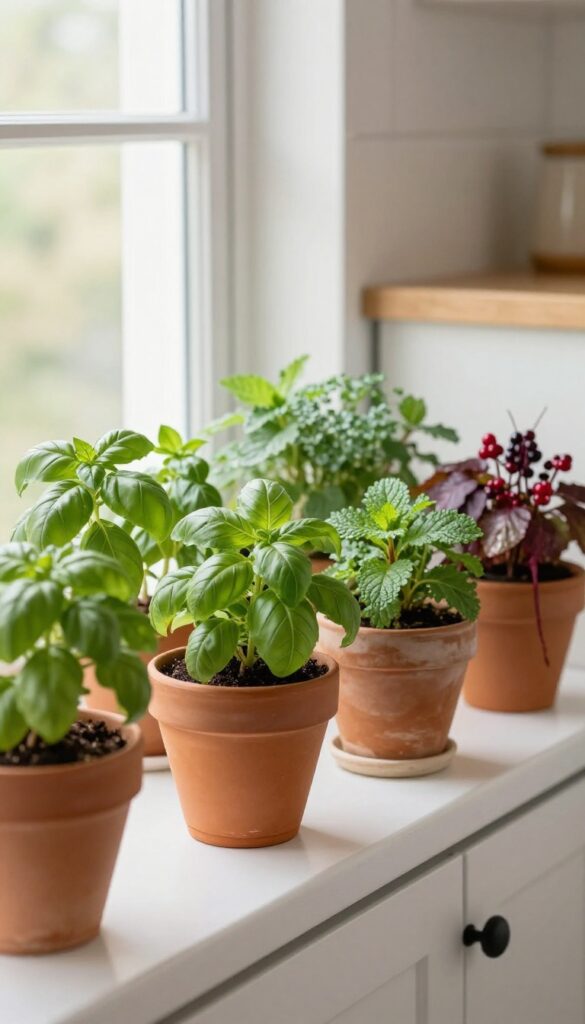
Tiny kitchens often miss out on greenery because counter space is too precious. A window sill herb garden solves that by turning an overlooked ledge into a living decor piece. Flower pots lined up on a slab sill under a window bring fresh color and a practical harvest right where you cook.
It feels like a mini indoor farm without sacrificing a single inch of prep space.
Place a row of small terracotta or ceramic pots on a wide slab sill beneath a kitchen window. Plant beetroot, carrots, sweet berries, or herbs like basil and mint for a pop of green. Use glass panes above to let natural light flood in—this adds depth and makes the sill feel like a tiny greenhouse.
The setup is weekend-refresh friendly: just swap out tired plants for new ones whenever you want a fresh look. No permanent installation, no bulky shelves, just pure charm that grows over time.
Best Plants
- Stick with compact, fast-growing options that thrive in indirect light. Basil, chives, and mint are forgiving and smell amazing. For a pop of color, add beetroot or carrot tops—they grow leafy greens even if you don't harvest the root.
- Sweet berries trail nicely over pot edges for a soft, cascading effect.
Pot & Sill Styling
- Use matching terracotta pots for a cohesive look, or mix white ceramic with natural wood tones for contrast. Keep pots small—4 to 5 inches wide—so they fit without crowding. A thin drip tray underneath protects the sill from water marks.
- If your sill is narrow, use a single long planter box instead of individual pots.
Lighting & Maintenance
- South- or east-facing windows give the best light. Rotate pots every week so all sides get sun. Water when the top inch of soil feels dry—overwatering is the biggest mistake.
- A weekly misting keeps leaves dust-free and glossy. Snip herbs regularly to encourage bushier growth and keep the arrangement looking tidy.
4. Compact Breakfast Nook
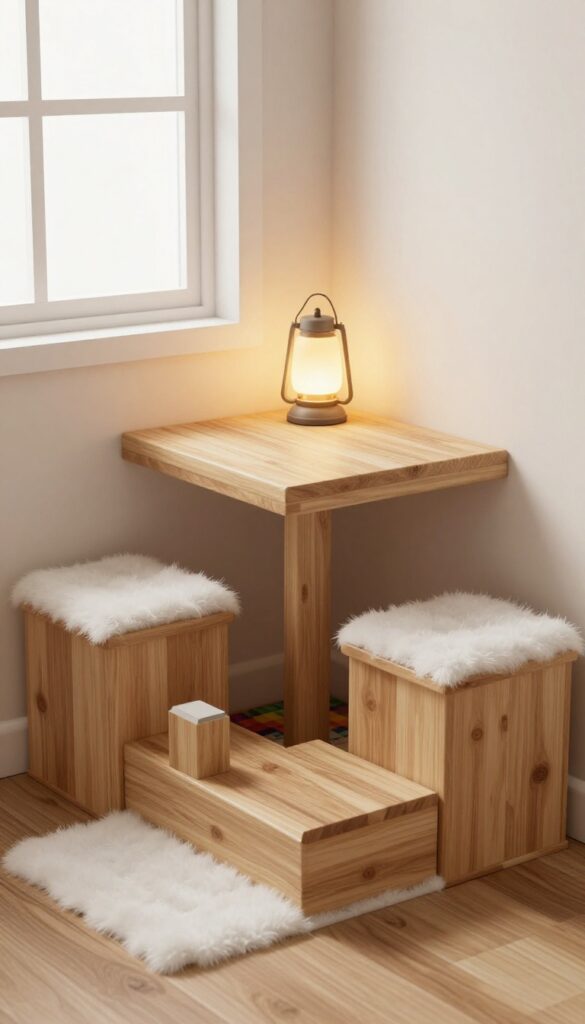
Tiny kitchens don't have to mean eating on the couch. A compact breakfast nook adds a cozy spot for morning coffee or a quick snack without taking up much floor space. By using stairs as seats and a pressure plate as a table, you get a functional dining area that feels intentional, not cramped.
The key is keeping it light and airy so the nook blends into the room rather than crowding it.
Create a tiny dining area with two stairs facing each other and a pressure plate table. Add a hanging lantern above for warmth. Perfect for a quick meal before mining.
Best Layout
Place the nook against a wall or in a corner to save space. Use two stair blocks facing each other as benches, with a pressure plate on top of a fence post as the table. Leave enough room to slide in and out easily.
Cozy Detail
Hang a lantern directly above the table to create a warm focal point. Choose a lantern with a soft glow—like a sea lantern or shroomlight—to make the nook feel inviting. Add a small rug underneath to define the area.
Storage Tip
Use the space under the stairs for storage. Place a chest or a few item frames with tools or ingredients nearby. This keeps essentials within reach while the nook stays clutter-free.
5. Butcher Block Island on Wheels

A kitchen island can feel like a luxury in a small space, but this mini version fits right in without crowding the floor. Using a piston and a block of stripped oak, you create the look of a movable butcher block island. Top it with a smoker for that rustic butcher station vibe, and you've got a functional prep spot that stays compact—just 2×1 blocks.
It's a weekend-friendly build that adds serious character without a major overhaul.
This idea works especially well in tight kitchens where every block counts. The piston gives the illusion of mobility, making the island feel intentional and adaptable. Pair it with light-colored cabinets and open shelving to keep the room airy.
The smoker doubles as a decorative focal point, so choose one with a bit of patina for extra charm. Keep the surrounding area clutter-free to let the island shine.
Best Materials
Stripped oak logs are your best bet for the island base—they offer a clean, warm wood tone that reads as butcher block. Use a piston underneath to elevate the look; it doesn't need to function, just suggest movement. For the top, a smoker block in dark iron or weathered copper adds contrast and a lived-in feel.
Layout Tip
Place the island against a wall or in a corner to save floor space, but leave a one-block gap on one side so it reads as movable. Pair it with a small rug or a floor pattern that defines the zone without adding bulk. Keep the path clear on the opposite side for easy traffic flow.
Finishing Touch
Hang a lantern or a small pendant light directly above the island to anchor the space. Add a cutting board or a few ceramic jars on the smoker for styling. A single stool tucked under one side completes the look without making it feel crowded.
6. Under-Stair Storage Drawers
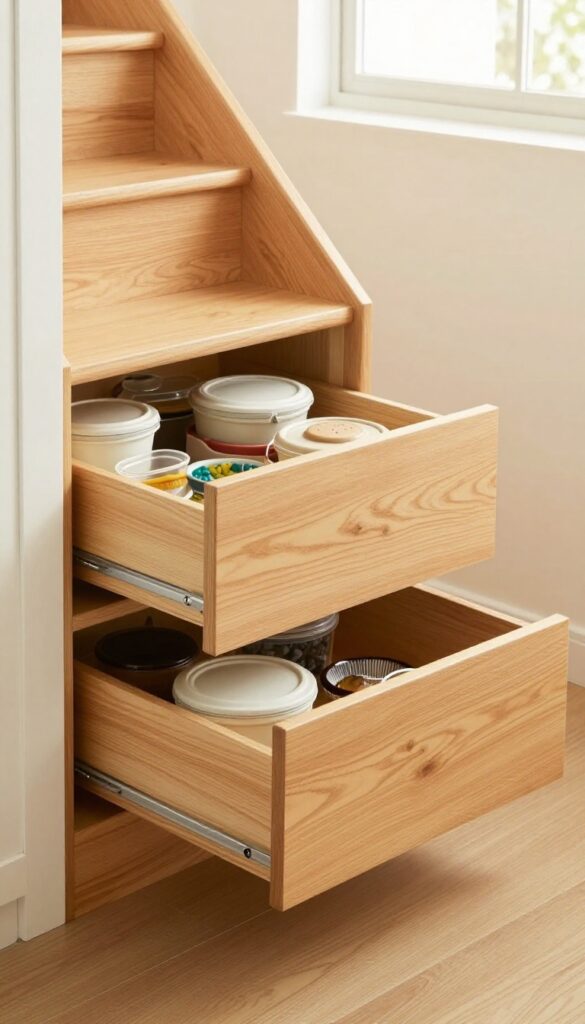
Stairs take up a surprising amount of floor space, and the area underneath often becomes a dusty catch-all for odds and ends. But when your kitchen is tucked beneath a staircase, that awkward nook can become one of the most functional spots in the room. With a few clever Minecraft tricks—pistons, trapdoors, and some matching wood—you can turn dead space into smooth, pull-out storage that keeps ingredients and tools neatly out of sight.
Pull-out drawers are a game-changer for small kitchens, especially when they disappear into the stairs themselves. Start by digging out a few blocks under the staircase and installing pistons that push trapdoors forward when activated. Paint the trapdoors to match the stair blocks above, so the drawers blend right in.
Store food items in one drawer, tools in another, and maybe a third for spare crafting materials. The seamless look makes the kitchen feel bigger, and the hidden storage keeps counters clutter-free.
Best Materials
- Stick with the same wood type as your stairs for a cohesive look. Oak or spruce trapdoors work well for a natural feel, while dark oak adds contrast. Use smooth stone or quartz for the drawer fronts if you want a modern twist.
- Redstone components should be tucked behind walls or under floor blocks so they don't distract from the decor.
Layout Tip
Plan the drawer sizes based on what you'll store. A single-wide drawer (one block wide) is perfect for tools like hoes and axes, while a double-wide (two blocks) fits larger food stacks. Leave at least one block of space between drawers to avoid cramping, and consider adding a small lip on the trapdoor so items don't slide off when you pull it open.
Finishing Touch
Add item frames on the wall above each drawer with a sample of what's inside—like a carrot for the food drawer or a pickaxe for tools. This makes grabbing ingredients quick and adds a bit of lived-in charm. A pressure plate on the floor in front of the drawers can also trigger a soft light underneath, making it easier to see inside.
7. Hanging Pot Rack with Chains

Ceilings in tiny kitchens often go unused, but they're prime real estate for storage and style. A hanging pot rack made from chains and trapdoors adds a rustic, chef-inspired look while freeing up cabinet space. The vertical movement draws the eye upward, making the room feel taller and more open.
Suspend a row of chains from the ceiling and attach iron trapdoors or cauldrons as pots. Add item frames with tools for a rustic chef's kitchen. This draws the eye up, making the room feel taller.
Best Materials
Use iron chains (or dark-colored wool string for a softer look) and iron trapdoors for a realistic pot feel. Cauldrons work great as deep pots. Item frames with stone axes or iron shovels add that chef's kitchen vibe.
Layout Tip
Hang the rack over a counter or island so the pots are within easy reach. Keep the chain length consistent for a clean line, or vary it slightly for a more organic feel. Make sure there's enough headroom—at least two blocks above your head.
Finishing Touch
Add a few item frames with food items like bread or carrots on the wall nearby to complete the rustic kitchen look. A campfire under a chimney block can add a warm glow without taking up floor space.
8. Corner Sink with Waterlogged Slabs
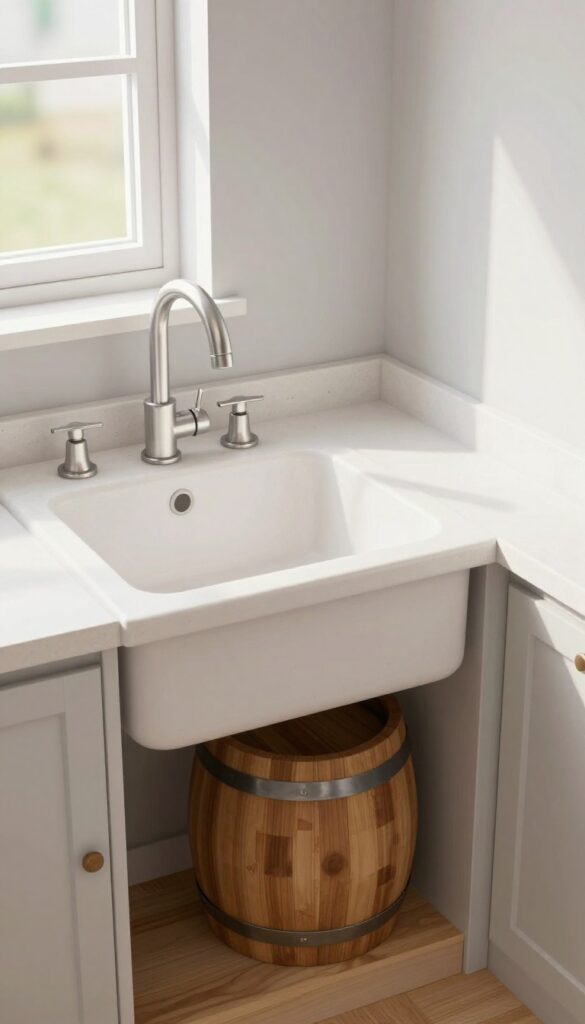
Tiny kitchens need every inch to work double duty, and corners often end up wasted. That empty spot where two countertops meet is prime real estate for a compact sink setup that feels intentional, not cramped. By using a waterlogged slab as the basin, you get a sleek, seamless look that blends right into the counter—no bulky sink rim eating into your workspace.
It's a clever trick that makes the corner feel like a purposeful design choice rather than an afterthought.
This corner sink setup is all about making the most of awkward angles while keeping the look clean and modern. The waterlogged slab creates a subtle, reflective surface that mimics a real sink without taking up precious counter depth. Pair it with a lever faucet and a button for soap, and you've got a functional washing station that feels complete.
A barrel tucked underneath adds hidden storage for sponges, scrub brushes, or extra dishware, keeping the counter clutter-free. It's a simple, space-efficient solution that works especially well in galley kitchens or L-shaped layouts where every square foot counts.
Best Colors
- Stick with light, airy tones to keep the corner from feeling heavy. White or pale gray slabs reflect light and make the sink area appear larger. Pair with a brushed nickel or chrome lever for a crisp, clean contrast.
- If you want a bit of warmth, opt for a warm wood barrel underneath—it adds texture without overwhelming the space.
Layout Tip
Place the sink in the corner where you have the most counter space on either side. This leaves room for a drying rack on one side and prep space on the other. Keep the lever faucet centered over the slab for easy access, and position the soap button within arm's reach but not directly in the splash zone.
Finishing Touch
Add a small cutting board that fits over the sink to create extra prep space when needed. A slim dish rack that hangs over the edge of the slab keeps drying dishes tidy without taking up counter room. For a cozy detail, tuck a small plant or a jar of dish soap on the barrel lid.
9. Wall-Mounted Spice Rack

If your kitchen walls are looking a little bare, a wall-mounted spice rack is a smart way to add both storage and personality. By using item frames to display bottles—think glass potion bottles or honey jars—you can keep your counters clutter-free while turning a plain wall into a colorful focal point. It’s a weekend-friendly project that instantly makes your kitchen feel more organized and lived-in.
This idea is perfect for tiny kitchens where every inch of counter space matters. Instead of digging through a drawer for spices, you’ll have them right on the wall, easy to grab and visually appealing. The mix of glass bottles and wooden frames adds texture, and you can customize the labels with signs for a cohesive look.
It’s practical, but it also brings a cozy, handmade feel to the room.
Best Bottles To Use
Stick with glass bottles that have a uniform shape and size—think small potion bottles or honey jars with cork stoppers. Clear glass lets the contents show, adding pops of color from spices or liquids. Avoid plastic, as it can look cheap and doesn’t catch the light the same way.
Placement And Layout
Mount the item frames in a neat grid or a staggered pattern, depending on your wall space. Keep them at eye level for easy access, and leave a few inches between each frame so the bottles don’t crowd each other. A spot near your stove or prep area is ideal for grabbing spices while cooking.
Labeling For A Polished Look
Use small signs above or below each frame to label the contents. You can write directly on the wall with chalk markers on a painted section, or attach tiny wooden tags. Consistent labeling makes the rack feel intentional and helps you find what you need fast.
10. Mini Fridge with Ice Blocks
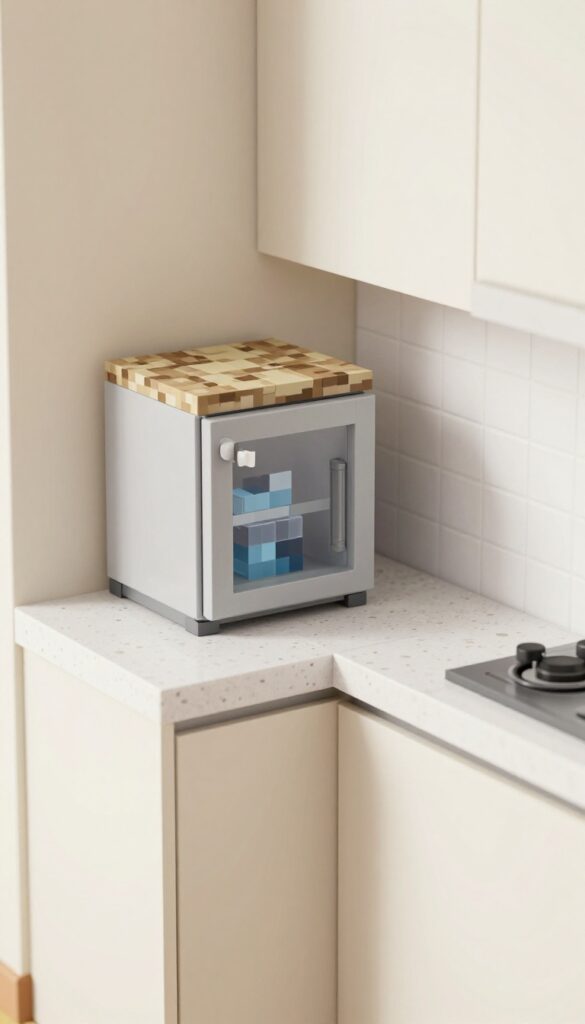
In a tiny Minecraft kitchen, every block counts, but that doesn't mean you have to sacrifice style. This mini fridge idea proves that even a two-block-tall appliance can feel modern and functional. Using a dispenser as the door and a block of ice for that cool, frosty vibe, you get a compact fridge that fits perfectly into a small build.
It's a simple swap that instantly makes your kitchen feel more lived-in and realistic.
The mini fridge is a weekend-friendly project that takes just minutes to build. Place a dispenser facing outward for the fridge body, then top it with a block of ice. The ice block adds a subtle blue tint and a chilly aesthetic without needing actual cooling mechanics.
Inside the dispenser, stash your food items—bread, steak, or even suspicious stew—so they're hidden but accessible. For a polished finish, add a slab on top (stone or quartz works great) and a button on the side of the dispenser. The button acts like a modern handle or control panel, giving it that sleek, contemporary look.
This idea works best in a corner or against a wall, leaving the rest of your counters open for prep space. Pair it with light-colored cabinets and a white or gray backsplash to keep the fridge as a subtle focal point. The overall effect is clean, practical, and surprisingly chic for such a small footprint.
Best Materials
- Stick with a dispenser for the door—it's the only block that can hold items and open with a right-click. For the ice block, regular ice works fine, but packed ice gives a clearer, more polished look. Top it with a stone slab or a quartz slab for a smooth, finished surface.
- The button should be stone or wood to match your kitchen's palette.
Layout Tip
Place the mini fridge against a wall or in a corner to save floor space. Leave at least one block of counter space next to it for food prep. If you're building a galley kitchen, tuck it between the stove and a cabinet for a seamless workflow.
Finishing Touch
Add a small flower pot or a lantern on top of the slab to soften the industrial feel. A light gray or white carpet in front of the fridge can also make it feel more grounded and cozy.
FAQ
What blocks work best for a small Minecraft kitchen?
Stripped logs, planks, stone bricks, and concrete are great choices. They offer a clean look without overwhelming the space. Use slabs and trapdoors to save room and add detail.
How can I make my kitchen look bigger?
Use light-colored blocks like birch or white concrete. Add windows or glass panes to let in natural light. Keep the layout open and avoid cluttering with too many furniture pieces.
What's a good lighting option for a tiny kitchen?
Hanging lanterns or glowstone hidden behind slabs work well. They provide soft, even light without taking up floor space. Sea lanterns also add a cool, modern vibe.
Can I combine these ideas in one build?
Absolutely! Mix and match ideas that fit your space. For example, pair the open shelf pantry with the corner sink for a functional layout.
Just keep the color palette consistent.
How do I add storage without making it look messy?
Use barrels and shulker boxes disguised as furniture. Item frames with organized labels keep things tidy. Stick to a uniform block palette to maintain a cohesive look.
Conclusion
These 10 small kitchen ideas prove that you don't need a massive space to create something beautiful and functional in Minecraft. Each build is designed to be weekend-friendly, so you can try one out without overhauling your entire base.
Pick a couple that resonate with your style and start building—you might be surprised how much character a tiny kitchen can hold.