10 Inside Kitchen Cabinets Ideas for Better Hidden Storage
Kitchen cabinets are the backbone of any cooking space, but they often become cluttered black holes where things go to disappear. You open the door, and a cascade of lids, measuring cups, and mismatched containers tumbles out.
It doesn't have to be that way. With a few smart tweaks, the inside of your cabinets can become a model of efficiency and calm.
These 10 ideas focus on making the most of every inch, especially in smaller kitchens where storage is at a premium. Each one is practical, visually clean, and designed to help you find what you need without a scavenger hunt.
1. Pull-Out Spice Racks That Slide Right Into the Gap
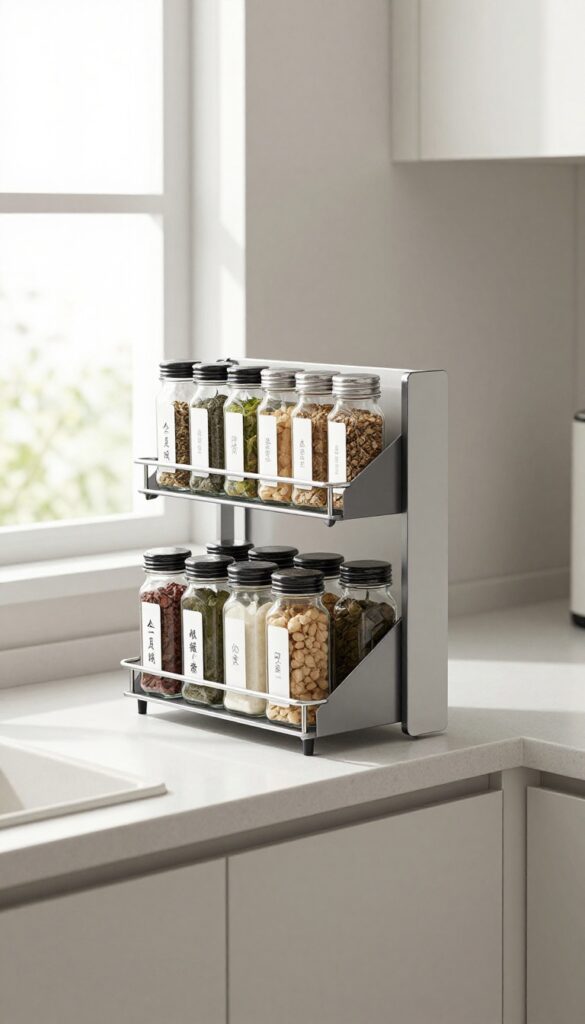
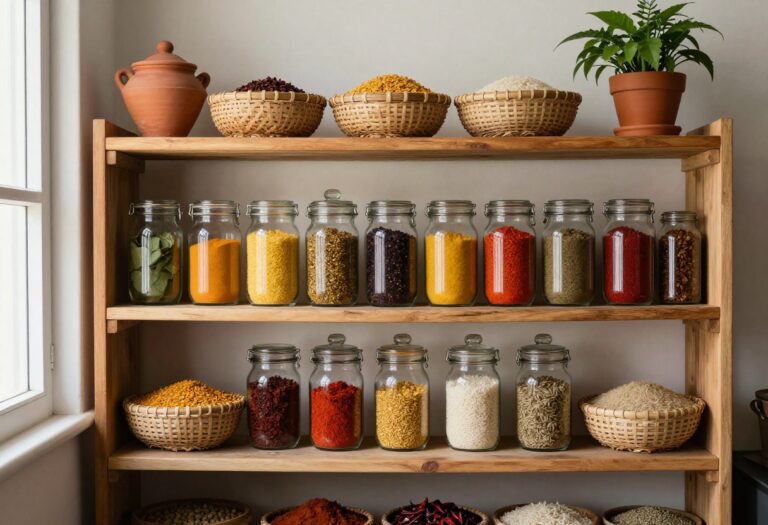
That thin strip of unused space between your counter and upper cabinets? It’s prime real estate for spices. Pull-out spice racks slide out smoothly, keeping every jar in plain sight without taking up precious counter or shelf room.
They turn a forgotten gap into the most efficient spot in your kitchen.
Instead of stacking spice jars in a dark cabinet corner where you forget what you own, install a narrow pull-out rack in that awkward gap. Most racks are less than three inches wide, so they fit even the slimmest spaces. They mount to the cabinet floor or the inside of a door, and they glide out on full-extension slides.
You can see every label at a glance, and grabbing the cumin mid-recipe takes one second. The best part? You reclaim cabinet space for pots, pans, and pantry staples.
For small kitchens, this trick is a game changer.
Best Materials
Look for racks made from coated steel or aluminum—they resist moisture and won't rust near the stove. Avoid solid wood in tight gaps near heat sources; it can warp over time. A matte black or brushed nickel finish blends into most cabinet hardware and keeps the look clean.
Small-space Fix
- Measure the gap width carefully before buying. Standard sizes are 2.5, 3, and 4 inches. If the gap is wider than 4 inches, consider a double-row rack.
- For a rental kitchen, use adhesive-mounted racks that peel off without damaging the cabinet.
Styling Tip
- Keep spice jars uniform for a tidy visual. Transfer spices into matching glass jars with white labels, or stick with the same brand of jars. Group them by frequency of use—most-used spices at eye level, less common ones below.
- A small label maker gives it that organized, Pinterest-ready finish.
2. Under-Shelf Baskets for Extra Vertical Storage
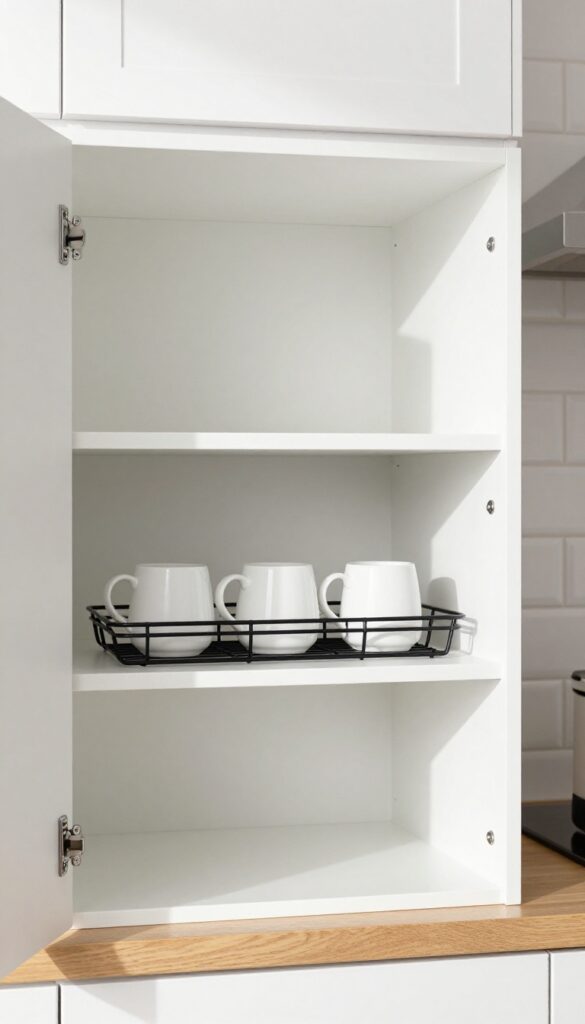
Those few inches of empty space beneath your upper cabinets? That's prime real estate going to waste. Clip-on wire baskets slide right onto existing shelves, turning dead air into a home for mugs, small bowls, or cleaning sprays.
They install in seconds with no tools, making them an instant win for renters or anyone who wants a quick storage fix.
Under-shelf baskets are a small-space superhero. They add vertical storage without taking up any counter or shelf surface, so you can keep everyday items within easy reach while freeing up room below. In a narrow kitchen, they make use of that awkward gap between the shelf and the items stored on it.
For a clean look, stick with wire or coated metal in black or white to match your cabinet hardware. Use them for coffee mugs near the coffee maker, spice jars above the prep zone, or cleaning cloths under the sink. The key is to keep them neat—baskets can get messy fast if you just toss things in.
Group similar items together and consider adding small bin dividers for extra organization.
Best Materials
Stick with sturdy steel wire or coated metal. A matte black or white finish blends into most kitchens without adding visual noise. Avoid plastic—it can look cheap and won't hold heavier items like cast-iron mugs.
Small-space Fix
In a galley kitchen or tiny apartment, use under-shelf baskets on the inside of cabinet doors too. They're perfect for storing lids, cutting boards, or spice packets that usually get lost in the back of a drawer.
Styling Tip
Keep the baskets visually light by storing items in a single row. For example, line up white mugs with a pop of color from a single ceramic spoon rest. This creates a tidy, intentional look rather than a cluttered jumble.
3. Door-Mounted Cutting Board Holders
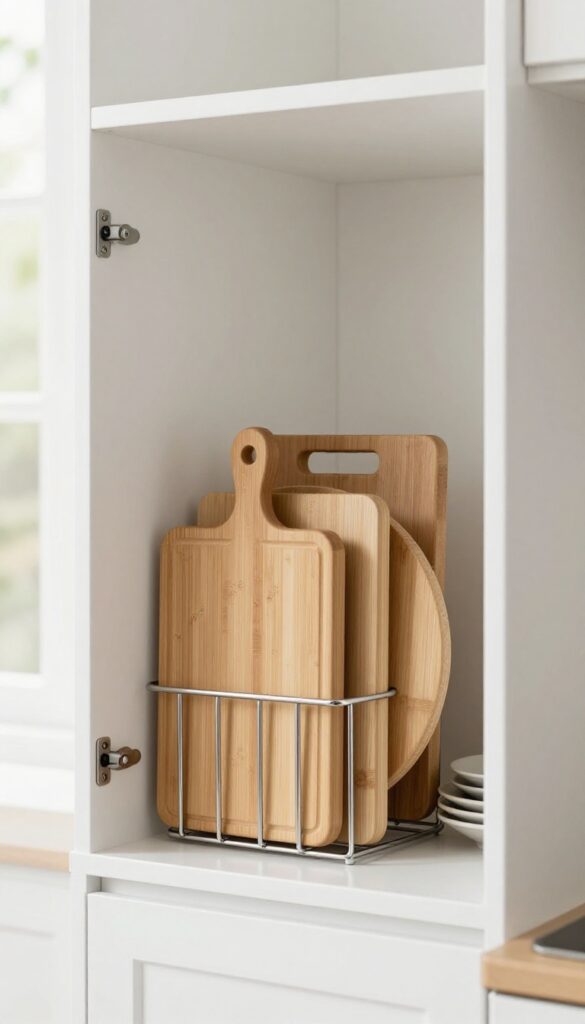
Cutting boards are one of those kitchen items that never seem to have a proper home. They slide around on shelves, get stacked haphazardly, and often end up taking prime real estate. Mounting a slim rack or tension rod inside a cabinet door changes that completely.
It turns an overlooked vertical surface into a dedicated storage spot that keeps boards upright, dry, and easy to grab. This small-space-friendly solution works especially well in galley kitchens or apartments where every inch counts.
The idea is simple: attach a narrow rack or tension rod to the inside of a lower or upper cabinet door, then slide your cutting boards into the slots. The boards stand vertically, so they don't take up shelf space, and air circulates around them to prevent moisture buildup. Choose a rack with adjustable dividers to accommodate different board thicknesses, or use a tension rod for a more flexible setup.
This trick works for wooden, plastic, or bamboo boards, and can even hold baking sheets or cooling racks if you have extra space.
Best Materials
- For the rack itself, look for stainless steel or coated wire options that resist rust and are easy to wipe clean. A tension rod with rubber ends is a budget-friendly alternative that grips the door securely without hardware. If you prefer a wooden rack, choose one with a clear sealant to protect against kitchen humidity.
- The cutting boards themselves should be lightweight enough not to strain the door hinges—thin bamboo or plastic boards are ideal.
Small-space Fix
- In tight kitchens, this hack frees up an entire shelf for pots, pans, or dry goods. Use the inside of a cabinet door near your prep zone so boards are within arm's reach. If your cabinet door is shallow, opt for a slim rack that holds boards sideways rather than flat.
- You can also install a second rack on the opposite door for even more storage.
Finishing Touch
Paint the inside of the cabinet a contrasting color—like a soft sage or warm terracotta—so the boards pop when the door opens. This adds a surprise visual element that makes the kitchen feel custom. Keep the boards themselves clean and organized by matching their colors or materials for a cohesive look.
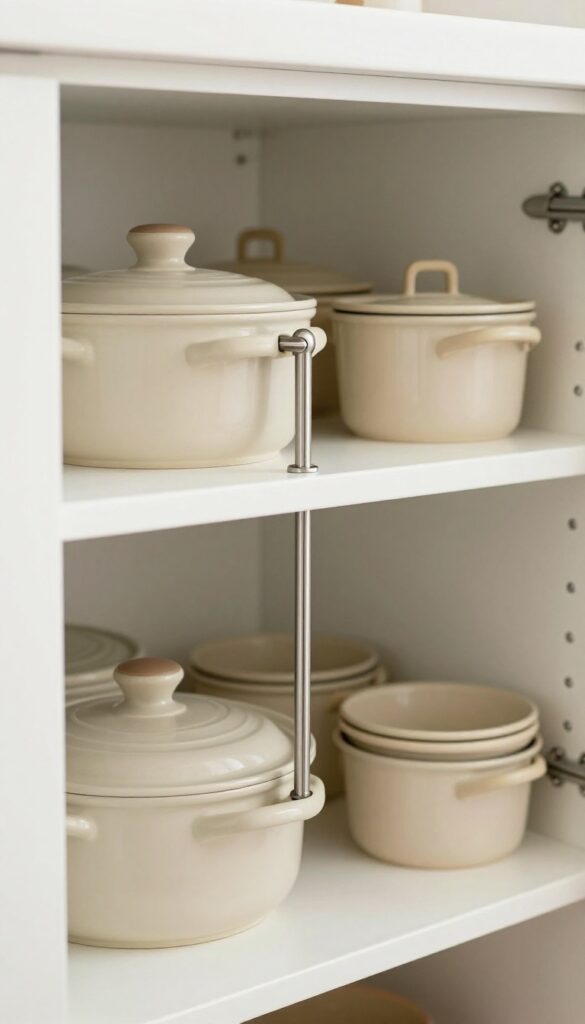
4. Stackable Shelf Risers for Double the Space
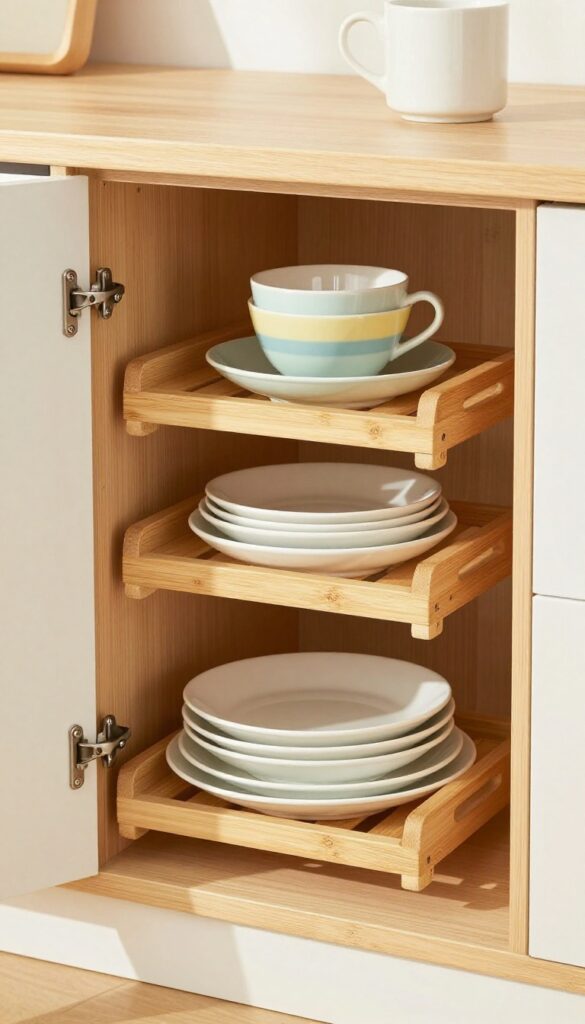
Ever open a cabinet and find yourself playing Jenga with your plates just to grab one from the bottom? Stackable shelf risers are the quiet heroes of kitchen organization. They instantly turn one shelf into two usable levels, so you can see everything at a glance without digging through stacks.
These tiered risers work wonders in upper cabinets where deep shelves often hide smaller items in the back. By elevating bowls, mugs, or canned goods, you create a mini stadium effect that makes every item front and center. No more forgotten cans of beans lurking in the shadows.
The best part? They come in materials like bamboo, clear acrylic, or coated wire, so you can match your cabinet's vibe without sacrificing function. For small kitchens, this is a game-changer—it's like gaining an extra shelf without any installation.
Best Materials
Bamboo risers add warmth and a natural touch, perfect for earthy or farmhouse kitchens. Clear acrylic keeps things sleek and modern, letting your dishes shine without visual clutter. Coated wire is lightweight and easy to clean, ideal for budget-friendly or industrial spaces.
Small-space Fix
In a tiny kitchen, every inch counts. Use risers in upper cabinets for plates and bowls, then stash mugs on top of the risers for an extra row. This trick works especially well for narrow shelves where stacking vertically is the only way to maximize space.
Styling Tip
Group similar items on each level—like all white plates on the bottom and colorful bowls on top—to create a clean, organized look. Stick to two colors or a monochrome palette for a cohesive, Pinterest-worthy cabinet interior.
5. Drawer-Style Pull-Outs for Deep Base Cabinets
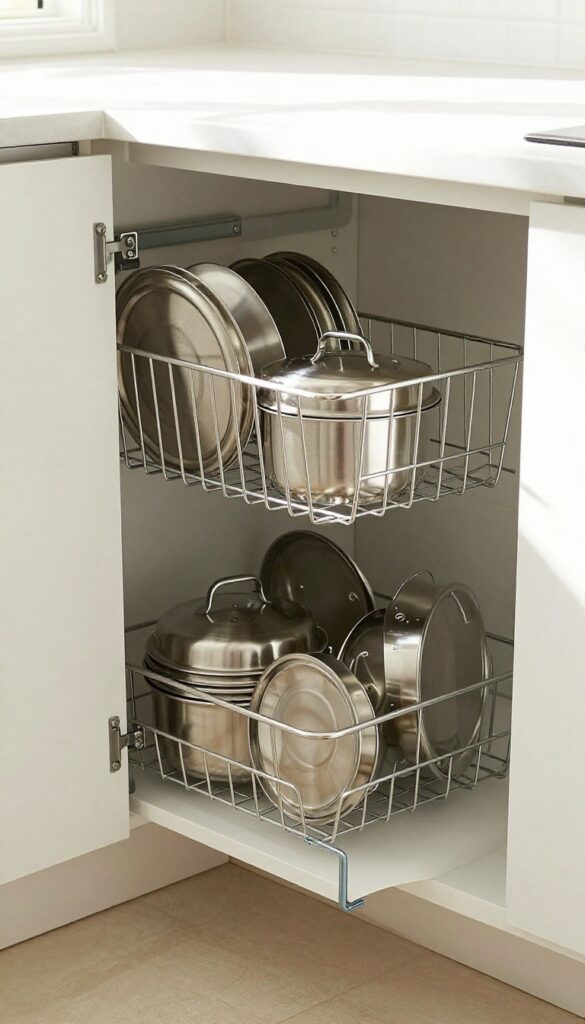
Deep base cabinets often become black holes where pots, pans, and small appliances disappear. You end up crouching, digging, and pulling everything out just to find the right lid. A simple retrofit with sliding drawers or baskets changes all that—everything glides out smoothly, and you can see every item at a glance.
This upgrade is especially brilliant in small kitchens, where every inch of storage needs to work hard. Plus, it makes cooking less of a chore: no more wrestling with heavy cookware in awkward corners.
The key is choosing the right system for your cabinet size and what you store. Full-extension drawers are ideal for pots and pans because they pull out completely, giving you full access. For deeper cabinets, consider tiered pull-out shelves or wire baskets that let you stack items vertically.
Installation is straightforward—many kits come with mounting rails and screws, and you can often do it yourself in an afternoon. If you rent, look for no-drill options that clamp onto existing shelves. The visual payoff is huge: a tidy, organized cabinet that feels like a custom built-in.
Best Materials
Sturdy metal slides with a soft-close mechanism are worth the investment—they prevent slamming and last for years. For the baskets or drawers, choose coated wire (easy to clean and see through) or solid wood fronts if you want a seamless look that matches your cabinetry. Avoid flimsy plastic slides; they can sag under heavy cookware.
Small-space Fix
- In a tiny kitchen, prioritize pull-outs for the base cabinet under the cooktop. Store your most-used pots, pans, and lids there. Use vertical dividers inside the drawer to keep lids upright and separate.
- This eliminates stacking and makes grabbing the right pan a one-handed operation.
Finishing Touch
Line the bottom of each drawer with a non-slip shelf liner in a neutral tone like warm gray or beige. It cushions the cookware and stops items from sliding when you open and close the drawer. Add small adhesive hooks on the inside of the cabinet door for pot lids or measuring spoons.
6. Lazy Susans for Corner Cabinet Chaos
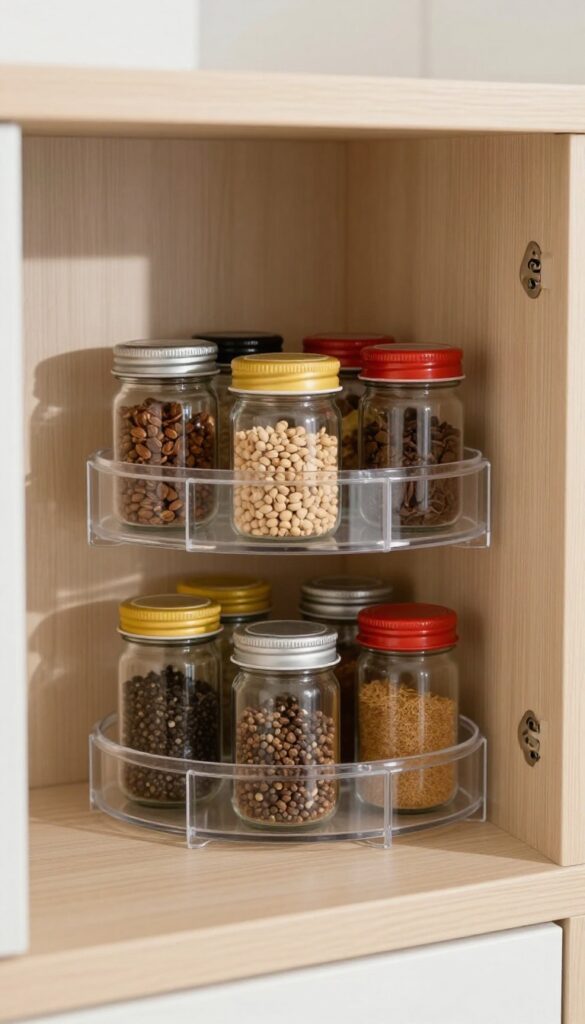
Corner cabinets are notorious for swallowing up spices, oils, and condiments into a black hole of forgotten bottles. A lazy Susan spins that wasted real estate into a functional pantry you can actually see and reach. The best part?
You don't need a massive renovation—just a turntable that fits your cabinet dimensions. Two-tier models double the storage without taking up extra floor space, making them a small-space hero.
For a clean, organized look, stick with clear glass or acrylic turntables so nothing visually clutters the cabinet. Wooden lazy Susans add warmth but can hide items behind solid sides. If you're after a sleek, modern feel, opt for a metal or chrome finish that matches your hardware.
Place taller bottles on the bottom tier and smaller jars on top to maximize every inch. This simple swap turns a frustrating corner into one of the most efficient spots in your kitchen.
Best Materials
Clear acrylic is the top choice for visibility—you can spot the cumin bottle without pulling everything out. Bamboo adds a natural, warm touch but works best for dry goods like pasta or grains. For a modern edge, brushed metal turntables look sharp and are easy to wipe down.
Layout Tip
Group items by frequency of use: everyday oils and vinegars on the top tier, less-used sauces and canned goods below. Keep similar bottle heights together so the turntable spins freely without toppling. If your cabinet is deep, consider a half-moon lazy Susan to fit around plumbing or odd corners.
Small-space Fix
In a galley kitchen, a lazy Susan in the corner cabinet frees up precious counter space by moving condiments and spices out of sight. Pair it with a tiered spice rack on the cabinet door for even more vertical storage. This combo keeps everything accessible without overcrowding your limited square footage.
7. Tension Rods for Lid Organization
Pot lids are the kitchen’s sneaky clutter culprit. They slide, stack awkwardly, and always seem to be in the way when you need the pot they belong to. A simple tension rod—the same one you might use for a shower curtain—can turn that chaos into calm.
Installed vertically inside a cabinet, it creates a dedicated lid holder that keeps everything upright, paired, and easy to grab. This trick is especially brilliant for small kitchens where every inch of cabinet space counts.
The beauty of this idea is its simplicity and cost. For under ten dollars, you can transform a messy cabinet into a neatly organized station. Choose a tension rod that fits snugly between your cabinet shelf and the cabinet wall.
Slide the rod into place, then tuck your pot lids between the rod and the shelf wall. The rod holds them upright, preventing them from toppling over when you open the door. Pair each lid with its pot stored nearby for a seamless cooking experience.
This system works best for standard-sized lids, but you can adjust the rod height or use multiple rods for different sizes.
Best Materials
- Look for a tension rod with rubber ends to grip the cabinet surfaces without scratching. Stainless steel or chrome finishes resist rust and match most cabinet hardware. Avoid plastic rods, which can bend under the weight of heavier lids.
- A rod with a spring mechanism inside provides a secure hold—just twist to adjust the tension.
Small-space Fix
- In a tiny kitchen, every cabinet inch is precious. This vertical storage solution uses otherwise wasted space between the shelf and the cabinet wall. It frees up shelf area for pots, pans, or other essentials.
- For deep cabinets, place the rod near the front so lids are easy to reach. If you have multiple cabinets, dedicate one to lid storage and keep all lids there—it simplifies cooking and cleanup.
Styling Detail
- Keep the look clean by storing lids of similar sizes together. If your cabinet is visible through glass doors, consider using matching lid sets or arranging them by color (e.g., stainless steel lids on one rod, glass lids on another). The rod itself is barely noticeable, so the focus stays on the tidy, functional display.
- Add a small label on the shelf edge to note which pot sizes correspond to which lids for extra organization.
8. Magnetic Strips for Knife and Tool Storage
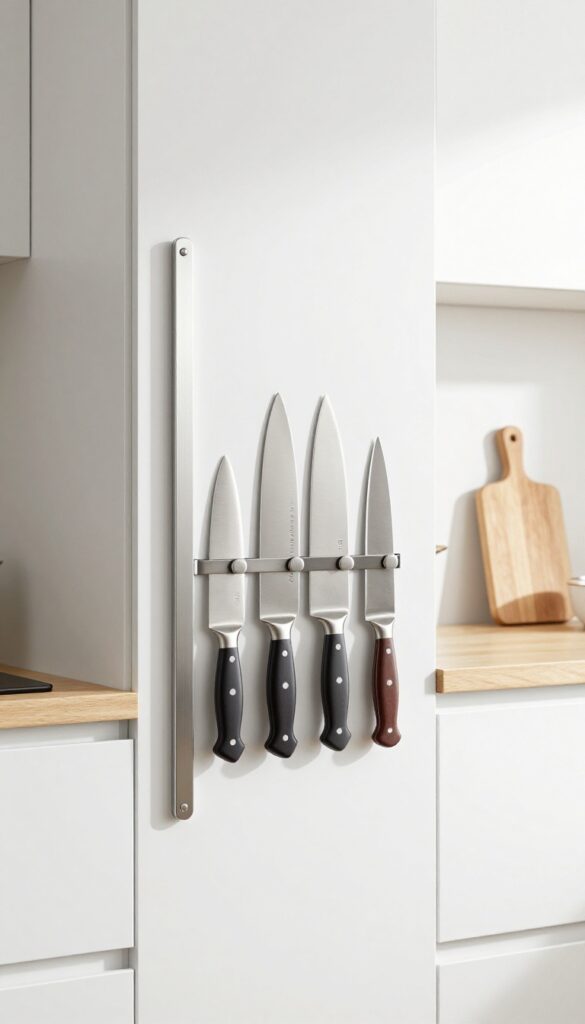
A magnetic strip mounted inside a cabinet door or along the back wall is one of those small upgrades that makes a big difference. It keeps knives, scissors, and metal utensils within easy reach while freeing up valuable drawer space. The look is clean and minimal, with tools floating neatly in plain sight but hidden when the door closes.
This trick works especially well in small kitchens where every inch counts. By using vertical space inside cabinets, you avoid cluttering countertops or cramming drawers. The magnetic hold is strong enough for heavy chef's knives, yet you can still grab what you need with one hand.
Plus, it adds a subtle industrial edge that pairs nicely with modern or farmhouse styles.
Best Placement
The inside of an upper cabinet door is ideal—just make sure the strip is mounted high enough so knives don't hit shelves when the door closes. Alternatively, attach a strip along the back wall of a lower cabinet near your prep zone. For a sleek look, choose a stainless steel strip that blends with your hardware.
Styling Tip
Keep the arrangement intentional: group similar items together, like all chef's knives on one strip and smaller tools on another. Leave a little breathing room between each tool so the display feels curated rather than chaotic. A dark matte or brass-finished strip can add a warm accent against white cabinets.
Small-space Fix
In a tiny kitchen, mount a magnetic strip on the side of a cabinet or even on the exposed end of a peninsula. This keeps tools accessible without taking up any counter or drawer space. Just ensure the strip is securely anchored into studs or cabinet framing for safety.
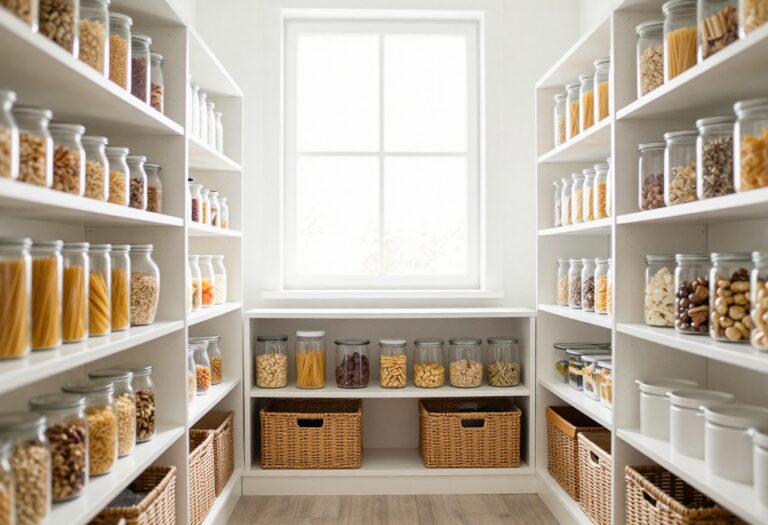
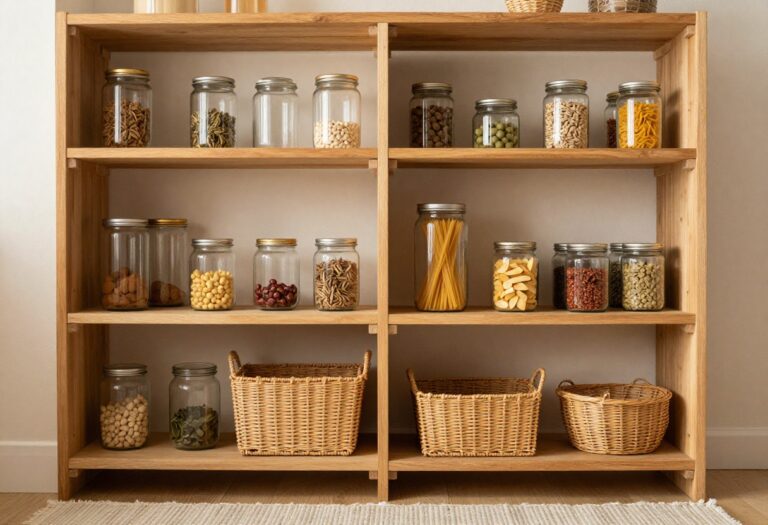
9. Clear Bins and Baskets for Categorized Grouping
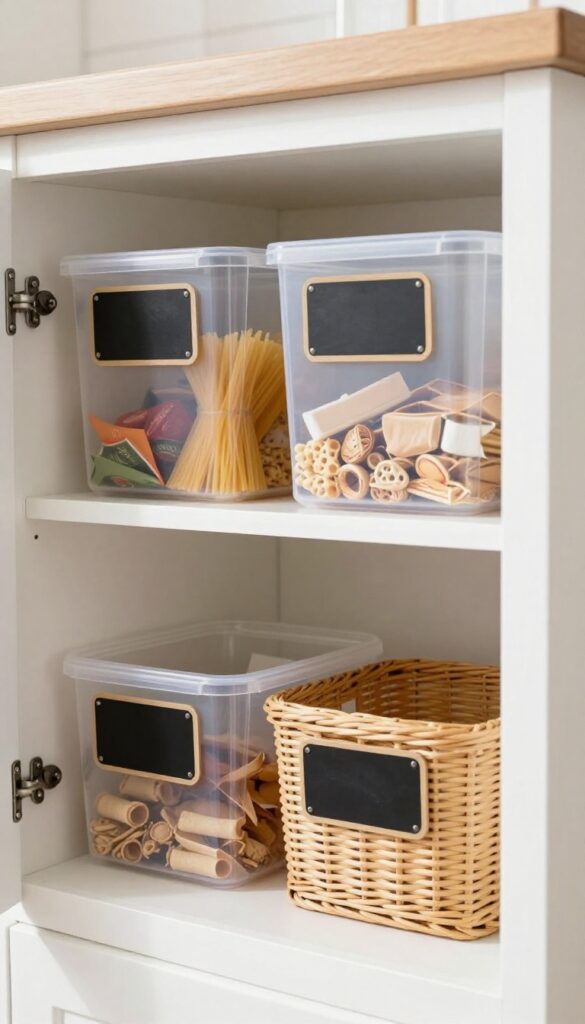
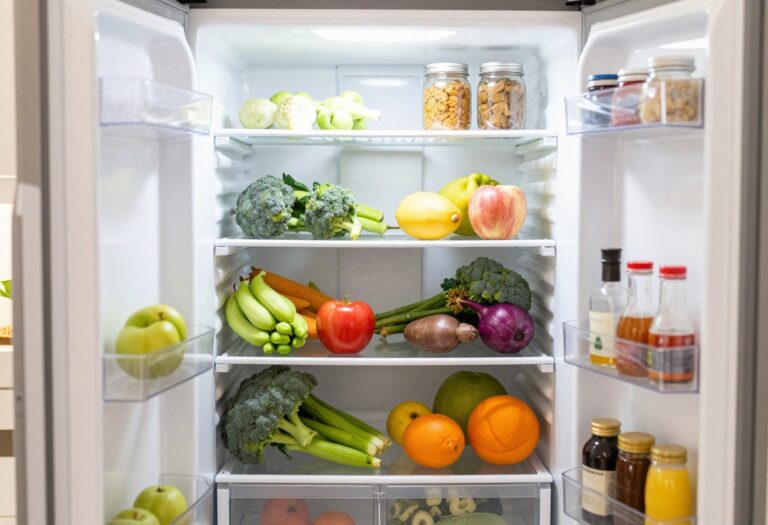
Open a cabinet and find everything you need at a glance—no more digging through bags of rice or knocking over spice jars. Clear bins and baskets bring that kind of calm to your kitchen storage. They let you group similar items together, like snacks, baking supplies, or lunch containers, while keeping them visible and easy to grab.
The transparency is the real win: you can see what's inside without pulling anything out, which means fewer forgotten cans of beans or expired boxes of crackers. In a small kitchen, this simple swap makes cabinets feel twice as functional.
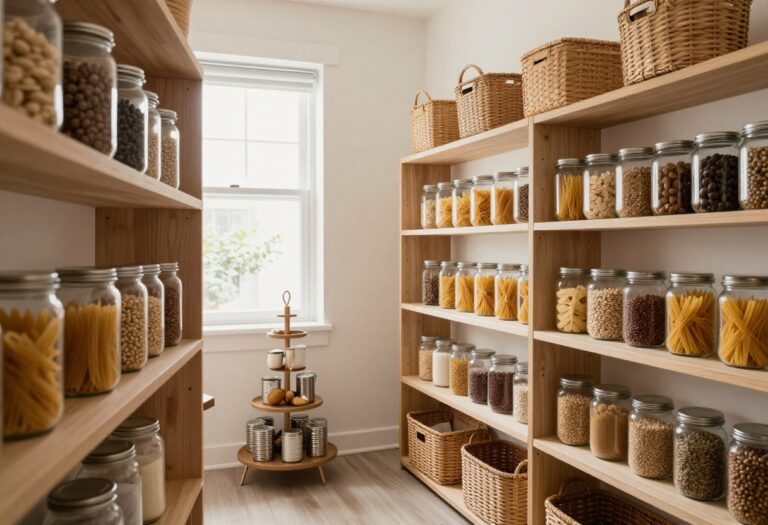
Start by measuring your cabinet shelves so the bins fit snugly without wasted space. Choose clear, stackable bins with flat lids or open-top baskets for everyday items. Group by category—baking goods in one bin, pasta and grains in another, kids' snacks in a third.
Add simple labels (chalkboard or vinyl) to each bin so everyone in the household knows where things go. The visual uniformity of matching bins instantly makes your cabinet look more organized, and the clear walls prevent the dreaded "out of sight, out of mind" problem. For deep cabinets, use pull-out bins or lazy Susans to access items at the back without a struggle.
This system works especially well in pantry cabinets, under-sink areas, and upper shelves where you store less frequently used gear.
Best Materials And Styles
- Look for sturdy, BPA-free plastic bins that are dishwasher safe for easy cleaning. Acrylic bins offer a sleek, modern look, while clear polypropylene is more budget-friendly. For a warmer feel, choose clear glass jars with airtight lids for dry goods like flour, sugar, and cereal.
- Woven baskets with clear liners can add texture while still showing contents. Avoid bins with colored or frosted plastic if visibility is your main goal—clear is key. Also consider bins with handles for easy pulling from high shelves.
Small-space Layout Tip
- In a compact kitchen, use vertical stacking bins to double your shelf space. Place taller bins on the bottom for bulky items like cereal boxes or large bags of flour, and shorter bins on top for packets and small jars. Use a tiered shelf riser inside the cabinet to create two levels of bins, so nothing gets buried.
- For corner cabinets, opt for pie-cut or D-shaped turntables with clear dividers to keep categories separate while maximizing the awkward space.
Finishing Touch: Labels And Color Coding
- Labels are what turn a pile of bins into a real system. Use a label maker or chalkboard stickers for a clean look. Color-code labels by category—green for produce-related, blue for baking, red for snacks—so you can spot a category from across the room.
- Keep a small bin for "miscellaneous" items that don't fit a group, but review it monthly to prevent clutter. The result is a cabinet that feels calm, efficient, and almost like a beautifully stocked mini-market.
10. Vertical Dividers for Baking Sheets and Trays
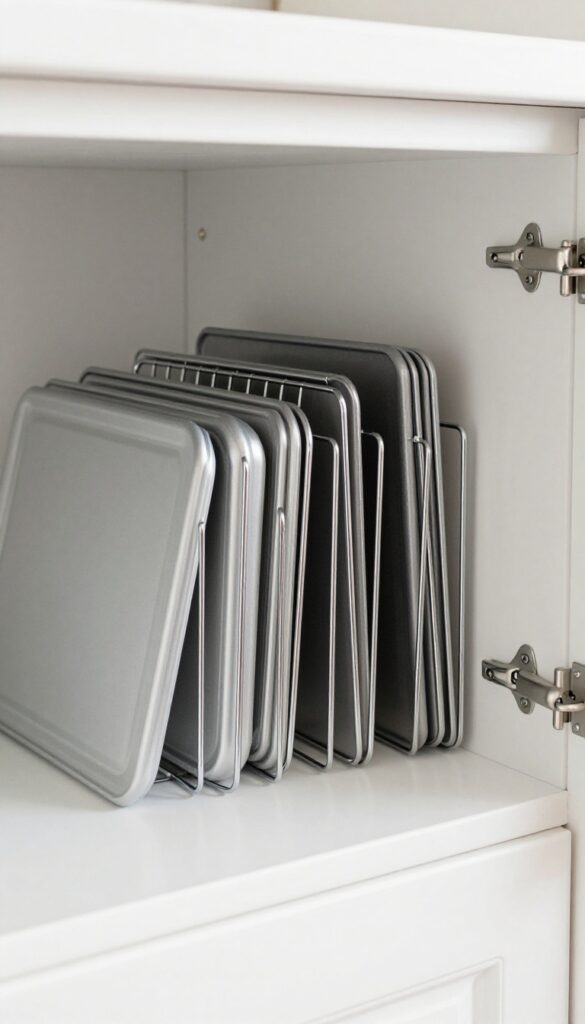
If your base cabinet looks like a chaotic pile of baking sheets every time you open the door, you're not alone. Those flat, slippery pans love to slide, lean, and crash into each other. The fix is surprisingly simple: vertical dividers.
They turn a messy horizontal stack into a neat, upright filing system that keeps everything accessible and scratch-free.
Vertical dividers are a small-space hero. Instead of wrestling with a leaning tower of pans, you slide each sheet into its own slot. They work for baking sheets, cutting boards, cooling racks, and even large platters.
The best part? You can install them in an existing cabinet without a full renovation. Just measure the height and depth of your cabinet, buy adjustable wire or wood dividers, and screw them into the base.
For a seamless look, paint the dividers to match your cabinet interior. If you rent, look for tension-mounted dividers that don't require drilling.
Best Materials
- For a clean, modern look, choose chrome or stainless steel wire dividers. They're durable, easy to clean, and let you see through to the back of the cabinet. If your kitchen leans traditional, go with unfinished wood dividers that you can stain or paint to match your cabinets.
- Wood also adds warmth and feels more custom. Avoid plastic—it can warp over time and doesn't hold up to heavy baking sheets.
Layout Tip
- Place the dividers near the front of the cabinet so you can grab pans without reaching into the depths. Leave a few inches of space at the back for taller items like a stand mixer attachment or a small cutting board. If your cabinet is deep, consider installing two rows of dividers: one for baking sheets and one for cutting boards.
- This keeps everything separated and easy to grab.
Small-space Fix
- In a tiny kitchen, every inch counts. Use the vertical space in a shallow cabinet (like one under a sink or beside the stove) by installing dividers that are just deep enough for a half-sheet pan. You can also add dividers inside a pull-out drawer for a double dose of organization.
- Pair them with a slim drawer organizer for spices or oils to maximize the footprint.
FAQ
How do I maximize storage in small kitchen cabinets?
Use vertical space with risers, door-mounted racks, and tension rods. Group items in clear bins and add pull-out drawers to deep cabinets. Every inch counts, so think in layers.
Are pull-out shelves easy to install in existing cabinets?
Yes, many pull-out kits are DIY-friendly with basic tools. Measure your cabinet depth and width, then choose a slide-out basket or drawer system that fits. Most attach to the cabinet floor or sides.
What's the best way to organize pots and pans in deep cabinets?
Use pull-out drawers or deep baskets so you can see everything at once. Vertical dividers for lids and a lazy Susan for smaller items also help keep things tidy.
Can I add storage to cabinet doors without damaging them?
Absolutely. Over-the-door racks, adhesive hooks, and tension rods require no drilling. For heavier items, use screws into the door frame—small holes are easy to fill if you remove them later.
How do I keep cabinet interiors clean and organized long-term?
Use shelf liners to protect surfaces and make cleaning easier. Regularly declutter and return items to their designated spots. Clear bins with labels help everyone maintain the system.
Conclusion
A well-organized kitchen doesn't require a full renovation—just a few clever tweaks inside your cabinets. These 10 ideas prove that hidden storage can be both functional and beautiful, turning everyday chaos into calm.
Start with one or two changes that address your biggest pain points, and build from there. Your kitchen will thank you with more space, less stress, and a cleaner look that makes cooking a pleasure.