13 Microwave Ideas in Kitchen Corners That Stay Neat
Corners in the kitchen often end up as dead zones—too awkward for cabinets, too small for a prep station. But with a little planning, that unused nook can become the perfect spot for your microwave.
The trick is to integrate it in a way that feels intentional, not like an afterthought.
Whether you're working with a compact galley or a sprawling open layout, these 13 ideas prove that corner microwaves can be both practical and polished.
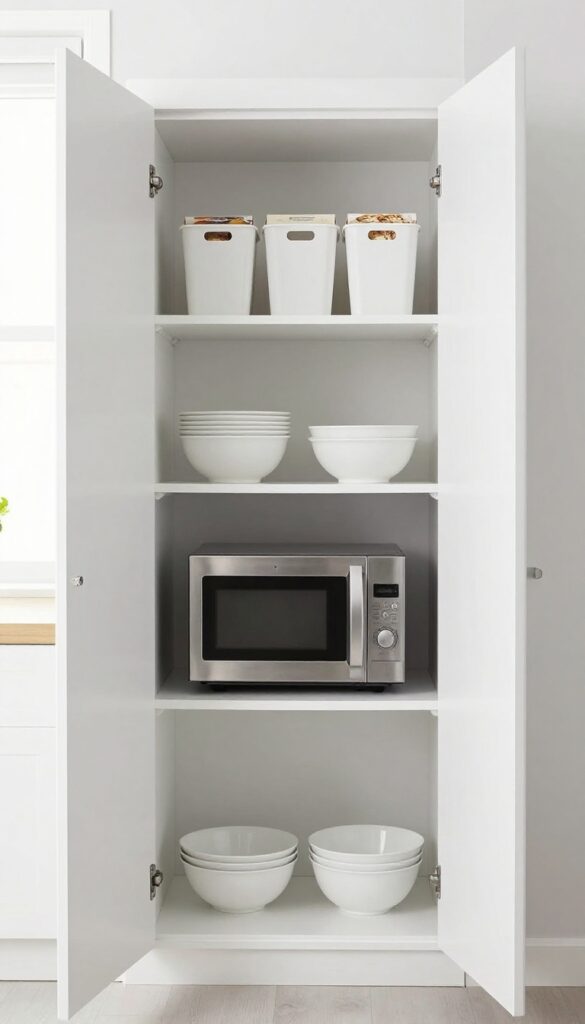
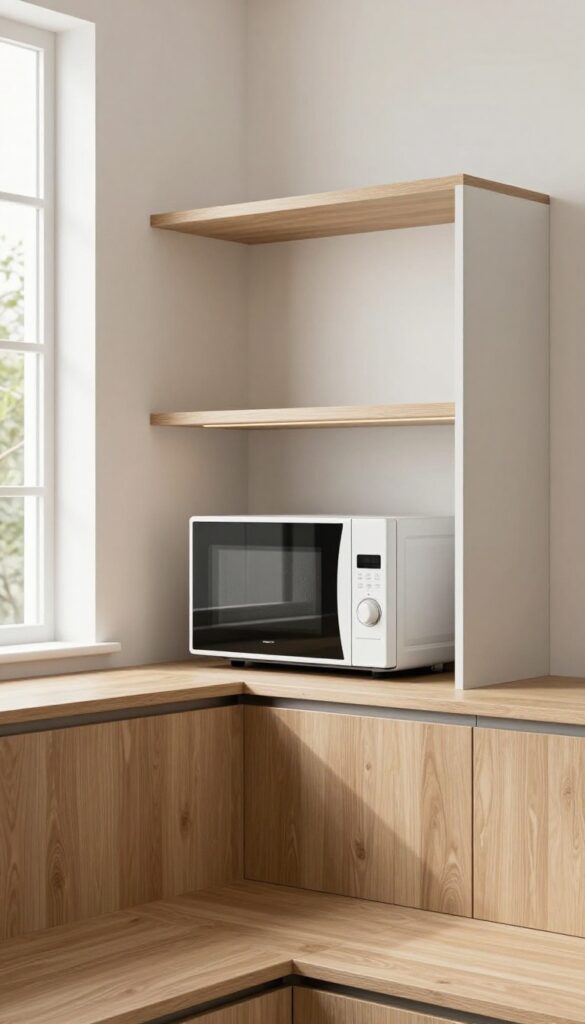
1. Built-In Cabinet Nook
A microwave doesn't have to be a bulky eyesore on your counter. Tucking it into a custom cabinet nook creates a seamless look that feels intentional and polished. The key is matching the cabinetry style, color, and hardware to your existing kitchen so the microwave almost disappears into the design.
This idea works especially well in kitchens where counter space is precious or where you want a streamlined, clutter-free look. By framing the microwave with surrounding cabinets, you gain a dedicated spot that keeps the appliance at a comfortable height—no bending or reaching. The result is a kitchen that feels both modern and effortlessly organized.
Best Materials
- Stick with the same cabinet material as the rest of your kitchen for a cohesive look. Painted wood in a soft white, light gray, or warm beige keeps things airy. If you prefer wood grain, choose a consistent stain that ties into your island or other cabinetry.
- Avoid mixing finishes unless it's a deliberate contrast.
Layout Tip
Position the microwave nook at a height that works for everyone in the household. Typically, the bottom of the microwave should sit about 15 to 18 inches above the counter. Leave a few inches of clearance above and on the sides for ventilation—check your microwave's specs for exact requirements.
Finishing Touch
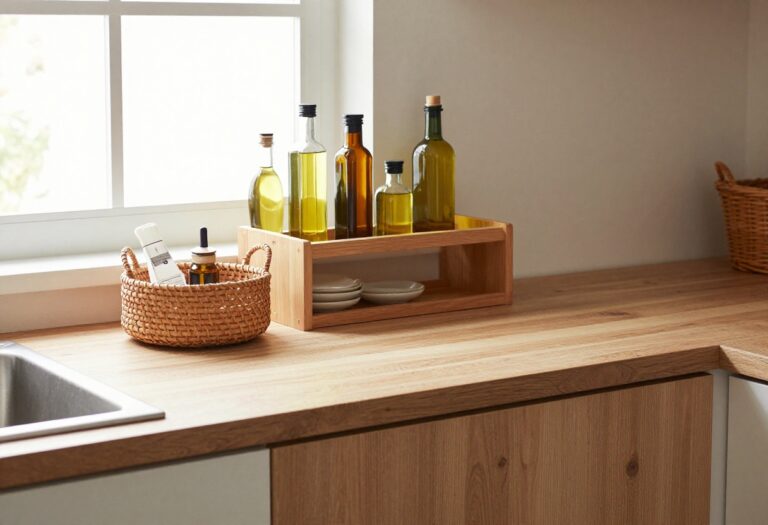
Add a shallow shelf above the microwave nook for a small plant, a wooden cutting board, or a jar of utensils. This turns an otherwise purely functional space into a styled vignette. Keep it minimal—one or two items—to maintain the clean, uncluttered feel.
2. Pull-Out Drawer Below the Counter
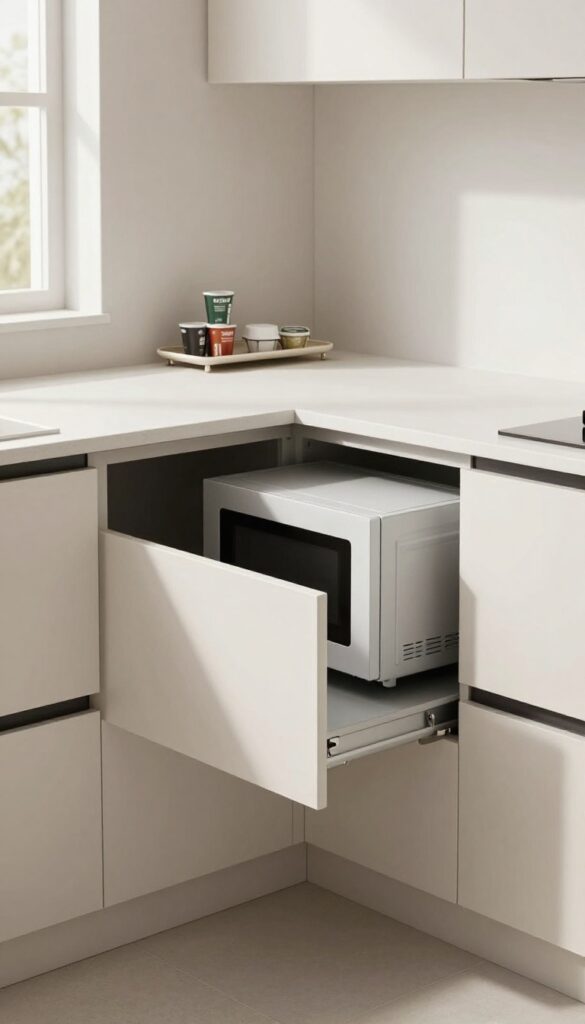
A microwave drawer tucked into a lower corner cabinet is one of those upgrades that feels both luxurious and completely practical. Instead of taking up precious counter space or sitting awkwardly above eye level, it slides out smoothly at waist height. The clean, flush front blends right into your cabinetry, keeping the kitchen looking sleek and uncluttered.
This idea works especially well in corners that are hard to reach or awkward to use. By placing the microwave in a pull-out drawer, you turn a dead zone into a highly functional spot. The drawer glides out effortlessly, so you can check on food or grab a hot dish without bending low or reaching high.
It's a smart, space-aware solution that keeps your countertops free for prep work and your kitchen feeling open and modern.
Best Placement And Fit
For a seamless look, install the microwave drawer in a base cabinet that's at least 24 inches wide. Corner cabinets work great, but you can also place it in a straight run of cabinetry near the main prep zone. Make sure the drawer is positioned at a comfortable height—typically 18 to 24 inches above the floor—so it's easy for everyone in the household to use.
Styling And Finishing Touches
- Match the drawer front to your existing cabinet doors for a built-in look. If your kitchen leans modern, go with flat-panel fronts and handleless push-to-open mechanisms. For a warmer vibe, choose a wood tone that complements your countertops.
- Add a slim pull-out shelf above the microwave for storing small items like coffee pods or a trivet.
Ventilation And Safety Note
Most microwave drawers are designed with front ventilation, so they can be safely installed in a closed cabinet. Just double-check the manufacturer's specs before installation. Keep the area around the drawer clear of clutter, and consider adding a soft-close mechanism to prevent slamming.
3. Floating Shelf with Appliance Garage
Corners can feel like wasted space, but a deep floating shelf turns that awkward spot into a dedicated microwave station. Adding a roll-up or sliding door—think of it as an appliance garage—keeps the counter clean and the microwave hidden when not in use. It's a smart, modern solution that feels intentional rather than makeshift.
Mount a sturdy floating shelf deep enough to hold your microwave, then install a tambour door or a sliding panel that tucks away when you need access. The door hides the appliance, so the corner looks like a sleek cabinet front, not a cluttered ledge. This setup works especially well in galley kitchens or L-shaped layouts where every inch counts.
Choose a shelf material that matches your cabinetry or go with a contrasting wood tone for a designer touch. Keep the microwave on a small turntable inside for easy rotation, and use the space above for a few decor pieces—a small plant or a ceramic jar—to soften the look.
Best Materials
Solid wood with a matte finish feels warm and modern, while glossy lacquer or laminate reads cleaner and more minimalist. For a truly seamless look, match the shelf and door to your upper cabinets. If you want contrast, try a warm walnut against white cabinets or a black matte shelf in an all-white kitchen.
Layout Tip
Measure your microwave's depth and add at least 2 inches of clearance so the door can close fully. Position the shelf so the microwave sits at eye level or slightly lower—this makes it easy to see inside and reach without stretching. If the corner is tight, use a tambour door that rolls up vertically instead of sliding sideways.
Finishing Touch
Add under-shelf LED strip lighting to illuminate the microwave controls and create a soft glow. It makes the corner feel intentional and helps you see what you're doing without overhead shadows. Choose warm white light for a cozy vibe or cool white for a crisp, modern feel.
4. Corner Cart with Microwave Shelf
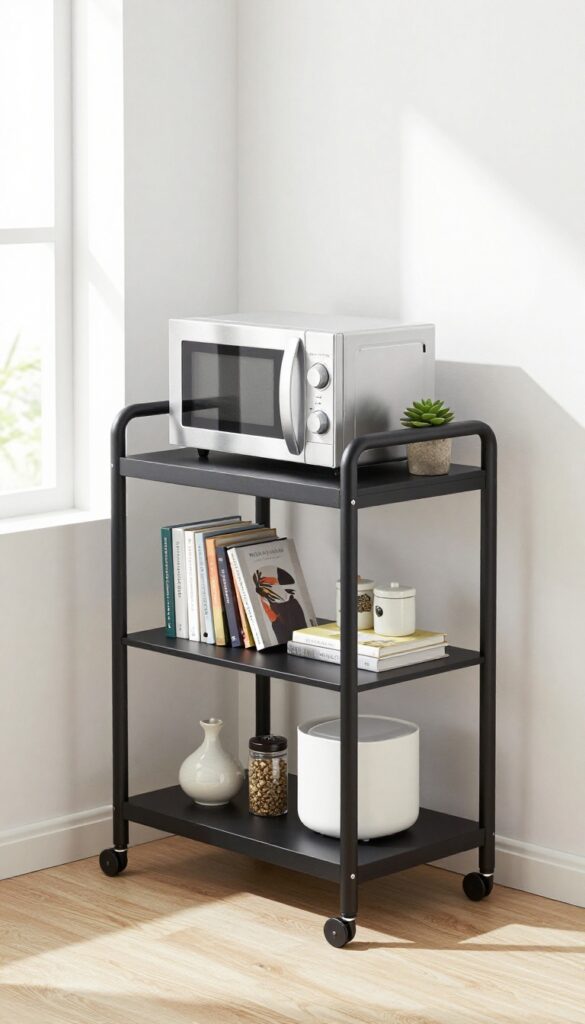
A slim rolling cart designed for corners turns an awkward gap into a hardworking station. The top shelf holds the microwave at a comfortable height, while lower levels tuck away cookbooks, spices, or small appliances. Because it’s on wheels, you can pull it out for deep cleaning or rearrange it when inspiration strikes.
This idea keeps your countertops clear and your corner looking intentional, not forgotten.
A corner cart with a dedicated microwave shelf is a smart solution for kitchens where every inch counts. The cart’s narrow profile fits into tight spaces that might otherwise go unused, and the open shelves keep essentials visible and easy to grab. Choose a cart with a sturdy top that can support the microwave’s weight, and look for one with a lip or raised edge to prevent sliding.
The rolling feature makes it easy to access outlets or wipe down floors, so the corner stays as clean as the rest of the kitchen.
Best Materials
Go with a metal cart for a sleek, modern look that’s easy to wipe clean. Stainless steel or matte black finishes resist fingerprints and pair well with most appliances. If you prefer warmth, a bamboo or solid wood cart adds natural texture, but make sure it’s sealed to handle kitchen moisture.
Layout Tip
Position the cart so the microwave faces the main work area, not the wall. This makes it easy to see and use without twisting. Leave a few inches of clearance above the microwave for ventilation, and keep the lower shelves for items you reach for often, like coffee pods or cooking oils.
Finishing Touch
Add a small tray on the top shelf next to the microwave for salt, pepper, and a spoon rest. A slim magnetic strip on the cart’s side can hold metal measuring spoons or bottle openers, keeping them handy without cluttering the surface.
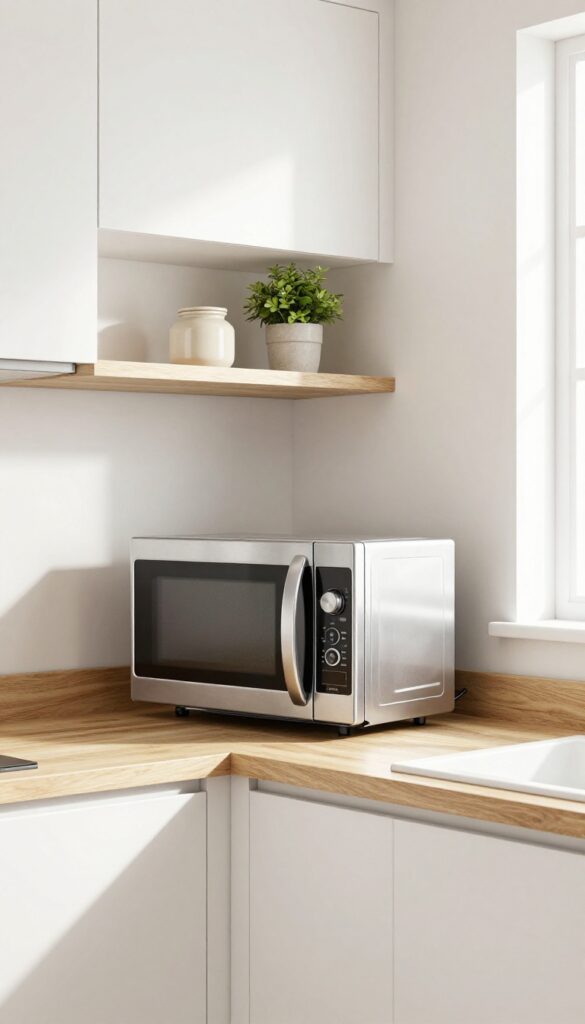
5. Under-Upper-Cabinet Bracket Mount
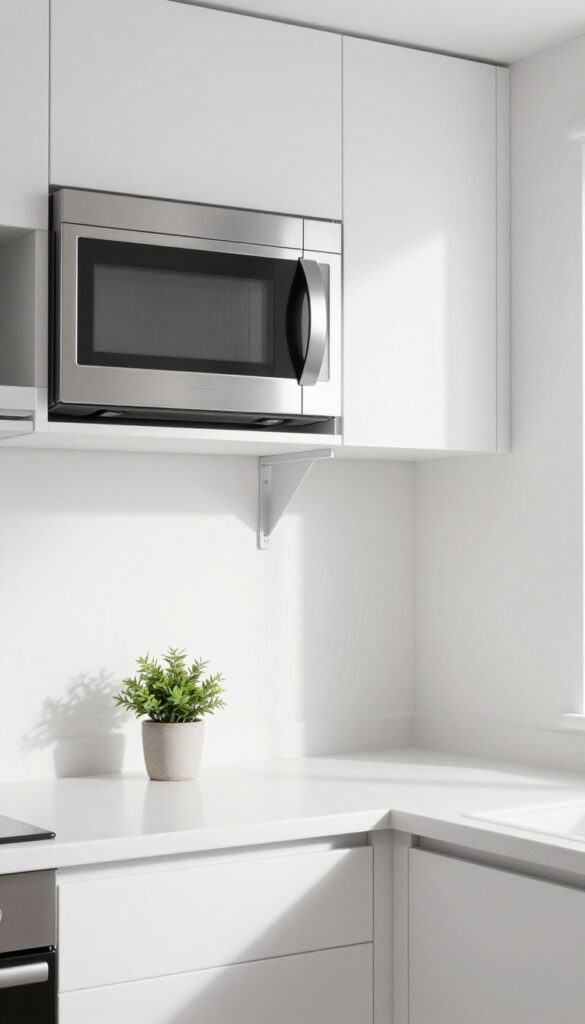
For corner kitchens where every inch counts, mounting the microwave under an upper cabinet is a game-changer. A sturdy bracket does the heavy lifting, leaving the counter below completely free for prep or decor. The floating effect feels modern and intentional, as if the microwave was always meant to be there.
It’s one of those ideas that makes you wonder why you didn’t try it sooner.
This setup works best in a corner where a standard upper cabinet would otherwise sit empty or awkward. By attaching a heavy-duty bracket to the cabinet’s underside, the microwave tucks neatly into the corner, out of the way but still within easy reach. The key is choosing a bracket that matches the microwave’s weight and size—most models need at least 50 pounds of support.
Once installed, the microwave appears to hover, giving the corner a clean, uncluttered look. Pair it with a slim trim kit to hide gaps and create a built-in appearance. The counter below stays open for a coffee station, a plant, or just breathing room.
Best Colors
Stick with stainless steel or matte black for the microwave to keep the look sleek. If your upper cabinets are white or light wood, a white trim kit blends seamlessly. For dark cabinetry, a black or bronze microwave adds a subtle industrial touch without overwhelming the corner.
Layout Tip
Position the microwave so the front aligns with the cabinet door above. This keeps the silhouette tidy and prevents the microwave from jutting out too far. If the corner is tight, consider a low-profile model—they’re shallower and fit better in compact spaces.
Finishing Touch
Add a small LED strip under the cabinet to illuminate the microwave’s control panel. It makes nighttime use easier and adds a soft glow that highlights the floating effect. Choose warm white for a cozy feel or cool white for a crisp, modern vibe.
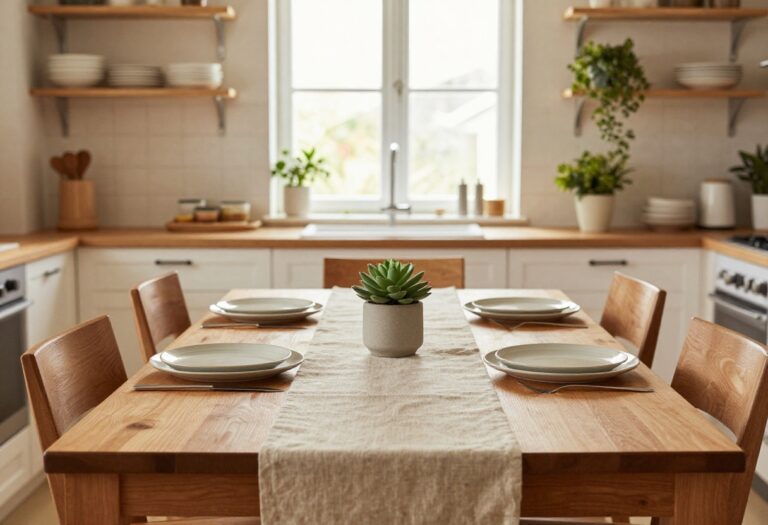
6. L-Shaped Counter Extension
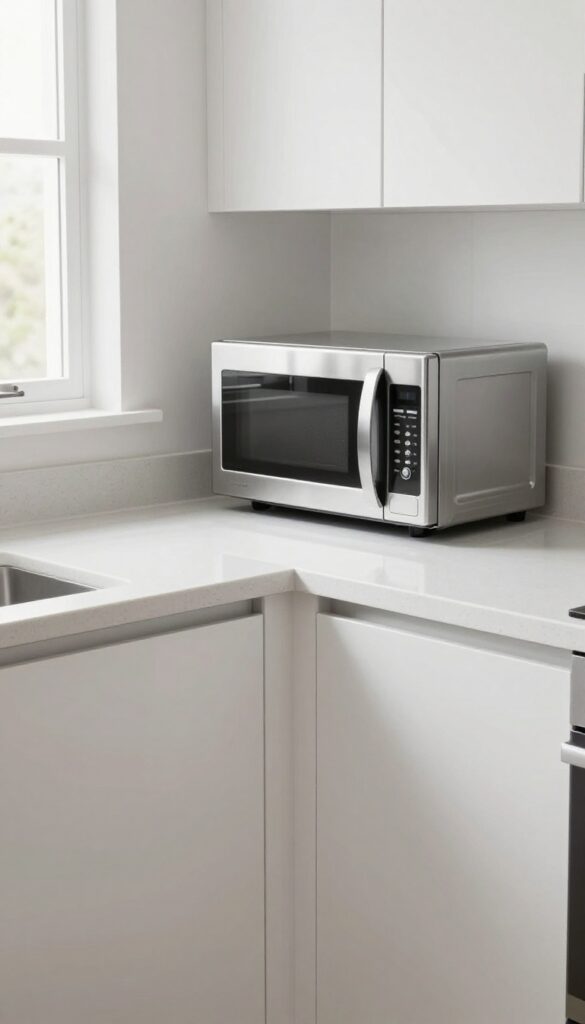
A corner microwave doesn't have to feel like an afterthought. By extending your countertop into a gentle L-shape, you give the microwave its own designated spot on the shorter leg while keeping the main counter clear for prep. This layout feels intentional and streamlined, especially in modern kitchens where clean lines matter.
The extended surface also doubles as a landing zone for hot dishes, so you're not juggling plates across the room.
The L-shaped counter extension works best in kitchens where you have at least a few feet of counter space on one wall. The shorter leg of the L becomes the microwave's permanent home, while the longer leg remains your primary workspace. This setup keeps the microwave accessible but not intrusive, and the continuous countertop creates a seamless visual flow.
For a clean look, match the countertop material and edge profile to your existing surfaces. Quartz or solid surface in a light tone keeps the corner feeling open, while a subtle waterfall edge on the short leg adds a custom touch.
Best Layout Tip
Position the microwave so its door opens away from the main work triangle. If your kitchen has a sink on one side and stove on the other, place the L-shaped extension on the opposite wall to avoid crowding. Keep at least 15 inches of counter space on the long leg for everyday tasks like chopping or setting down groceries.
Material And Color Flow
Stick with the same countertop material as the rest of the kitchen for a unified look. White quartz or light gray granite keeps the corner bright and airy. If you want contrast, use a darker tone on the short leg only—like charcoal quartz—to visually anchor the microwave zone without breaking the overall palette.
Finishing Touch
Add a slim, under-cabinet LED strip along the underside of the upper cabinets above the microwave. This eliminates shadows on the counter and makes the L-shaped extension feel like a purposeful work zone. Choose warm white (2700K–3000K) for a cozy glow that complements modern finishes.
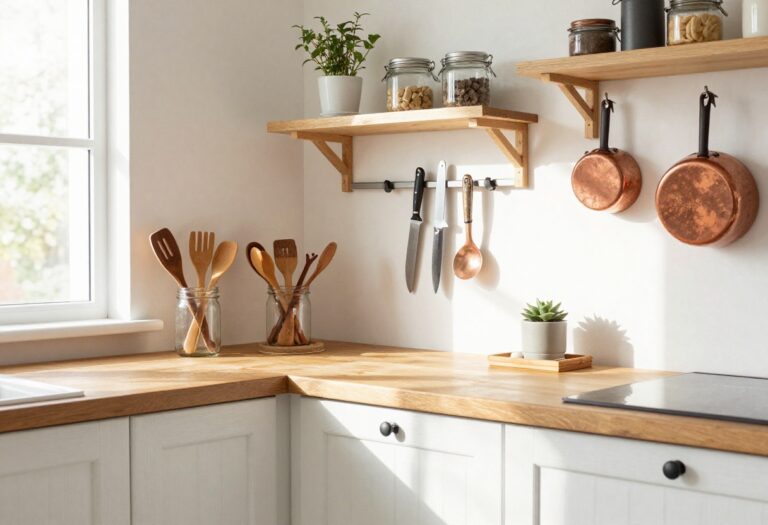
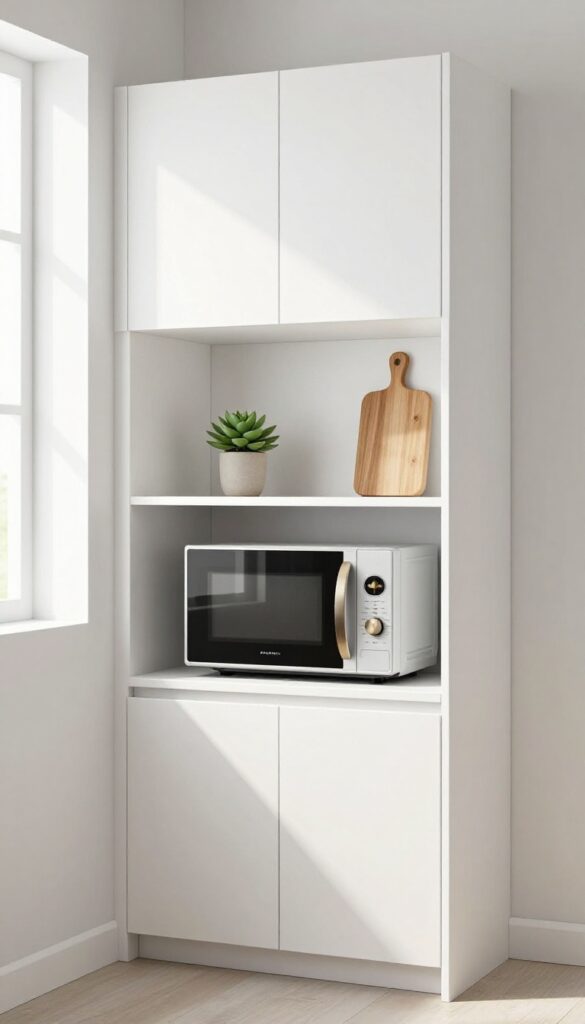
7. Open Shelving Trio
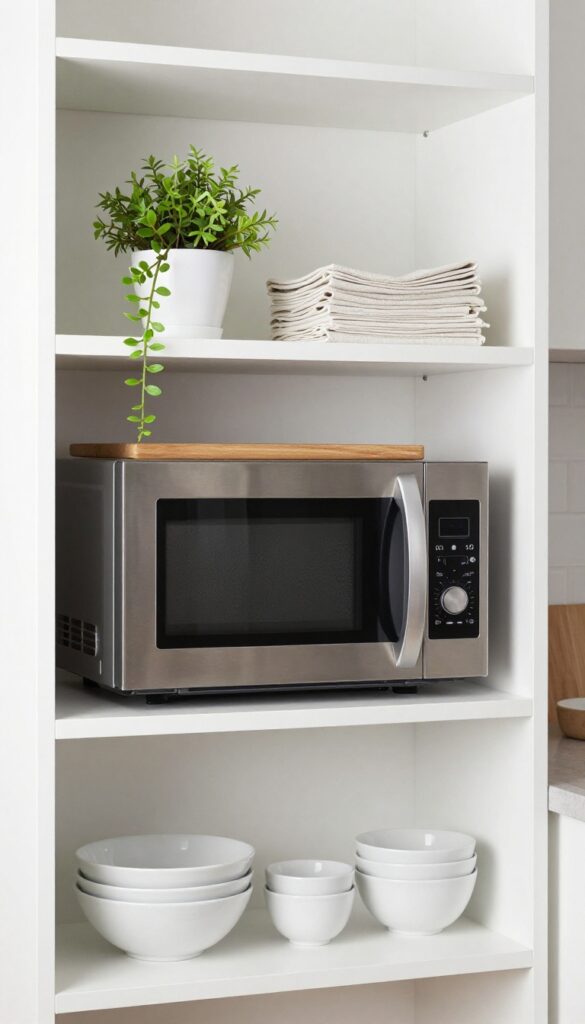
Three open shelves in a corner can turn a microwave into a design feature instead of an afterthought. By placing the microwave on the middle shelf, you create a balanced focal point that feels intentional. The shelves above and below give you room to layer in everyday dishes, cookbooks, or a few decorative pieces, so the whole setup reads like a styled vignette rather than a storage compromise.
This idea works especially well in modern kitchens where clean lines and visible organization are part of the appeal. The microwave sits at eye level, making it easy to reach without bending, while the surrounding shelves soften its utilitarian look. Stick to a consistent color palette for the items on display—think white ceramics, wood accents, and a single plant—to keep the corner feeling curated and calm.
Best Materials
Floating shelves in a matte white or light wood finish keep the look airy and modern. Avoid dark or overly glossy shelves, which can make the corner feel heavy. Pair them with a microwave in stainless steel or a matching neutral tone to maintain visual flow.
Shelf Styling Tip
On the top shelf, place a small trailing plant and a stack of linen napkins for softness. The bottom shelf works well for everyday bowls or a few cookbooks arranged horizontally. Keep the microwave’s shelf clear except for the appliance itself, and add a slim cutting board leaning behind it for a layered effect.
Layout Tip
Measure the microwave’s depth before installing shelves—you want it to sit flush or slightly recessed, not jutting out. Leave at least six inches of clearance above for ventilation and easy cleaning. If the corner has an outlet nearby, you can hide the cord by routing it through a cable management channel painted to match the wall.
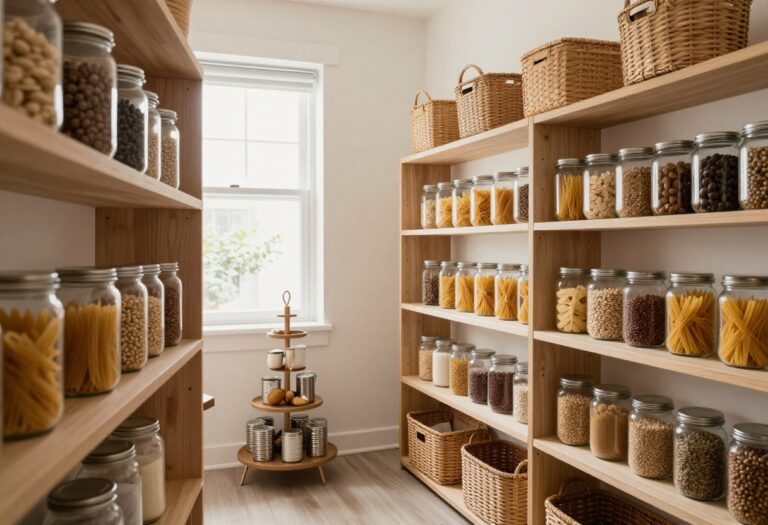
8. Corner Pantry with Appliance Shelf
A deep corner pantry can do more than store dry goods—it can hide your microwave completely. By installing a dedicated shelf at just the right height, you turn an awkward storage spot into a tidy appliance station. The best part?
Close the door and the kitchen looks clutter-free, with no microwave in sight.
This idea works especially well in kitchens where counter space is limited or where you want a streamlined look. The pantry should be deep enough (at least 24 inches) to accommodate the microwave depth plus a few inches for airflow. Paint the shelf the same color as the pantry interior, or use a contrasting wood tone for warmth.
Keep the microwave on a pull-out tray or a simple stationary shelf—either way, it stays out of sight when not in use. Inside the pantry, use the surrounding shelves for frequently used items like plates, bowls, and snacks, so everything you need for a quick meal is within arm's reach.
Shelf Height And Depth
- Measure your microwave's height and depth before installing the shelf. Leave at least 2 inches of clearance above and on the sides for ventilation. A depth of 16 to 18 inches usually works for standard microwaves.
- If your pantry is extra deep, consider a pull-out shelf for easy access.
Styling The Pantry Interior
- Keep the inside organized with matching bins or baskets for a clean look. Use the shelves above the microwave for lightweight items like cereal boxes or spices. Below, store heavier items like mixing bowls or small appliances.
- A consistent color palette—white bins, wood tones, or neutral labels—keeps the space feeling calm and intentional.
Finishing Touch
Add a small strip of LED motion-sensor lighting under the shelf above the microwave. It makes finding things easy and adds a modern, polished feel when you open the pantry door. Choose warm white light for a cozy vibe or cool white for a crisp, clean look.
9. Microwave Inside a Hutch
A hutch in the corner does more than store dishes—it can hide your microwave in plain sight. By dedicating the middle compartment to the microwave, you free up counter space and add a furniture-like focal point to the kitchen. This setup works especially well in open layouts where the microwave would otherwise stick out.
The hutch brings warmth and storage, making the corner feel intentional rather than awkward.
A hutch or buffet placed in a corner becomes a natural home for the microwave. The middle shelf or cabinet is typically at the perfect height for easy access, while the upper and lower sections hold cookbooks, serving pieces, or everyday dishes. This approach keeps the microwave from dominating the kitchen and instead blends it into a piece of furniture that adds character.
Choose a hutch with a solid back or one that allows airflow, and make sure the compartment is deep enough to accommodate the microwave's vents. A clean-lined hutch in white or light wood keeps the look modern, while a darker finish adds contrast and a furniture-like feel.
Best Materials And Finishes
- For a modern and clean look, opt for a hutch with smooth, flat surfaces and minimal hardware. White or light oak works well in bright kitchens, while a matte black or navy hutch adds depth without feeling heavy. Avoid overly ornate details—stick to simple shaker-style doors or slab fronts.
- The microwave itself should be stainless steel or black to blend in, not a bright color that draws attention.
Layout And Ventilation Tip
- Measure your microwave's depth and ventilation requirements before choosing a hutch. Most microwaves need at least 3 inches of clearance on the sides and back for airflow. If the hutch has a solid back, consider cutting a ventilation hole or removing the back panel in that section.
- A shallow hutch might not work for full-size microwaves, so look for one with a deep enough cavity or use a smaller countertop model.
Styling The Hutch Around It
- Keep the surfaces around the microwave clutter-free to maintain a clean look. Use the top of the hutch for a few decorative items like a ceramic vase or a stack of cookbooks. Inside the upper cabinet, store everyday glasses or mugs for easy access.
- The lower section can hide bulky items like a stand mixer or extra pots. This keeps the hutch functional without feeling crowded.
10. Corner Desk Turned Coffee Station
A small corner desk can become the most functional spot in your kitchen. Instead of letting that awkward nook collect clutter, turn it into a streamlined beverage station. The microwave sits neatly on the desktop, a coffee maker fits right beside it, and hooks underneath hold your favorite mugs.
Baskets or small bins corral pods, stir sticks, and napkins, keeping everything tidy and within reach. This setup feels intentional, not makeshift, especially when you choose a desk with clean lines and a finish that matches your kitchen's palette.
Repurposing a corner desk as a coffee station is a smart move for kitchens short on counter space. It gives you a dedicated zone for morning routines without eating into meal prep areas. The key is treating the desk like a piece of kitchen furniture, not an office leftover.
Choose a desk with a smooth, easy-to-wipe surface, and style it with a few decorative touches that make it feel like part of the room. A small plant, a ceramic canister for sugar, or a slim tray for the coffee maker add personality while keeping the look clean and uncluttered. This idea works especially well in L-shaped kitchens or galley layouts where every inch counts.
Best Materials
- A wood or wood-laminate desk with a matte finish feels warm and blends easily with most kitchen styles. For a more modern look, go with a white or light gray desk that has metal legs. Avoid glossy surfaces, they show water rings and coffee drips too easily.
- A butcher-block top is another great option because it's durable and can be lightly sanded if it gets stained.
Storage Tip
Use the desk's existing drawers for storing coffee beans, filters, and small tools. If the desk has no drawers, add a slim rolling cart underneath or a set of stackable bins on the desktop. Hooks mounted on the underside of the desk are perfect for hanging mugs and keep them from taking up surface space.
Finishing Touch
Add a small task lamp with a warm bulb to make the station feel cozy and functional. A cord management kit hides wires from the microwave and coffee maker, keeping the desk looking neat. A small tray or lazy Susan on the desktop corrals the coffee maker and accessories, making the whole setup feel intentional and polished.
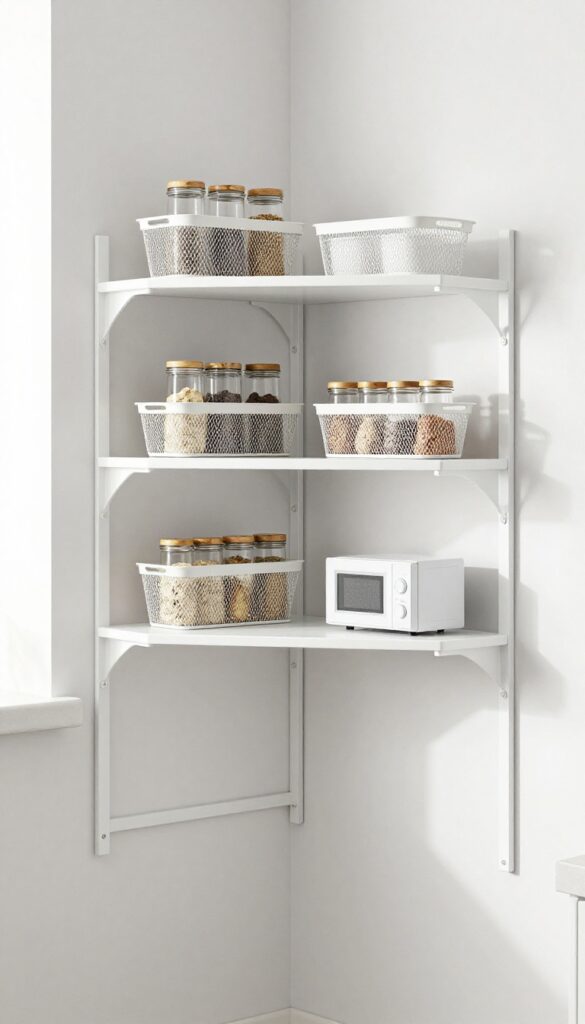
11. Wall-Mounted Shelf with Baskets
A wall-mounted shelf takes advantage of empty vertical space in a corner, giving the microwave a dedicated spot without eating into counter space. Placing the microwave on one side and woven baskets on the other creates a balanced, intentional look that feels curated rather than cramped. This setup works especially well in kitchens where every inch counts, adding both function and a touch of texture.
Mount a sturdy floating shelf or a bracket shelf in an unused corner, making sure it's deep enough to hold the microwave securely. Choose a shelf material that complements your kitchen—wood for warmth, metal for an industrial edge, or painted MDF for a seamless look. On the opposite side of the shelf, arrange two or three woven baskets of varying sizes to store kitchen linens, napkins, or small gadgets.
The baskets add visual warmth and keep the area from feeling too appliance-heavy. For a clean finish, tuck cords behind the shelf or use a cord cover painted to match the wall. This idea keeps the microwave accessible while maintaining a neat, organized corner.
Best Materials
A solid wood shelf with a natural or stained finish pairs beautifully with woven baskets, creating a warm, organic feel. For a more modern look, go with a sleek white or black floating shelf and contrast it with light-toned seagrass baskets. Metal brackets in matte black or brass can add a subtle industrial touch.
Layout Tip
Place the microwave on the side closer to an outlet to minimize visible cords. If the corner is tight, choose a shelf that extends at least 24 inches wide so the microwave and baskets sit comfortably without overlapping. Leave a few inches of space above the microwave for ventilation.
Styling The Baskets
Use baskets with handles for easy grabbing, and keep the contents visible but tidy—folded dish towels, rolled napkins, or a small jar of wooden spoons. For a cohesive look, stick to one basket material and color family, like all seagrass or all dark rattan.
12. Custom Corner Banquette with Shelf
A corner banquette usually means cozy breakfast nook vibes, but tucking a microwave into the side panel changes the game. It keeps the appliance close for quick coffee reheats or popcorn without cluttering the counter. The built-in look feels intentional and clean, especially when the shelf matches the banquette's finish.
Instead of letting the side of your banquette sit blank, turn it into a functional ledge. A shallow shelf cut into the panel holds the microwave at a comfortable height, so you can grab snacks without standing up. The rest of the banquette stays as a seating area, but now it pulls double duty as a mini kitchen station.
This works best in kitchens where counter space is tight but you still want a spot for casual meals. Choose a shelf depth that leaves the microwave flush or slightly recessed for a built-in feel.
Best Materials
Stick with the same wood or painted finish as the banquette to keep the shelf seamless. A solid butcher block or quartz top adds durability if you plan to set hot dishes there. For a modern look, use a thin metal bracket and a floating wood shelf that contrasts slightly with the banquette color.
Layout Tip
Position the shelf on the side of the banquette that faces the main kitchen area so the microwave is easy to reach from the counter. If the banquette has a table, leave enough clearance for chairs to slide out without hitting the microwave door.
Finishing Touch
Add a small LED strip under the shelf to light the microwave controls. It makes the nook feel more polished and helps when you're heating up a late-night snack without turning on the big lights.
13. Over-the-Door Shelf Unit
A door that usually just swings open can become one of the most useful spots in your kitchen. Hanging an over-the-door shelving unit on a pantry or closet door near the kitchen gives the microwave a dedicated home without eating into counter or cabinet space. The look is clean and intentional, especially when you choose a unit with a reinforced shelf rated for the microwave's weight.
It feels smart, modern, and surprisingly spacious once you reclaim all that countertop real estate.
This idea works best when the door is sturdy and the shelving unit is installed securely. Look for a unit with adjustable shelves and a solid bottom shelf that can handle the microwave's weight. The rest of the shelves can hold lightweight items like spices, tea towels, or small appliances you don't use daily.
The overall effect is tidy and streamlined, with everything visible and easy to grab. Choose a finish that matches your door color or hardware for a built-in feel. White or black metal units blend seamlessly with most kitchens, while wood tones add warmth.
Keep the shelves organized with baskets or bins to maintain that clean, modern look.
Best Materials
- Steel or heavy-duty wire shelves with a powder-coated finish are durable and easy to clean. Avoid plastic units that may warp under the microwave's weight. A metal shelf with a solid bottom panel (not just wire) provides better support and prevents the microwave from wobbling.
- For a warmer look, choose a unit with wood-finished shelves, but confirm the weight capacity first.
Layout Tip
Position the microwave on the lowest reinforced shelf so it's easy to reach and doesn't block your view of other items. Use the upper shelves for lighter, everyday items like coffee pods, mugs, or small jars. If the door is near your main prep area, this setup keeps the microwave close without crowding your counters.
Finishing Touch
Add a small hook on the side of the shelving unit to hang oven mitts or a dish towel. This keeps essentials within arm's reach and adds a practical, polished detail. Choose a hook that matches the unit's finish for a cohesive look.
FAQ
What is the best height for a corner microwave?
Aim for 15 to 18 inches above the countertop, or about 3 to 6 inches below your shoulder height. This makes it easy to see inside and reach without straining.
Can I put a microwave in a corner cabinet without ventilation issues?
Yes, as long as the cabinet has proper airflow. Leave a few inches of space around the microwave, and consider adding a vent grille or using a built-in microwave model designed for enclosed spaces.
How do I keep a corner microwave from looking cluttered?
Use a cabinet door or a roll-up cover to hide it when not in use. Keep the surrounding area minimal—just a few decorative items or a small plant—to maintain a clean look.
Is it safe to put a microwave on a floating shelf?
Yes, if the shelf is properly anchored into wall studs and rated for the microwave's weight. Use heavy-duty brackets and check the manufacturer's weight limit before installing.
What size microwave works best for a corner setup?
Compact or mid-size microwaves (0.7 to 1.2 cubic feet) are ideal for corners. They fit neatly on shelves or carts without overwhelming the space.
Conclusion
A corner doesn't have to be a wasted spot in your kitchen. With a little creativity, it can become a functional home for your microwave while keeping the room looking clean and intentional.
Whether you choose a built-in cabinet or a simple rolling cart, the key is to match the solution to your space and habits. Try one of these ideas, and you might find that corner becomes your favorite part of the kitchen.