15 End of Kitchen Cabinet Ideas for Bonus Storage Spots
Kitchen cabinets are workhorses, but their ends often go unused. That narrow strip of space at the end of a cabinet run is prime real estate for extra storage. Whether you have a galley kitchen or an open layout, those few inches can hold surprising amounts of stuff.
The trick is to style them so they look intentional, not like an afterthought. From open shelving to pull-out racks, these 15 ideas turn dead space into your kitchen's most useful spot.
Ready to make every inch count? Let's dive in.
1. Add a Slim Spice Rack
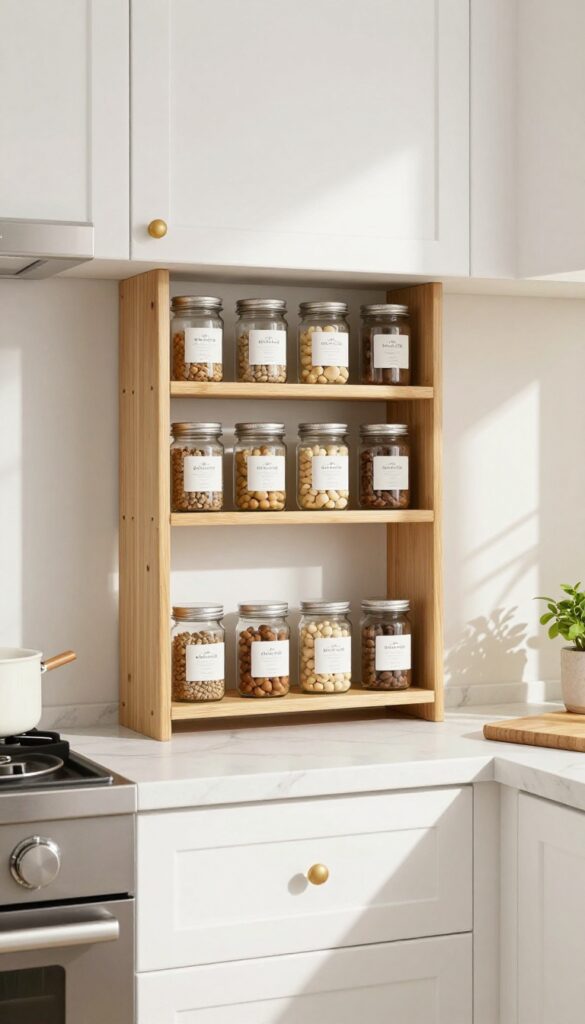
That narrow strip of cabinet end panel often gets overlooked, but it’s prime real estate for a slim spice rack. Mounting one here keeps your most-used seasonings visible and within arm’s reach while you’re cooking. No more rummaging through deep cabinets or cluttered drawers—just grab, sprinkle, and go.
It’s a small change that makes a big difference in how your kitchen flows.
A slim spice rack on the end of a cabinet turns an awkward gap into a functional cooking companion. The key is choosing a rack that fits the depth of your cabinet face so it doesn’t stick out too far. Look for narrow, tiered designs that hold standard spice jars without wasting space.
This setup works especially well near the stove or prep zone, where you need seasonings fast. Plus, it adds a pop of color from all those labels and spices, making the kitchen feel more lived-in and personal.
Best Materials
Go with metal or bamboo for durability and a clean look. Wire racks keep things airy and easy to clean, while bamboo adds warmth without feeling heavy. Avoid plastic if you want a more polished, decor-forward feel.
Layout Tip
Mount the rack at eye level or slightly below so you can read labels without bending. If your cabinet end sits near a counter, leave enough clearance for the rack to clear any appliances or jars below.
Finishing Touch
Use matching spice jars with uniform labels for a cohesive, styled look. It turns a practical storage fix into a mini display that feels intentional and polished.
2. Install a Towel Bar
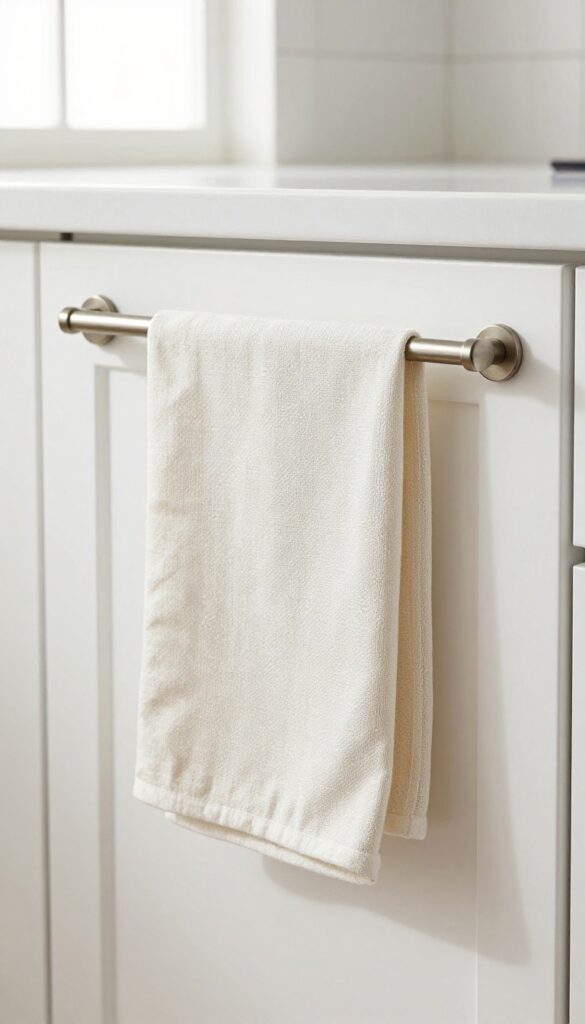
Sometimes the smallest tweaks make the biggest difference in a kitchen. Adding a towel bar to the end of a cabinet is one of those low-effort, high-reward upgrades. It turns an often-forgotten vertical surface into a handy spot for drying dishes or grabbing a mitt while you cook.
No more rummaging through drawers or draping damp towels over oven handles.
A towel bar mounted on the side of a cabinet keeps essentials within arm's reach without eating up counter space. It's especially useful near the sink or stove, where you need quick access to a dish towel or oven mitt. The best part?
Installation is straightforward—just a drill and a few screws, and you're set. Choose a bar that complements your hardware finish, like brushed nickel or matte black, for a cohesive look.
Best Placement
Position the bar on the cabinet end that faces your main work zone. If your sink is against a wall, mount it on the side of the adjacent cabinet so the towel hangs freely without blocking drawers or doors.
Finish & Material
Match the towel bar to your existing cabinet pulls and faucet for a polished look. Stainless steel is durable and easy to clean, while brass adds warmth. For a budget-friendly swap, try a simple adhesive hook if you can't drill.
Styling Tip
Fold your dish towel in thirds and drape it over the bar for a tidy appearance. Rotate colors seasonally—linen in summer, darker hues in fall—to keep the kitchen feeling fresh.
3. Create a Cookbook Ledge
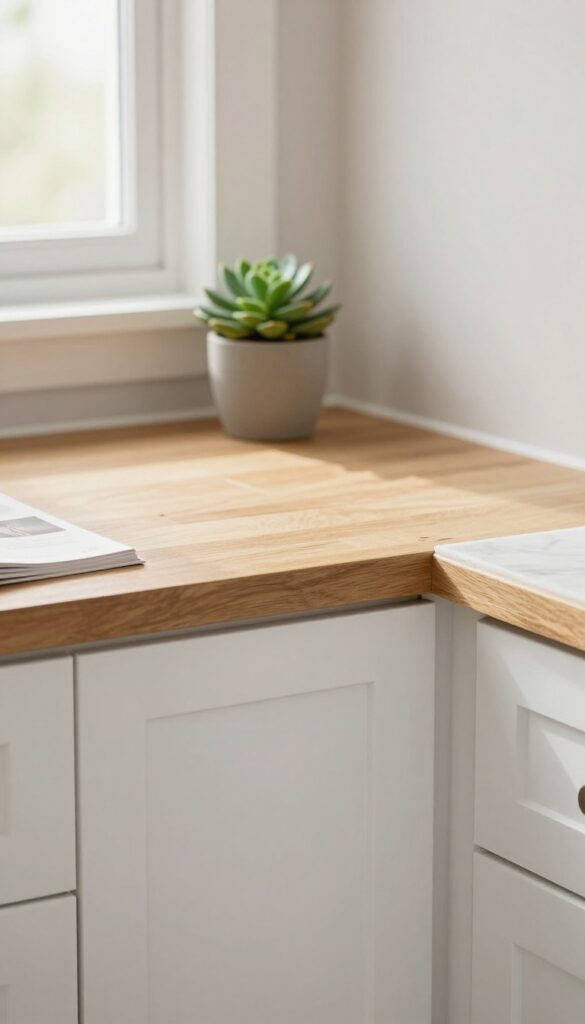
The end of a cabinet run is often just dead space, but it’s the perfect spot for a slim ledge that holds a cookbook or tablet. This idea keeps your countertops clear while making recipe access super convenient. It’s a small addition that feels intentional and polished, especially in a busy kitchen where every inch counts.
A cookbook ledge is essentially a narrow shelf, about 4 to 6 inches deep, mounted at the end of your base or upper cabinets. It’s ideal for propping open a cookbook or setting down a tablet so you can follow steps without clutter. The ledge can match your cabinet finish for a seamless look or contrast with a different material for a pop of personality.
Place it near the stove or prep area for easy reach, and consider adding a small lip to keep items from sliding off. This idea works best in galley or L-shaped kitchens where cabinet ends are exposed, but it can also be added to an island end if you have the clearance.
Best Materials
- Wood is the most common choice, either stained to match your cabinets or painted for contrast. Butcher block adds warmth, while a metal ledge (like brass or black steel) brings an industrial edge. For a budget-friendly option, a simple pine board with a clear coat works well.
- If you want extra durability, consider a quartz or marble remnant—it’s sleek and easy to wipe clean.
Styling Tip
- Keep the ledge functional but styled. A cookbook or tablet is the star, but you can add a small plant, a salt cellar, or a decorative spoon rest for visual interest. Avoid overcrowding—the point is to keep it clear for cooking.
- If you have multiple cookbooks, rotate them seasonally to keep the look fresh.
Installation Note
Mount the ledge at a height that’s comfortable to read while standing—usually about 12 to 18 inches below eye level. Use sturdy brackets or a cleat system to support the weight of heavy books. If you’re renting, look for adhesive or tension-mounted shelves that don’t require drilling.
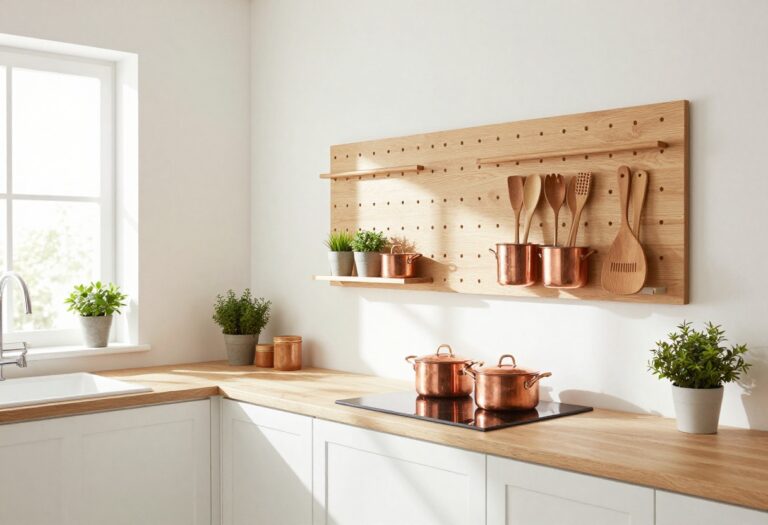
4. Hang a Pegboard
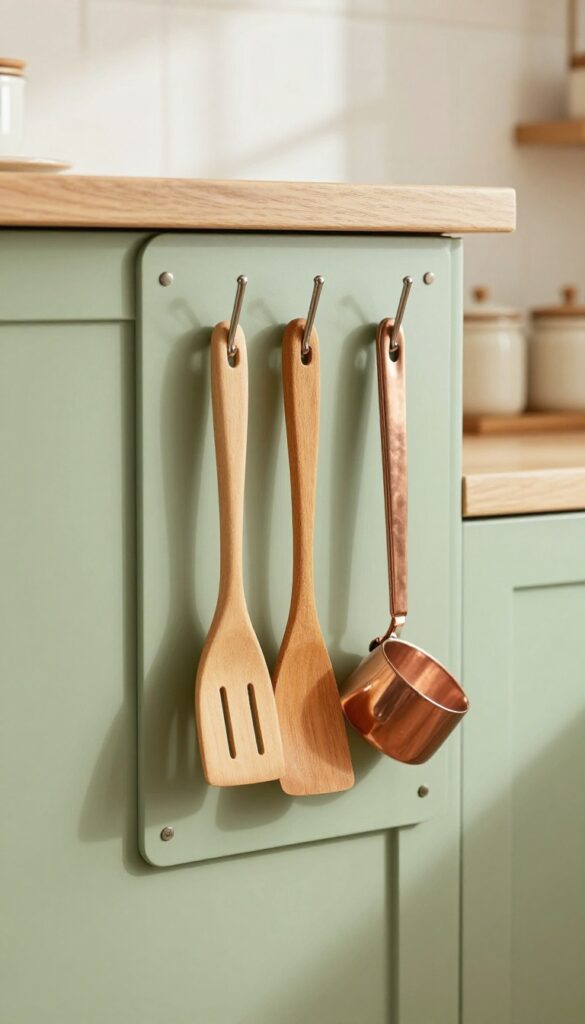
That narrow strip of cabinet end is often treated like dead space, but it’s actually prime real estate for a pegboard. A small pegboard instantly adds a DIY, workshop-meets-kitchen vibe that feels both practical and personal. You can hang your most-used utensils, measuring cups, or even a tiny pot, keeping them within arm’s reach without cluttering your countertops.
The best part? You can customize the layout as your needs change, so it grows with you.
A pegboard on the end of a cabinet is one of those ideas that looks like you spent hours planning, but really takes an afternoon to set up. Start with a piece of hardboard or a pre-made pegboard panel cut to fit the cabinet end. Paint it a fun color like sage green, mustard yellow, or keep it classic white to blend in.
Attach it with small spacers so the hooks have room to hold items. Then add hooks, small shelves, and bins for a mix of storage and display. This works especially well next to the stove for hanging spatulas and tongs, or near the coffee station for mugs and filters.
The visual effect is layered and lived-in, with texture from the metal hooks and the items themselves. It’s also a great spot to lean into a theme, like copper utensils or wooden spoons, to tie the look together.
Best Placement
The most functional spot is on the cabinet end closest to your main work zone, like beside the stove or sink. That way, you can grab a spatula or a scrub brush without taking a step. If your kitchen has an island, consider the ends of the cabinets facing the dining area for a decorative pegboard that holds pretty mugs or small plants.
Styling Tip
- Don’t overload the pegboard. Leave some negative space so it feels curated, not chaotic. Group items by color or function, and add a small shelf at the top for a tiny plant or a salt cellar.
- A warm wood or black pegboard adds contrast against white cabinets, while a painted pegboard can become a subtle accent wall.
Budget-Friendly Swap
If you don’t want to drill into the cabinet, use strong adhesive strips or a tension rod system that hooks over the top of the cabinet door. You can also repurpose a cheap picture frame, remove the backing, and add pegboard inside for a more finished look.
5. Build a Wine Rack
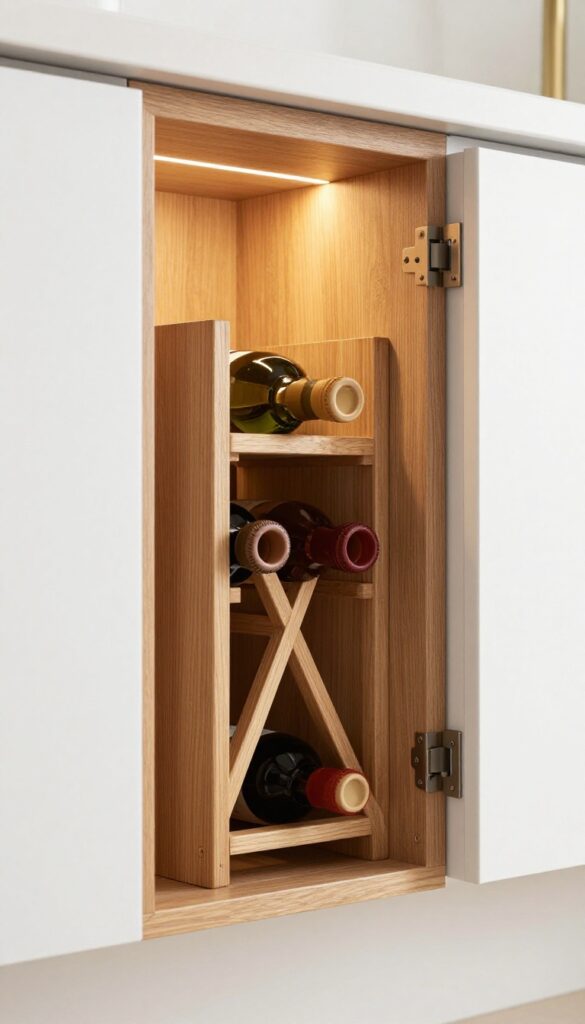
If you love having a bottle or two of wine on hand but don’t have a dedicated wine cellar or even a proper pantry, the end of your cabinets can step in. A narrow wine rack tucked into that awkward corner or beside the fridge keeps bottles within easy reach without taking up counter space. It’s a small addition that feels intentional and instantly adds a touch of sophistication to your kitchen.
A slim wine rack at the end of a cabinet run is one of those ideas that looks custom but is totally doable. You can buy a ready-made wooden rack that fits the width of your cabinet, or have a local carpenter build one that matches your existing cabinetry. The key is keeping it narrow—just deep enough for a standard wine bottle to sit horizontally.
This works especially well in galley kitchens or L-shaped layouts where the end cabinet is often a dead zone. Stack two or three bottles high, and you’ve got a mini wine collection on display. Finish it with a small LED strip underneath for a cozy glow, and you’ll wonder why you didn’t do this sooner.
Best Materials
- Stick with wood that matches or complements your cabinet finish—oak, maple, or walnut are classic choices. If your kitchen leans modern, black metal or stainless steel racks offer a sleek contrast. For a rustic vibe, reclaimed wood adds warmth and texture.
- Avoid plastic or cheap particleboard; wine racks get handled often, so durability matters.
Layout Tip
Place the rack on the end of a lower cabinet near the dining area or living room entrance. That way, grabbing a bottle doesn’t interrupt your cooking flow. If your kitchen is open-plan, it also doubles as a visual anchor that defines the cooking zone.
Finishing Touch
Add a small tray or coaster on top of the rack for a corkscrew and a couple of stemless glasses. It keeps everything you need in one spot and makes the setup feel intentional rather than just storage.
6. Add a Magnetic Strip
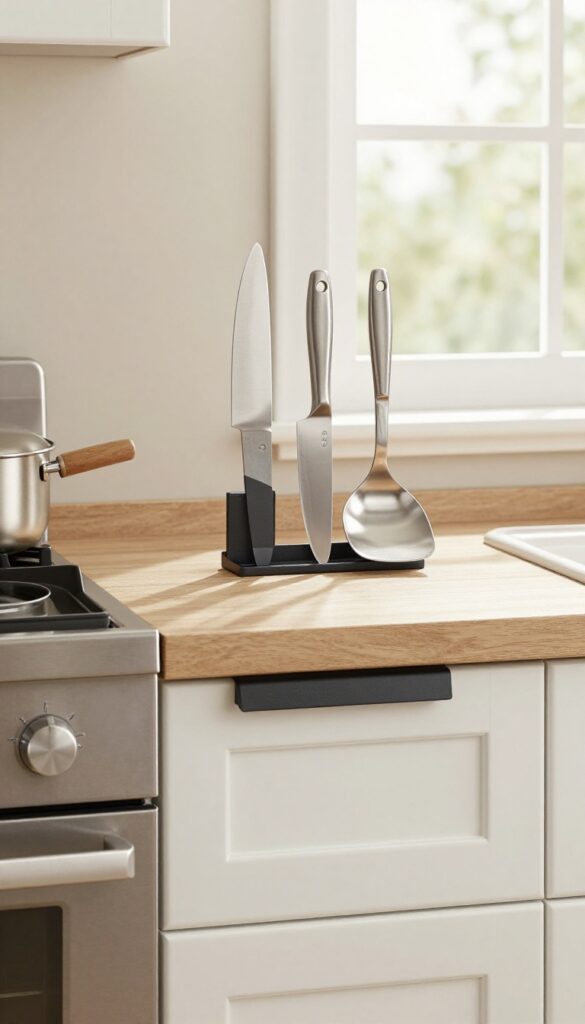
A magnetic strip mounted on the end of a cabinet is one of those small upgrades that feels both clever and effortless. It keeps your most-used knives and metal utensils within easy reach while freeing up drawer space and clearing countertops. The look is clean, modern, and surprisingly sculptural—especially when you arrange tools by size or color.
Mounting a magnetic strip on the end of a cabinet turns an often-overlooked spot into a functional display. It works especially well on the side of a cabinet near the stove or prep zone, so you can grab a knife or spatula without reaching into a drawer. The visual effect is streamlined and almost artistic, with blades and utensils floating in midair.
For a cohesive look, choose a strip that matches your cabinet hardware—brushed brass for warm kitchens, matte black for industrial vibes, or stainless steel for a seamless blend.
Best Placement
The end of a cabinet that faces your main work triangle is ideal. If you have a cabinet next to the stove, mount the strip on the side panel so knives are within arm's reach but out of the way of cooking splatters. For a peninsula or island cabinet end, place the strip on the side that faces the sink or prep area.
Styling Tip
Arrange knives by size—longest on the outside, shortest in the middle—for a balanced look. Add a few metal spatulas or tongs to break up the blade shapes. If your strip is strong enough, you can even hang a small magnetic hook for pot holders or a kitchen towel.
Safety Note
Make sure the strip is mounted securely into studs or with heavy-duty anchors, especially if you're storing chef's knives. Keep the strip at least a few inches above counter height so kids or pets can't accidentally bump into the blades.
7. Install a Paper Towel Holder
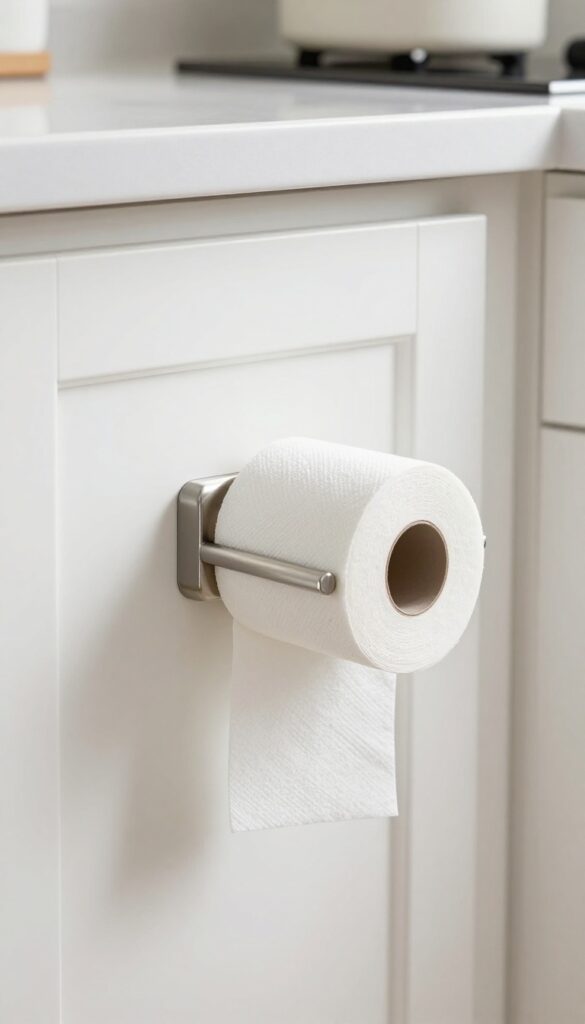
That awkward sliver of cabinet end space? It’s perfect for a paper towel holder. Instead of letting that roll hog precious counter real estate, mount a holder right on the side or underneath the cabinet.
You’ll free up workspace and keep towels within easy reach while cooking or cleaning up. It’s one of those small tweaks that makes the kitchen feel instantly more organized.
Mounting a paper towel holder on the end of a cabinet is a simple weekend project that pays off every day. Choose a holder that matches your hardware finish—brushed nickel, matte black, or brass—for a cohesive look. If you go with an under-cabinet mount, make sure the roll clears the counter below.
Side-mount options work great on narrow ends and keep towels visible. Either way, you’re reclaiming counter space and adding a handy detail that feels intentional.
Best Placement
For easy access, mount the holder on the cabinet end closest to your prep zone or stove. If you have a kitchen island, consider a side-mount on the cabinet facing the island. Under-cabinet mounts are ideal near the sink so you can grab a towel without dripping water across the floor.
Styling Tip
Match the holder’s finish to your cabinet pulls or faucet for a pulled-together look. A sleek stainless steel holder blends in, while a matte black or brass one adds a subtle accent. Keep the roll simple—unbleached or patterned towels can double as a decorative touch.
Installation Note
- Most holders come with screws and anchors. For solid wood cabinets, drill pilot holes to prevent splitting. For laminate or particleboard, use toggle bolts or adhesive strips rated for the weight.
- Measure twice to ensure the roll spins freely and doesn’t hit the counter.
8. Create a Coffee Station
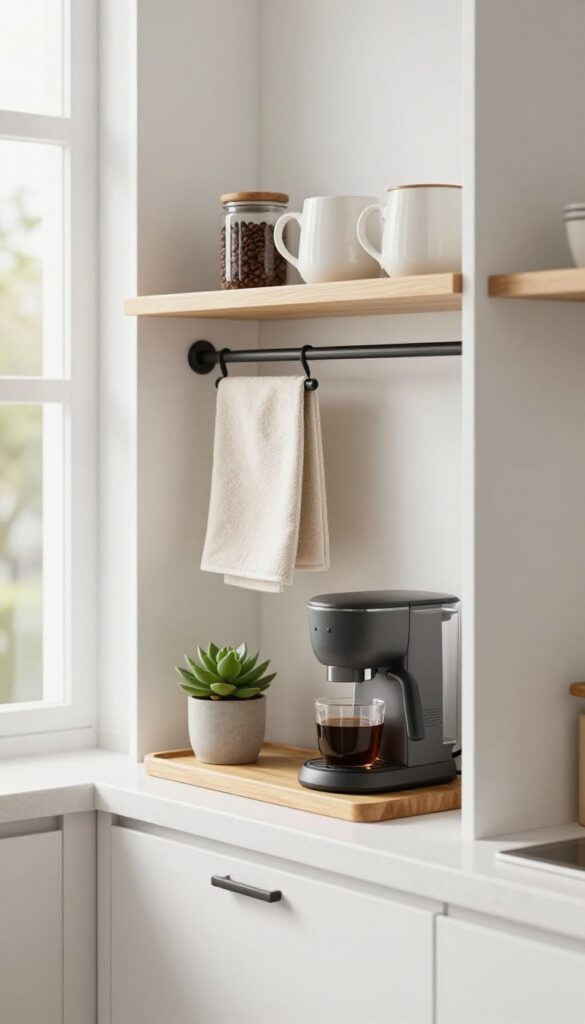
That awkward cabinet end next to the fridge or stove? It’s prime real estate for a mini coffee station. Instead of letting it collect dust or random bottles, turn it into a dedicated spot for your morning brew.
A small shelf, a couple of hooks, and your favorite mug collection transform this narrow space into something you’ll actually look forward to using. It’s compact, convenient, and keeps your countertops clutter-free.
Setting up a coffee station on a cabinet end is all about making the most of vertical space. Start with a slim shelf mounted at a comfortable height—just above your coffee maker if you plan to keep one there. Use the shelf for mugs, pods, or a small canister of beans.
Below, you can hang a rail for towels or a small hook for your go-to mug. Keep the color palette warm and inviting: think wood tones, matte black, or soft white to blend with your kitchen. A small tray corrals the essentials, and a tiny plant or a piece of art adds personality.
This station works best in a high-traffic area near an outlet, so you can plug in your coffee maker without cord chaos. It’s a simple upgrade that makes your kitchen feel more intentional and your mornings smoother.
Best Layout Tip
- Position the coffee station on the cabinet end closest to your sink or pantry. That way, you’re near water for filling the reservoir and close to your coffee supplies. If the end is narrow, opt for a wall-mounted shelf instead of a countertop unit to save space.
- Keep the coffee maker on a small tray to catch drips and make cleaning easy.
Storage Tip
Use a magnetic strip on the side of the cabinet to hold metal tins of coffee or small utensils. Stack mugs on a small riser or use hooks underneath the shelf for hanging cups. A slim drawer organizer inside the cabinet can hold pods, sweeteners, and stir sticks—everything you need within arm’s reach.
Finishing Touch
Add a small framed print or a chalkboard label above the station for a cozy café vibe. A warm LED strip light under the shelf makes the area feel inviting and helps you see what you’re doing in the early morning. Finish with a small plant, like a succulent or a trailing pothos, to soften the look.
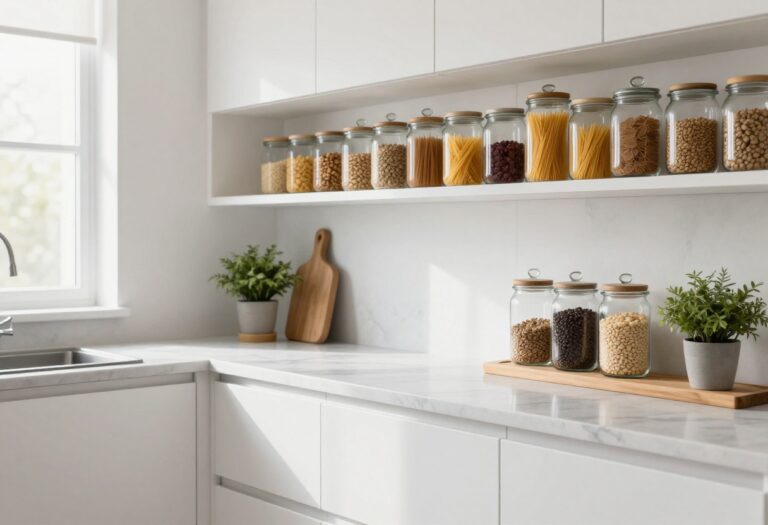
9. Add a Spice Drawer
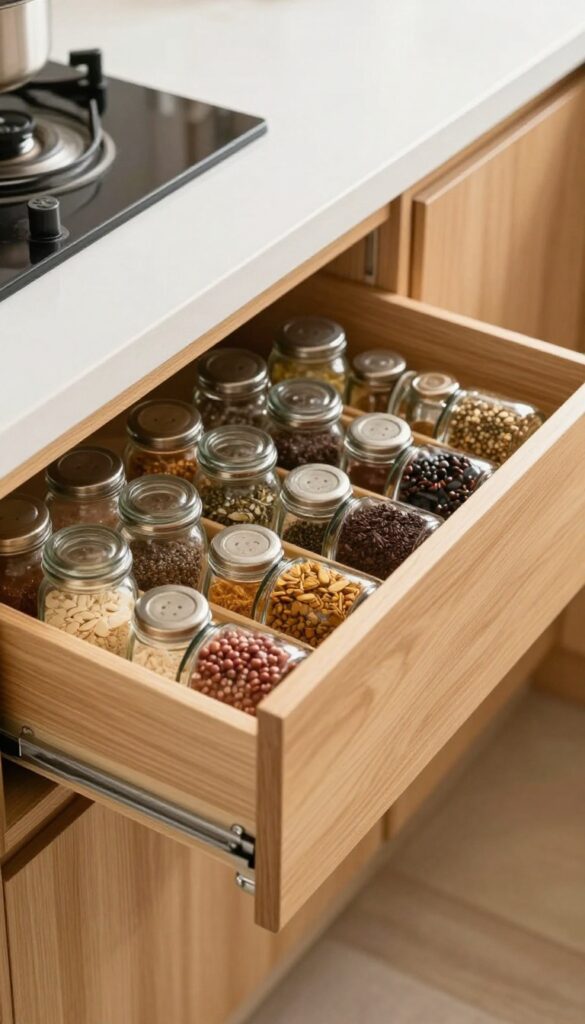
That narrow gap at the end of your cabinets often gets treated as dead space, but it’s actually prime real estate for a pull-out spice drawer. Instead of digging through a crowded cabinet or hunting for that jar of cumin, you can slide open a slim drawer and see every bottle at a glance. It’s one of those upgrades that feels luxurious but doesn’t require a full renovation—just a clever use of an inch or two.
A pull-out spice drawer turns an awkward gap into a highly functional storage spot. The key is making it deep enough to hold standard spice jars upright, with a shallow lip to keep them from tipping when you open the drawer. Line the interior with a non-slip mat or bamboo liner so jars stay put, and consider adding a small rail or tiered insert to maximize visibility.
This idea works especially well on the end of a base cabinet near the stove, so your most-used spices are within arm’s reach while you cook. The visual payoff is a clean, clutter-free countertop and a satisfying sense of order every time you reach for a pinch of paprika.
Best Materials
Go with solid wood or plywood for the drawer box—it’s sturdy and holds up to daily use. For the front, match your existing cabinet door style and finish so the drawer blends in seamlessly. If you want a pop of personality, try a contrasting wood stain or a matte black front for a modern edge.
Layout Tip
Position the drawer on the end of the cabinet closest to your cooking zone. If you have a peninsula or island, consider adding a pull-out on both sides: one for spices, another for oils and vinegars. Keep the depth between 3 to 4 inches to fit most standard jars without wasted space.
Finishing Touch
Add a soft-close mechanism so the drawer glides shut quietly. Inside, use small adhesive labels on the front of each jar or on the drawer lip itself so you can quickly find what you need. A clear glass spice jar set with uniform labels also makes the drawer look beautifully curated.
10. Hang a Pot Rack
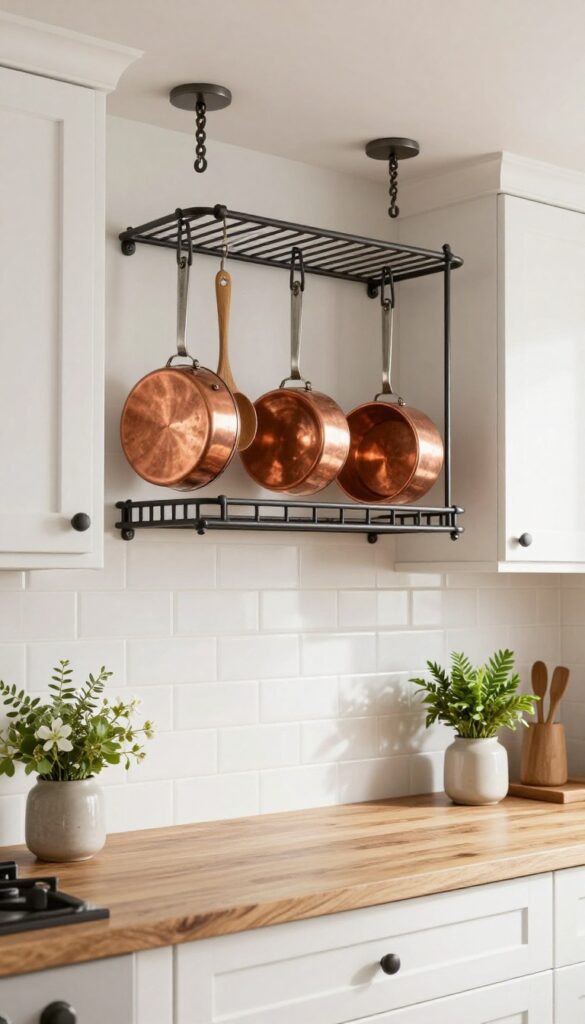
That awkward empty wall at the end of your cabinet run? It’s practically begging for a pot rack. Not only does it free up major cabinet space, but it also adds a warm, rustic touch that makes your kitchen feel more lived-in and functional.
Plus, having your pots and pans within arm’s reach makes cooking so much smoother.
A pot rack hung on the cabinet end is a smart storage hack that turns unused vertical space into a hardworking display. Whether you go with a classic wrought iron rack or a sleek modern bar, this idea keeps heavy cookware off your shelves and within easy grab-and-go reach. It works especially well in galley kitchens or on the end of a peninsula, where the rack doesn’t block sightlines or traffic flow.
The visual effect is cozy and inviting—like a chef’s kitchen that actually gets used.
Best Materials
Wrought iron or matte black steel gives that timeless farmhouse feel, while brushed brass or stainless steel leans more modern. If your kitchen has open shelving or exposed wood, a natural wood bar with hooks can tie everything together. Just make sure the material matches your cabinet hardware or light fixtures for a cohesive look.
Layout Tip
Mount the rack about 12 to 18 inches out from the cabinet end so pots hang freely without bumping into the cabinet door. If the end is narrow, use a single-bar rack instead of a wider one. For a peninsula, center the rack over the countertop so it doesn’t interfere with seating or prep space.
Styling Note
Keep the rack curated—hang only your most-used or prettiest pots and pans. Mix in a few wooden spoons or a hanging herb planter for texture. Avoid overcrowding; leave a little breathing room between each piece so the rack feels intentional, not cluttered.
11. Install a Message Center
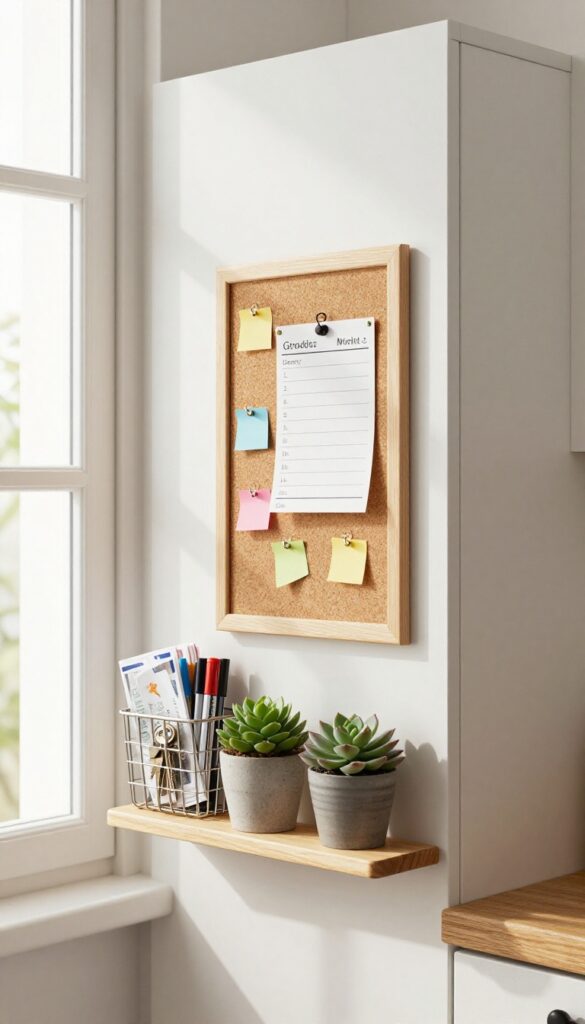
That skinny cabinet end you walk past a dozen times a day? It’s prime real estate for a family message center. Instead of letting it sit bare, turn it into a spot where grocery lists, appointment reminders, and sweet little notes all have a home.
It’s one of those tiny upgrades that instantly makes your kitchen feel more organized and lived-in.
A message center on the end of a cabinet works because it’s right where you need it—by the kitchen, near the door, or wherever your family naturally gathers. You don’t need a full wall or a fancy built-in. Just a chalkboard, corkboard, or dry-erase panel mounted on the cabinet side, plus a small tray or basket for markers and pushpins.
It’s a simple way to keep paper clutter off the counter and give everyone a visual spot to check before heading out the door.
Best Materials For The Surface
- Chalkboard paint is a budget-friendly option that lets you draw or write directly on the cabinet. If you prefer a cleaner look, a framed corkboard adds warmth and works well with pretty pushpins. For a modern touch, try a slim magnetic dry-erase board that also holds photos or reminders with magnets.
- Whichever you choose, make sure the finish is easy to wipe clean and matches your cabinet color or contrasts nicely.
Styling And Storage Add-ons
- Keep the area functional but not cluttered. Mount a small shelf or magnetic strip below the board to hold a cup of pens, a key hook, or a tiny plant. Add a shallow basket for mail or takeout menus.
- If your cabinet end is narrow, a vertical layout works best—board on top, storage below. A pretty washi tape border or a mini calendar can add personality without overwhelming the space.
Placement And Lighting Tip
- Install the message center at eye level so it’s easy to see and use. If the cabinet end is in a darker corner, add a small battery-operated puck light above the board or a clip-on lamp. Good lighting makes the board feel intentional and helps notes stand out.
- Avoid placing it too close to the stove or sink where moisture or heat could damage paper or the board surface.
12. Add a Shelf for Small Appliances
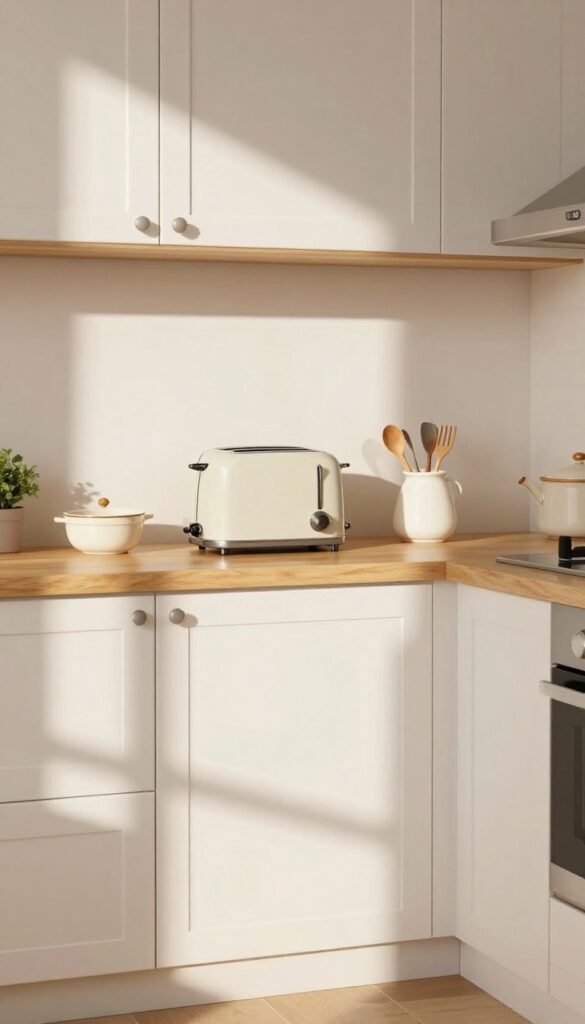
That empty wall at the end of your cabinet run is just begging to hold something useful. Instead of letting that space go to waste, mount a sturdy shelf there to give your toaster, blender, or mixer a permanent home. You’ll free up precious counter space while keeping your most-used gadgets within easy reach.
Plus, it adds a nice layered look to your kitchen—functional and stylish at the same time.
A shelf at the end of your cabinets is one of those ideas that feels obvious once you see it. It turns a dead zone into a hardworking spot without any major renovation. The key is choosing a shelf that’s deep enough for your appliances and strong enough to handle the weight.
Go for a solid wood or metal shelf with brackets anchored into studs. Style it with a small plant or a canister of utensils to soften the utilitarian vibe. This works especially well in galley kitchens or any layout where counter space is tight.
Best Materials
- Solid wood shelves (like oak or walnut) bring warmth and blend with most cabinet finishes. For a more industrial look, go with black metal or stainless steel. If your kitchen leans modern, a thick white or matte black shelf keeps things sleek.
- Just make sure the material can handle a bit of heat and moisture from the appliances.
Layout Tip
Mount the shelf about 18 inches above the counter so there’s enough clearance for taller appliances like a blender or mixer. If you’re placing it near an outlet, even better—no trailing cords across the counter. For a cohesive look, match the shelf length to the width of the cabinet end, or go a few inches wider for a more intentional feel.
Styling The Shelf
- Keep it practical but pretty. Place the appliance slightly off-center and add a small wooden cutting board or a ceramic canister on the other side. A trailing plant like pothos softens the hard edges.
- Avoid overcrowding—you want to be able to grab the appliance easily without moving things around.
13. Create a Cutting Board Storage
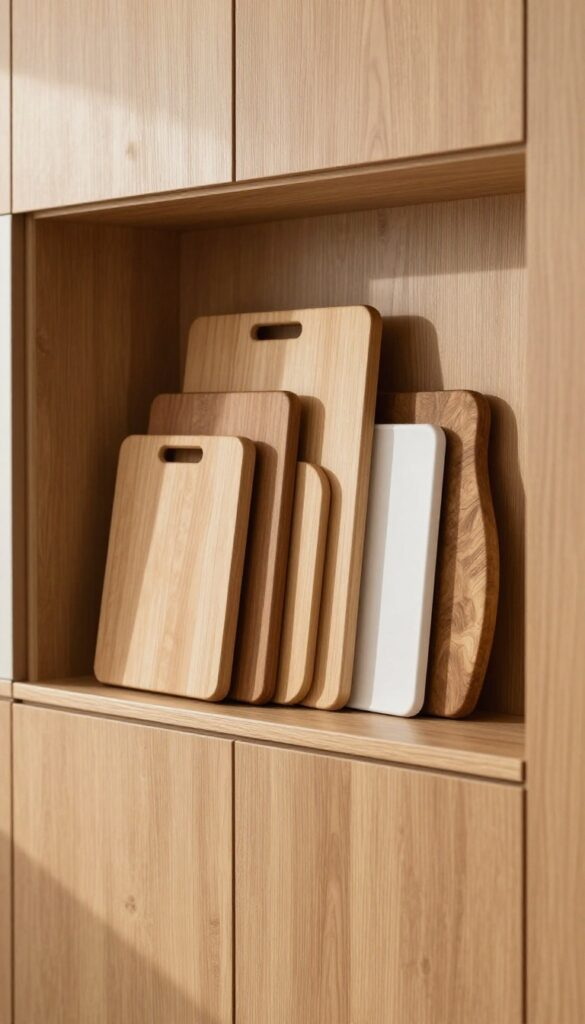
That narrow gap at the end of a cabinet run is perfect for storing cutting boards, baking sheets, and trays. Instead of stacking them in a deep drawer where you have to dig to find the one you need, vertical dividers keep everything upright and instantly accessible. It’s one of those small tweaks that makes your kitchen feel more organized without adding any bulk.
Vertical dividers turn an awkward sliver of space into a dedicated home for flat kitchen essentials. You can install them inside a cabinet or even on the side of an island if you have the clearance. The key is to measure your largest board or sheet first so the slots are wide enough.
Then slide in your pieces and enjoy never having to unstack a pile again.
Best Materials
Go with wood dividers if you want a warm, custom look that blends with cabinetry. Metal wire dividers are more budget-friendly and let you see through to the back, which helps when you’re grabbing a specific pan. For a sleek modern vibe, try acrylic dividers—they’re nearly invisible and keep the focus on the items stored.
Layout Tip
Place this storage near your prep zone so you can grab a cutting board without taking extra steps. If you have a double stack of dividers, use the lower slots for heavy baking sheets and the upper ones for lighter cutting boards. That way you’re not bending down for everyday items.
Finishing Touch
Add a thin wooden trim along the top edge of the dividers to match your cabinet finish. It makes the whole setup look built-in rather than like an afterthought. A small label on the side of each slot can also help family members return items to the right spot.
14. Add a Trash Can Pull-Out
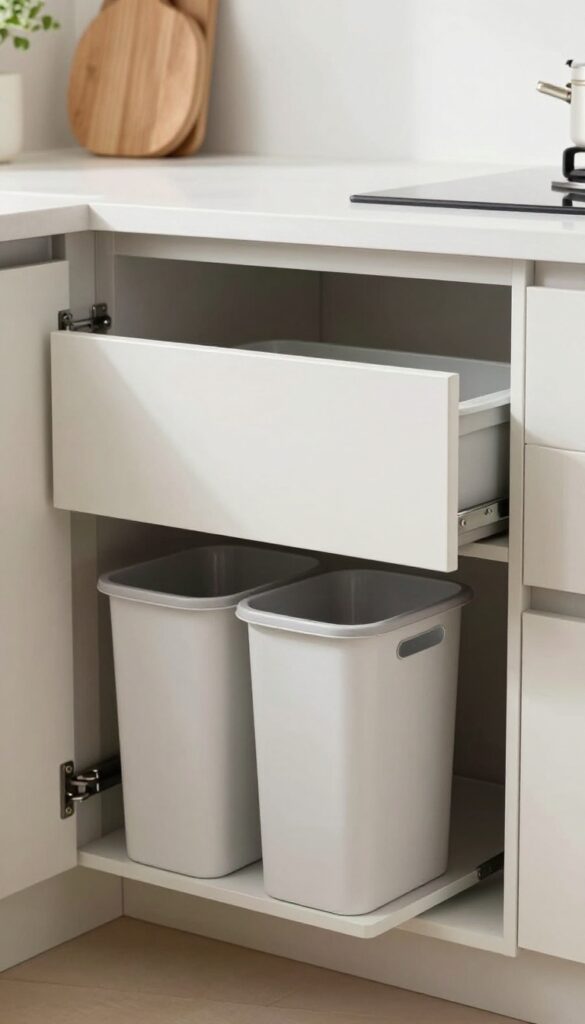
Trash cans are a kitchen necessity, but they can also be an eyesore. A slim pull-out unit tucked into the end of your cabinets keeps garbage and recycling out of sight while freeing up valuable floor space. This idea is especially handy in galley kitchens or islands where every inch counts.
The best part? It looks like a regular drawer from the outside, so your kitchen stays sleek and uncluttered.
A pull-out trash can is one of those upgrades that feels both luxe and practical. It mounts inside a cabinet base, slides out smoothly, and can hold one or two bins for sorting. Because it’s hidden behind a drawer front, it blends right in with your existing cabinetry.
No more ugly plastic cans taking up room by the counter. Plus, you can customize the size to fit your space—narrow units work for recycling, while wider ones handle general waste. It’s a small change that makes a big difference in how your kitchen functions and looks.
Best Placement
- The end of a base cabinet is prime real estate for a pull-out trash can. Look for a cabinet that’s at least 15 inches wide to accommodate a standard bin. If you have a kitchen island, the end facing the dining area is a great spot—it keeps trash out of the cooking zone but still easy to access.
- For a peninsula, tuck it on the side that’s less visible from the main living space.
Storage Tip
- Go for a double-bin system if you have the room. One side for trash, the other for recycling. This keeps everything organized and reduces trips to the main bin.
- Look for models with soft-close slides so the drawer doesn’t slam shut. You can also add a small pull-out for cleaning supplies above the bin to maximize vertical space.
Finishing Touch
- Choose a drawer front that matches your cabinet style—shaker, slab, or inset. For a seamless look, use the same hardware as the rest of your cabinets. If you want a pop of personality, consider a contrasting color or a metal mesh front that adds texture while still hiding the bin.
- Add a small pull handle that’s easy to grip even with messy hands.
15. Install a Charging Station
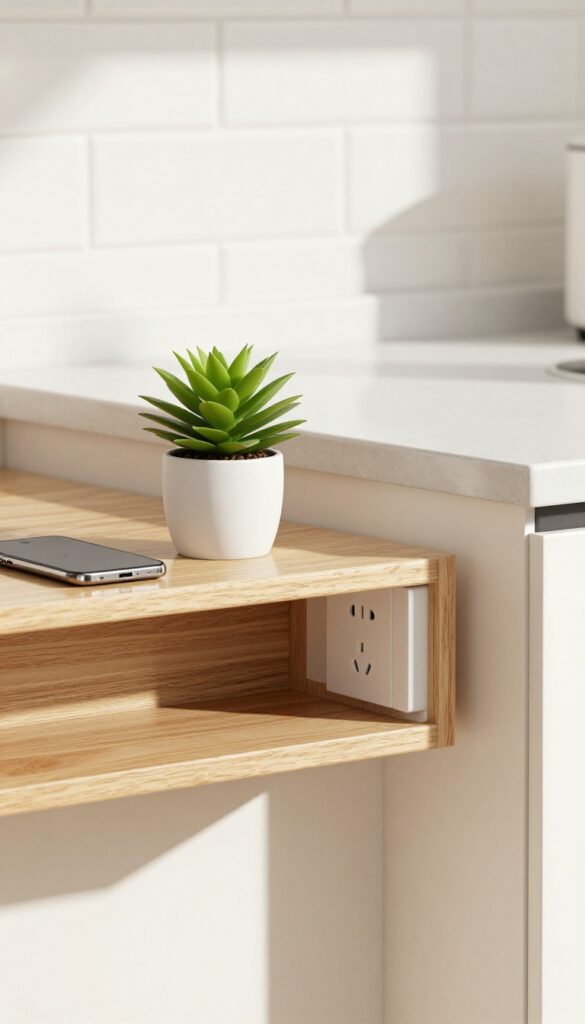
The end of a cabinet run is prime real estate that often goes overlooked, but it’s the perfect spot for a tiny tech hub. Instead of letting that small wall space sit empty, turn it into a charging station that keeps your countertops clutter-free. With a built-in outlet and a slim shelf, you can plug in phones, tablets, or even a smart speaker without cords snaking across the kitchen.
It’s one of those small upgrades that makes daily life feel smoother—and it looks clean and intentional, too.
A charging station at the end of a cabinet is a smart way to reclaim counter space and keep devices organized. The key is to keep it minimal: a single outlet (or a USB-C panel) plus a narrow shelf just big enough for a phone or two. You can tuck it into the side of a cabinet or mount it on the adjacent wall.
Either way, it’s a subtle addition that blends into your kitchen’s flow. Plus, it’s a breeze to install—no major renovation needed. Just make sure the outlet is accessible and the shelf is at a comfortable height for plugging in.
Best Materials
- Stick with materials that match your existing cabinets or countertops. A floating shelf in the same wood tone as your cabinetry keeps the look cohesive. For a more modern vibe, go with a sleek metal shelf in brushed nickel or matte black.
- The outlet plate should also blend in—consider a color-matched or stainless steel cover to keep it from sticking out.
Layout Tip
Position the charging station on the side of the cabinet that faces the main work area, not tucked into a corner. You want it easy to reach while you’re cooking or prepping. If you have a peninsula, the end facing the dining area works great too—guests can charge their phones without getting in your way.
Finishing Touch
Add a small tray or dish on the shelf to corral cords and keep devices from sliding off. A shallow wooden or ceramic dish adds a warm texture and prevents that “tech clutter” look. You can even run a short cable organizer along the underside of the shelf to hide the cord completely.
FAQ
Can I install these ideas on any cabinet end?
Most cabinet ends can support lightweight additions like spice racks or towel bars. For heavier items like pot racks, check that the cabinet is anchored to the wall.
Do I need to hire a professional for installation?
Many ideas are DIY-friendly with basic tools. For electrical work like adding an outlet, it's best to call a licensed electrician.
Will these ideas work in a rental kitchen?
Yes, choose removable options like adhesive hooks, magnetic strips, or tension-mounted racks to avoid damaging the cabinets.
How do I keep the cabinet end looking neat?
Stick to a cohesive color palette and avoid overcrowding. Use baskets or bins to corral small items and maintain a clean look.
Can I combine multiple ideas on one cabinet end?
Absolutely, but keep it balanced. For example, a slim shelf above a towel bar works well without feeling cluttered.
Conclusion
The ends of your kitchen cabinets are small but mighty. With a little creativity, they can become your favorite storage spots. Whether you go for a simple towel bar or a full coffee station, each idea adds function without sacrificing style.
Start with one idea that fits your needs, and you'll wonder why you didn't use that space sooner. Happy organizing!