11 Very Small Kitchen Ideas Layout Plans That Feel Open
A very small kitchen doesn't have to feel cramped or claustrophobic. With the right layout and a few clever design choices, you can make even the tiniest cooking space feel open and inviting. The key is to prioritize flow, light, and smart storage without overcrowding the room.
Modern, clean lines help a small kitchen breathe. By choosing streamlined cabinetry, light colors, and multi-functional elements, you create visual space that makes the room feel larger than it is.
Every inch counts, but that doesn't mean you have to sacrifice personality. Below are 11 layout plans and decor ideas that turn a very small kitchen into an open, functional, and stylish space.
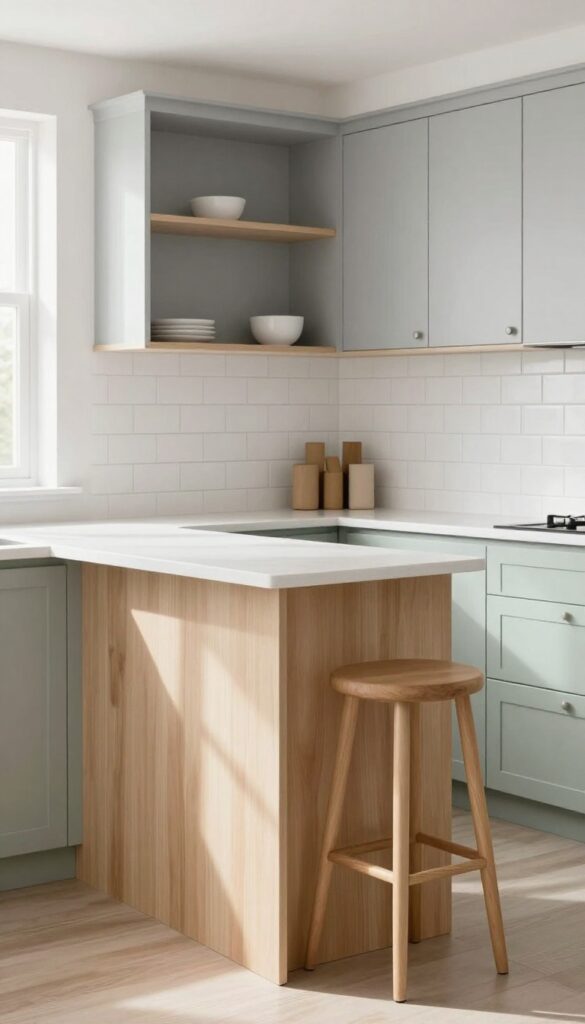
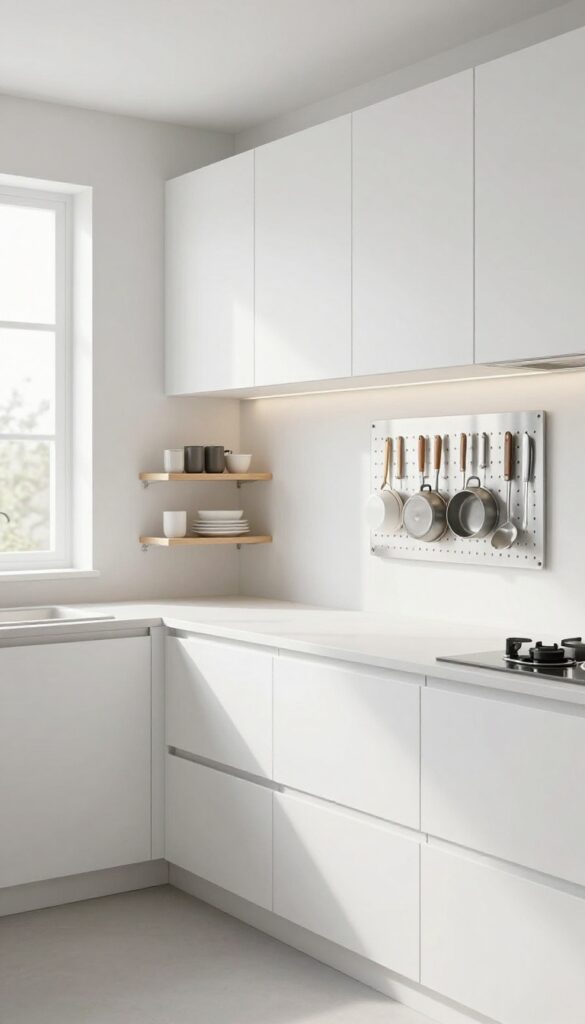
1. Open Shelving Instead of Upper Cabinets
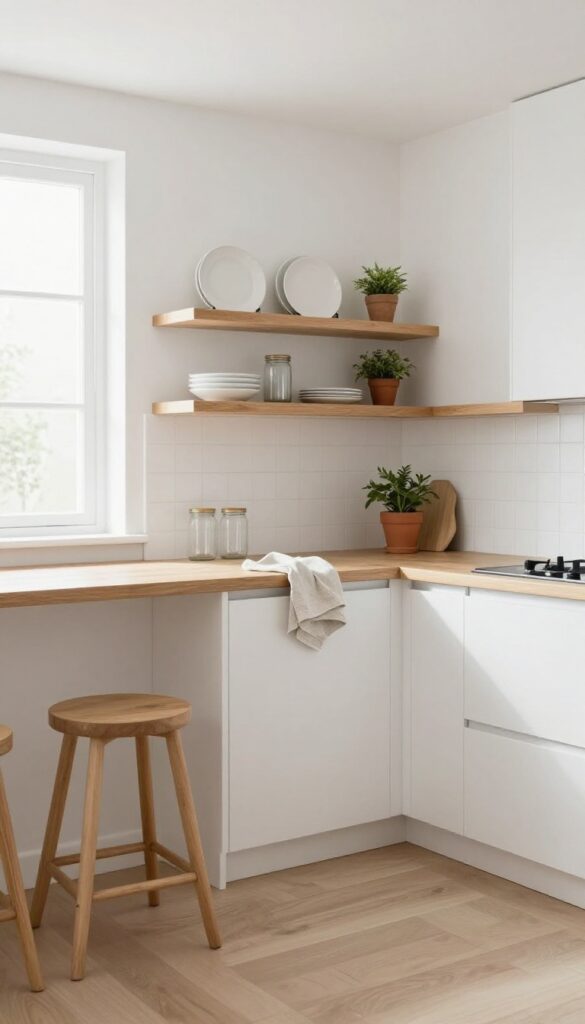
Upper cabinets can make a small kitchen feel closed in, even when they're painted white. Swapping them for open shelving instantly changes the whole mood—suddenly the room breathes. You get that airy, collected look without losing storage, as long as you're smart about what goes on display.
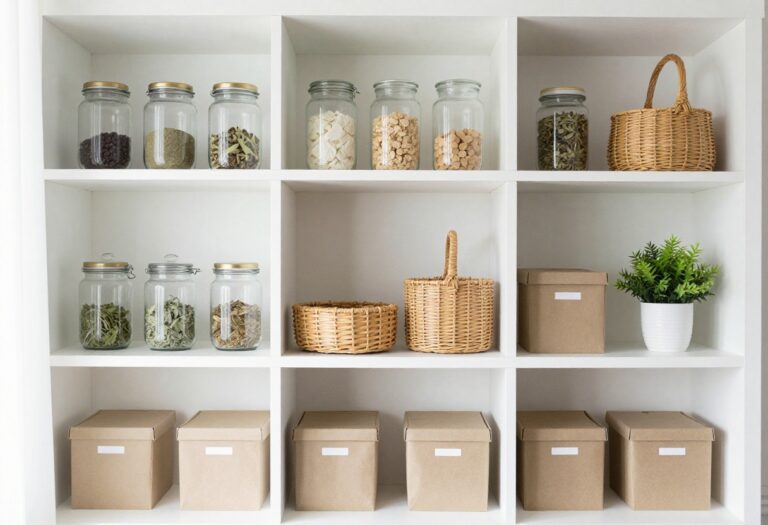
Open shelving forces you to edit, which is exactly what a tiny kitchen needs. Instead of hiding mismatched mugs behind doors, you curate a few beautiful pieces—simple white plates, a stack of linen napkins, a single ceramic pitcher. The shelves themselves become part of the decor.
Floating wood planks warm up a sterile white kitchen, while sleek black metal brackets add an industrial edge. The key is keeping the arrangement sparse and intentional. Leave some empty space between items so the eye can rest.
A row of matching glass jars for pantry staples looks neat and graphic. And don't forget the bottom shelf: use it for everyday bowls and glasses you grab without thinking. Open shelving works best on a wall that's visible from the main living area, so the kitchen feels connected rather than hidden away.
Best Materials
Go for natural wood like oak or walnut to add warmth, or choose powder-coated metal for a modern edge. If you want something in between, try a thick butcher-block shelf with visible grain. Avoid glossy finishes—they show every fingerprint and smudge.
Shelf Styling Tip
Group items in odd numbers and vary heights. Stack plates on a wooden stand, lean a cutting board against the wall, and set a small plant at one end. Keep the color palette tight—mostly white, wood, and one accent hue—so it feels calm, not cluttered.
Layout Fix
Install shelves at different heights to break up the wall and make the ceiling feel higher. Leave at least 18 inches between the countertop and the first shelf so you have room for a coffee maker or utensil crock.
2. Galley Layout with a Single Wall of Storage
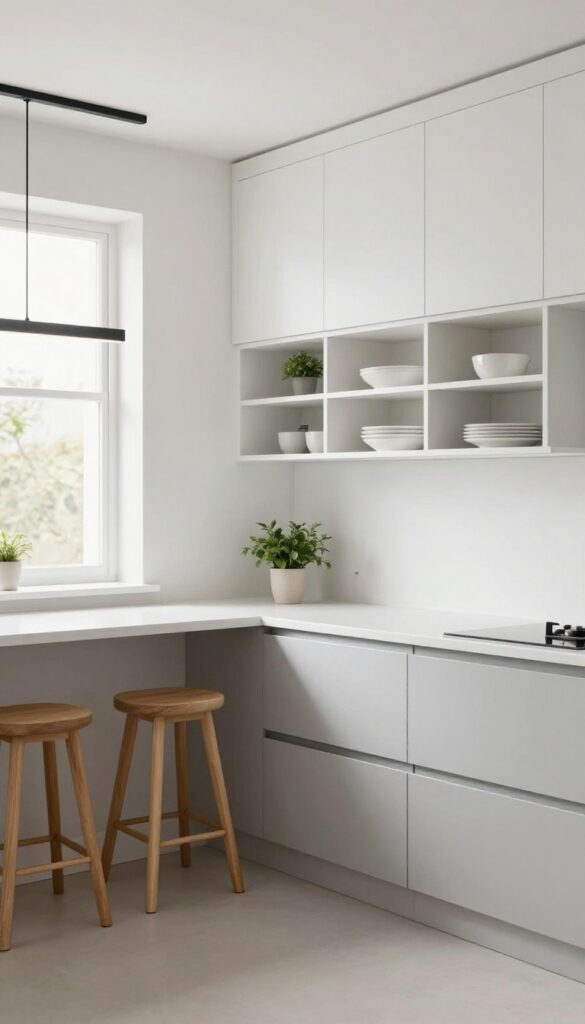
A narrow galley kitchen doesn't have to feel like a hallway. By putting all your storage on one side, you free up the opposite wall for a slim counter or even a couple of bar stools. This one-sided approach instantly makes the room feel wider and more open—plus it's a dream for keeping your workflow streamlined.
The key is to keep the storage wall visually clean so it doesn't overwhelm the space.
Concentrating cabinets and shelves on one wall creates a clear, uncluttered sightline. Use deep drawers and open shelving to avoid a heavy, boxed-in look. On the opposite side, install a narrow countertop—just 12 to 15 inches deep—for a breakfast bar or extra prep space.
Pair it with backless stools that slide underneath when not in use. This layout tricks the eye into seeing more floor area, and it makes the kitchen feel intentional rather than cramped.
Best Colors
Stick with light, reflective tones on the storage wall—think soft white, pale gray, or warm beige. Keep the opposite wall and countertop in a similar light palette to maintain continuity. A subtle contrast, like a white upper cabinet with a slightly darker lower cabinet, adds depth without breaking the openness.
Layout Tip
Position the sink and stove on the storage wall to keep the work triangle compact. Leave the opposite countertop clear for quick tasks or casual dining. If space allows, add a slim shelf above the bar area for cookbooks or a plant—just don't clutter it.
Finishing Touch
Hang a long, linear pendant light or a row of small pendants above the open side to define the zone. Choose a fixture with a slim profile so it doesn't block the view. A warm metallic finish, like brushed brass, adds a touch of elegance without feeling heavy.
3. L-Shaped Layout with a Peninsula
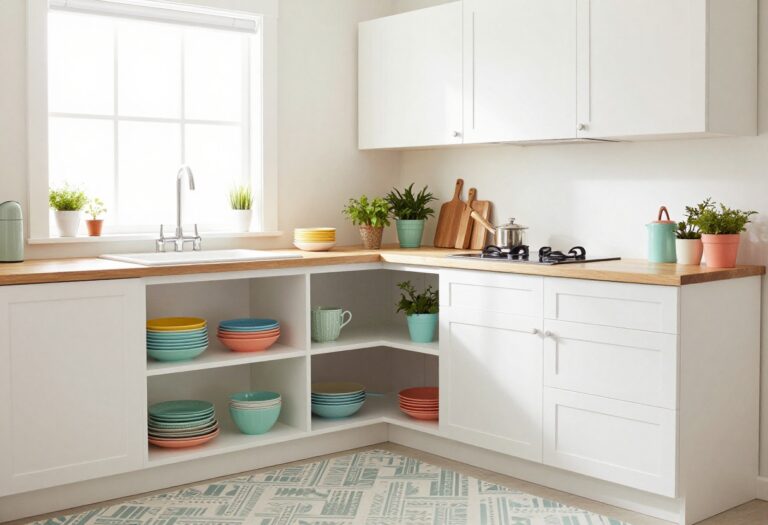
An L-shaped layout already makes smart use of corners, but adding a small peninsula takes it a step further. This setup creates a natural division between the kitchen and adjacent living or dining space without closing things off. The peninsula gives you extra counter space for prepping meals and a spot for casual seating, so it pulls double duty in a tiny footprint.
Keep the base cabinets streamlined and the countertops clutter-free to maintain that open, airy feel.
The L-shaped layout with a peninsula is a go-to for small kitchens that need more function without sacrificing flow. The peninsula extends from one leg of the L, creating a partial barrier that defines the kitchen zone while still allowing visual and physical connection to the rest of the room. Use the overhang on the outer side for bar stools—two is plenty for a compact setup.
On the kitchen side, the peninsula becomes prime real estate for meal prep or a coffee station. Stick with light-colored cabinets and a simple countertop material like quartz or butcher block to keep the look clean and modern. Open shelving above the peninsula can hold everyday dishes or a few decorative pieces, but keep it minimal to avoid visual weight.
Best Colors
Stick with a light, neutral palette to keep the space feeling open. White or pale gray cabinets paired with a warm wood or white quartz countertop create a clean backdrop. Add a subtle contrast with a darker island base or a soft pastel on the peninsula—think sage green or pale blue—to introduce personality without overwhelming the room.
Layout Tip
Make sure the peninsula doesn't block the main workflow. Aim for at least 36 inches of clearance between the peninsula and the opposite counter or appliances. If you're adding seating, leave about 12 inches of overhang for legroom and choose stools that tuck under when not in use.
Finishing Touch
Hang a pair of slim pendant lights above the peninsula to define the zone and add warmth. Choose fixtures with a simple, modern shape—glass or metal works well—and keep them low enough to create intimacy but high enough not to bump heads.
4. Light Color Palette from Floor to Ceiling
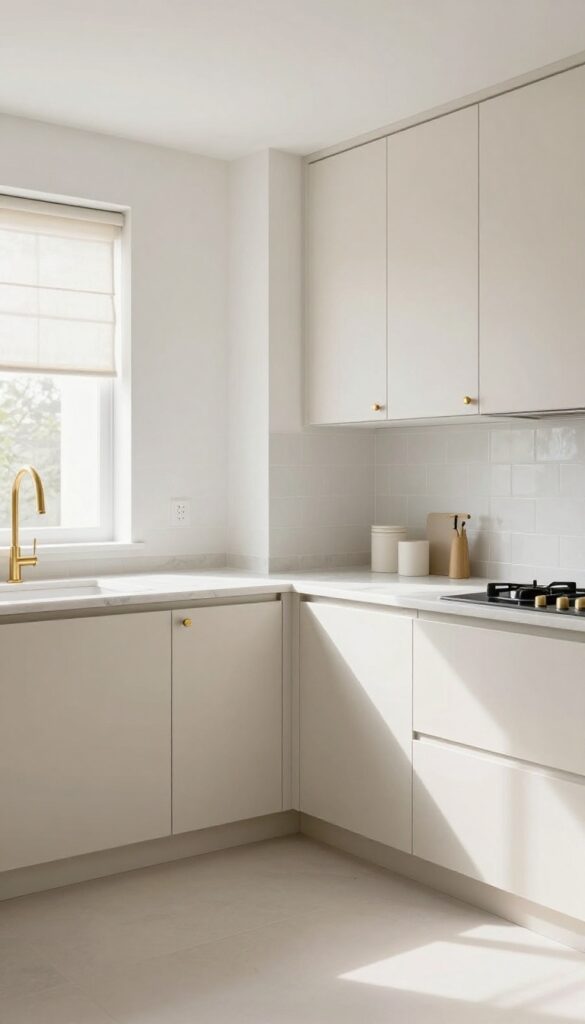
When square footage is tight, the fastest way to open up a room is through color. A light palette that wraps from the floor to the ceiling creates a seamless, airy backdrop that tricks the eye into seeing more space. Soft whites, creamy off-whites, and pale greiges work beautifully because they reflect natural light instead of absorbing it.
This isn't just about painting walls—carrying the same light tone across cabinets, backsplash, and even the ceiling eliminates visual clutter and makes boundaries disappear.
A monochromatic light scheme does more than just brighten—it erases harsh lines that can make a small kitchen feel chopped up. When cabinets, walls, and ceiling share a similar value, the room reads as one continuous volume. This approach is especially effective in kitchens with limited windows or awkward layouts, because it maximizes every ray of light.
The result is a calm, clean space that feels intentionally minimalist rather than cramped.
Best Colors
Stick with warm whites like Swiss Coffee or Alabaster to avoid a cold, clinical feel. Pale greiges such as Agreeable Gray add subtle warmth without going beige. For a slightly bolder but still airy look, try a soft blush or powder blue on the ceiling while keeping walls and cabinets white.
Texture Mix
To prevent a flat, boring look, layer in texture through matte painted cabinets, a honed marble or quartz countertop, and a slightly glossy ceramic tile backsplash. A linen roman shade or woven wood blind adds softness, while matte black or brushed brass hardware gives just enough contrast.
Finishing Touch
Carry the light palette onto open shelving by using white dishes and glassware. A few pale wood cutting boards or a light ceramic vase with dried eucalyptus keep the look layered but still monochromatic. Avoid dark accessories—they create visual stops that break the flow.
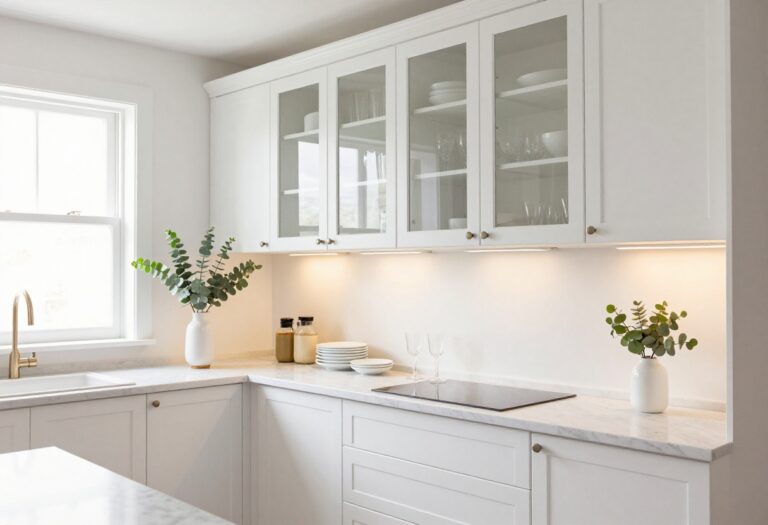
5. Glass Cabinet Doors for Depth
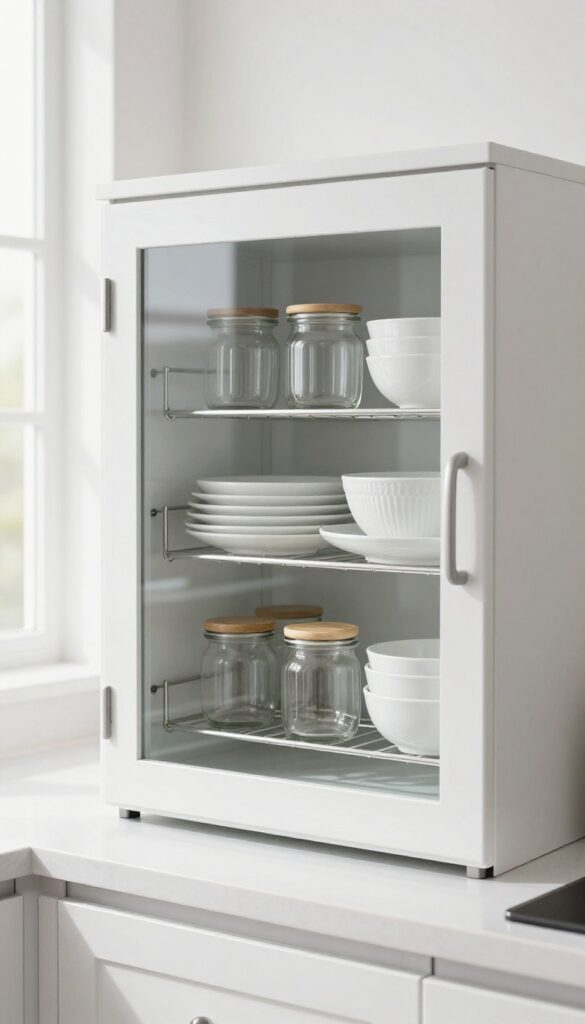
Solid upper cabinets can make a small kitchen feel boxed in. Swapping a few doors for clear glass instantly tricks the eye into seeing more space, because you’re looking past the cabinet into a deeper layer. The trick is keeping what’s inside neat and intentional—think matching white dishes, glass jars, or a curated stack of bowls.
That way the transparency feels like a design choice, not a mess on display.
Glass-front cabinets bounce light around and break up heavy cabinetry, which is exactly what a tiny kitchen needs. They work best on upper cabinets where you can see the wall behind them, creating a sense of depth that solid doors just can’t match. Stick to clear glass rather than frosted or textured—you want that clean, open look.
Inside, edit ruthlessly: group similar items, use shelf risers, and stick to a neutral palette so the view stays calm. If your kitchen gets a lot of natural light, the glass will catch it and make the whole room feel brighter without adding a single lamp.
Best Cabinets To Convert
- Focus on the upper cabinets that are at eye level—those are the ones that will give you the most visual payoff. Avoid converting lower cabinets or ones near the stove where grease and splatters are a problem. If you have a bank of three upper cabinets, try swapping just the center one for glass.
- That single change can open up the whole wall without overwhelming the space.
Styling The Shelves Inside
- Treat the inside of a glass-front cabinet like a mini display. Stack dinner plates on a slim metal riser, line up matching drinking glasses, or group white ceramic canisters. Keep colors light and consistent—cream, white, pale gray, or soft wood tones.
- A few open baskets can hide less pretty items like measuring cups or small gadgets. The goal is a clean, intentional look that feels more like a shelf than a cabinet.
Lighting And Finishing Touches
- Add a thin LED strip under the cabinet above the glass door to highlight the items inside. Warm white light (2700K–3000K) keeps the display cozy and inviting. If your cabinet frames are dark, paint the interior of the cabinet a light color so the contrast isn’t jarring.
- Simple glass knobs or matte black pulls complete the modern, clean look without distracting from the transparency.
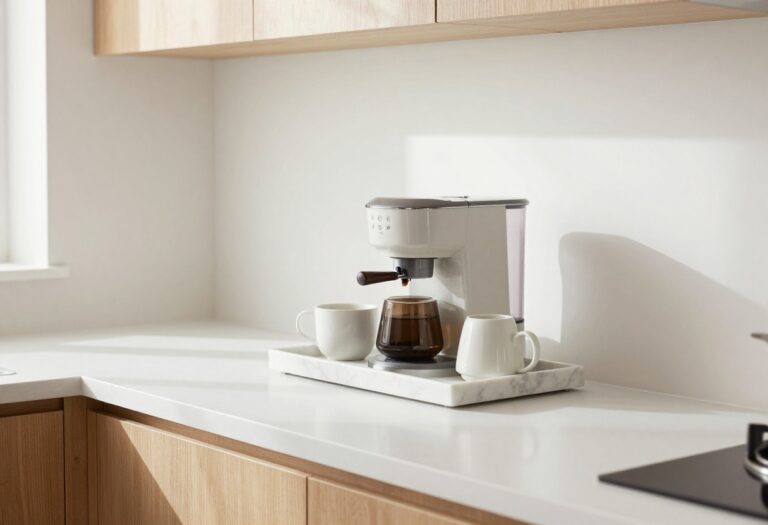
6. Slim, Integrated Appliances
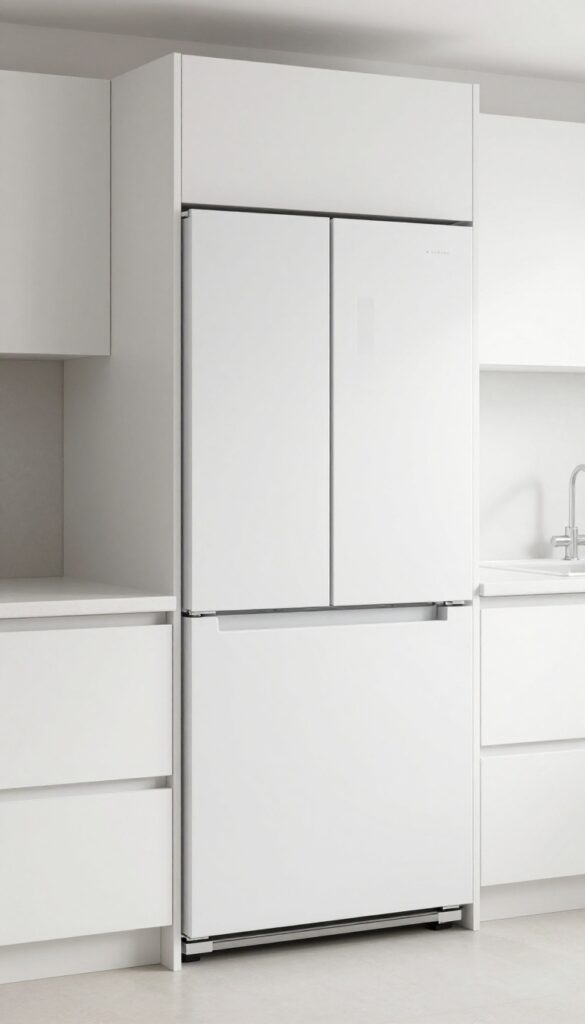
One of the quickest ways to make a tiny kitchen feel bigger is to let your appliances disappear. Standard refrigerators and dishwashers stick out past countertops, creating visual bumps that break the clean line of your cabinetry. Slim, integrated appliances sit flush with your cabinets, so the eye glides smoothly across the room without stopping at bulky white boxes.
The result is a kitchen that feels custom, calm, and surprisingly spacious—even when square footage is tight.
When every inch counts, choosing appliances that blend in rather than stand out is a game-changer. Counter-depth refrigerators align with your countertops, eliminating that awkward forward jut. Slim dishwashers, often just 18 inches wide, fit into narrow cabinet runs without sacrificing capacity.
Compact ranges or induction cooktops with built-in downdrafts free up wall space for upper cabinets. The visual trick here is continuity: your cabinetry becomes the star, and the appliances become quiet supporting players.
Best Materials
Match your appliance panels to your cabinet fronts for a seamless look. If you have shaker-style cabinets, order panel-ready dishwasher and refrigerator fronts in the same wood or painted finish. Stainless steel is still an option, but consider brushed or matte finishes that reflect less glare and feel more subdued.
Layout Tip
Place the refrigerator at the end of a cabinet run so its depth doesn't interrupt the main countertop flow. For a slim dishwasher, tuck it next to the sink on the side opposite the range—this keeps the work triangle efficient without crowding the prep zone.
Small-space Fix
If a full counter-depth fridge is out of budget, look for an under-counter refrigerator drawer. It slides into base cabinets and frees up vertical space for extra upper storage or open shelving. Pair it with a compact freezer drawer elsewhere.
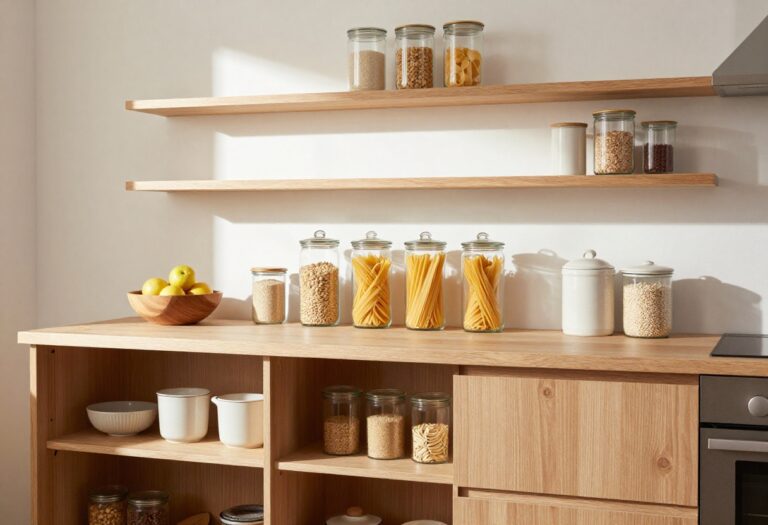
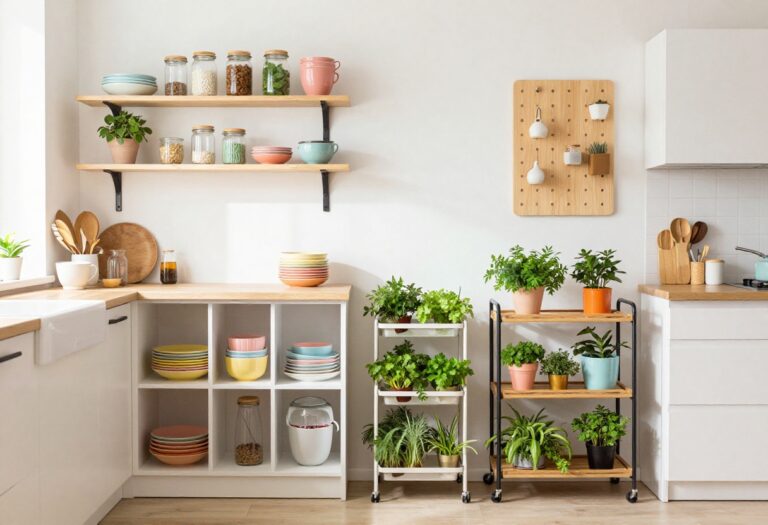
7. Vertical Storage Solutions
When floor space is tight, the only way to go is up. Tall cabinets that stretch to the ceiling not only store more but also make the room feel taller and less cluttered. Pair that with wall-mounted organizers, and suddenly your countertops breathe again.
This approach keeps everything within reach while preserving that clean, modern look you want in a small kitchen.
Vertical storage is the secret weapon of tiny kitchens. By using every inch of wall height, you can stash away pots, pans, utensils, and even small appliances without sacrificing precious counter space. The result is a kitchen that feels open, organized, and effortlessly stylish.
Here’s how to make it work in your own space.
Best Materials
Stick with sleek, handleless cabinetry in a matte finish—white, light gray, or warm wood tones keep the look airy. For open shelving, try slim metal racks or floating wood shelves that don’t overwhelm the wall. Pegboards work best in powder-coated steel or natural wood, and magnetic strips should be brushed stainless steel for a cohesive feel.
Layout Tip
Install cabinets from floor to ceiling on one main wall, and use the top shelves for rarely used items like holiday platters or bulk staples. Reserve the middle zone for everyday dishes and glassware. On the opposite wall, mount a pegboard near the prep area for pots, ladles, and colanders—keeping them visible but off the counter.
Finishing Touch
Add under-cabinet lighting to banish shadows and make the vertical storage feel like a design feature, not just a necessity. Warm LED strips along the toe kick and above the cabinets create a soft glow that emphasizes height and adds a modern, clean ambiance.
8. Under-Cabinet Lighting for Brightness
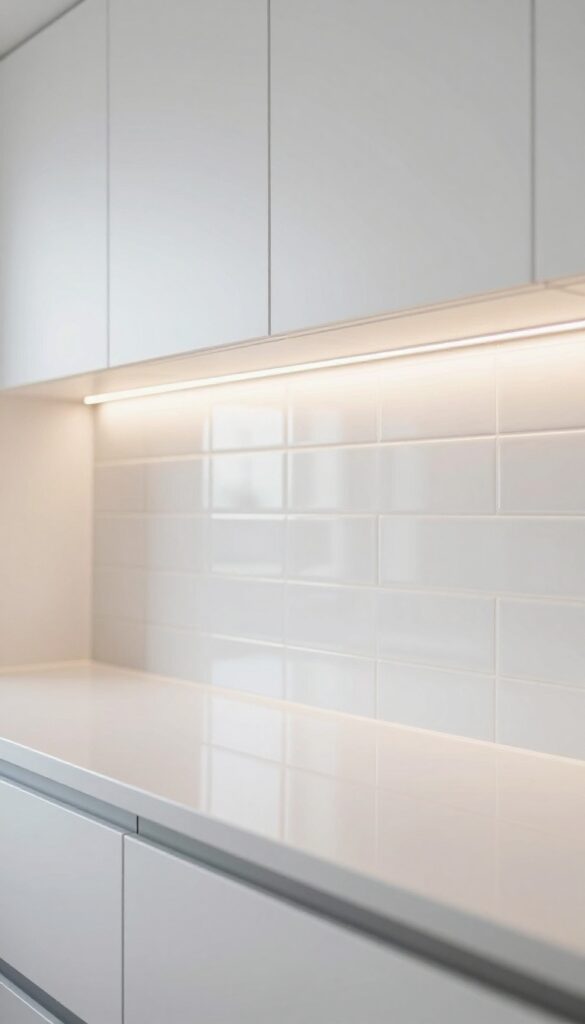
Shadows on your countertops can make a small kitchen feel even more cramped. Under-cabinet lighting eliminates those dark spots, instantly opening up the space and making your work surfaces feel larger. Whether you choose warm white for a cozy glow or cool white for a crisp, modern look, this simple upgrade transforms both the function and feel of your kitchen.
LED strip lights are the go-to choice for under-cabinet lighting because they're slim, energy-efficient, and easy to install. They slide into place with adhesive backing or clip-on channels, so you don't need an electrician. The result is a seamless wash of light that makes your countertops the star of the show.
Plus, the even illumination highlights your backsplash and countertop materials, adding depth and texture to the whole room.
Best Color Temperature
Warm white (2700K–3000K) gives off a soft, inviting glow that works beautifully with wood tones and warm neutrals. Cool white (3500K–4000K) feels crisp and clean, perfect for modern kitchens with white cabinets or stainless steel. Stick with one temperature throughout to keep the look cohesive.
Installation Tip
Place the lights toward the front edge of the cabinet, not the back. This prevents glare and directs light exactly where you need it—on the countertop. Use a dimmer switch to adjust brightness throughout the day, from bright task lighting for cooking to a softer glow for late-night snacks.
Styling Note
Pair under-cabinet lighting with a glossy or metallic backsplash to bounce light around the room. Subway tile, glass mosaic, or stainless steel backsplash will amplify the effect, making the kitchen feel brighter and more spacious without adding a single fixture.
9. Reflective Surfaces and Mirrors
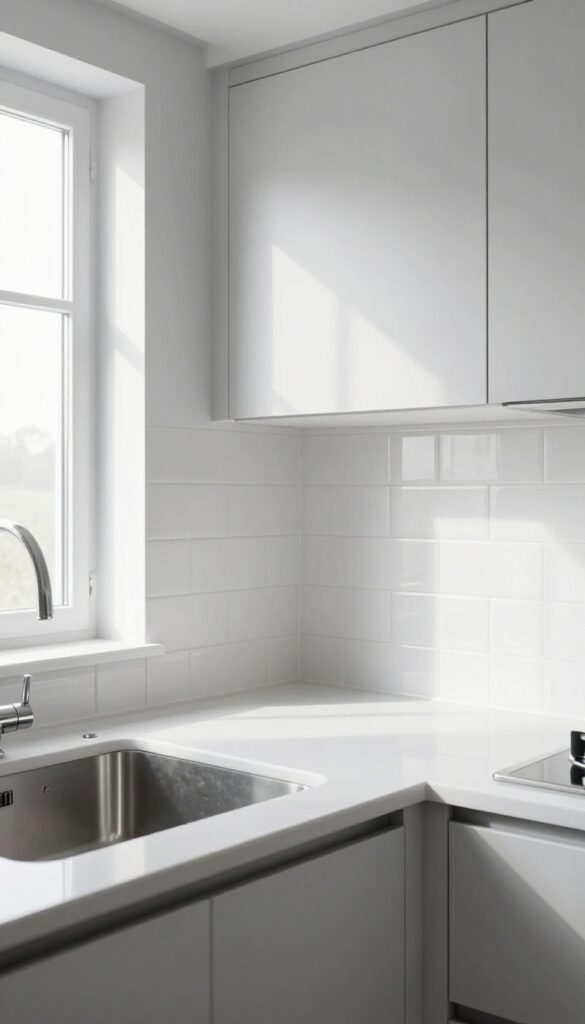
Mirrors and glossy finishes are a tiny kitchen's best friend. They bounce light around the room, making the space feel airy and larger than it actually is. A mirrored backsplash or high-gloss tiles can transform a cramped galley into a bright, open-looking area without any structural changes.
The key is to use reflective elements strategically so they catch both natural and artificial light, creating depth and a subtle sense of luxury.
Reflective surfaces work by tricking the eye into seeing more space. When light hits a mirror or glossy tile, it bounces back, illuminating dark corners and making the room feel twice as big. This trick is especially effective in small kitchens where every inch counts.
Plus, the sleek, clean look of reflective materials fits perfectly with a modern aesthetic. You don't need to cover every wall—just one well-placed mirror or a strip of glass tile can make a dramatic difference.
Best Materials
- Opt for polished glass subway tiles, mirrored stainless steel sheets, or high-gloss ceramic tiles in white or pale gray. These materials reflect light without overwhelming the space. Avoid dark glossy finishes—they can feel heavy and actually absorb light.
- Stick to light, cool tones that amplify brightness.
Placement Tips
- Install a mirrored backsplash behind the stove or sink, where it catches the most light. Alternatively, use a large mirror on a wall opposite a window to double the natural light. For a subtle touch, add mirrored cabinet fronts or a glossy tile strip above the counter.
- Keep the reflective area clean and free of clutter to maximize the effect.
Finishing Touch
Pair reflective surfaces with matte hardware and open shelving to balance the shine. Add a few glass jars or metallic accessories to echo the glossy theme without going overboard. A small pendant light with a reflective shade can also amplify the glow, making the kitchen feel polished and bright.
10. Multi-Functional Island on Casters
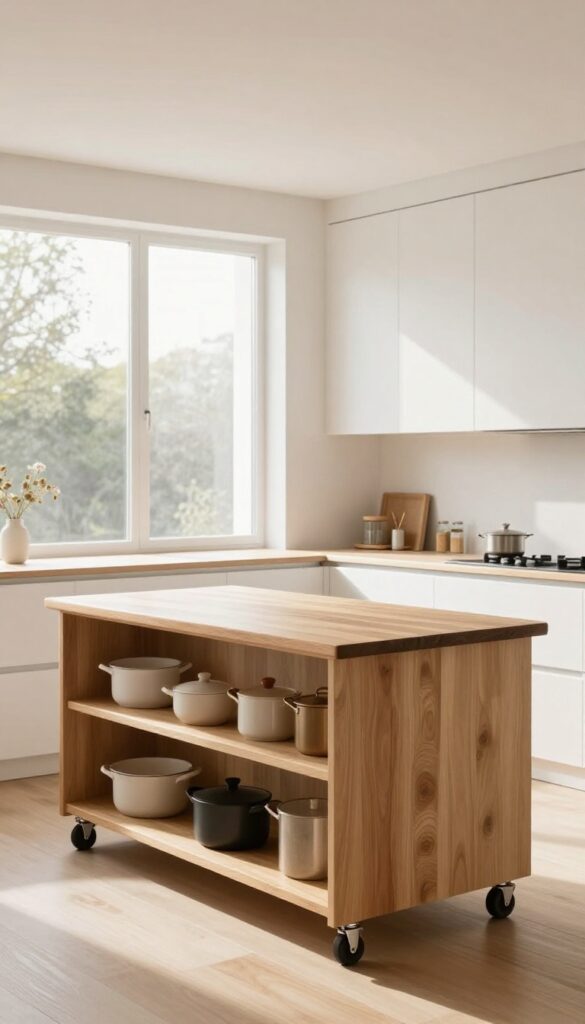
A rolling kitchen island is the ultimate multitasker for a small space. It gives you extra counter space when you're prepping, a spot to set down a cutting board, and open shelves for storing pots or pantry staples—all without committing to a permanent fixture. When you need more floor space for cleaning or hosting, just roll it to the side.
The butcher block top adds warmth and a natural texture that keeps the kitchen feeling grounded, while the casters make the whole setup feel light and flexible.
A rolling island with a butcher block top and open shelving is a smart addition to any tiny kitchen. It offers the functionality of a full island without the permanence, so you can rearrange your layout whenever you need. The open shelves keep everyday items within easy reach and prevent the island from feeling bulky.
Choose a design with clean lines and a simple silhouette to match the modern, clean aesthetic. Position it near your main work zone for easy access, and roll it away when you want an unobstructed path.
Best Materials
- Look for an island with a solid wood or butcher block top—it’s durable, easy to maintain, and adds a natural contrast to sleek cabinetry. The base can be metal or painted wood in a neutral tone like white, black, or matte gray. Avoid overly ornate details; stick with clean, straight lines.
- Open shelves made of wire or solid wood keep the look airy and functional.
Layout Tip
- Place the island parallel to your main counter to create a galley-like workflow. Leave at least 36 inches of clearance on all sides so you can move comfortably. If your kitchen is very narrow, choose a slim island that’s no wider than 18 inches.
- The casters let you shift it closer to the wall when you need extra floor space for cooking or cleaning.
Storage Strategy
- Use the open shelves for items you reach for daily: mixing bowls, cutting boards, or a few favorite cookbooks. Add small baskets or bins to corral loose items like spices or utensils. Keep the top clear except for a small cutting board or a plant to maintain an uncluttered look.
- Avoid stacking too much—the goal is to feel open, not crowded.
11. Minimalist Decor with a Single Focal Point
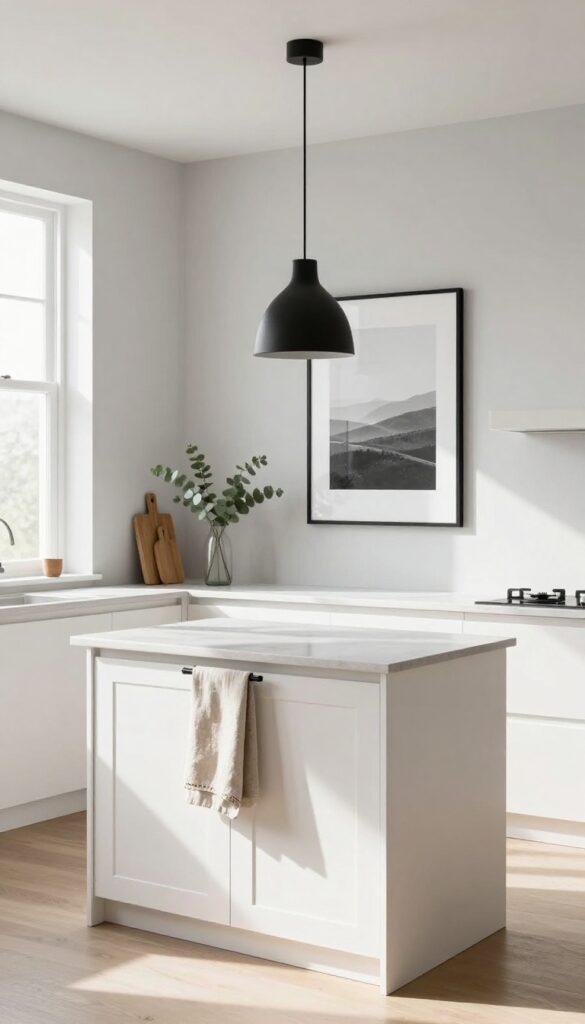
A tiny kitchen can easily feel chaotic when every surface is covered. The minimalist approach flips that by stripping back to essentials and letting one standout piece do the talking. It’s a breath of fresh air—clean, calm, and surprisingly personal.
The key is restraint. Clear off your countertops completely, then add back only what you truly use daily. Everything else stays hidden in cabinets or drawers.
Now choose your focal point: maybe a sculptural pendant light in matte black, a large framed print propped on the counter, or a single vase with fresh eucalyptus. That one item becomes the star, giving the room character without visual noise. The result feels open, intentional, and way bigger than it actually is.
Best Colors
Stick to a neutral base—white, warm gray, or soft beige—for cabinets and walls. Then let your focal point introduce a subtle pop of color, like a deep navy pendant or a terracotta vase. This keeps the space airy while adding just enough personality.
Lighting Tip
A single statement pendant hung low over a small island or prep zone draws the eye up and creates a sense of height. Go for a fixture with clean lines—a globe, a cone, or a slim linear shape—to keep the look uncluttered.
Finishing Touch
Add one textural element, like a linen dish towel draped over the oven handle or a small wooden cutting board leaning against the backsplash. It softens the minimalism without breaking the clean vibe.
FAQ
What is the best layout for a very small kitchen?
The best layout depends on your space, but galley and L-shaped layouts are popular for small kitchens. Galley layouts maximize efficiency in narrow spaces, while L-shaped layouts offer more counter space and can accommodate a small peninsula or island.
How can I make my small kitchen feel bigger without renovating?
Use light colors, add mirrors or reflective surfaces, improve lighting with under-cabinet lights, and declutter countertops. Open shelving and glass cabinet doors also create a sense of openness without major construction.
What colors make a small kitchen look larger?
Light, neutral colors like white, cream, pale gray, and soft beige make a small kitchen feel larger. A monochromatic color scheme from floor to ceiling eliminates visual breaks and expands the space visually.
Is open shelving practical for a small kitchen?
Yes, open shelving can be very practical if you keep it organized and limit items to everyday use. It saves space by eliminating bulky cabinets and makes the room feel more open. Use baskets or bins for less attractive items.
Can I have an island in a very small kitchen?
Yes, a small island on casters or a slim peninsula can work. Choose a compact, multi-functional island that provides extra prep space and storage. A rolling island can be moved when not needed, keeping the floor plan flexible.
Conclusion
A very small kitchen can still feel open, modern, and fully functional with the right layout and design choices. Focus on light colors, smart storage, and reflective surfaces to create an airy atmosphere. Each of these 11 ideas offers a practical way to maximize your space without sacrificing style.
Remember, the goal is to make your kitchen work for you—not the other way around. Start with one or two changes that resonate with your space, and build from there.