13 Kitchen Booth Ideas for Cozy Built-In Dining Corners
A kitchen booth can turn an awkward corner into your favorite spot in the house. It’s where morning coffee lingers, homework gets done, and dinner feels a little more special.
The best part? You don’t need a huge renovation budget to make it happen.
With a few smart choices, you can create a cozy built-in dining nook that feels custom and inviting. Here are 13 kitchen booth ideas that keep style high and costs low.
1. Repurpose a Bench from Another Room
You don't need to buy a single piece of furniture to create a cozy kitchen booth. Look around your home for a wooden bench that's currently living in your entryway, at the foot of your bed, or on your patio. Slide it up to a small table—maybe a bistro table or a narrow console you already own—and you've got an instant built-in feel.
Add a few plush cushions and some throw pillows, and it'll look like you planned the whole setup from the start. This approach is not only budget-friendly but also gives your kitchen a collected-over-time vibe that feels warm and personal.
The beauty of repurposing is that you're working with pieces that already have a patina or story. A worn wooden bench brings texture and warmth that brand-new furniture often lacks. Pair it with a table that contrasts slightly—maybe a round metal-top table or a painted wooden one—to keep the look intentional rather than accidental.
Cushions are key here: they soften the hard bench surface and make the booth inviting for lingering over coffee or homework. For a cohesive look, choose cushion colors that tie into your kitchen's existing palette, like navy blue against white cabinets or mustard yellow with warm wood tones.
Best Bench Types
- Look for benches with a solid, flat seat and a height that matches your table. Entryway benches, storage benches, and even simple outdoor benches work well. Avoid benches with arms, as they make sliding in and out awkward.
- A backless bench is ideal because it tucks neatly under the table and doesn't block the view across the room.
Cushion And Pillow Tips
- Measure your bench length and depth before buying cushions. Look for high-density foam cushions with removable, washable covers—kitchens get messy. Add two or three lumbar pillows for back support and a pop of pattern.
- Stick to stain-resistant fabrics like outdoor canvas or performance velvet.
Budget-Friendly Swap
- If you don't have a bench at home, check thrift stores, garage sales, or Facebook Marketplace. A solid wood bench can often be found for under $50. Sand it down and apply a fresh coat of paint or stain to match your kitchen.
- This DIY touch makes the bench feel custom without the custom price tag.
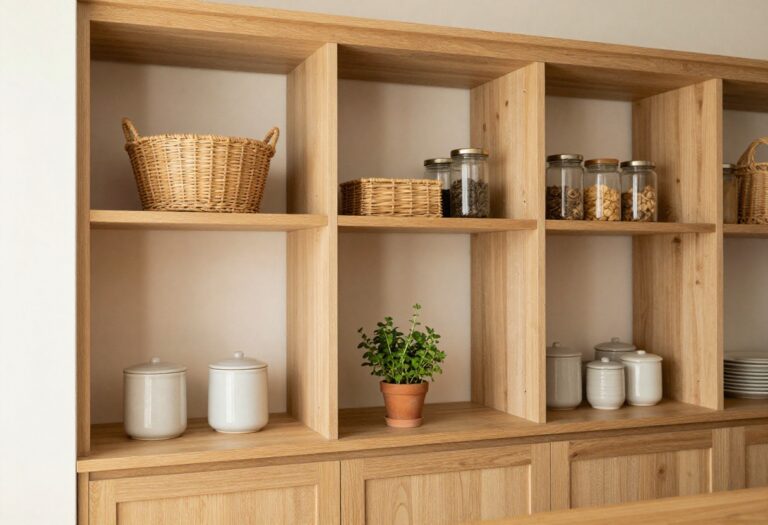
2. Use Stock Cabinetry for a Built-In Look
You don’t need custom millwork to get that seamless built-in banquette look. Standard base cabinets from any home improvement store can do the heavy lifting. Pair them with a plywood top and foam cushions, and you’ll have a cozy dining nook that feels tailor-made—without the tailor-made price tag.
Stock cabinets are surprisingly versatile for DIY banquettes. They come in standard widths (like 12, 18, or 24 inches), so you can mix and match to fit your space. Plus, they already have doors and shelves, meaning instant storage.
The trick is to treat them like a single unit: line them up, secure them together, and top with a continuous piece of plywood. Add a thick foam cushion on top, and no one will ever guess you raided the aisle at the big-box store.
Best Materials
- Choose unfinished or pre-primed base cabinets for the most affordable route. Plywood for the seat should be at least ¾-inch thick to avoid flexing. For the cushion, high-density foam (2 to 3 inches thick) wrapped in a durable upholstery fabric gives you that custom feel.
- Skip the expensive custom foam—many online retailers sell precut sizes that fit standard cabinet widths.
Layout Tip
Arrange cabinets in an L-shape or U-shape to define your dining corner. Leave a gap at the end for easy access, or use a pull-out drawer cabinet as the corner piece. If your space is tight, go with a straight run against one wall—it still feels built-in and leaves room for a small table.
Budget-Friendly Swap
Instead of pricey custom cabinetry, look for stock cabinets with shaker-style doors—they look timeless and pair well with any decor. You can also paint them yourself to match your trim or walls for a truly integrated look. Adding a simple base molding along the bottom hides any gaps and makes the whole thing look like it was built on-site.
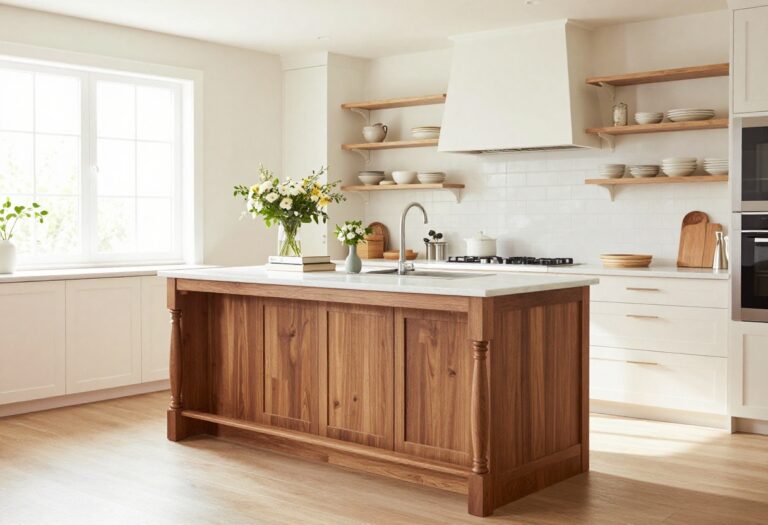
3. Add a Drop-Leaf Table for Flexibility
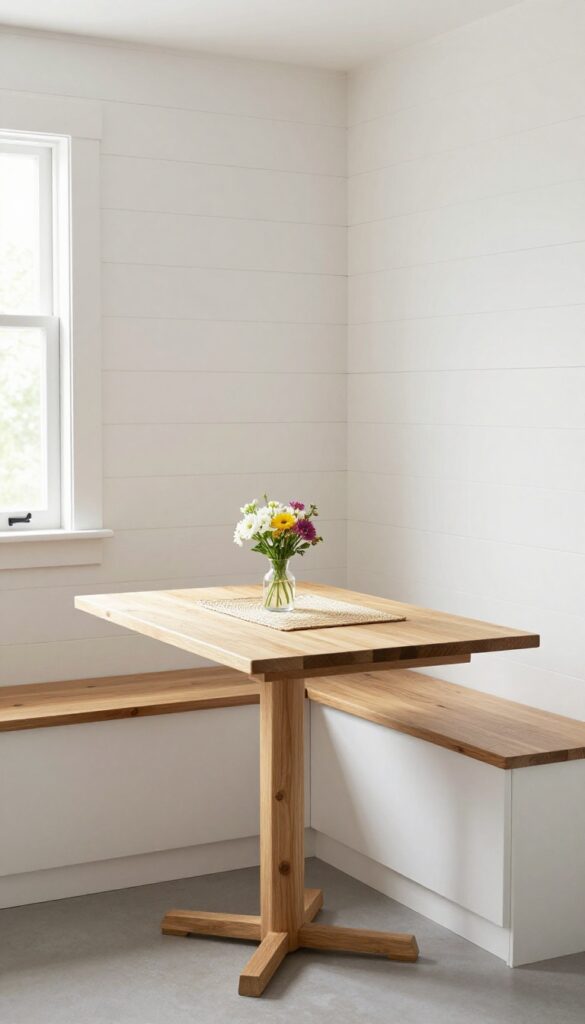
When your kitchen booth is squeezed into a tight corner, a fixed table can feel like a commitment you're not ready to make. A drop-leaf table gives you the best of both worlds: a compact surface for everyday meals that expands in seconds when company drops by. It's the kind of clever, budget-friendly solution that makes a small space feel bigger without sacrificing function.
A drop-leaf table tucked against the wall keeps your kitchen booth looking neat and uncluttered most of the time. But when you need extra seating—say, for a holiday dinner or a casual game night—you simply flip up the leaves and pull out a couple of chairs. This flexibility is especially handy in narrow kitchens where every inch counts.
Plus, when the leaves are down, the table doubles as a prep surface or a spot to set down groceries. Look for a table with a simple folding mechanism that's easy to operate one-handed, and choose a finish that matches your booth's style. A light wood or white painted table keeps the space airy, while a darker stain adds warmth.
Pair it with a bench on one side and a couple of stackable chairs on the other for maximum seating without crowding.
Best Materials
- For a budget-friendly pick, go with a solid wood or wood-veneer table that can handle daily wear. Butcher block is a durable, warm option that works well in kitchens. If you're worried about scratches, a distressed or matte finish hides them better than high-gloss.
- Metal legs with a wood top give an industrial edge and are often more affordable than all-wood designs.
Layout Tip
Place the drop-leaf table against the longest wall of your booth nook so the leaves open into the room, not into a walkway. Leave at least 36 inches of clearance when the leaves are up so chairs can slide out comfortably. If your booth is built-in, measure the bench depth to ensure the table sits close enough for easy reaching.
Budget-Friendly Swap
Skip the custom-built table and look for a vintage or secondhand drop-leaf table at thrift stores or online marketplaces. A quick coat of paint in a cheerful color like sage green or navy blue can transform a dated find into a custom-looking piece. Add a clear polyurethane topcoat for easy cleanup.
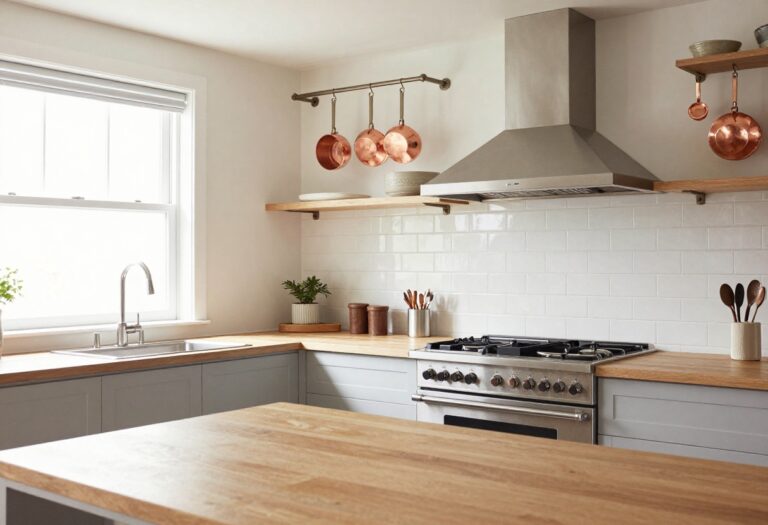
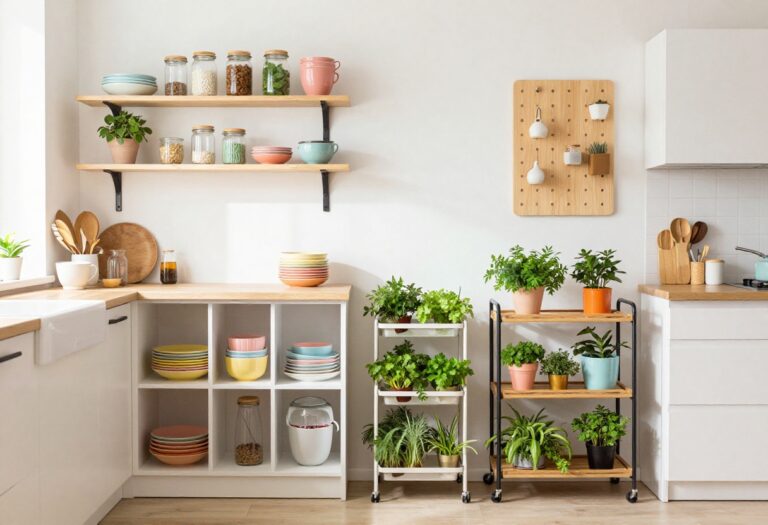
4. Install Floating Shelves Above the Booth
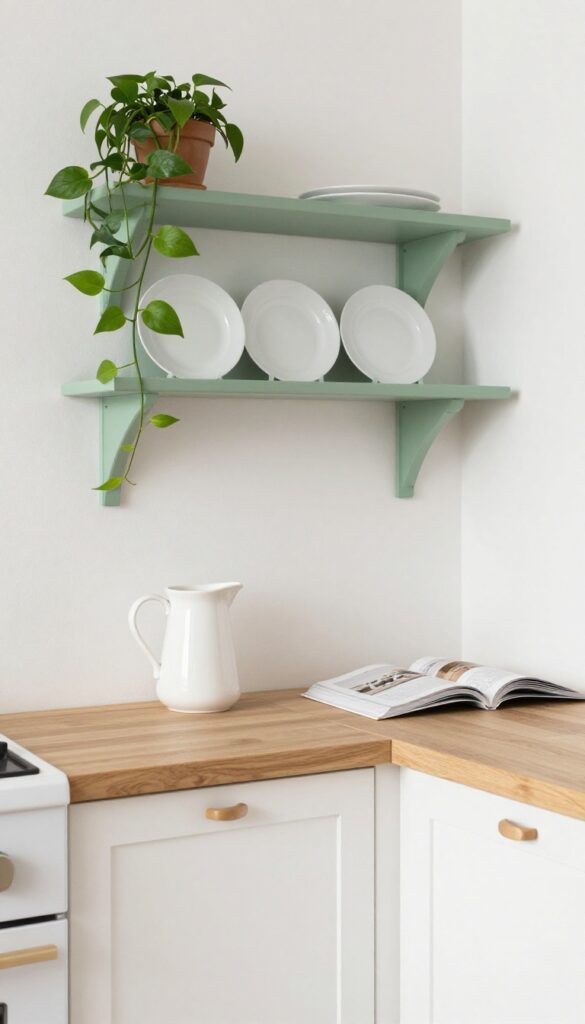
Floating shelves are a budget-friendly way to add personality and function above your booth seating. They keep the visual weight low while offering a spot for everyday dishes, coffee mugs, or a few trailing plants. Because they don’t require full cabinetry, you can achieve a custom look for a fraction of the cost.
Open shelving above the seating area adds storage for dishes, cookbooks, or plants. It draws the eye up and makes the nook feel intentional without extra square footage. The key is to keep the styling simple and uncluttered.
Stick to a few core items like a stack of plates, a small vase, and a cookbook propped open. This creates a vignette that feels curated, not crowded.
Best Materials
For a budget-friendly approach, use pine or poplar boards and paint them to match your trim or booth color. If you want a more natural look, reclaimed wood adds warmth without the high price tag of solid hardwoods. Floating shelf brackets are inexpensive and easy to install—just make sure they’re anchored into studs for safety.
Shelf Styling Tip
- Group items in odd numbers and vary heights. Place a stack of three dinner plates on one end, a small ceramic pitcher in the middle, and a trailing pothos plant on the other. Leave plenty of negative space so the shelves don’t feel heavy.
- Rotate seasonal decor to keep the look fresh without spending money.
Budget-Friendly Swap
Instead of buying pre-made floating shelves, make your own from a single pine board cut to size. Sand and paint it in a color that contrasts with your wall—like a soft sage against white—for a designer look. Total cost can be under $20 per shelf.
5. Choose a Bench with Hidden Storage
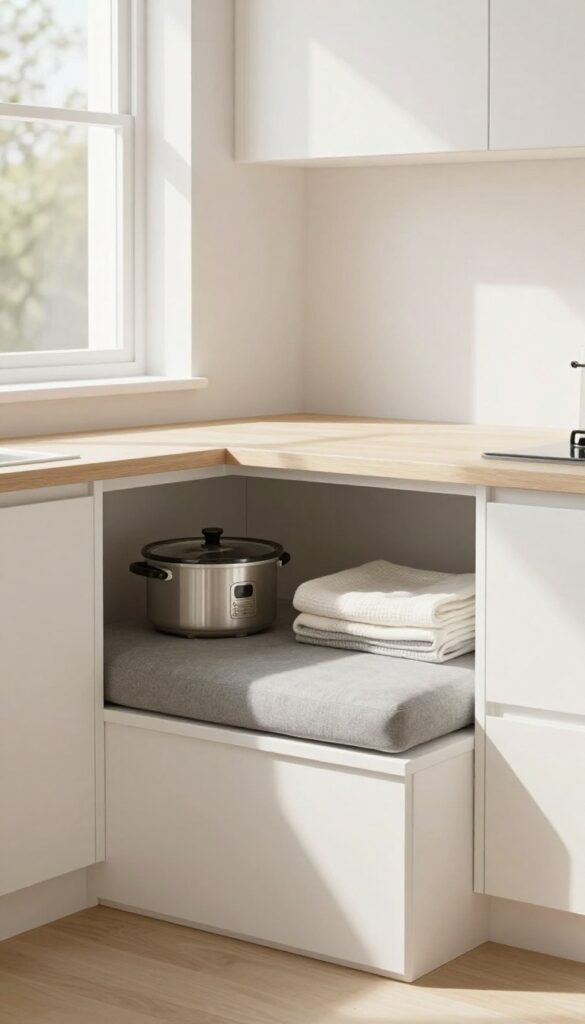
A kitchen booth is already a cozy spot for meals and morning coffee, but when you add hidden storage under the seat, it becomes a total workhorse. Think about it: that bench cushion lifts up to reveal a deep compartment perfect for stashing bulky items you don't need every day. Holiday platters, extra table linens, or even that slow cooker you only use twice a year can disappear neatly out of sight.
It's a simple upgrade that makes your dining nook feel both intentional and incredibly practical—especially in smaller kitchens where every square inch counts.
Building or buying a bench with a hinged seat is one of those ideas that sounds fancy but is surprisingly budget-friendly. You can DIY a basic plywood box with a piano hinge and add a cushion on top for under $100. Or look for ready-made storage benches at secondhand stores or big-box retailers—many come with lift-up tops and cost less than custom cabinetry.
The key is making sure the hinge is sturdy and the seat is easy to lift, so you actually use the storage. Paint or stain the bench to match your existing kitchen tones, or go for a contrasting color to make it a statement piece. Either way, you'll gain a hidden catchall that keeps your kitchen looking tidy without sacrificing style.
Best Materials For A Budget Build
- Plywood is your best friend here. A single sheet of ¾-inch plywood cut to size can form the base, seat, and lid. Add a piano hinge along the back edge and some small gas struts to keep the lid open safely.
- For the seat, a 2-inch foam cushion wrapped in durable fabric (think indoor-outdoor or performance velvet) keeps costs low and cleanup easy. If you're not into DIY, check thrift stores or Facebook Marketplace for solid wood benches that just need a fresh coat of paint—often under $50.
Styling Tip: Keep The Top Clutter-free
- Since the bench doubles as storage, resist the urge to pile pillows and throws on top. One or two slim lumbar cushions are fine, but keep the surface mostly clear so lifting the seat is quick and easy. A simple tray with a plant or a stack of cloth napkins adds a decorative touch without creating a hassle.
- This way, the bench stays functional for both sitting and stashing.
Finishing Touch: Match The Bench To Your Table
- For a pulled-together look, paint or stain the bench to coordinate with your dining table. A white bench with a white table feels airy and classic, while a dark wood bench against a lighter table adds warmth and contrast. If your table has metal legs, try a bench with similar metal accents or a painted finish that echoes the table's color.
- It's a small detail that makes the whole nook feel custom.
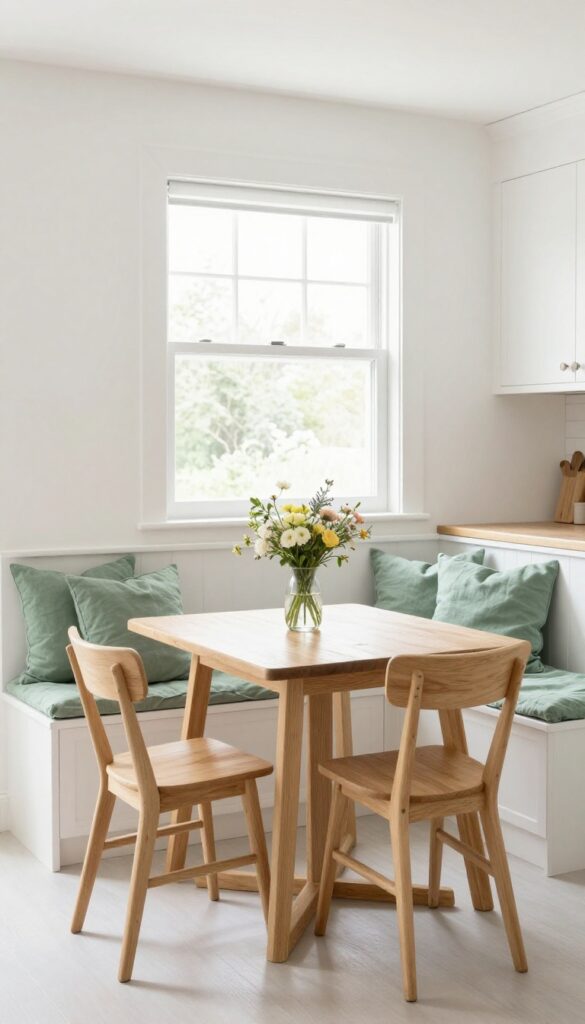
6. Mix and Match Chairs with a Bench
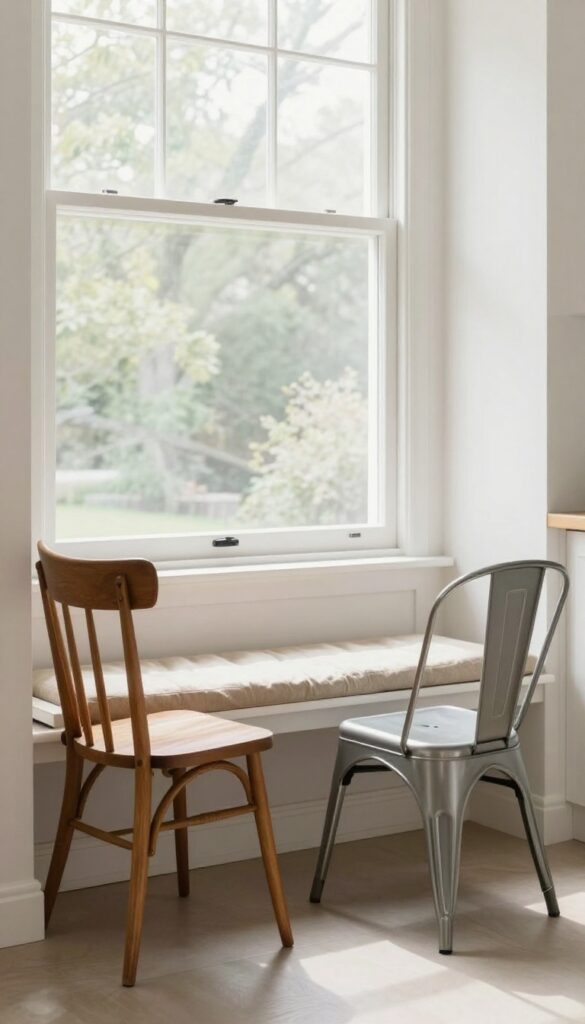
Not every dining nook needs a matching set of chairs. Pairing a built-in bench on one side with two mismatched chairs on the other gives your kitchen booth a collected-over-time feel that’s full of personality. It’s also a smart budget-friendly move—you can pull chairs from other rooms or snag them secondhand without worrying about finding a perfect pair.
The bench anchors the space visually while the mismatched chairs keep things interesting. Aim for chairs that share a common element—like color, material, or era—so the look feels intentional, not random. A vintage wooden chair next to a sleek modern one?
Totally works if the wood tones are similar. This setup also makes it easy to swap chairs later if your style changes or you find a new treasure at a flea market.
Budget-Friendly Swap
- Keep costs down by using chairs you already own. Maybe that accent chair from the living room or a dining chair you’ve been storing in the garage. If they don’t match at all, a coat of paint in the same color can tie them together.
- Even just painting the legs the same shade creates a subtle link.
Best Materials
Mix wood and metal for an eclectic vibe, or stick with all wood but vary the styles—like a Windsor chair next to a ladder-back. If your bench is upholstered, try a couple of wooden chairs for contrast. For a cozy feel, add a cushion to the bench in a fabric that picks up a color from one of the chairs.
Layout Tip
Place the bench against a wall or under a window to save space, and position the chairs on the opposite side. If your booth is in a corner, put the bench along the longer wall and the chairs on the shorter side. This keeps the walkway clear and makes the seating feel balanced.
7. Paint an Accent Wall Behind the Booth
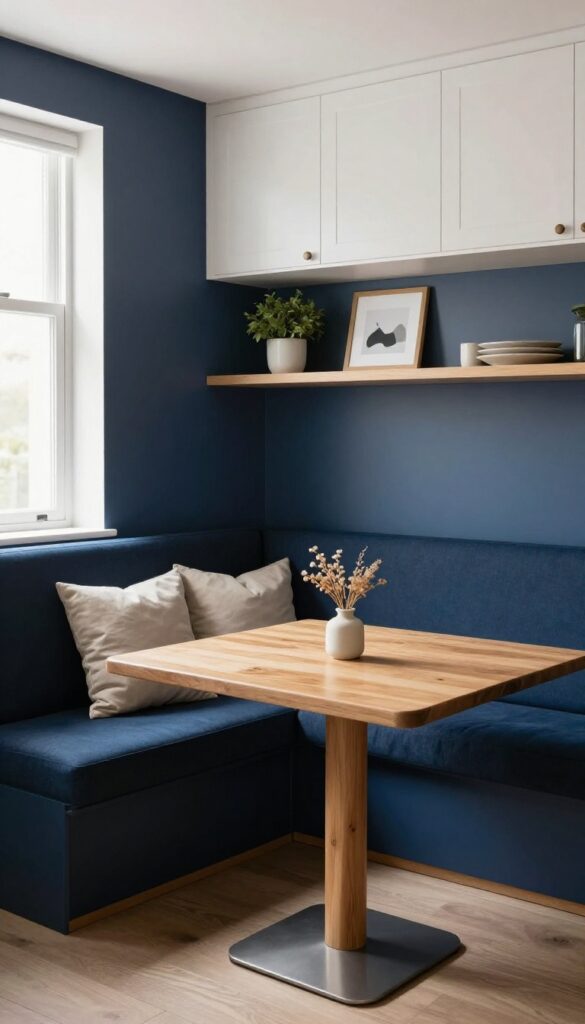
A bold paint color or wallpaper behind the seating defines the nook and makes it feel like a separate zone. It’s a low-cost way to add major visual impact without touching the rest of the kitchen.
An accent wall behind your booth does double duty: it anchors the seating area and adds personality. Since the rest of the kitchen stays neutral, the booth becomes a focal point that draws the eye. Best of all, this is a weekend project that costs under $100 if you use paint.
Even wallpaper can be budget-friendly if you choose a peel-and-stick option. The key is picking a color or pattern that complements your kitchen’s existing palette without clashing. Think deep navy, forest green, or a warm terracotta for a cozy feel.
If you’re renting or want flexibility, removable wallpaper is your best friend.
Best Colors For A Cozy Nook
- Dark, moody shades like charcoal, navy, or forest green create an intimate, cocooning effect. Lighter options like sage green or dusty blue keep things airy. For a pop of personality, try a warm mustard or burnt orange.
- Stick to one wall only to avoid overwhelming the space.
Budget-friendly Wallpaper Options
Peel-and-stick wallpaper is a renter-friendly, low-cost alternative to paint. Look for patterns that mimic tile, wood, or geometric shapes. You can cover the accent wall for under $50, and it’s easy to remove or swap out when you want a new look.
Finishing Touches To Tie It Together
Add a floating shelf above the booth with a few plants or small artwork to bridge the wall and seating. Keep the booth cushions and table accessories in colors that pick up tones from the accent wall. This creates a cohesive, pulled-together look without extra cost.
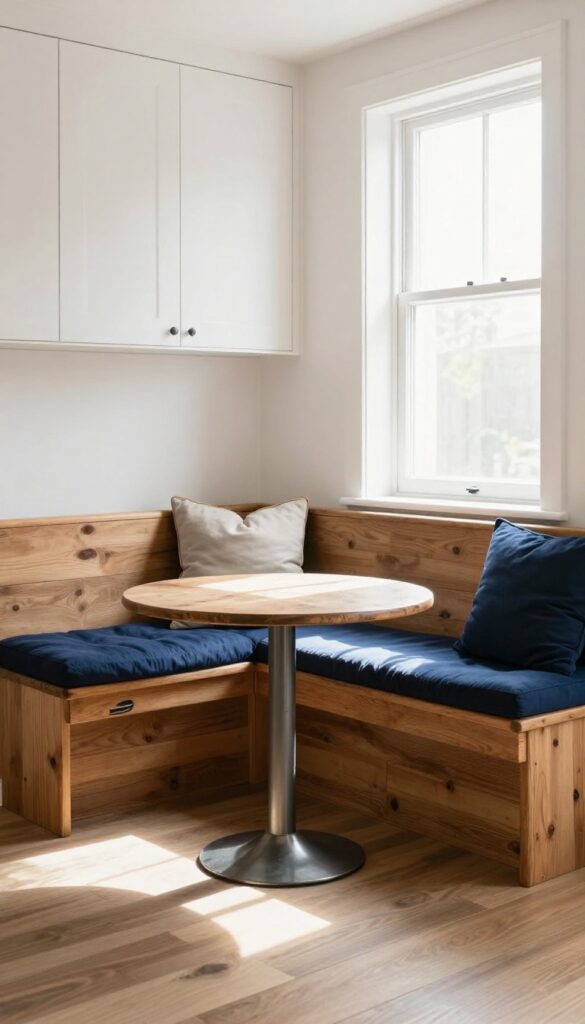
8. Use a Round Table for Tight Corners
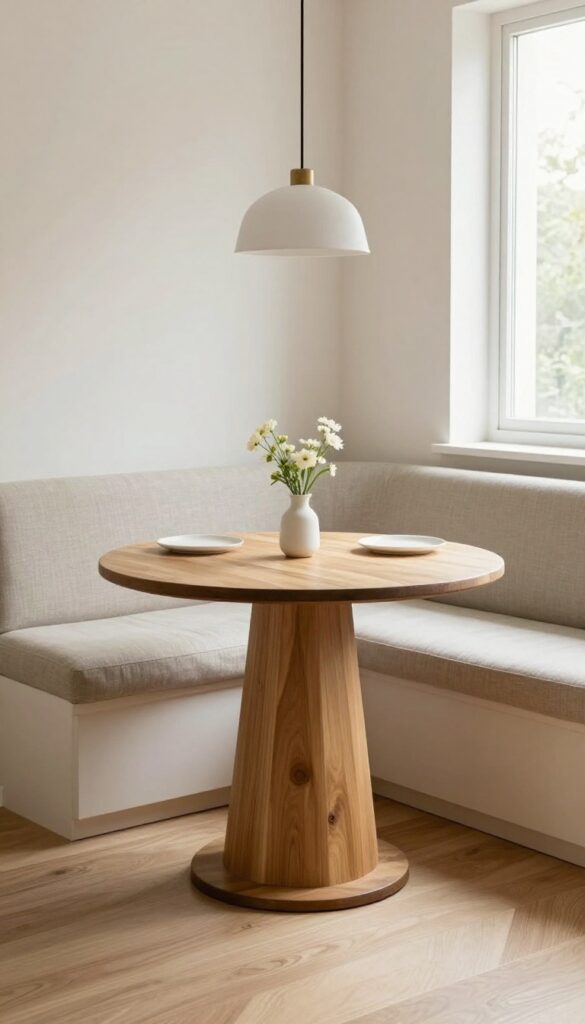
A round table is a smart choice when your kitchen corner feels cramped or awkward. Its curved shape slips into tight spots better than a rectangle, leaving more room to move around. Plus, it naturally draws people in for easy conversation—perfect for a cozy breakfast nook or casual dining corner.
Round tables are space-saving heroes in small kitchens. They eliminate sharp corners that can make a tight area feel even more crowded, and they encourage a more social seating arrangement. Pair yours with a curved bench that hugs the wall or a set of compact stools to keep the footprint small.
A pedestal base adds legroom and makes the table feel lighter, which is great for narrow spaces. Finish the look with a simple pendant light overhead to define the zone without overwhelming it.
Best Materials
For a budget-friendly option, look for a round table with a laminate or wood veneer top that mimics natural wood. A solid pine table is affordable and can be painted to match your kitchen’s color scheme. Avoid heavy stone or thick glass tops that feel bulky and cost more.
Layout Tip
Center the table in the corner with at least 24 inches of clearance on all sides. If you’re using a curved bench, push it against the wall and leave stools on the opposite side for easy access. A round table with a central pedestal makes it easier to squeeze in extra chairs when needed.
Budget-Friendly Swap
Skip the custom built-in banquette and go for a ready-made round table from a secondhand store or flat-pack retailer. Add a cushioned bench seat from a discount home store for a fraction of the cost. A coat of chalk paint can transform a dated table into a fresh, farmhouse-style piece.
9. Add Cushions with Removable Covers
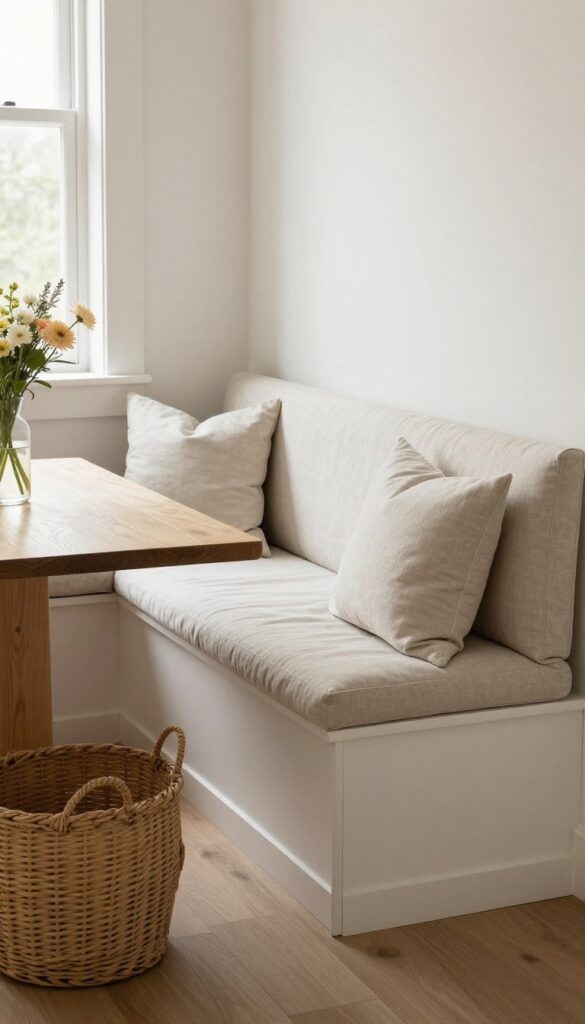
Custom cushions can cost a small fortune, but you don't have to break the bank to get a cozy, custom look. By using foam cut to size and sewing your own removable covers, you can achieve the same effect for a fraction of the price. Plus, removable covers make cleaning a breeze—just unzip and toss them in the wash.
If you've been dreaming of a built-in booth but cringing at the price of upholstery, this budget-friendly trick is your answer. Start with high-density foam from a craft store or online supplier, cut to fit your bench seats. Then, sew simple envelope-style or zippered covers using durable, machine-washable fabric.
Canvas, denim, or outdoor fabric work great for kitchens. The best part? When spills happen (and they will), you can wash the covers without ruining the cushion.
This approach keeps your booth looking fresh for years without the hefty price tag of custom upholstery.
Best Fabrics For Kitchen Cushions
- Stick with fabrics that can handle daily life. Cotton canvas is affordable, easy to sew, and comes in tons of colors. For extra stain resistance, look for performance fabrics like Sunbrella or recycled polyester.
- Avoid velvet or linen—they stain too easily and aren't as washable.
Budget-Friendly Swap
- Instead of buying pre-made cushions, buy foam by the roll and cut it yourself with an electric knife. Then use a simple pillow cover pattern (no zipper needed if you use an envelope closure). This can cut your costs by more than half.
- For the fabric, check clearance sections or use old curtains or duvet covers.
Finishing Touch
Add a few throw pillows in complementary colors to tie the booth into your kitchen's palette. Choose pillows with removable covers too, so everything stays easy to clean. A small lumbar pillow can also make the bench more comfortable for lounging.
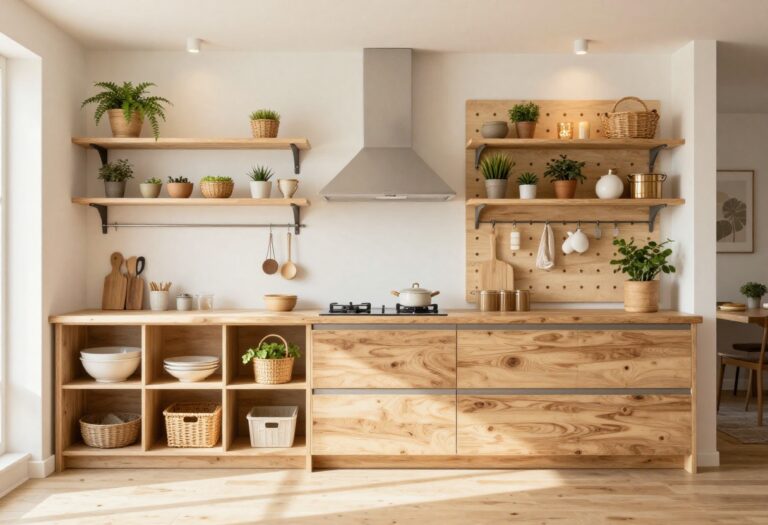
10. Incorporate a Pegboard or Rail for Hanging Storage
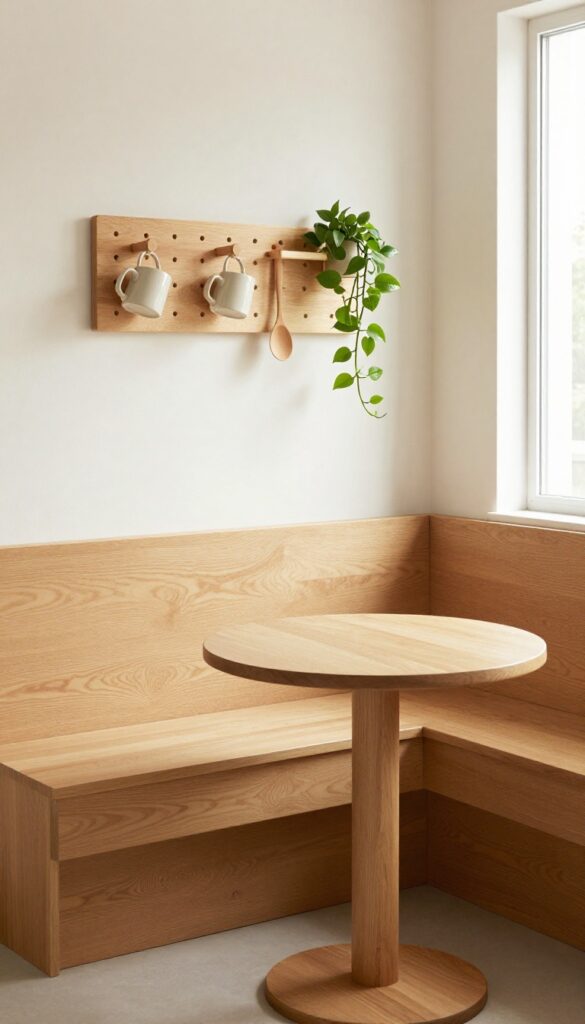
Wall space near a booth can easily go unused, but it’s prime real estate for adding both function and personality. A pegboard or wooden rail lets you hang mugs, utensils, or small plants without sacrificing counter space. It’s a budget-friendly way to keep essentials within reach while giving your dining corner a lived-in, curated look.
Pegboards and rails are versatile storage solutions that work especially well in cozy kitchen booths. They keep frequently used items accessible and add visual interest to blank walls. For a relaxed, budget-friendly approach, choose a simple wooden rail or a small pegboard painted to match your trim.
Hang a mix of ceramic mugs, wooden spoons, and a trailing pothos for an effortless, charming display. The key is to keep it uncluttered—edit your items so each one has room to breathe.
Best Materials
For a warm, natural look, go with a solid wood rail or a pegboard made from birch plywood. If your style leans more industrial, a metal rail with hooks adds a subtle edge. Both options are affordable and easy to install with basic tools.
Styling Tip
Mix functional pieces like coffee mugs and measuring spoons with decorative ones like a small framed photo or a dried herb bundle. This blend keeps the display practical but still visually appealing. Stick to a cohesive color palette—neutrals with one accent color—so it feels intentional.
Budget-Friendly Swap
Skip expensive custom pegboards and pick up a ready-made one from a hardware store or online. A 12×24-inch board costs under $20. Paint it with leftover wall paint for a custom look, or leave it natural for a Scandinavian vibe.
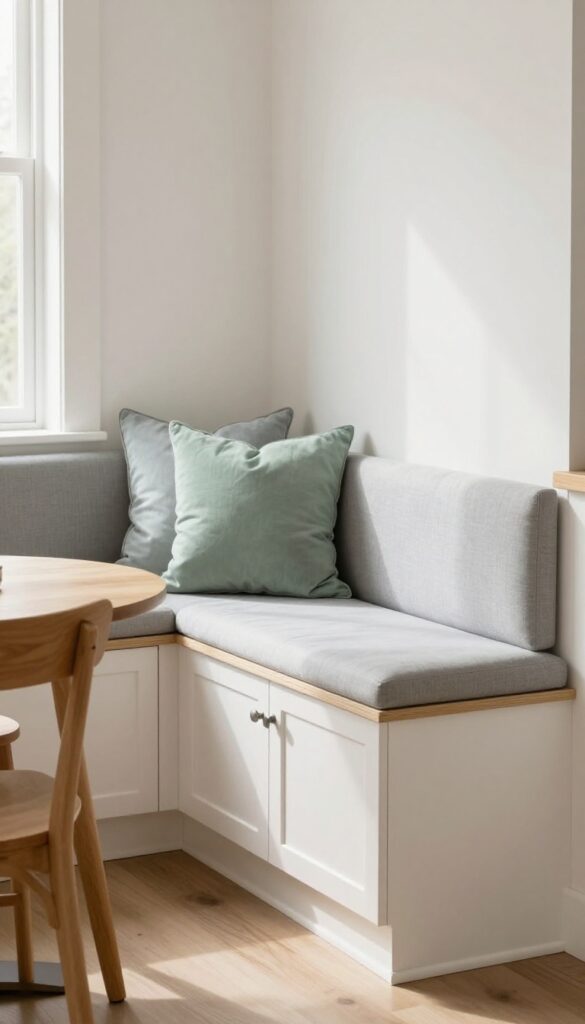
11. Go for a Banquette with a Low Back
A low-back banquette is one of those ideas that looks custom but doesn’t cost a fortune. By keeping the back height below the windowsill or counter line, you preserve sightlines and make the whole kitchen feel more open. It’s a smart choice for smaller spaces where you want cozy seating without closing off the room.
A low-back bench keeps the sightline open and makes a small kitchen feel larger. It’s also easier to build yourself with basic lumber and plywood, which keeps the project budget-friendly. The lower profile pairs well with a simple table and doesn’t compete with upper cabinets or open shelving.
For a relaxed look, skip the upholstery and use loose cushions that you can swap out seasonally.
Best Materials
Plywood and pine are affordable and easy to work with. Paint the bench the same color as your lower cabinets or trim for a seamless look. If you want a bit of contrast, try a dark stain on the bench with light walls.
Layout Tip
Place the banquette against a wall with a window above to maximize natural light. Keep the table depth around 24 inches so there’s enough legroom without sticking out too far into the kitchen.
Budget-Friendly Swap
Instead of buying a custom bench, build a simple plywood box and add a hinged lid for hidden storage. Top it with a thick foam cushion from a craft store to keep costs low.
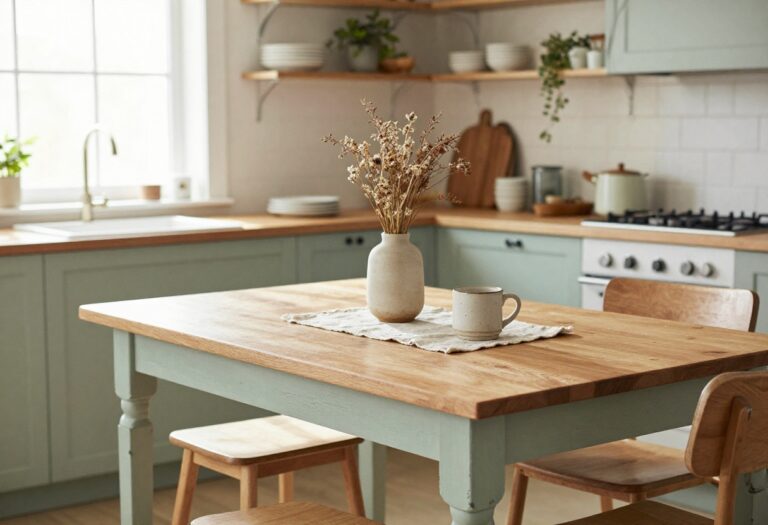
12. Use a Vintage Table as the Centerpiece
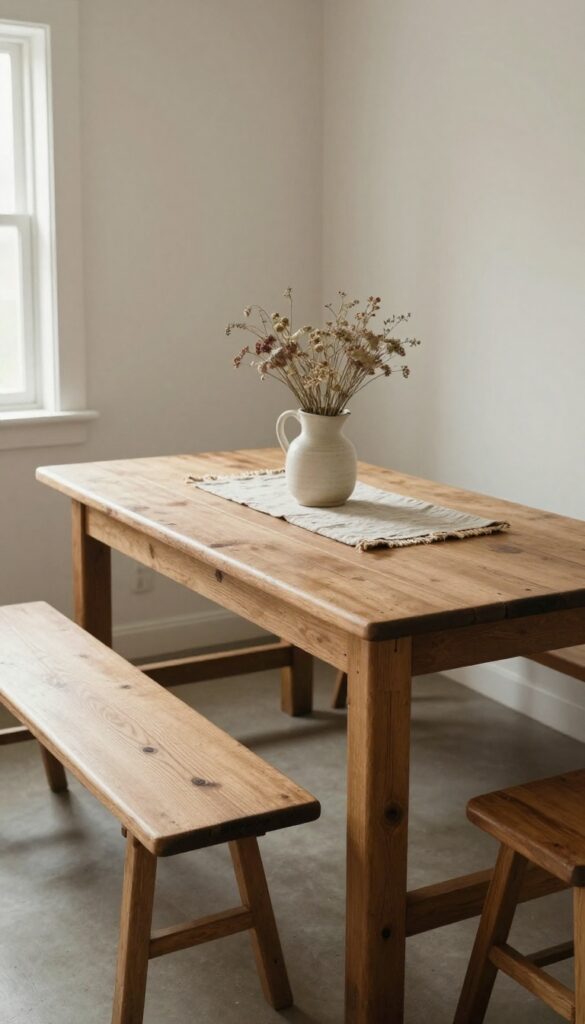
Scoring a vintage or thrifted table for your booth is a smart move—both for your wallet and your style. A worn farmhouse table or a retro diner table brings instant character that new furniture just can't fake. It pairs beautifully with simple benches, creating a cozy, collected look that feels personal and lived-in.
The beauty of a vintage table is that it doesn't have to be perfect. A few scrapes, a faded finish, or even a little wobble just adds to the charm. Look for solid wood pieces that can handle daily use—oak, pine, or maple are great choices.
If the top is too rough, a light sanding and a coat of food-safe mineral oil can bring it back to life without stripping its history. Pair it with plain wooden benches or even mismatched chairs for an eclectic vibe. To keep the budget-friendly angle, hit up flea markets, estate sales, or Facebook Marketplace.
You'll often find solid tables for under $200 that just need a little love. Style the table with a simple runner, a ceramic pitcher of dried flowers, and woven placemats to tie the whole booth together.
Best Materials
- Stick with solid wood—oak, pine, or reclaimed barn wood. Avoid particleboard or veneer, which won't hold up to daily kitchen life. A chunky farmhouse table works well in larger booths, while a slim retro diner table fits tighter corners.
- Metal bases with wood tops are also a great vintage find and add an industrial touch.
Budget-Friendly Swap
If a full vintage table is out of reach, look for a solid wood tabletop at a salvage yard and attach simple hairpin legs. You get the same worn-in look for a fraction of the cost. Another option: paint a thrifted table in a creamy off-white or sage green to freshen it up while keeping the vintage bones.
Finishing Touch
Add a low-hanging pendant light above the table to highlight its character. A warm Edison bulb or a vintage schoolhouse fixture creates a cozy glow that makes the wood grain pop. Layer in a textured rug underneath the booth to anchor the space and soften the hard edges of the table.
13. Add Under-Bench Lighting for Ambiance
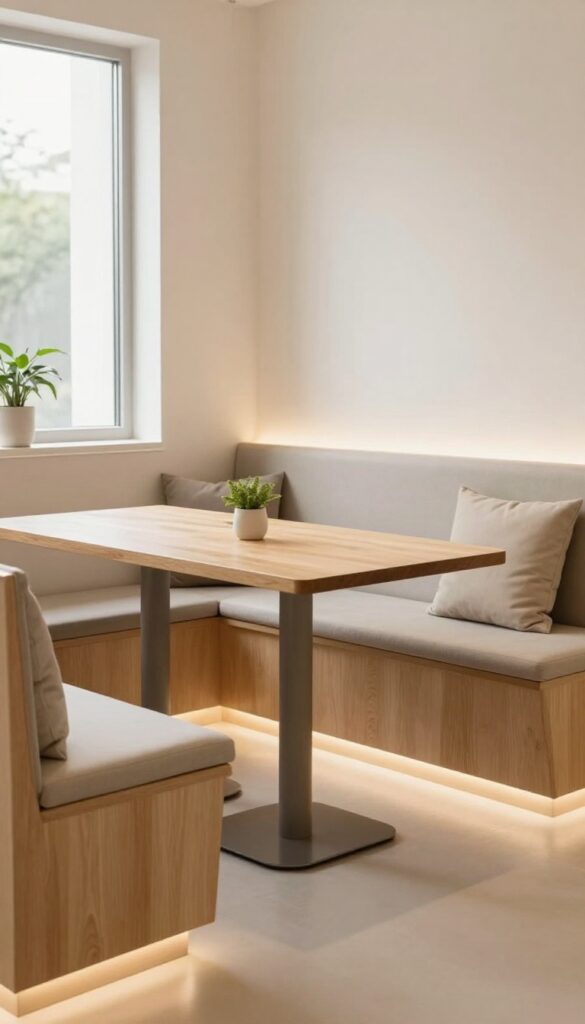
Nothing makes a kitchen booth feel more inviting than a soft, warm glow after dark. Under-bench lighting is one of those upgrades that looks like a splurge but costs very little—especially if you're handy with a drill and some adhesive strips. The light spills out from beneath the seat or along the toe kick, creating a floating effect that instantly makes the nook feel like a cozy retreat.
It’s a small touch that pays off every single evening.
LED strip lights are the easiest way to add this effect. You can buy battery-operated or plug-in versions, and many come with remote controls or timers. Stick them along the underside of the bench seat or inside the toe kick space.
Warm white (2700K–3000K) is the best choice for a relaxed, candle-like glow. Avoid cool white or colored lights if you want a timeless, calm atmosphere. This idea works especially well in dark corners or breakfast nooks that lack overhead lighting.
It also makes the booth feel more like a piece of furniture than a built-in bench. For a budget-friendly version, look for peel-and-stick LED strips at hardware stores or online. Installation takes about 15 minutes, and the result is dramatic.
Where To Place The Lights
- The most common spot is under the front lip of the bench seat, so the light shines down toward the floor. This hides the strip from view and creates a soft wash of light. Another option is along the toe kick, which is the recessed area at the bottom of the bench.
- That placement gives a subtle floor glow that feels like a nightlight. If your booth has open shelving underneath, you can also run strips along the shelf edges to highlight baskets or storage.
Best Materials For A Clean Look
- For a seamless appearance, choose LED strips with a silicone coating that diffuses the light and prevents hot spots. Aluminum channels with a frosted cover look even more polished and protect the strips from dust. If you’re renting or want a temporary solution, adhesive-backed strips work fine—just make sure the surface is clean and dry before sticking.
- For a permanent install, hardwired low-voltage tape lights are worth the extra effort.
Budget-Friendly Swap
- If you’re on a tight budget, skip the fancy smart strips and go for a basic warm-white LED rope light. Tuck it into the toe kick space using small clips or double-sided tape. You can plug it into a nearby outlet and hide the cord with cord clips along the baseboard.
- Total cost: under $20. It won’t be as sleek as a channeled strip, but the effect is still cozy and inviting.
FAQ
How much does it cost to build a kitchen booth on a budget?
A DIY kitchen booth can cost as little as $100 to $500 if you use repurposed furniture or stock cabinets. Even with new materials, keeping it simple keeps costs low.
What size table fits a kitchen booth?
For a two-person booth, a table 24 to 30 inches wide works well. For four people, aim for 36 to 48 inches. Always measure your space first.
Can I add a kitchen booth to a small kitchen?
Absolutely. A corner booth with a small table or drop-leaf design maximizes space. Even a 4×4 foot area can accommodate a cozy nook.
What materials are best for a budget-friendly booth?
Plywood, MDF, and stock cabinets are affordable and easy to work with. For cushions, use high-density foam and durable fabric like canvas or outdoor material.
How do I make a kitchen booth comfortable?
Add thick seat cushions (at least 3 inches), a supportive backrest, and maybe a few throw pillows. Proper seat depth (18-20 inches) also helps.
Conclusion
A cozy kitchen booth doesn’t have to break the bank. With a little creativity and some DIY spirit, you can turn an unused corner into a warm, inviting dining spot.
Whether you repurpose old furniture or build from scratch, these ideas prove that budget-friendly doesn’t mean boring. Start small, pick one idea that fits your space, and enjoy your new favorite hangout.