10 Microwave Storage Ideas Small Kitchen Owners Need
Microwaves are one of those kitchen workhorses that somehow always end up in the way. On a cramped countertop, they eat up precious prep space and make the whole room feel cluttered.
But hiding one away isn't always easy either—especially when every cabinet and drawer is already spoken for. The good news is that with a little creativity, you can tuck your microwave into a spot that feels intentional and even charming.
These ten ideas lean into a warm, lived-in aesthetic, so your kitchen stays functional without losing its cozy soul. Think open shelving, repurposed furniture, and clever built-ins that make the microwave blend right in.
1. A Dedicated Microwave Cart with Warm Wood Tones
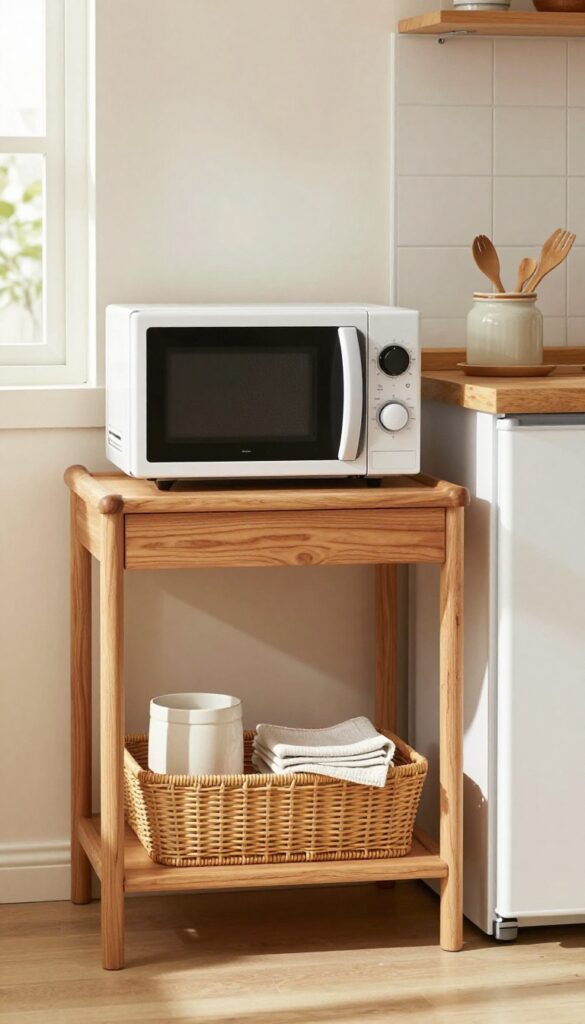
A rolling cart in a warm wood finish gives the microwave its own station and adds extra counter space. Choose one with a lower shelf for cookbooks or a basket for linens. The natural grain and honeyed hue bring a cozy, lived-in feel to even the tiniest kitchen.
This idea works especially well in galley kitchens or L-shaped layouts where counter space is precious. The cart can tuck into a corner or sit beside the fridge, and because it rolls, you can move it out of the way when you need extra room for prepping. The warm wood tones soften the look of the appliance and make the whole setup feel intentional rather than makeshift.
Best Materials
Look for a cart made of solid acacia, mango, or rubberwood with a clear or light stain. Avoid dark finishes that can feel heavy in a small space. Metal casters with a brass or bronze finish add a touch of warmth and contrast nicely with the wood.
Layout Tip
Place the cart near an outlet, ideally on the same wall as your main counter to keep the work triangle efficient. Leave about 6 inches of clearance on each side so the microwave can vent properly. If your cart has a butcher-block top, you can use it as a landing zone for hot dishes.
Cozy Detail
Add a small woven basket on the lower shelf for dish towels or pot holders. A ceramic jar filled with wooden utensils on top of the cart ties the look together and makes the station feel styled, not cluttered.
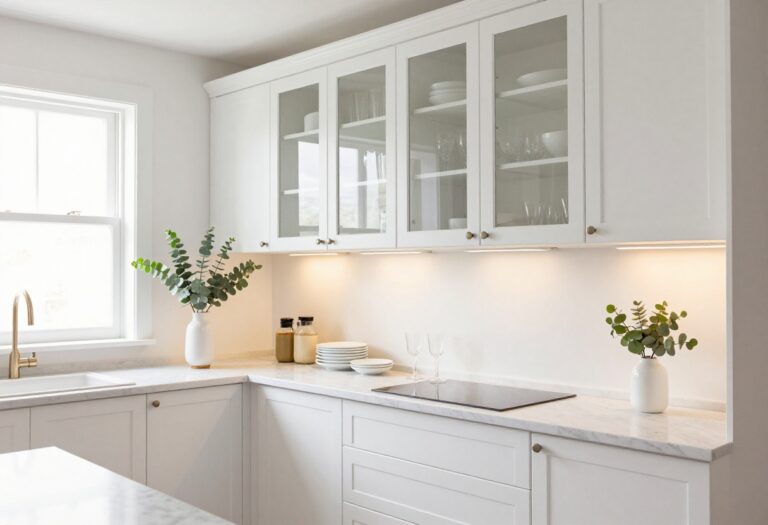
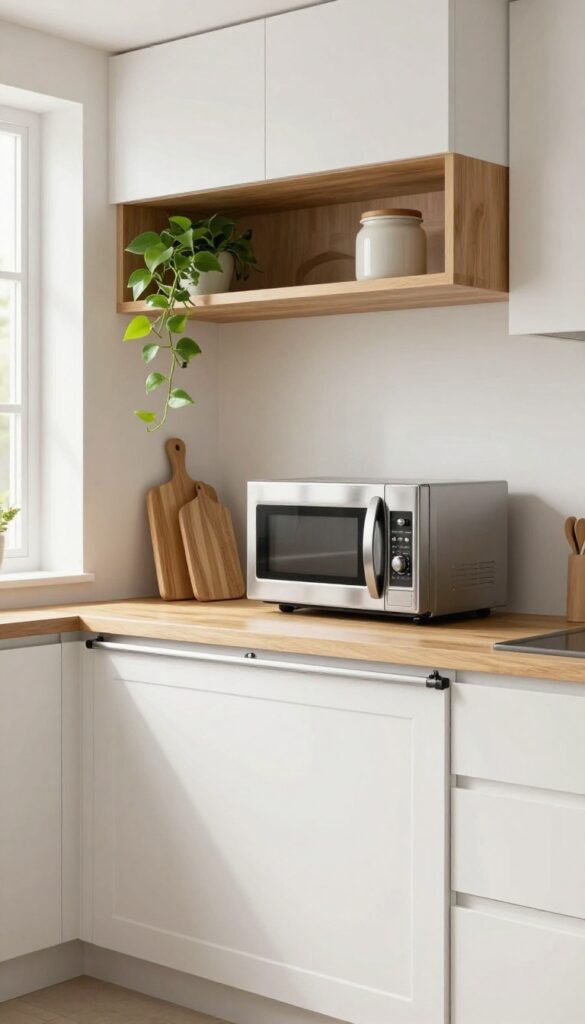
2. Under-Cabinet Shelf with a Built-In Feel
Tucking your microwave under the cabinets is a classic small-kitchen move, but it can look like an afterthought if the shelf is just a basic board. The trick to making it feel intentional is choosing brackets that echo your cabinet hardware and positioning the microwave so it sits slightly recessed, not jutting out. That small shift in placement gives the whole setup a custom, built-in look that blends with your cabinetry rather than fighting for attention.
Mount a sturdy shelf beneath upper cabinets to free up the counter. Use brackets that match your hardware and keep the microwave slightly recessed for a cleaner look.
Best Materials
Go with a solid wood shelf that matches your cabinet finish, or choose a butcher-block style for warmth. Avoid glossy laminates that show every smudge. A matte or satin finish hides fingerprints and ties into the lived-in feel.
Layout Tip
Measure the microwave depth and add an extra inch so it sits back slightly. This recessed placement makes the shelf look like it was designed around the appliance, not just slapped up. Also, leave a couple of inches above the microwave for ventilation.
Finishing Touch
Install a small LED strip light under the shelf to illuminate the microwave controls and counter below. Warm white light softens the utilitarian look and makes the whole corner feel cozy and intentional.
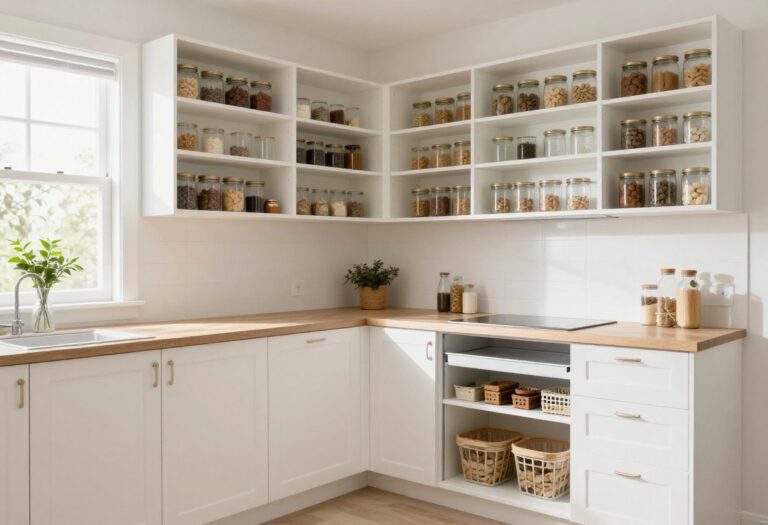
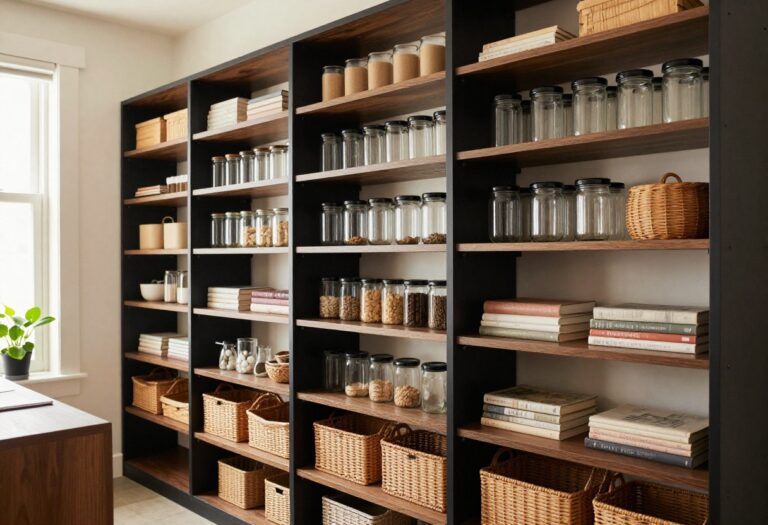
3. Open Shelving Nook with Baskets
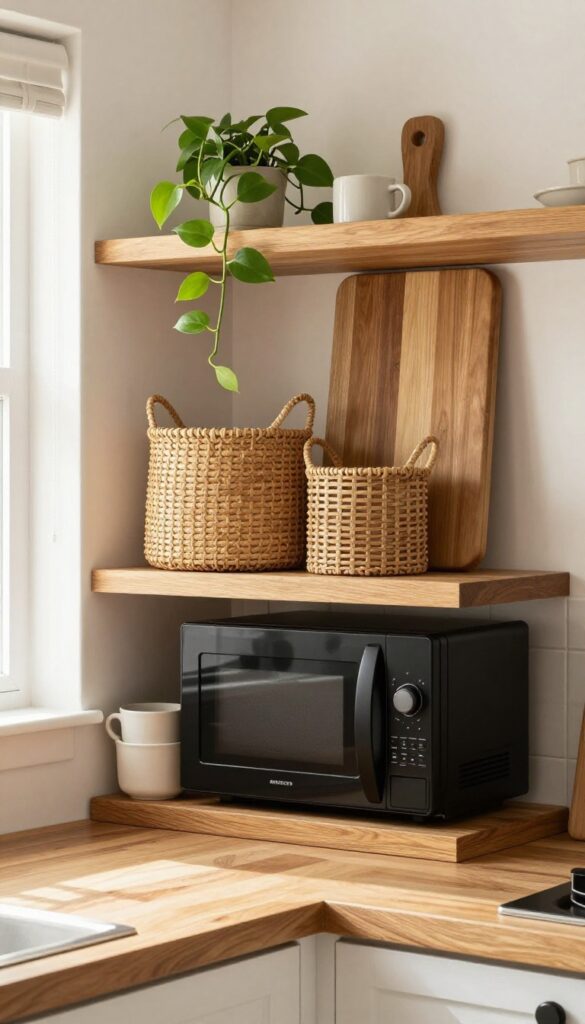
Carving out a dedicated spot for your microwave on open shelving keeps countertops clear and adds a cozy, curated feel. Pair it with woven baskets on either side to stash small appliances or pantry overflow — the natural texture softens the look and makes the whole setup feel intentional, not cluttered. This idea works especially well in galley kitchens or breakfast nooks where every inch counts.
Designate a section of open shelving for the microwave, flanked by woven baskets that hide smaller appliances or pantry items. The baskets add texture and warmth.
Best Materials & Colors
Stick with warm wood shelves (oak or walnut) and natural rattan or seagrass baskets to keep the look grounded. A matte black or white microwave blends seamlessly, while a retro pastel model can become a playful accent. Avoid shiny metals or cool grays — they'll fight the cozy vibe.
Layout Tip
Mount the microwave on a shelf at eye level or just below to avoid bending down. Use the shelf above for daily-use mugs or a small plant, and the shelf below for cookbooks or a utensil crock. Keep the baskets shallow enough to pull out easily — deep bins become black holes.
Finishing Touch
Add a slim wooden cutting board leaning against the back of the shelf behind the microwave. It breaks up the appliance's bulk and ties back to the warm, lived-in feel. A tiny trailing plant like pothos on the top shelf softens the hard edges.
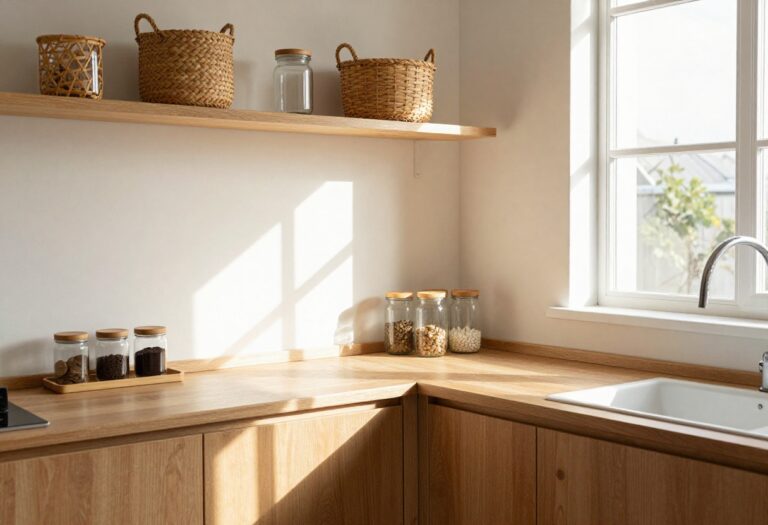
4. Repurposed Sideboard or Buffet
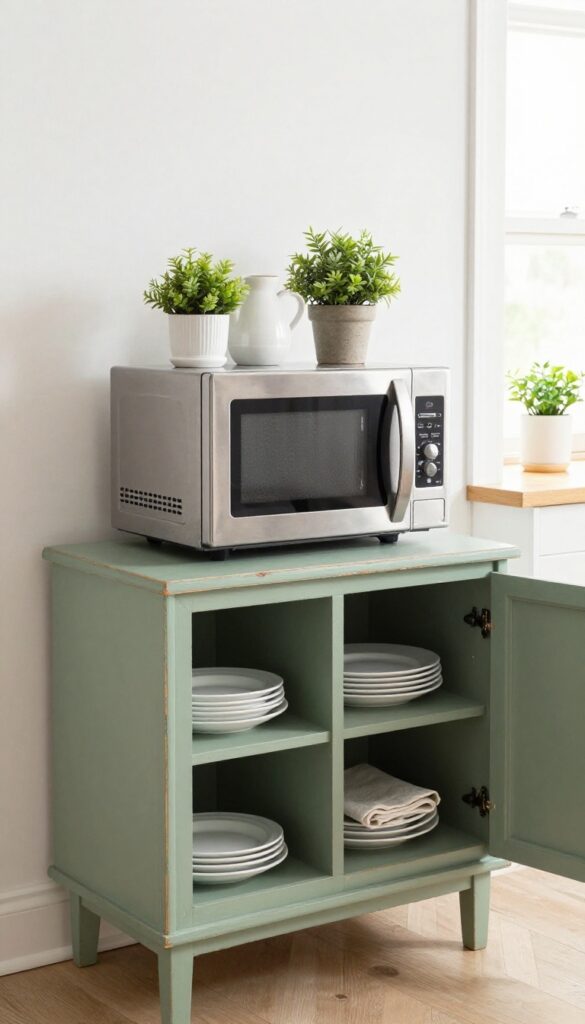
A low sideboard or buffet in a distressed finish brings instant character to a small kitchen. It holds the microwave on top while offering hidden storage for dishes or linens below. The lived-in look softens the utilitarian feel of appliances and makes the space feel collected over time.
This piece works especially well in kitchens that lack counter space but have a spare wall or nook.
Instead of buying a bulky appliance garage, consider a vintage-inspired sideboard. The low height keeps the microwave accessible without blocking your view or making the room feel top-heavy. Choose a piece with a slightly weathered finish—think chipped paint or worn wood—to add warmth and texture.
The top can double as a coffee station or prep area, while the drawers and cabinets stash everything from baking sheets to extra mugs. It’s a smart way to blend function with that cozy, gathered-over-time aesthetic.
Best Colors And Finishes
- Look for muted, earthy tones like sage green, dusty blue, or creamy white. A distressed or matte finish works best to keep the look relaxed. Avoid high-gloss or overly polished surfaces—they can feel too formal for a lived-in kitchen.
- If you find a solid wood piece, a light sanding and a coat of chalk paint can give it that perfect worn-in vibe.
Layout And Placement Tip
Place the sideboard against a wall that’s not part of the main work triangle, like an empty stretch near the dining area or a hallway leading into the kitchen. Leave at least 12 inches of clearance above the microwave for ventilation. If your sideboard is narrow, use a slim microwave to keep the proportions balanced.
Styling The Top
Keep the microwave slightly off-center so there’s room for a small tray with salt and pepper shakers or a ceramic spoon rest. Add a low vase with dried eucalyptus or a stack of linen napkins to soften the appliance’s bulk. A small cutting board leaning against the wall adds a functional, decorative touch.
5. Corner Cabinet Carousel Hack
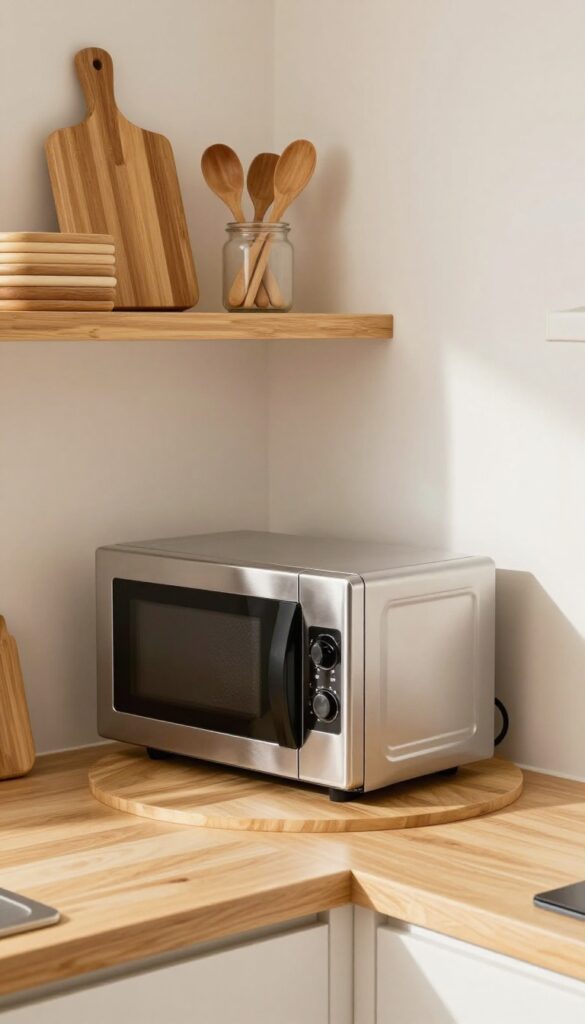
That deep corner cabinet where pots go to die? It's prime real estate for your microwave. By removing one shelf and dropping in a sturdy lazy Susan, you create a rotating platform that brings the microwave right to you.
No more reaching into dark corners or stacking things precariously. The turntable makes it effortless to spin the microwave out for use and tuck it away again, keeping your counters clear and your workflow smooth.
This hack turns an awkward, often wasted space into a functional microwave station. The lazy Susan allows full rotation, so you can access the microwave from either side—perfect for tight galley kitchens or L-shaped layouts. Choose a heavy-duty turntable that can support the weight (look for ones rated for 50+ pounds).
The microwave sits securely, and you can still store lightweight items like cutting boards or spices on the remaining shelf space above or below. It's a budget-friendly solution that doesn't require any permanent changes—just a shelf removal and a quick install.
Best Materials
- Go for a solid wood or bamboo lazy Susan with a metal bearing for smooth rotation. Avoid cheap plastic ones that might warp under the microwave's weight. For the cabinet itself, keep it simple: painted white or light wood tones help the space feel open.
- If your cabinet is dark, consider a peel-and-stick liner in a warm neutral to brighten the interior.
Layout Tip
Place the microwave on the turntable so its door opens toward the kitchen work triangle—ideally between the sink and stove. This minimizes steps when you're reheating or defrosting. If your corner cabinet is near a counter, you can even use the microwave's top as extra prep space when it's rotated in.
Small-space Fix
If the cabinet is too shallow for a standard microwave, look for a slim or compact model (under 12 inches deep). Measure the interior width and depth before buying. Also, ensure there's at least 3 inches of clearance around the microwave for ventilation—don't cram it in tight.
6. Microwave Shelf Above the Stove (Carefully
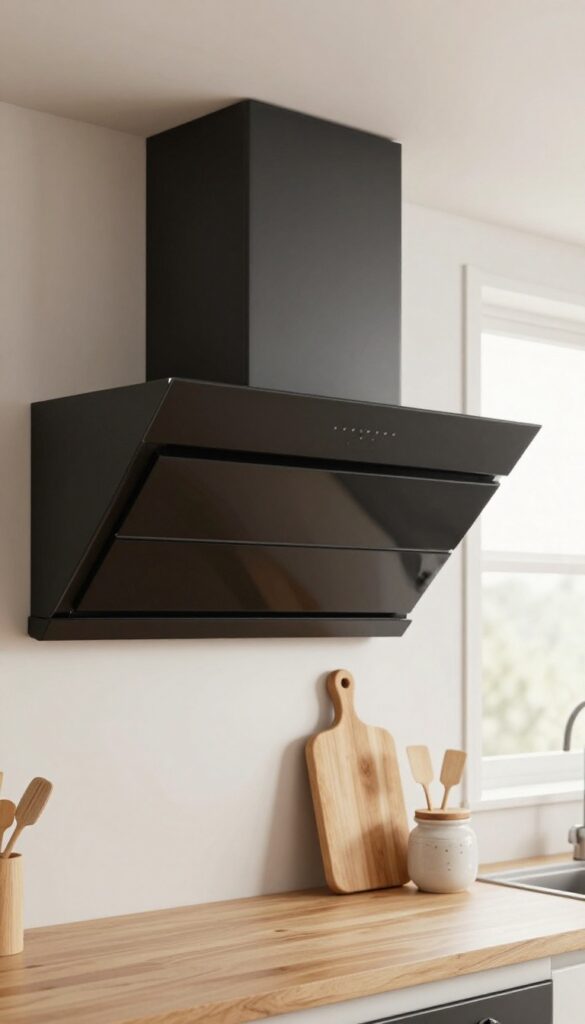
If your range hood is compact or recessed, the empty wall above your stove can become prime real estate for your microwave. It’s a clever way to free up counter space without sacrificing style. The key is to install a heat-resistant shelf at a safe height—at least 18 inches above the burners—and use a trim kit to make the microwave look like a built-in.
The result feels intentional, not makeshift, and keeps your cooking zone clutter-free.
This setup works best in kitchens where the stove isn’t directly under a window or cabinet. Measure your microwave’s depth and choose a shelf that can support its weight. A sturdy metal or solid wood shelf with a matching trim kit creates a seamless look.
For a warm, lived-in feel, pair it with a small wooden cutting board or a ceramic jar for spatulas nearby. The shelf itself can be painted to match your cabinets or left in a contrasting dark tone for depth.
Best Materials
Go for heat-resistant materials like powder-coated steel, solid teak, or thick bamboo. Avoid glass or thin particleboard—they can warp or crack. A matte black or brushed nickel shelf blends with most appliances, while a warm wood tone adds coziness.
Safety First
Always check your microwave’s manual for clearance requirements. Keep the shelf at least 18 inches above the burners and ensure it’s anchored into wall studs. Use a trim kit designed for your microwave model to hide gaps and wires.
Styling Tip
Add a small plant or a jar of wooden spoons on the shelf beside the microwave. This softens the utilitarian look and brings a touch of life to the cooking area. Keep it minimal—too many items can feel cluttered near the heat.
7. Pull-Out Drawer in a Base Cabinet
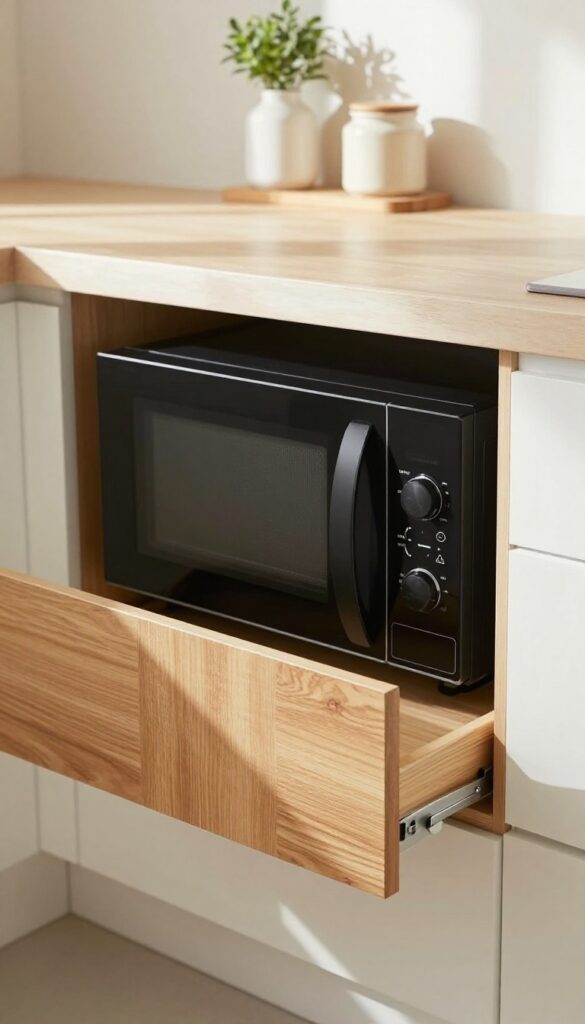
There’s something quietly satisfying about opening a drawer and finding your microwave right there, at waist height. No bending, no reaching, and no counter space sacrificed. A microwave drawer tucked into a lower cabinet feels like a secret upgrade—one that makes the kitchen work better without shouting about it.
It’s the kind of detail that makes you wonder why every small kitchen isn’t designed this way.
A pull-out microwave drawer transforms how you use your kitchen. It frees up precious counter space, eliminates the need to reach over hot stovetops, and adds a built-in, custom look without requiring a full renovation. The key is choosing the right cabinet and planning the installation carefully.
This idea works especially well in galley kitchens or L-shaped layouts where every inch of counter is valuable. The drawer sits flush with the cabinetry, so it blends in seamlessly—almost like it was always meant to be there.
Best Placement
Place the microwave drawer in a base cabinet near the main food prep zone but away from the sink to avoid splashes. A spot under a landing area or beside the refrigerator works beautifully. Make sure there’s at least 15 inches of clearance above the drawer for easy access and ventilation.
Cabinet Styling Note
Match the drawer front to your existing cabinet doors for a cohesive look. If your kitchen has shaker-style cabinets, use the same panel. For a more modern feel, opt for a slab front in a contrasting color—like a warm wood tone against white cabinets—to make the drawer a subtle focal point.
Small-space Fix
In a tiny kitchen, every square inch counts. A microwave drawer eliminates the need for a bulky countertop model and frees up space for a coffee station or cutting board. It also keeps the visual line of your countertops clean and uncluttered, making the whole room feel larger.
8. Wall-Mounted Pegboard Station
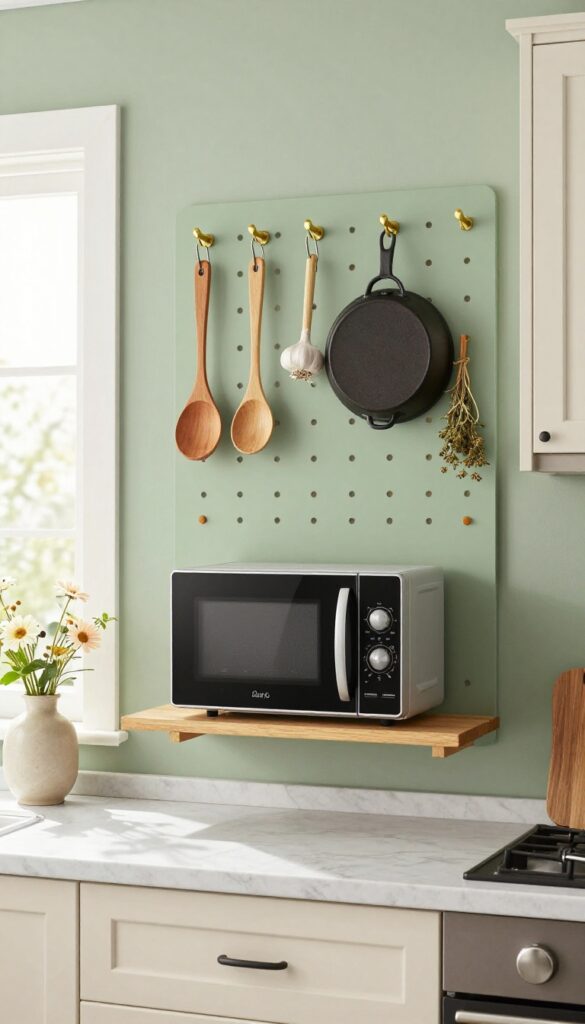
Pegboards aren’t just for garages and craft rooms. In a small kitchen, they can become a warm, lived-in focal point that holds your microwave and then some. Mount one on an empty wall, add a sturdy shelf for the appliance, and let the rest of the board become a rotating gallery of utensils, small pots, and dried herbs.
The look is practical but also artsy—like a functional still life that makes your kitchen feel curated rather than cramped.
Pick a pegboard that fits the width of your microwave, ideally leaving a few inches on each side for hooks. Paint it a soft, warm tone like sage green or creamy white to keep the space feeling cozy. Mount the shelf at a height that lets you easily see and use the microwave buttons, then use the surrounding holes to hang everyday tools—wooden spoons, a garlic keeper, or a small cast-iron pan.
The mix of textures (wood, metal, ceramic) adds visual interest without clutter. This setup works best on a narrow wall between cabinets or next to a window, where it won’t block counter space.
Best Materials
Go for a solid wood pegboard or a thick MDF board with a smooth finish—avoid thin hardboard that can warp. Pair it with a floating shelf in a matching wood tone or a contrasting black metal for an industrial touch. Use brass or black hooks for a warm, lived-in feel.
Layout Tip
Keep the microwave centered on the shelf, then arrange hooks in a balanced but not perfectly symmetrical pattern. Hang heavier items like a small skillet closer to the shelf and lighter ones like measuring spoons higher up. Leave a few empty hooks so the board doesn’t look overcrowded.
Finishing Touch
Add a small trailing plant in a wall-mounted pot above the microwave, or tuck a sprig of dried lavender behind a hook. This softens the utilitarian look and ties the pegboard into the rest of your kitchen decor.
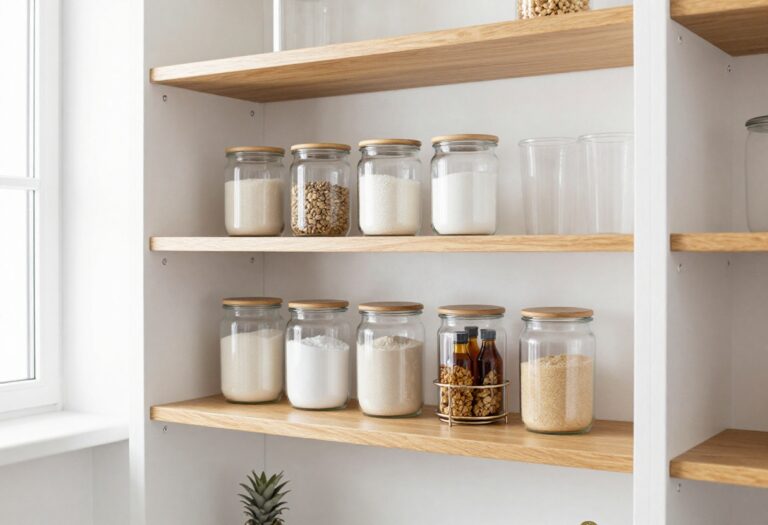
9. Inside a Pantry or Closet

A pantry or a broom closet can be the perfect hiding spot for your microwave, keeping it out of sight but still easy to reach. This idea works especially well if you have a deep pantry with a little extra shelf space or a closet that isn't used to its full potential. The microwave becomes part of the storage system, not an afterthought on the counter.
Clear a shelf at a comfortable height—waist level is ideal—and slide the microwave in. Add a power strip inside the closet so you can plug it in without running cords across the floor. If the closet has a door, consider leaving it open while the microwave runs, or install a small vent in the door or wall to let heat escape.
This setup keeps your counters clean and gives the kitchen a more streamlined, intentional look.
Best Layout Tip
Place the microwave on a shelf that's at least 18 inches deep to allow for proper airflow. If the shelf is adjustable, set it so the microwave sits with a few inches of clearance above and behind it. This prevents overheating and makes it easy to slide dishes in and out.
Storage Tip
Use the space above the microwave for lightweight items like paper towels, trivets, or microwave-safe covers. Below it, store a small step stool or a basket of kitchen linens. This keeps everything you need nearby without cluttering the main kitchen.
Finishing Touch
Paint the inside of the pantry or closet a warm, light color like soft cream or pale beige to make the space feel larger and more inviting. Add a small battery-operated motion light on the shelf so you can see inside without fumbling for a switch.
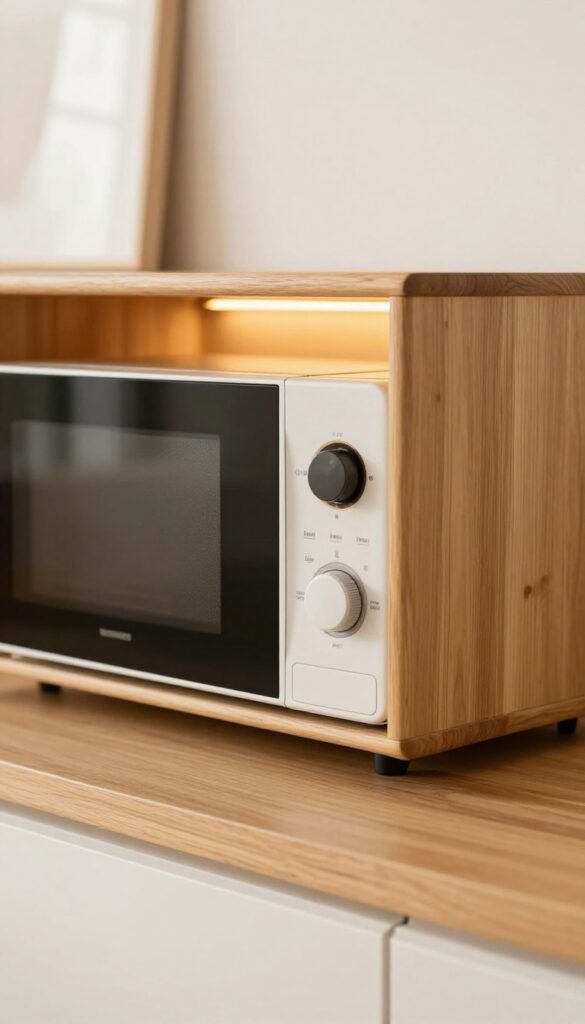
10. Floating Shelf Above a Countertop Appliance Garage
You don't need to sacrifice style to stash your microwave in a small kitchen. A shallow floating shelf mounted right above an appliance garage—the kind of cabinet that lifts up—creates a clever layered look that feels intentional, not cramped. The microwave sits up high, freeing your counter for prep work, while the garage below hides toasters, coffee makers, or stand mixers.
It’s a warm, lived-in solution that makes your kitchen feel both open and organized.
This idea works best in kitchens where counter space is precious but you still want everyday appliances within easy reach. The floating shelf should be just deep enough to hold the microwave—usually 12 to 14 inches—and mounted at a height that feels natural when you open the microwave door. Paint the shelf the same color as your wall or cabinets to keep the look seamless, or choose a contrasting wood tone for a cozy, collected feel.
The appliance garage below can be a standard upper cabinet retrofitted with a tambour door or a custom lift-up front; either way, it keeps clutter out of sight while the microwave stays accessible.
Styling the shelf is where the personality comes in. Since the microwave is the main event, keep the surrounding decor minimal: a small wooden cutting board, a single ceramic jar, or a trailing plant like pothos adds warmth without competing. If your microwave is stainless steel, balance it with warm wood or matte black accessories.
The key is to make the shelf feel like a deliberate design choice, not an afterthought. This setup is especially smart for galley kitchens or L-shaped layouts where every inch of counter counts.
Best Materials & Finishes
- For a warm, lived-in look, choose a solid wood shelf with a natural or lightly stained finish—oak, walnut, or ash work beautifully. If your kitchen leans modern, a matte black or white shelf with clean edges keeps the look crisp. Avoid glossy or mirrored finishes, which can feel cold and show fingerprints.
- The appliance garage door can match your existing cabinets or stand out with a contrasting color like sage green or navy for a subtle pop.
Layout & Height Tip
- Mount the shelf so the microwave sits 4 to 6 inches above the appliance garage top. This leaves room for the garage door to open fully without hitting the microwave. Measure your microwave’s depth and add an inch so it doesn’t hang over the edge.
- In a small kitchen, this vertical stack frees up counter space without making the wall feel crowded.
Finishing Touch
Add under-shelf lighting—a slim LED strip—to brighten the counter below and create a warm glow around the microwave. It makes the whole setup feel like a custom built-in. Stick to warm white bulbs (2700K–3000K) to keep the mood cozy and avoid harsh shadows.
FAQ
Is it safe to put a microwave on a shelf under cabinets?
Yes, as long as the shelf is sturdy and the microwave has at least a few inches of clearance above for ventilation. Avoid blocking the vents on the sides or back.
What is the best height for a microwave in a small kitchen?
Aim for the bottom of the microwave to be about 18 to 24 inches above the counter. This keeps it accessible without taking up valuable workspace.
Can I put my microwave in a cabinet without ventilation?
It's not recommended. Microwaves need airflow to prevent overheating. If you must enclose it, use a trim kit with built-in vents or leave the cabinet door open when in use.
How do I hide the microwave cord?
Use a cord cover that matches your wall color, or route the cord through a cable management kit. For carts, drill a small hole in the back to feed the cord through.
What style of microwave cart looks best in a small kitchen?
A cart with warm wood tones, slim metal legs, and a lower shelf for storage blends well. Avoid bulky designs—look for one that's narrow and fits your color palette.
Conclusion
Finding a home for your microwave in a small kitchen doesn't have to mean sacrificing style or counter space. With a little thought, you can turn that appliance into a natural part of your kitchen's warm, lived-in character. Whether you choose a rolling cart or a built-in drawer, the key is to make it feel intentional.
Try one of these ideas and see how it changes the flow of your cooking space. A small change can make your kitchen feel bigger, calmer, and more like home. Happy decorating!