13 Hallway Kitchen Ideas for Long Walk-Through Cooking
Long, narrow kitchens can feel like a challenge—especially when they double as a hallway. You're trying to cook while people walk through, and every inch of counter space feels precious. But with the right approach, that awkward layout can become one of the most functional rooms in your home.
The trick is to think storage-smart from the start. When you have limited width, every shelf, hook, and cabinet needs to earn its keep. The good news?
You don't have to sacrifice style for practicality. These 13 ideas focus on making your walk-through kitchen work harder without feeling cramped.
1. Install Slim Floating Shelves Above the Counter
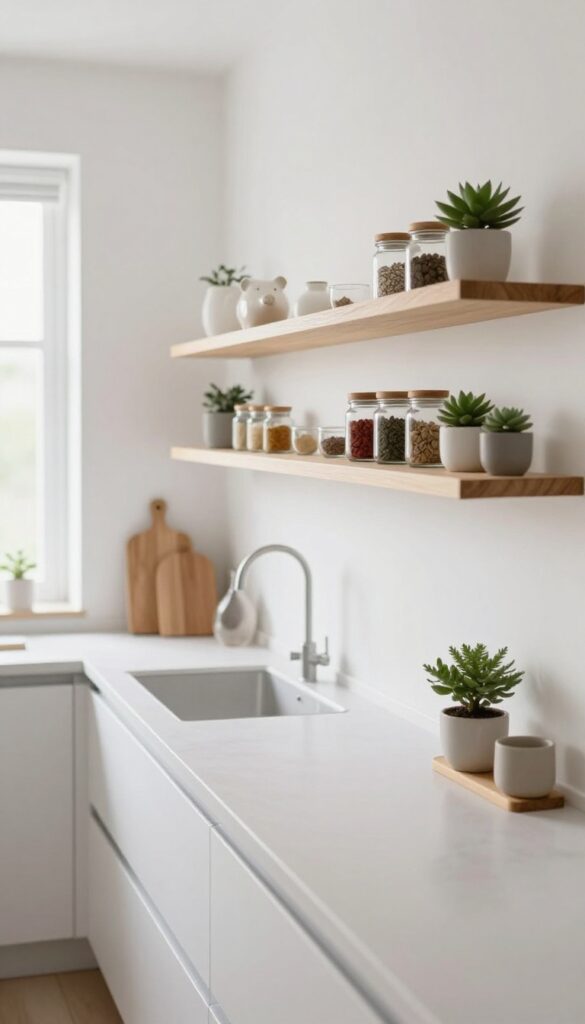
When your kitchen doubles as a hallway, every inch of counter space is precious. That's where slim floating shelves come in—they give you a spot for everyday essentials without stealing any floor room. Think of them as a vertical landing strip for spices, oils, and small jars, keeping everything within arm's reach while leaving the walkway wide open.
Slim floating shelves are a game-changer for long, narrow kitchens. They take advantage of empty wall space above the counter, so you can store items you use daily without cluttering your work surface. Keep them shallow—around 6 to 8 inches deep—so they don't jut into the path.
Use them for small jars, spice bottles, or a few pretty canisters. The result is a kitchen that feels organized and open, not cramped.
Best Materials
Go with solid wood for warmth or sleek metal for an industrial touch. If your kitchen is tight on visual space, choose a shelf color that matches your wall to make it recede. For a pop of contrast, try a dark stain against light walls.
Styling Tip
Group items by height and color to keep the shelf looking intentional. Place taller bottles at the back and shorter jars in front. Add a small plant or a ceramic salt pig for a lived-in feel without overcrowding.
Small-space Fix
Install two shelves instead of one to double your storage. Keep the lower shelf for everyday items and the upper one for less-used pieces like backup spices or decorative jars. Just make sure the top shelf doesn't block your view or feel too high to reach.
2. Use a Rolling Cart as a Movable Island
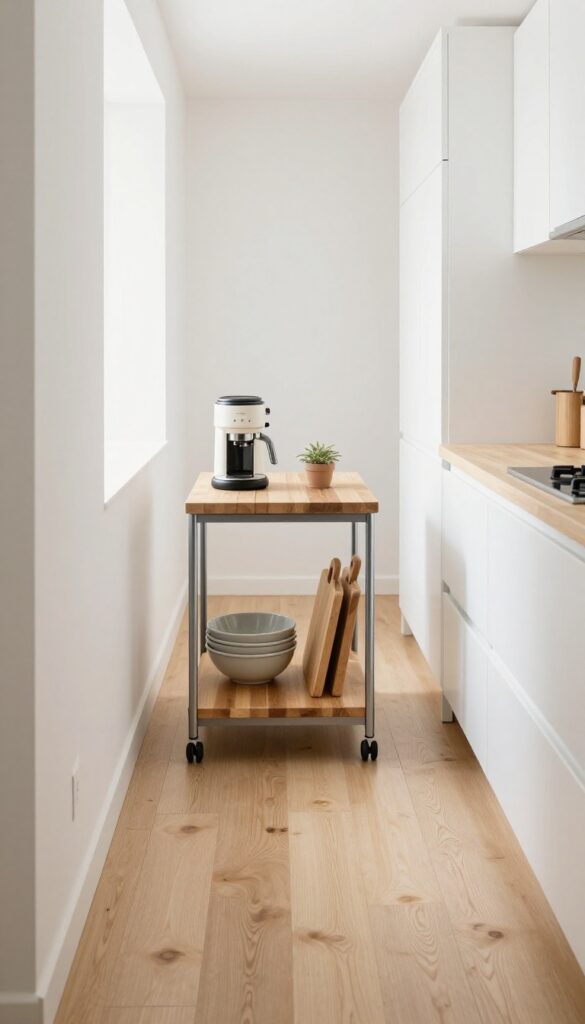
In a long, narrow hallway kitchen, every inch of counter space is precious. A slim rolling cart can be your best friend—it adds prep area and storage right where you need it, then rolls out of the way when foot traffic picks up. Think of it as a mini island on wheels, ready to hold your coffee station, extra pots, or a stack of cutting boards.
A rolling cart is a storage-smart solution that adapts to your flow. Look for one with shelves or drawers to keep utensils, pantry staples, or even small appliances organized. Place it near the stove for easy access while cooking, then tuck it against a wall when you need the walkway clear.
The beauty is in its flexibility—you can move it to wherever you need extra surface, whether that’s prepping veggies or staging plates for serving.
Best Materials
Go for a cart with a sturdy metal frame and wooden or butcher-block top. The wood adds warmth and a solid work surface, while the metal keeps it lightweight and easy to roll. Avoid flimsy wire racks—they wobble and don’t offer a stable chopping area.
Storage Tip
Use the shelves for vertical storage: stack mixing bowls, store cutting boards upright, or keep a few baskets for onions and garlic. If your cart has a drawer, that’s perfect for utensils or measuring spoons. Keep the top clear for prep work or a small plant.
Layout Tip
Position the cart parallel to your main counter, leaving at least 36 inches of clearance on the traffic side. In a tight hallway, a cart that’s 18 inches wide or less works best. When not in use, roll it flush against the wall or into a corner to keep the path open.
3. Hang a Pegboard Wall for Utensils and Tools
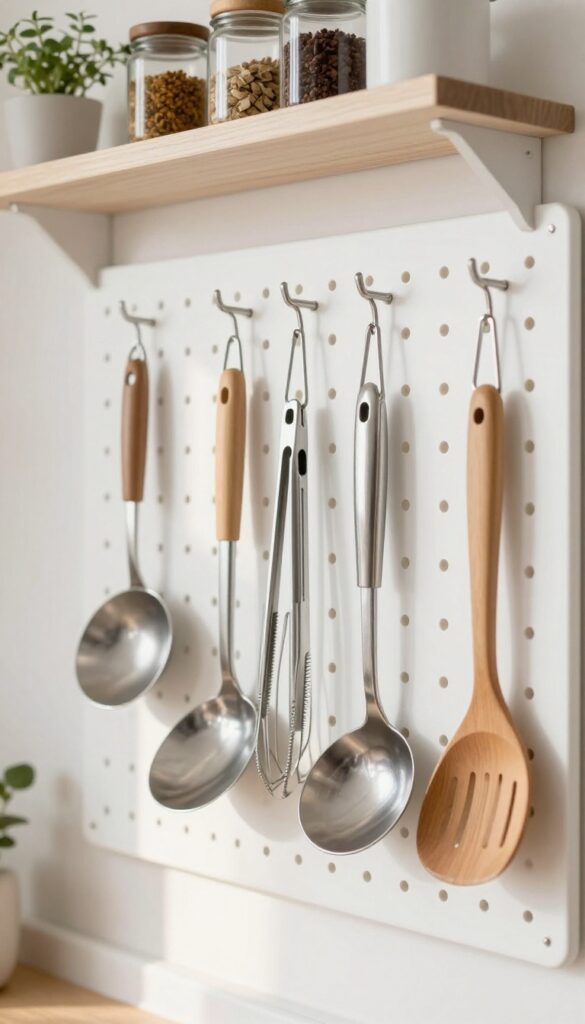
Pegboards aren’t just for garages—they’re a total game-changer in a hallway kitchen. When you’re cooking in a narrow space, every inch of counter and drawer real estate counts. Mounting a pegboard on an empty wall keeps your most-used tools right where you can grab them, without cluttering up your work surfaces.
Plus, you can customize the layout as your needs change, which is perfect for a busy kitchen that’s always in use.
A pegboard wall brings both function and personality to a long, narrow kitchen. It turns a blank wall into a living, breathing storage system that adapts to you. Whether you’re a minimalist who wants everything hidden or a maximalist who loves displaying colorful spatulas and ladles, a pegboard can fit your vibe.
Paint it to blend into the wall for a seamless look, or choose a bold accent color to make it a focal point. Add hooks, small shelves, and even magnetic strips to hold metal tools. The best part?
It’s easy to rearrange whenever you get new gadgets or change your cooking routine.
Best Colors And Finishes
- For a cohesive look, paint the pegboard the same color as your wall—especially if your kitchen is small and you want to avoid visual clutter. White or light gray works well in most kitchens. If you’re feeling adventurous, go for a contrasting color like navy, charcoal, or even a warm terracotta to add depth.
- For a natural touch, use unfinished wood and seal it with a matte varnish. Metal pegboards with a matte black or brushed nickel finish give an industrial edge.
Storage And Layout Tips
- Think about your workflow: hang your most-used utensils (spatulas, tongs, wooden spoons) near the stove, and keep measuring cups and spoons closer to your prep area. Use small bins or baskets on shelves to hold spices, oils, or smaller tools. Leave some hooks empty so you can add items as you go.
- A pegboard also works great for hanging pots and pans—just make sure you use heavy-duty hooks and secure the board into studs. If your hallway kitchen has limited wall space, consider a narrow pegboard strip above the counter or even on the back of a door.
Finishing Touch: Add Greenery
- To soften the utilitarian look, tuck a small trailing plant like pothos or string of pearls on one of the shelves. The green leaves add life and contrast against the tools. You can also hang a small herb garden in tiny pots with S-hooks—fresh basil or mint will be within arm’s reach while you cook.
- Just make sure the herbs get enough light if the pegboard isn’t near a window.
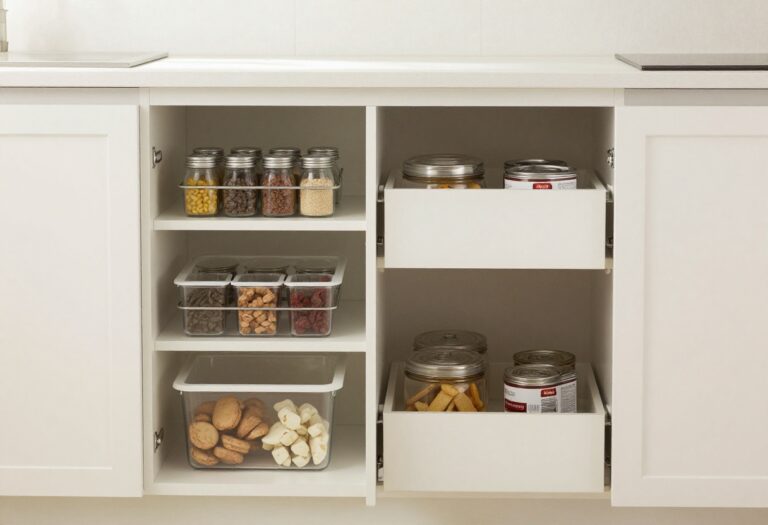
4. Opt for Deep Drawers Instead of Lower Cabinets
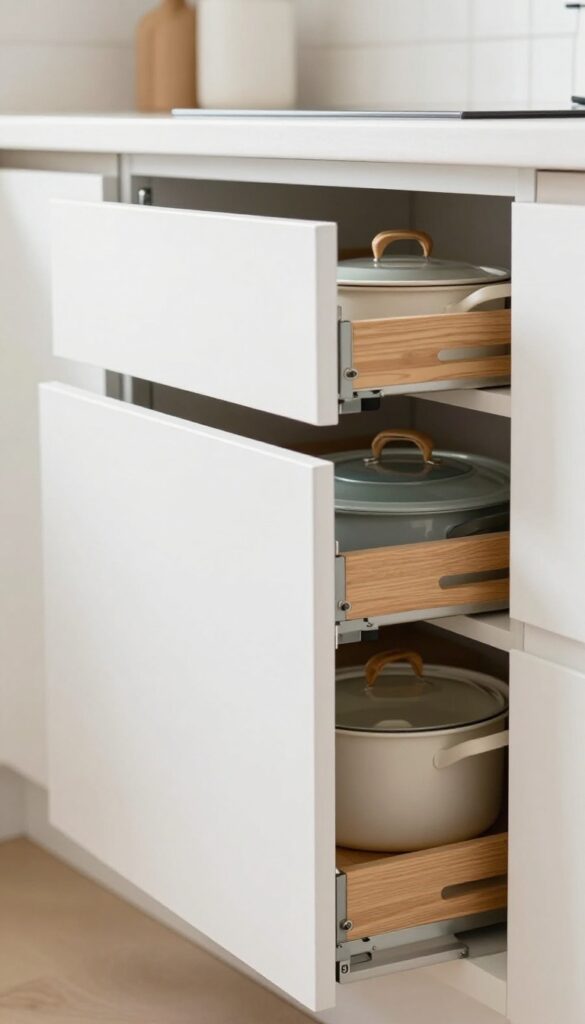
Lower cabinets in a narrow hallway kitchen can be a pain. You have to bend down, rummage through dark corners, and often lose things in the back. Deep drawers solve that by pulling everything out into the light.
They make grabbing a pot or finding a lid feel effortless, which is exactly what you need in a tight walk-through space.
Deep drawers are a game-changer for long, narrow kitchens where every inch counts. Instead of standard cabinets that force you to crouch and dig, these pull-out drawers let you see everything at a glance. They’re especially handy for storing heavy cookware—no more lifting awkwardly from a low shelf.
Use dividers to keep pots, pans, and lids separate, so you can grab what you need without shifting a stack. The smooth glide of full-extension drawers also makes the kitchen feel more open and organized, even when the square footage is tight.
Best Materials
- Go for plywood drawer boxes with dovetail joints—they’re sturdy and resist warping in humid kitchen conditions. Soft-close slides are a must for quiet operation in a hallway where people pass through. For the drawer fronts, match your cabinet style: flat-panel for a modern look, or shaker for a classic feel.
- A matte finish hides fingerprints better than gloss.
Layout Tip
- Install deep drawers in the base cabinets closest to the stove or prep area. That way, you can store pots, pans, and lids right where you cook. Keep the deepest drawers (around 24 inches) for larger items, and use shallower ones (12 inches) for baking sheets and cutting boards.
- Avoid mixing drawer depths in the same run—it looks cleaner when they’re uniform.
Storage Tip
Use adjustable dividers or peg-style organizers to keep items upright and separated. For lids, a vertical divider rack inside the drawer stops them from sliding around. You can also add a shallow tray on top of deeper drawers for utensils or spices—just make sure it doesn’t block the drawer from closing fully.
5. Add a Magnetic Knife Strip on the Wall
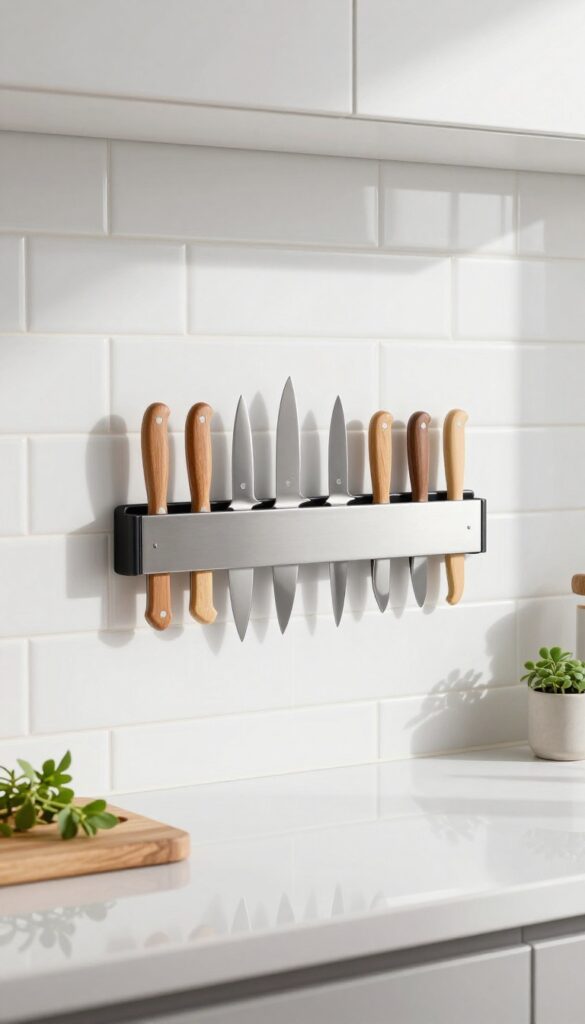
Counter space is precious in a narrow hallway kitchen, so anything you can move off the counter is a win. A magnetic knife strip does exactly that—it holds your blades securely on the wall, freeing up room for prep work. Plus, it turns your knives into a sleek, modern display that adds visual interest to an otherwise plain wall.
Mounting a magnetic knife strip along the backsplash or on a side wall keeps your most-used tools within arm’s reach. The strip itself is minimal and industrial, which pairs well with stainless steel appliances or matte black fixtures. You can choose a finish that blends in or stands out—brass for warmth, black for contrast, or silver for a seamless look.
This idea works especially well in long, narrow kitchens where every inch of counter space matters. The knives become part of the decor, so keep them clean and arranged by size for a tidy, intentional look.
Best Placement
The ideal spot is near your main prep area but away from the stove to avoid heat and grease. If your backsplash is tile, use a drill with a masonry bit to mount the strip securely. For a renter-friendly option, look for adhesive magnetic strips that hold up to light use.
Style It Right
To keep the look cohesive, pair the magnetic strip with other metal accents in the kitchen, like a brass faucet or black cabinet pulls. If your knives have wooden handles, the natural wood tones add warmth against a white subway tile backsplash. Avoid overcrowding the strip—leave a little space between knives so it feels curated, not cluttered.
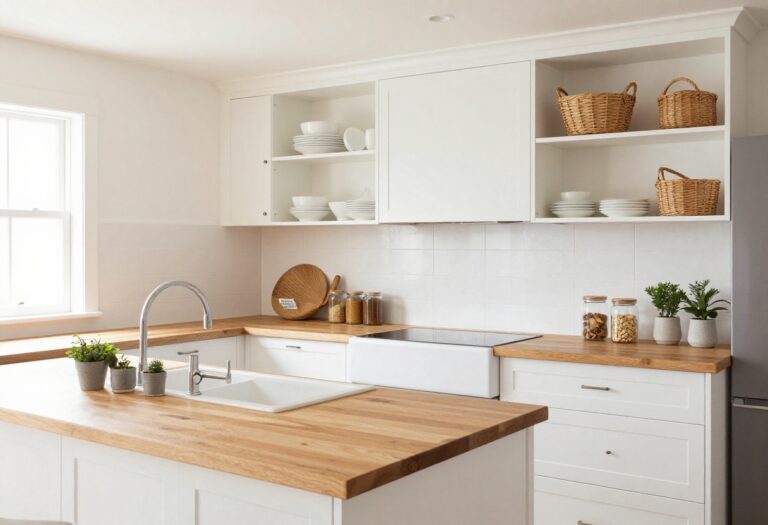
6. Choose Open Shelving Over Upper Cabinets
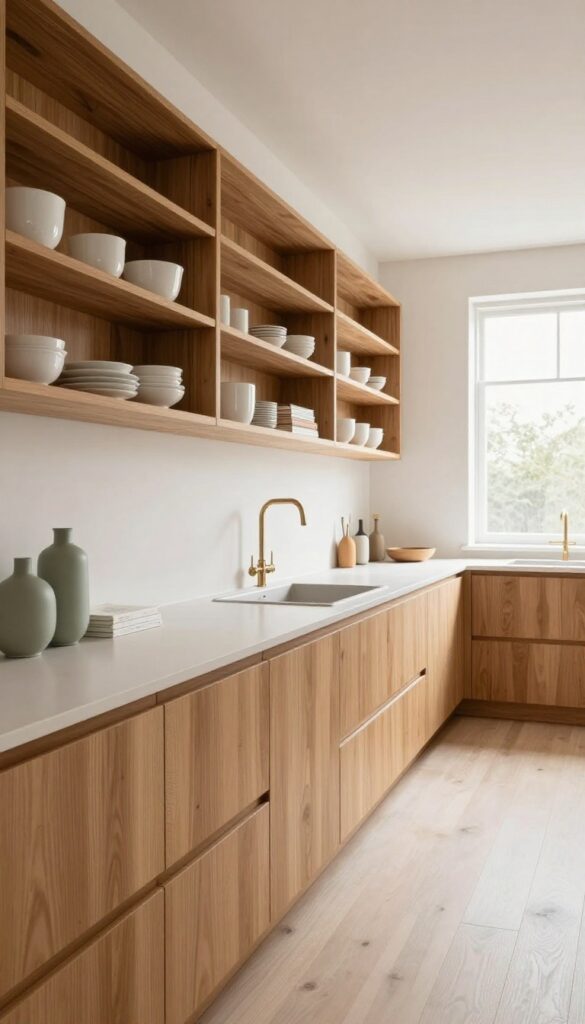
Upper cabinets can feel heavy and overwhelming in a long, narrow kitchen. Swapping them out for open shelving instantly makes the space feel more open and less like a hallway. It’s a practical move that also lets you show off your favorite dishes or glassware—just keep the palette tight and the styling intentional to avoid a cluttered look.
Open shelves invite the eye to travel farther, which is exactly what you want in a walk-through kitchen. They break up the wall visually and create breathing room. Plus, you can easily grab a mug or a plate without opening a door.
The key is to group items by color or material so the shelf reads as a curated display, not a catch-all.
Best Materials For Open Shelving
Solid wood shelves in a warm oak or walnut add natural texture and keep the kitchen from feeling cold. For a more modern look, opt for floating metal shelves in black or brass—they’re slim and don’t crowd the space. If your kitchen leans rustic, reclaimed wood with visible grain brings character without being too busy.
Shelf Styling Tip
Group items in odd numbers and vary heights using stackable plates, small vases, or cookbooks. Stick to two or three colors across the shelf—say, white ceramics, natural wood, and a single accent like sage green. Leave about 30% of the shelf empty to let the eye rest.
Storage-smart Arrangement
Use baskets or ceramic canisters on the lower shelves for everyday items like coffee filters or snack bags. Reserve the upper shelves for prettier pieces like glassware or serving bowls. This way, the shelves stay functional but still look intentional from every angle.
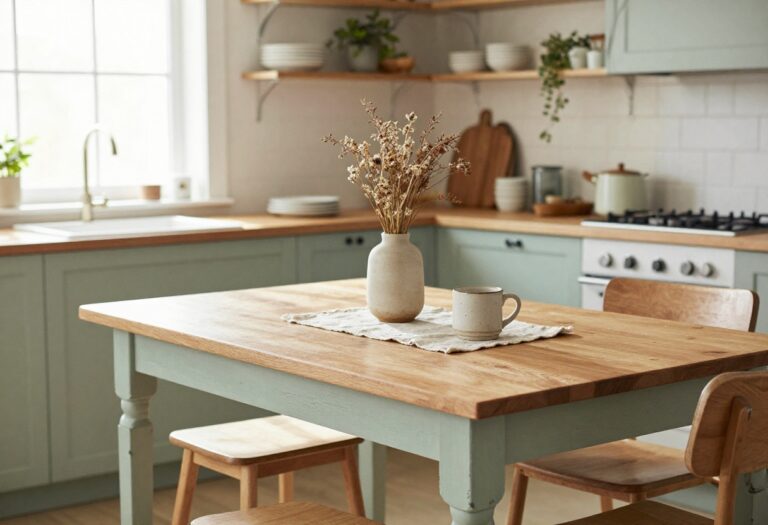
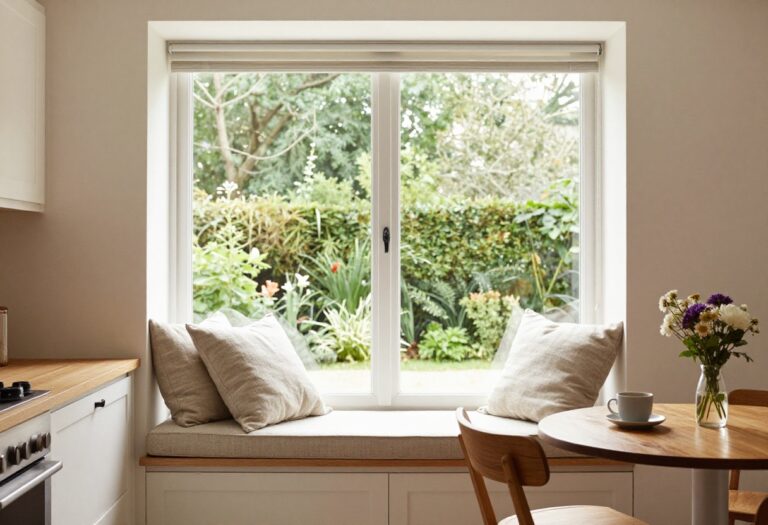
7. Install a Fold-Down Table for Extra Prep Space
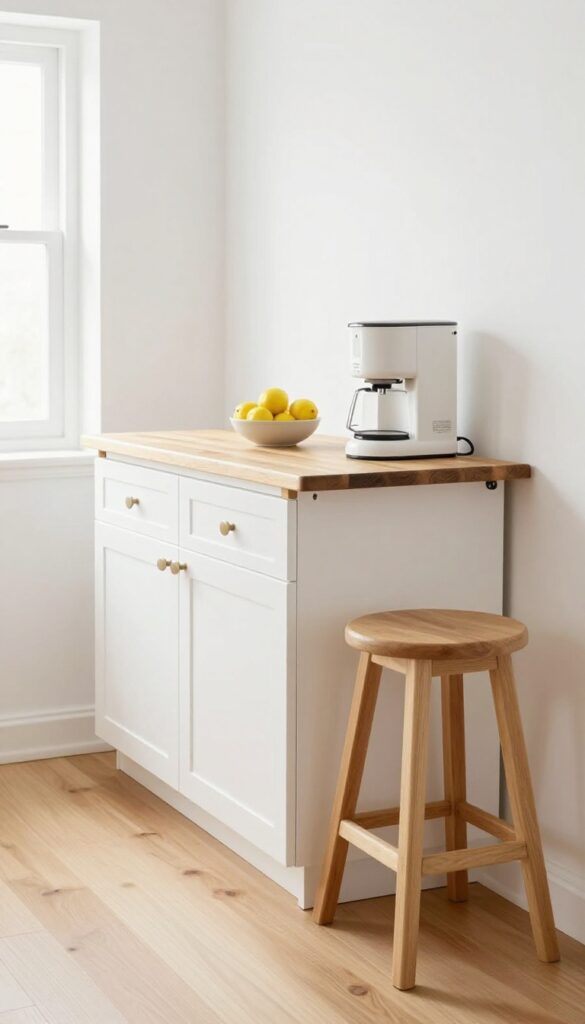
Hallway kitchens are masters of compromise, but they don't have to feel cramped. A wall-mounted fold-down table gives you a temporary work surface that disappears when not in use. It's perfect for setting down groceries, prepping ingredients, or even holding a small appliance like a coffee maker or toaster.
When you're done, just flip it up and reclaim your floor space. Add a stool underneath, and you've got a quick breakfast spot that doesn't eat into your walkway.
This idea works best in a narrow galley or hallway kitchen where every inch counts. The table should be mounted at a comfortable counter height (around 36 inches) and secured with sturdy hinges that lock in place. Choose a material that complements your kitchen—butcher block adds warmth, while a white laminate keeps things light and airy.
For a cohesive look, match the table's finish to your existing countertops or cabinets. Don't forget a fold-down bracket that supports the weight of meal prep or a small appliance. When not in use, it folds flat against the wall, leaving your hallway wide open.
Best Materials
- Butcher block is a popular choice for its warmth and durability, but if your kitchen leans modern, a sleek white laminate or even a solid surface like Corian can blend in seamlessly. For a budget-friendly option, a thick plywood board with a clear polyurethane finish works great. Avoid heavy materials like granite unless you have extra-strong brackets.
- The key is to keep the table lightweight enough to fold easily but sturdy enough for daily use.
Layout Tip
- Mount the table on a wall that's free of obstacles like light switches or outlets. Ideally, it should be near your main prep zone or across from your stove so you can pivot easily. If space allows, install a small shelf above for spices, oils, or a plant.
- That way, the area feels intentional and not just a leftover spot. Leave at least 12 inches of clearance on either side so you can move comfortably.
Finishing Touch
- Add a slim stool that tucks completely under the table when not in use. A backless wooden or metal stool saves space and keeps the look uncluttered. For extra charm, hang a small pendant light above the table to define the area as a mini breakfast nook.
- Even a simple cord with a bare bulb can make it feel special without overwhelming the hallway.
8. Use Tension Rods Under the Sink for Cleaning Supplies
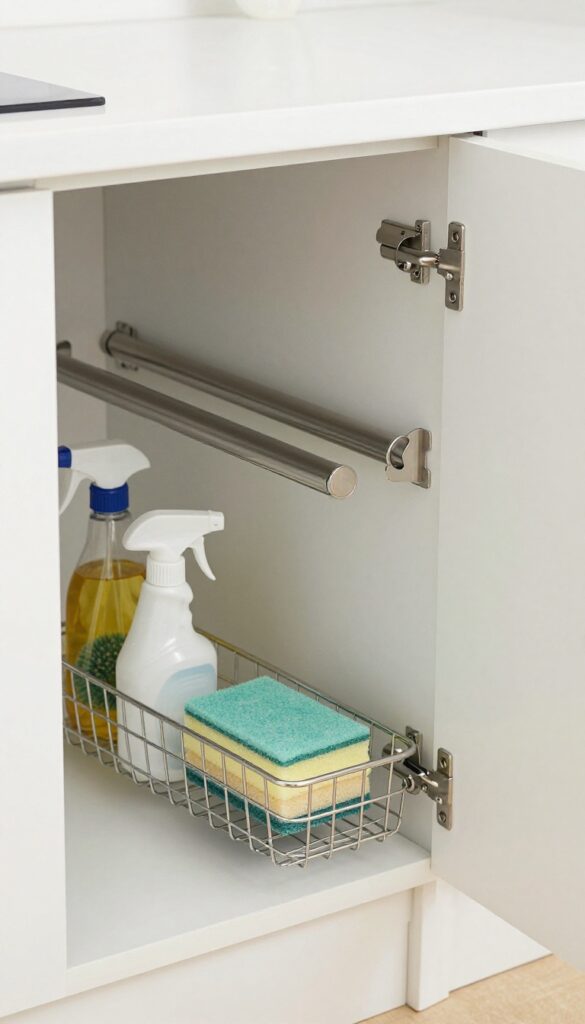
Under-sink cabinets can quickly become a black hole of bottles, brushes, and mystery sponges. But with a couple of tension rods, that awkward space turns into a neat little command center for cleaning gear. It’s one of those fixes that feels clever without costing much or requiring any tools.
Plus, it frees up floor space for a small trash can or recycling bin.
Start by installing one or two tension rods horizontally across the cabinet, just below the sink basin. Hang spray bottles by their necks so they dangle neatly—no more tipping over when you grab the all-purpose cleaner. Below the rods, add a small basket or two for sponges, scrub brushes, and extra rags.
If your cabinet has a door, mount a slim organizer on the inside for steel wool or gloves. The whole setup takes minutes and makes a huge difference in how functional that cramped spot feels.
Best Materials
- Go with stainless steel tension rods—they resist moisture and won’t rust like cheaper alternatives. For baskets, choose wire or plastic with drainage holes to let damp sponges dry out. Clear or white bins keep the look clean and make it easy to spot what you need.
- Avoid anything that can’t handle a little humidity.
Storage Tip
- Measure your cabinet depth before buying rods; they need to fit snugly. If you have a double sink with a center pipe, use two shorter rods on either side. Group bottles by frequency of use—daily cleaners in front, heavy-duty ones in back.
- Add a small adhesive hook on the cabinet wall for a scrub brush or dustpan.
Finishing Touch
Line the cabinet floor with a cut-to-size mat or a shallow tray to catch drips. This keeps the cabinet bottom clean and makes wiping up spills a breeze. Choose a mat in a neutral tone or a fun pattern—it’s a small detail that adds a pop of personality to an otherwise hidden spot.
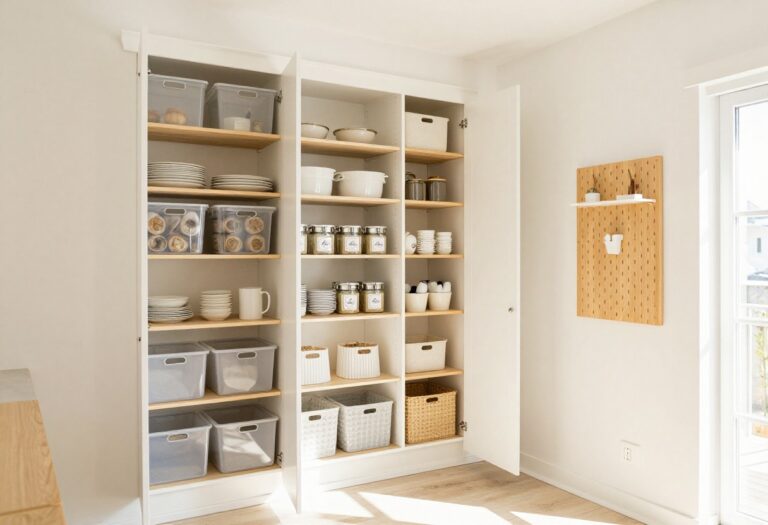
9. Incorporate a Slim Pantry Cabinet
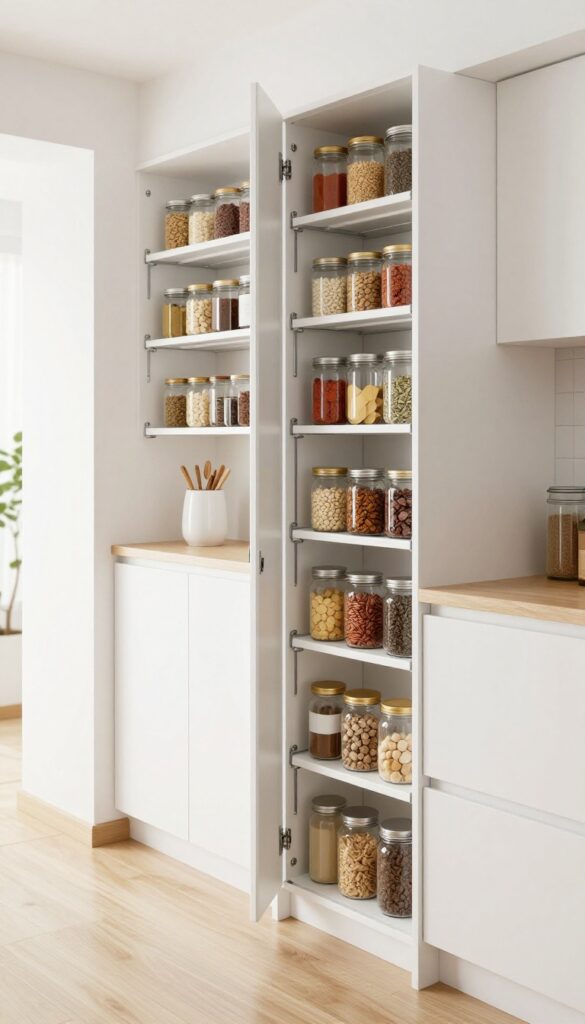
Every hallway kitchen has that one awkward gap between the fridge and the wall or next to the stove. Instead of letting it collect dust bunnies, slide in a tall, narrow pull-out pantry cabinet. It uses vertical space you didn’t know you had and keeps dry goods organized without taking up counter or floor space.
Think of it as a walk-in pantry condensed into a sliver—perfect for spices, canned goods, and backup snacks.
A slim pantry cabinet (typically 12 to 18 inches wide) fits into tight spots and makes the most of every inch. The pull-out shelves bring everything to eye level, so you never lose a can of beans in the back again. Adjustable shelves or removable bins let you customize the layout for tall bottles, small jars, or bulk bags.
It’s a storage-smart solution that feels like a secret weapon in a long, narrow kitchen.
Best Materials
- Go for plywood or MDF with a smooth laminate finish—easy to wipe down and durable. For the front, match your existing cabinet style or choose a contrasting color for a furniture-like look. White keeps it airy, while a dark navy or charcoal adds depth without overwhelming the narrow space.
- Metal pull-out baskets are another option if you prefer an open, industrial vibe.
Layout Tip
- Place the pantry cabinet near the prep zone or the end of the counter where you unload groceries. If your hallway kitchen has a dead corner, a slim cabinet on wheels can slide out for access. For a built-in look, frame it with trim to match surrounding cabinets.
- Keep the top shelf for rarely used items and the middle shelves for everyday staples.
Storage Hack
- Use clear bins or labeled baskets on the pull-out shelves to group similar items: baking supplies, pasta, snacks, or spices. Install a small tension rod inside for hanging spice jars or bag clips. If the cabinet is deep, add a tiered shelf or lazy Susan for easy access to small cans and jars.
- Every inch counts, so think vertically and use the door interior for a slim rack.
10. Hang Hooks on the Back of the Door
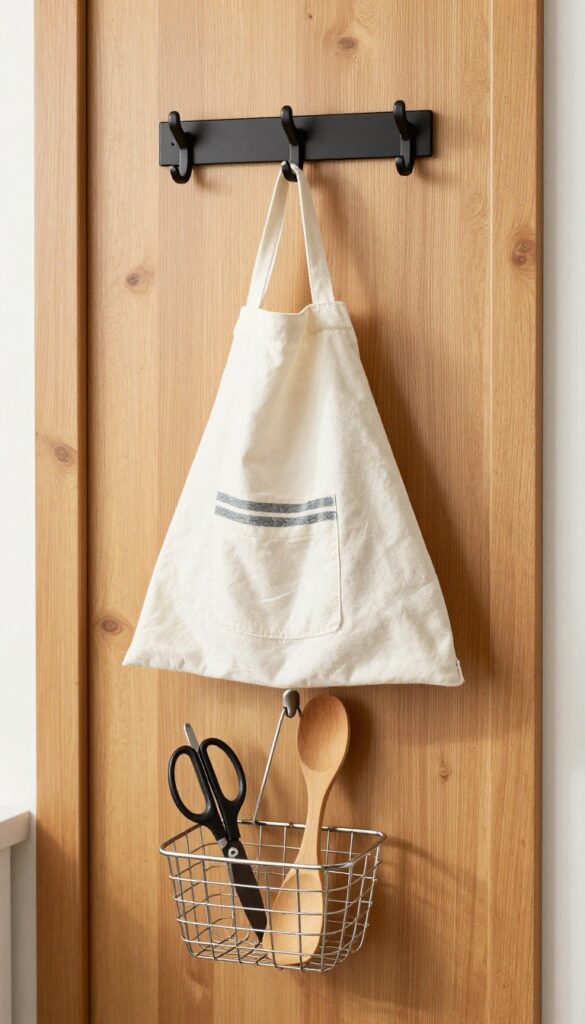
The back of your kitchen door is prime real estate that often goes unused. Instead of letting that blank surface collect dust, turn it into a grab-and-go station for the items you reach for daily. Over-the-door hooks are the easiest way to add storage without any tools or drilling, making them perfect for renters or anyone who wants a quick, low-commitment upgrade.
Think about how many times you fumble for an apron or a dish towel while cooking. Having them right on the back of the door means you can snag one in seconds. This setup works especially well in narrow kitchens where every inch of counter space is precious.
Plus, it keeps frequently used items visible and accessible, so you're not digging through drawers mid-recipe.
Best Materials
Stick with sturdy metal hooks—steel or wrought iron hold up best under daily use. For a warmer look, go with matte black or brushed brass, which adds a touch of style without screaming for attention. Avoid plastic hooks; they can warp or break under the weight of heavy aprons or bags.
Storage Tip
Group items by how often you use them. Keep aprons and oven mitts on the top hooks, and hang lightweight shopping bags or reusable produce sacks on the lower ones. That way, you're not lifting heavy stuff every time you need a bag for leftovers.
Finishing Touch
Add a small over-the-door basket at the bottom for odds and ends like kitchen shears, a thermometer, or a few spice packets. It keeps the hooks from looking cluttered and gives you a spot for those little tools that always seem to wander off.
11. Add a Narrow Console Table Against a Wall
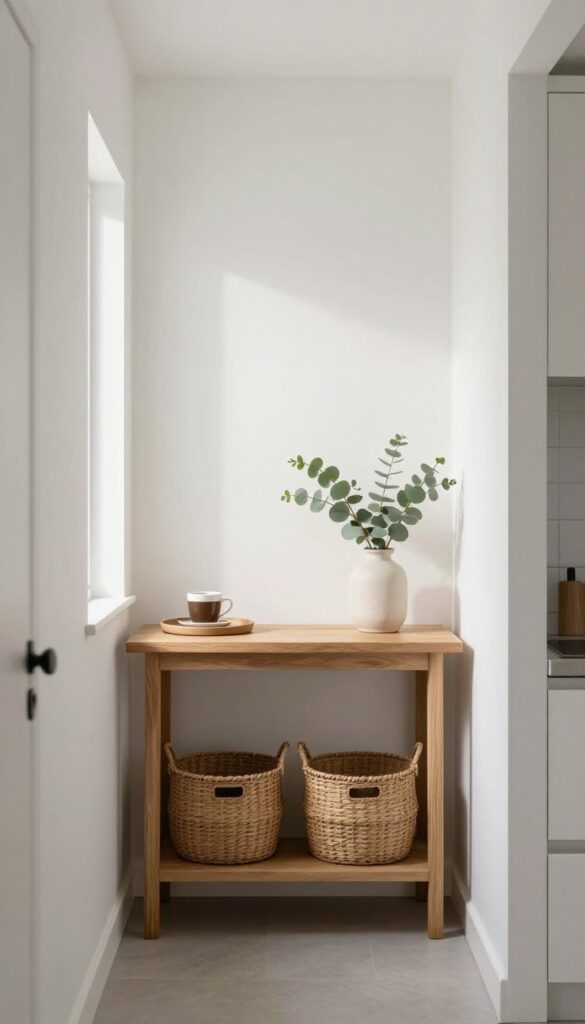
When your hallway kitchen is more runway than room, a narrow console table is the unsung hero you didn't know you needed. It slides into tight spots, gives you a landing zone for morning coffee or a place to stash keys, and adds a dose of personality without eating up precious floor space. The trick is picking one that's slim enough to keep the walkway clear but substantial enough to feel like a deliberate design choice.
A slim console table provides extra surface for a coffee station or decorative trays. Use the lower shelf for cookbooks or baskets. It adds character without blocking the flow.
Best Materials
Go for something that can handle the occasional splash—think metal, sealed wood, or even a glass top. A bamboo console brings warmth without feeling heavy, while a black metal frame keeps things airy and modern. If your hallway sees a lot of foot traffic, avoid raw wood that stains easily.
Storage Tip
Use the lower shelf for baskets that hide odds and ends like napkins, takeout menus, or spare lightbulbs. A couple of woven baskets keep the look tidy and add texture. If you need more vertical storage, add a small tiered stand for spices or tea bags.
Styling Tip
Keep the surface uncluttered: a small tray for coffee essentials, a single plant or vase, and maybe a stack of cookbooks. This keeps the table functional without turning it into a catch-all. A slim lamp or a piece of art above the table draws the eye up and makes the whole setup feel intentional.
12. Use Clear Canisters for Pantry Staples
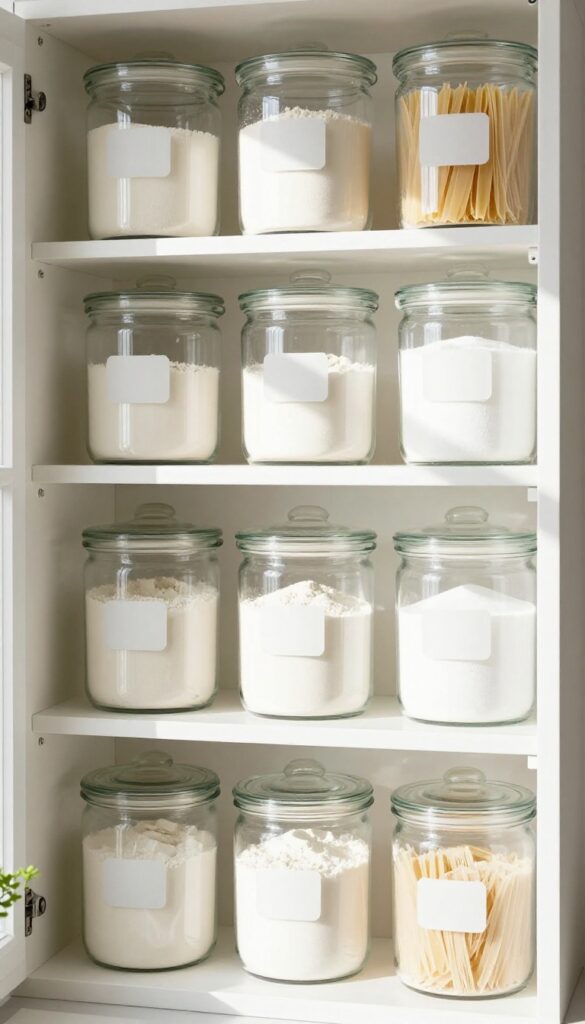
Clear canisters are one of those small swaps that make a big visual and practical difference. They turn a jumble of bags and boxes into a tidy, uniform display that feels intentional rather than chaotic. Plus, seeing exactly how much flour or pasta you have left means fewer surprise shortages mid-recipe.
Stack them on open shelves or line them up in a cabinet, and you’ve got a system that looks good and works hard.
Best Materials
- Glass canisters are the classic choice—they’re heavy, durable, and don’t stain or hold odors. Look for ones with airtight seals, like rubber gaskets or clamp lids, to keep everything fresh. If you’re worried about breakage, high-quality acrylic or PET plastic canisters are lightweight and shatterproof, though they may scratch over time.
- Avoid thin plastic that warps in the dishwasher.
Shelf Styling Tip
- Mix canister heights and shapes to create visual rhythm. Group tall cylindrical ones for pasta and rice next to shorter square ones for sugar and salt. Keep labels consistent—use the same font and placement (like on the lid or front) for a cohesive look.
- Leave a little breathing room between each canister so the shelf doesn’t feel overcrowded.
Small-space Fix
In tight hallways or galley kitchens, clear canisters let you store staples vertically without losing track of inventory. Use slim rectangular canisters that fit neatly on narrow shelves or in shallow cabinets. Stackable designs maximize vertical space, and you can even mount a magnetic strip on the wall for metal canisters to free up counter space.
13. Install Under-Cabinet Lighting for Task Visibility
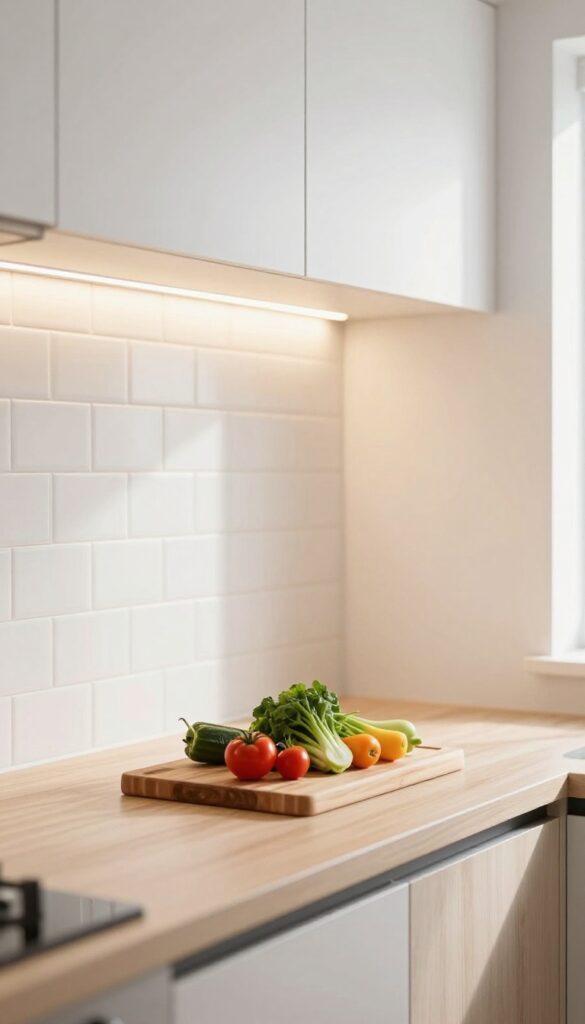
A long, narrow kitchen can feel like a tunnel, especially when shadows from overhead lights leave your countertops dim. Under-cabinet lighting solves that instantly, turning your workspace into a bright, functional zone. It’s one of those upgrades that feels luxurious but doesn’t require a full renovation—just a few strips or pucks and you’re set.
Plus, it adds a warm glow that makes the whole kitchen feel more inviting, even when you’re just passing through.
Under-cabinet lighting isn’t just about seeing what you’re chopping—it’s about making your hallway kitchen feel wider and more purposeful. By eliminating harsh shadows, you create a seamless line of light that draws the eye along the counter, visually extending the space. Choose warm white (2700K–3000K) for a cozy, residential feel, or cool white (4000K–5000K) if you prefer a crisp, modern look.
LED strips are easy to install with adhesive backing, and hardwired options offer a cleaner finish. Either way, this simple addition transforms your cooking experience and adds serious style points.
Best Color Temperature
Warm white (2700K–3000K) creates a soft, inviting glow that complements wood tones and warm paint colors. Cool white (4000K–5000K) feels brighter and more clinical, ideal for modern kitchens with white cabinets and stainless steel. For a hallway kitchen, stick with warm white unless you have a very contemporary space—it helps the narrow room feel cozy rather than sterile.
Installation Tips
Plug-in LED strips are the easiest DIY option—just stick them under the cabinet lip and plug into an outlet. For a built-in look, hardwire slim pucks or linear strips and hide the wires with a cord cover painted to match your cabinets. Position lights toward the front of the cabinet to illuminate the countertop, not the backsplash.
Budget-Friendly Swap
If you’re not ready to commit to hardwiring, battery-operated puck lights work well for renters or quick fixes. Look for ones with remote controls and dimmable settings. They’re not as seamless, but they still banish shadows and make your kitchen feel brighter instantly.
FAQ
How do I make a narrow kitchen feel wider?
Use light colors on walls and cabinets, add mirrors or reflective surfaces, and keep countertops clutter-free. Open shelving and under-cabinet lighting also help create an airy feel.
What is the best flooring for a long hallway kitchen?
Durable, easy-to-clean materials like luxury vinyl plank or tile work well. Running the flooring lengthwise can make the space appear longer, while a diagonal pattern adds visual interest.
Can I have an island in a narrow kitchen?
Yes, but choose a slim, movable cart or a narrow fixed island. Leave at least 36 inches of clearance on each side for comfortable movement. A rolling cart offers flexibility.
How do I store pots and pans in a small kitchen?
Use deep drawers with dividers, hang them on a wall rack or pegboard, or store them in a pull-out cabinet. Vertical storage saves space and keeps them accessible.
What colors work best in a hallway kitchen?
Light neutrals like white, beige, or soft gray make the space feel larger. Add pops of color through accessories or a single accent wall. Avoid dark colors that can make the room feel cramped.
Conclusion
A long, narrow kitchen doesn't have to feel like a compromise. With a few storage-smart tweaks and some thoughtful styling, you can turn that walk-through space into a place you actually enjoy cooking in. The key is to work with the layout, not against it.
Start with one or two ideas that speak to your biggest pain point—whether it's counter clutter or missing prep space. Small changes add up, and soon your hallway kitchen will feel both functional and inviting.