11 Budget-Friendly Kitchen Laundry Room Ideas for Shared Utility Corners
Combining your kitchen and laundry area can feel like a design puzzle, especially when you're working with a tight budget. But with a little creativity, that shared corner can become one of the most functional—and stylish—spots in your home.
The key is to choose ideas that pull double duty without clashing visually. Think streamlined storage, cohesive colors, and smart layouts that keep both cooking and laundry tasks feeling effortless.
Here are 11 budget-friendly ways to make your kitchen-laundry nook look intentional, not makeshift.
1. Stack Your Washer and Dryer for Instant Floor Space
When your kitchen and laundry room share a corner, every square inch counts. Stacking your washer and dryer is one of the smartest moves you can make. It frees up valuable floor area for a slim pantry cart or extra counter space—a simple change that instantly opens up the room without a major renovation.
Stacking your washer and dryer is a budget-friendly way to reclaim floor space in a shared utility corner. Most stacking kits are affordable and easy to install, turning a bulky side-by-side setup into a compact tower. Once you stack, you'll have room for a narrow rolling cart that can hold pantry staples or cleaning supplies.
If you have a bit more space, add a countertop over the machines for folding laundry or prepping ingredients. This idea works especially well in galley-style kitchens or tight laundry nooks where every inch matters.
Budget-Friendly Swap
Skip the expensive custom cabinetry and opt for a simple stacking kit. These kits typically cost between $20 and $60 and are designed for most standard washer and dryer models. If you're handy, you can even build a sturdy shelf above the stacked units using basic lumber and brackets for under $50.
Small-space Fix
- After stacking, measure the freed-up floor area. A slim rolling cart (12-18 inches wide) fits perfectly beside the tower. Use it for extra pantry storage, laundry supplies, or even a coffee station.
- This keeps the area functional and clutter-free.
Finishing Touch
To make the stacked units feel intentional, add a tension rod above them. Hang a simple curtain to hide the machines when not in use. Choose a fabric that complements your kitchen palette—like a subtle stripe or solid linen—to tie the corner into the rest of the room.
2. Install a Fold-Down Drying Rack Above the Sink
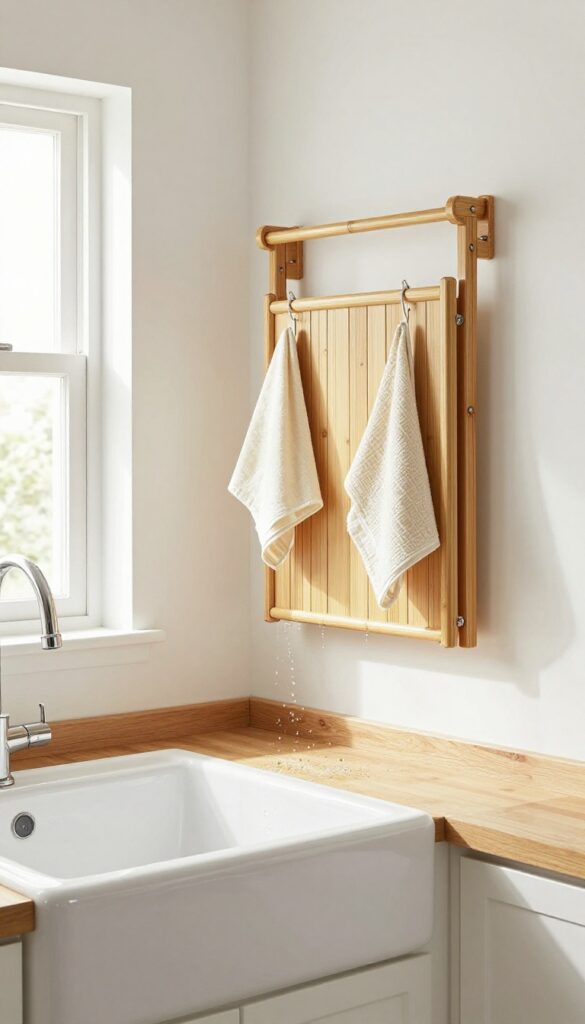
In a shared kitchen-laundry corner, every inch of counter space is precious. A fold-down drying rack mounted above the sink lets you air-dry delicates and hand-washed items without sacrificing workspace. When not in use, it tucks flat against the wall, keeping the area tidy and open.
Budget-friendly bamboo or metal versions add a natural or industrial touch without breaking the bank.
This wall-mounted rack is a game-changer for small utility corners. By positioning it directly over the sink, drips fall right into the basin, so you don't need a separate drip tray. Choose a rack with multiple tiers or pegs for versatility—bamboo suits a warm, organic kitchen, while chrome or matte black fits modern or industrial spaces.
Installation is straightforward with basic tools, and most racks hold up to 15–20 pounds, enough for a few shirts or kitchen towels.
Best Materials For Durability And Style
Bamboo is a top pick for its warm look and moisture resistance—just seal it annually with food-safe oil. For a sleek, low-maintenance option, go with powder-coated metal; it won't rust and wipes clean easily. Avoid raw wood or untreated metal, as they can warp or spot over time.
Small-space Installation Tips
- Mount the rack so it clears the faucet by at least 2 inches when folded down. Use a level and wall anchors rated for your rack's weight. If your sink is in a corner, angle the rack slightly to avoid bumping into cabinets.
- A quick tip: install a small hook nearby to hang a squeegee for wiping down the rack after use.
Budget-Friendly Swap
Instead of a pricey designer rack, look for a simple foldable wooden or metal rack from home stores or online marketplaces. Many options cost under $30. For an even cheaper DIY, attach a wooden dowel rack to a hinged board—paint it to match your wall for a seamless look.
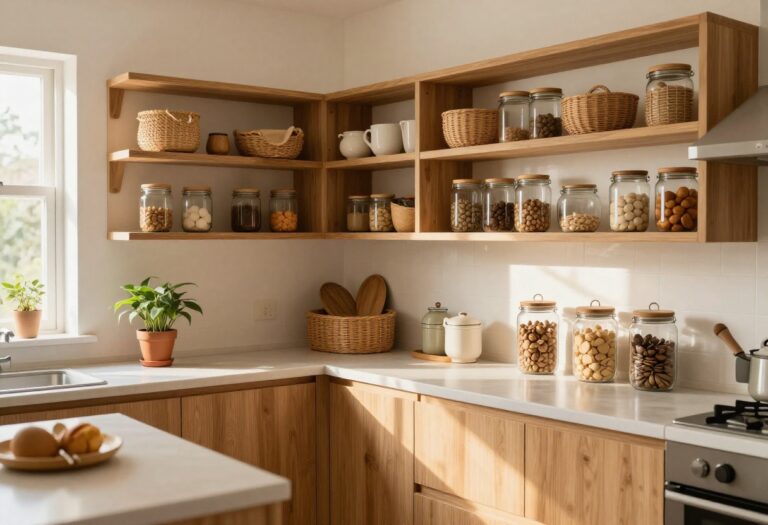
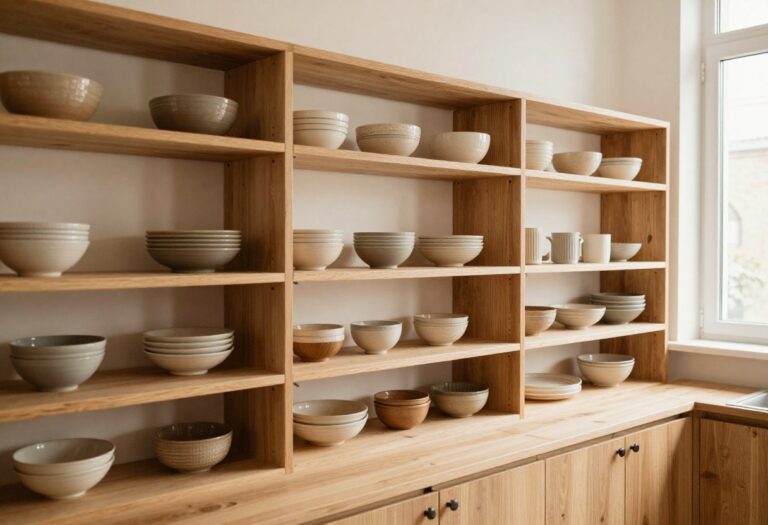
3. Use Matching Baskets for Laundry and Pantry Storage
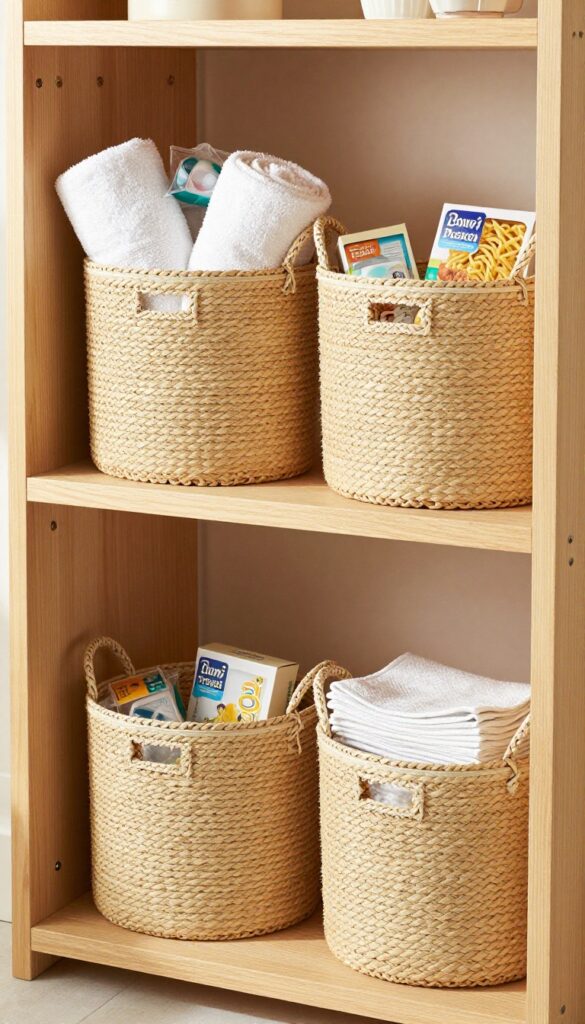
Open shelving in a shared kitchen-laundry corner can quickly look cluttered with mismatched bottles and boxes. The fix is surprisingly simple: a set of uniform baskets. When you choose the same style for both laundry supplies and pantry staples, the whole wall reads as intentional decor instead of storage chaos.
Natural materials like seagrass or woven cotton add warmth without costing a fortune, and the cohesive look makes a small space feel more put-together.
Matching baskets are a budget-friendly way to bring order to a dual-purpose corner. They hide detergent pods, dryer sheets, snack bags, and spice jars behind a tidy facade, while still keeping everything easy to grab. The key is picking a basket that works for both wet and dry items—seagrass is sturdy and breathable, while woven cotton bins are soft and washable.
Stick to one color family (like warm beige or light gray) to keep the visual calm. For a smart space-aware touch, measure your shelves first and buy baskets that fit snugly without wasting an inch. Label them with simple tags or chalkboard stickers so you never confuse baking soda with bleach.
Best Materials For Dual-purpose Baskets
- Seagrass and water hyacinth are top picks because they handle humidity from laundry machines without warping. Woven cotton rope baskets are another solid choice—they're lightweight, machine-washable, and come in neutral tones that blend with any decor. Avoid metal or dark plastic if you want that warm, approachable look.
- A set of three matching baskets in different sizes can cover laundry pods, snack packs, and tea bags, all for under $40.
Shelf Styling Tip For Maximum Impact
- Place the largest baskets on lower shelves for heavier items like detergent jugs, and smaller ones up top for spices or dryer sheets. Leave a little breathing room between baskets to avoid a wall-of-storage feel. Tuck a small plant or a pretty jar on the shelf above to break up the rows and add life.
- This keeps the corner functional but still nice to look at.
Budget-friendly Swap To Try
- Skip expensive designer bins and look for sets at discount home stores or online marketplaces. A three-pack of seagrass baskets often costs less than $30. For an even cheaper DIY, buy plain canvas bins and add a coat of fabric paint in a single color to create your own uniform set.
- Just make sure the paint is safe for fabric and won't rub off on your laundry.
4. Add a Slim Rolling Cart for Detergent and Spices
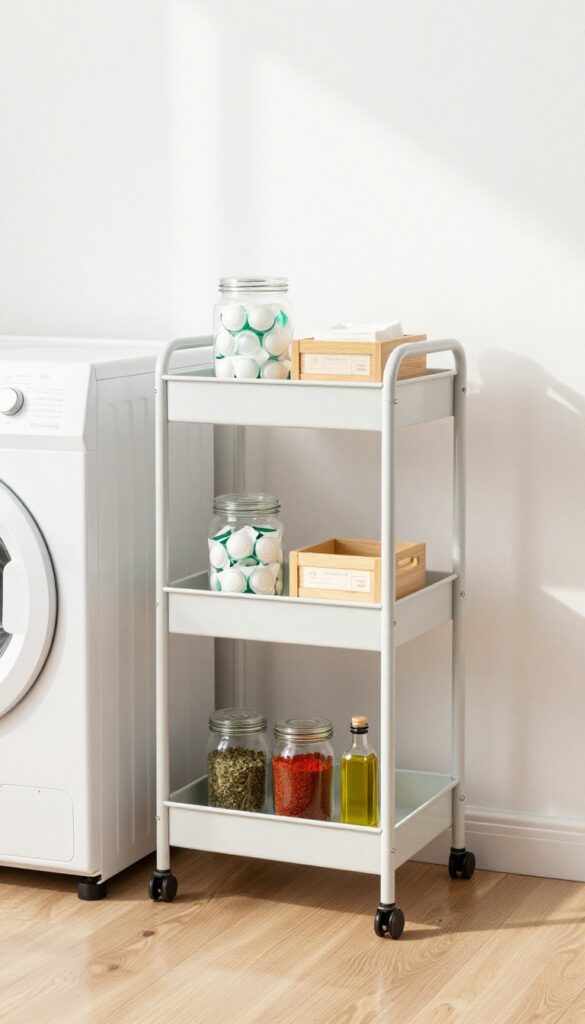
That awkward gap between the washer and the wall? It's prime real estate. A slim rolling cart slides right in, turning dead space into a dual-purpose caddy.
On one side, stash your detergent and dryer sheets; on the other, olive oil and spices. It's mobile, affordable, and endlessly useful—especially in a shared utility corner where every inch counts.
A narrow cart tucked between the washer and wall can hold laundry supplies on one side and cooking essentials on the other. It's mobile, affordable, and endlessly useful. Look for a cart that's about 6 to 8 inches wide—just enough to fit without sticking out.
Wire or metal designs keep things airy, while a slim wooden cart adds warmth. Use small bins or jars to corral items and keep the look tidy. The best part?
You can roll it out when you need access to the wall or want to reorganize.
Best Materials
Go with a metal or wire cart for a light, industrial feel that won't overwhelm the space. If your kitchen leans warm and rustic, a slim wood cart with casters blends right in. Avoid plastic—it can look cheap and doesn't hold up as well in humid laundry areas.
Small-space Fix
- Measure the gap before you buy. A cart that's too wide will block the washer door or stick out awkwardly. Look for one with locking wheels so it stays put when you need it.
- Use clear jars or matching containers on the cooking side to keep spices visible and easy to grab.
Budget-Friendly Swap
- You don't need a fancy designer cart. A simple IKEA RÅSKOG or similar utility cart works perfectly. Spray-paint the frame in a bold color like mustard or sage to tie it into your kitchen palette.
- It's a quick, cheap upgrade that makes the cart feel custom.
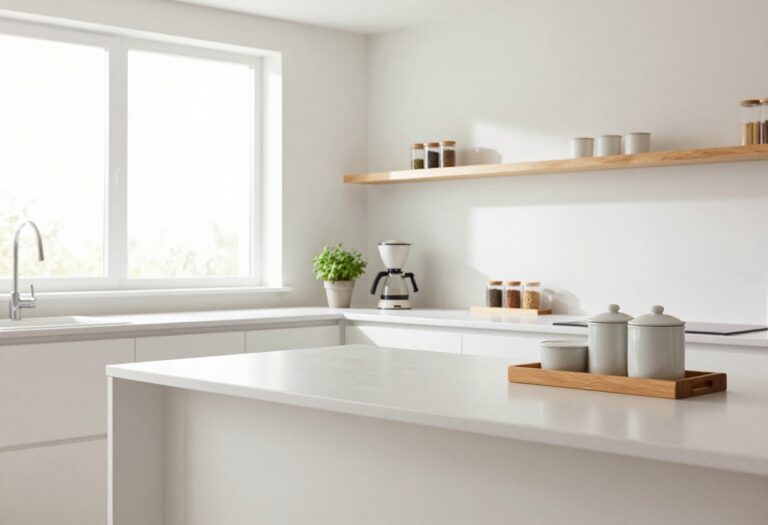
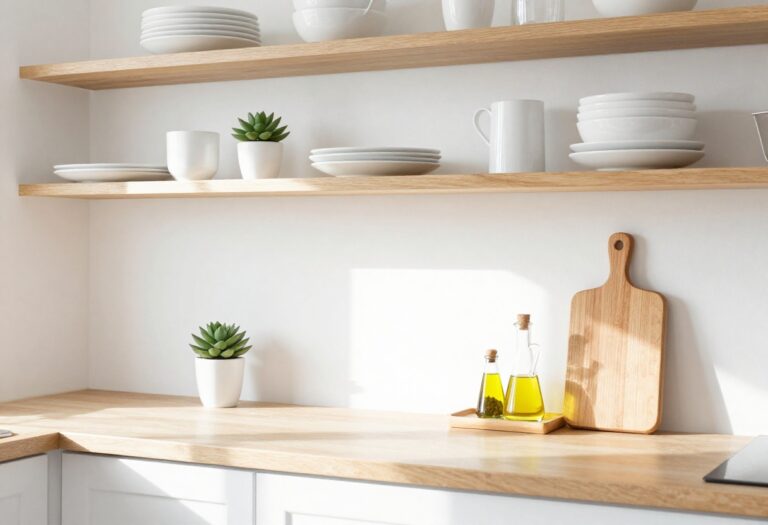
5. Paint the Space a Unified, Light Color
A shared kitchen-laundry corner can easily feel like two separate, cluttered zones. The simplest fix? Paint everything the same light, airy shade.
Soft white, pale gray, or a muted sage green visually connects the cabinetry, walls, and trim, making the whole area feel larger and more intentional. This trick costs only a few cans of paint and a weekend, yet it instantly brings cohesion to a tricky dual-purpose space.
When you treat the kitchen and laundry areas as one continuous room, the eye stops jumping between different colors and finishes. A unified light palette (think Benjamin Moore's Simply White or Sherwin-Williams' Repose Gray) reflects natural light and makes a cramped corner feel open. For extra warmth, try a soft sage green like Farrow & Ball's Green Smoke—it adds a subtle earthy note without darkening the room.
Keep all cabinets, walls, and even the ceiling in the same family of white or pale neutral. This creates a clean backdrop that lets your appliances and decor pop without visual chaos.
Best Colors For A Seamless Look
- Stick with whites, off-whites, light grays, or pale greens. Avoid stark white if your space gets little natural light—instead, choose a warm white with a hint of cream or beige. For a slightly bolder but still light option, try a pale blue-gray like 'Palladian Blue' by Benjamin Moore.
- The key is to use the same color on all walls, cabinets, and trim so the laundry nook doesn't feel like an afterthought.
Budget-friendly Swap: Paint Vs. Replace
- Instead of replacing mismatched cabinets or buying new laundry units, paint existing doors and drawer fronts. A quart of quality paint costs around $20–$40, and you can often do the job in a day. If your washer and dryer are different colors, consider appliance paint (about $15 per can) to match them to your cabinetry.
- This small investment transforms the whole corner without a major renovation.
Finishing Touch: Add A Subtle Sheen
- Use a satin or eggshell finish for walls and a semi-gloss for cabinets and trim. The slight sheen reflects light and makes the space feel cleaner. It also stands up to moisture and occasional splashes from both the kitchen sink and laundry machines.
- A matte finish can look flat and show marks more easily in a high-traffic utility zone.
6. Hang a Pegboard for Tools and Laundry Accessories
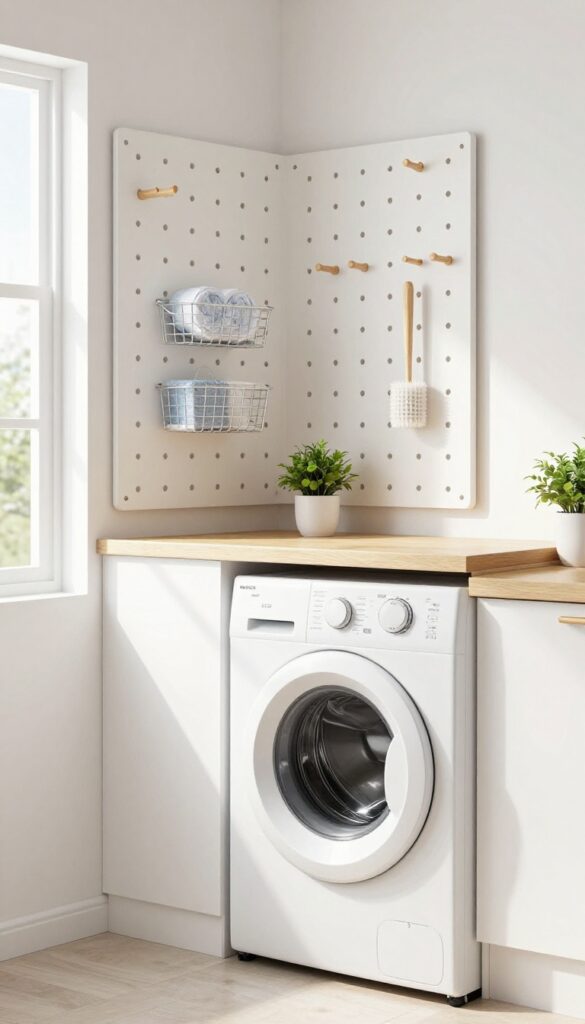
A pegboard above the washer or counter is one of those ideas that looks good and works hard. It turns a blank wall into a flexible storage zone for lint brushes, measuring cups, and small tools. The best part?
You can change the layout anytime without drilling new holes. It’s a budget-friendly way to keep essentials within arm’s reach while adding a little industrial charm to your laundry corner.
Pegboards come in various sizes and materials, from classic hardboard to metal or even wood. For a shared utility corner, a white or light-colored pegboard keeps the space feeling airy, while a dark one adds contrast. You can paint it to match your cabinets or go for a bold accent color.
Mount it securely above the washer or a counter, then add hooks, shelves, and small bins for lint rollers, dryer sheets, and stain removers. The visual effect is clean and organized—everything has a place, and the wall becomes part of the storage solution. This idea works especially well in tight spaces where every inch counts.
Plus, it’s easy to customize as your needs change. If you’re on a tight budget, a simple hardboard pegboard from the hardware store costs under $20 and takes an afternoon to install.
Best Materials And Finishes
- Hardboard is the most affordable and easy to paint, but metal pegboards offer a sleek, modern look and extra durability. For a warmer feel, consider a wooden pegboard with a light stain. If your laundry area has a farmhouse or cottage style, a whitewashed wood pegboard fits right in.
- Match the pegboard color to your cabinets or go with a contrasting hue like navy or sage green for a pop of personality.
Storage Tip: Mix Hooks And Shelves
Use a combination of standard hooks for hanging lint brushes and small tools, plus a narrow shelf for items like a spray bottle or a small plant. Add a few small bins or cups for odds and ends like clothespins or sewing supplies. This layered approach keeps the pegboard from looking cluttered while maximizing vertical storage.
Layout Tip: Keep It Accessible
- Place frequently used items like the lint brush or measuring cup at eye level or within easy reach. Reserve higher spots for less-used tools or extra supplies. If your washer is front-loading, mount the pegboard high enough so you can still open the lid without bumping into hooks.
- A pegboard above a counter works well for folding stations—keep the surface clear by hanging utensils and small tools.
7. Swap Cabinet Doors for Open Shelving
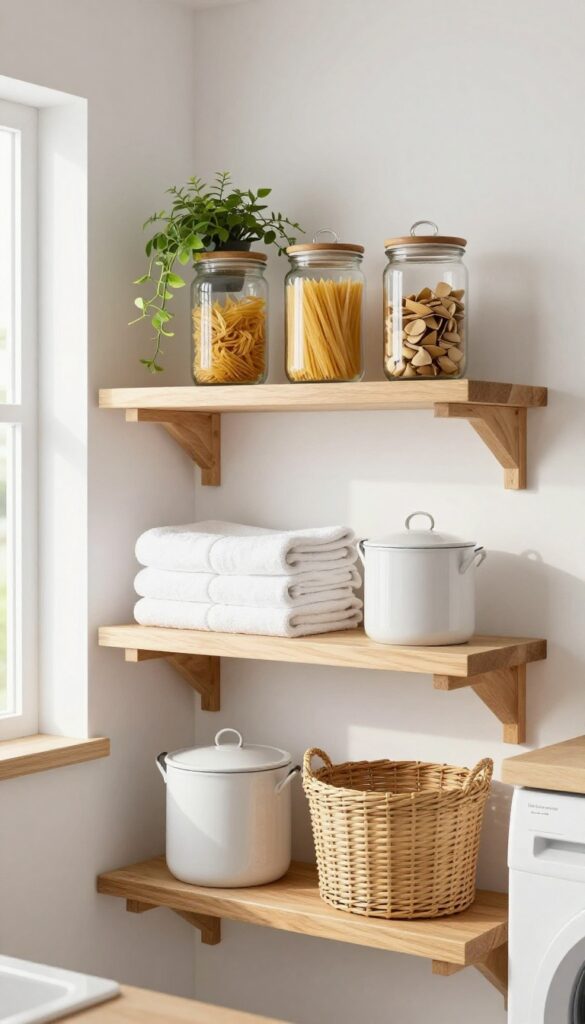
Removing upper cabinet doors instantly lifts the whole room, making a shared kitchen-laundry corner feel less cramped and more intentional. Open shelves turn everyday items into decor—think matching jars of pasta on one side and neatly stacked laundry pods on the other. It's a budget-friendly swap that costs almost nothing if you already have sturdy shelves, and it forces you to keep things tidy without much effort.
Open shelving works especially well in tight utility corners because it visually expands the space. Without doors, the wall feels further back, and you can layer in texture with ceramic canisters, woven baskets, and a few trailing plants. Stick to a cohesive color palette—white, wood, and soft neutrals—so the mix of kitchen and laundry items doesn't look chaotic.
Use the lower shelves for heavier, everyday items like mixing bowls or detergent bottles, and reserve eye-level shelves for prettier pieces like glass jars or folded linens.
Best Materials For A Polished Look
- Floating wood shelves in a warm oak or matte black finish add instant character without breaking the bank. If you're on a tight budget, painted MDF shelves with metal brackets give the same effect for less. Avoid glossy or overly ornate styles—they tend to look busy in a small space.
- A simple, clean line keeps the eye moving and makes the room feel larger.
Shelf Styling Tip
- Group items in threes for a curated feel: a jar of pasta, a small plant, and a stack of folded towels. Leave some breathing room between groups so the shelves don't look cluttered. Use matching containers for laundry pods and dishwasher tablets to tie the two zones together visually.
- A small basket on the top shelf can hide less attractive supplies like scrub brushes or extra sponges.
8. Use a Curtain to Hide the Laundry Area

A washer and dryer in the kitchen can feel like an eyesore, especially when you're trying to keep the space looking polished. The good news? You don't need a full renovation or custom cabinetry to tuck them out of sight.
A simple tension rod and a well-chosen curtain can do the job for under $30, and it instantly softens the utility corner.
A curtain is one of the most budget-friendly ways to conceal laundry appliances while adding a cozy, finished look to your kitchen. It works especially well in small spaces where a door or cabinet would eat up precious square footage. The key is picking a fabric that blends with your kitchen's color scheme and style—think linen for a light, airy feel, or a cotton print if you want a little pattern.
Mount a tension rod inside the alcove or between two walls, and you're done. When you need to do laundry, just pull the curtain aside. This trick also hides detergent bottles and bins, keeping the whole area tidy without requiring built-ins.
Best Fabrics For A Polished Look
- Linen or linen-blend curtains work beautifully because they drape well and resist wrinkles. If your kitchen leans modern, a solid cotton duck cloth in a neutral tone like oatmeal or soft gray keeps things clean. For a touch of personality, try a subtle stripe or a small-scale geometric print that echoes your backsplash or countertop colors.
- Avoid heavy velvet or anything too dark, as it can make the corner feel closed in.
Budget-Friendly Swap
- Skip expensive custom drapes and grab a ready-made panel from a home store—often under $20. Use a spring tension rod that fits your opening (no drilling required). If the rod is too long, cut it with a hacksaw or choose a smaller size.
- For a no-sew hem, use fabric tape or iron-on hemming tape to adjust the length. Total cost: around $25.
Small-space Fix
If your laundry area is tight, choose a curtain that stops just below the washer lid or at the floor—whichever looks cleaner. A floor-length curtain hides more clutter but can feel heavy in a narrow space; a shorter curtain keeps it airy. Pair with a slim shelf above the rod for storing detergent or dryer sheets within reach.
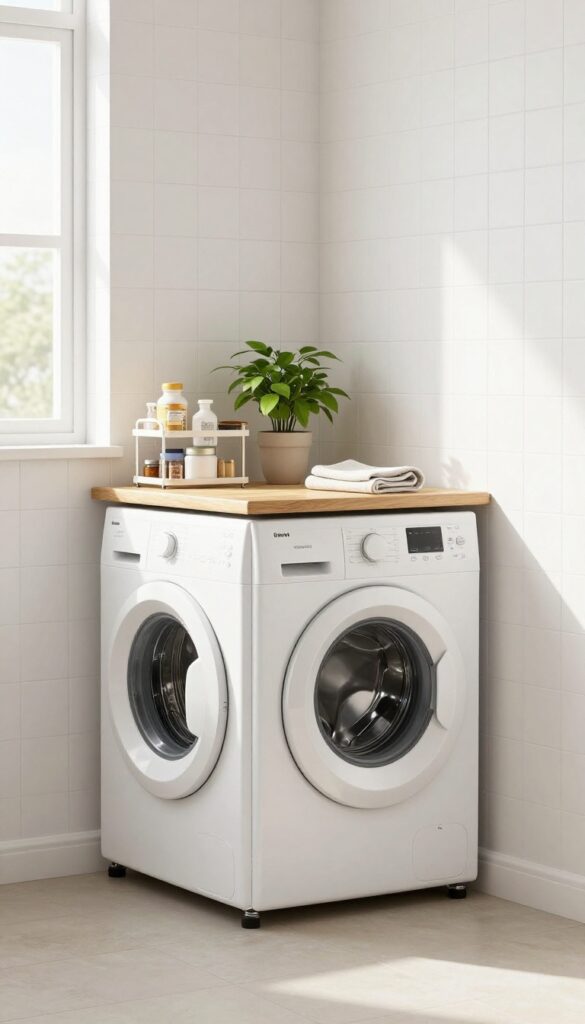
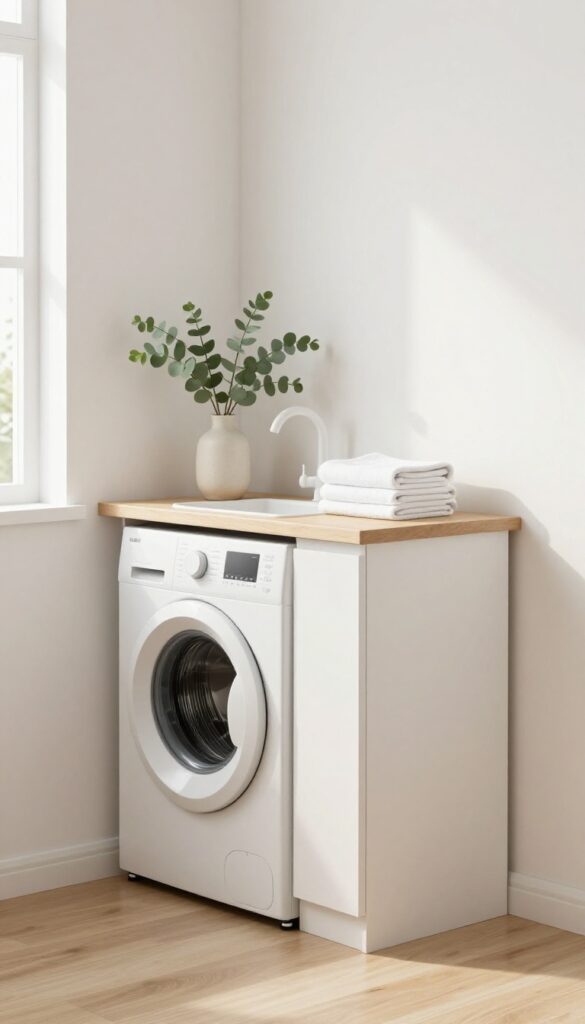
9. Add a Countertop Over the Washer and Dryer

Stacking a butcher block or laminate countertop on top of your washer and dryer is one of those ideas that feels obvious once you see it. Suddenly, that awkward gap between machines becomes a usable surface for folding laundry, setting down a basket, or even staging ingredients when the kitchen counter is full. It's a smart, budget-friendly way to borrow square footage from your laundry zone without knocking down walls.
A countertop over the washer and dryer transforms wasted vertical space into a functional landing pad. For shared utility corners, this simple addition bridges the kitchen and laundry areas, giving you extra prep space when cooking and a dedicated folding station when doing laundry. The best part?
It's a weekend DIY project that costs a fraction of a full renovation. Choose a material that complements your kitchen countertops or adds a warm contrast—butcher block brings a natural, farmhouse feel, while laminate is easy to clean and budget-friendly. Keep the surface clear of clutter by storing detergent and supplies in baskets or canisters on open shelves above.
This idea works especially well in galley-style or open-plan homes where every inch counts.
Best Materials For A Diy Countertop
- Butcher block is the top pick for a warm, natural look that pairs nicely with kitchens. It's affordable, easy to cut to size, and can be sanded and refinished if it gets scratched. Laminate is another solid choice—it's waterproof, comes in endless colors and patterns, and is often cheaper than butcher block.
- For a more polished feel, consider a solid surface remnant from a local fabricator; it's durable and seamless, but usually pricier. Whichever material you choose, seal it properly to protect against moisture and detergent spills.
Styling And Storage Tips
- Keep the countertop functional and tidy by using wall-mounted shelves above for detergent, dryer sheets, and stain removers. A slim caddy or magnetic strip can hold small tools like scissors or a lint roller. Add a small plant or a pretty jar for a touch of life, but avoid overcrowding the surface.
- For a cohesive look, match the countertop material to your kitchen counters or choose a complementary wood tone. A simple runner or a foldable drying rack can be stored on the counter and pulled out when needed.
Budget-Friendly Swap
- Instead of buying a custom countertop, look for a pre-cut butcher block countertop from a home improvement store—they often have standard sizes that fit standard washer/dryer widths. If you're handy, you can cut it down yourself with a circular saw. Another thrifty option is using a solid-core door slab from a salvage yard; sand it down and apply a few coats of polyurethane for a durable, inexpensive surface.
- Skip the expensive edge profiles—simple square edges are modern and easy to maintain.
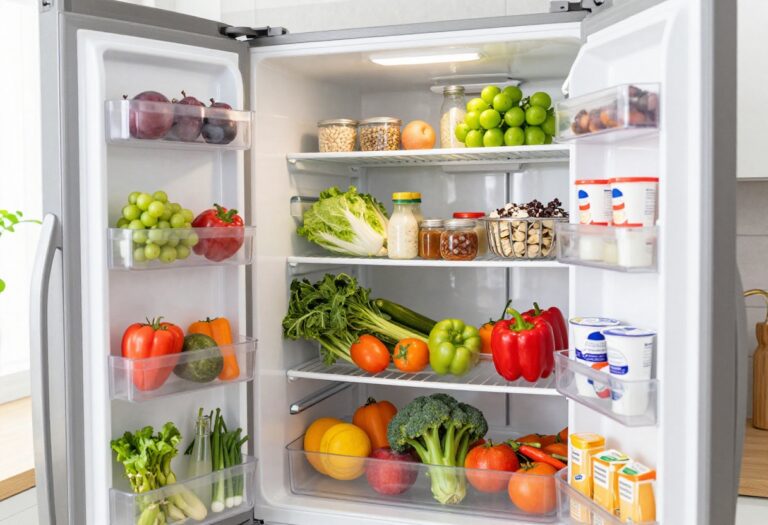
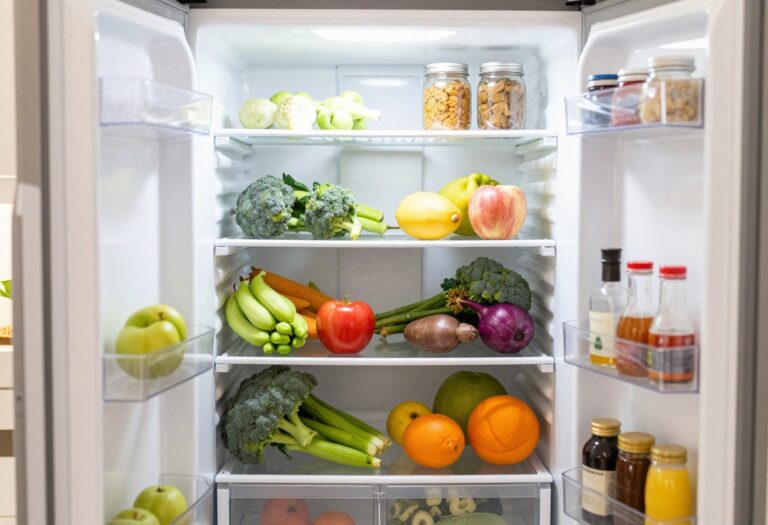
10. Incorporate a Slim Pull-Out Hamper Next to the Fridge
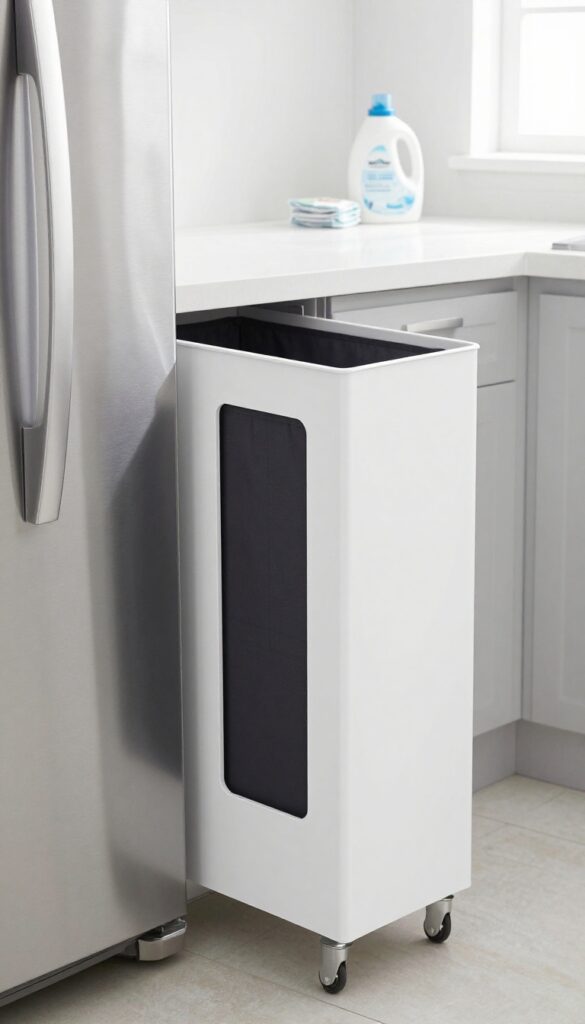
That narrow gap beside your refrigerator—maybe six inches wide—usually just collects dust bunnies and lost bottle caps. But with a slim pull-out hamper, it becomes one of the most useful spots in your kitchen-laundry combo. The idea is simple: a tall, narrow bin on smooth glides that slides out when you need it and disappears when you don’t.
It keeps dirty laundry out of sight while your kitchen bin handles trash and recycling, so you don’t end up with a pile of gym clothes next to the produce.
A pull-out hamper is a budget-friendly upgrade that makes the most of dead space. Look for a model with a soft-close mechanism and a removable liner for easy washing. Place it near the laundry area but far enough from the stove to avoid heat or grease.
Use it for darks or delicates to keep sorting simple. The slim profile means it won’t block traffic, and the clean front panel (choose a matte white or stainless steel) blends right in with your fridge. No more tripping over a laundry basket in the middle of cooking dinner.
Best Placement And Fit
- Measure the gap between your fridge and the counter or wall before you buy. Standard slim hampers are 5 to 7 inches wide, but some go up to 12 inches. If the gap is wider, you can add a small shelf above the hamper for detergent or dryer sheets.
- Make sure the hamper doesn’t block the fridge’s ventilation—leave at least an inch of clearance behind it.
Budget-Friendly Swap
- Skip the custom-built option and buy a ready-made pull-out hamper from a home store or online. Many are under $50 and come with mounting brackets. If you’re handy, you can even repurpose a narrow rolling cart and attach a fabric bin.
- Paint the cart the same color as your cabinets for a seamless look.
Styling And Finishing Touch
- Choose a hamper with a sleek front panel—like a brushed nickel or matte black finish—to match your fridge handles. Add a small hook on the side for a reusable shopping bag or apron. Keep the area around it clear so the slide-out motion stays smooth.
- A woven basket on top of the fridge can hold extra linens or cleaning supplies, tying the whole corner together.
11. Hang a Wall-Mounted Ironing Board That Doubles as a Shelf
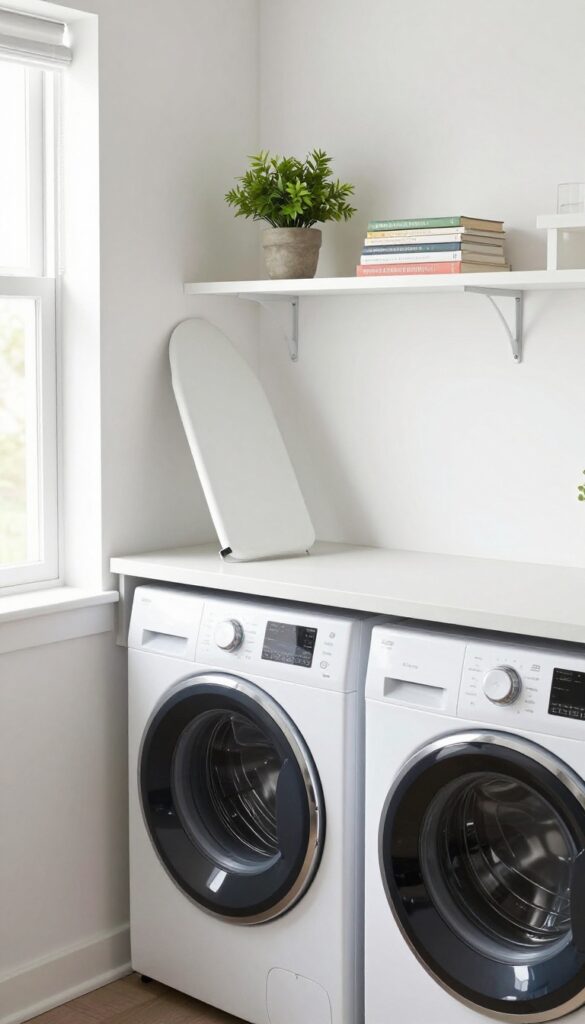
Ironing boards are bulky, awkward to store, and always seem to be in the way. But what if you could tuck one flat against the wall and gain a shelf at the same time? Wall-mounted ironing boards with a fold-down design do exactly that—they save floor space and give you a handy surface for mail, cookbooks, or a small plant when not in use.
It’s a smart, budget-friendly swap that turns a utility corner into a multitasking zone.
A wall-mounted ironing board that folds down and doubles as a shelf is a game-changer for a shared kitchen-laundry corner. Instead of wrestling with a freestanding board that eats up floor space, you mount a compact unit on the wall. When you need to iron, you flip it down.
When you’re done, you fold it back up, and the built-in shelf becomes a spot for your coffee mug, a small vase, or a stack of recipes. Look for models with a sturdy metal frame and a padded surface that won’t wobble. Many come with a built-in shelf or a small cabinet above for extra storage.
This idea works especially well in tight spaces—think a narrow wall between the kitchen counter and the laundry closet. The key is to mount it at a comfortable height so you don’t have to bend or reach. Paint the shelf the same color as the wall to make it blend in, or go for a contrasting wood tone to turn it into a design feature.
Either way, you’re reclaiming space that would otherwise be wasted.
Best Materials
- Go for a board with a sturdy steel frame and a heat-resistant cotton or silicone cover. The shelf should be solid wood or a durable composite that can hold a few pounds without sagging. Avoid flimsy plastic models—they won’t last and can feel wobbly when you’re ironing.
- A matte black or white finish blends with most walls, but a warm wood shelf adds a cozy touch to a laundry corner.
Small-space Fix
- Measure your wall space carefully before buying. You want a board that’s wide enough for most garments but not so large that it overwhelms the corner. A 12-by-36-inch board is a good middle ground.
- Install it at least 48 inches from the floor so you can iron standing up. If the wall is shared with the kitchen, position it away from the stove to avoid splatters.
Budget-Friendly Swap
Skip high-end designer models and look for a basic wall-mounted ironing board at a home improvement store or online for under $50. You can always upgrade the shelf later by adding a stained wood plank or a peel-and-stick wallpaper backing. The savings let you splurge on a quality iron or a cute storage caddy for supplies.
FAQ
How can I make a small kitchen-laundry combo feel bigger on a budget?
Use light paint colors, stack your washer and dryer, and add mirrors or open shelving to reflect light. Keep clutter minimal with uniform baskets and slim storage solutions.
What are the best storage solutions for a shared kitchen-laundry corner?
Slim rolling carts, pegboards, wall-mounted racks, and pull-out hampers maximize vertical and narrow spaces. Matching baskets and open shelving also keep things organized and cohesive.
Can I add counter space without a full renovation?
Yes, a butcher block or laminate countertop placed over your washer and dryer is a simple DIY project. You can also use a fold-down shelf or a rolling cart for extra prep area.
How do I hide the laundry area in a kitchen?
Install a tension rod with a curtain that matches your kitchen decor. Alternatively, use sliding barn doors or bi-fold doors for a more permanent but still budget-friendly solution.
What colors work best for a combined kitchen and laundry room?
Light neutrals like white, cream, pale gray, or soft pastels help unify the space and make it feel larger. You can add pops of color through accessories like towels or canisters.
Conclusion
Blending your kitchen and laundry area doesn't have to mean sacrificing style or blowing your budget. With a few smart swaps—like stacking appliances, adding open shelving, or using a simple curtain—you can create a space that feels both functional and inviting. The best part?
Most of these ideas are easy to tackle over a weekend and cost very little. Start with one or two changes, and watch your shared corner transform into a room you actually enjoy spending time in.