10 Kitchen Island Countertop Ideas That Double as Storage Powerhouses
Your kitchen island is more than just a prep station—it's the heart of the room. But if it's not pulling its weight in storage, you're missing out.
The right countertop can hide clutter, organize tools, and still look gorgeous.
Here are 10 ideas that prove practicality and beauty can coexist on one surface.
1. Butcher Block with Built-In Knife Slots
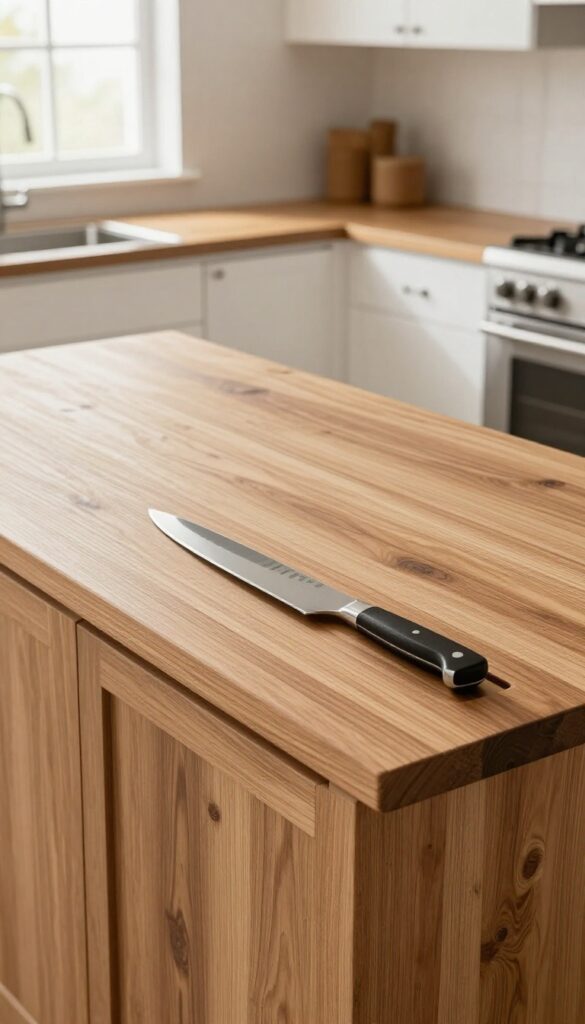
A butcher block countertop brings warmth and texture to any kitchen, but the real magic happens when you add built-in knife slots. This clever design keeps your most-used tools right where you need them—no more digging through drawers or reaching for a magnetic strip. It’s a practical upgrade that serious home cooks will love, and it adds a custom, handcrafted feel to your island.
The combination of a thick wood surface with integrated knife storage creates a seamless work zone. The slots are typically cut into the side or top of the block, so knives stay organized and out of the way. This idea works especially well in kitchens where counter space is tight, because it eliminates the need for a separate knife block or drawer organizer.
Plus, the wood grain adds natural warmth that balances stainless steel appliances or cool stone countertops.
Best Wood Choices
- Maple and walnut are top picks for butcher block countertops. Maple is hard and durable, with a light color that brightens the kitchen. Walnut offers a richer, darker tone that pairs beautifully with white cabinets or brass hardware.
- Both woods are dense enough to handle daily chopping and resist knife marks better than softer woods like pine.
Layout And Slot Placement
For easy access, position the knife slots along the front edge of the island, facing the cook. You can have a row of slots for chef’s knives, plus a few smaller ones for paring knives or kitchen shears. If your island doubles as a dining spot, consider placing the slots on the side or back edge so they’re out of sight when not in use.
Care And Maintenance
- Butcher block needs regular oiling to stay hydrated and prevent cracking. Use food-grade mineral oil or a beeswax blend every few weeks, especially near the knife slots where moisture can collect. Avoid letting water pool on the surface, and wipe up spills promptly.
- With proper care, a butcher block countertop can last for years and develop a beautiful patina.
2. Quartz with Integrated Drainboard Grooves
Imagine a kitchen island that pulls double duty as a drying station. Quartz countertops with carved drainboard grooves make that possible, blending seamless style with everyday practicality. The subtle channels guide water back into the sink, so you can let dishes air-dry without a bulky rack cluttering your counter.
It's a smart, polished look for anyone who values both form and function.
This idea is all about streamlining your kitchen workflow while keeping the surface clean and uncluttered. The grooves are precision-cut during fabrication, so they integrate smoothly into the slab. You get the durability of quartz—non-porous, stain-resistant, and easy to wipe down—plus a built-in drying area that disappears when not in use.
It's especially handy for busy households where dishes pile up fast. Pair it with a deep undermount sink and a gooseneck faucet to complete the efficient setup.
Best Colors And Finishes
- White or light gray quartz with subtle veining keeps the drainboard grooves looking intentional and elegant. For a bolder statement, dark charcoal or navy quartz creates a striking contrast against pale dishes. Honed finishes soften the look and hide water spots better than high-gloss, but polished surfaces are easier to wipe clean.
- Choose a slab with minimal pattern so the grooves remain the focal point.
Layout And Sink Placement
- Position the grooves on the side of the island closest to the sink for a natural water flow. A single or double groove that slopes gently toward the sink works best. If your island has a prep sink, integrate the drainboard right next to it.
- Leave ample counter space on the opposite side for food prep or serving to keep the island multifunctional.
Styling And Finishing Touch
- Keep the island top clear of clutter to highlight the sleek design. Add a wooden cutting board or a ceramic fruit bowl for warmth without blocking the grooves. Under-island lighting, like LED strip lights, casts a soft glow that emphasizes the carved channels at night.
- This combination of smart storage and subtle illumination makes the island feel both luxurious and lived-in.
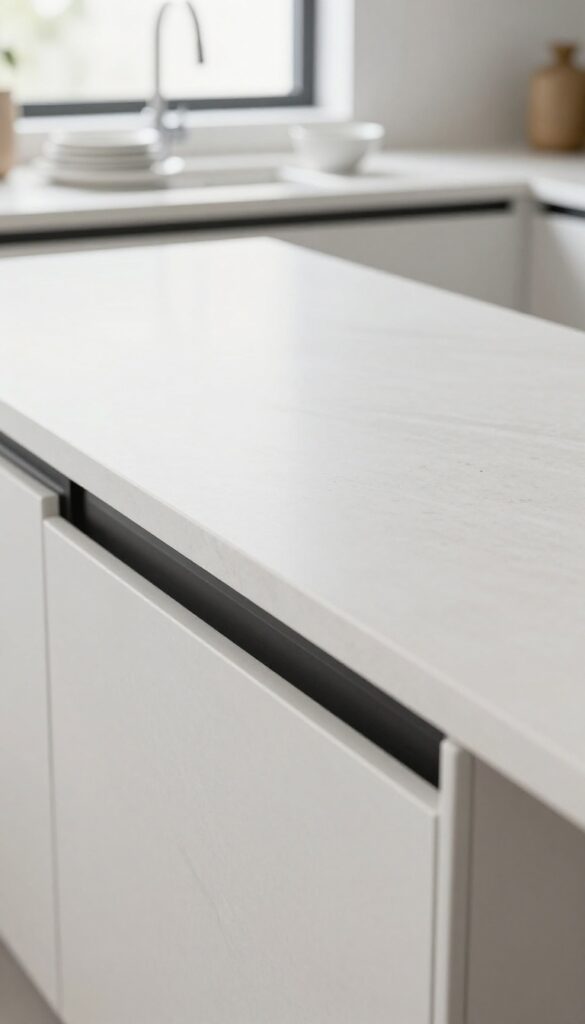
3. Marble Look with a Flip-Up Trash Chute
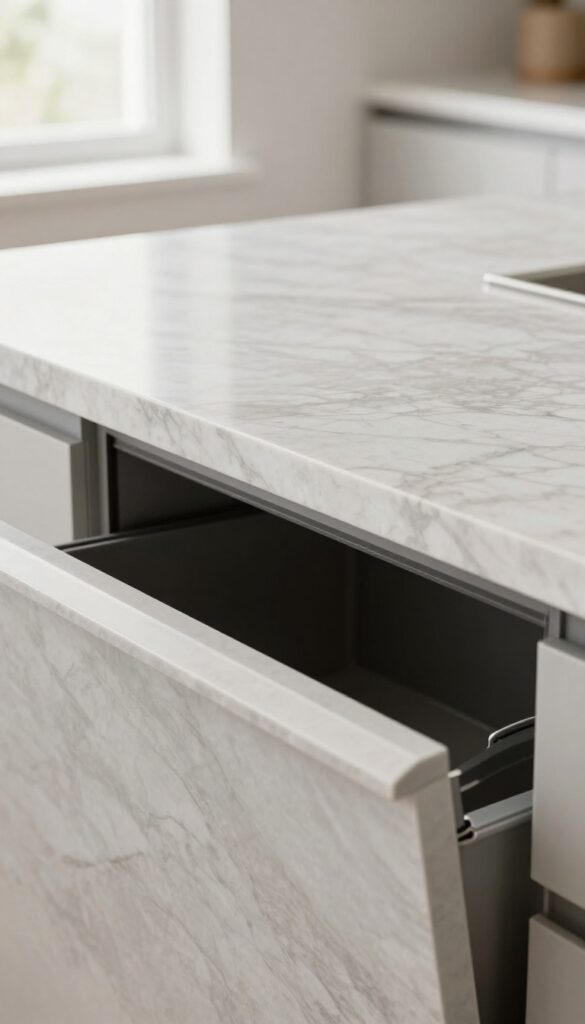
Countertops that double as a garbage disposal sound like something out of a futuristic kitchen, but the flip-up trash chute makes it surprisingly practical. A sleek marble-look surface hides a small hatch near the prep zone—just flip it open and sweep veggie peels or crumpled wrappers straight into a pull-out bin below. It keeps the counters clutter-free and saves you from constantly walking to the main trash can.
The best part? The marble effect brings that timeless elegance without the high maintenance of real stone.
This idea works beautifully in busy kitchens where counter space is prime real estate. The marble look can be achieved with quartz or porcelain slabs that resist stains and scratches better than natural marble. The flip-up mechanism is discreet—usually a small section of the countertop that hinges upward, revealing a chute leading to a bin in the base cabinet.
When closed, it blends seamlessly with the rest of the surface, so no one would guess your trash is hidden in plain sight. It's a smart storage solution that doesn't compromise style.
Best Materials
- Quartz is the top choice for this setup because it's durable, non-porous, and available in marble-like patterns. Porcelain slabs are another excellent option—they're heat-resistant and can mimic the veining of Carrara or Calacatta marble. Avoid real marble here, as the constant opening and closing of the chute can stress the stone, and acidic spills might etch the surface.
- Stick with engineered stone for a worry-free look.
Placement Tip
- Install the flip-up chute near your main food prep area—ideally between the sink and the stove. That way, you can scrape cutting boards directly into the chute without reaching across the counter. Make sure the pull-out bin below is large enough for daily use (around 10–12 gallons) and has a lid to contain odors.
- A soft-close mechanism on the chute adds a premium feel.
Styling Note
- Pair the marble-look countertop with matte brass or brushed nickel hardware to keep the look cohesive. A white or light gray base with subtle veining feels airy and classic, while darker veins add drama. Keep the backsplash simple—subway tile or a solid slab in a complementary tone—so the countertop remains the star.
- Add a few open shelves with neutral ceramics to soften the hard surfaces.
4. Stainless Steel with Magnetic Strip Edge
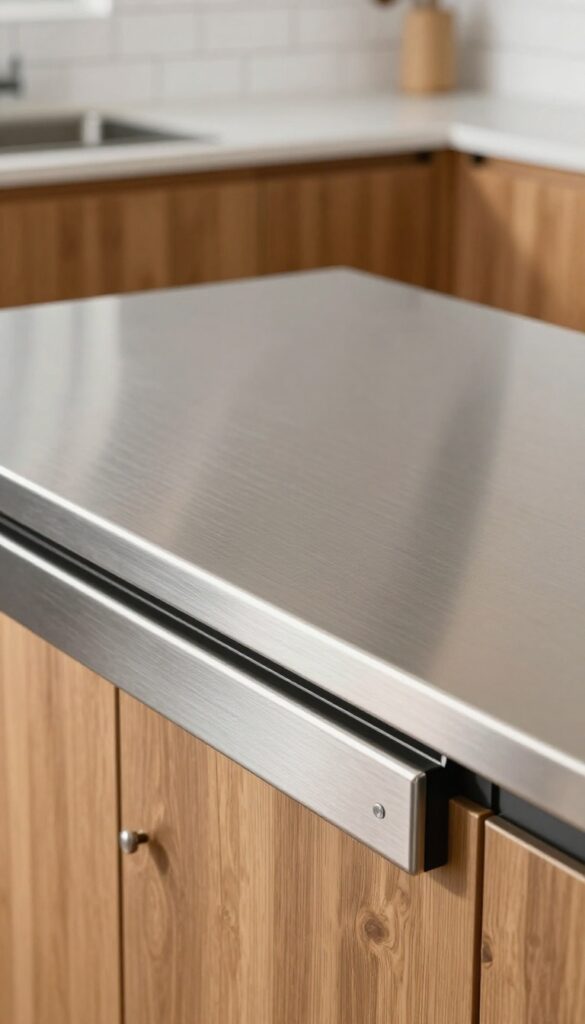
If you love the industrial look but also crave a clutter-free workspace, a stainless steel countertop with a built-in magnetic strip might be your perfect match. The cool, reflective surface feels sleek and modern, while the magnetic edge keeps your most-used utensils within arm's reach but off the counter. It's a smart, storage-savvy solution that doesn't sacrifice style.
This countertop idea combines the durability and heat resistance of commercial-grade stainless steel with a clever organizational feature. The magnetic strip runs along one side or the back edge, allowing you to hang metal utensils, knives, or even spice tins. It frees up drawer space and keeps your cooking tools visible and accessible.
The steel surface itself is easy to clean and develops a subtle patina over time, adding character. Pair it with warm wood cabinets or open shelving to soften the industrial edge and create a balanced, inviting kitchen.
Best Pairings
Stainless steel works best with contrasting materials. Try it with dark stained wood, matte black fixtures, and white subway tile. The cool metal against warm wood tones creates a visually interesting tension that feels both modern and grounded.
Magnetic Strip Placement
Position the magnetic strip on the side facing your main work area for easy access. If your island is against a wall, install it on the front or side edge. Make sure the strip is strong enough to hold heavy knives but not so strong that it's hard to remove items.
Maintenance Tip
Stainless steel shows fingerprints and water spots, but a quick wipe with a microfiber cloth and a dab of mineral oil keeps it looking pristine. Avoid abrasive cleaners that can scratch the surface. Over time, a light patina adds charm, so don't stress about perfection.
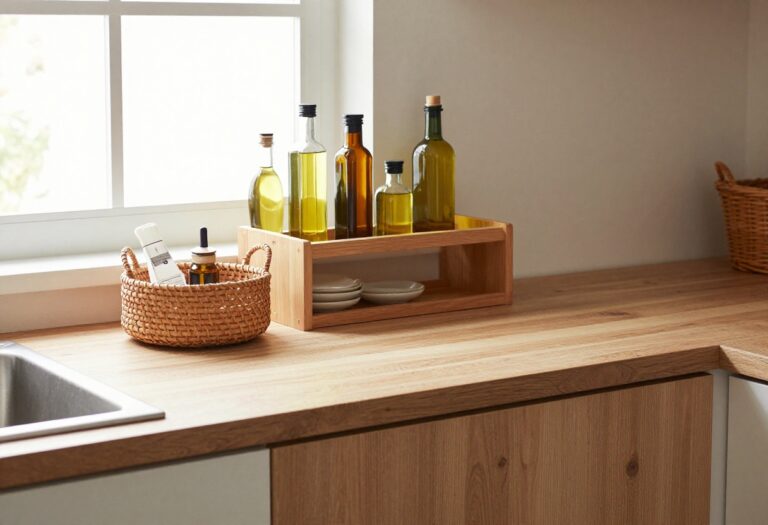
5. Concrete with Embedded Shelf Nooks
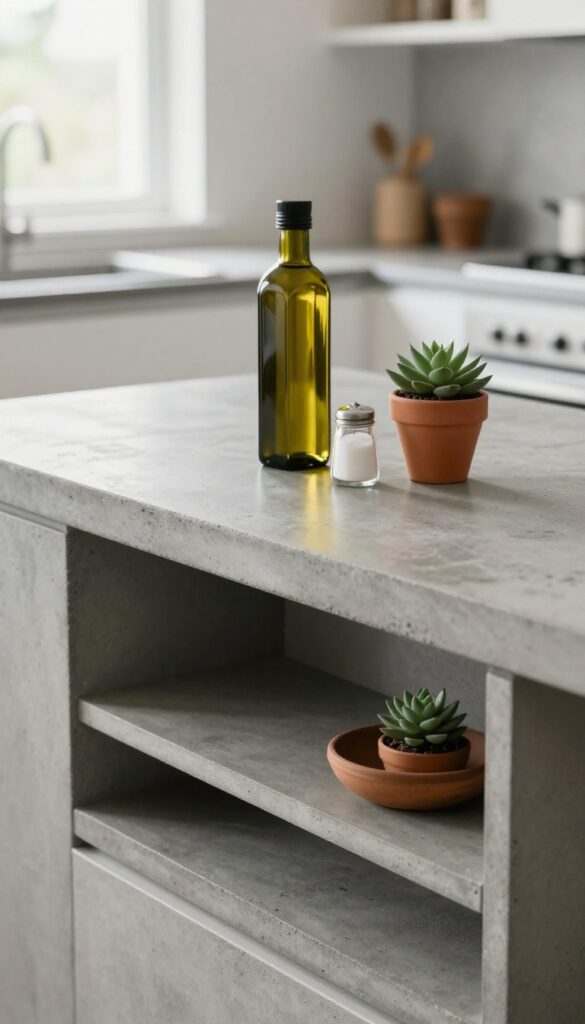
Concrete countertops bring an industrial edge that feels both raw and refined. But what makes this version truly clever is the addition of small recessed shelves carved right into the slab—perfect for stashing everyday oils, spices, or your favorite cookbook. The nooks break up the solid surface, adding visual texture and a built-in storage solution that keeps clutter off the main workspace.
It’s a look that says utilitarian chic without trying too hard, and it works especially well in modern, farmhouse, or eclectic kitchens.
The concrete itself can be tinted in warm grays, soft charcoals, or even earthy terracotta tones to complement your cabinetry. The recessed shelves are typically formed during the pour, creating seamless cubbies that feel intentional rather than added on. To keep the look practical, line the nooks with a small metal or wood insert for easy cleaning.
Style them with a few slim bottles of olive oil, a salt cellar, and a tiny succulent for a vignette that’s both functional and photogenic. The key is restraint—too many items will make the nooks feel cluttered instead of curated.
Best Colors And Finishes
Stick with neutral concrete tones like warm gray, charcoal, or a soft beige to keep the look versatile. A matte sealer preserves the natural texture, while a slight sheen can make the surface easier to wipe down. For a bolder move, try a subtle pigment like dusty blue or sage green—just keep the nook interiors a lighter shade so they don’t disappear.
Storage And Styling Tip
Use the recessed shelves for items you reach for daily: a cruet of oil, a pepper grinder, and a small jar of salt. Avoid stacking or overcrowding—leave a little breathing room so each piece stands out. A narrow cookbook can lean against the back wall for a cozy, lived-in feel.
Layout And Lighting Note
Position the nooks near the main cooking zone but away from the sink to keep them dry. Under-cabinet lighting aimed at the cubbies will highlight their depth and make the contents easy to grab, especially during evening meal prep.
6. Soapstone with a Pop-Up Outlet and USB Hub
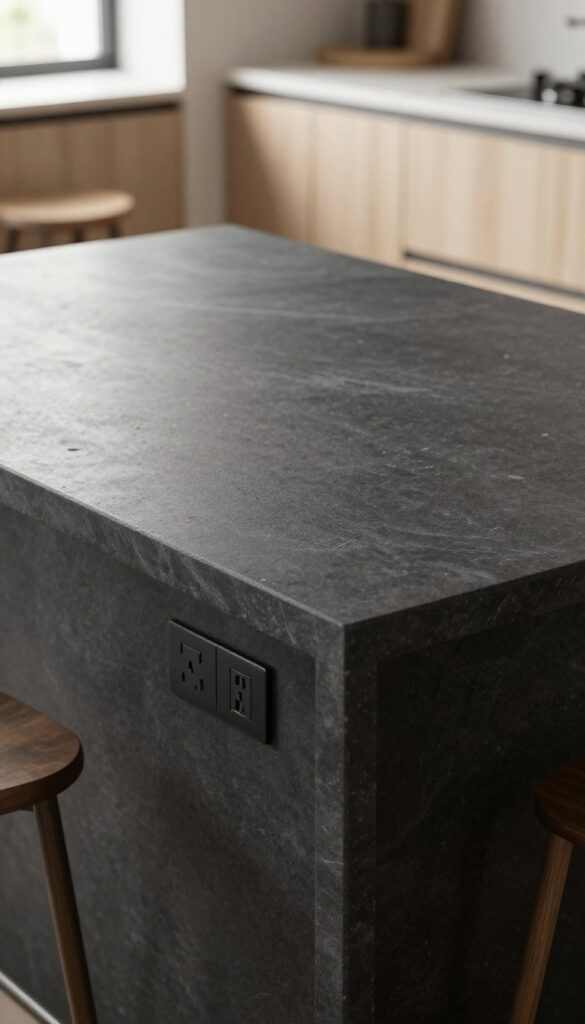
Dark, matte soapstone brings a quiet sophistication to any kitchen, but it's the hidden tech that makes this countertop a true workhorse. A pop-up power station blends seamlessly into the stone, keeping cords and devices off the surface while offering easy access for charging. This idea is perfect for modern homes that value clean lines and everyday convenience.
Soapstone's natural resistance to stains and heat makes it a practical choice for busy kitchens, and its soft, non-reflective finish hides fingerprints and smudges beautifully. The pop-up outlet sits flush when not in use, preserving the countertop's sleek look. When you need to charge a tablet, phone, or laptop, a gentle push reveals a power hub with standard outlets and USB ports.
It's a smart solution for kitchen islands where family and guests gather to work, cook, or hang out.
Best Colors And Finishes
Soapstone typically ranges from deep charcoal to nearly black, with subtle veining that adds character. For a cohesive look, choose a darker slab that contrasts with lighter cabinets or a wood island base. A honed or matte finish is essential—it maintains the stone's natural feel and makes scratches less noticeable (which can actually be buffed out easily).
Placement And Layout Tip
Install the pop-up outlet near the end of the island where people naturally sit or stand. Avoid placing it directly in the main prep zone to prevent spills from reaching the electronics. If your island has an overhang for seating, position the outlet on the seating side for easy access without disrupting countertop workspace.
Storage And Styling Note
Pair this countertop with open shelving or a simple bar cart to keep the look airy. Use a few ceramic canisters or a wooden cutting board as decor—they'll stand out beautifully against the dark stone. For a cohesive palette, stick with warm woods, brass or black fixtures, and soft white or gray cabinetry.
7. Tile Mosaic with a Lift-Up Lid for Small Appliances
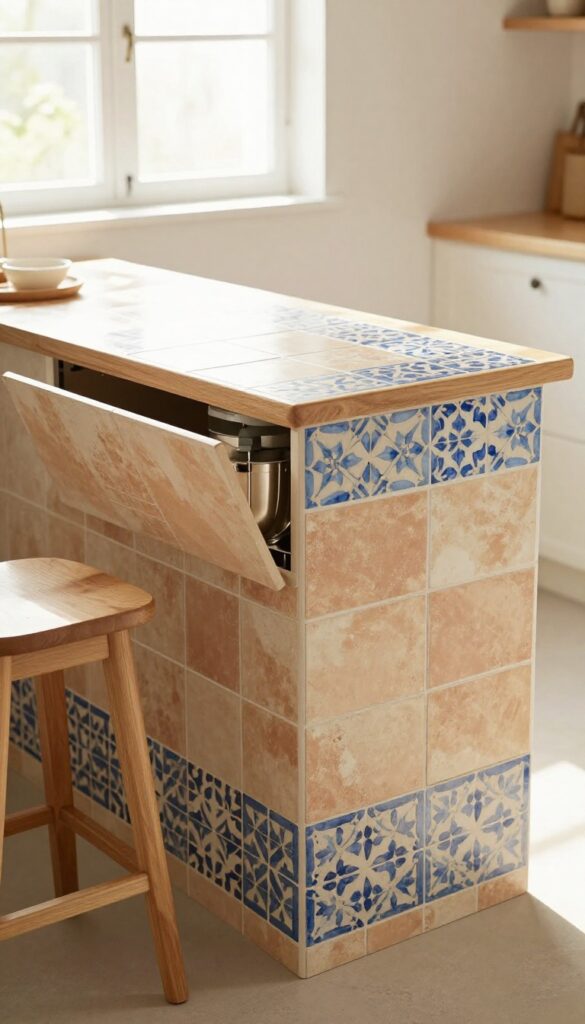
A kitchen island should work as hard as you do, especially when counter space is tight. That’s where a tile mosaic countertop with a lift-up lid comes in—it hides your stand mixer or blender under a colorful, patterned surface, so they’re always ready but never in the way. The lift section feels like a secret compartment, making the island feel both playful and purposeful.
It’s a smart solution for anyone who loves baking or cooking with bulky gadgets but hates the clutter.
This idea pairs the beauty of handmade or patterned tiles with the practicality of hidden storage. The lift-up lid, usually hinged at the back or side, reveals a shallow cabinet or open shelf below, just deep enough for a mixer, food processor, or air fryer. When closed, the mosaic becomes the star of the kitchen—a vibrant focal point that draws the eye.
Choose tiles in warm terracotta, cool blue-and-white, or geometric black-and-white for a look that fits your style. The lift mechanism can be gas-strut assisted for easy opening, and the lid itself can be a solid slab of wood or a matching tile panel for a seamless finish.
Best Tile Patterns For This Idea
Go for a pattern that hides crumbs and minor stains—think encaustic cement tiles, Moroccan fish scales, or a herringbone layout in soft neutrals. If you prefer a cleaner look, large-format porcelain tiles with a subtle marble or terrazzo print work well and are easier to wipe down. Avoid very glossy or high-contrast tiles near the lift area, as they show fingerprints and wear faster.
Storage Tip: What To Keep Underneath
- Reserve the lift-up space for appliances you use at least once a week, like a stand mixer, blender, or instant pot. Leave the lid open while you work, then close it to reclaim the counter. Add a power strip inside the cubby so you can plug in without pulling the appliance out.
- For safety, make sure the cubby is well-ventilated if you plan to store heat-producing gadgets.
Finishing Touch: Hardware And Edges
Use a flush pull or a recessed handle on the lift-up lid so it doesn’t interrupt the tile pattern. For the island edge, consider a contrasting wood trim or a metal profile that echoes the tile colors. A subtle under-cabinet LED strip inside the cubby makes it easier to grab the mixer in low light and adds a warm glow when the lid is open.
8. Reclaimed Wood with a Drop-Down Cutting Board
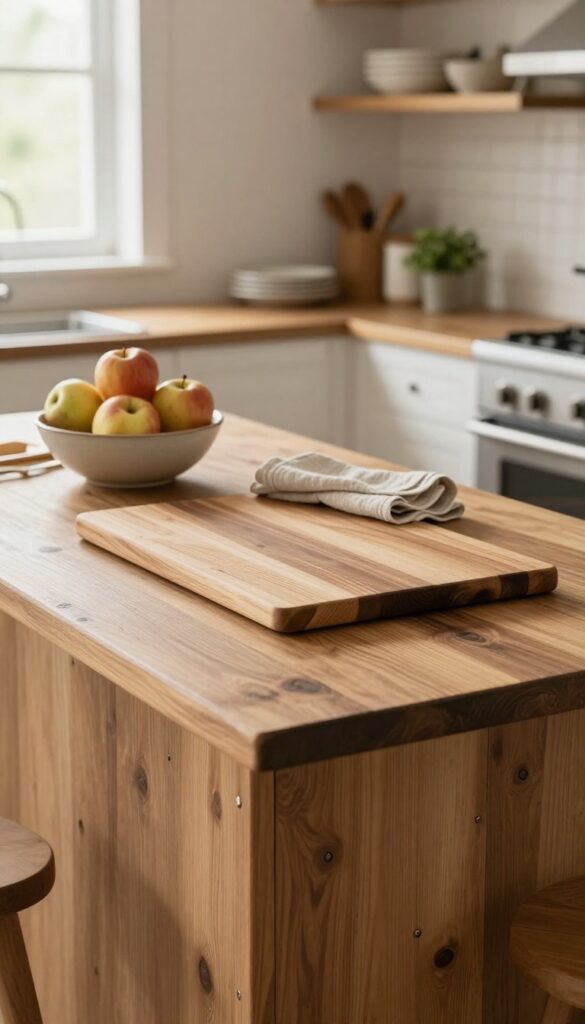
A reclaimed wood countertop brings warmth and character to any kitchen, but it also solves a common problem: where to chop without sacrificing counter space. This idea pairs rustic, salvaged planks with a clever pull-out cutting board that slides out when you need it and tucks away when you don't. It's a practical, storage-smart solution that keeps your prep area clutter-free while adding a touch of farmhouse charm.
Reclaimed wood instantly adds texture and history to your kitchen island. The natural variations in grain, color, and even nail holes create a lived-in look that feels both cozy and sophisticated. By integrating a drop-down cutting board, you get a dedicated prep zone that doesn't eat into your main counter space.
The board can be made from the same reclaimed wood or a contrasting hardwood like maple for a two-tone effect. When not in use, it slides neatly under the countertop, keeping your island looking clean and uncluttered. This idea works especially well in busy family kitchens where prep space is at a premium, and it pairs beautifully with open shelving and neutral cabinetry.
Best Materials
For the countertop, choose reclaimed wood that's been properly sealed with a food-safe finish—look for oak, pine, or teak with visible grain. The drop-down board can be the same wood for a seamless look, or opt for a harder species like cherry or walnut for durability. Add a stainless steel or brass track system for smooth sliding action, and consider a built-in groove to catch juices.
Storage Tip
Maximize the space beneath the drop-down board by adding a shallow drawer or pull-out tray for knives, cutting boards, or kitchen towels. This keeps essentials within arm's reach while maintaining the clean, rustic aesthetic. You can also install a small magnetic strip on the underside of the board to hold metal utensils.
Finishing Touch
Seal the reclaimed wood with a matte, food-safe oil or wax to preserve its natural texture while protecting against stains. Pair the island with a couple of woven bar stools and a pendant light with a warm brass or black finish to complete the rustic-modern vibe. Add a small bowl of fresh fruit or a vase of dried flowers on the counter for a pop of color.
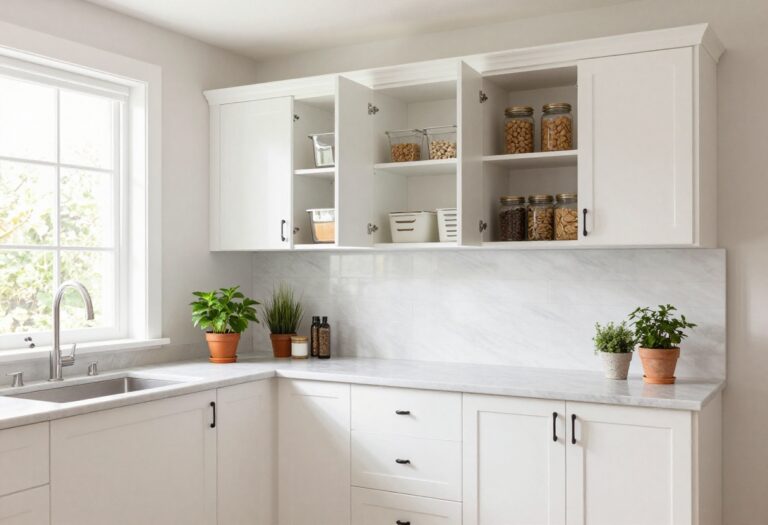
9. Solid Surface with a Hidden Spice Rack Cutout
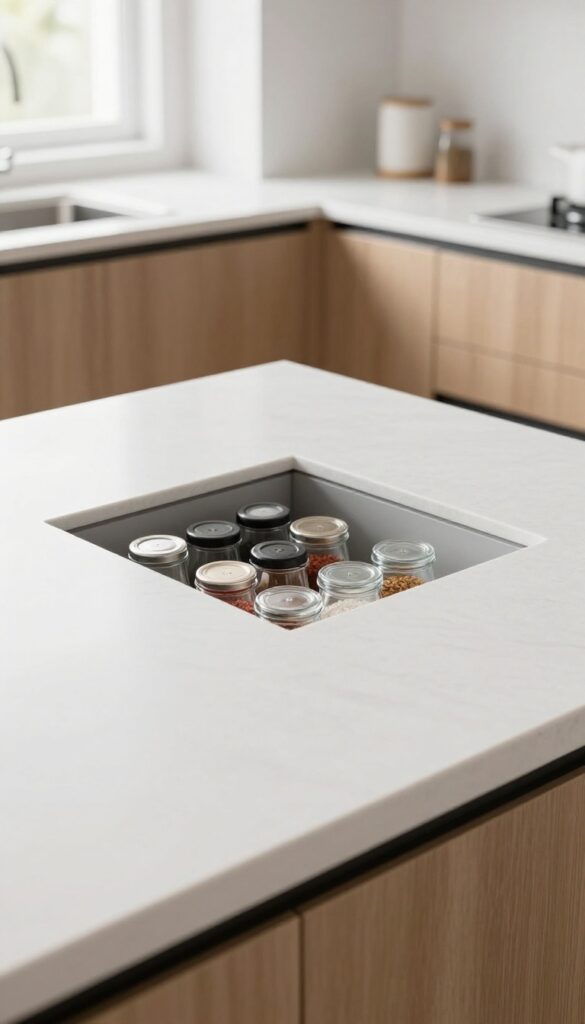
A seamless solid surface countertop already looks clean and modern, but adding a shallow cutout with a sliding cover takes it to another level. This design tucks your most-used spices right where you need them—next to the stove—without cluttering the counter. The cover slides closed when you're not cooking, so the surface stays sleek and uninterrupted.
This idea works beautifully in contemporary kitchens where minimalism meets function. The cutout is typically placed near the cooktop or prep zone, and the cover can be made from the same solid surface material for a truly invisible look. You get the convenience of having salt, pepper, and a few key spices at your fingertips, but the visual payoff is a countertop that appears uncluttered and intentional.
Best Materials
- Solid surface materials like Corian, quartz, or even a thick butcher block work well. The key is a material that can be seamlessly routed and polished. Avoid natural stone with heavy veining, as the cutout edges may look busy.
- Stick with matte or satin finishes to hide fingerprints and daily wear.
Storage Tip
Line the cutout with a thin silicone mat to prevent jars from sliding and to make cleaning easy. Choose uniform spice jars—small glass ones with magnetic lids or standard shaker tops—so they fit neatly without rattling. Keep the collection to 6–8 jars to avoid overcrowding.
Finishing Touch
Add a subtle LED strip inside the cutout that turns on when the cover slides open. This makes finding the right spice quick, even in low light, and adds a premium feel to the kitchen. The light can be motion-activated or tied to a simple switch near the stove.
10. Granite with a Side-Mounted Towel Bar
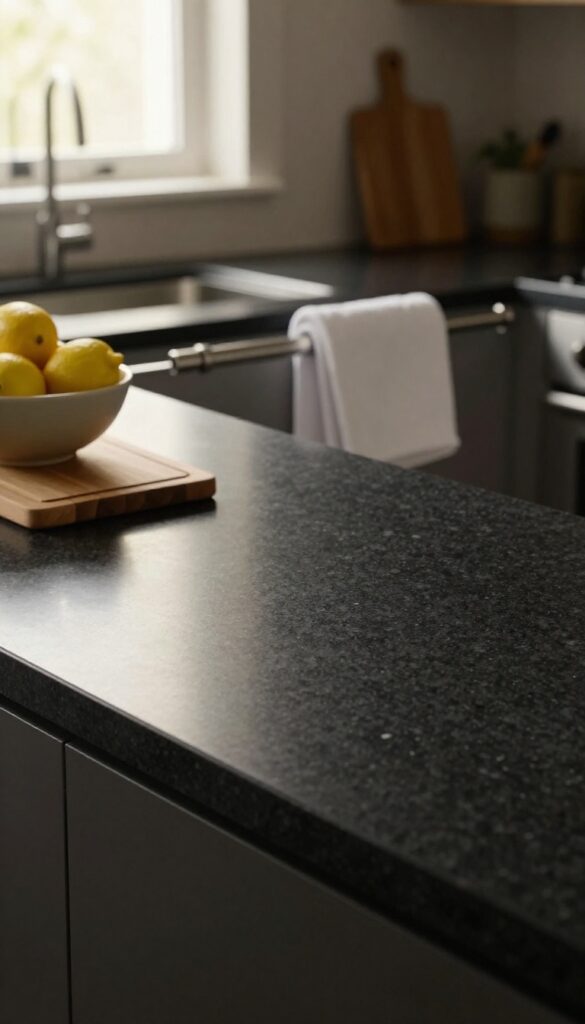
A kitchen island countertop needs to pull double duty: look great and handle daily messes. Granite delivers on both fronts, but adding a side-mounted towel bar takes it a step further. This simple addition keeps a dish towel within arm’s reach without cluttering the counter or slipping off the edge.
It’s a small tweak that makes a big difference in how your island functions day to day.
Granite countertops are a classic choice for a reason—they’re tough, heat-resistant, and come in a huge range of colors and patterns. But the real genius here is the towel bar mounted right on the side of the island. No more hunting for a towel when your hands are covered in dough or sauce.
The bar is typically installed under the overhang, so it’s out of the way but easy to grab. Plus, it adds a subtle custom detail that makes your kitchen feel thoughtfully designed.
Best Granite Colors For This Look
Darker granites like Absolute Black or Ubatuba hide stains and show fewer fingerprints, making them ideal for busy kitchens. If you prefer a lighter look, consider White Ice or Colonial Gold—they still hide crumbs well and brighten up the space. The towel bar itself can be stainless steel or brushed nickel to match your fixtures.
Installation Tip
Make sure the towel bar is mounted on the side of the island that faces your main work zone—usually the sink or stove side. That way, you can grab it without walking around. Also, choose a bar length that fits your island’s side without sticking out awkwardly; 18 to 24 inches is standard.
Styling The Rest Of The Island
- Keep the countertop clear except for a small utensil crock or a cutting board. The granite itself is the star, so let it shine. Add a couple of bar stools with a contrasting finish—like wood or black metal—to warm up the stone.
- A pendant light above the island will highlight the granite’s natural veining and make the whole setup feel polished.
FAQ
What is the most durable kitchen island countertop for heavy use?
Quartz and granite are top contenders for durability. They resist scratches, heat, and stains, making them ideal for busy kitchens.
Can I add storage features to an existing island countertop?
Yes, many storage upgrades like magnetic strips, pop-up outlets, or knife slots can be retrofitted without replacing the whole countertop.
Which countertop material is best for hiding crumbs and smudges?
Matte finishes like honed marble, soapstone, or textured concrete hide fingerprints and crumbs better than glossy surfaces.
How do I keep a butcher block island countertop clean?
Wipe with mild soap and water, avoid soaking, and oil regularly with food-safe mineral oil to prevent drying and cracking.
Are integrated drainboards worth the extra cost?
If you hand-wash dishes often, yes. They save counter space and reduce clutter, but require a custom fabrication that adds to the price.
Conclusion
Your kitchen island countertop can do double duty as a workspace and a storage hero. Whether you choose a hidden spice rack or a built-in cutting board, the key is matching the feature to your daily habits.
Pick one idea that solves your biggest clutter struggle, and let the island become the centerpiece you actually use.