11 Kitchen Pegboard Ideas for Flexible Wall Storage
Kitchen walls often end up bare, but they hold so much potential. Pegboards offer a flexible, low-cost way to store everything from pots to spices without committing to permanent shelves or bulky cabinets.
You can rearrange hooks and shelves whenever your needs change, making them ideal for renters or anyone who loves to tweak their layout. Best of all, pegboards come in various colors and finishes, so they can blend in or stand out as a design feature.
Whether you have a tiny galley kitchen or a spacious open plan, these 11 ideas will help you make the most of your vertical space without breaking the bank.
1. Corner Pegboard for Awkward Nooks
That empty corner in your kitchen might seem like wasted space, but with a custom-cut pegboard, it can become a surprisingly useful storage hub. By angling the board to fit the corner, you create a compact zone that keeps frequently used tools within easy reach without eating into your counter space. It's a smart, budget-friendly way to turn an awkward nook into something you'll actually use every day.
A corner pegboard is all about making the most of a tricky spot without spending much. You can buy a standard pegboard sheet and cut it to size, or have a hardware store cut it for you. Mount it on simple corner brackets or furring strips to create a slight angle that faces you as you work.
The result is a storage area that feels intentional and keeps your most-used items—like measuring cups, small pans, or spatulas—right where you need them. The angled placement also makes it easy to see everything at a glance, so you're not digging through drawers.
Best Materials
- Go with a standard hardboard pegboard (about 1/4 inch thick) for a budget-friendly option. Paint it with leftover wall paint or a bold accent color to make it pop. For a more durable choice, use a metal pegboard panel, but that will cost a bit more.
- Either way, use pegboard hooks and small shelves to customize the layout.
Layout Tip
Arrange your tools by frequency of use. Hang everyday items like measuring spoons and spatulas at eye level, and store less-used gadgets higher up or on the sides. Add a small shelf near the bottom for a coffee mug or a small plant to soften the look.
Finishing Touch
Edge the pegboard with thin wood trim or paint the cut edges to give it a polished, built-in feel. A coat of matte paint in a neutral tone like charcoal or sage green helps it blend with the wall, while a bright color turns it into a feature.
2. Spice Rack Pegboard Above the Stove
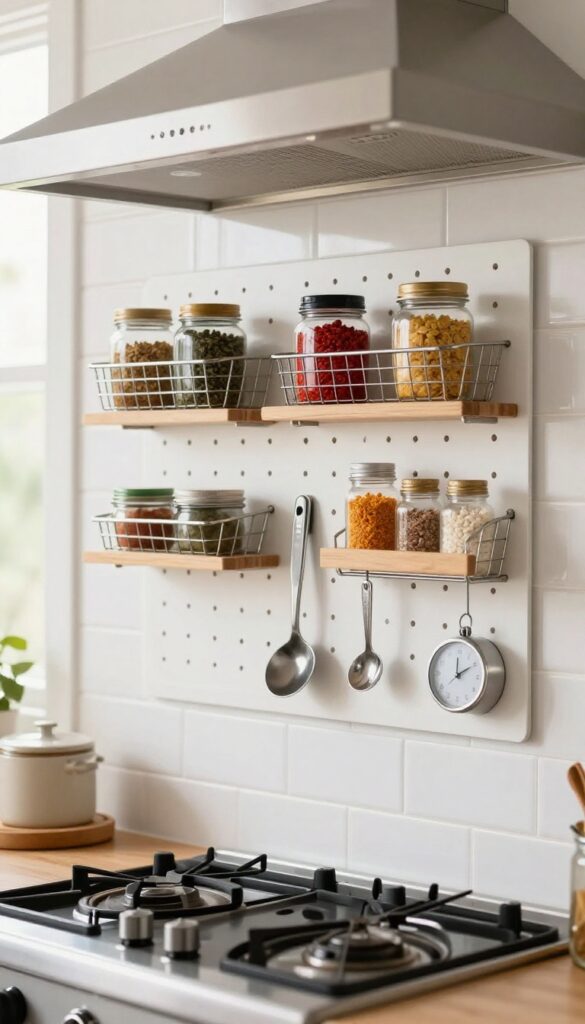
That awkward gap between your stove and range hood is often too shallow for cabinets but perfect for a slim pegboard. By mounting a narrow board and adding small baskets or tiny shelves, you can keep your most-used spices right where you cook. It’s a budget-friendly hack that clears out cabinet clutter and adds a touch of organized charm to your cooking zone.
A narrow pegboard mounted above the stove turns unused wall space into a functional spice rack. Use small wire baskets or mini wooden shelves to hold spice jars, and add hooks for measuring spoons or a small timer. Choose a pegboard with a heat-resistant finish—or treat a standard one with a clear sealant—to keep it safe from steam and splatters.
This setup keeps seasonings within arm’s reach and frees up cabinet space for larger items. Plus, it’s easy to rearrange as your spice collection grows.
Best Materials
For safety, go with a metal pegboard or a thick wood board coated with a heat-resistant sealant. Avoid raw MDF near the stove—it can warp. Small galvanized buckets or ceramic ramekins work well as spice holders, and they add a nice texture contrast against the pegboard.
Layout Tip
Place your most-used spices (salt, pepper, garlic powder) at eye level, and store less frequent ones on higher shelves. Keep the board narrow—about 12 to 18 inches wide—so it doesn’t interfere with the range hood or feel overwhelming.
Budget-Friendly Swap
Instead of buying a custom pegboard, pick up a standard 2×2-foot hardboard pegboard from the hardware store for under $10. Cut it to size, sand the edges, and paint it with a heat-resistant spray paint in a color that matches your kitchen. Add pegboard hooks and small baskets from the dollar store—total cost under $20.
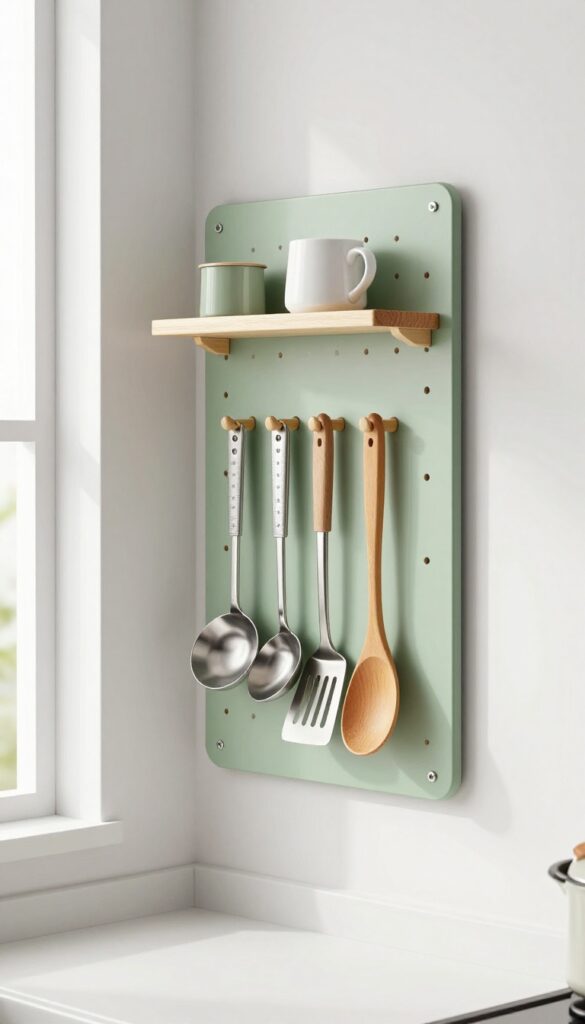
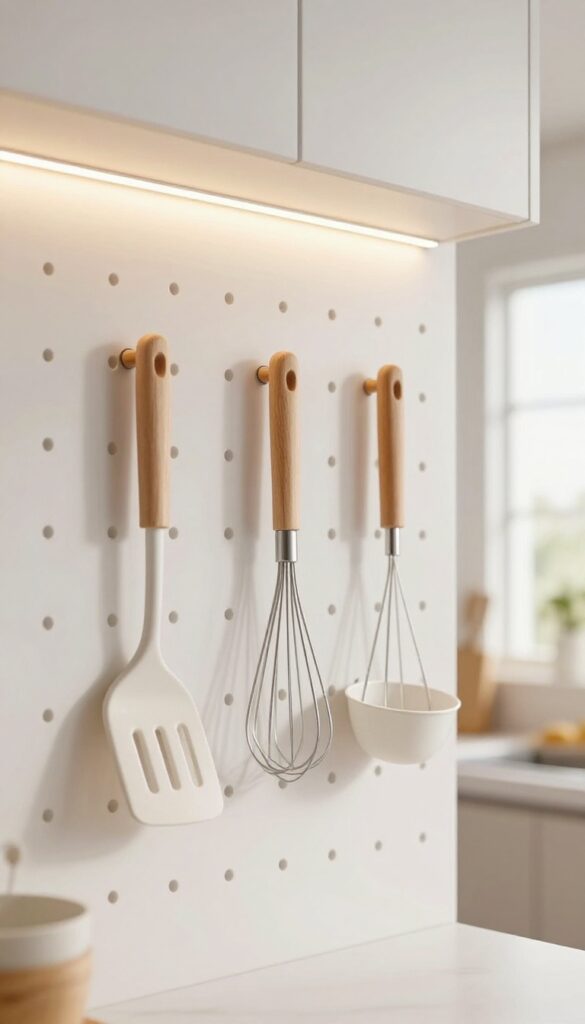
3. Utensil Organizer Pegboard Near the Prep Zone
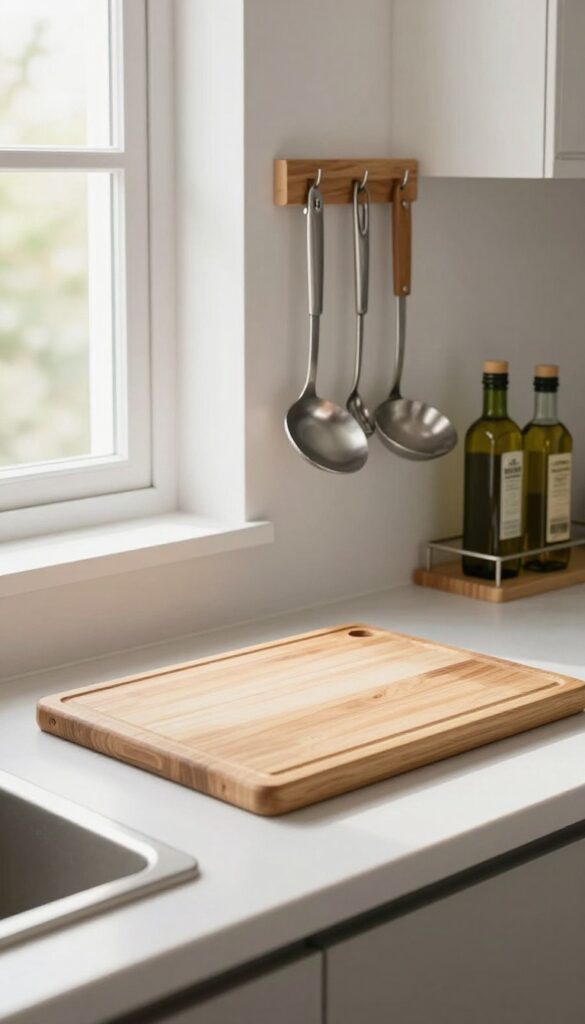
Imagine reaching for your go-to spatula or ladle without rummaging through a drawer. A pegboard mounted right beside your cutting board makes that possible. This setup keeps your most-used tools out in the open, within arm's reach, and adds a lively, functional display to your kitchen wall.
Install a pegboard beside your cutting board area to hang spatulas, ladles, and tongs on S-hooks. Add a small shelf for oils and vinegar bottles. This setup keeps tools visible and accessible, reducing drawer clutter.
Best Materials
Go with a wooden pegboard for warmth or a metal one for a modern touch. Both are durable and easy to paint to match your kitchen. For a budget-friendly option, use a pre-cut hardboard panel from the hardware store.
Layout Tip
Position the pegboard at eye level and within easy reach of your main prep area. Leave enough space below for a small shelf or a countertop canister. Group tools by type—spatulas together, tongs together—for a clean look.
Budget-Friendly Swap
Instead of buying a full pegboard kit, repurpose a piece of leftover plywood or a large cutting board. Drill holes or use adhesive hooks. Paint it in a contrasting color to make it pop against your backsplash.
4. Pot Rack Pegboard on a Blank Wall
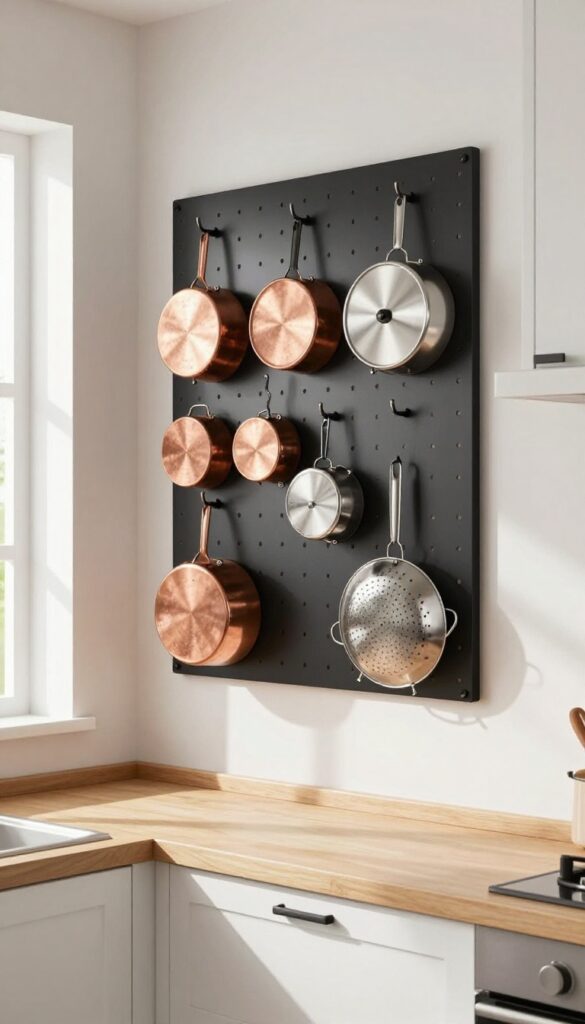
A blank wall in the kitchen is often just that—blank. But it could be doing so much more. Instead of a bulky pot rack that takes over the room, try a large pegboard fitted with heavy-duty hooks.
It holds all your pots, lids, and even a colander, freeing up cabinet space and adding a touch of industrial charm. Paint the pegboard to match your cabinets for a seamless look, or go bold with a contrasting color that becomes a focal point. It's a budget-friendly swap that feels custom and smart.
A large pegboard mounted on a blank wall can replace a traditional pot rack, offering flexible storage that adapts to your needs. Heavy-duty hooks keep pots and lids within easy reach, while the pegboard itself can be painted to blend in or stand out. This idea works best in kitchens where wall space is available but cabinet storage is tight.
It's a practical, space-aware solution that doesn't cost a lot, especially if you DIY the installation.
Best Colors
Match the pegboard to your cabinet color for a built-in look, or choose a contrasting shade like matte black or deep navy to make it a design feature. White keeps it airy, while bold colors add personality without overwhelming the room.
Storage Tip
Use a mix of hook sizes—small ones for lids, large ones for heavy pots. Arrange items by frequency of use, placing everyday pots at eye level and less-used ones higher up. Add a small shelf at the top for spices or oil bottles to maximize utility.
Budget-Friendly Swap
- Skip the expensive pre-made pegboard kits. Buy a large sheet of hardboard or plywood, cut it to size, and paint it yourself. Heavy-duty hooks are inexpensive online.
- Total cost can stay under $30, making this one of the most affordable kitchen upgrades.
5. Pegboard Coffee Station
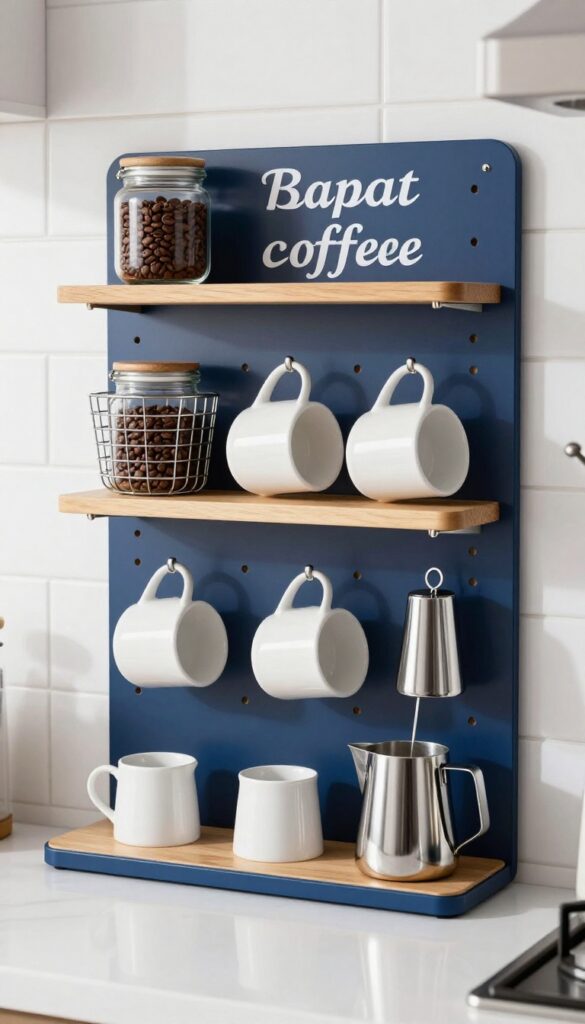
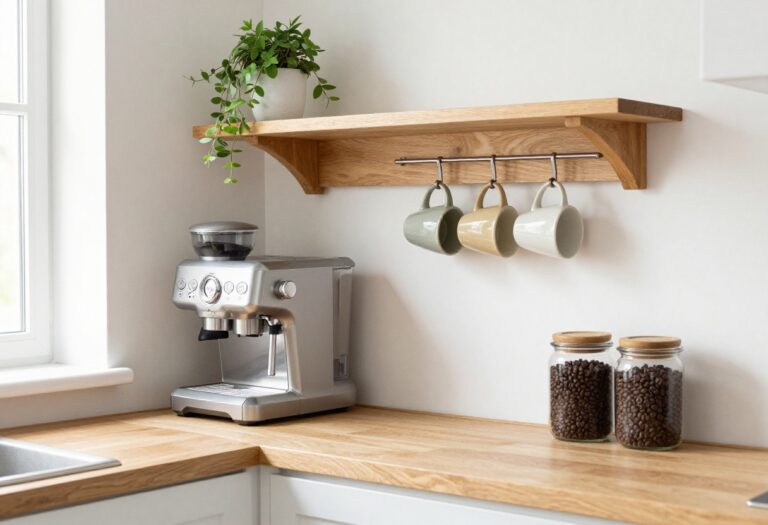
If your morning routine feels a little chaotic, a dedicated coffee station can change the whole vibe. Mounting a pegboard above your coffee maker turns a small wall into an organized command center for your caffeine fix. It keeps mugs, beans, filters, and accessories within easy reach while freeing up precious counter space.
The best part? You can customize the layout as your coffee habits evolve, so it stays functional without looking cluttered.
A pegboard coffee station is all about making your morning flow smoother. By using hooks for mugs, a small shelf for beans or filters, and a basket for pods, you create a system that works with your routine. Add a magnetic strip for metal accessories like a frother, and you have everything you need in one spot.
This setup is especially great for small kitchens where counter space is at a premium. The pegboard keeps the area visually tidy while adding a touch of industrial charm that fits modern, budget-friendly decor.
Layout Tip
Position the pegboard so the bottom edge sits about 6 inches above your coffee maker. This leaves room for the machine's lid to open while keeping mugs and supplies easily accessible. Arrange the most-used items—like your go-to mug and coffee pods—at eye level, and store extras like syrups or spare filters on a higher shelf.
Budget-Friendly Swap
Skip expensive custom pegboard kits and use a standard hardboard panel from the hardware store. Paint it with leftover wall paint for a seamless look, or go bold with a contrasting color like deep navy or sage green. Basic pegboard hooks and small baskets are inexpensive and easy to rearrange as your needs change.
Finishing Touch
Add a small plant or a framed photo on the top shelf to soften the industrial vibe. A warm-toned wooden shelf bracket or a brass hook here and there can elevate the look without spending much. Keep the color palette cohesive—stick to two or three accent colors for hooks and baskets to avoid visual noise.
6. Herb Drying Pegboard Near a Window
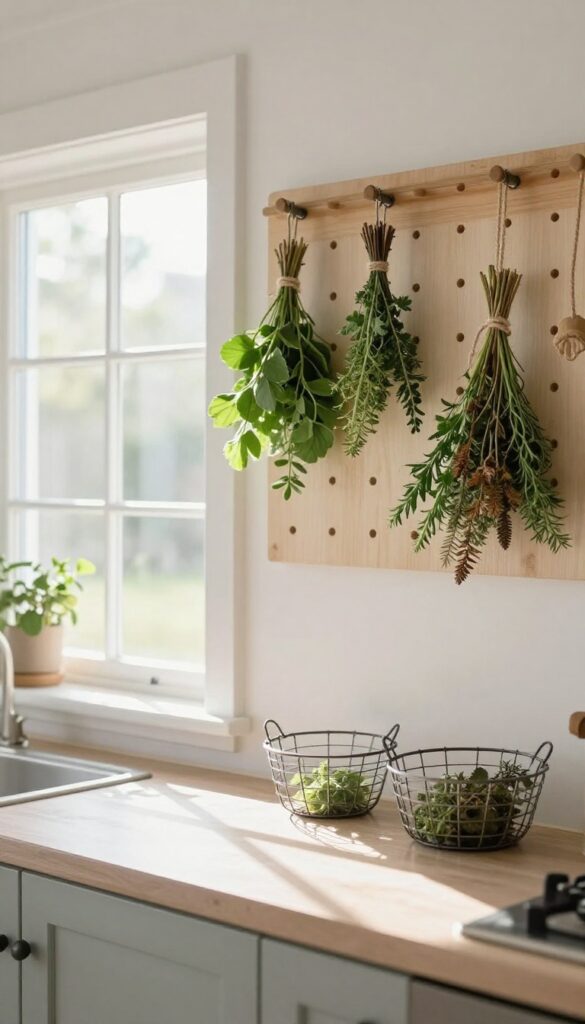
A sunny kitchen window is prime real estate for something alive and useful. Mount a pegboard on the wall beside it, and you've got an instant herb drying station that looks like it belongs in a farmhouse kitchen. The best part?
It costs next to nothing to set up, and it keeps your countertops clear while adding a cozy, rustic vibe.
This setup works beautifully in small kitchens where every inch counts. By using vertical wall space near natural light, you free up counter area for meal prep while creating a charming display. The herbs dry naturally, and you can snip them straight into cooking without any extra steps.
Plus, the visual of hanging greenery against a pegboard adds texture and life to an otherwise plain wall.
Best Materials
- Go with a solid wood or bamboo pegboard for a warm, organic look that complements the herbs. Avoid plastic or shiny metal—they can feel too modern and clash with the rustic feel. Use small metal clips or natural twine to hang the herb bundles.
- Shallow wire baskets or wooden crates work well to hold dried herbs once they're ready.
Layout Tip
Position the pegboard so it gets indirect sunlight for most of the day—direct afternoon sun can dry herbs too quickly and fade their color. Leave a few inches of space between the pegboard and the window to prevent moisture buildup. Arrange the herbs in a staggered pattern so they don't block each other's airflow.
Budget-Friendly Swap
Instead of buying a pre-made pegboard, pick up a scrap piece of plywood from a hardware store and drill your own holes. Paint it with leftover chalk paint or whitewash for a distressed finish. Use binder clips from the office supply aisle instead of pricey herb clips—they hold stems just as well and cost pennies.
7. Pegboard for Cutting Boards and Baking Sheets
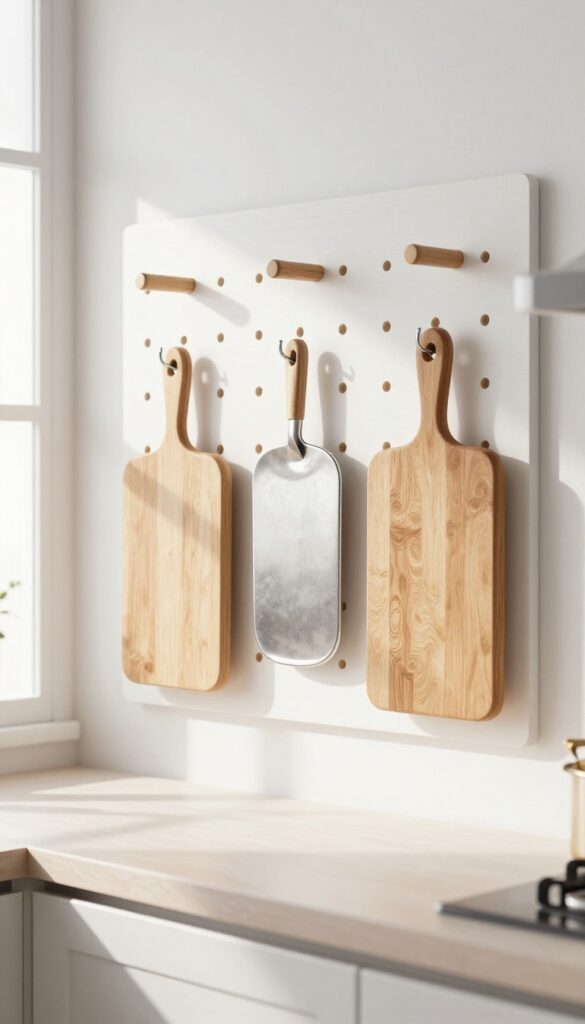
That stack of cutting boards and baking sheets sliding around in your deep cabinet? It’s time to pull them out and put them on display. A pegboard fitted with long hooks or wooden dowels turns a bare wall into a vertical storage station for all your flat kitchen gear.
Mount it next to the oven or your main prep zone, and you’ll grab the right board or tray in seconds. Plus, it frees up that cabinet chaos for things that actually need to be hidden.
This setup works especially well in smaller kitchens where every inch of counter and cabinet space counts. By going vertical, you reclaim deep cabinet shelves that always seem to turn into a jumble of lids and pans. The visual effect is also surprisingly tidy—like a chef’s workstation that feels intentional, not cluttered.
Use a mix of long hooks for cutting boards and wider dowels or shelf brackets for baking sheets. Keep the most-used items at arm’s reach and stash holiday-only trays higher up. It’s a budget-friendly upgrade that costs little more than a pegboard panel and a few accessories.
Best Materials
- Choose a solid wood or thick MDF pegboard that can handle the weight of multiple boards and sheets. Metal pegboards work too, but they can feel cold in a kitchen. Paint the board to match your cabinets or go with a contrasting color like navy or sage for a pop.
- For hooks, opt for coated metal or wooden dowels inserted into the holes—they won’t scratch your bakeware.
Layout Tip
- Map out your most-used items first. Place the cutting board you reach for daily at the center, then flank it with smaller boards and trays. Leave a few inches of space between each item so you can grab them without knocking others down.
- If you have a mix of wood and plastic boards, group them by type for a more curated look.
Budget-Friendly Swap
Skip expensive pegboard kits and DIY your own. Buy a standard 2×4-foot pegboard from a hardware store for under $15, add a simple wooden frame, and mount it with furring strips for airflow. Use inexpensive dowel rods cut to length instead of metal hooks—they cost pennies and give a warm, rustic feel.
8. Pegboard with Built-In Lighting
A pegboard is already a smart storage solution, but adding LED strip lights behind or above it takes the setup from purely functional to genuinely beautiful. The soft glow highlights your neatly arranged tools and turns a simple wall into a focal point. This works especially well in dark corners, above a sink, or inside a pantry where you need both visibility and atmosphere.
The lighting doesn't have to be expensive—battery-operated or plug-in strips are budget-friendly and easy to install without an electrician.
The key to this idea is layering light. Instead of relying on overhead fixtures that cast shadows, the direct illumination on your pegboard makes every item easy to grab and adds a warm, inviting glow to the kitchen. Choose warm white LEDs (2700K–3000K) for a cozy feel, or go with dimmable strips to adjust the brightness throughout the day.
The pegboard itself can be painted to match your cabinets or left natural for contrast. This setup is perfect for renters too, since most LED strips are removable without damaging walls.
Best Colors
Stick with light or neutral pegboard colors like white, light gray, or natural wood to let the lighting pop. Dark pegboards absorb light and reduce the effect. If you want a bolder look, try a soft pastel like sage green or pale blue—the light will still reflect nicely without overwhelming the space.
Lighting Tip
- Use adhesive-backed LED strip lights with a remote or app control. Place them along the top edge of the pegboard facing downward, or behind the board if it's mounted with a gap. This creates a floating effect that looks polished and professional.
- For a truly budget-friendly option, battery-operated puck lights work well in smaller setups.
Small-space Fix
In a tiny kitchen, a lit pegboard can double as a nightlight or task light. Install it above a counter or near the stove to add both storage and illumination without taking up counter space. The glow makes the area feel larger and more open.
9. Pegboard for Small Appliances
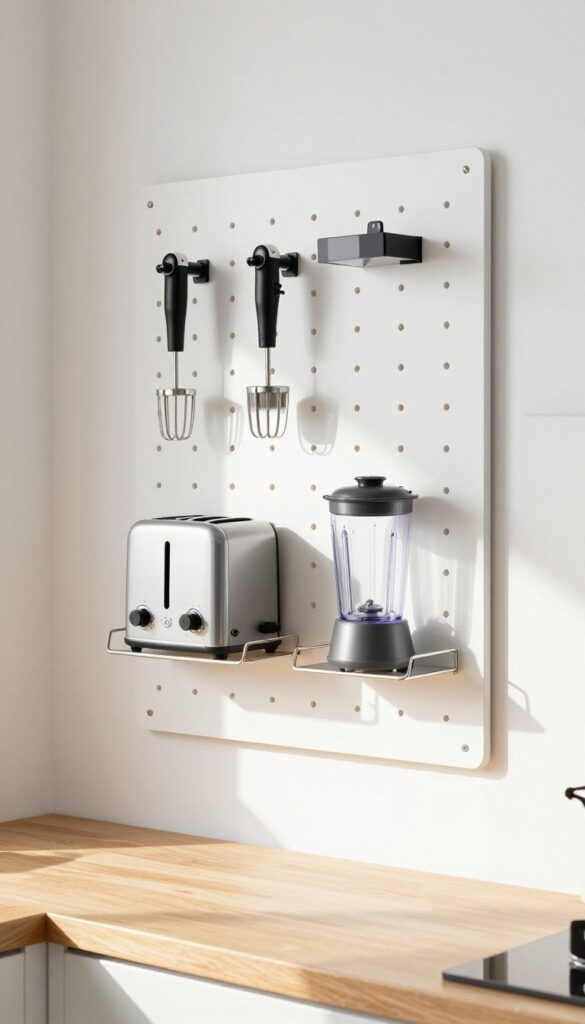
Counter space is precious, especially in a busy kitchen. Instead of letting your hand mixer, blender, or toaster hog valuable real estate, mount them on a sturdy pegboard with heavy-duty shelves. This setup keeps appliances plugged in and ready to grab, while cord clips tame the tangle.
It’s a budget-friendly way to reclaim your counters without sacrificing convenience.
A pegboard dedicated to small appliances turns a blank wall into a functional command center. Choose a board with enough depth and reinforcement to support the weight, then arrange shelves at the right heights for each gadget. The result feels intentional and efficient, like a pro kitchen but without the renovation cost.
Heavy-duty Shelving
- Standard pegboard hooks won’t cut it for a toaster or blender. Invest in reinforced metal shelves that lock into the board securely. Look for options rated for 20 pounds or more, and position them so appliances sit level and stable.
- This keeps the look clean and prevents accidents.
Cord Management
- Nothing ruins a tidy pegboard faster than dangling cords. Use adhesive cord clips along the back of the board or tuck cords into small cable sleeves. For appliances you use daily, leave them plugged into a power strip mounted discreetly behind the board.
- That way, you just flip a switch to power everything on.
Layout Tip
- Arrange appliances by frequency of use. Keep the coffee maker or toaster at eye level for easy access, and relegate the stand mixer or slow cooker to lower shelves. Leave a little breathing room between items so the board doesn’t feel cramped.
- A pegboard with a white or light wood finish keeps the look airy and budget-friendly.
10. Pegboard as a Message Center
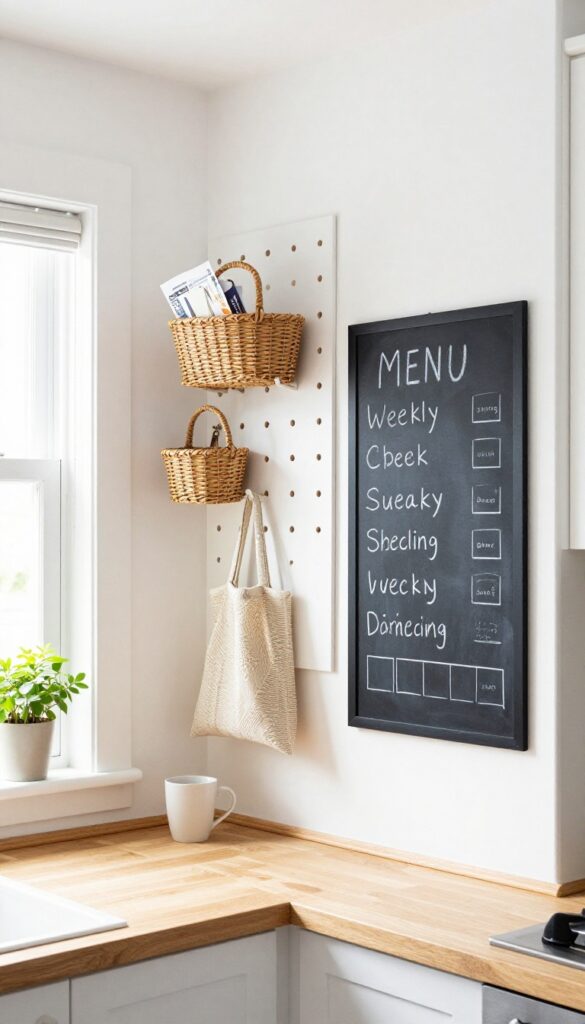
Your kitchen wall can do more than just hold utensils. By turning a section of pegboard into a family command center, you create a hub for notes, schedules, and daily essentials. It keeps clutter off the counter and makes mornings smoother.
Plus, the mix of chalkboard or corkboard with pegboard hooks and baskets adds visual interest without feeling busy.
A pegboard message center is both practical and decorative. Start with a large pegboard panel, then paint a section with chalkboard paint or attach a thin corkboard sheet. Use small baskets on pegs for mail and coupons, hooks for reusable bags and keys, and a clip for a calendar or shopping list.
Keep the layout balanced—leave some empty pegs so it doesn't look overcrowded. This setup works great near the back door or in a kitchen pass-through.
Best Colors
Stick with a neutral pegboard like white or light gray so the chalkboard or cork stands out. If you want a pop of color, paint the frame or use colorful baskets. Avoid dark pegboards in small kitchens—they can feel heavy.
Budget-Friendly Swap
Instead of buying a pre-made command center, DIY your own. A standard pegboard sheet costs under $20, and chalkboard paint is cheap. Use thrifted baskets and hooks to keep costs low while adding character.
Layout Tip
Place the chalkboard section at eye level for easy writing. Hang the calendar below it, and use the bottom row for hooks and baskets. This creates a natural flow from notes to storage.
11. Pegboard for Cleaning Supplies Under the Sink
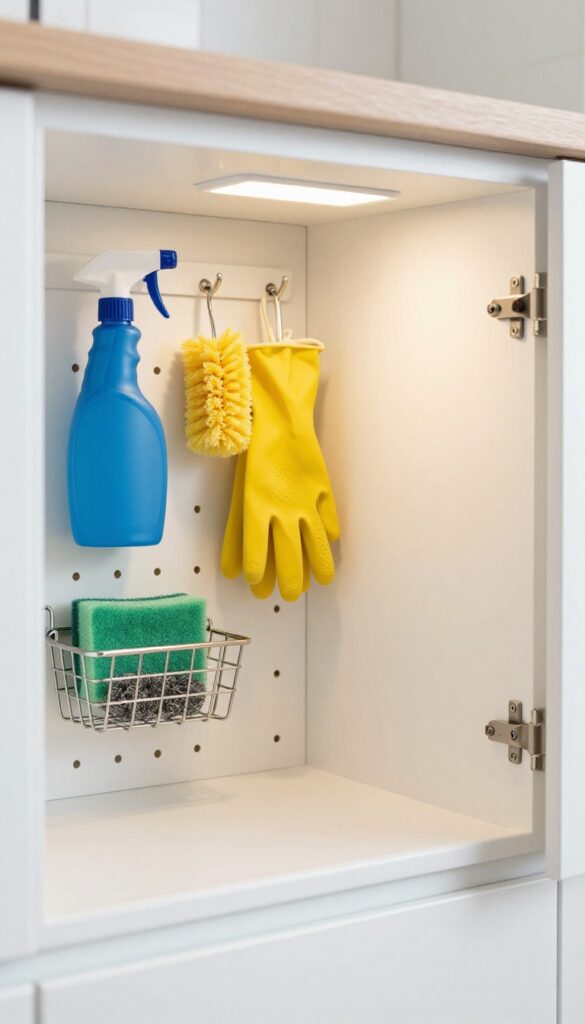
The cabinet under the sink is often a black hole of sponges, half-empty bottles, and mystery drips. A small pegboard mounted on the inside wall can turn that chaos into a tidy, accessible cleaning station. It keeps spray bottles upright, brushes within reach, and gloves off the floor, making the most of that awkward, cramped space.
Best of all, it costs next to nothing and takes just an afternoon to set up.
Mount a small pegboard inside the cabinet under the sink to hang spray bottles, brushes, and gloves. Use hooks and small bins to keep everything off the floor. This maximizes awkward under-sink space and keeps it organized.
What To Hang And How
- Start by measuring the back wall of the cabinet and cutting a pegboard to fit. Attach it with spacers so hooks can slide in easily. Use cup hooks for spray bottles with trigger handles, larger hooks for scrub brushes, and a small bin for sponges or steel wool.
- Gloves can hang on a single peg or a clip. Keep heavier items lower to prevent tipping.
Budget-Friendly Swap
Instead of buying a fancy under-sink organizer, repurpose a scrap of pegboard from a hardware store (often under $10) and use basic hooks. You can even spray-paint the pegboard to match your cabinet interior. This is one of the cheapest ways to gain serious organization without any permanent changes.
Finishing Touch
Add a small adhesive LED motion light to the cabinet ceiling so you can see everything clearly. Stick-on bins for the door can hold extra sponges or trash bags. The result is a spotless, functional space that makes cleaning feel less like a chore.
FAQ
How much weight can a pegboard hold?
Standard hardboard pegboards can hold about 10-15 pounds per hook if properly anchored into studs. For heavier items like pots, use metal pegboard with reinforced hooks or add a wooden frame for extra support.
Can I install a pegboard in a rental kitchen?
Yes, use adhesive hooks or command strips designed for pegboards, or mount it on a lightweight frame that leans against the wall. Some renters also use tension rods or freestanding pegboard panels to avoid drilling.
What tools do I need to cut a pegboard to size?
A jigsaw or circular saw works best for cutting pegboard. For straight cuts, a utility knife with a straightedge can score and snap it. Always wear safety goggles and a dust mask.
How do I keep pegboard hooks from falling out?
Use pegboard hooks with locking tabs or add a dab of hot glue on the back of the hook. Some hooks come with rubber grips that hold tighter. You can also install a backplate to prevent hooks from rotating.
What's the best paint for pegboard?
Use a semi-gloss or satin latex paint for easy cleaning. Apply a primer first to prevent the hardboard from absorbing too much paint. Chalk paint also works well for a matte finish, but seal it with wax.
Conclusion
Pegboards are one of the most versatile and affordable ways to add storage and personality to your kitchen. With a little creativity, you can turn any blank wall into a functional display that adapts to your cooking habits.
Start small with one idea, and you'll likely find yourself adding more as you see how much easier meal prep becomes. Remember, the best kitchen setups grow with you, and pegboards make that flexibility simple and stylish.