11 White Kitchen Splashback Ideas for a Crisp Bright Wall
A white splashback can make your kitchen feel bigger, cleaner, and more open. But it doesn't have to be just a pretty surface—it can also work hard for you.
With the right materials and layout, your splashback can double as a storage zone, a display area, or a clever organizer. These 11 ideas focus on keeping your walls bright while adding practical touches that make daily cooking easier.
Whether you love classic tile or want something unexpected, there's a white splashback here that fits your style and your storage needs.
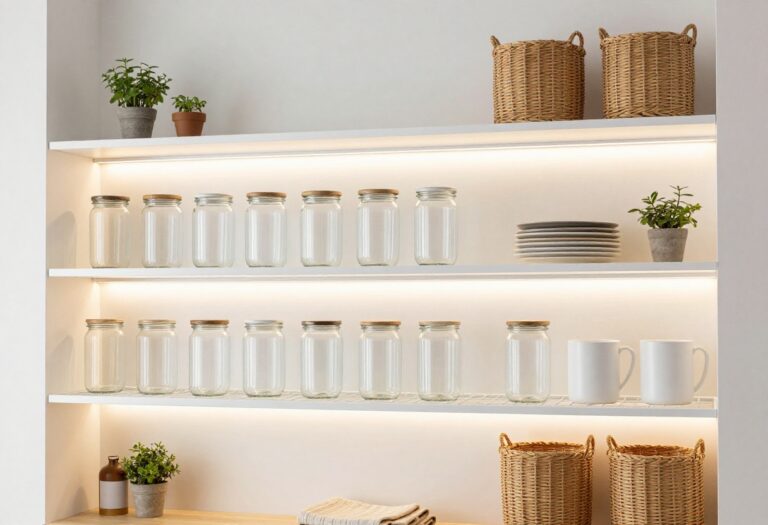
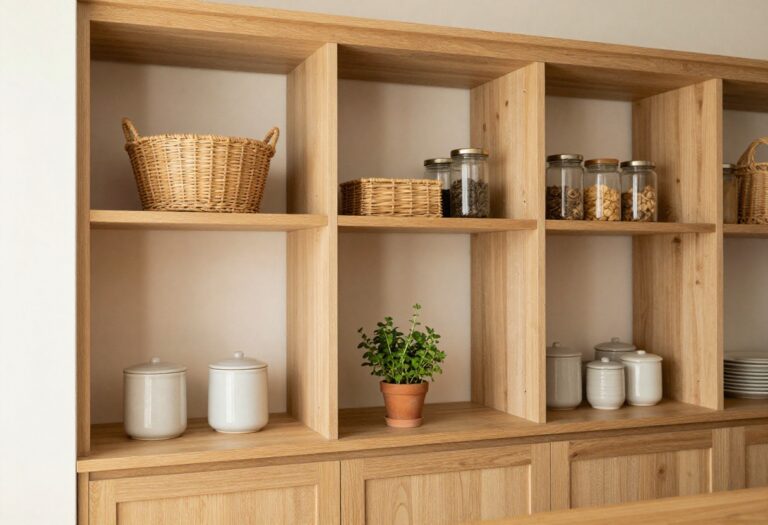
1. Subway Tile with Open Shelving Inserts
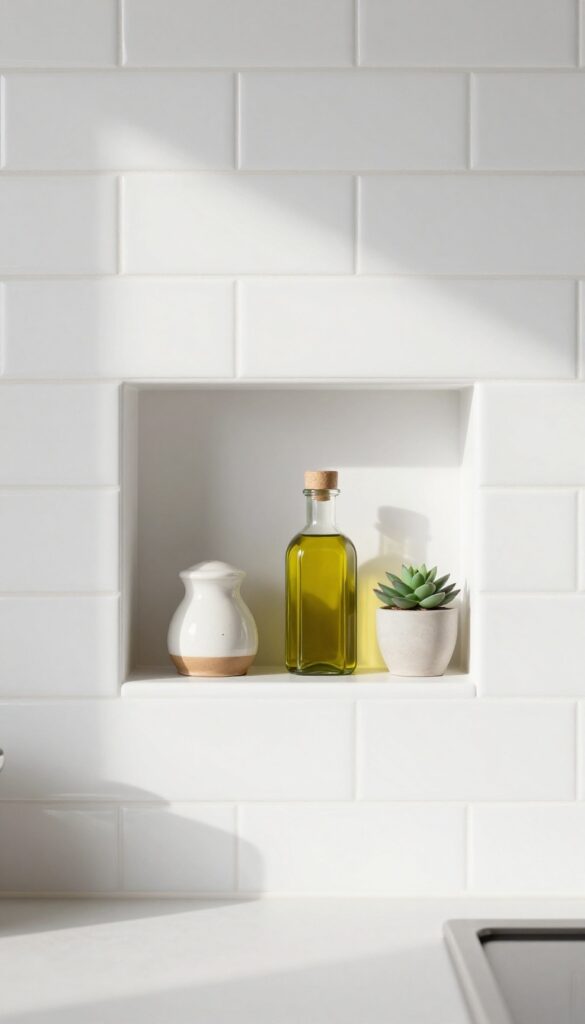
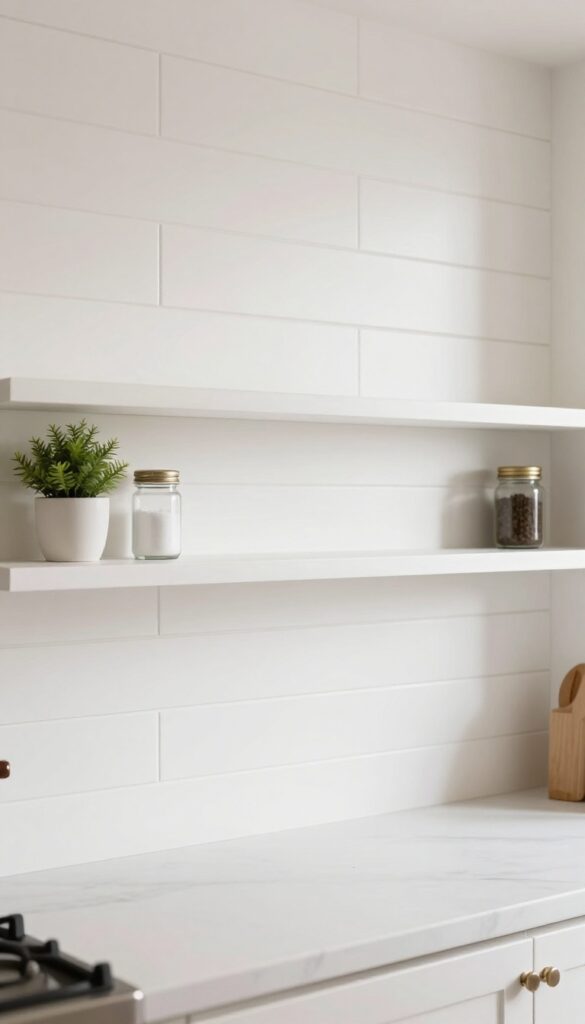
White subway tile is a timeless choice for kitchen splashbacks, but it can feel a bit predictable. By incorporating built-in open shelving niches directly into the tile layout, you add both character and function. These recessed shelves break up the tile pattern and create convenient spots for everyday items like spices, oils, or small jars, keeping your countertops clutter-free.
This idea takes the classic subway tile and gives it a smart storage upgrade. Instead of a flat wall of tile, you install one or more open shelving niches within the tiled area. The niches are framed with tile edges, creating a seamless look that feels intentional rather than an afterthought.
The shelves themselves can be made of wood, metal, or even glass, depending on your style. This approach works especially well in smaller kitchens where every inch of storage counts. The white tile keeps the space bright and airy, while the open shelves add warmth and personality.
You can style them with a mix of functional items like olive oil and vinegar bottles, and decorative touches like a small plant or a ceramic salt cellar. The key is to keep it curated—too many items can make the shelves look cluttered. This idea is both practical and stylish, giving you easy access to cooking essentials while maintaining a clean, crisp aesthetic.
Best Layout Tip
Place the shelving niche in a spot that's convenient for your workflow—ideally near the stove or prep area. A single long niche or two smaller ones can work. Make sure the depth is enough to hold standard spice jars (about 4 inches deep) without protruding too far.
Material Pairing
For a warm contrast against white tile, use solid wood shelves in oak or walnut. If you prefer a more modern look, opt for sleek stainless steel or black metal. The shelf material should complement your countertop and hardware finishes for a cohesive feel.
Styling Tip
- Group items by height and color for a tidy appearance. Start with taller bottles at the back, then layer smaller jars in front. Add a small trailing plant or a minimalist salt cellar for a touch of life.
- Keep the overall look balanced and avoid overcrowding.
2. White Beadboard with Magnetic Strip
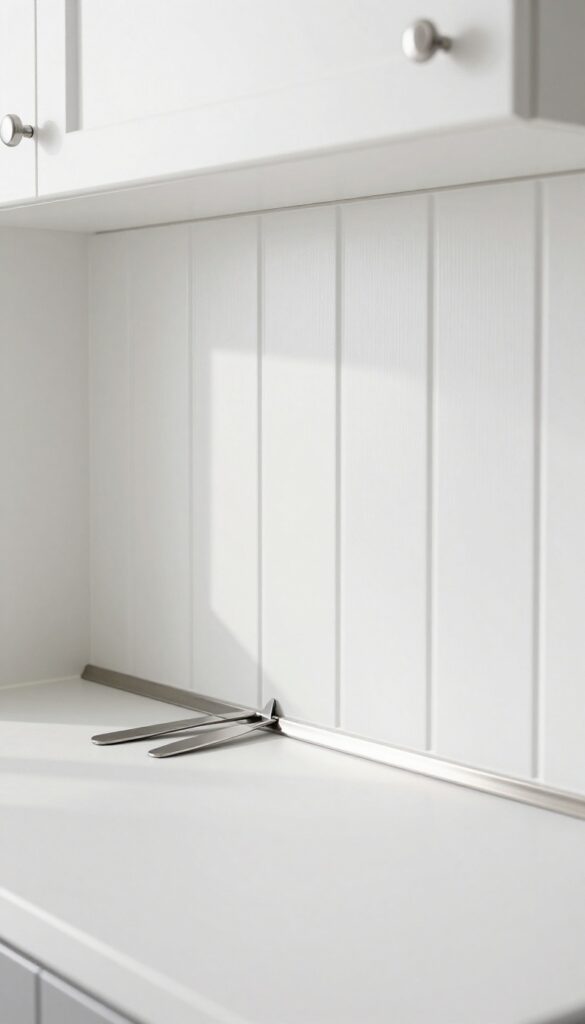
Beadboard brings instant cottage charm to a kitchen, and when it’s painted crisp white, it makes the whole wall feel light and airy. But here’s the clever part: you can attach a slim magnetic strip right onto the beadboard to hold your knives and metal utensils. It’s a storage-smart move that frees up drawer space and keeps your most-used tools within easy reach.
This splashback idea blends texture with function beautifully. The vertical lines of beadboard add visual interest without overwhelming the space, while the magnetic strip becomes an almost invisible storage solution. It’s perfect for kitchens where every inch of counter or drawer space counts.
Plus, the white finish reflects light, making even a small kitchen feel bigger and brighter. Pair it with open shelving or simple white cabinets for a cohesive, practical look.
Best Materials
- Go with moisture-resistant MDF beadboard panels or real wood beadboard if your budget allows. Both take paint well and hold up in a kitchen environment. For the magnetic strip, choose a stainless steel or brushed nickel option that won’t rust.
- Install it securely with screws into the beadboard—no need for a stud finder if you use heavy-duty wall anchors.
Layout Tip
Mount the magnetic strip about 6 inches above the countertop so knives hang without touching the surface. Keep it at least 2 inches away from the stove to avoid heat damage. If you have a long backsplash, consider two shorter strips spaced apart for a balanced look.
Finishing Touch
Add a small shelf above the beadboard to display a few ceramic canisters or a trailing plant. This softens the utilitarian feel of the magnetic strip and brings in a cozy, lived-in vibe. Stick to white or light wood tones to keep the space feeling open.
3. Glossy White Glass with Floating Corner Shelves
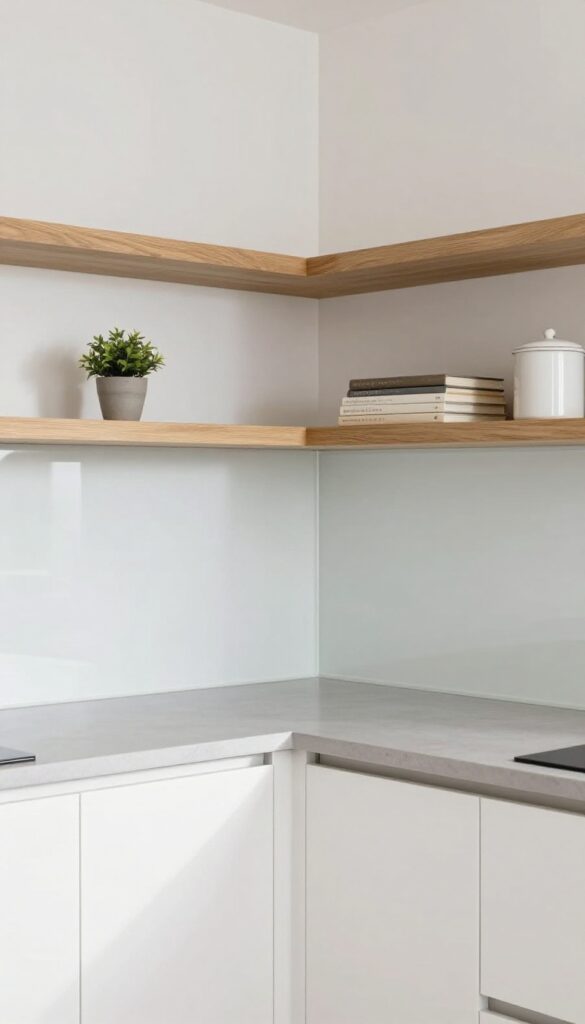
Glass backsplashes have a way of making a kitchen feel larger and brighter, especially when you choose a glossy white finish. The reflective surface bounces light around the room, which is a huge bonus for smaller kitchens or spaces without a ton of natural light. What makes this idea extra special is pairing it with floating corner shelves—they break up the sleek glass with a warm, functional touch.
You get the clean, seamless look of a glass backsplash plus a spot to display your favorite cookbooks or a few pretty canisters.
A glossy white glass backsplash is all about maximizing light and creating an airy, open feel. The panels are usually custom-cut to fit your wall, so there are minimal grout lines—just a clean, reflective surface that makes your kitchen look polished and expansive. Adding floating corner shelves in a natural wood or matte black finish introduces texture and warmth, balancing the cool glass.
These shelves are perfect for storing everyday items you want within reach, like spices, oils, or a small plant, while also giving you a chance to style a little vignette. For the best effect, keep the shelves shallow so they don't overwhelm the corner, and stick to a few carefully chosen pieces to avoid visual clutter. This setup works especially well in galley kitchens or L-shaped layouts where corner space often goes unused.
Best Materials
- Tempered glass is the go-to for backsplashes because it's durable, heat-resistant, and easy to clean. Opt for a high-gloss white finish—it reflects light better than matte or frosted glass. For the shelves, solid wood like oak or walnut adds warmth, or go with powder-coated metal for a more industrial feel.
- Make sure the shelf brackets are sturdy and discreet, preferably hidden or minimal.
Storage Tip
Use the corner shelves for items you use daily—like a small jar of utensils, a salt cellar, or a few go-to spices. Keep the look intentional by limiting each shelf to two or three objects. A small trailing plant, like pothos, adds life without taking up much visual space.
Finishing Touch
Install under-cabinet lighting directly above the glass backsplash to make it glow. The light will bounce off the glossy surface and illuminate your countertop, making the whole kitchen feel brighter and more inviting. Choose warm LED strips for a cozy ambiance or cool white for a crisp, modern look.
4. White Herringbone Tile with Pegboard Accent
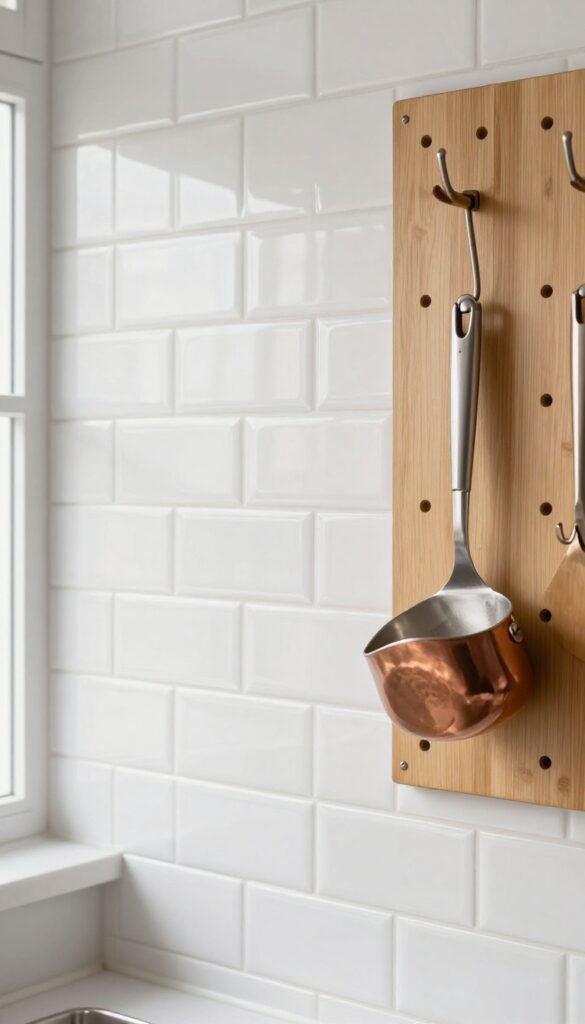
Herringbone tile is a classic choice that never feels boring, and when it's white, it keeps your kitchen bright without sacrificing texture. The zigzag pattern draws the eye and adds movement to an otherwise flat wall. To make this backsplash work even harder, swap a small section of tile for a pegboard—it's a smart way to keep your most-used tools within easy reach while adding an industrial-chic touch.
The combination of crisp white herringbone tile and a functional pegboard strikes a perfect balance between style and storage. The tile provides a clean, polished backdrop, while the pegboard introduces warmth and practicality. This setup is ideal for kitchens where counter space is limited, as it frees up drawers and counters for prep work.
The pegboard can be painted to match your cabinetry or left in a natural wood tone for contrast.
Best Colors And Materials
Stick with glossy white subway tile in a herringbone layout for maximum light reflection. For the pegboard, choose a warm wood like birch or walnut to soften the look, or go with black metal for an edgier vibe. If you prefer a seamless appearance, paint the pegboard the same white as the tile—just use a matte finish so it doesn't compete with the glossy tile.
Layout And Storage Tips
Install the pegboard behind your stove or main prep area so pots, spatulas, and measuring cups are always handy. Keep the pegboard section proportional—about 18 to 24 inches wide works well without overwhelming the tile. Use hooks and small shelves to hold frequently used items, and leave some pegboard empty for a clean, curated look.
Finishing Touches
Add a thin wooden shelf above the pegboard for a few decorative jars or a small plant. This ties the pegboard into the rest of the kitchen and prevents it from feeling like an afterthought. For a cohesive look, match the shelf wood to the pegboard or your countertops.
5. Matte White Zellige with Hanging Rail
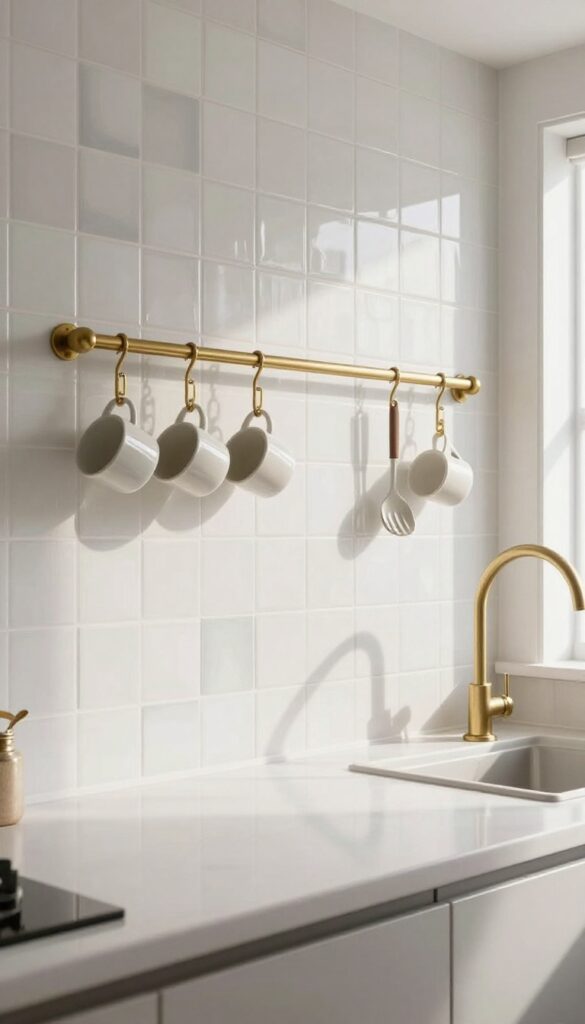
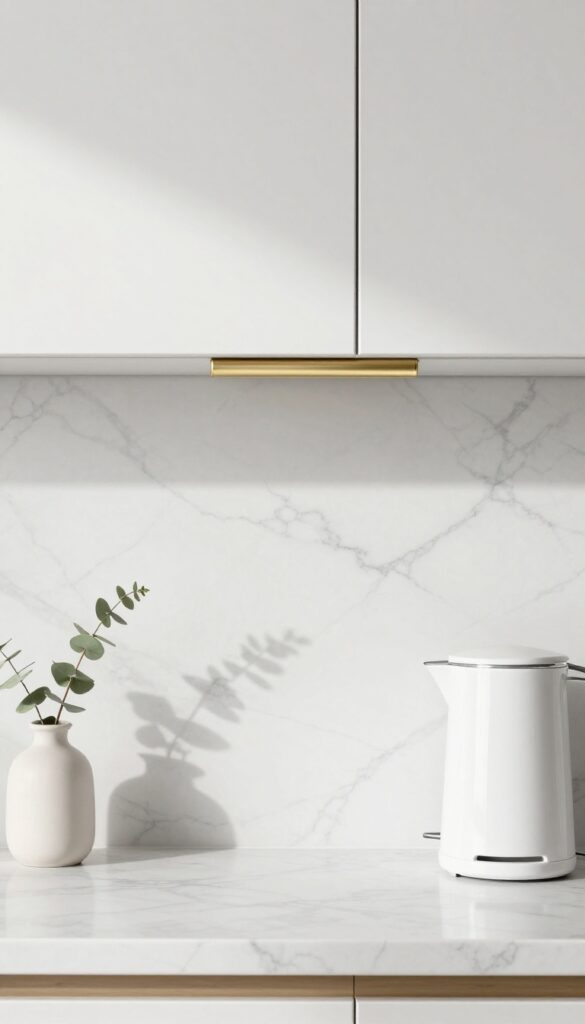
Handmade zellige tiles bring a subtle, natural variation that keeps a white kitchen from feeling flat. Each tile catches light differently, creating a soft, textured surface that feels warm and artisanal. Pair that with a brass or stainless steel rail running along the splashback, and you get a storage-smart solution that also adds a sleek, functional line to the wall.
The combination of matte white zellige and a hanging rail is a practical yet stylish way to keep everyday items within reach. The rail can hold mugs, small utensils, or even lightweight pots, freeing up counter space while adding visual interest. This idea works especially well in kitchens where counter space is limited or where you want to display a curated collection of ceramics.
The handmade quality of zellige tiles means no two are exactly alike, giving your kitchen a unique, lived-in feel that’s far from sterile.
Best Colors & Finishes
Stick with matte white zellige for the tiles—the subtle undulations and slight color shifts (from creamy white to soft gray) keep the look organic. For the rail, choose a finish that complements your hardware: brass adds warmth and a vintage touch, while stainless steel or matte black feels more modern. A brass rail with brass faucets and cabinet pulls ties the room together beautifully.
Storage Tip
- Install the rail about 6 to 8 inches above the countertop, centered on the splashback. Use S-hooks to hang mugs, measuring cups, or small utensils. Keep the items you hang practical—things you use daily—so the rail stays functional rather than just decorative.
- Avoid overcrowding; a few well-placed pieces look better than a cluttered line.
Layout & Installation
- This idea works best on a full-height splashback (from counter to upper cabinets or range hood). If your kitchen has a window above the sink, run the rail along the side splashbacks instead. For a cohesive look, match the rail’s finish to other metal accents in the room, like the sink faucet or cabinet handles.
- The tiles themselves should be installed with a minimal grout line (1/8 inch or less) to emphasize their handcrafted texture.
6. White Penny Tile with Built-In Soap Dispenser
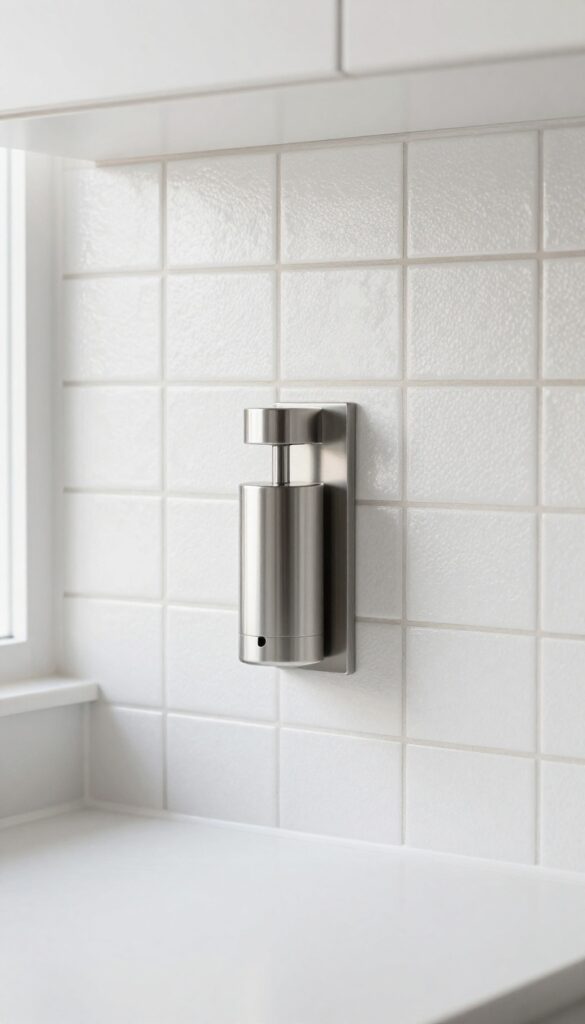
Small round penny tiles bring a playful, tactile quality to your kitchen wall, but the real genius here is how they hide the mess. By embedding a soap dispenser and a sponge holder directly into the splashback, you free up counter space and keep the sink area looking tidy. It’s a smart, storage-savvy twist on a classic tile shape that feels both nostalgic and modern.
Penny tiles are already a favorite for their vintage charm and subtle texture. When you add built-in dispensers, you turn a pretty backsplash into a hardworking hub. The round shapes break up the usual grid of subway or square tiles, creating visual rhythm without being busy.
White keeps it crisp and bright, while the grout lines add depth. This idea works especially well in smaller kitchens where every inch of counter space counts. The built-ins mean no bulky bottles sitting by the sink, so the whole area feels cleaner and more intentional.
Best Colors And Grout Choices
- Stick with bright white tiles for maximum light reflection. For the grout, a warm gray or soft charcoal adds contrast without going too dark. If you want a more seamless look, match the grout to the tile color.
- The built-in dispenser and sponge holder should be brushed stainless steel or matte black to tie into your faucet finish.
Layout And Installation Tip
- Plan the placement of the dispensers before tiling. Mark exactly where the soap dispenser and sponge holder will go, and have the tile cut around them for a flush fit. It’s easier to install the dispensers during the tiling process rather than trying to retrofit them later.
- Keep them close to the sink but not directly behind the faucet.
Styling The Surrounding Area
- Since the splashback handles the sink clutter, keep the countertop minimal. A single plant or a small dish for sponges can sit nearby, but avoid adding more bottles. Let the penny tile be the star.
- Pair with white or light wood cabinets and a simple quartz countertop for a clean, airy look.
7. White Shiplap with Narrow Shelf Ledges
Horizontal shiplap brings a clean, modern farmhouse feel to any kitchen. The white planks reflect light beautifully, making the wall feel crisp and open. By adding narrow shelf ledges right on the shiplap, you gain handy storage for everyday cooking essentials without cluttering the counter.
White shiplap instantly softens a kitchen's look while keeping it bright. The horizontal lines draw the eye across the wall, making a narrow galley feel wider. Pair it with slim ledges—just deep enough for salt, pepper, and olive oil—and you've got a backsplash that works as hard as you do.
The ledges break up the shiplap's repetition and add a practical layer without overwhelming the space. For a cohesive look, choose ledges in the same white or a natural wood tone that complements your countertops. This setup is especially smart in small kitchens where every inch of storage counts.
The shiplap itself is easy to install as a DIY project, and the ledges can be mounted with simple brackets. Keep the styling minimal: a few small jars, a tiny plant, and maybe a favorite spice blend. The result is a wall that feels both finished and functional.
Best Materials
For a water-resistant backsplash, use MDF shiplap with a waterproof primer and semi-gloss paint, or go with PVC shiplap panels that mimic wood. Real wood is beautiful but needs careful sealing near the stove. The ledges can be solid pine or poplar, painted to match or stained for contrast.
Layout Tip
Install the shiplap horizontally and stop it about 18 inches above the counter. Place the ledges at a comfortable reach—around 12 to 14 inches above the countertop—so you can grab salt or oil while cooking without stretching. Leave a few inches of shiplap visible above the top ledge for a balanced look.
Shelf Styling Tip
- Keep the ledges clutter-free. Use uniform glass jars for dry spices, a small wooden salt cellar, and a single small succulent or herb pot. Rotate items seasonally to keep the display fresh.
- Avoid stacking items—each ledge should hold just two or three pieces for a clean, intentional look.
8. White Marble Slab with Hidden Outlet Strip
There's something effortlessly polished about a single slab of white marble stretching across your backsplash. No grout lines, no busy patterns—just a clean, uninterrupted surface that makes your kitchen feel both modern and timeless. The real genius here is tucking away an outlet strip behind a flip-up cover, so your toaster and coffee maker stay plugged in without cluttering the view.
It's a detail that blends storage-smart thinking with a look that's pure elegance.
A full slab backsplash is a bold choice, but white marble keeps it airy and bright. The hidden outlet strip means you don't have to sacrifice convenience for style—just flip the cover down when you want that seamless marble look. This idea works especially well in galley kitchens or open-plan spaces where every surface is on display.
Pair it with matte brass or chrome fixtures for a touch of warmth, and let the marble's natural veining be the only pattern in the room.
Best Materials
Go with a honed white marble for a soft, matte finish that hides fingerprints better than polished stone. Carrara or Calacatta marble are classic choices, but a quartzite slab offers similar beauty with more durability. Make sure the slab is cut to fit your exact backsplash area, including behind the stove, for a truly custom look.
Layout Tip
Plan the outlet strip location before the slab is installed. A horizontal strip under the upper cabinets works well for countertop appliances, while a vertical strip near the backsplash edge is handy for charging stations. Coordinate with your electrician to ensure the flip-up cover aligns perfectly with the slab cutout.
Finishing Touch
Add a thin brass or chrome trim along the slab's top edge where it meets the countertop. This small detail frames the marble and gives the installation a furniture-like feel. It also protects the slab edge from chips over time.
9. White Hexagon Tile with Hanging Herb Planter

Hexagon tiles bring a subtle honeycomb texture that feels modern but not cold. When paired with a hanging herb planter, the splashback becomes both a visual feature and a functional spot for fresh garnishes. This setup works especially well in kitchens where counter space is tight—you get storage without cluttering the worktop.
White hexagon tiles create a soft geometric pattern that catches light without overwhelming the room. Mounting a small magnetic or suction-cup herb planter directly on the tiles keeps basil, mint, or thyme within easy reach while cooking. The planter adds a pop of green that contrasts beautifully with the white backdrop, making the splashback feel alive and purposeful.
For best results, choose a planter with a slim profile so it doesn't protrude too far, and place it near the prep zone rather than over the stove to avoid heat damage. This idea blends storage and style seamlessly, turning an ordinary wall into a mini herb garden.
Best Materials
Glossy white ceramic hexagon tiles are ideal because they reflect light and are easy to wipe clean. For the planter, look for food-grade stainless steel or BPA-free plastic with a strong magnetic back—suction cups can lose grip over time. If your tiles are non-magnetic, a lightweight adhesive strip planter works just as well.
Layout Tip
Arrange the hexagon tiles in a brick-lay pattern for a classic honeycomb look, or go vertical for a more elongated effect. Leave a small gap between the planter and the countertop to avoid water splashes pooling. Position the planter at eye level so the herbs are easy to snip without bending.
Plant Styling Tip
Choose compact herbs like chives, oregano, or dwarf basil that stay bushy and don't outgrow the planter quickly. Rotate two or three herbs seasonally to keep the display fresh. A single trailing plant like variegated mint adds a soft cascade that softens the geometric tile pattern.
10. White Brick Tile with Spice Rack Niche
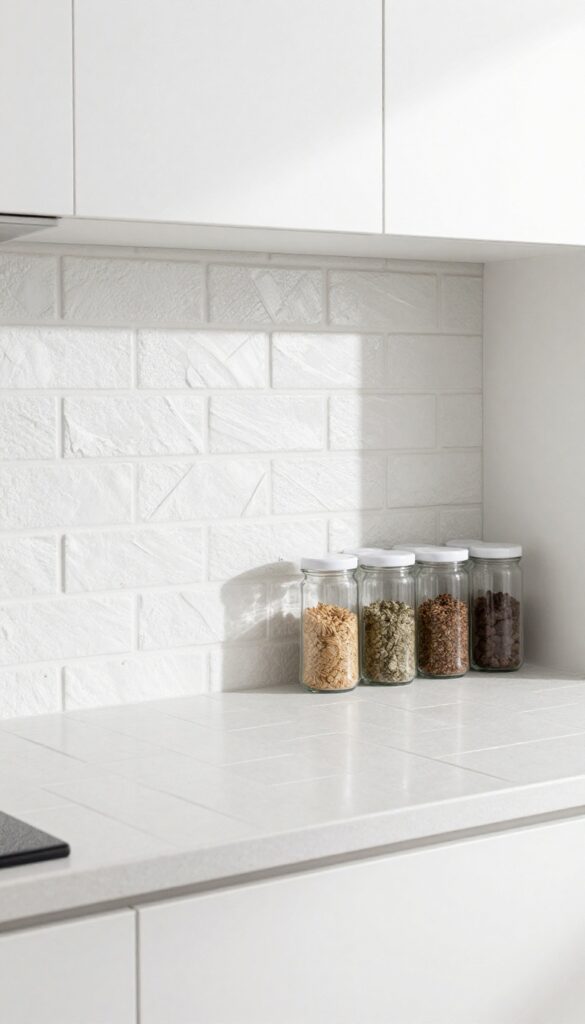
White brick tile brings a subtle industrial edge to your kitchen without going full loft. The textured surface catches light softly, making the wall feel alive. Adding a shallow niche for a spice rack turns an ordinary backsplash into a functional feature.
It keeps your most-used spices within arm's reach while freeing up counter space. The contrast between the rough brick and neat spice jars creates a practical, curated look.
White brick tiles have a timeless appeal that works with both modern and rustic kitchens. The key is to install them in a classic subway or herringbone pattern for added visual interest. The niche should be planned during tiling, set at a comfortable height between counter and upper cabinets.
Line the niche with the same tile or a complementary metal sheet for easy cleaning. Fill it with uniform spice jars or small bottles for a cohesive look. This setup is especially handy for avid cooks who want ingredients visible and organized.
Best Tile Patterns
A traditional running bond pattern keeps the look clean and understated. For more movement, try a herringbone or vertical stack. The white brick tile works well with dark grout to emphasize the individual tiles, or matching grout for a seamless wall.
Niche Placement Tips
Position the niche about 18 inches above the countertop so it's easy to reach while cooking. Make it deep enough to hold standard spice jars (around 4 inches) but not so deep that it becomes a dust collector. A width of 12 to 24 inches can hold 6 to 12 jars.
Styling The Spices
Use identical glass jars with white lids or cork tops for a uniform look. Arrange them by frequency of use or color. Add a small plant or a salt cellar on the counter below to tie the niche into the overall decor.
11. White Porcelain Panel with Fold-Down Table
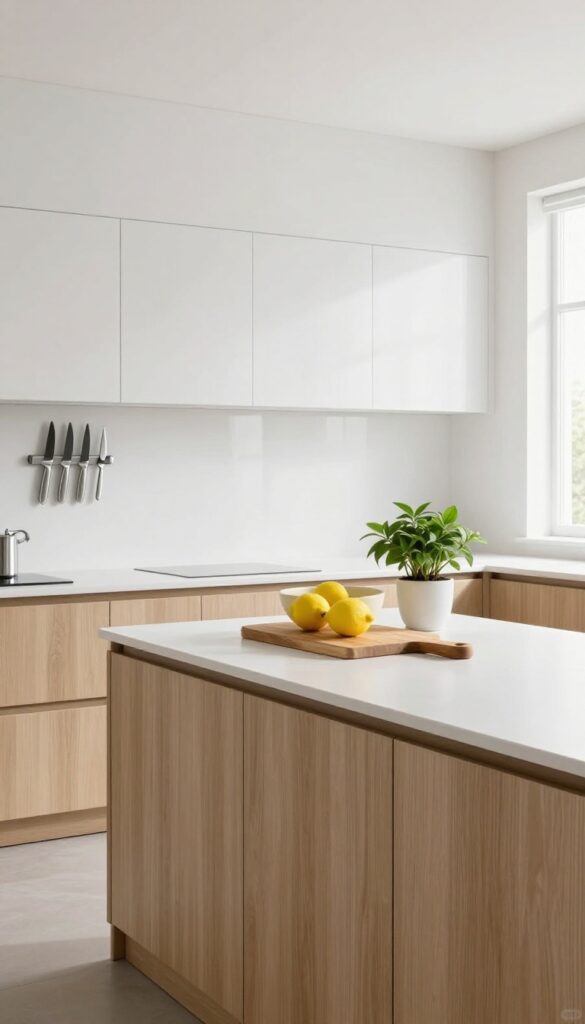
Large white porcelain panels create a seamless, ultra-clean backdrop that feels both modern and timeless. The real genius here is adding a fold-down table or shelf that tucks flat against the panel when not in use. It gives you extra prep space exactly when you need it, without cluttering your countertops or floor plan.
This idea works especially well in narrow kitchens or galley layouts where every inch counts. The white panel reflects light, making the space feel bigger, while the fold-down surface can double as a breakfast bar or a spot to set down groceries. Choose a matte finish for a softer look or high-gloss for easy wipe-downs.
Best Materials
Porcelain panels are durable, heat-resistant, and non-porous, so stains and splatters wipe right off. Look for rectified edges to minimize grout lines, creating that seamless wall effect. A thickness of 6mm or more ensures stability when mounting the fold-down hardware.
Storage Tip
Mount the fold-down table at a height that works as both prep space and casual seating. Add a magnetic knife strip or a small shelf above it to keep utensils and spices within reach. When the table is folded up, the wall stays clean and uncluttered.
Small-space Fix
In a tiny kitchen, this setup can replace a bulky island. Pair it with bar stools that slide completely under the folded table. The white porcelain backdrop helps the area feel airy, and you can add a pop of color with a fruit bowl or a small plant on the shelf.
FAQ
What is the best white splashback for a small kitchen?
Glossy white glass or large-format porcelain panels reflect light and minimize grout lines, making a small kitchen feel larger and brighter.
How can I add storage to a white splashback without making it look cluttered?
Use built-in niches, narrow ledges, or magnetic strips to keep items organized and off the counter. Stick to a few functional pieces to maintain a clean look.
Are white splashbacks hard to keep clean?
Not if you choose the right material. Glossy tile, glass, and sealed stone are easy to wipe down. Matte finishes may require a bit more care but still clean well.
Can I install a white splashback myself?
Peel-and-stick tile or beadboard panels are DIY-friendly. For glass or stone slabs, professional installation is recommended for best results.
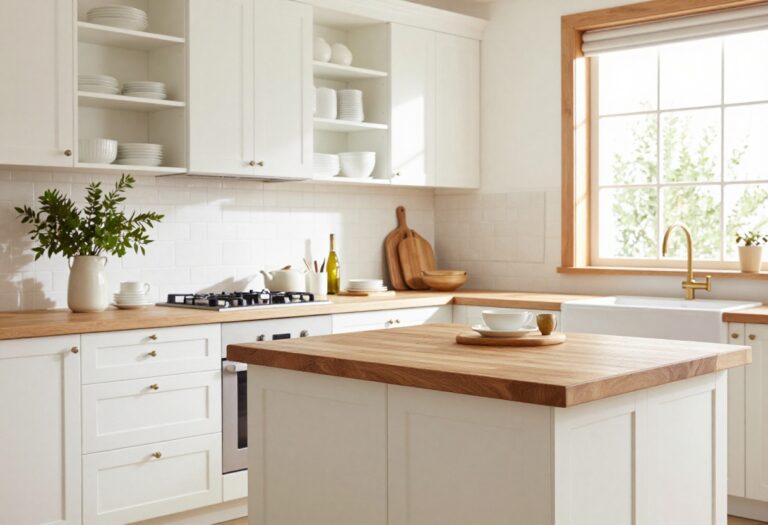
What backsplash color goes with white cabinets?
White on white creates a seamless, airy look. You can also add subtle texture or pattern with tile shapes like herringbone or hexagon for contrast.
Conclusion
A white kitchen splashback doesn't have to be just a backdrop. With a little planning, it can become a hardworking part of your kitchen that keeps essentials close and surfaces tidy.
Whether you choose tile, glass, or wood, each idea here proves that bright and practical can go hand in hand. Pick the one that fits your cooking habits and enjoy a kitchen that feels both crisp and capable.