15 Small Kitchen and Living Room Ideas for Open Homes
Open-concept living sounds great in theory, but when your kitchen and living room share one footprint, making both areas feel distinct yet cohesive can be tricky. The good news?
You don't need a big budget or a complete overhaul to create a space that's both functional and inviting. With a few smart swaps and clever styling tricks, you can define zones, add warmth, and keep everything looking polished.
Here are 15 budget-friendly ideas that prove small spaces can still feel stylish and practical.
1. Use a Rug to Define the Living Area
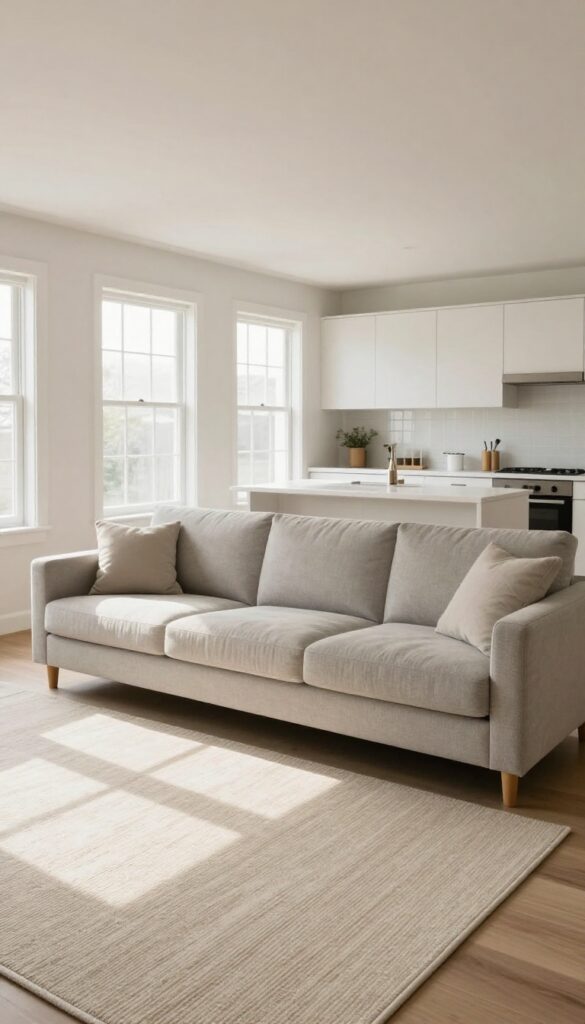
In an open-concept space, the line between kitchen and living room can blur fast. A rug is the easiest way to carve out a distinct seating zone without building a single wall. It anchors your sofa and chairs, adds warmth underfoot, and instantly makes the area feel intentional.
Plus, a well-chosen rug can pull the whole room together without costing a fortune.
A rug acts like a visual boundary, telling your eye where the living room ends and the kitchen begins. For budget-friendly results, stick with low-pile options in neutral tones or subtle patterns—they hide crumbs better and vacuum easily. Make sure the rug is large enough that at least the front legs of your sofa and chairs sit on it; a too-small rug can make the space feel choppy.
If your kitchen floor is hard tile or wood, the rug also adds a softness that makes the living area feel cozier and more inviting.
Best Colors And Patterns
Neutral rugs in beige, gray, or soft cream blend seamlessly and keep the space feeling open. If you want a pattern, choose something low-contrast like a subtle geometric or faded tribal print—it adds interest without overwhelming the room. Darker tones like charcoal or navy work well if you have pets or kids, as they hide stains better.
Size And Placement Tips
- Measure your seating area before buying. A 5×8 or 6×9 rug works for most small living zones, but go bigger if you can. Place the rug so it extends about 6–12 inches beyond the sides of your sofa.
- In a narrow open layout, orient the rug parallel to the kitchen to create a clear lane between the two zones.
Budget-Friendly Swap
- Skip expensive wool or silk rugs. Instead, look for polypropylene or cotton flatweaves that mimic the look of natural fibers at a fraction of the cost. Indoor-outdoor rugs are another great option—they're durable, easy to clean, and come in stylish patterns.
- You can even layer a smaller, softer rug on top for extra coziness.
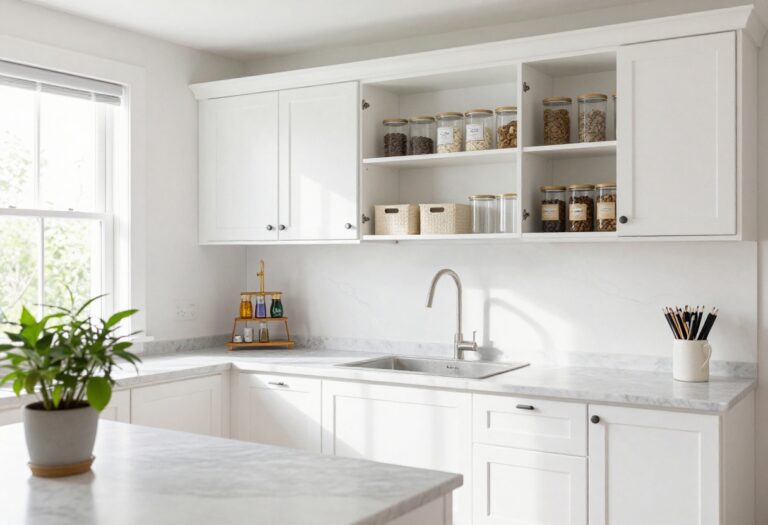
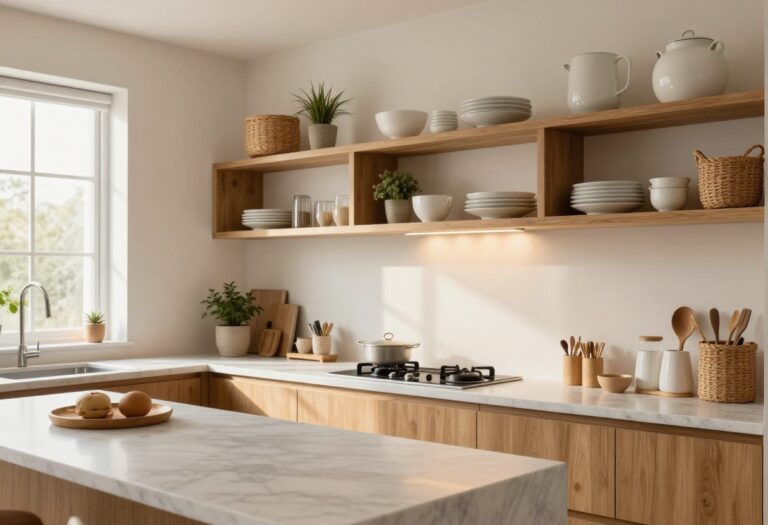
2. Swap Upper Cabinets for Open Shelving
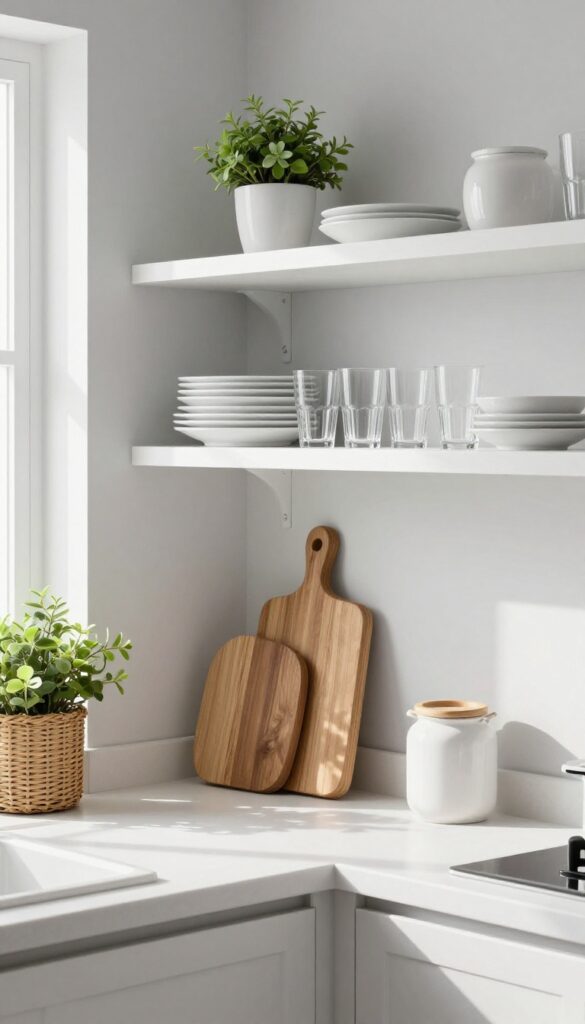
Removing a few upper cabinet doors or installing inexpensive floating shelves instantly transforms a cramped kitchen into an open, breathable space. This swap creates a casual, airy feel while keeping your everyday dishes and glassware within easy reach. It’s a budget-friendly way to make a small kitchen feel larger without a full renovation.
Open shelving forces you to curate what you display, which naturally reduces clutter. Stick to a cohesive color palette—white plates, clear glasses, and a few neutral ceramics—to keep the look intentional. Mix in a couple of plants or woven baskets for texture.
This idea works best for dishes you use daily; store rarely used items in lower cabinets or a pantry.
Best Materials
Floating shelves in solid wood (like pine or oak) add warmth, while metal brackets give an industrial edge. For a seamless look, paint shelves the same color as your walls. If you’re renting, peel-and-stick shelf brackets are a damage-free option.
Shelf Styling Tip
Group items in odd numbers and vary heights: stack plates on a stand, lean a cutting board, and place a small plant or jar of utensils. Leave about 20% of the shelf empty to avoid a crowded look.
Budget-Friendly Swap
Instead of buying new shelves, repurpose an old wooden crate or a sturdy ladder. Sand it down, add a coat of paint, and mount it horizontally. This costs under $20 and adds rustic charm.
3. Add a Slim Console Table Behind the Sofa
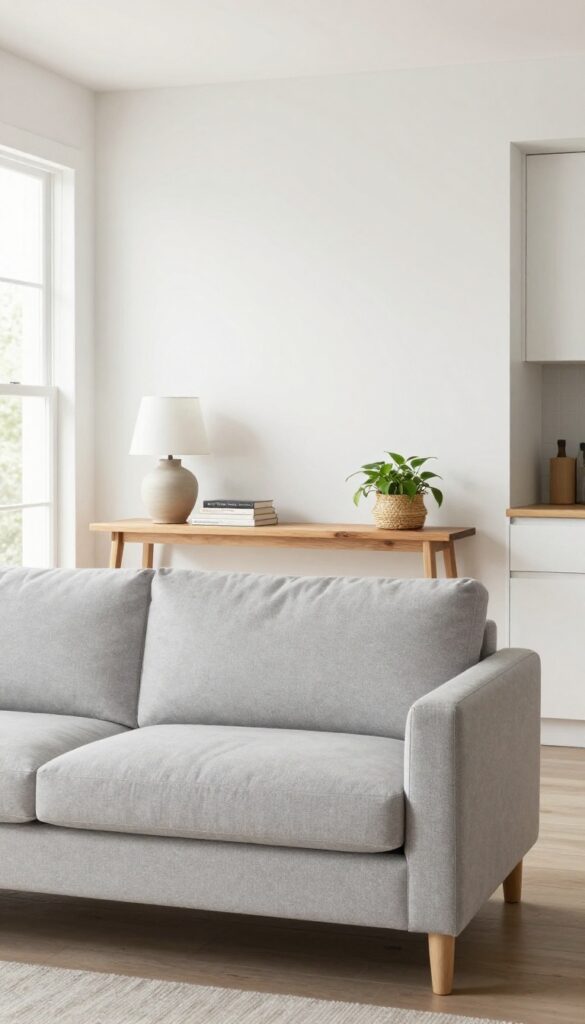
If your living area flows right into the kitchen, a slim console table behind the sofa can work wonders. It defines the seating zone without closing off the space, and it’s a perfect landing spot for a lamp, a stack of books, or a trailing plant. Best of all, it doesn’t eat up floor space—just a few inches behind the couch is all you need.
A narrow console table behind the sofa is one of the most budget-friendly ways to carve out separate zones in an open-plan room. Look for a piece that’s about the same length as your couch or slightly shorter, and no deeper than 12 to 14 inches. This leaves enough room to walk behind it while still giving you a surface to style.
Use it to hold a couple of table lamps for cozy evening lighting, a tray for remote controls and coasters, or a few woven baskets for extra storage. The trick is to keep the styling low and intentional so the table doesn’t feel like a barrier. A pair of matching lamps, a small stack of books, and a single plant create a balanced vignette that reads as deliberate, not cluttered.
Best Materials For A Budget Pick
- You don’t need to spend a lot to get a good-looking console table. Look for options in solid pine or MDF with a wood veneer—these are sturdy, easy to paint, and often under $150. Metal frames with a glass or wood top are another affordable choice and add a light, airy feel.
- If you’re handy, a simple DIY version using a butcher block countertop on hairpin legs costs even less and gives you total control over the size and finish.
Layout Tip For Open Spaces
Place the console table so it’s centered behind the sofa, with at least 18 inches of clearance between the table and the wall or kitchen island. This keeps the walkway open and prevents the table from blocking traffic. If your sofa is against a kitchen counter, slide the table just behind the couch so it extends slightly past the sofa ends—this visually anchors the living area without overlapping the kitchen zone.
Styling For A Practical Look
- Keep the surface simple: one lamp on each end, a small tray in the middle for everyday items, and a low plant or a stack of books. Use baskets underneath for blankets, magazines, or kids’ toys. Stick to a neutral color palette—white, black, or natural wood—so the table blends in rather than competing with the sofa.
- A runner or a slim vase can add a pop of color without taking up too much room.
4. Paint an Accent Wall in the Dining Nook
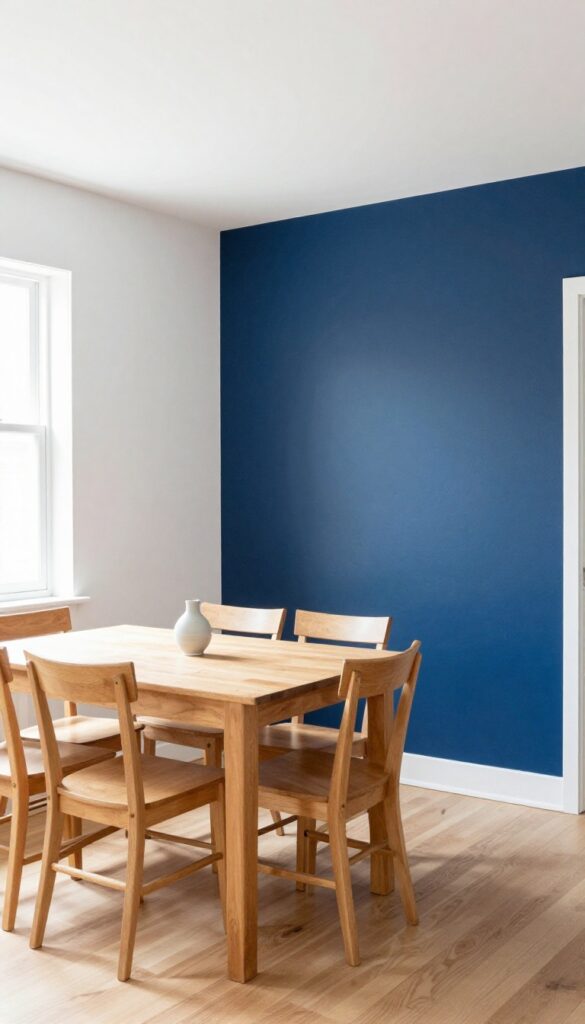
A single wall can completely change how a room feels. In an open-concept home, the dining nook often blends into the kitchen and living area, making it easy to overlook. Painting one wall a bold color instantly carves out a dedicated eating zone without adding any furniture or dividers.
It’s a budget-friendly move that brings personality and definition to the space.
Choosing a deep navy, forest green, or even a warm terracotta can make the dining area feel intentional and cozy. The key is picking a wall that naturally frames the table—usually the one behind it or to the side. This trick works especially well in small open layouts because it creates visual separation without blocking light or sightlines.
Plus, paint is one of the cheapest ways to make a big impact. You can change it down the road if your style evolves, so there’s little risk.
Best Colors For A Small Space
- Stick with saturated but not dark shades if your nook lacks natural light. Deep teal, charcoal, or even a rich mustard add drama without shrinking the room. If the nook gets good sunlight, you can go darker—think navy or slate.
- Always test a sample on the wall first and observe it at different times of day.
Budget-friendly Paint Swaps
Save money by using a high-quality paint in a standard finish (like eggshell or satin) instead of expensive designer brands. Many stores offer mistint or clearance paint for a fraction of the price. You only need one gallon for a small accent wall, so this is a low-cost project that delivers high visual return.
Styling The Accent Wall
- Let the painted wall be the star. Keep the table and chairs neutral or in complementary tones. Add a simple shelf with a few plants or a small piece of art to tie the look together.
- Avoid cluttering the wall with too many items—the color itself does the heavy lifting.
5. Hang a Large Mirror to Reflect Light
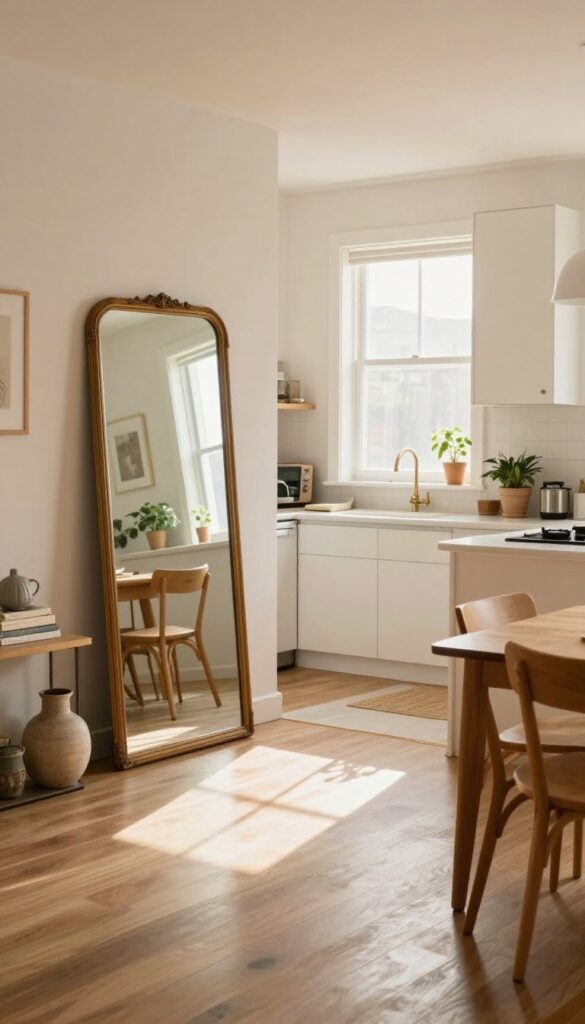
Light is everything in an open-concept space, but not every home gets flooded with natural sun. A large mirror tricks the eye and bounces light around the room, making the whole area feel airier and more expansive. Thrifting a vintage mirror or framing a simple sheet of mirror glass keeps the project under $50 and adds character without breaking the bank.
A big mirror on one wall makes the entire open area feel larger and brighter. Thrift one or buy a simple frame and DIY the look for under $50. Position it opposite a window to double the natural light and create the illusion of a second window.
In a small kitchen-living room combo, this trick visually separates zones while keeping the space cohesive.
Best Placement
Hang the mirror on the wall perpendicular to your main window, not directly across from it. This catches indirect light and spreads it evenly without harsh glare. In an open layout, place it near the dining table or above a console to reflect both the kitchen and living areas.
Budget-Friendly Swap
- Skip expensive framed mirrors. Look for an old window frame at a flea market or salvage yard, then have a glass shop cut a mirror to fit. Or buy a large frameless mirror tile and wrap it in thin wood trim for a custom look under $50.
- Command strips work for lightweight mirrors if you're renting.
Styling Tip
Lean the mirror against the wall instead of hanging it for a casual, collected vibe. Pair it with a low plant or stack of books at the base. The reflection will make your decor look twice as abundant and add depth to a narrow room.
6. Use a Rolling Cart as a Mobile Kitchen Island
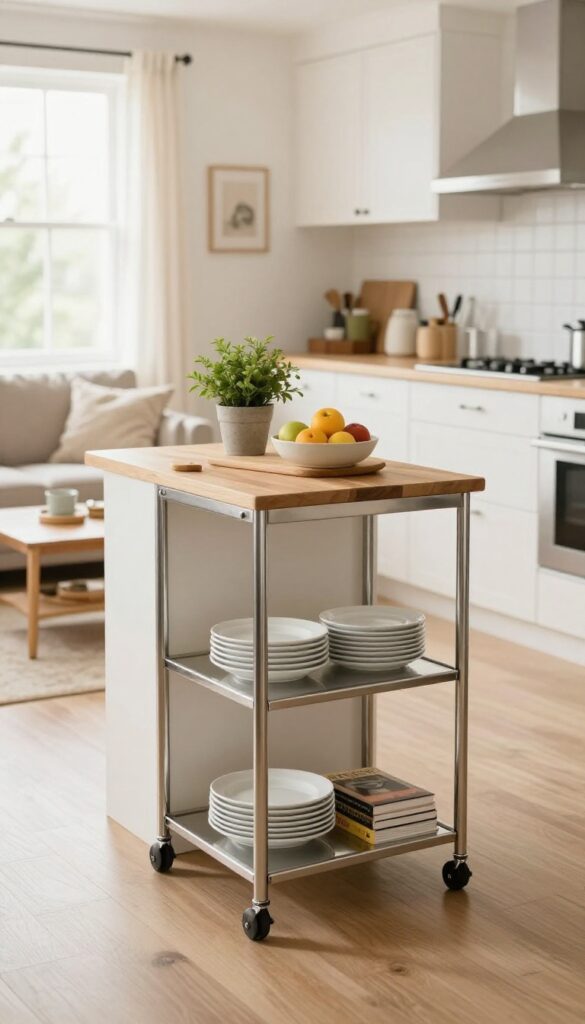
A rolling cart is one of the most versatile pieces you can add to a small open-plan home. It gives you extra counter space when you need it and tucks away neatly when you don't. Stainless steel options feel modern and industrial, while wooden carts bring warmth and a farmhouse touch.
Either way, you get a movable island that adapts to your cooking and entertaining needs.
In a compact kitchen-living room combo, every square inch counts. A rolling cart acts as a flexible workhorse—use it for meal prep, as a serving station during parties, or even as a coffee bar in the morning. When guests arrive, wheel it into the living area to hold drinks and snacks.
The key is choosing a cart with enough surface area and storage shelves or drawers to keep essentials organized. Look for one with locking wheels so it stays put when you need stability.
Best Materials For Longevity
Stainless steel carts are durable, easy to clean, and resist rust—perfect for a kitchen where spills happen. Wooden carts, especially those with butcher-block tops, offer a warm, natural look and can double as a cutting surface. For a budget-friendly option, consider a metal cart with a wood-look top; it gives you the best of both worlds without breaking the bank.
Layout And Placement Tips
- Keep your rolling cart near the main kitchen counter so it feels like an extension of your workspace. When not in use, slide it against a wall or into a corner to keep pathways clear. If you have a peninsula or island, position the cart on the opposite side to create a U-shaped work zone.
- This setup streamlines cooking and makes the space feel intentionally designed.
Styling Your Cart For Dual Purpose
- Style the top shelf with a small plant, a salt cellar, and a wooden spoon holder for a lived-in look. Use lower shelves for storing cookbooks, extra dish towels, or a basket of produce. To keep it from looking cluttered, limit items to three or four functional pieces.
- This way, the cart remains practical and visually appealing, whether it's in kitchen mode or living room mode.
7. Layer Lighting with Floor and Table Lamps
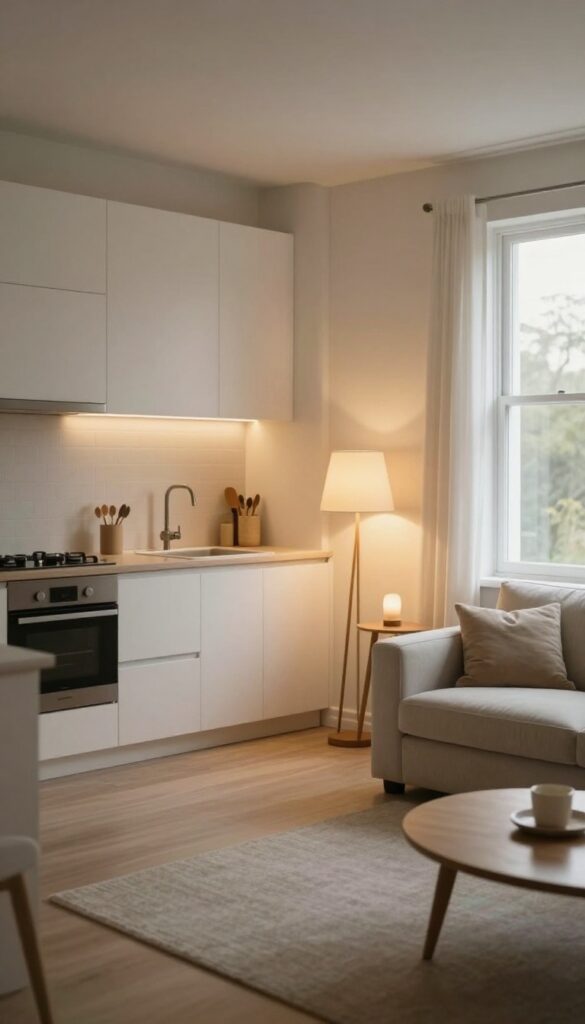
Overhead lights can feel harsh and flatten the cozy vibe you're going for in an open kitchen-living room. Instead of relying on that single ceiling fixture, bring in a mix of floor and table lamps to create warm pockets of light. This layered approach not only makes the space feel more inviting but also helps define each zone without needing walls.
Skip the harsh overheads and place a floor lamp near the sofa and a small table lamp on a side table. Warm bulbs create a cozy glow that unifies both zones. This budget-friendly trick instantly adds depth and makes the room feel larger and more intentional.
Best Bulb Temperature
Stick with bulbs in the 2700K to 3000K range for a soft, warm glow that flatters skin and makes the room feel snug. Avoid cool white or daylight bulbs—they can make the space feel sterile and uninviting.
Placement Tips
Position a floor lamp next to the sofa to create a reading nook or conversational area. Place a table lamp on a console table or sideboard near the kitchen side to visually separate the zones. Keep lamp shades opaque or semi-sheer to diffuse light evenly.
Budget-Friendly Swap
Thrift store lamps are easy to update with a fresh coat of spray paint or a new shade. Look for metal or ceramic bases in neutral tones like black, brass, or cream—they blend seamlessly with most decor styles and cost a fraction of new ones.
8. Incorporate Greenery with Low-Maintenance Plants
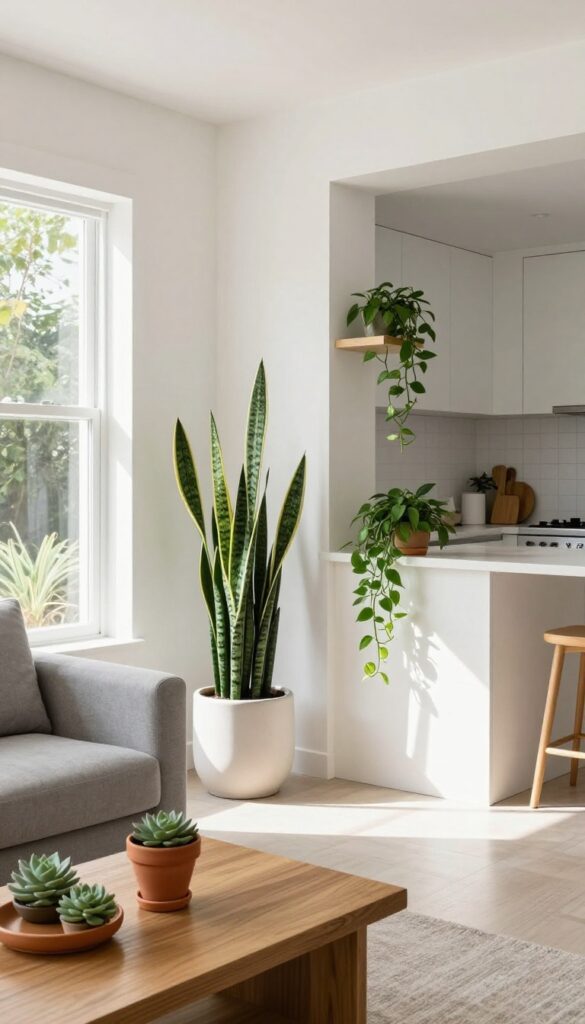
Plants are one of the easiest ways to make a small open space feel alive and inviting. They add color, texture, and a sense of calm without taking up much floor area. The trick is choosing varieties that thrive on neglect—so you get the look without the stress.
Snake plants, pothos, and ZZ plants are practically unkillable. Place a tall snake plant in a corner to draw the eye up and make the ceiling feel higher. Trail a pothos from a high shelf or atop the fridge for a soft, cascading effect.
Group a few small pots on the coffee table or kitchen counter for a layered, collected look. Stick to neutral ceramic pots in matte white, terracotta, or soft gray to keep the vibe clean and modern. This greenery instantly freshens the air and the aesthetic, all for under $50.
Best Spots For Plants
- In a small open layout, every surface is an opportunity. Try a slim shelf above the sink or window for trailing plants. A corner floor plant next to the sofa fills empty space without clutter.
- Even the top of a bookshelf or a windowsill ledge works. Just make sure each spot gets indirect light—most low-maintenance plants prefer that.
Budget-Friendly Swap
- Skip expensive planters and repurpose what you already have. Clean tin cans, mason jars, or thrifted teacups make charming pots. Just add a drainage hole or use them as cachepots with a plastic nursery pot inside.
- This keeps costs near zero while adding personality.
Styling Tip
- Mix heights and leaf shapes for visual interest. Pair a tall snake plant with a bushy pothos and a small succulent. Use a plant stand or stack a few books to elevate shorter pots.
- This creates a mini garden vignette that feels intentional, not random.
9. Install Peel-and-Stick Backsplash in the Kitchen

A fresh backsplash can completely change the feel of your kitchen, but the cost and hassle of traditional tile often stop people from making the upgrade. Peel-and-stick tiles solve that problem beautifully. They go right over your existing surface, no grout or special tools required, and they look surprisingly high-end for the price.
For an open-concept home, this is an especially smart move because the kitchen backsplash becomes part of the visual flow between rooms. A quick update here can tie the whole space together without touching the living area.
Peel-and-stick backsplash tiles are a renter-friendly, budget-savvy way to add texture and color to your kitchen. They mimic materials like subway tile, marble, or even herringbone patterns, so you get a designer look without the renovation. Installation takes an afternoon, and if you ever want to change it, they peel off cleanly.
This makes them perfect for open homes where the kitchen is always on display. Choose a style that complements your countertops and cabinets, and you'll instantly elevate the entire room.
Best Materials And Finishes
- Look for vinyl or PVC tiles with a strong adhesive backing. Many options have a glossy finish that reflects light and makes a small kitchen feel bigger. For a more natural look, matte finishes hide fingerprints and water spots better.
- Stick with neutral tones like white, gray, or beige for a timeless feel, or try a soft sage green for a subtle pop of color that connects with living room plants or textiles.
Installation Tips For A Seamless Look
- Start at the center of your backsplash area and work outward so the pattern stays balanced. Use a level to keep the first row straight, and press firmly with a smoothing tool to remove air bubbles. For outlets and switches, cut the tile slightly oversized and trim with a utility knife after placement.
- Let the adhesive cure for 24 hours before exposing the tiles to steam or splashes.
Budget-Friendly Swap
- If you want the look of expensive marble or handmade tile, peel-and-stick is the most affordable route. A 10-square-foot pack often costs under $50, and you can cover a standard backsplash for around $100. Compare that to traditional tile installation which can run several hundred dollars or more.
- Plus, you can always change it later if your style evolves.
10. Create a Gallery Wall That Bridges Both Zones
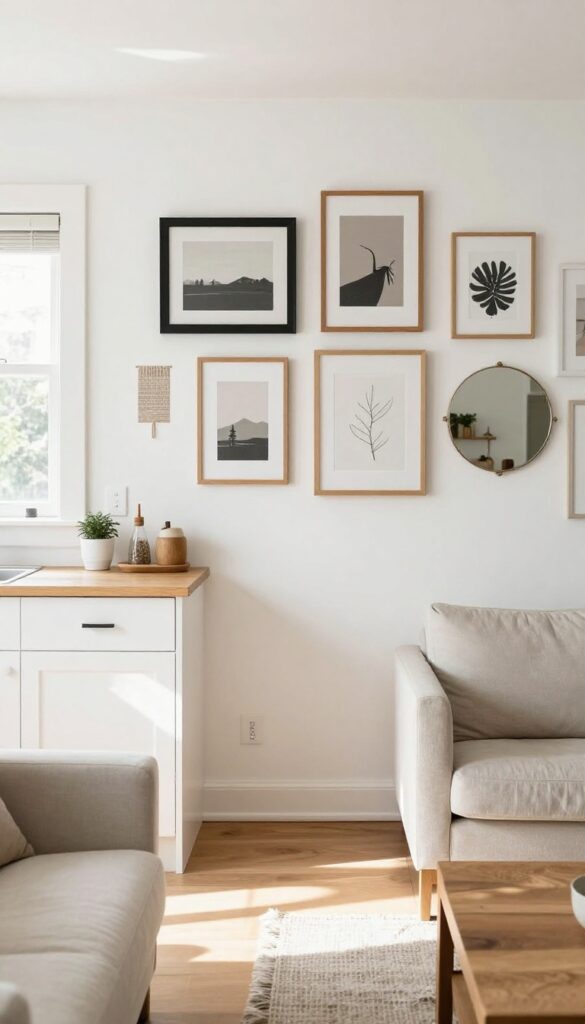
A gallery wall is one of the easiest ways to tie an open kitchen and living room together without spending much. By choosing frames and art that flow from one side to the other, you create a visual bridge that makes the whole space feel intentional. The trick is to keep it relaxed—matching frames for cohesion, but varying the sizes and spacing so it doesn't look too stiff.
When your kitchen and living room share one open area, a gallery wall can act like a design handshake between the two zones. Start by picking a color scheme for your frames—black, white, or natural wood are budget-friendly and easy to find at thrift stores or discount home shops. Then gather a mix of art: a few small prints, a larger piece, maybe a mirror or a textile.
Arrange them on the floor first to test the layout, keeping the overall shape loose and organic. Once you're happy, hang them starting from the center and working outward. The result is a cohesive look that draws the eye across both spaces, making the whole room feel larger and more connected.
Budget-friendly Frame Swap
- You don't need expensive art to make an impact. Hit up garage sales or online marketplaces for secondhand frames, then spray-paint them all the same color for instant unity. Print free digital art from sites like Unsplash or use pages from old books or maps.
- A cohesive frame color makes even mismatched art look like a curated collection.
Layout Tip: Keep It Flowing
- Arrange your gallery so it spans across the visual divide between kitchen and living room. For example, start a cluster near the kitchen counter and let it trail into the living area above the sofa. Use similar spacing between frames—about two to three inches apart—to keep the eye moving smoothly.
- Avoid placing all the art in one zone; the bridge effect only works if the gallery actually crosses both spaces.
Finishing Touch: Add A Shelf
For extra flexibility, install a long, narrow shelf along the wall where the two zones meet. Lean a few frames on it and swap them out whenever you want. This approach is even more budget-friendly because you only need a few pieces, and it adds a casual, lived-in feel that suits a practical, stylish home.
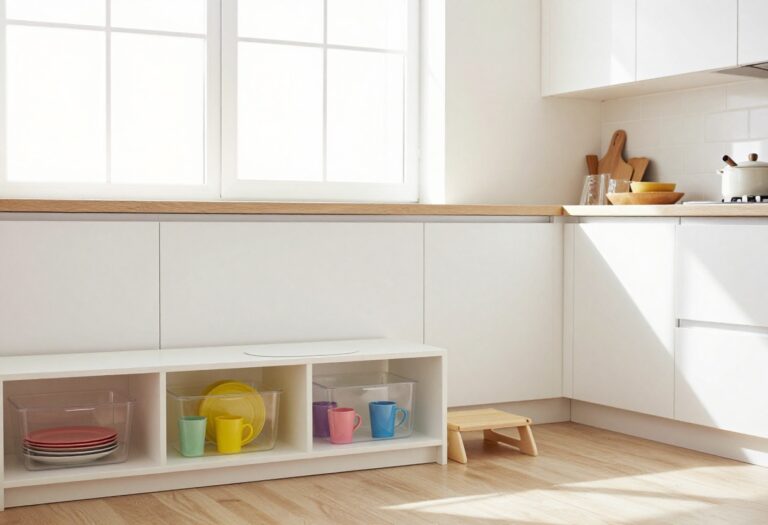
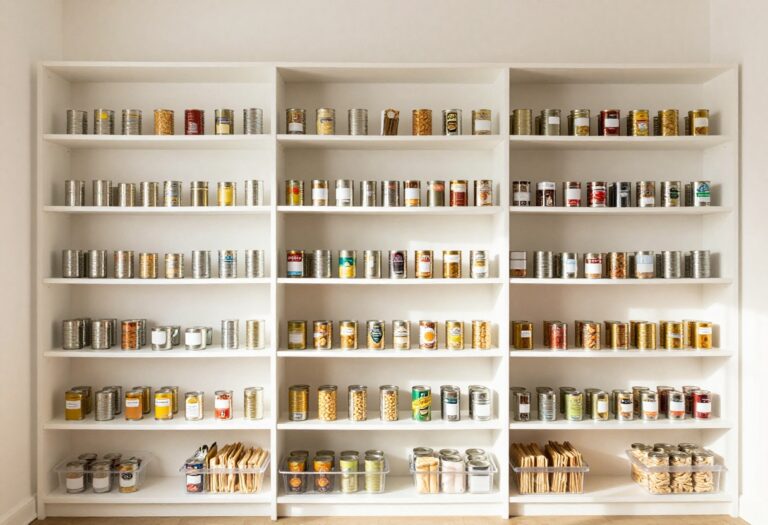
11. Add Baskets for Stylish Storage
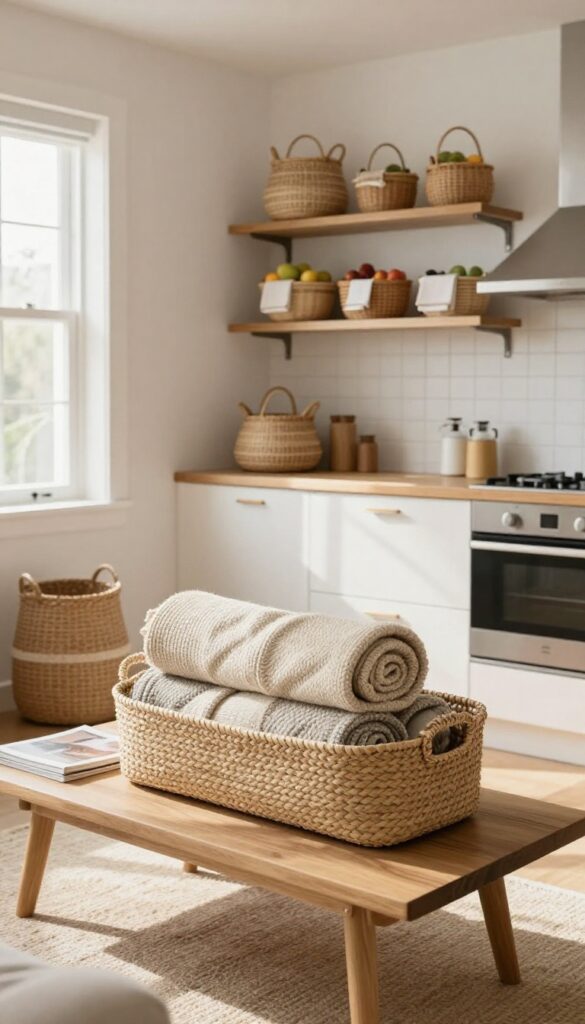
Baskets are one of those decor pieces that do double duty without trying too hard. They hide the everyday mess—remotes, mail, throw blankets—while adding warmth and texture to your space. In an open-concept home where your kitchen and living room share one sightline, baskets keep things looking tidy without feeling sterile.
They’re also budget-friendly, so you can stock up without guilt.
Woven baskets are a lifesaver when you need to stash clutter fast, especially in a combined kitchen-living area where every surface is on display. Place a large rectangular basket under your coffee table to corral remotes, coasters, and magazines. Use smaller round baskets on open kitchen shelves to hold fruit, tea towels, or extra napkins.
The natural texture of seagrass, rattan, or water hyacinth softens the hard edges of furniture and adds a cozy, organic feel. For a polished look, stick to one or two tones—like all neutral raffia or all dark brown bamboo—so the baskets feel intentional, not random.
Best Materials For Everyday Use
- Seagrass and rattan are durable, lightweight, and easy to clean—just a quick vacuum or a wipe with a damp cloth. Water hyacinth is sturdier and holds its shape well, making it great for heavier items like extra throws or cookbooks. If you want something more modern, look for woven rope or cotton baskets in solid colors.
- They still add texture but feel a bit cleaner and more minimalist.
Where To Place Them
- Under the coffee table is the obvious spot, but don’t stop there. Tuck a tall basket in a corner to hold throw blankets or yoga mats. On open kitchen shelves, use baskets to group similar items—like all your tea bags and sweeteners in one, or snack packs in another.
- A small basket on the kitchen counter can hold fruit or garlic, keeping it accessible but contained. In the living area, a pair of matching baskets on either side of the media console can hide cables, gaming controllers, or kids’ toys.
Budget-Friendly Swap
- You don’t need to spend a lot. Thrift stores and discount home shops often have great woven baskets for under $10. If the color is off, spray paint them in a matte neutral like cream, taupe, or charcoal.
- Another cheap trick: line a plain basket with a fabric liner in a fun pattern to add a pop of color. That way you get the texture of the basket plus a custom look for pennies.
12. Choose a Cohesive Color Palette
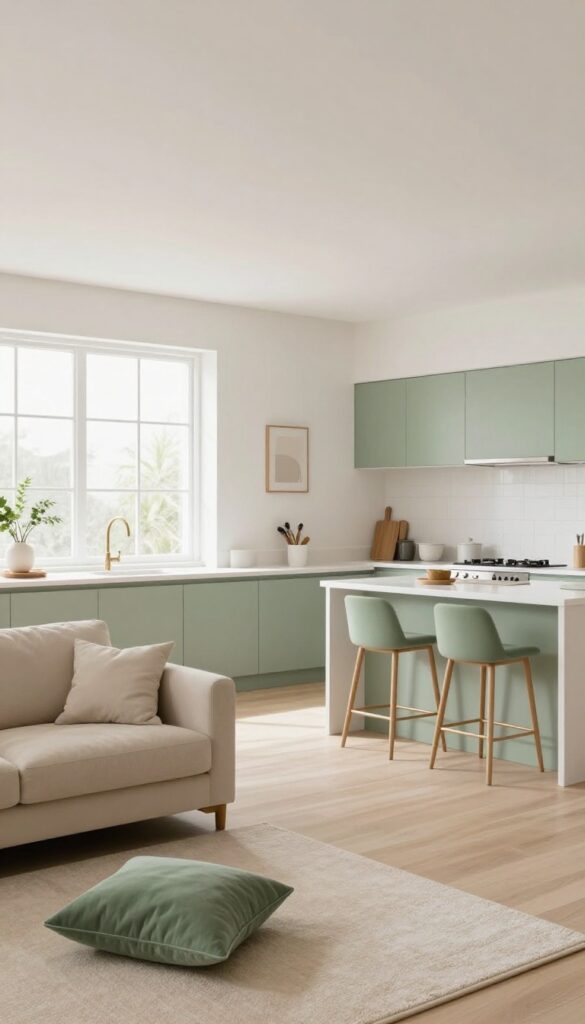
A unified color scheme is the easiest way to make an open kitchen and living room feel like one intentional space, not two separate rooms that happen to be connected. By limiting yourself to two or three complementary colors—like soft white, warm beige, and a muted green—you create visual flow without everything matching too perfectly. This approach keeps the look pulled together while still allowing each area to have its own personality.
When you're working with a tight budget, paint is your best friend. You don't need new furniture or expensive decor to tie the rooms together—just a consistent color story. Start by choosing one neutral base (like a warm white or light greige) for the walls in both areas.
Then pick one or two accent colors that repeat in each zone through pillows, curtains, rugs, or kitchen towels. The goal is harmony, not uniformity. A muted sage green on the living room throw pillows and the same shade on kitchen bar stools creates a subtle bridge between the two spaces.
Keep the palette simple: too many colors can feel chaotic in an open layout. Stick to a neutral base, one mid-tone color, and one accent shade that pops just a little.
Best Colors For Open Layouts
- Earthy neutrals work beautifully for open kitchens and living rooms because they feel warm and inviting without competing for attention. Think creamy whites, soft taupes, warm grays, and muted greens or blues. Avoid stark whites or very dark colors unless you have abundant natural light—they can make a small open space feel flat or closed in.
- A palette of three colors is ideal: a light base for walls, a medium tone for larger furniture or cabinetry, and a small accent color for decor pieces.
Budget-Friendly Swap
- You don't need to repaint everything to create a cohesive palette. Instead, use accessories to introduce your chosen colors. Swap out throw pillow covers, add a new rug, or change kitchen towel sets.
- These small updates cost less than a gallon of paint and can be done in an afternoon. Look for coordinating items at discount home stores or online marketplaces—mixing high and low pieces keeps the look personal and affordable.
Finishing Touch
To really seal the cohesive look, repeat your accent color in a few unexpected places. A vase on the kitchen counter in the same shade as the living room artwork, or a stack of books on the coffee table that pick up the kitchen's wall color. These tiny visual echoes make the whole space feel thoughtfully designed without spending much money.
13. Use Curtains to Soften the Space
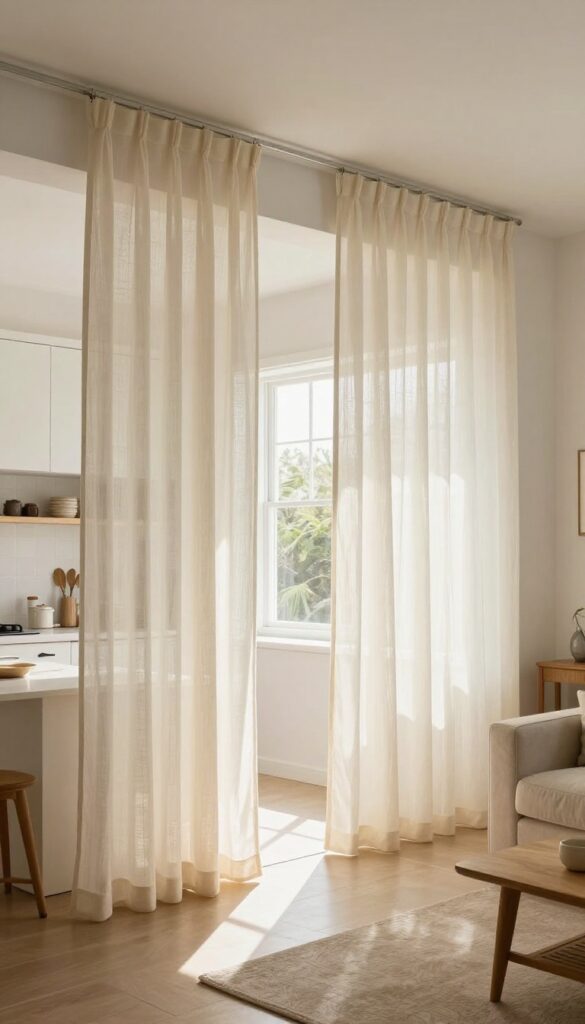
In an open-concept home, the kitchen and living room can sometimes feel like they’re competing for attention. Hard surfaces, open shelving, and sleek appliances add function but can also make the space feel cold or echoey. That’s where curtains come in—they’re one of the easiest ways to introduce softness, texture, and a sense of separation without building a wall.
Floor-length panels hung on a simple tension rod can visually define the cooking zone while keeping the overall layout airy and connected.
Curtains do more than just cover windows. In an open layout, they can act as a flexible room divider, soften harsh lines, and absorb sound. The trick is to choose fabrics that feel light and airy—think linen, cotton, or sheer blends—so they don’t block light or make the space feel smaller.
Hang them from ceiling height to draw the eye upward, which makes both rooms feel taller. For a budget-friendly approach, use a tension rod inside a doorway or between two walls to create a makeshift partition. This works especially well if your kitchen and living areas share a wide opening.
Keep the color palette neutral—white, cream, or soft gray—to maintain a cohesive flow. If you want a pop of color, go for muted earth tones like sage or terracotta that tie into your existing decor. The result is a softer, more inviting space that feels intentionally styled, not cluttered.
Best Fabrics For A Soft Look
- Sheer linen or cotton blends are your best bet. They let natural light filter through while adding a gentle, breezy texture. If you need more privacy or want to block out harsh afternoon sun, opt for a double-rod setup: sheers on the inner rod and heavier drapes on the outer one.
- For a truly budget-friendly option, look for ready-made curtain panels at big-box stores—they often come in neutral tones and standard lengths that work with tension rods.
Placement Tips For Open Layouts
- Hang curtains on a tension rod placed between the kitchen counter and the living area to create a soft boundary. Alternatively, mount a rod across a wide opening that connects the two rooms. Keep the panels pulled to one side when you want an open feel, and draw them closed for a cozier, more defined space.
- Make sure the rod extends a few inches beyond the opening so the curtains don’t block the passage when open.
Budget-Friendly Swap
- Skip expensive custom drapes and use flat bed sheets or drop cloths instead. Hem them with fabric glue or iron-on tape for a no-sew solution. Choose a neutral color and hang them with clip rings on a tension rod.
- This gives you the same soft, flowing effect for a fraction of the cost. You can also swap them out seasonally for a quick refresh.
14. Incorporate Multi-Functional Furniture
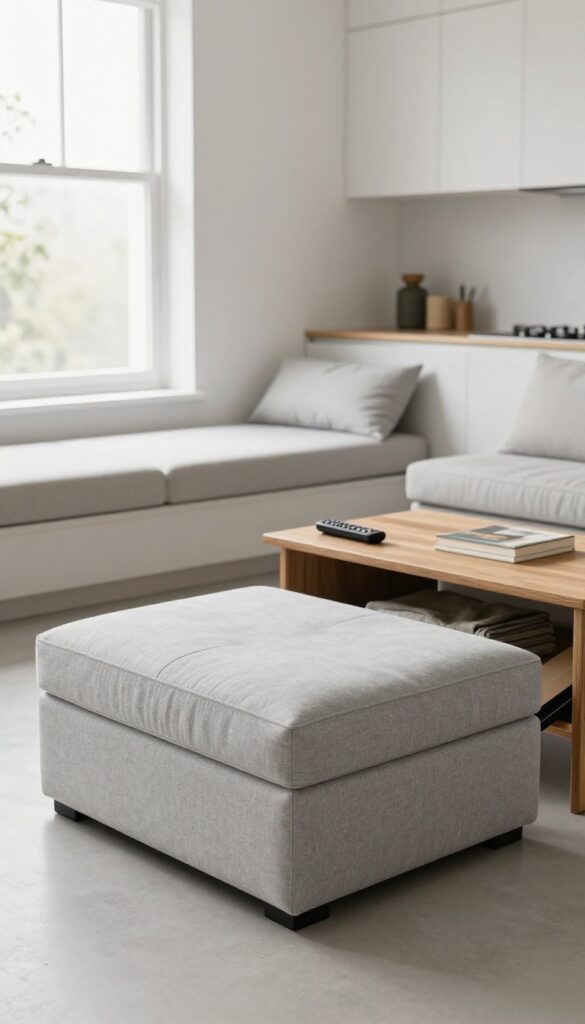
When every square inch counts, furniture that pulls double duty is a game-changer. An ottoman that hides blankets, a coffee table with lift-top storage, or a bench that works as seating and shoe storage can transform how your small space functions. The trick is choosing pieces that look intentional, not like you're just cramming in extra storage.
Multi-functional furniture is the secret weapon of small-space living. It lets you keep your home clutter-free without sacrificing style. The key is to look for pieces that blend seamlessly with your decor while offering hidden storage or convertible features.
A storage ottoman can serve as a footrest, extra seating, and a place to stash remotes or throws. A nesting coffee table provides surface space when you need it and tucks away when you don't. A bench with a flip-top lid or built-in cubbies works wonders in an entryway or even a kitchen nook.
These pieces save both space and money since you're buying one item that does the job of two or three.
Best Materials For Durability
- Look for solid wood frames or high-quality plywood for longevity. Upholstered pieces in performance fabrics like microfiber or Crypton resist stains and wear. For storage ottomans, a tufted top adds a polished look, while a leather or faux leather finish is easy to wipe clean.
- In high-traffic areas, opt for darker colors or patterns that hide dirt.
Layout Tip: Keep It Flexible
- Place a storage ottoman on casters so you can easily move it around. Use a nesting coffee table to create more floor space when you need it for yoga or guests. A bench with storage can double as a dining banquette or a window seat.
- The goal is to keep the layout adaptable so your room can shift with your needs.
Budget-Friendly Swap
- You don't need to splurge on designer pieces. Check thrift stores or online marketplaces for solid wood benches or ottomans that you can reupholster yourself. A simple coat of paint can update a dated coffee table.
- Look for DIY plans to build your own storage bench—it's easier than you think and costs a fraction of retail.
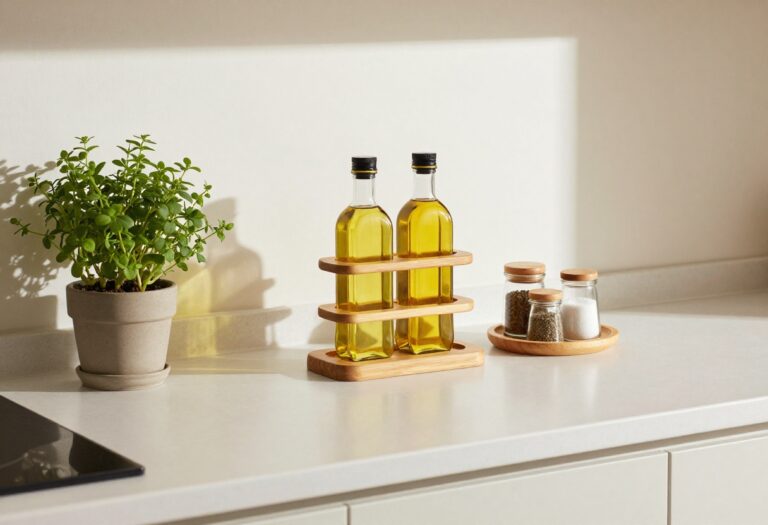
15. Add a Small Bar Cart for Entertaining
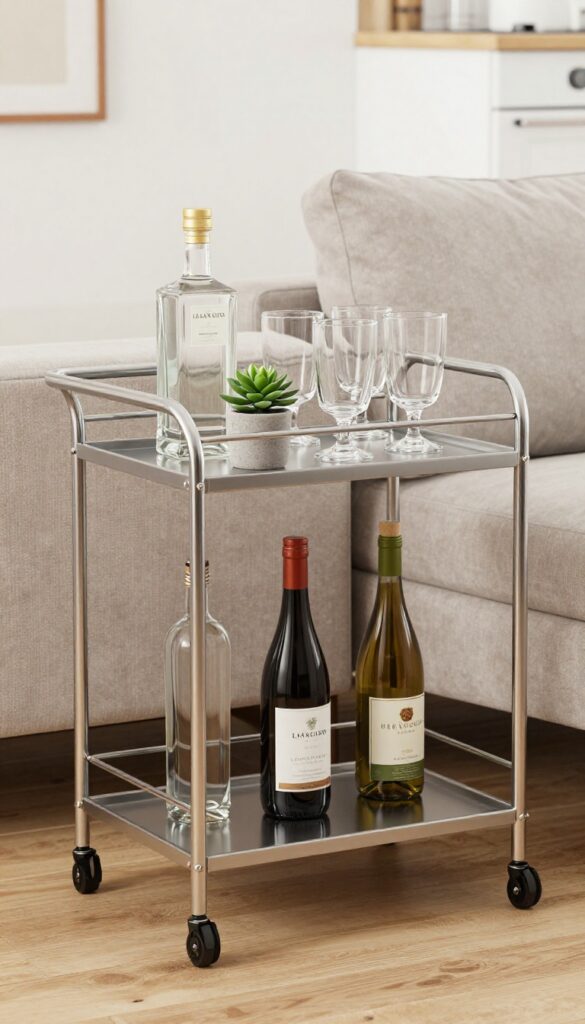
A compact bar cart on wheels is one of those pieces that pulls double duty without taking up much room. It gives you a dedicated spot to serve drinks near the living area, then rolls out of sight when you need the floor space back. The best part?
You don't need a big budget to style one—just a few bottles, some glasses, and a small plant can make it feel intentional and inviting.
A bar cart doesn't have to be fancy to be functional. Look for a metal or wood cart with two tiers so you can store bottles below and glasses up top. Keep the styling simple: group three bottles (one clear spirit, one dark, one wine), add four matching glasses, and tuck a small potted succulent or trailing ivy on the lower shelf.
This setup gives guests something to look at without feeling cluttered. When you're not hosting, the cart can hold coffee table books or a small lamp near the sofa. The wheels make it easy to move near the kitchen for refills or tuck it beside the entryway as a catchall.
Budget-Friendly Swap
Skip the expensive marble-top carts and look for a simple metal frame from a thrift store or big-box retailer. A coat of spray paint in matte black or brass can transform a basic cart into a stylish piece. You can also repurpose a small utility cart—just add a tray on top for a cleaner look.
Styling Tip
- Less is more when it comes to bar cart styling. Stick to a color palette of two or three tones—like clear glass, warm wood, and a pop of green from a plant. Group items in odd numbers (three bottles, five glasses) for visual balance.
- Leave some empty space so the cart doesn't feel overcrowded.
Small-space Fix
If floor space is tight, look for a slim cart that's only 12–18 inches wide. Place it in a corner of the living room or beside the sofa. You can also use a wall-mounted folding shelf as a bar area and store bottles in a nearby basket—same function, even smaller footprint.
FAQ
How can I make my open-concept kitchen and living room feel separate on a budget?
Use area rugs, furniture placement (like a console table behind the sofa), and different lighting zones to define each area without walls.
What are cheap ways to add storage to a small open home?
Try open shelving, rolling carts, baskets, and multi-functional furniture like ottomans with hidden storage.
Can I use paint to tie together an open space?
Yes, a cohesive color palette with one accent wall in the dining or living area can unify the space without making it feel disjointed.
What kind of lighting works best for open-concept homes?
Layer floor lamps, table lamps, and under-cabinet lights. Avoid relying solely on overhead fixtures to create a warm, inviting atmosphere.
How do I choose a rug for an open-concept space?
Pick a rug that fits under your main seating area to define the living zone. Choose a low-pile, durable material that's easy to clean.
Conclusion
Decorating a small open-concept home doesn't require a huge budget or a complete redesign. By focusing on a few smart, budget-friendly changes—like adding a rug, swapping cabinet doors for shelves, or layering lighting—you can create a space that feels both practical and stylish. The key is to keep things cohesive without being matchy, and to let each zone have its own personality while still working together.
Start with one or two ideas that speak to you, and build from there. Your home will thank you.