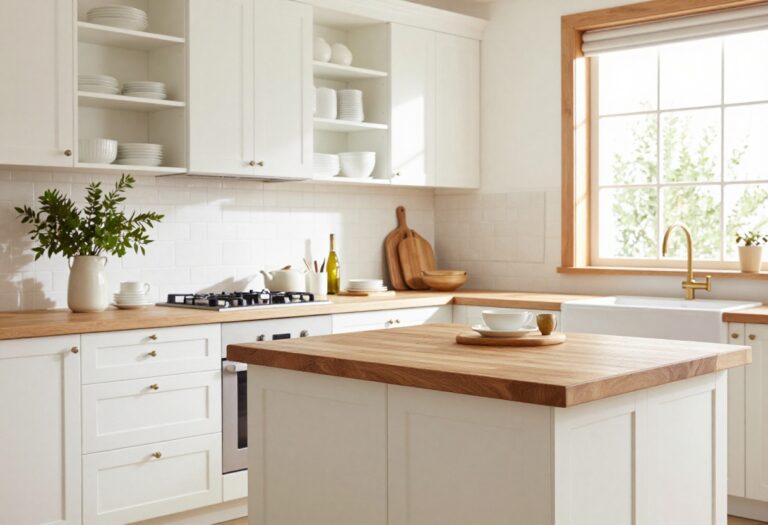
13 Cupboard Ideas for Kitchen Storage That Can Use More Smartly
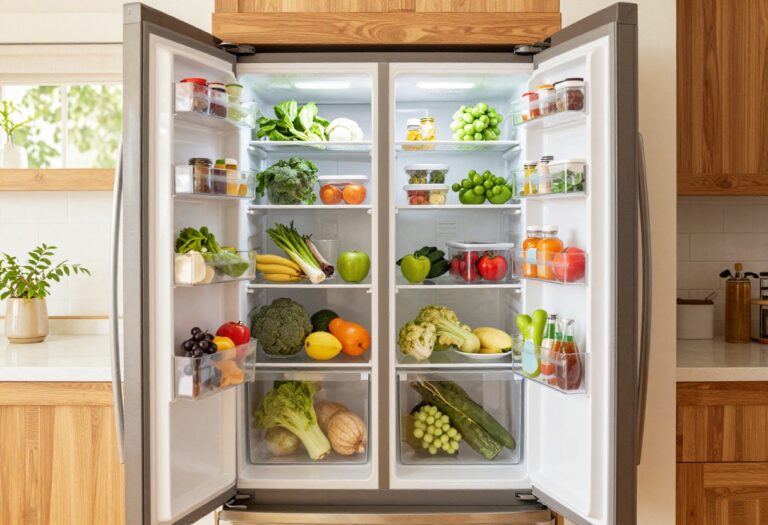
Kitchen cupboards often become black holes for mismatched Tupperware and forgotten canned goods. But with a few thoughtful tweaks, those same cabinets can turn into highly efficient storage zones that make cooking and cleaning a breeze.
The key is to think beyond stacking and start using every inch with intention. Modern kitchen storage isn't about cramming more stuff in—it's about creating systems that work with your daily habits.
Whether you're remodeling or just refreshing, these 13 ideas will help you reclaim your cupboards and keep everything within easy reach. From pull-out drawers to door-mounted racks, each idea focuses on clean lines and practical access.
1. Pull-Out Pantry Shelves for Deep Cabinets
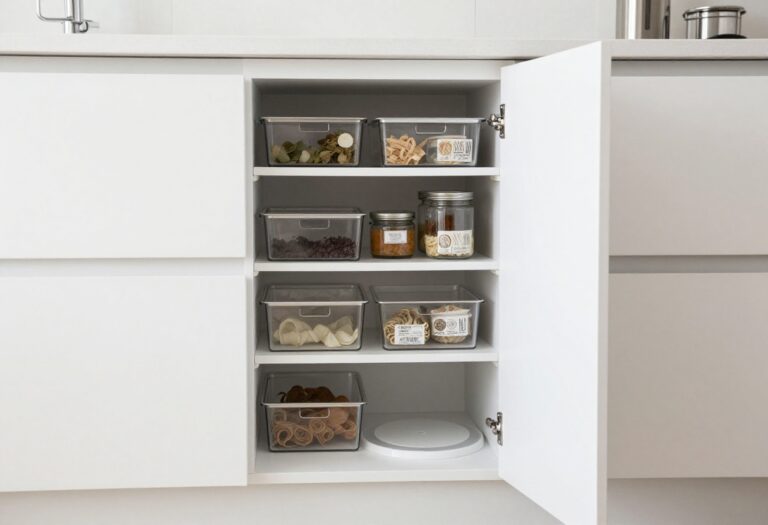
Deep cabinets often become black holes where cans and spices go to disappear. Pull-out pantry shelves solve that by bringing everything into plain view. These sliding units glide out smoothly, so you can grab that bag of lentils from the back without rearranging the entire shelf.
They turn wasted depth into organized, accessible storage that feels almost like having a walk-in pantry in a standard cabinet.
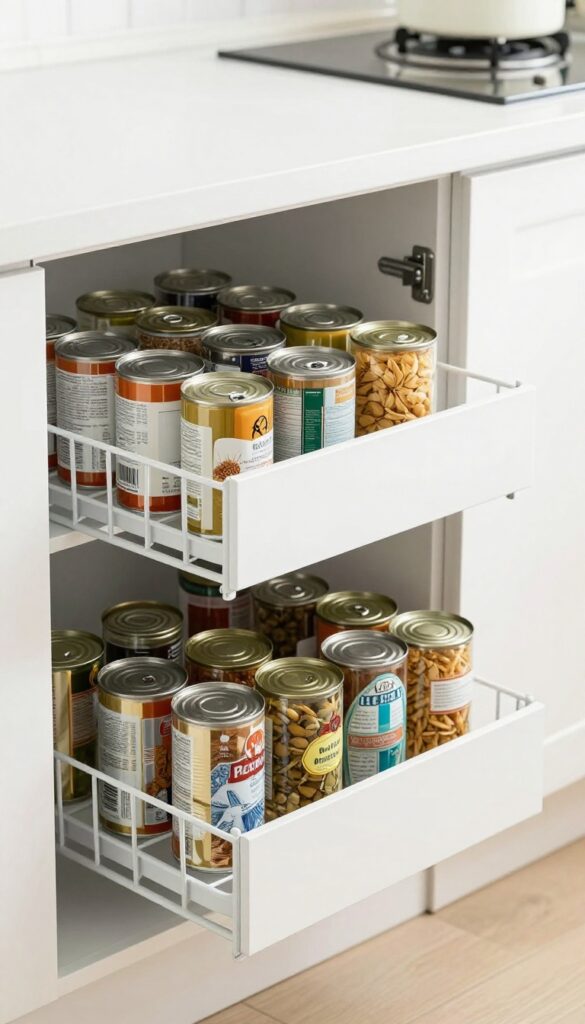
The beauty of pull-out shelves lies in their simplicity and immediate impact. Instead of stacking cans two or three deep, you line them up in neat rows. When you pull the shelf forward, every item is right there.
This system works wonders for dry goods, small appliances, and even pots and pans. The clean, modern look comes from the hardware and materials you choose—full-extension slides and sturdy wire or wood frames keep everything stable and easy to clean. For a kitchen that values both style and function, pull-out shelves are a no-brainer upgrade that pays off every time you cook.
Best Materials
- Wire baskets offer a light, airy look that lets you see through to items below, perfect for pantry staples. For a warmer feel, choose solid wood shelves with a smooth finish—they hide clutter and add a furniture-like touch. Metal frames with a matte black or brushed nickel coating resist rust and match modern hardware.
- If you prefer a budget-friendly option, bamboo pull-out shelves bring natural texture and are surprisingly durable.
Storage Tip
- Group similar items together on each shelf: canned goods on one, spices and jars on another, snacks on a third. Use clear bins or small baskets within the pull-out to corral loose packets and small bottles. Label the front edge of each shelf so you know what’s where at a glance.
- This system keeps the cabinet organized and makes restocking effortless.
Finishing Touch
Add a thin non-slip liner to each shelf to prevent items from sliding when you pull them out. Choose a liner in a neutral tone like gray or beige to keep the look clean. For an extra polished feel, install under-cabinet LED strip lights that illuminate the shelves when they’re pulled open—this makes finding ingredients even easier and adds a subtle glow to your kitchen.
2. Door-Mounted Spice Racks for Instant Access
The inside of your cabinet doors is prime real estate that often goes unused. By attaching slim spice racks or wire baskets to the door, you can keep your most-used spices visible and within arm's reach. This simple swap frees up shelf space for larger pantry items and makes cooking feel more streamlined.
Plus, it adds a clean, organized look that fits right into a modern kitchen.
Door-mounted spice racks are a game-changer for anyone who loves to cook but hates digging through a cluttered cabinet. Instead of stacking bottles behind each other, you can see every spice at a glance. Magnetic racks are especially popular for their sleek, no-drill installation—just stick them on and you're done.
Adhesive options work just as well and are perfect for renters. The key is to choose racks that are narrow enough to let the door close fully, so measure your cabinet depth before buying. For a cohesive look, stick to matching jars or decant your spices into uniform containers.
This not only looks cleaner but also makes labeling easier. The result is a kitchen that feels both efficient and effortlessly stylish.
Best Materials For A Modern Look
- For a clean, modern aesthetic, opt for clear acrylic or stainless steel racks. Acrylic lets the spices themselves become the visual focus, while stainless steel adds a subtle industrial edge. Both materials are easy to wipe down and resist rust, making them practical for the kitchen environment.
- Avoid dark or ornate finishes that can feel heavy inside a cabinet.
Small-space Fix
If your cabinets are shallow, look for ultra-slim racks that are less than two inches deep. Another option is to use adhesive magnetic strips designed for spice jars—they take up almost no depth and can hold multiple jars in a row. This works especially well on the inside of a pantry door or a narrow cabinet next to the stove.
Styling Tip
- Group spices by type or frequency of use for a logical layout. Place the ones you reach for daily, like salt, pepper, and garlic powder, at eye level. Use small labels on the jars or racks to keep everything tidy.
- If you have a mix of bottle sizes, decant into uniform jars for a cohesive look that feels intentional.
3. Vertical Dividers for Baking Sheets and Cutting Boards
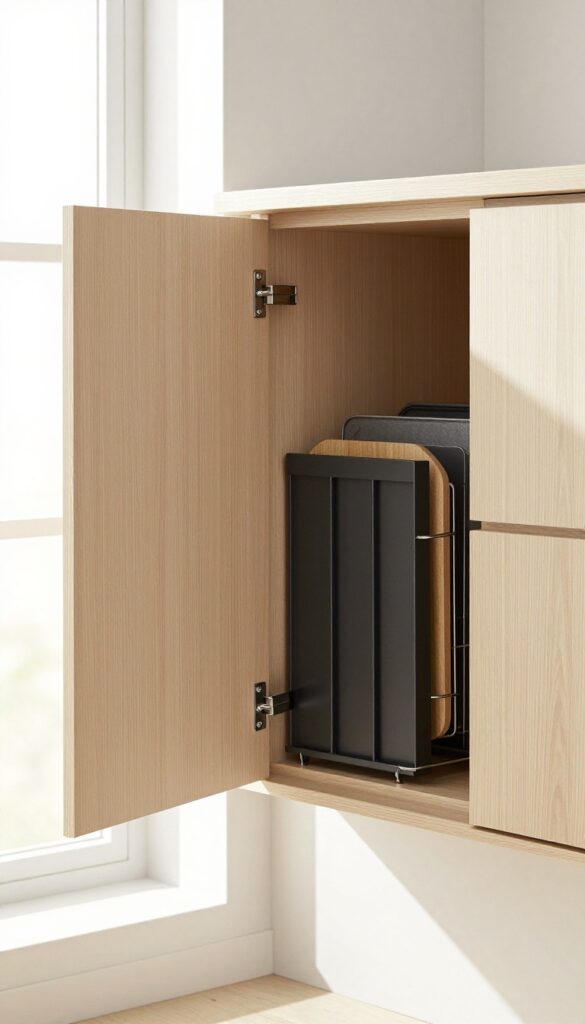
Clattering stacks of baking sheets and cutting boards are a kitchen annoyance that’s easy to fix. Instead of wrestling with a leaning tower every time you need a sheet pan, install vertical dividers inside a base cabinet to store everything upright. This simple change keeps your cookware scratch-free and makes grabbing the right piece almost automatic.
Vertical dividers turn a messy cabinet into a tidy, organized station. By storing baking sheets, cutting boards, and even cooling racks on their sides, you eliminate the frustration of digging through piles. The dividers are typically made of wood or metal and can be custom-fitted or bought as adjustable inserts.
This setup works best in a lower cabinet near the oven or prep area, so everything you need for roasting or chopping is within arm’s reach. The clean, upright arrangement also makes the cabinet feel more spacious and intentional.
Best Materials And Finishes
For a modern look, choose dividers in a matte black or brushed nickel finish that complements your cabinet hardware. Wood dividers in a light oak or white-painted finish blend seamlessly with shaker-style cabinets. If you want a more custom feel, consider dividers with a slight groove or lip to keep items from sliding out.
Layout Tip
Measure the height of your tallest baking sheet and the width of your widest cutting board before installing dividers. Leave a few inches of space above the tallest item for easy removal. Group similar items together: all baking sheets on one side, cutting boards on the other, and wire racks in the middle if you have them.
Small-space Fix
In a narrow cabinet, use a single vertical divider to split the space into two sections. This works especially well in apartment kitchens where every inch counts. You can also add a thin pull-out tray with dividers for even easier access.
4. Under-Shelf Baskets for Extra Storage
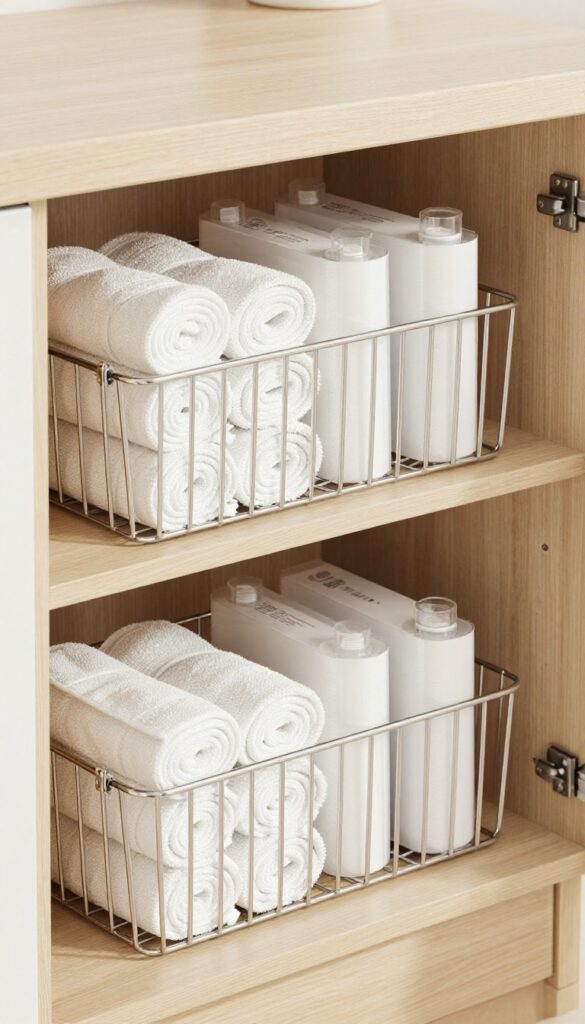
Kitchen cabinets often have wasted vertical space between the shelf and the items below. Under-shelf baskets slide right onto your existing shelves, instantly giving you a second layer of storage. They're perfect for keeping small, everyday items within easy reach without cluttering your counters or filling up drawers.
These wire baskets hang from standard kitchen shelves, doubling your storage capacity in seconds. Use them for lightweight items like dish towels, plastic wrap, snack packs, or even spices. They're easy to install—just clip them onto the shelf—and can be removed for cleaning.
The open wire design keeps things visible and airy, so your cabinets still feel organized and modern. Stick to a uniform finish, like brushed nickel or matte black, to keep the look clean and intentional.
Best Materials
Choose sturdy wire baskets with a smooth, rust-resistant coating. Brushed nickel or chrome blends seamlessly with modern kitchens, while matte black adds a subtle contrast against white or wood shelves. Avoid plastic baskets—they can look cheap and don't hold up as well over time.
Shelf Styling Tip
Group similar items together in each basket for a tidy look. For example, dedicate one basket to dish towels rolled into neat cylinders, another to plastic wrap and foil boxes. This keeps your shelves visually organized and makes grabbing what you need a breeze.
Small-space Fix
In a narrow cabinet, use slim under-shelf baskets that are half the depth of your shelf. This prevents items from getting lost in the back and leaves room for taller bottles or containers below. Perfect for apartments or galley kitchens where every inch counts.
5. Drawer Inserts for Utensil Organization
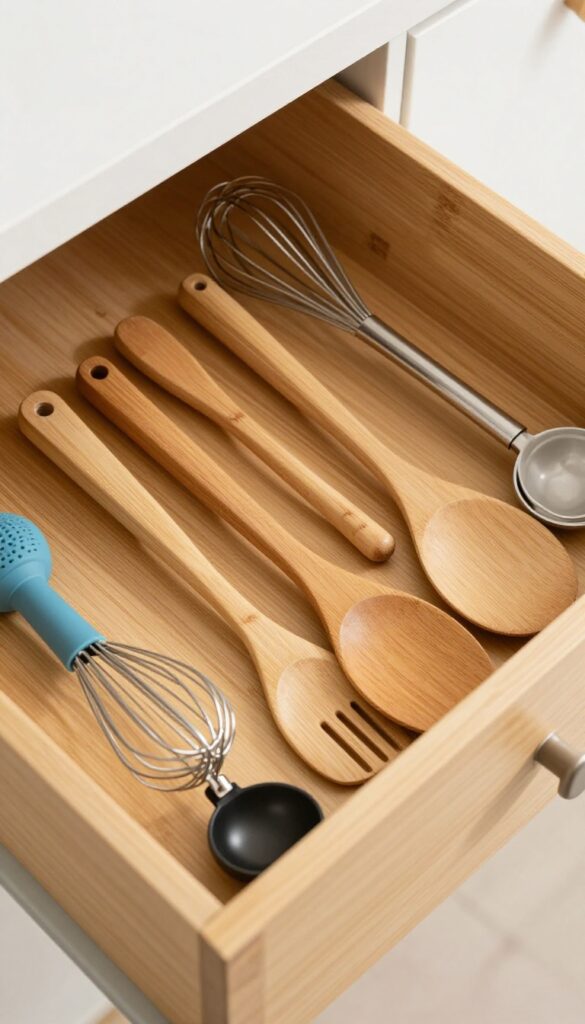
Open a kitchen drawer and find a jumble of spatulas, whisks, and measuring spoons tangled together. It’s a small frustration that adds up every time you cook. Custom drawer inserts change that by giving every tool its own spot, so you can grab what you need without digging.
The result is a drawer that feels calm and intentional, with a place for everything and everything in its place.
Think of drawer inserts as the foundation of a well-organized kitchen. Instead of letting utensils pile up in a chaotic mess, you create a system where each piece has a designated home. This not only saves time but also protects your tools from scratches and damage.
Modern inserts come in materials like bamboo, plastic, or metal, and many feature adjustable dividers that let you customize the layout to fit your exact collection. Whether you have a deep drawer for large spatulas or a shallow one for measuring spoons, there’s an insert that works. The visual payoff is a drawer that looks as good as it functions—neat, clean, and ready for action.
Best Materials For A Modern Look
- Bamboo inserts bring warmth and a natural texture that pairs beautifully with white or wood cabinetry. They’re sturdy, sustainable, and resist moisture well. For a sleeker, more industrial vibe, go with metal inserts in matte black or stainless steel.
- These feel ultra-modern and are easy to wipe clean. Plastic inserts are budget-friendly and come in many sizes, but they can look cheap if not chosen carefully. Stick to clear or neutral tones for a cleaner appearance.
- Whichever material you pick, make sure it fits your drawer dimensions snugly to avoid shifting.
Layout Tip: Group By Use
- Arrange your inserts so that utensils used for the same tasks live together. Keep spatulas and tongs near the stove, measuring spoons and cups near the prep area, and whisks with mixing bowls. This logical grouping makes cooking flow more smoothly.
- Use adjustable dividers to create wider compartments for bulky items like potato mashers or ladles, and narrower slots for skinny tools like skewers or peelers. If you have a deep drawer, consider a tiered insert that stacks smaller compartments on top for even more efficiency.
Finishing Touch: Liner For Grip
- Add a non-slip liner beneath your insert to keep it from sliding around when you open and close the drawer. Choose a liner in a neutral color like gray or beige so it fades into the background. This small detail prevents annoying shifting and protects the drawer bottom from scratches.
- It also gives the whole setup a polished, finished look that feels custom-made.
6. Corner Cabinet Solutions with Lazy Susans
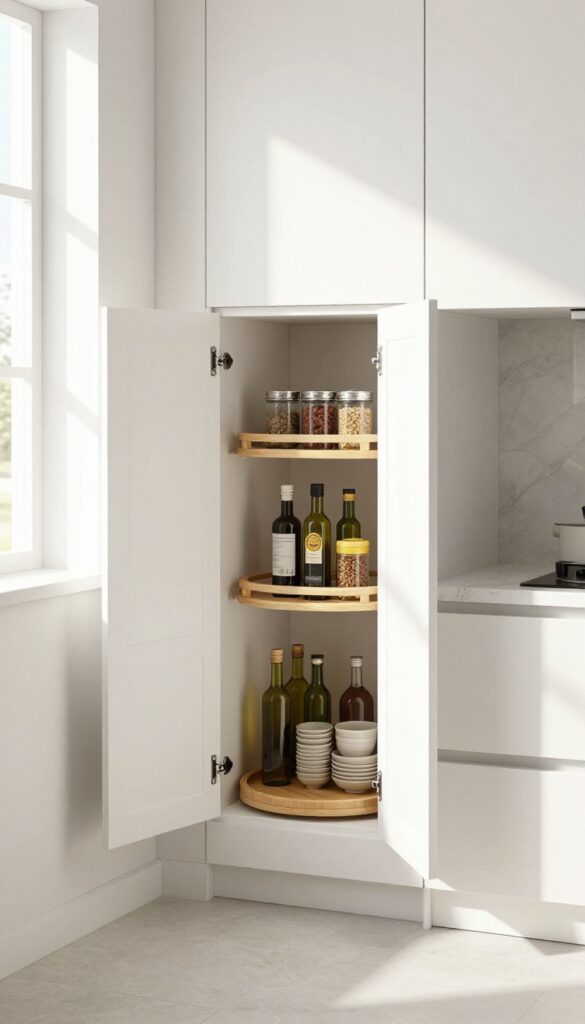
Corner cabinets are notorious for becoming black holes where rarely used appliances go to hide. A lazy Susan or pull-out corner rack transforms that awkward space into one of the most functional spots in your kitchen. The two-tier design is especially clever, letting you stash tall bottles on the bottom and small jars up top without wasting a single inch of vertical room.
A lazy Susan isn't just for your dining table anymore. In a corner cabinet, it rotates smoothly to bring everything within reach. No more crouching and digging—just a gentle spin and you've got your olive oil or spice blend right in front of you.
For deeper cabinets, a half-moon or kidney-shaped lazy Susan fits the corner curve better than a full circle, maximizing every inch. If you prefer a more modern look, pull-out corner drawers with custom dividers offer the same accessibility with a cleaner aesthetic. They slide out completely, so you can see everything at once, making them ideal for pots, pans, or small appliances.
Best Materials
- For a clean, modern kitchen, opt for a lazy Susan made from durable materials like bamboo or coated wire. Bamboo adds warmth without feeling rustic, while wire shelves with a white epoxy coating keep the look light and airy. If you're going for a seamless appearance, choose a pull-out system with solid wood fronts that match your existing cabinetry.
- The goal is to make the storage solution blend in, not stand out.
Layout Tip
When installing a lazy Susan, make sure the cabinet door opens wide enough—ideally 180 degrees—so the trays can spin freely without hitting the frame. For pull-out drawers, measure the depth carefully; you want them to slide out completely without bumping into the opposite cabinet or wall. A pro tip: use a spacer to center the lazy Susan in the cabinet, ensuring even clearance on all sides.
Storage Tip
- Group similar items together on each tier. Use the bottom tier for heavy bottles like oils, vinegars, and tall condiment jars. Reserve the top tier for smaller items such as spice jars, canned goods, or baking extracts.
- Add clear bins or small baskets to keep like items corralled—this prevents things from sliding around when you spin the tray. For pull-out drawers, adjustable dividers let you customize compartments for baking sheets, cutting boards, or mixing bowls.
7. Pegboard Panels Inside Cabinet Doors
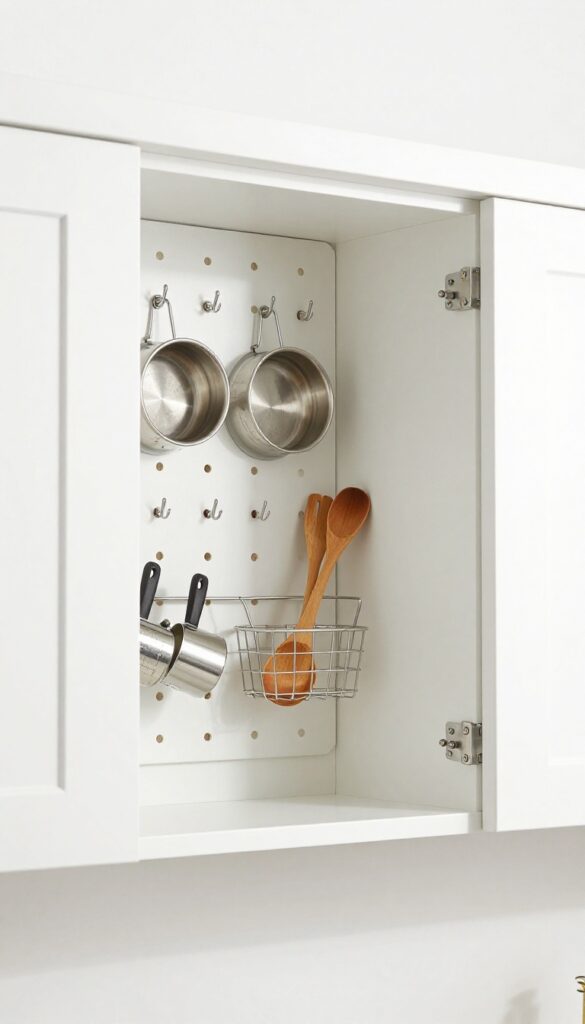
One of the most underused spaces in a kitchen is the inside of cabinet doors. Instead of letting that real estate go to waste, mount a slim pegboard panel on the door to create instant vertical storage. The look is clean and modern, especially when you choose a pegboard that matches your cabinet color or go with a crisp white for contrast.
It keeps pot lids, measuring cups, and small tools within arm's reach without cluttering your countertops or drawers.
Pegboard panels inside cabinet doors turn dead space into a functional display. The key is to keep it organized and intentional—use hooks for hanging items and small baskets for odds and ends. This idea works best on upper cabinet doors or pantry doors where you access items frequently.
The result is a kitchen that feels more efficient and visually streamlined, with everything you need right where you can see it.
Best Materials & Colors
- For a modern look, choose a white or light gray pegboard with a smooth finish. Metal pegboards offer durability and a sleek industrial vibe, while wooden ones add warmth. If your cabinets are dark, a bright white pegboard creates a striking contrast that makes items pop.
- Stick with neutral tones to keep the kitchen feeling clean and uncluttered.
Storage Tip
- Use a mix of hooks and small wire baskets to hold different items. Deep hooks work well for pot lids and colanders, while shallow hooks are perfect for measuring cups and spoons. Add a small basket for spice jars or tea bags.
- Keep heavier items toward the bottom to prevent the door from sagging.
Finishing Touch
- Install a magnetic strip on the pegboard for knives or metal utensils. This adds another layer of functionality without taking up extra space. For a cohesive look, arrange items by color or size—silver lids together, colorful measuring cups in a row.
- It turns a practical storage solution into a small visual feature.
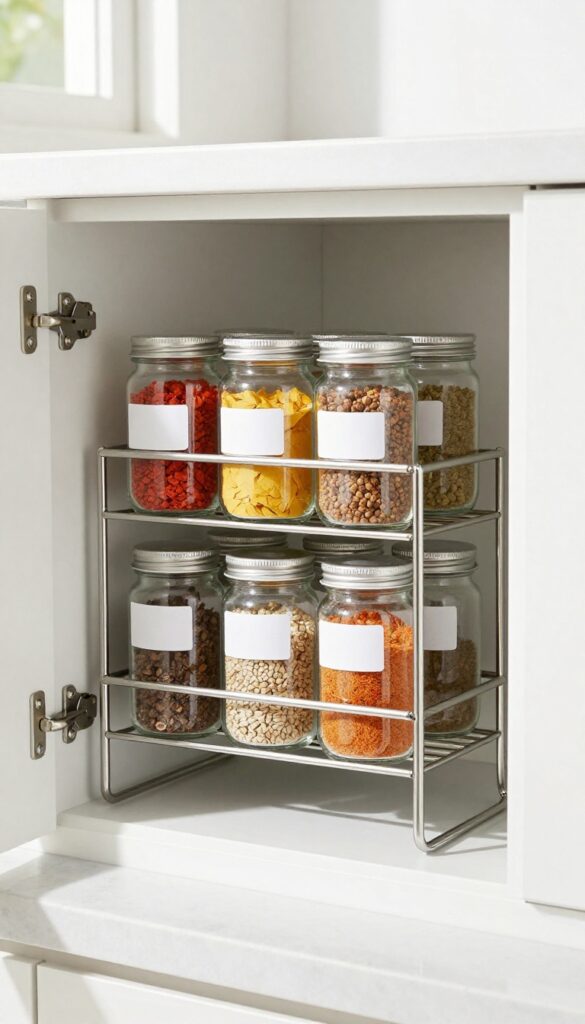
8. Stackable Shelf Risers for Canned Goods
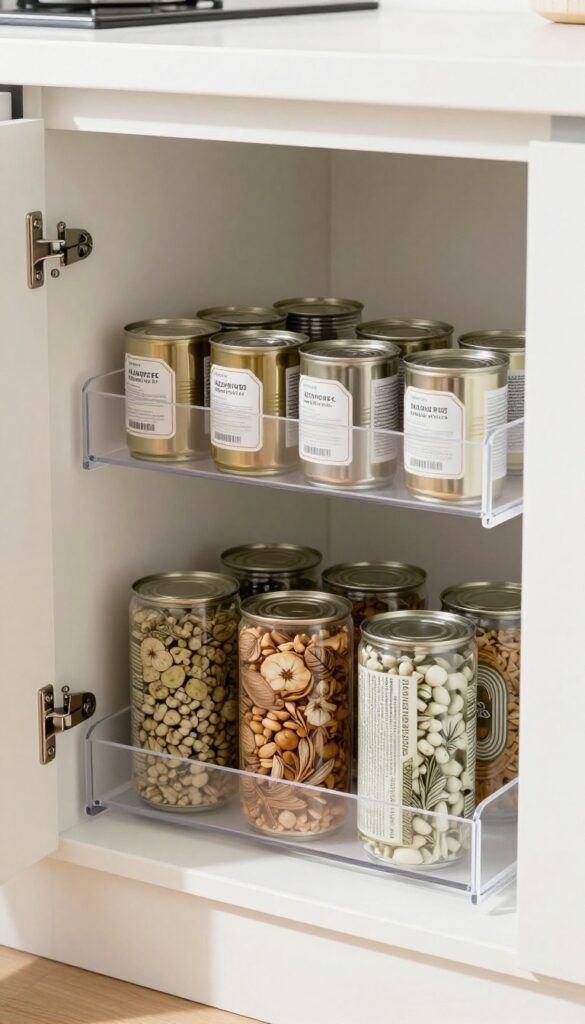
Deep cabinets are a blessing until you have to dig through three layers of cans to find the tomato paste. Stackable shelf risers solve that by giving you a second level inside your existing shelves. They turn wasted vertical space into prime real estate, and the best part is that everything stays visible and easy to grab.
Clear acrylic versions keep the look airy and modern, so your pantry feels organized without looking cluttered.
Stackable shelf risers are the unsung heroes of kitchen storage. They create a tiered effect inside your cabinets, so you can see every can and jar at a glance. No more shuffling items around or forgetting what's in the back.
These risers work especially well for canned goods, spices, and small jars. Choose clear acrylic for a sleek, minimalist look that blends with any cabinet interior. The risers are easy to install—just place them on the shelf and stack your items.
They also come in various sizes to fit standard cabinet depths. For a cohesive look, stick with one material and finish across all your shelves.
Best Materials
- Clear acrylic is the top choice for a modern, clean aesthetic. It's durable, easy to clean, and virtually invisible, so your cans take center stage. Wood risers add warmth but can feel bulky in small cabinets.
- Wire risers are another option, but they can snag labels and look less polished. For a seamless look, acrylic is the way to go.
Layout Tip
- Group similar items together on each riser level. Place taller jars on the bottom and shorter cans on top. This keeps labels visible and makes grabbing what you need quick.
- If your cabinet has a lip, measure the depth to ensure the riser fits without sticking out.
Finishing Touch
Use small acrylic bins or clear jars on the risers to corral loose items like spice packets or tea bags. This adds another layer of organization and keeps the look cohesive. Stick to a neutral color palette for the containers to maintain that clean, modern vibe.
9. Magnetic Knife Strips on Cabinet Sides
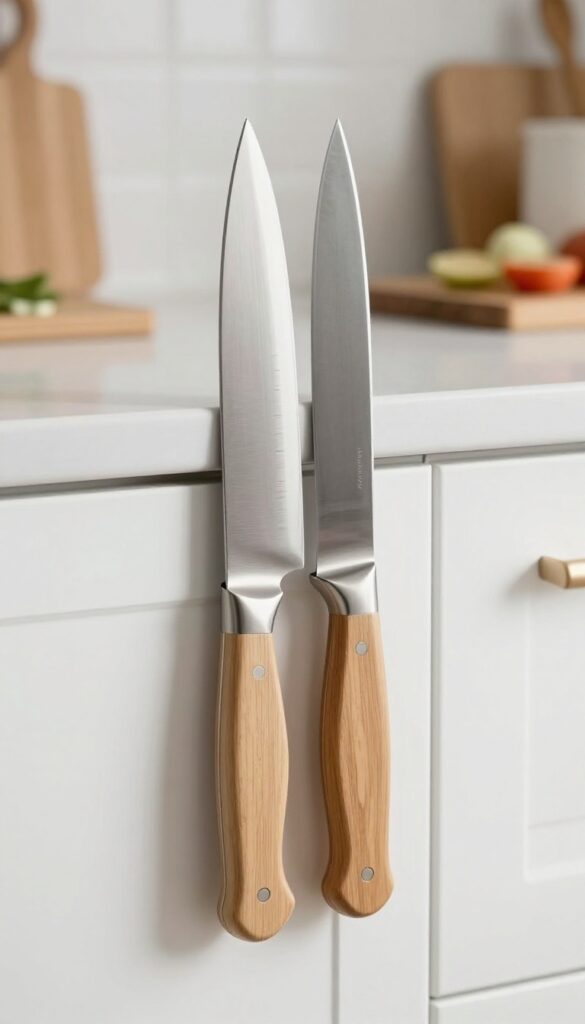
Counter space is prime real estate in any kitchen, and cluttering it with a knife block can feel like a waste. Mounting a magnetic strip on the side of a cabinet or inside a door keeps your blades safely stored and instantly accessible. This swap not only clears your counters but also gives your kitchen a clean, professional look that fits perfectly with a modern aesthetic.
Magnetic knife strips are a sleek, space-saving solution that turns unused vertical surfaces into functional storage. By attaching one to the side of a cabinet or inside a door, you free up counter space while keeping knives within arm's reach during cooking. The visual effect is streamlined and modern—blades seem to float against the wall, adding a subtle industrial touch.
For a cohesive look, choose a strip that matches your cabinet hardware or go with a dark finish for contrast. This idea works best in galley kitchens or small spaces where every inch counts, but it also shines in open layouts as a design statement. To keep it safe, make sure the strip is securely mounted and out of reach of children.
Best Placement
The side of a cabinet near your main prep area is ideal—it keeps knives handy without interfering with cabinet doors. Inside a cabinet door works too, especially for smaller knives or shears, but make sure the door opens fully without hitting anything. Avoid placing strips above a stove or sink where heat and moisture could affect the magnet or knives.
Style And Finish
Stainless steel strips blend seamlessly with modern kitchens, while black or matte finishes add a bold contrast against light cabinetry. For a warmer look, choose a wooden-backed strip that matches your countertops. The key is to keep it minimal—no bulky hardware or logos—so the knives themselves become the focal point.
Safety And Maintenance
- Ensure the strip is strong enough to hold your heaviest knife—test it before relying on it daily. Clean the strip regularly with a damp cloth to remove dust and grease buildup. Also, keep knives sharp; a dull blade is more likely to slip off the magnet.
- For extra safety, consider a strip with a slight lip at the bottom to catch any accidental slides.
10. Tension Rods for Cleaning Supply Storage
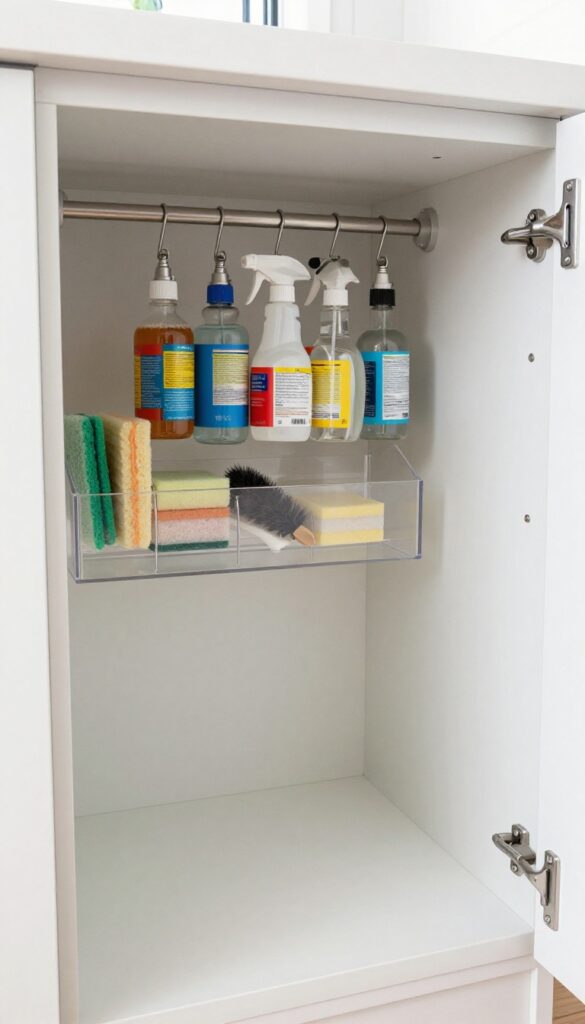
Under-sink cabinets often turn into a chaotic jumble of bottles, brushes, and mystery sponges. A simple tension rod changes that completely by giving spray bottles a dedicated spot to hang. This trick lifts everything off the floor, making the space easier to clean and far more functional.
Pair it with a small caddy, and you have a system that feels both tidy and effortlessly modern.
A tension rod isn't just for curtains—it's a genius solution for under-sink storage. By installing one horizontally, you can hang spray bottles by their triggers, keeping them upright and accessible. Cleaning cloths can be draped over the rod as well, freeing up the cabinet floor for a slim caddy or extra supplies.
This approach maximizes every inch of that awkward space while maintaining a clean, streamlined look that fits a modern kitchen aesthetic.
Best Materials
Choose a stainless steel tension rod with strong rubber ends to ensure it stays put even when you grab bottles. Avoid plastic rods that can warp or slip over time. For a cohesive look, match the rod's finish to your cabinet hardware—brushed nickel or matte black work well in most modern kitchens.
Small-space Fix
If your under-sink area is extra shallow, look for a tension rod that adjusts down to 18 inches. You can also install it vertically to hang smaller spray bottles or scrub brushes. For maximum efficiency, add a slim wire shelf above the rod to store extra sponges or dishwasher pods.
Finishing Touch
Complete the setup with a clear acrylic or white caddy for sponges and brushes. This keeps wet items from sitting directly on the cabinet bottom, preventing water stains and mold. Stick to a neutral color palette—white, gray, or black—to keep the visual clutter low and the space feeling airy.
11. Glass-Front Cabinets for Display and Function
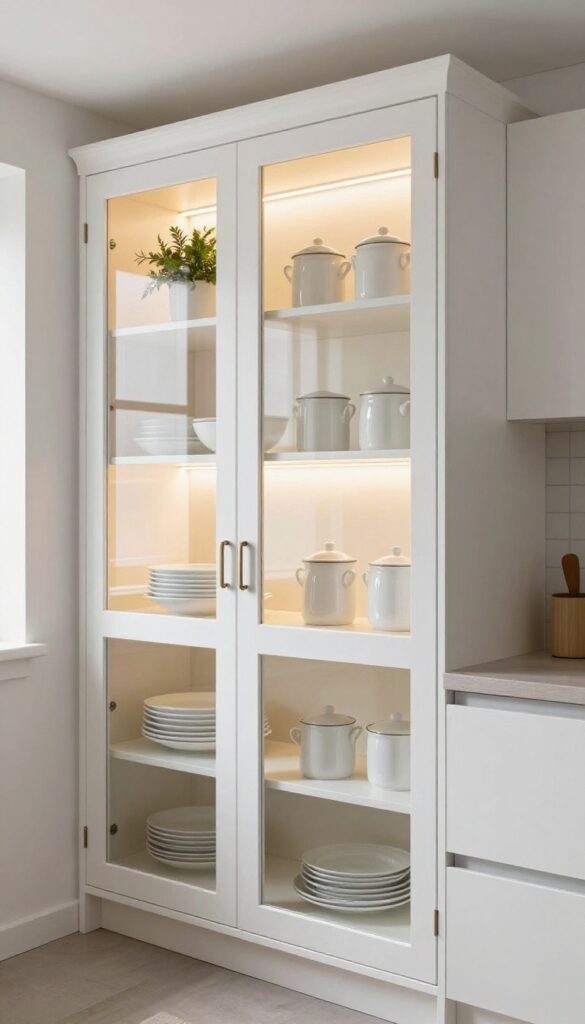
Solid upper cabinets can make a kitchen feel closed in, especially in smaller spaces. Swapping them for glass-front doors instantly opens up the room and gives you a chance to turn everyday dishware into part of the decor. It's a smart way to add depth without knocking down walls.
Glass-front cabinets strike a balance between open shelving and full coverage. They let you display your favorite pieces while keeping dust and grease at bay. The transparency forces you to stay organized, which is a good motivator to declutter.
For a modern, clean look, stick with clear glass and a simple white or wood frame. If you prefer something softer, frosted glass hides minor chaos while still letting light pass through.
Styling The Shelves
- Treat each shelf like a mini vignette. Group matching dinnerware sets together, then add a few ceramic canisters or a small plant for visual breaks. Avoid overcrowding—leave some breathing room so each piece stands out.
- Stick to a cohesive color palette, like all white dishes with neutral linens, to keep the look calm and intentional.
Lighting Inside The Cabinet
- Adding LED strip lights inside glass-front cabinets makes a huge difference. It highlights your items and creates a warm glow in the kitchen, especially in the evening. Install them on the top shelf pointing down, or use puck lights for a more targeted effect.
- Warm white (2700K-3000K) works best for a cozy, inviting feel.
Choosing The Right Glass
- Clear glass is great for a crisp, open look, but it demands perfect organization. If you're not ready for that level of visibility, go with frosted or ribbed glass. These options still let light through but soften the view, so a slightly messy shelf won't be as noticeable.
- For a modern twist, try wire glass or glass with a subtle grid pattern.
12. Pull-Out Trash and Recycling Bins
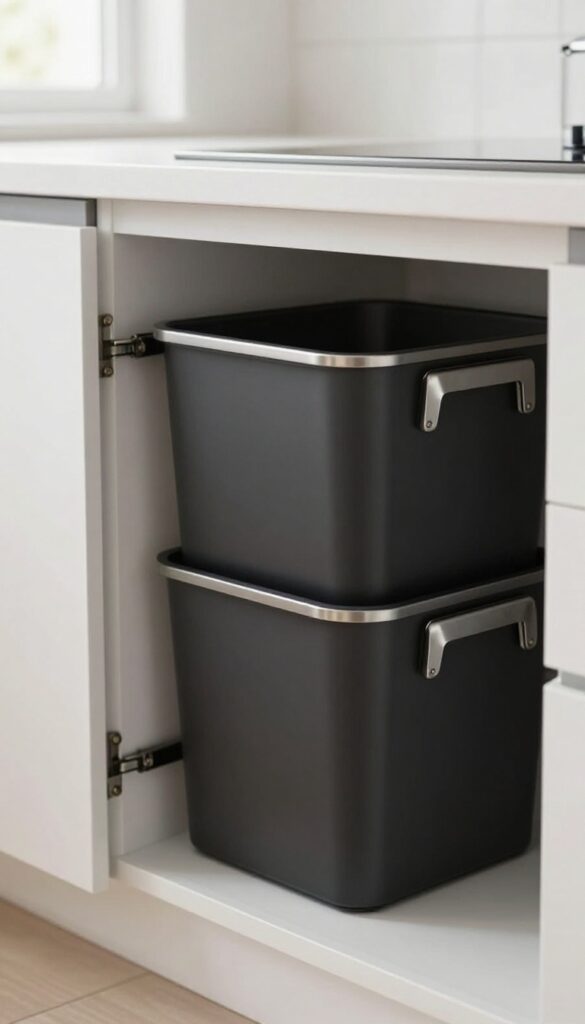
Trash cans can be an eyesore, especially in a sleek, modern kitchen. A pull-out cabinet drawer hides everything behind a seamless facade, keeping your space looking clean and intentional. The best part?
It frees up precious floor space and makes sorting recyclables feel effortless.
Installing pull-out bins in a base cabinet transforms waste management into a streamlined, almost invisible part of your kitchen. Choose a dual-bin system for trash and recycling, and look for models with soft-close slides and a lid to trap odors. For a modern and clean look, stick with matte black or stainless steel bins that match your hardware.
Position the pull-out near the sink or prep area for easy access while cooking. Add a small charcoal filter inside the cabinet to keep smells at bay, and line the bins with bags that tuck neatly out of sight.
Best Materials
Opt for heavy-duty steel or aluminum bins that resist rust and are easy to wipe down. The cabinet itself should be plywood or MDF with a durable laminate finish—avoid particleboard, which can warp from moisture. Soft-close slides are worth the investment for a quiet, smooth operation.
Layout Tip
Install the pull-out in a lower cabinet that's at least 15 inches wide for a standard dual-bin setup. If your kitchen is tight, consider a single-bin pull-out with a separate recycling basket on a slide-out shelf above. Keep the pull-out away from the dishwasher to prevent heat and steam from affecting the bins.
Finishing Touch
Paint the interior of the cabinet a light color like white or pale gray so crumbs and spills are easy to spot. Add a small pull-out drawer above the bins for storing extra bags, gloves, or cleaning wipes—everything you need in one tidy spot.
13. Adjustable Shelf Systems for Flexibility

Fixed shelves can be limiting, especially when your kitchen storage needs shift with the seasons. Adjustable shelf systems let you reconfigure your cabinets in minutes, accommodating tall blenders one week and stacks of dinner plates the next. The result is a space that feels both organized and adaptable, with a clean, modern look that doesn't sacrifice function.
Adjustable shelf systems bring a sense of order and flexibility to kitchen cabinets. Instead of being stuck with one layout, you can raise or lower shelves to fit whatever you need to store. This is especially useful in base cabinets where pots and small appliances often compete for space.
The system typically uses metal tracks and movable shelf pins, making adjustments quick and tool-free. Visually, the clean lines of the tracks and the ability to create uniform spacing give cabinets a streamlined, intentional appearance. It's a small upgrade that pays off every time you reorganize.
Best Materials
Look for systems with sturdy metal tracks and solid wood or coated MDF shelves. Chrome or brushed nickel tracks blend seamlessly with modern hardware, while matte black adds a subtle contrast. Avoid plastic pins that can warp over time—metal pins with a rubber grip are more durable and hold shelves securely.
Layout Tip
- Plan your shelf heights around your most-used items. For example, set one shelf at 12 inches high for cereal boxes and another at 8 inches for mugs. Leave a taller gap in a corner cabinet for a stand mixer or blender.
- The beauty of adjustable shelves is that you can tweak the layout as your needs change.
Finishing Touch
Add slim LED strip lights under a shelf to illuminate the contents below. This not only makes items easier to find but also adds a warm, modern glow to the cabinet interior. Choose warm white LEDs for a cozy feel or cool white for a crisp, clean look.
FAQ
What is the best way to organize deep kitchen cabinets?
Pull-out shelves or drawers are the most effective solution for deep cabinets. They allow you to access items in the back without digging, and you can see everything at a glance. Consider adding tiered organizers for canned goods.
How can I maximize storage in a small kitchen with limited cabinets?
Use every inch of available space: install hooks on cabinet doors, add under-shelf baskets, and use vertical dividers. Also consider magnetic strips for knives and tension rods for cleaning supplies. Every surface can hold something.
Are glass-front cabinets practical for everyday use?
Yes, but they require you to keep the inside tidy since everything is visible. They work best for displaying matching dishware or glassware. If you prefer a cleaner look, opt for frosted glass to hide clutter while still adding light.
What is the easiest DIY cupboard organization project?
Installing tension rods under the sink or inside cabinets is one of the easiest projects. You don't need any tools—just twist the rod into place. Use them to hang spray bottles or store cutting boards vertically.
How do I organize corner cabinets without losing space?
Lazy Susans are the classic solution for corner cabinets. They spin to bring items to the front. For deeper corners, consider pull-out drawers that slide out completely, making every item accessible.
Conclusion
A well-organized kitchen doesn't require a full renovation—just a few smart cupboard upgrades can make a world of difference. By focusing on accessibility and visibility, you'll spend less time searching and more time enjoying your space.
Start with one or two ideas that address your biggest pain points, and build from there. Small changes like pull-out shelves or door-mounted racks can transform your daily routine and make your kitchen feel brand new.