13 Nice Kitchen Ideas That Make the Room Feel Welcoming (Budget-Friendly)
A welcoming kitchen isn't about a full renovation or expensive finishes. Sometimes, the smallest changes—a new texture, a pop of color, or better lighting—can completely shift the mood. And the best part?
You don't need a big budget to make it happen. Whether you're renting or own your home, these 13 ideas focus on affordable swaps and DIY touches that add warmth and personality. Think soft textiles, clever storage, and natural elements that feel both stylish and lived-in.
Ready to give your kitchen a cozy upgrade without spending a fortune? Let's dive into these simple, budget-friendly ideas that truly make a difference.
1. Swap Out Hardware for an Instant Facelift
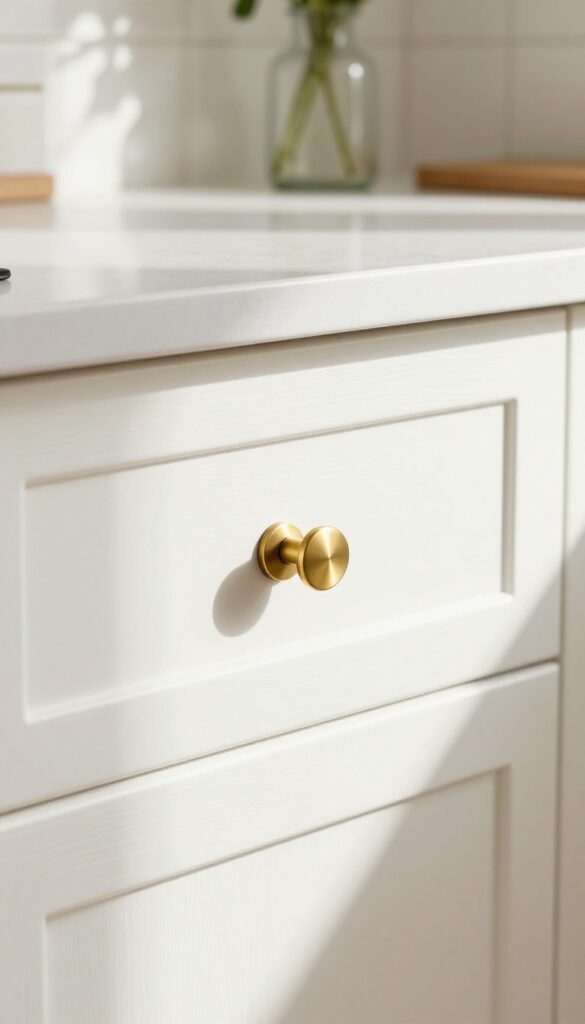
Sometimes the smallest change makes the biggest visual impact. Your cabinet knobs and drawer pulls are like jewelry for the kitchen—they catch the eye and set the tone. Swapping them out is a weekend project that costs next to nothing but instantly upgrades the whole room.
Replacing cabinet hardware is one of the cheapest and easiest ways to refresh your kitchen. You don't need tools beyond a screwdriver, and the whole job can be done in an afternoon. For under $50, you can give your cabinets a completely new personality.
Brushed brass brings warmth and a modern touch, while matte black feels sleek and contemporary. If you prefer something softer, ceramic knobs with a vintage floral pattern add charm and character. The effect is immediate: the kitchen looks more intentional and polished without a full renovation.
Best Finishes For A Budget-friendly Refresh
- Stick with finishes that feel current but timeless. Brushed brass and matte black are top choices because they work with almost any cabinet color—white, navy, gray, or wood. For a softer look, try unlacquered brass that will patina over time, or go with polished nickel for a subtle shine.
- Avoid trendy finishes that might feel dated in a few years.
Mixing Shapes For Visual Interest
- Don't be afraid to mix hardware shapes. Use long bar pulls on drawers and round knobs on cabinets. This adds subtle variety and makes the kitchen feel custom.
- Keep the finish consistent to tie it all together. For example, combine matte black cup pulls on lower cabinets with matte black knobs on uppers.
Installation Tip For A Clean Look
- Before you start, fill old screw holes with wood filler if the new hardware has a different spacing. Let it dry, sand lightly, and paint over the filler to match your cabinets. This small step makes the upgrade look seamless and professional.
- Use a template to ensure new holes are perfectly aligned.
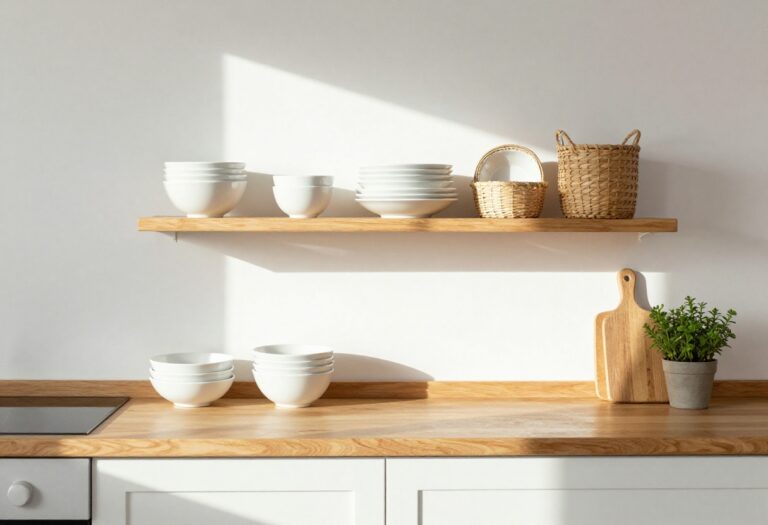
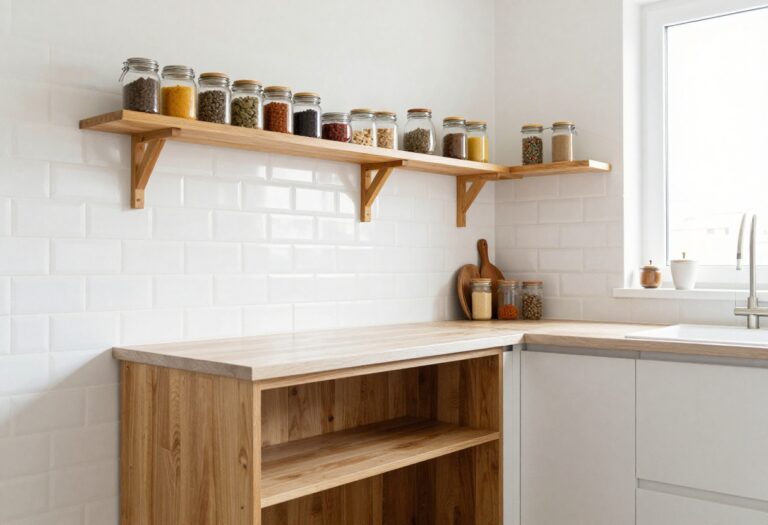
2. Add Open Shelving with Thrifted Finds
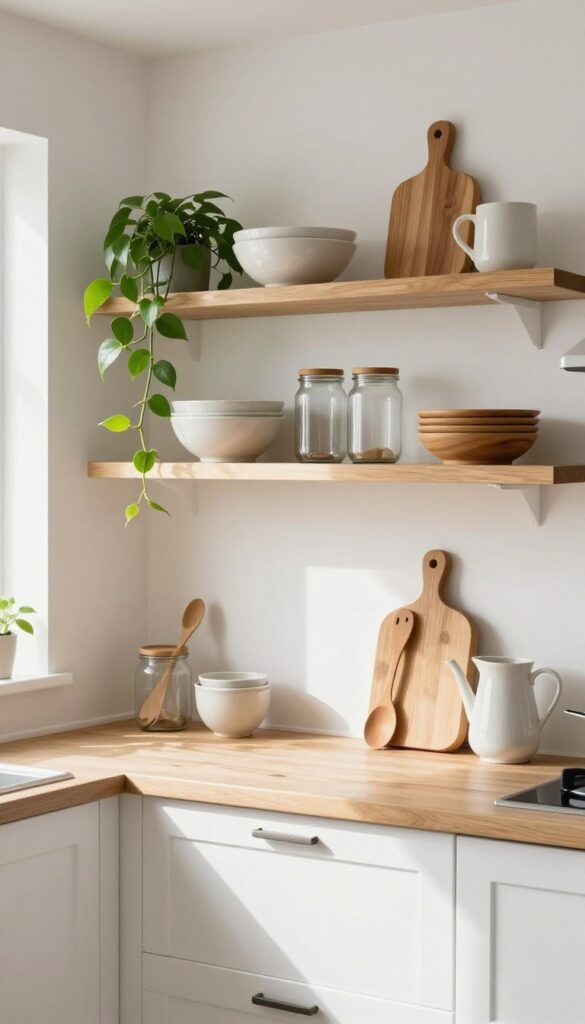
Upper cabinets can make a kitchen feel closed in and heavy. Swapping a few doors for open shelves instantly lightens the room and gives you a chance to show off pieces you actually love. Thrift stores are perfect for finding ceramic bowls, wooden cutting boards, and glass jars that add personality without costing a fortune.
The mix of textures and shapes creates a collected-over-time look that feels warm and welcoming.
Open shelving is one of the easiest ways to make a kitchen feel more open and inviting. It breaks up the monotony of solid cabinets and lets you display items that bring you joy. The key is to keep it practical—use the shelves for everyday dishes and glassware, so they're both decorative and functional.
Thrifted finds add character and keep the look from feeling too polished or generic. Stick to a cohesive color palette to avoid visual clutter, and leave some breathing room between items for a clean, airy feel.
Best Items To Thrift
- Look for ceramic pitchers, stoneware mugs, wooden spoons, and small cutting boards. Glass jars in different sizes are great for storing pasta, beans, or cookies. Avoid anything too precious or fragile—these shelves should be practical first.
- Mixing matte and glossy finishes adds depth without overwhelming the eye.
Shelf Styling Tip
Arrange items in small groupings of odd numbers—three pieces together often look best. Vary heights by stacking a couple of plates on a stand or propping a cutting board behind a jar. Add a small trailing plant like pothos on one end to soften the hard edges and bring life to the display.
Budget-Friendly Swap
Instead of buying new floating shelves, look for solid wood boards at thrift stores or Habitat for Humanity ReStores. Sand them down and apply a simple stain or paint for a custom look at a fraction of the cost. Brackets can also be found secondhand—just make sure they're sturdy enough for your dishware.
3. Layer in Soft Textiles for Warmth
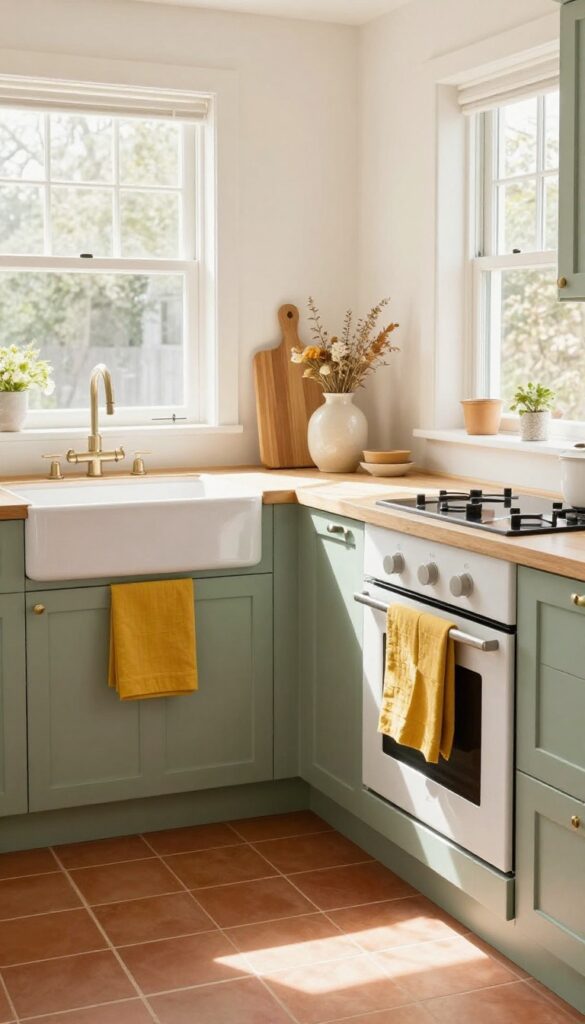
Kitchens often lean hard on hard surfaces—tile, quartz, stainless steel. That's great for cleanup, but it can leave the room feeling cold and echoey. Soft textiles are the quickest way to fix that without a renovation.
A runner in a warm terracotta stripe, a set of cotton dish towels in sage, and a small machine-washable rug near the sink instantly make the space feel lived-in and welcoming. Best of all, you can find these pieces for under $30 each at stores like Target or IKEA, so the whole look costs less than a fancy faucet.
Textiles absorb sound, add color, and introduce a tactile layer that makes a kitchen feel like the heart of the home rather than a sterile workspace. The trick is to choose fabrics that can handle spills and frequent washing, and to stick with a cohesive warm palette. Terracotta, sage green, and mustard yellow all play well together and bring a cozy, organic feel.
A runner down the center of the galley or in front of the stove defines the work zone, while a small rug at the sink catches drips and gives your feet a softer place to stand. Finish the look with a few folded tea towels draped over the oven handle or hung from a simple hook. This is one of those instant upgrades that changes the whole mood of the room in an afternoon.
Best Fabrics For Kitchen Use
- Cotton and linen are your best friends here. They're absorbent, washable, and get softer over time. Look for flat-weave cotton rugs that won't trap crumbs, and avoid anything with a thick shag that could become a sponge.
- For towels, 100% cotton in a simple stripe or check pattern is both practical and pretty. If you have a dishwasher, you'll go through fewer towels, but having a stack of clean ones on hand always makes the kitchen feel ready for company.
Color Pairing That Works
- Stick to warm, earthy tones that feel natural in a kitchen. Terracotta pairs beautifully with sage green and warm wood tones. Mustard adds a pop of energy without being loud.
- If you prefer a neutral base, go for cream or beige textiles with a subtle texture like a ribbed weave, then add one accent color through a single piece—maybe a mustard runner or a set of sage dish towels. This keeps the look cohesive but not boring.
Budget-Friendly Swap
- You don't need to spend a lot. A cotton runner from IKEA costs around $15, and a pack of four dish towels from Target runs about $12. For a small rug near the sink, check the clearance section at HomeGoods or look for a machine-washable doormat that's soft enough for indoor use.
- The total cost for a full textile refresh can easily stay under $50, and it's all easy to swap out when you want a new look.
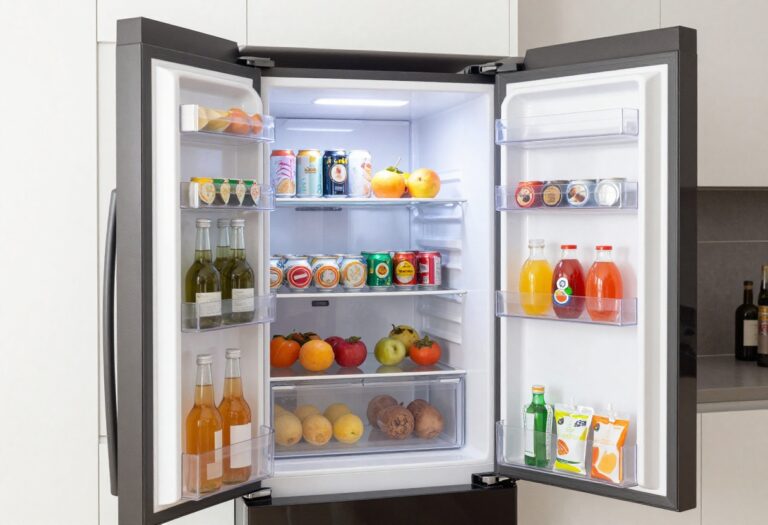
4. Use Plants to Bring Life to Corners
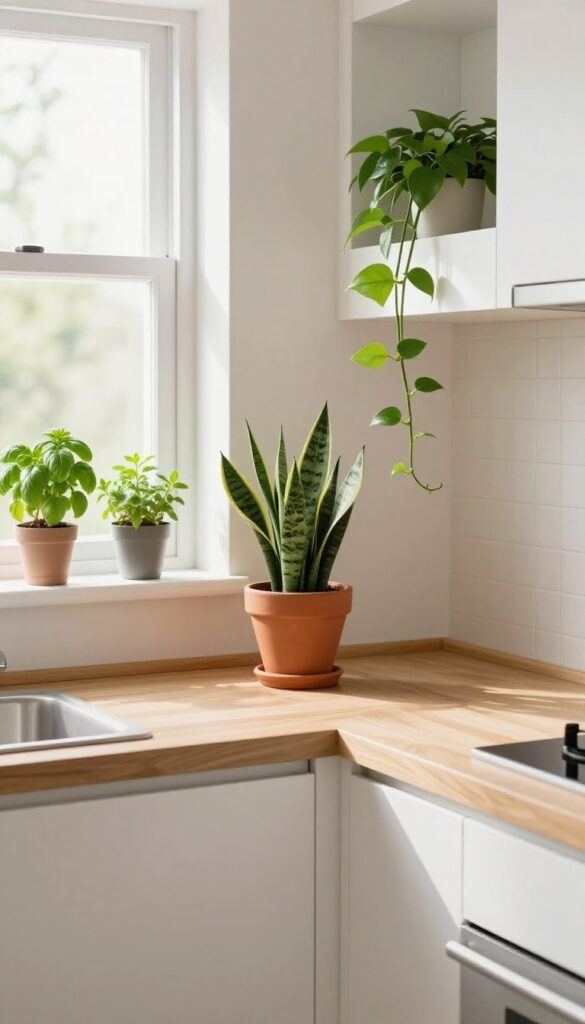
Kitchen corners often end up as dead space—empty, awkward, and a little sad. But a well-placed plant can transform that forgotten spot into a mini oasis. Herbs on the windowsill, a trailing pothos on top of cabinets, or a small snake plant on the counter add freshness without overwhelming the room.
The best part? You don't need a green thumb or a big budget. Thrifted pots, painted old ones, or even simple mason jars work beautifully.
Plants improve air quality and make the space feel alive, which is exactly what a welcoming kitchen needs.
Plants are the easiest way to inject life into a kitchen, both literally and visually. They soften hard edges, add organic texture, and bring a pop of green that complements any color scheme. For a budget-friendly approach, skip the fancy plant store and grab cuttings from friends or propagate your own.
Snake plants, pothos, and spider plants are nearly impossible to kill and thrive in low light. Place them in corners, on open shelving, or even hang them near a window. Grouping small pots together creates a fuller look without spending much.
And if you're worried about mess, choose plants that don't drop leaves or require constant pruning.
Best Spots For Kitchen Plants
- Not every corner gets equal light, so match the plant to the spot. A sunny windowsill is perfect for culinary herbs like basil, mint, and rosemary—they'll thrive and be handy for cooking. Darker corners near the fridge or pantry are ideal for low-light champions like ZZ plants or pothos.
- The top of cabinets is another prime spot: a trailing plant cascading down adds softness to an otherwise hard line. Just make sure you can reach it for watering without a ladder.
Budget-friendly Potting Ideas
- You don't need expensive ceramic pots to make plants look good. Thrift stores and garage sales are goldmines for unique containers—think old teacups, tin cans, or wooden crates. A coat of spray paint in a unified color (like matte black or sage green) ties mismatched pots together instantly.
- For a cohesive look, stick to one color family or material, like all terra-cotta or all white. Drainage is key, so either drill holes or use a cachepot system (plastic nursery pot inside a decorative one).
Styling Tip: Layer Heights
- A flat row of pots can look boring. Create visual interest by mixing heights: use a plant stand, a stack of books, or an upside-down pot to elevate some plants. Place taller plants like snake plants or fiddle-leaf figs in corners, and let smaller pots cluster on counters or shelves.
- This layering draws the eye around the room and makes the greenery feel intentional rather than an afterthought.
5. Paint an Accent Wall or Backsplash

A single wall painted in a rich hue can completely shift the energy of your kitchen. Warm olive green, soft blue, or even a muted terracotta adds depth without overwhelming the space. For a backsplash, peel-and-stick tiles or a stenciled pattern deliver the same visual punch—both are renter-friendly and easy on the wallet.
Painting an accent wall or backsplash is one of the quickest ways to make your kitchen feel intentional and cozy. The key is choosing a color that complements your cabinets and countertops. Olive green pairs beautifully with white or wood tones, while soft blue keeps things airy.
If you're renting, stick with peel-and-stick tiles or a stencil—they come off cleanly and cost under $100. Finish with matte black or brass hardware to tie the look together.
Best Colors
- Stick with warm, welcoming shades that don't compete with your cabinets. Olive green, dusty blue, and warm terracotta are top picks. For a bolder look, try deep navy or charcoal—they add drama without feeling cold.
- Test samples on the wall first; natural light changes how colors read.
Budget-Friendly Swap
- Skip expensive tile and go for peel-and-stick options. They come in subway, hexagon, and Moroccan patterns. Or use a stencil and paint to create a custom backsplash.
- Both cost under $100 and take an afternoon to install. Plus, they're easy to remove when you want a change.
Finishing Touch
Once your accent wall or backsplash is done, add open shelving with a few ceramic pieces or a small plant. The color will anchor the room, and the shelves keep it from feeling too heavy. Use warm LED under-cabinet lighting to highlight the texture and tone.
6. Display Everyday Items as Decor
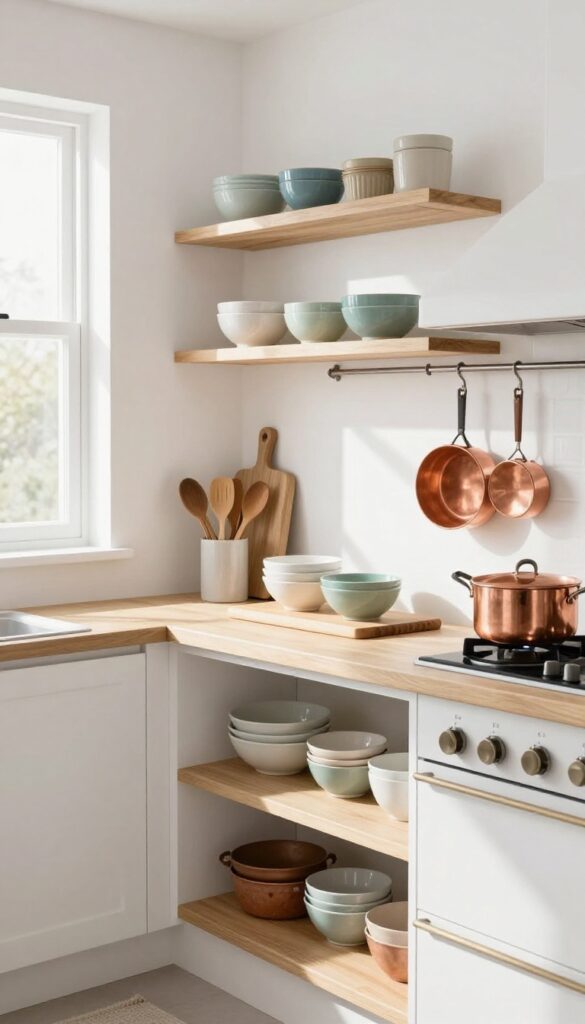
Your kitchen is full of beautiful tools you use every day—so why hide them away? Grouping wooden spoons in a crock, stacking colorful bowls on open shelves, or hanging copper pots on a rail turns functional items into decor. This approach saves storage space, adds personality, and costs almost nothing to execute.
Everyday kitchen items like utensils, cutting boards, and cookware can double as decor when arranged with intention. Instead of cramming everything into drawers, let your tools breathe on countertops, shelves, or wall racks. The trick is to keep the display tidy and cohesive—think matching finishes or a consistent color palette.
This idea works especially well in rental kitchens where you can’t change cabinets, but you can style your countertops to feel curated.
Best Materials To Showcase
- Natural materials like wood, ceramic, and copper warm up a kitchen instantly. Wooden spoons and cutting boards bring texture, while ceramic bowls add pops of color. Copper pots catch the light and feel timeless.
- Stick to two or three materials so the display doesn’t look cluttered.
Storage Tip: Use Vertical Space
Hang a pot rail or magnetic knife strip to free up counter space and put your best pieces on display. For smaller items like measuring cups or spatulas, use a countertop crock or a wall-mounted pegboard. Group similar items together—like all wooden spoons in one container—for a clean, intentional look.
Budget-Friendly Swap
- If you don’t own copper or ceramic, start with what you have. Thrift stores often have colorful Pyrex bowls or vintage utensils for a few dollars. Even a simple collection of white ramekins or mason jars can look styled when arranged on a wooden tray.
- The key is repetition and order.
7. Upgrade Lighting with Affordable Fixtures
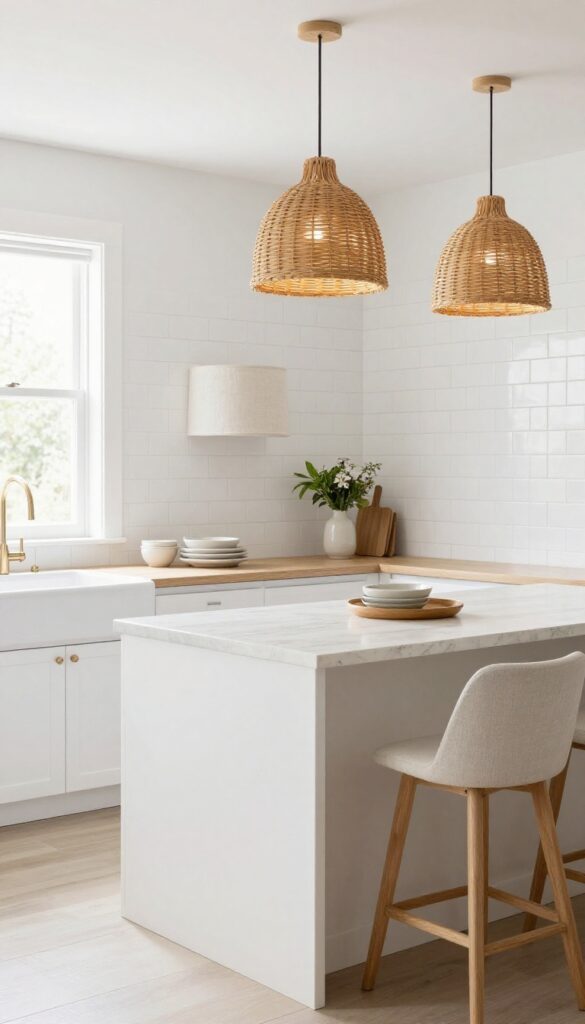
Good lighting can transform a kitchen from flat to inviting in seconds, and you don't need an electrician or a big budget to make it happen. Swapping out a basic builder-grade fixture for something with more character is one of the quickest ways to add warmth and personality. Think rattan pendants, simple drum shades, or even a plug-in sconce near the sink—each option brings a soft, welcoming glow without breaking the bank.
Start by looking at your main overhead light. If it's a standard flush mount, consider replacing it with a pendant light that hangs lower over an island or a dining area. Rattan or woven shades add texture and a natural feel, while a clean drum shade in linen or metal keeps things modern.
For smaller kitchens or rental spaces, plug-in sconces are a game-changer—they mount to the wall and plug into an outlet, so no hardwiring is needed. Place one next to the sink or above a counter to create a cozy task light. Secondhand stores and budget-friendly home retailers often have great options for under $50, so you can refresh the look without guilt.
Best Fixture Styles For A Warm Glow
- Rattan pendants are a top choice for adding texture and diffusing light softly. They work well in farmhouse, boho, or transitional kitchens. Drum shades in cream or beige linen give a clean, tailored look that fits modern and traditional spaces.
- For a touch of industrial charm, go with a black metal cone pendant. The key is to choose fixtures that cast light downward or through a shade—avoid bare bulbs that can feel harsh.
Budget-friendly Swap Tips
- Check Facebook Marketplace, thrift stores, or IKEA for affordable finds. A simple flush mount can often be replaced with a pendant for under $40 if you buy secondhand. For plug-in sconces, look for swing-arm styles that let you direct light exactly where you need it.
- If you're renting, keep the original fixture in a box and swap it back when you move—no harm done.
Placement And Layering
- Layer your lighting by combining the new overhead fixture with under-cabinet LED strips or a small table lamp on the counter. This creates a balanced, inviting glow at different heights. If you add a sconce near the sink, position it at eye level to avoid shadows while washing dishes.
- The goal is to make the kitchen feel brighter and cozier without turning on every overhead light.
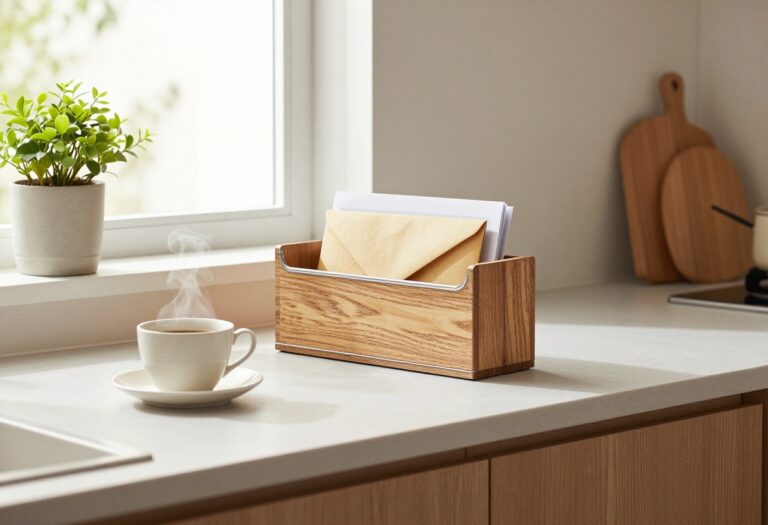
8. Create a Coffee or Tea Station
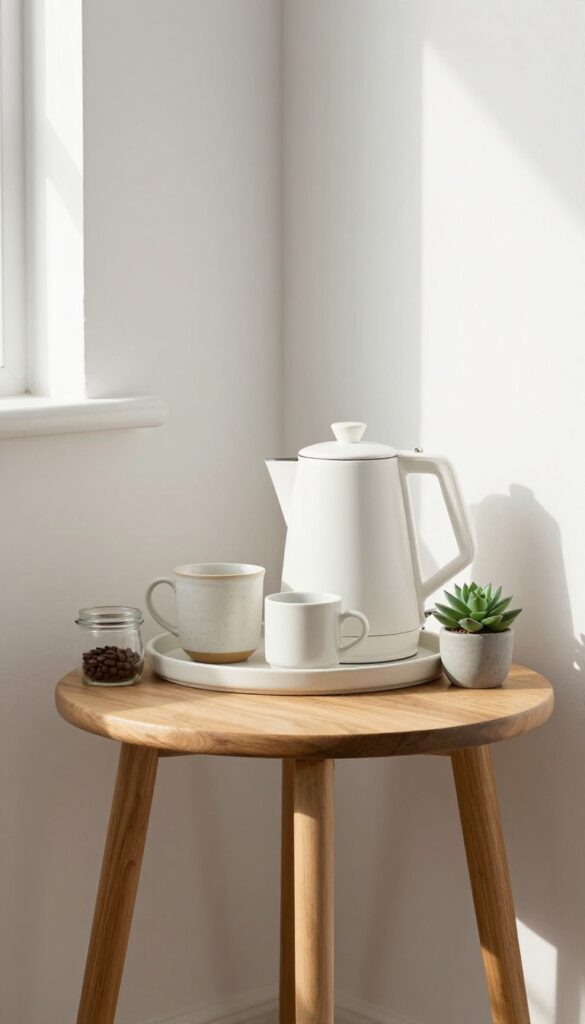
A dedicated coffee or tea corner transforms your morning routine into a small ritual. You don't need a huge kitchen or a fancy remodel—just a thrifted side table, a rolling cart, or even a narrow shelf. The key is gathering your kettle, favorite mugs, and a few essentials on a tray so everything feels intentional, not cluttered.
A tiny plant or a small vase of greenery adds life and makes the spot feel like a purposeful part of your kitchen.
Even if you're on a tight budget, a coffee or tea station can look polished and inviting. Start with a simple tray—wood, metal, or ceramic—to corral your items. Add a small electric kettle, a couple of mugs, and maybe a jar of your go-to brew.
A thrifted side table or a rolling cart works perfectly and adds extra storage. Place it in an unused corner, on a counter, or even on a narrow console table. The station becomes a visual anchor that says "slow down and enjoy."
Best Colors And Materials
- Stick with a neutral palette—white, cream, wood tones, or soft gray—so the station blends into your kitchen without feeling busy. A wooden tray adds warmth, while a metal or ceramic one feels crisp. If you want a pop of color, choose a single accent like a bright mug or a small plant.
- Keep the look cohesive by matching the tray material to other finishes in your kitchen, like your cabinet hardware or light fixtures.
Budget-Friendly Swap
- Skip the expensive store-bought cart and look for a vintage side table at a thrift store or flea market. A quick coat of paint can transform it. Use a simple wooden crate turned on its side as open shelving for mugs.
- Repurpose a small cutting board as a tray. These swaps cost pennies but add character and keep your station unique.
Finishing Touch
- Add a small plant or a sprig of eucalyptus in a tiny vase. It softens the utilitarian look of the kettle and mugs. A small dish for tea bags or sugar packets keeps everything tidy.
- If you have room, a small stack of napkins or a pretty spoon rest completes the setup. The goal is to make the station feel like a curated vignette, not just a pile of stuff.
9. Add Warmth with Wood Accents
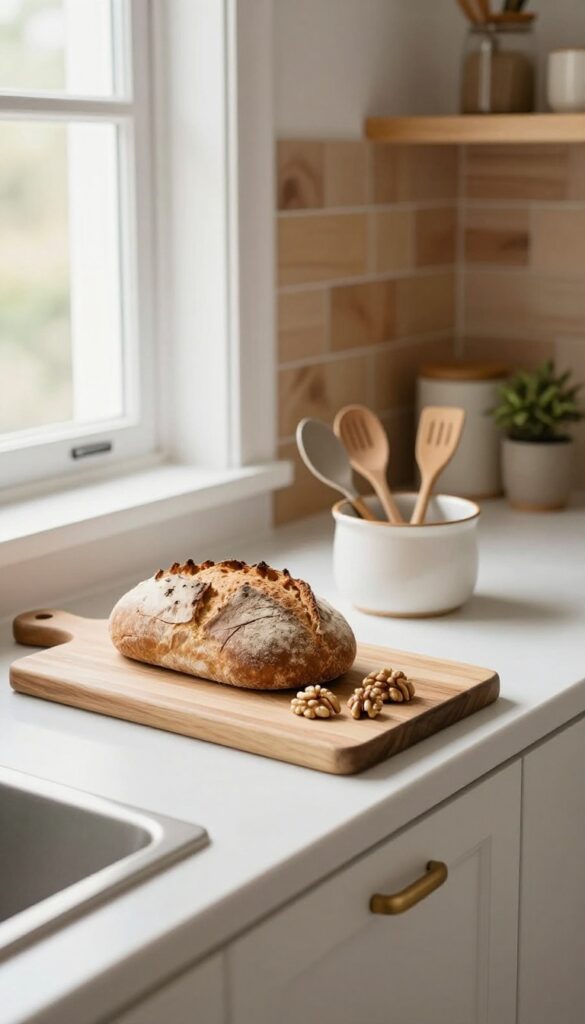
Wood has a way of making any kitchen feel instantly more inviting. It softens the hard edges of tile and stainless steel, bringing a natural, grounded warmth that’s hard to replicate. And the best part?
You don’t need a full renovation to get the look. Small, affordable wood accents can transform the space without breaking the bank.
Start with the simplest swap: wooden cutting boards and butcher block countertops. A large wooden cutting board left out on the counter doubles as both a functional tool and a decor piece. If your budget allows, a peel-and-stick wood backsplash is an easy weekend upgrade that adds texture and warmth without the commitment of real tile.
Even a few wood-handled utensils in a crock by the stove can make the room feel cozier.
Best Woods To Use
Stick with warm-toned woods like oak, walnut, or bamboo. These bring out the cozy factor without looking too rustic or too modern. Avoid cool-toned woods like ash or maple if you’re going for warmth—they can feel a bit sterile in a kitchen setting.
Budget-Friendly Swap
If a full butcher block countertop isn’t in the cards, try a large wooden chopping board that sits over the stove or sink. Or add a wooden fruit bowl filled with apples and oranges for a pop of color and texture. Even a set of wood-edged trivets can make a difference.
Finishing Touch
To keep the look cohesive, repeat the wood accent in at least two places—like a cutting board on the counter and a wooden shelf above the sink. This creates a visual rhythm that feels intentional, not accidental.
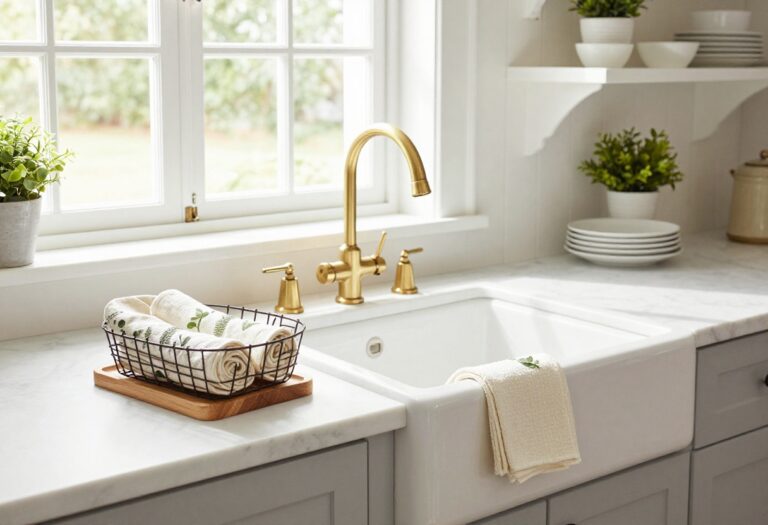
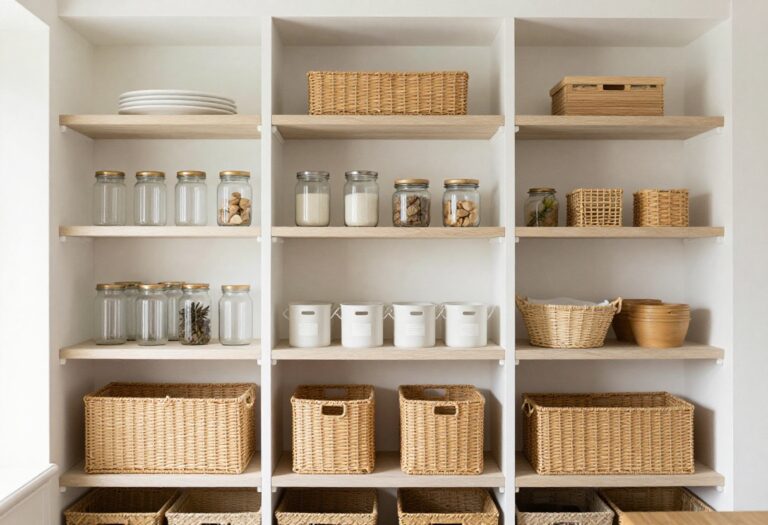
10. Use Baskets for Stylish Storage
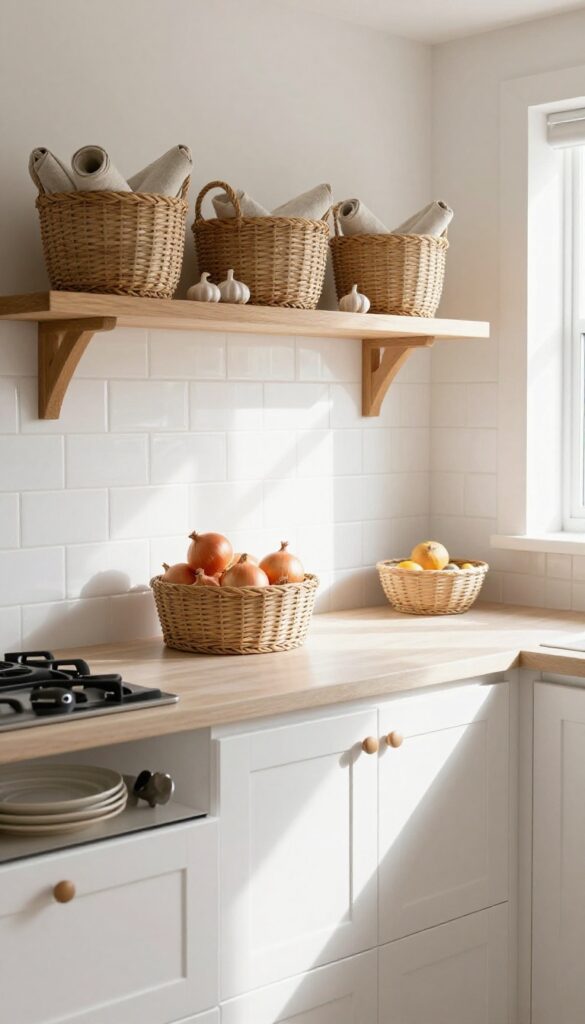
Baskets are the unsung heroes of kitchen organization. They instantly make a room feel more collected and less cluttered, all while adding natural texture that softens hard surfaces like tile and countertops. Best of all, they're budget-friendly and come in endless shapes, sizes, and weaves, so you can find exactly what fits your style and space.
Woven baskets hide clutter while adding texture. Use them on top of cabinets for seldom-used items, or under open shelves for linens and produce. They're inexpensive and come in various sizes and weaves.
Best Materials & Weaves
Seagrass and water hyacinth offer a light, airy look that works well in bright kitchens. For a warmer, more rustic feel, go with rattan or bamboo. Darker woven options like abaca or palm leaf add depth and contrast against white cabinets or light walls.
Where To Place Them
Top of cabinets: use large rectangular baskets to store bulky platters or mixing bowls you don't use daily. Under open shelves: small round baskets corral produce like onions and potatoes, or hold dish towels and napkins. On countertops: a single medium basket can catch mail, keys, or fruit.
Budget-Friendly Swap
Skip expensive designer bins and check discount stores, flea markets, or online thrift shops. A uniform set of baskets in the same weave creates a cohesive look without costing much. Mixing two complementary weaves adds visual interest without feeling messy.
11. Hang a Statement Mirror
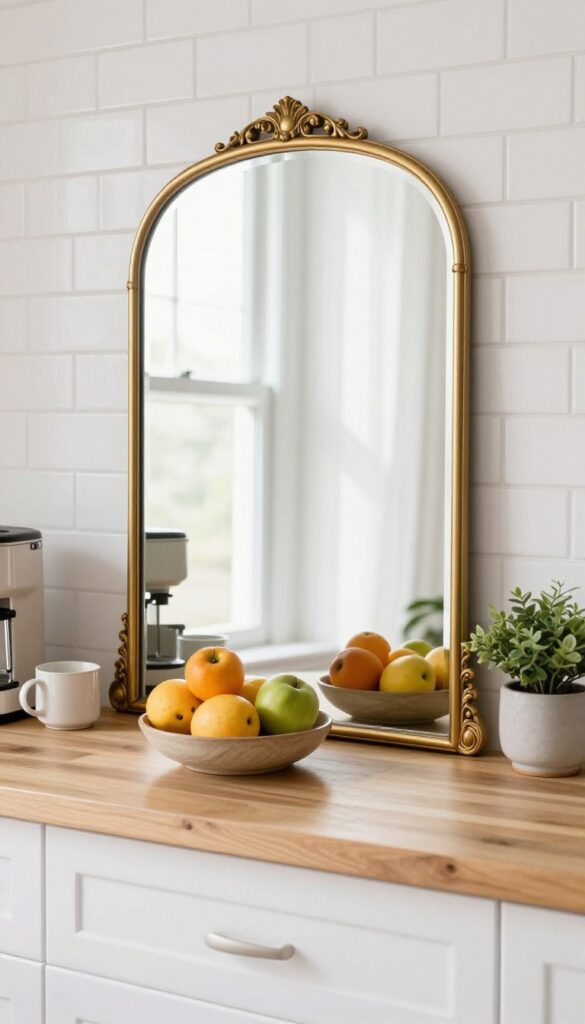
A mirror does more than check your reflection—it opens up the whole room. In a kitchen, a well-placed mirror bounces natural light around, making even a narrow galley feel airy and bright. Leaning a vintage mirror against the backsplash or hanging one on a blank wall adds instant depth and a subtle touch of elegance, all for very little cost.
It's one of those budget-friendly tricks that quietly transforms the space without a renovation.
The beauty of a statement mirror in the kitchen is how effortlessly it blends function and style. It catches the morning light from a window and spreads it across the countertops, making the room feel larger and more welcoming. You don't need a huge mirror—even a medium-sized one can shift the whole atmosphere.
Lean it casually against the tile for a relaxed, collected look, or hang it securely above a coffee station or open shelf. The reflective surface also adds a layer of polish that balances out the utilitarian edges of a kitchen. For the best effect, place it opposite a window or a light-colored wall so it can do its job of amplifying brightness.
Best Placement
- Position your mirror where it can reflect something beautiful—a window, a bowl of fruit, or a row of pretty dishes. Avoid placing it directly behind the stove or sink where it might catch splashes or steam. A blank wall near the dining area or across from an entryway works perfectly.
- If you're leaning it, make sure it's stable and out of high-traffic zones.
Style And Frame
- Choose a frame that complements your kitchen's vibe. A vintage gold or brass frame adds warmth against white subway tile, while a dark wood or black frame feels grounded in a modern farmhouse kitchen. For a lighter look, try a simple round mirror with a thin metallic rim.
- The frame is where you can inject personality without overwhelming the space.
Budget-Friendly Swap
- You don't need an antique or a designer piece. Thrift stores, flea markets, and online marketplaces are full of affordable mirrors with character. A quick spray paint update can transform a dated frame into something that looks intentional and chic.
- Even a basic IKEA mirror can feel custom when leaned against a shelf with a few plants or cookbooks.
12. Incorporate Black and White Contrast
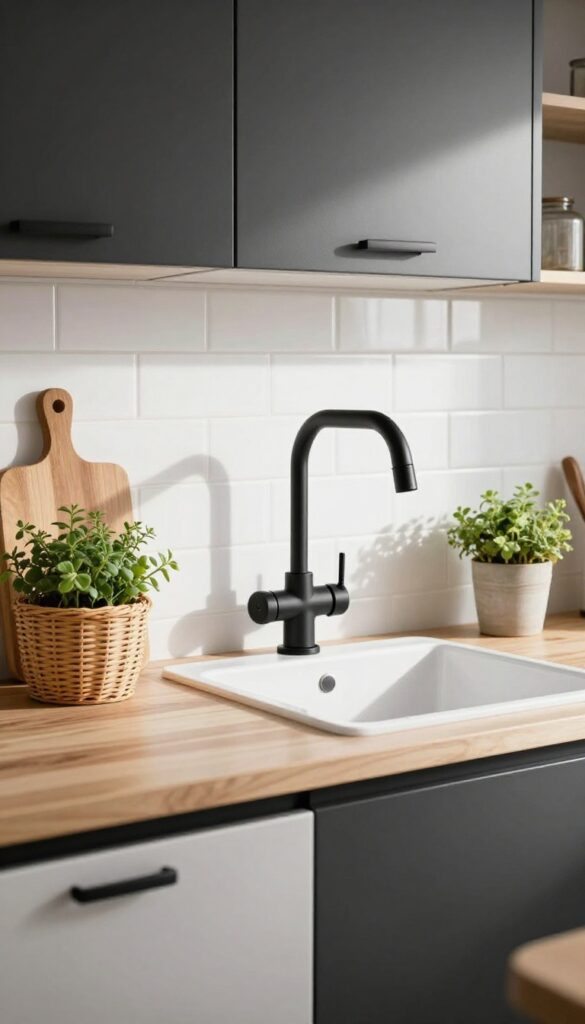
Black and white kitchens have a timeless appeal, but they can sometimes feel a bit cold or stark. The trick to making this classic combo feel welcoming is balancing the contrast with warm touches. Think matte black hardware against a crisp white backsplash, then soften the look with natural wood cutting boards, a small potted herb garden, or a woven basket for produce.
It's a budget-friendly way to create a high-impact, clean look that still feels like home.
This idea is all about using contrast to create visual interest without spending a lot. The key is to keep the black and white elements simple and intentional, then let warmth come through in the textures and accessories. A white subway tile backsplash paired with black cabinet pulls and a black faucet instantly gives your kitchen a modern, crisp edge.
To keep it from feeling too clinical, add a few wooden elements—like a butcher block countertop or open shelving with wood brackets. Greenery also works wonders; a small snake plant or a vase of eucalyptus brings life and softness to the monochrome palette. The whole look feels clean, welcoming, and surprisingly affordable, especially if you focus on swapping out hardware and accessories rather than renovating the whole space.
Best Materials
- Stick with materials that have a bit of texture to avoid a flat look. For black elements, choose matte finishes over glossy ones—matte black hardware, a matte black faucet, or even a matte black range hood. For white surfaces, consider a slightly textured subway tile or a beadboard backsplash.
- Wood accents are essential: a bamboo cutting board, wooden salad bowls, or a teak utensil holder add warmth. Avoid plastic or shiny metals, which can make the space feel cheap or cold.
Budget-Friendly Swap
- You don't need to replace cabinets or countertops to get this look. Start by swapping out your cabinet knobs and pulls for matte black ones—they're inexpensive and easy to install. Next, add a black faucet if your budget allows, or simply paint your existing one with a high-heat spray paint designed for metal.
- A white peel-and-stick backsplash can mimic tile for a fraction of the cost. Finish with a few black canisters or a utensil holder from a discount store. Small changes add up to a big transformation.
Finishing Touch
- The final layer is all about warmth. Place a small wooden cutting board on the counter next to the stove, and set a black ceramic salt cellar and a small potted succulent on it. Hang a few black-and-white tea towels from the oven handle, but make sure they have a natural linen texture.
- A wooden fruit bowl filled with lemons or green apples adds a pop of color and life. These details make the kitchen feel lived-in and welcoming, not like a showroom.
13. Add a Personal Gallery Wall
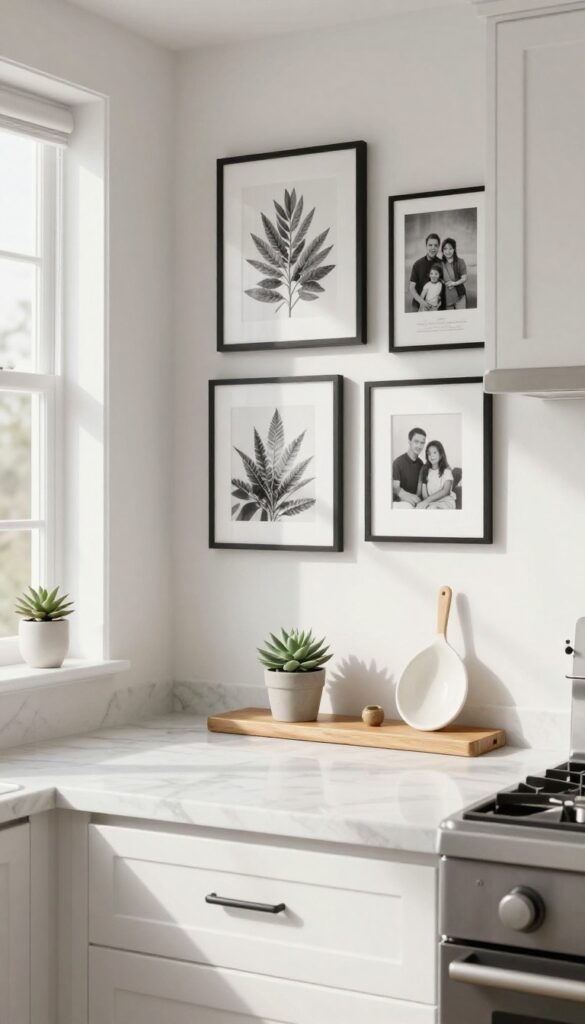
Blank kitchen walls are a missed opportunity for warmth and personality. A gallery wall turns an empty stretch into a conversation starter without costing a fortune. Mix affordable prints, family photos, or vintage finds to create a display that feels collected over time.
Matching frames keep it tidy; mismatched frames add an eclectic, lived-in charm.
A gallery wall in the kitchen softens the hard surfaces of cabinets and countertops. It makes the room feel uniquely yours, especially in open-plan spaces where the kitchen blends into the living area. Stick to a cohesive color palette—black and white, warm wood tones, or soft pastels—so the wall feels intentional rather than cluttered.
Use lightweight frames to avoid damaging drywall, and arrange them on the floor first to perfect the layout before hanging.
Budget-Friendly Swap
- Don't splurge on expensive art. Print free downloadable quotes or botanical illustrations from online archives. Frame them in simple IKEA frames or thrifted frames spray-painted the same color for a unified look.
- Swap out prints seasonally or whenever you crave a refresh.
Layout Tip
For a small kitchen, keep the gallery wall to one focal area—beside the window, above the coffee station, or along a narrow backsplash. Use a mix of small and medium frames, leaving equal spacing between them. A centered arrangement works best, but you can also lean frames on a shelf for a casual, adjustable display.
Finishing Touch
Add a small shelf beneath the gallery wall to hold a tiny plant, a salt cellar, or a ceramic spoon rest. This anchors the display and ties it into the kitchen's daily function. Choose a shelf that matches your frame finish—black metal for a modern look, natural wood for a rustic feel.
FAQ
What is the cheapest way to make my kitchen feel welcoming?
Start with small, high-impact changes like swapping hardware, adding a rug, or displaying a few plants. These cost under $50 and instantly soften the space.
Can I make my kitchen look welcoming if I rent?
Absolutely. Focus on renter-friendly updates like peel-and-stick backsplash, removable wallpaper, and temporary lighting. Textiles and decor items are also easy to take with you.
How do I choose a color scheme for a warm kitchen?
Stick to earthy tones like warm whites, soft greens, terracotta, and wood tones. These colors naturally feel cozy and pair well with budget-friendly decor.
What are some easy DIY projects for a kitchen makeover?
Painting cabinets or an accent wall, installing open shelving, and creating a gallery wall are all beginner-friendly. Many can be done in a weekend with basic tools.
How can I add storage without spending much?
Use baskets, mason jars, and wall-mounted racks. Repurpose items you already own, like using a mug tree for utensils or a spice rack for small jars.
Conclusion
Making your kitchen feel welcoming doesn't require a big budget or a complete overhaul. Small, intentional changes—like swapping hardware, adding plants, or displaying everyday items—can transform the space into a warm, inviting hub. Pick a few ideas that resonate with your style and start there.
Even one or two updates can make a noticeable difference. Your kitchen should feel like the heart of your home, and with these budget-friendly tips, it will.