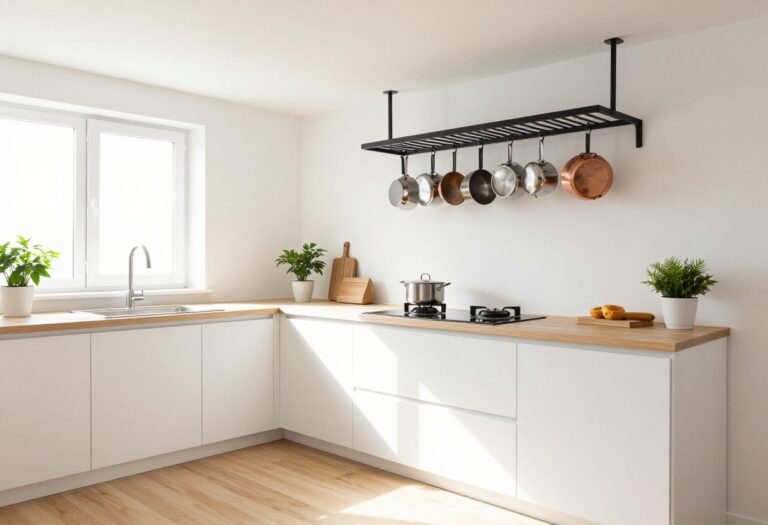
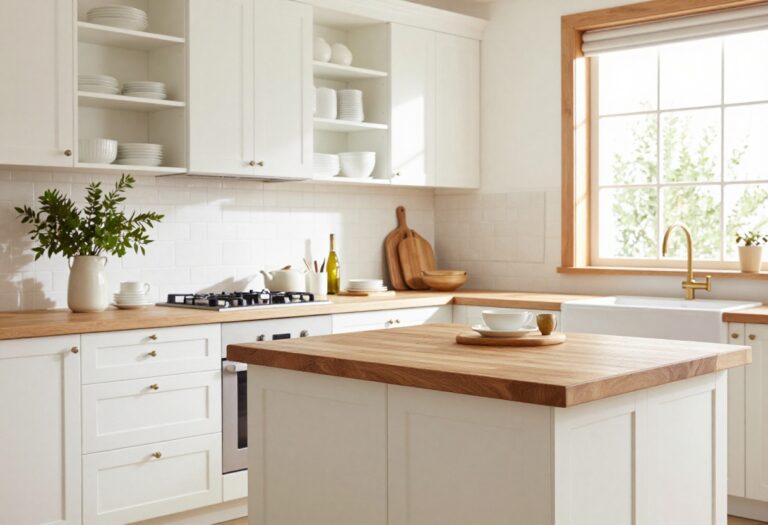
15 Kitchen Cabinet Lighting Ideas for a Brighter Work Zone
Good lighting can make or break a kitchen. When you're chopping vegetables or reading a recipe, shadows from overhead fixtures get in the way.
Cabinet lighting solves that problem while adding a warm, polished look to your space. Whether you're remodeling or just want a quick upgrade, these 15 ideas focus on smart storage and easy installation.
Each option balances practicality with style, so your kitchen feels brighter and more organized without a major overhaul.
1. Under-Cabinet LED Strip Lights for Task Lighting
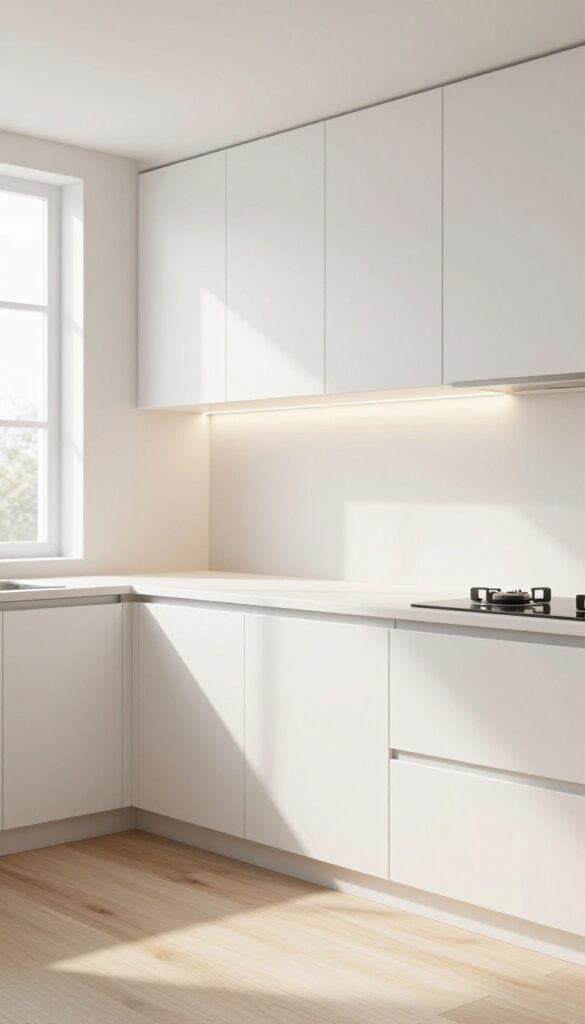
Countertops can feel like a dark zone even with overhead lights on, especially when your body blocks the main fixture. Under-cabinet LED strips solve that by casting light exactly where you need it—right on your prep surface. They’re slim enough to hide from view, so the focus stays on your countertops and backsplash.
Warm white strips give the kitchen a soft, inviting glow, while cool white helps you see every detail when chopping or reading recipes.
These lights are one of the quickest kitchen upgrades you can make. Most kits come with adhesive backing and plug into a standard outlet, so no electrician is needed. Stick them toward the front of the cabinet underside to light the counter edge, or place them further back to illuminate the whole surface.
Because they’re low-profile, they won’t interfere with cabinet doors or drawers. Pair them with a dimmer switch or smart plug for adjustable brightness throughout the day.
Best Color Temperature
For a kitchen that feels both practical and cozy, stick with 2700K to 3000K (warm white) if your cabinets are wood tones or you want a relaxed vibe. Go with 4000K to 5000K (cool white) if you do a lot of precision cooking or have a modern all-white kitchen. Some LED strips let you switch between temperatures, which is handy for different tasks.
Installation Tip
Before sticking the strips, clean the cabinet underside with rubbing alcohol to remove grease or dust. Measure the length you need and cut the strip at the marked points (most are cuttable every few inches). If your cabinets have a lip, mount the strip on the bottom edge rather than the recessed area to avoid shadows.
Storage-smart Bonus
- Use the light to highlight your most-used tools. Place a small magnetic strip on the backsplash to hold knives or spice tins right under the glow. The light makes them easy to grab and keeps counters clutter-free.
- You can also install a slim power strip inside the cabinet above to hide cords and keep outlets accessible.
2. Puck Lights Inside Glass-Front Cabinets
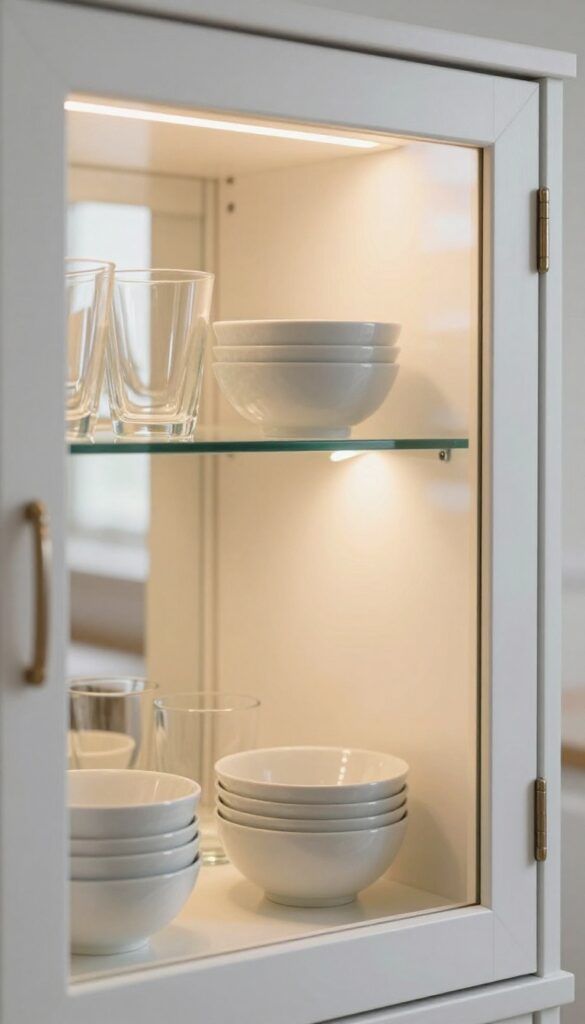
Glass-front cabinets are a double-edged sword. They look beautiful and open up a kitchen, but they also put everything on display. The trick to making them work is intentional lighting.
Adding small puck lights inside the cabinets turns your dishes into a curated display and makes the whole kitchen feel deeper and more polished. Battery-operated options mean you can skip the electrician and still get that warm, gallery-like glow.
Puck lights are small, round fixtures that sit directly on the shelf and cast light downward or outward. Inside a glass-front cabinet, they highlight the texture of ceramic bowls, the sparkle of glassware, or the color of a stacked set of dinner plates. The soft illumination also reduces harsh shadows and makes the cabinet contents feel like part of the room's decor rather than just storage.
For the best effect, place one puck light per shelf, positioned slightly toward the back so the light spreads evenly across the items in front. Battery-operated versions with remote controls or motion sensors are especially convenient—no wiring, no drilling, and you can adjust brightness or turn them off without opening the door.
Best Placement For Maximum Impact
- Focus on cabinets that hold your most visually appealing items—matching dinnerware, colored glass, or heirloom pieces. Avoid overcrowding the shelves; leave some breathing room so the light can travel. If your cabinet has multiple shelves, stagger the puck lights so they don't create a harsh line of light.
- A warm white bulb (2700K to 3000K) gives the softest, most inviting glow.
Battery Vs. Hardwired: Which To Choose
- Battery-operated puck lights are the most practical choice for renters or anyone who wants a quick upgrade. Look for lights with long battery life (some last up to 50 hours) and easy-to-replace batteries. Hardwired options are more permanent and can be tied to a wall switch, but they require an electrician.
- For most kitchens, battery-powered lights with a remote are the sweet spot between convenience and aesthetics.
Styling Tip: Edit What You Display
- Puck lights make everything visible, so take a moment to edit your cabinet contents. Keep only the items that look good together—stick to a cohesive color palette or material theme. Remove clutter like mismatched lids or plastic containers.
- The light will emphasize what's there, so a clean, curated shelf will look like a designer feature, not a messy cupboard.
3. Toe-Kick Lighting for a Floating Effect
The space under your cabinets often gets overlooked, but a strip of LED tape along the toe kick can change the whole mood of your kitchen. It casts a soft, floor-level glow that makes cabinets appear to float, instantly opening up the room. Beyond the visual trick, it’s a practical safety feature for late-night water runs or early-morning coffee.
Toe-kick lighting is one of those smart upgrades that feels both luxurious and budget-friendly. The low-profile LEDs are easy to install and hide, and they add just enough light to eliminate dark corners without overwhelming the space. It works especially well in galley kitchens or open-concept layouts where you want a seamless transition between rooms.
Best Colors
Warm white (2700K–3000K) is the go-to for a cozy, inviting glow that complements most cabinet finishes. Cool white can feel too clinical, but it works in modern all-white kitchens. Avoid colored LEDs unless you’re going for a party vibe—they tend to look dated fast.
Lighting Tip
Use a continuous strip rather than puck lights for an even, uninterrupted line of light. Measure your toe-kick length carefully and look for strips with a high CRI (90+) so the floor and cabinet colors read true. A dimmer switch gives you control over the intensity, perfect for adjusting from task lighting to ambient mood.
Small-space Fix
In a narrow kitchen, toe-kick lighting visually widens the floor area by drawing the eye to the perimeter. Pair it with light-colored flooring to maximize the effect. If your cabinets sit on legs, you can run the strip along the inside edge for a similar floating look without cutting into the toe kick.
4. Adjustable Track Lighting Above Open Shelving
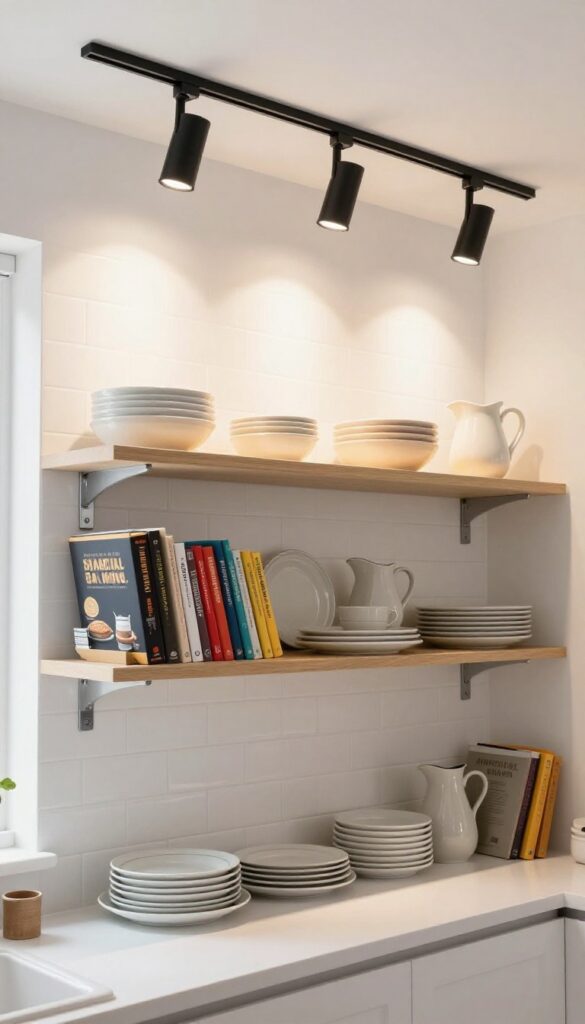
Open shelving is a double-edged sword: it looks airy and curated, but it can also cast shadows that hide your favorite dishes. Adjustable track lighting solves that by letting you point light exactly where you need it—right onto your ceramic collection or that stack of colorful cookbooks. The slim profile keeps the look clean, and the adjustable heads mean you can shift the focus whenever you rearrange your shelves.
It’s a practical upgrade that makes your storage work harder while adding a sleek, modern edge.
Track lighting above open shelves is one of those ideas that feels both intentional and flexible. Instead of relying on a single overhead fixture that washes everything in flat light, you get to play director—highlighting a vintage pitcher here, a row of matching mugs there. The result is a kitchen that feels brighter, more layered, and instantly more polished.
Plus, because the track mounts flush to the ceiling, it doesn’t eat into your vertical storage space. It’s a smart choice for renters too, since installation is often less invasive than hardwiring new cans.
Best Finishes
- Matte black is a go-to for a reason: it disappears against dark ceilings or adds a subtle anchor to white walls. Brass brings warmth and a hint of luxury, especially if your hardware or faucet already leans gold. For a more understated look, go with brushed nickel or matte white—they blend in without competing with your shelf styling.
- Whichever you choose, keep the track finish consistent with other metal accents in the room for a cohesive feel.
Placement Tip
- Mount the track about 8 to 12 inches in front of the shelf edge, centered over the shelf’s depth. This angle lets the light hit the front of your displayed items rather than casting shadows behind them. If you have two shelves, one longer track with multiple heads works better than separate short tracks—it gives you more flexibility to aim each head independently.
- For a narrow shelf, a single-head track is enough; for wider spans, three to four heads keep everything evenly lit.
Styling The Shelves
- Since the light will draw attention to what’s on display, keep your shelf styling intentional. Group items in odd numbers, mix heights, and leave a little breathing room between objects so the light doesn’t get blocked. Glassware and metallic finishes really catch the light, so place those where you want the most sparkle.
- And don’t forget the practical side: store everyday dishes on lower shelves and save the top shelf for your prettiest pieces—the track light will make them shine.
5. In-Cabinet Strip Lights for Deep Pantries
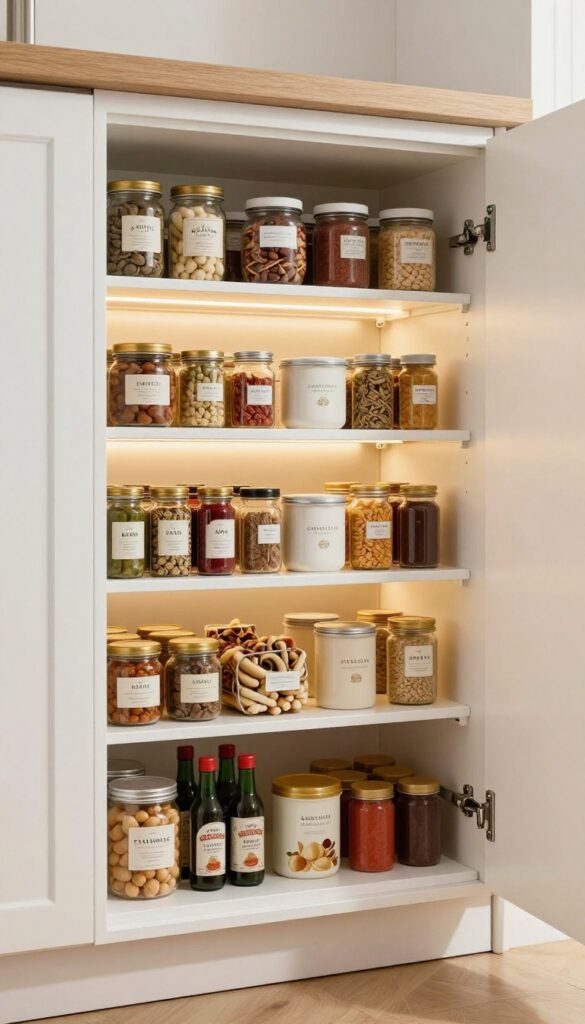
Deep cabinets and pull-out pantries are great for stashing dry goods, but they can turn into a black hole of mislabeled jars and lost spice bottles. Motion-sensor LED strip lights solve that problem instantly. Stick them along the top edge or sides of the cabinet, and they flicker on the moment you open the door, casting a warm glow over every shelf.
No more fumbling for the right seasoning or accidentally grabbing two bags of the same lentil.
These strips are easy to install—most come with adhesive backing and run on batteries or plug into a nearby outlet. Pick a warm white (2700K–3000K) to keep the pantry feeling cozy, or a neutral white (3500K–4000K) if you prefer a crisper, more task-oriented light. The strips are thin enough to hide behind the front lip of the shelf, so you get light without any visible hardware.
For a polished look, choose strips with a frosted diffuser that softens the beam and eliminates harsh dots.
Best Placement
Install the strip along the front underside of each shelf, about an inch from the front edge. This casts light directly onto the items below without glaring into your eyes. For pull-out drawers, run a single strip along the top interior edge so the light shines down as the drawer opens.
Power Source Tip
Battery-powered strips with a motion sensor are the most flexible—no wiring needed, and you can place them anywhere. Look for strips that use standard AAA or AA batteries for easy replacement. If you have an outlet nearby, plug-in strips offer brighter, longer-lasting light and often include a dimmer switch.
Storage-smart Styling
Pair the lights with clear, uniform containers (like glass jars or acrylic bins) so every item reflects the light and looks organized. Group similar spices on one shelf and label them with a consistent label maker. The light will make the labels pop, turning your pantry into a beautifully functional display.
6. Rope Lights Under the Counter Overhang

That breakfast bar or kitchen island overhang is prime real estate for a subtle lighting upgrade. Tucking a flexible rope light underneath creates a warm, indirect glow that makes late-night snacking or casual meals feel cozier. It’s an easy DIY project that adds both function and ambiance without taking up any counter space.
Rope lights are incredibly versatile and forgiving to install. You can cut them to length, bend them around corners, and even connect multiple strands. For a seamless look, choose a color temperature that complements your existing fixtures—warm white (2700K–3000K) is usually the safest bet for a cozy feel.
Dimmable options let you dial the brightness up for food prep or down for a relaxed evening vibe. The light bounces off the floor and lower cabinets, creating a soft halo that defines the island without being harsh.
Best Colors And Finishes
Stick with warm white or soft amber tones to keep the glow inviting. Avoid cool white or multicolor strips unless you’re going for a very modern or party-ready look. The rope light itself should be barely visible—choose a clear or white casing that blends with your cabinet underside.
Installation Tip
Use adhesive clips or a track system designed for rope lights to keep them secure and straight. Measure the overhang length carefully and cut the rope light at the marked cut points (never cut a sealed LED strip in the middle). Plug it into a switched outlet or add a remote-controlled plug for easy on/off.
Storage-smart Styling
Since the rope light is tucked away, it doesn’t interfere with storage underneath. Use the island’s base for cabinets or open shelving to store cookbooks, baskets, or barware. The soft light will highlight those items without creating glare, making the whole island feel purposeful and polished.
7. Glass Shelf Lighting for Display Storage
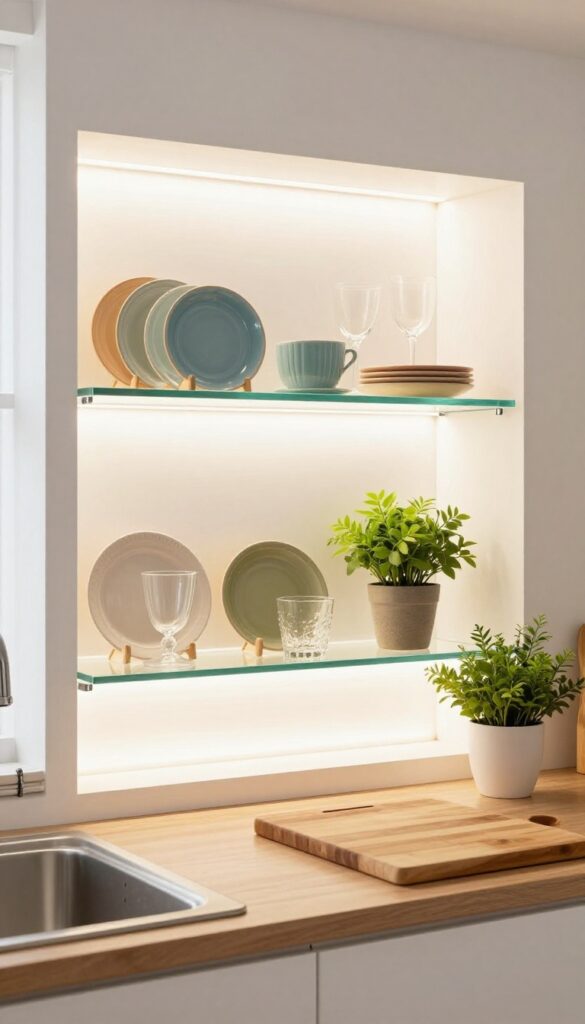
Swap out solid shelves for glass ones and watch your kitchen transform. The transparency lets light travel through, making colorful dish collections or cookbooks look almost museum-worthy. LED strips along the front edge create a soft glow that highlights every item without harsh shadows.
It's a practical way to brighten your workspace while showing off your favorite pieces.
Glass shelves with integrated lighting turn ordinary storage into a focal point. The light passes through the glass, illuminating items from below and making colors pop. This setup works especially well above a prep area or sink, where you need task lighting but also want to display pretty ceramics or glassware.
The sleek, modern look keeps the kitchen feeling open and airy, while the LED strips provide functional light for chopping or reading recipes.
Best Glass Types
- Tempered glass is a must for safety and durability. Frosted glass diffuses light softly, while clear glass gives a crisp, unobstructed view. For a warm touch, consider lightly tinted glass in amber or smoke.
- Thickness matters too—at least 1/4 inch to avoid bowing under weight.
Led Strip Placement
- Install LED strips along the front edge of each shelf, facing downward. This directs light onto the items below and creates a clean line. Use warm white (2700K–3000K) for a cozy feel or cool white (4000K) for a brighter, more modern look.
- Dimmable strips let you adjust the mood.
Styling Your Shelves
- Group items in odd numbers and vary heights for visual interest. Stack plates vertically, lean cookbooks, and add small plants or jars. Leave some negative space to avoid a cluttered look.
- Since the glass is transparent, keep the backsplash behind it clean and simple—subway tile or solid color works best.
8. Corner Cabinet Lights for Hard-to-See Spots
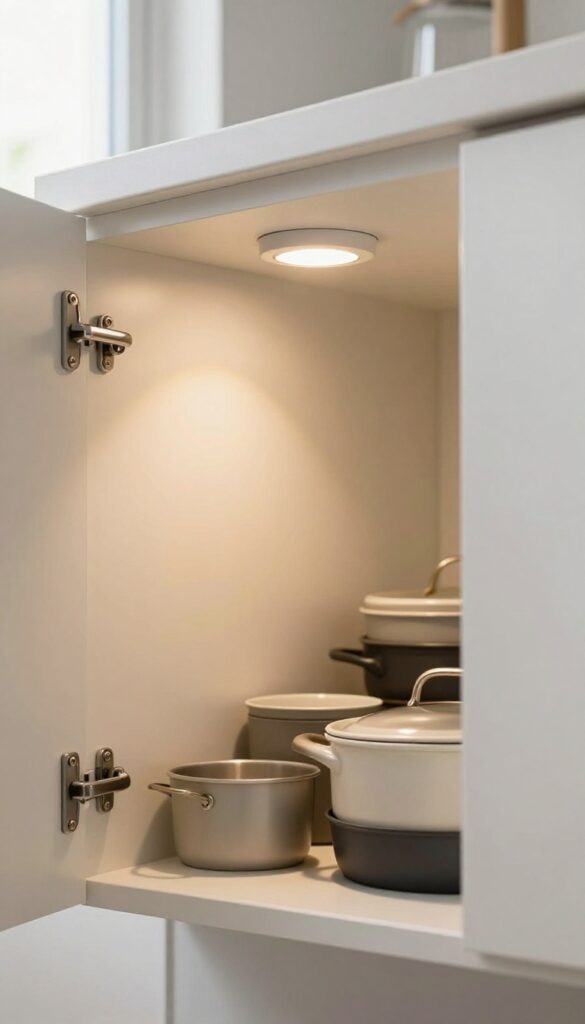
Corner cabinets and lazy Susans are notorious black holes of the kitchen. You know something is in there, but finding it means getting on your hands and knees with a flashlight. Small battery-operated lights change that completely.
Stick them inside the cabinet or under the shelf, and suddenly those deep, dark corners become usable storage. No wiring, no electrician, no fuss.
These tiny lights are a game-changer for anyone who stores pots, pans, baking sheets, or small appliances in corner cabinets. They are especially helpful in lower cabinets where shadows hide everything. The best part?
You can install them in minutes with no tools. Just peel off the adhesive backing, stick the light to the cabinet ceiling or side wall, and you are done. Most run on AAA batteries or rechargeable USB, so you never have to worry about outlets.
Look for lights with motion sensors or push-to-turn switches so they only turn on when you open the door. That way, the batteries last months. Warm white LEDs keep the glow cozy and kitchen-appropriate, while cool white is better for task visibility.
Choose a slim, round puck style for a discreet look, or a small rectangular bar if you want more even light distribution. Either way, these lights make your storage work harder and your life easier.
Best Placement Tips
- For maximum effect, place the light on the ceiling of the cabinet near the front edge so it shines toward the back. If your cabinet has shelves, stick one light under each shelf to eliminate shadows. For lazy Susans, mount the light on the top surface of the rotating shelf so it moves with the contents.
- Avoid placing lights on the side walls where they might get blocked by tall items.
Battery Life And Maintenance
- Look for lights with auto-off timers or motion sensors that shut off after 15–30 seconds. This saves battery and prevents you from accidentally leaving them on. Rechargeable options with USB ports are convenient—just pop the light out and plug it in every few months.
- Stick-on lights are easy to replace when the adhesive wears out, and they leave no damage when removed.
Style And Finish Options
- Choose lights with a brushed nickel, white, or black trim to match your cabinet hardware. For a seamless look, go with white pucks that blend into the cabinet ceiling. If you want a subtle pop, copper or brass finishes add warmth.
- Avoid overly large or bulky fixtures that crowd the cabinet interior. Slim, low-profile designs keep the focus on your stored items, not the light itself.
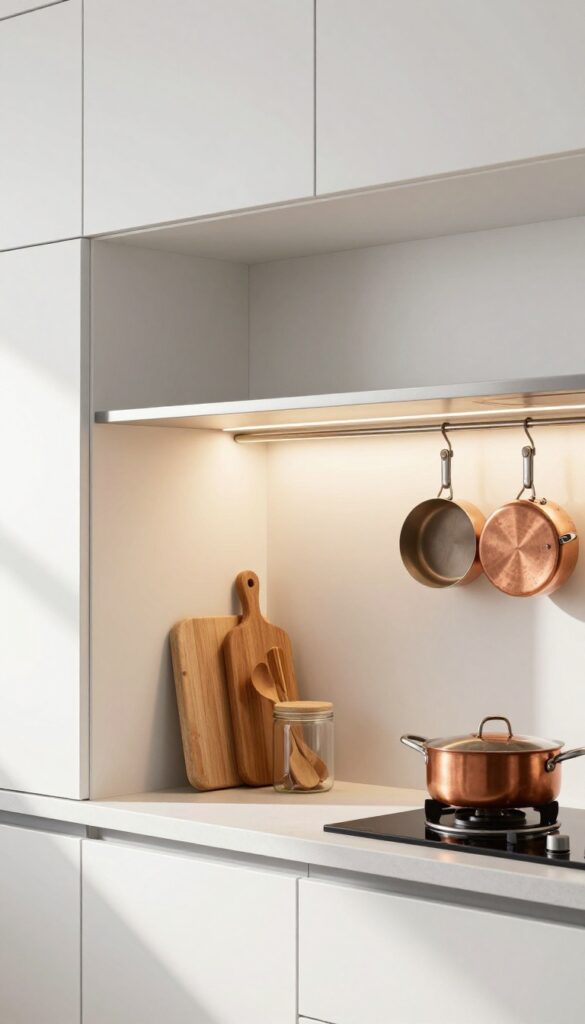
9. Over-Cabinet Ambient Lighting for Height
That gap between your cabinets and the ceiling doesn't have to be a dark void or a dust collector. By running LED tape along the top edge of your cabinets, you can turn that dead space into a soft, diffused light source that visually lifts the ceiling. The glow bounces off the white or light-colored ceiling above, creating a halo effect that makes the whole kitchen feel taller and airier.
It's an unexpectedly simple upgrade that reduces harsh shadows and adds a warm, inviting ambiance without any major renovation.
This trick works best in kitchens where cabinets stop a few inches short of the ceiling. The LED strip is hidden from direct view, so the light source itself is never glaring—you just see the beautiful, indirect glow. It's a practical choice for renters too, since most LED tape is adhesive-backed and removable.
Plus, it's a budget-friendly way to add a custom, high-end feel to standard builder-grade cabinets. The effect is especially striking in the evening when you want task lighting off but still need a soft, atmospheric light.
Best Light Temperature
Stick with warm white (2700K–3000K) for a cozy, flattering glow that complements most cabinet finishes. Cool white can feel clinical and will highlight every speck of dust on top of your cabinets. Dimmable LED strips give you even more control over the mood.
Installation Tip
Clean the top edge of your cabinets thoroughly before sticking the tape. Measure carefully and cut the strip at the marked lines (most are cuttable every few inches). Use connector clips to turn corners neatly, and hide the cord behind a cabinet or inside a nearby upper cabinet.
Styling The Top
Keep the area above the cabinets minimal—a few low-profile baskets or a single trailing plant can look lovely in the glow. Avoid clutter, which will cast messy shadows. The whole point is the clean, floating light effect.
10. Drawer-Integrated Lights for Utensil Storage

Deep drawers are a dream for storing pots, pans, and utensils, but they can quickly become a black hole of clutter. Thin LED strips wired inside the drawer solve that problem by illuminating every compartment the moment you pull it open. This small upgrade makes a huge difference in dark kitchens with limited natural light, turning a functional storage space into a polished, easy-to-use feature.
The magic of drawer-integrated lights lies in their simplicity. They activate automatically when the drawer slides open, so you never fumble for a switch. The result is a clean, well-organized drawer where every spatula, measuring cup, or knife block is instantly visible.
This idea works especially well in deep drawers for cutlery, utensils, or even pantry items like spices and canned goods. The soft glow also adds a subtle luxury feel to your kitchen without being over the top.
Best Materials
Go with warm white LED strips (2700K to 3000K) to match your under-cabinet lighting. Look for low-profile strips that are no more than a quarter-inch thick so they don't interfere with drawer contents. Adhesive-backed strips work fine, but for a cleaner look, choose strips that fit into a small aluminum channel recessed into the drawer's top edge.
Installation Tip
Wire the lights to a magnetic reed switch that triggers when the drawer opens. This is safer than a standard push-button switch because it eliminates wear and tear. If you're not comfortable with wiring, battery-operated LED strips with a motion sensor are a no-drill alternative, though you'll need to replace batteries every few months.
Styling Note
- Pair the lights with drawer organizers in natural wood tones or matte black for a cohesive look. Avoid glossy plastic organizers that can create harsh reflections. The light should highlight the utensils, not the organizer itself.
- For a finishing touch, line the drawer bottom with a soft felt liner to reduce noise and add a hint of texture.
11. Swing-Arm Sconces Beside Upper Cabinets
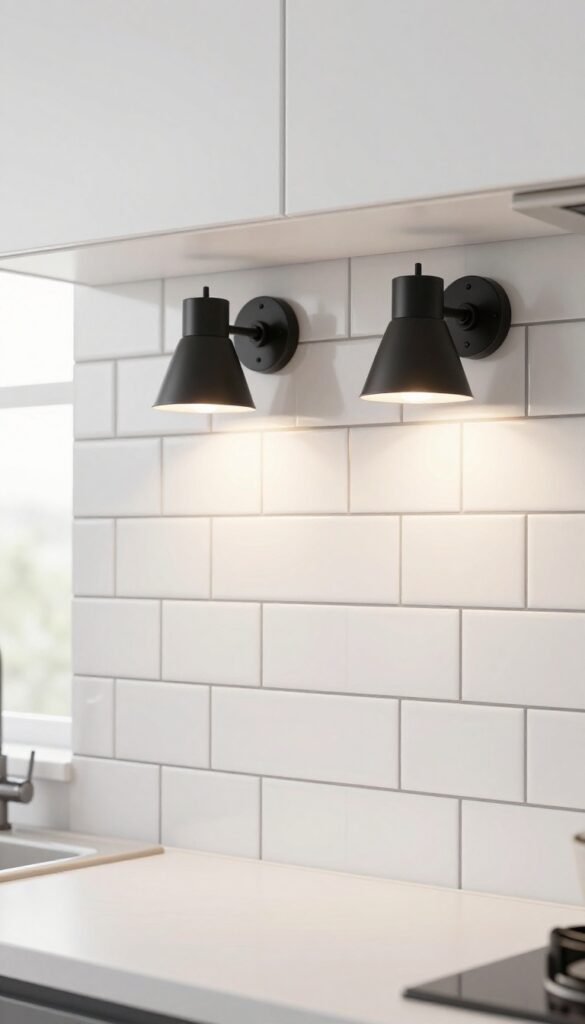
Wall space next to upper cabinets often goes unused, but it’s prime real estate for task lighting with personality. Swing-arm sconces mounted beside cabinets bring light exactly where you need it—over the sink, stove, or prep zone—and their adjustable arms let you direct the beam as you work. The vintage or industrial look adds character without cluttering counters, making it a smart choice for kitchens that need both function and style.
Swing-arm sconces are a practical lighting solution that also serve as decor. Mount them on the wall adjacent to upper cabinets, positioning the arm so it can swing over the counter. Choose a shade that directs light downward—like a metal cone or fabric bell—to minimize glare and maximize task illumination.
This setup works especially well in galley kitchens or against a backsplash wall where under-cabinet wiring isn’t an option. The sconces become a focal point, so pick a finish that complements your hardware: matte black for industrial, brass for vintage, or chrome for modern.
Best Placement
Position sconces about 6 to 8 inches above the countertop and 4 to 6 inches from the cabinet edge. This height lets the arm swing freely without hitting the cabinet door. For a sink or stove, center one sconce on each side of the fixture for balanced light.
Style Pairing
Pair metal sconces with a tile backsplash that has a matte or textured finish—like subway tile or zellige—to avoid competing reflections. If your kitchen has open shelving, mount sconces on the wall between shelves to highlight displayed dishes or plants.
Wiring Tip
Hardwired sconces offer a clean look, but plug-in versions with a cord cover are a renter-friendly alternative. Run the cord along the cabinet edge or behind a false panel to keep it tidy. Use a dimmer switch to adjust brightness for different tasks.
12. Magnetic Lights for Metal Shelving or Racks
Metal shelving and pot racks are practical, but they can cast shadows that make it hard to see what you're grabbing. Magnetic stick-on lights solve that without any wiring or drilling. They snap right onto the metal surface, give you a focused beam of light, and can be moved around whenever you rearrange your shelves.
For renters or anyone who wants a low-commitment upgrade, this is a clever way to brighten up dark corners without breaking the lease.
Magnetic lights are a game-changer for kitchens with open metal shelving or a hanging pot rack. They attach securely to any ferrous metal surface, so no adhesive or tools are needed. The light is directed exactly where you need it—onto spices, pots, or cutting boards—making your work zone safer and more efficient.
Plus, because they're magnetic, you can reposition them in seconds if you reorganize your shelves or want to highlight a different area. They come in various sizes and brightness levels, from slim strips to puck lights, so you can choose what fits your space best.
Best Placement Spots
Think about the areas where you need the most light: under a metal shelf above your prep zone, inside a metal cabinet, or on the underside of a pot rack. For a pot rack, attach a light to the bottom of the rack so it shines down on your cookware. On shelving, place the light at the front edge of the shelf to illuminate the items below without glare.
Brightness And Color Temperature
- Look for magnetic lights with adjustable brightness and color temperature. A warm white (2700K-3000K) is cozy and flattering for a kitchen, while a cool white (4000K-5000K) is better for task lighting. Many models are rechargeable via USB, so you don't need to worry about batteries or outlets.
- Choose a light with a high CRI (90+) to make food colors look natural.
Renter-friendly Installation
- Since these lights are magnetic, they leave no marks or residue. That makes them perfect for renters who can't modify their kitchen. You can take them with you when you move, and they work on any metal surface—even the side of a refrigerator or a metal backsplash.
- Just make sure the surface is clean and dry before attaching.
13. Cove Lighting in Crown Molding
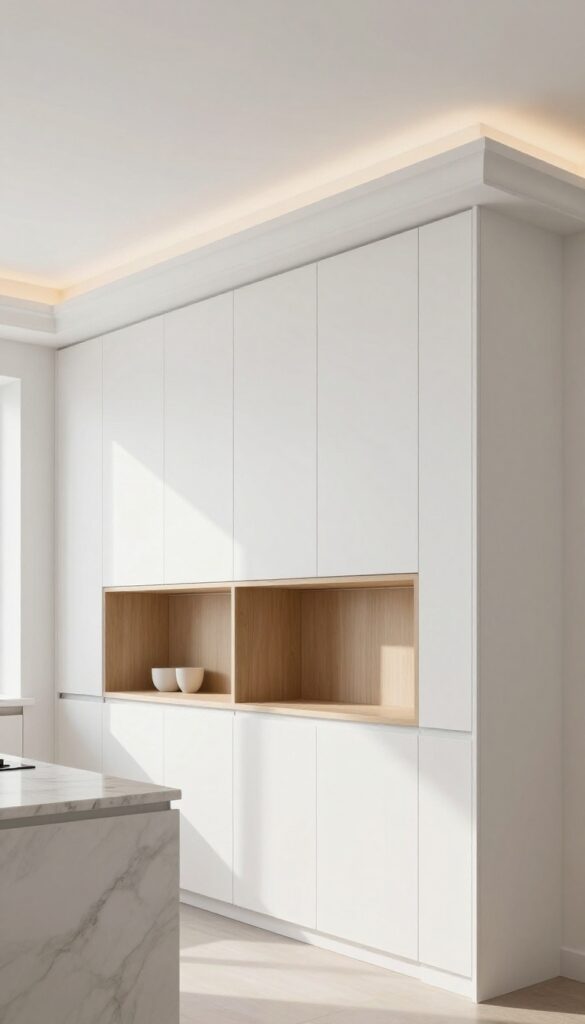
Cove lighting tucked into crown molding is one of those details that feels understated but completely transforms a kitchen. Instead of a single fixture overhead, soft LED strips hidden inside a cove cast a warm glow upward, making the ceiling appear to float. It’s a polished, high-end look that works especially well in kitchens with taller cabinets or open shelving, where the light can bounce off the ceiling and fill the room without harsh shadows.
The effect is both practical and atmospheric—brighter counters for cooking, plus a subtle glow that makes evening gatherings feel more intimate.
Installing LED strips inside a crown molding cove above cabinets creates a floating ceiling effect and makes the kitchen feel luxurious. It's a more permanent option but adds serious wow factor. The hidden light source eliminates glare while providing ambient illumination that makes the whole space feel larger and more open.
This approach is especially effective in kitchens with white or light-colored ceilings, as the reflected light softens the room and reduces contrast between bright task areas and darker upper zones.
Best Colors
Warm white (2700K–3000K) works best for cove lighting because it mimics natural sunset tones and feels cozy without being too yellow. Avoid cool white or blue tones, which can make the kitchen feel sterile and wash out wood cabinets. If you want a touch of drama, dimmable LEDs let you adjust the warmth from bright task lighting to a softer evening glow.
Installation Tip
For a seamless look, have an electrician cut a channel into the crown molding or use a pre-made cove molding kit. Position the LED strip so it points upward at a 45-degree angle—this spreads light evenly across the ceiling without creating hot spots. Make sure the strip is fully hidden behind the molding lip so you see only the glow, not the source.
Budget-Friendly Swap
If full crown molding isn't in the budget, try adhesive-backed LED tape installed on a simple L-shaped bracket mounted above the cabinets. Paint the bracket to match the wall or ceiling so it disappears. This DIY version still creates the floating effect for under $50, and you can plug it into a smart outlet for voice control.
14. Plug-In Picture Lights Over Cabinet Art

Top-of-cabinet space often becomes a catchall for seldom-used gadgets or forgotten decor. But with a few plug-in picture lights and some framed art, that flat surface turns into a mini gallery. The focused beam highlights the pieces and draws the eye upward, making the whole kitchen feel taller and more curated.
It's an easy way to add personality without sacrificing counter space or drilling into tile.
Plug-in picture lights are a storage-smart solution because they keep your countertops clear and your cabinet tops useful. Instead of storing rarely-used items, you display art that reflects your style. The lights plug into a nearby outlet, so there's no need for hardwiring or hiring an electrician.
Choose warm LED bulbs to avoid heat damage to your artwork and to create a cozy glow during evening hours. For a cohesive look, match the light finish to your cabinet hardware or light fixtures.
Best Art Choices
- Go with pieces that have strong contrast or metallic accents, as they pop under directed light. Black-and-white photography, botanical prints, or abstract line art work well. Avoid overly dark or busy images that might get lost in the shadow.
- Frame them in slim, uniform frames to keep the look streamlined.
Placement And Power
- Position the light about 6 to 8 inches above the art and centered. Use a plug-in cord that can be tucked along the back edge of the cabinet or run down the side to an outlet. Cord clips or paintable cord covers help hide the wire.
- If your cabinets are deep, angle the light slightly downward to avoid casting shadows on the wall behind.
Finishing Touch
Layer in a few small objects like a ceramic vase or a stack of cookbooks at the base of the art to anchor the display. Keep the arrangement balanced but not symmetrical. The light will tie everything together, creating a vignette that feels intentional and polished.
15. Smart Color-Changing Strips for Mood Control
Under-cabinet lighting doesn't have to be purely functional. Smart LED strips give you the power to shift from crisp white light for prepping veggies to a soft amber glow for a relaxed dinner. Controlled via app or voice, they're a practical upgrade that also brings a playful edge to your kitchen.
Whether you're hosting a party or just winding down, these strips let you set the scene without lifting a finger.
Smart color-changing LED strips are a game-changer for kitchen lighting. They mount easily under cabinets, providing task light when you need it and ambiance when you don't. The ability to adjust brightness and color temperature means you can match the light to your activity—bright white for chopping, warm yellow for a cozy breakfast, or even a soft blue for a calm evening.
Many kits are DIY-friendly, with adhesive backing and simple plug-in connections, so you don't need an electrician. Plus, they're energy-efficient and last for years, making them a smart investment for any kitchen.
Best Colors For Kitchen Zones
- Stick with tunable white (2700K to 5000K) for daily use—warm for dining areas, cool for prep zones. Add RGB color for fun: a soft green for St. Patrick's Day or a gentle pink for Valentine's dinner.
- Avoid overly saturated colors during cooking, as they can distort food appearance.
Installation Tips For A Clean Look
- Measure your cabinet runs carefully and cut strips at marked intervals. Use corner connectors to turn corners smoothly. Hide the power cord by routing it through a cabinet gap or using a cord cover that matches your wall color.
- For a seamless look, install strips toward the front of the cabinet underside to illuminate the counter without glare.
Smart Control Setup
Choose strips compatible with Alexa or Google Home for voice control. Set up routines—like 'cooking mode' for bright white and 'dinner mode' for warm dim. Place the controller in an accessible spot, like under the sink or inside a cabinet door, and label it for easy troubleshooting.
FAQ
What is the best type of lighting for kitchen cabinets?
LED strip lights are the most versatile and energy-efficient choice. They come in various color temperatures and are easy to install under or inside cabinets.
Do I need an electrician to install cabinet lighting?
Not always. Many options like battery-operated puck lights, stick-on LED strips, and plug-in fixtures are DIY-friendly. Hardwired setups may require a professional.
How do I choose the right color temperature for cabinet lights?
For task areas, go with cool white (4000K-5000K) for clarity. For ambient or display lighting, warm white (2700K-3000K) creates a cozy atmosphere.
Can I add cabinet lighting to an existing kitchen without remodeling?
Yes. Stick-on LED strips, puck lights, and plug-in under-cabinet fixtures can be added without major changes. Many are removable and renter-friendly.
How do I hide the wires for cabinet lighting?
Use cord clips along the back of cabinets, run wires through cable raceways, or choose battery-powered lights to avoid wires altogether.
Conclusion
Cabinet lighting is one of those upgrades that makes a kitchen feel more functional and inviting. Whether you go with simple stick-on strips or a custom cove setup, the right light helps you see better and enjoy your space more.
Start with one area that bothers you most, and build from there. Small changes add up to a brighter, smarter kitchen.