10 Super Small Kitchen Ideas Tiny Houses Can Actually Use
Tiny house kitchens come with a unique challenge: you need everything a full-size kitchen offers, but in a fraction of the space. The good news is that with a few smart choices, you can create a cooking zone that feels open, organized, and even a little luxurious.
These ten ideas are designed to help you make the most of every square inch without sacrificing style.
Whether you're building a tiny home or just downsizing your current kitchen, these tips will help you cook, clean, and entertain with ease.
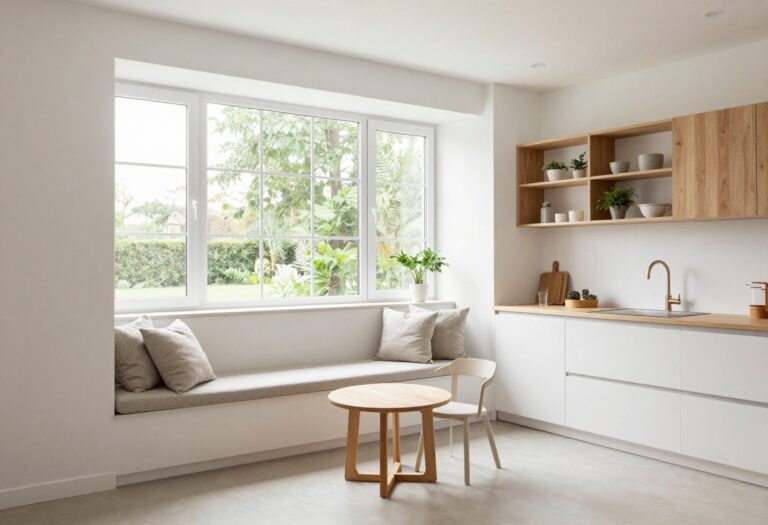
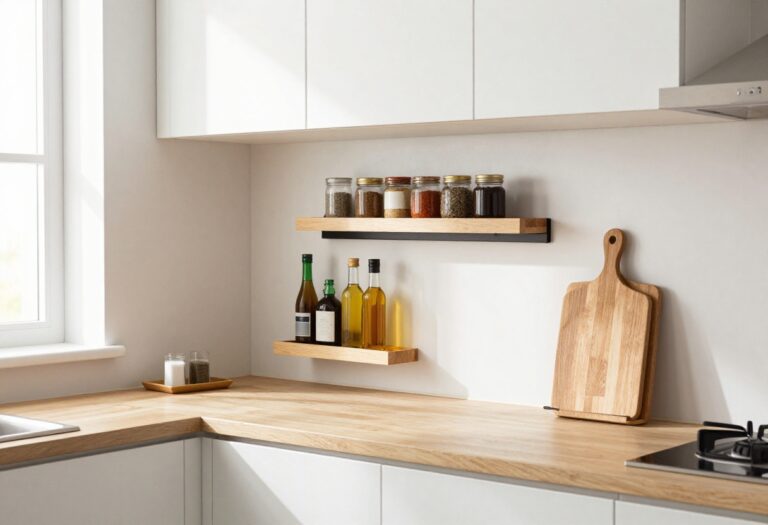
1. Go Vertical with Open Shelving
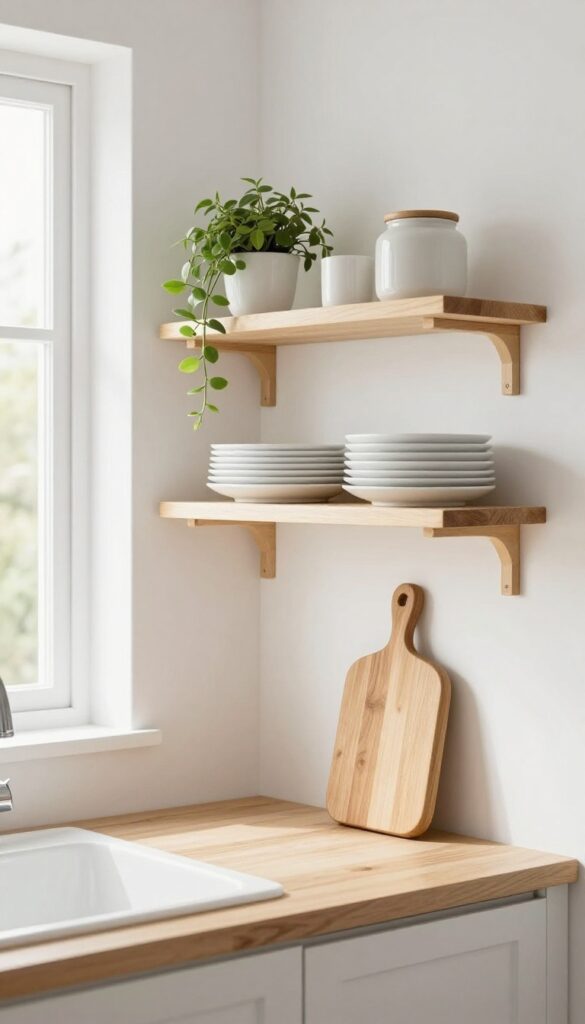
Upper cabinets can make a tiny kitchen feel closed in. Swapping them for open shelves instantly opens up the room and draws the eye upward, creating the illusion of height. Slim floating shelves in a light wood or crisp white keep things airy, while everyday dishes and a few curated pieces add personality without clutter.
Open shelving is a go-to trick for small kitchens because it removes the visual weight of bulky cabinets. By keeping only what you use and love on display, the space feels intentional rather than cramped. Stick to a cohesive color palette—white dishes, a single ceramic jar, a small trailing plant—to maintain a calm, collected look.
Best Materials And Finishes
Light woods like birch or maple, or white-painted shelves, keep the look fresh and unobtrusive. For a subtle contrast, try slim black metal brackets against white shelves. Avoid dark, heavy woods that can feel imposing in a small space.
Shelf Styling Tip
Group items in odd numbers and vary heights. Stack plates flat, lean a cutting board, and add a small vase or herb plant. Leave about 30% of each shelf empty to avoid a cluttered feel.
Layout And Placement
Install shelves above the sink or prep area, but leave enough clearance for comfortable movement. Two to three shelves spaced 12–15 inches apart work well. Keep the most-used items on the middle shelf for easy reach.
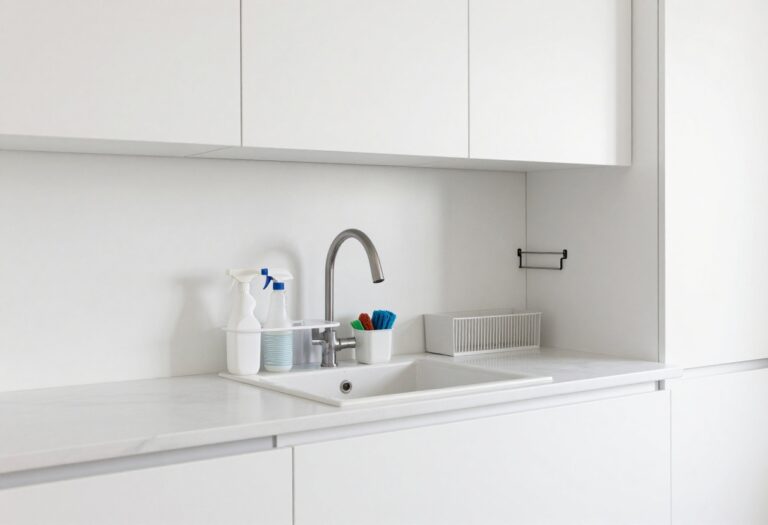
2. Choose a Compact, Multifunctional Sink
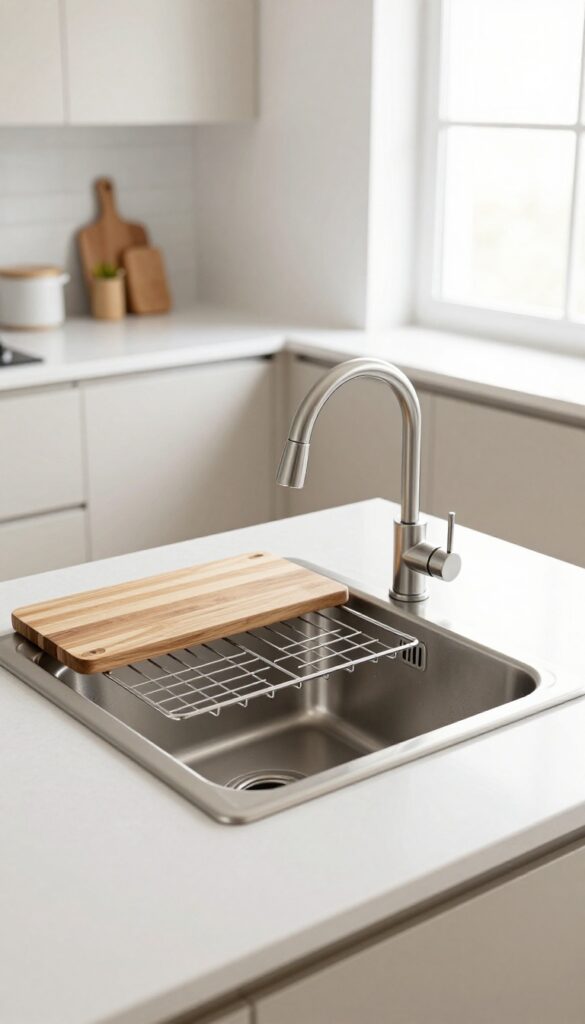
In a tiny kitchen, every inch of counter space matters. That’s why swapping a bulky double sink for a compact, multifunctional model can be a total game-changer. A smaller sink frees up valuable prep area, and when it comes with built-in accessories, it does double duty as a workstation.
Think of it as the kitchen equivalent of a Swiss Army knife—practical, space-saving, and surprisingly stylish.
A deep, single-basin sink with a built-in cutting board or drying rack turns washing and prepping into a seamless flow. Some models even include a colander or drain tray, so you can rinse veggies and chop them right over the sink. This setup keeps countertops clutter-free and makes cleanup a breeze.
Look for materials like fireclay or stainless steel that resist scratches and stains, and pair with a high-arc faucet to maximize clearance. The result? A sink that works as hard as you do, without taking up extra room.
Best Materials And Finishes
- Stainless steel is the go-to for durability and easy maintenance, but don’t overlook fireclay or quartz composite for a warmer look. Fireclay resists chips and stains, while quartz composite offers a matte finish that hides water spots. For a tiny kitchen, a lighter finish like brushed nickel or matte white can make the sink area feel more open.
- Avoid dark, glossy surfaces that show every speck.
Layout And Storage Tips
- Position the sink near the stove or prep zone to streamline workflow. Underneath, use a caddy or pull-out organizer for sponges, scrub brushes, and dish soap—keeping them off the counter. If your sink has a built-in drying rack, store it over the basin when not in use.
- For extra storage, install a slim shelf above the sink for frequently used oils or spices.
Small-space Fix
- If your kitchen is ultra-tight, consider a corner sink with a rounded basin. It tucks neatly into unused space and can still accommodate a cutting board overlay. Pair with a gooseneck faucet that swings out of the way.
- This layout works especially well in galley kitchens or L-shaped layouts where every corner counts.
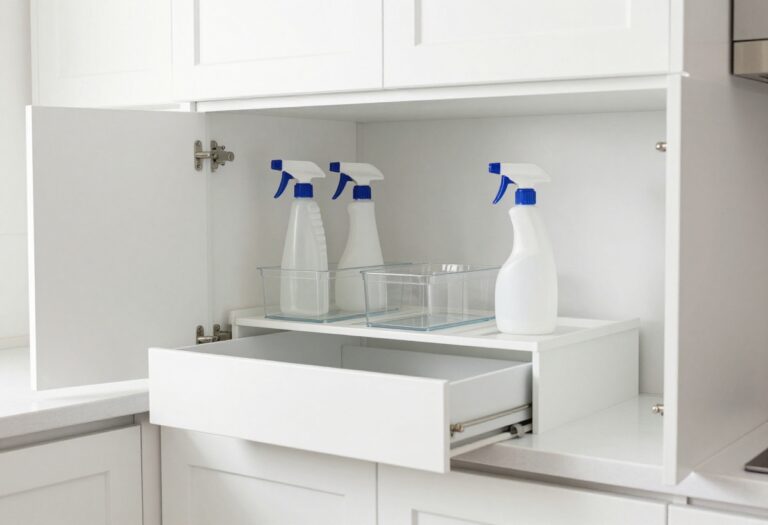
3. Install a Pull-Out Pantry
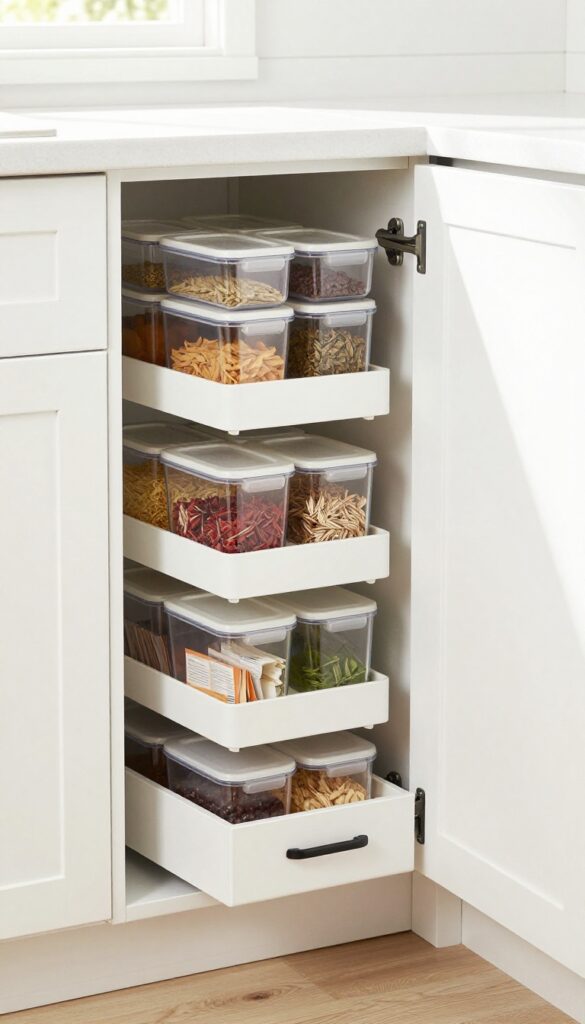
That awkward gap between your fridge and the wall, or next to your stove, is prime real estate you're probably ignoring. A pull-out pantry slides neatly into those narrow spaces, turning wasted inches into a storage powerhouse. It's one of those smart kitchen ideas that feels custom, even if you're working with standard cabinets and a tight budget.
Pull-out pantries are slim vertical cabinets on rollers that tuck into gaps as narrow as 6 to 12 inches. They're perfect for storing dry goods, spices, oils, and even small appliances like a toaster. The best part?
Everything slides out in one smooth motion, so you can see every item at a glance. No more digging to the back of a deep cabinet or forgetting you bought that can of beans. For tiny houses and small kitchens, this is a game-changer for keeping counters clear and meals organized.
Best Placement
Look for gaps between the fridge and wall, beside the stove, or next to a base cabinet. Even a 9-inch gap can fit a slim pull-out unit. If you're renovating, plan for a custom slot near your prep zone so pantry items are within arm's reach while cooking.
Storage Tip
Use clear containers and tiered shelves to maximize visibility. Group similar items together—baking supplies on one shelf, canned goods on another. Add small bins for packets and spice jars to prevent tipping when you slide the pantry out.
Finishing Touch
Match the pull-out front to your existing cabinet doors for a seamless look. Add a slim pull handle or a push-to-open mechanism for a clean, minimal aesthetic. If your kitchen is open to the living area, consider a matching wood tone or a contrasting painted finish to tie the space together.
4. Use a Rolling Kitchen Island
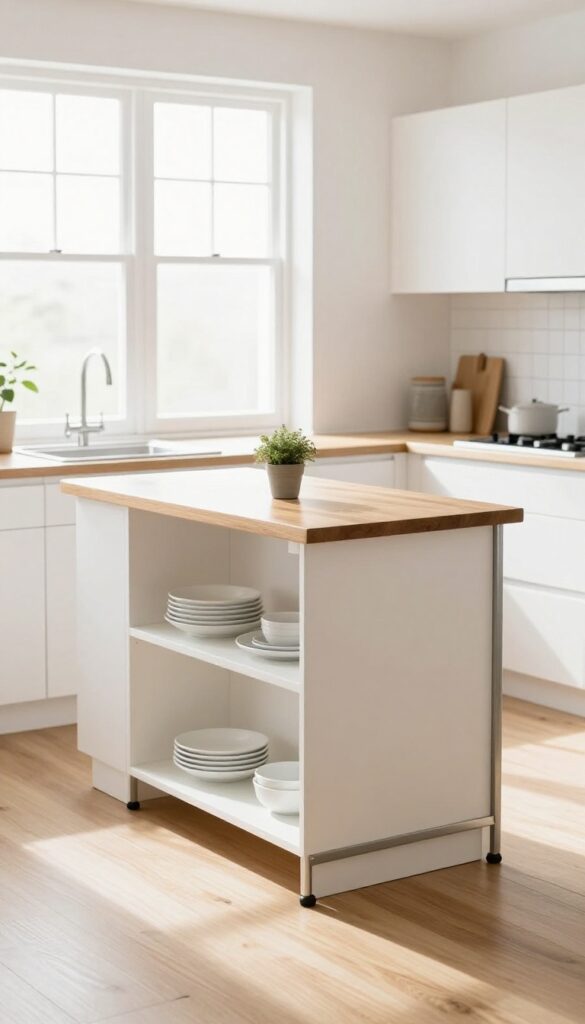
Counter space is precious in a tiny kitchen, but a rolling island gives you exactly that—plus storage and a prep zone—without committing to a permanent footprint. When you're done cooking or eating, just wheel it out of the way. It's like having a secret weapon for small-space cooking.
A small, wheeled island provides extra counter space and storage when you need it, then tucks away when you don't. Choose one with shelves or drawers for utensils, pots, or linens. A butcher block top adds warmth and doubles as a prep surface.
Best Materials
Go for a butcher block or solid wood top—it's warm, durable, and perfect for chopping. A metal or white base keeps it light and airy, while a dark base adds contrast. Avoid glass tops; they show every fingerprint and aren't practical for prep.
Layout Tip
- Measure your kitchen's walkway before buying. Leave at least 36 inches of clearance around the island so you can move comfortably. Place it near your main work triangle—stove, sink, fridge—for easy access.
- When not in use, park it against a wall or in a corner.
Storage Strategy
Maximize the island's storage with deep drawers for pots and pans, open shelves for cookbooks or baskets, and a towel bar on the side. Add hooks for utensils or mugs. Keep the top clear except for a cutting board or a small plant to maintain a clean look.
5. Hang Pots and Pans from a Ceiling Rack
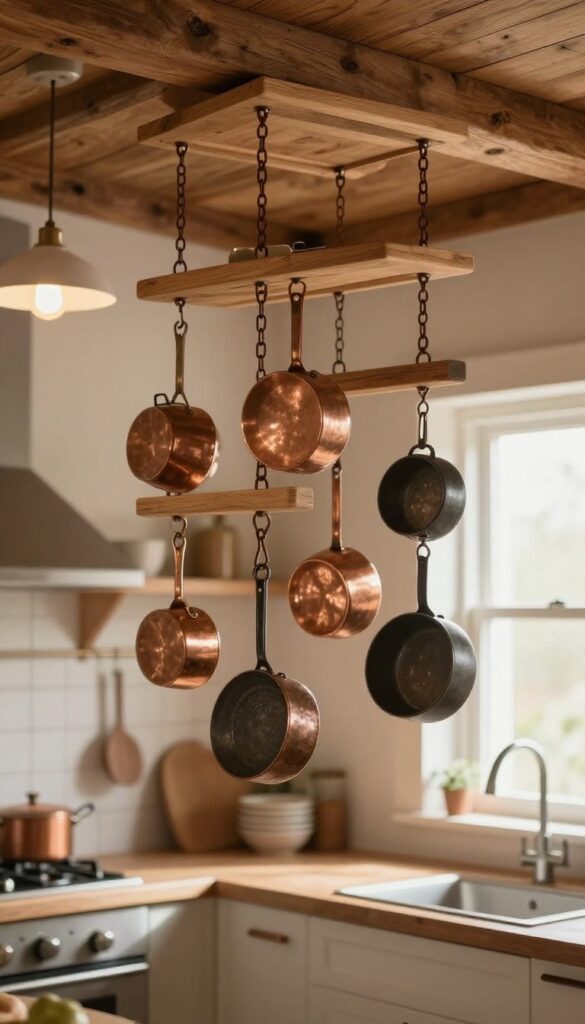
Ceiling space is often wasted in small kitchens, but it can be one of your most useful storage zones. Suspending a pot rack not only frees up cabinet room but also turns your cookware into decor. A simple metal grid or a wooden ladder keeps things airy and adds a cozy, rustic feel.
Hanging pots and pans from a ceiling rack is a smart way to reclaim cabinet space while adding visual warmth to your tiny kitchen. The key is choosing a rack that complements your style—sleek stainless steel for modern kitchens, or reclaimed wood for a farmhouse look. Install it low enough to reach comfortably, but high enough to avoid head bumps.
This setup also keeps your most-used cookware within arm's reach, making cooking more efficient.
Best Materials
For a durable and stylish rack, consider wrought iron for a classic feel, stainless steel for a modern touch, or a wooden ladder for rustic charm. Each material brings its own texture and can be matched with your existing hardware and cabinet finishes.
Small-space Fix
In a tiny kitchen, opt for a linear rack rather than a circular one to save overhead visual space. Mount it parallel to the counter or island so it doesn't crowd the room. Use S-hooks to hang pots at different heights for easy access and a layered look.
Finishing Touch
Add a small pendant light above the rack to highlight your cookware and create a focal point. This not only improves visibility but also enhances the cozy, inviting atmosphere. Choose a light with a simple shade that doesn't compete with the rack.
6. Opt for a Two-Burner Cooktop
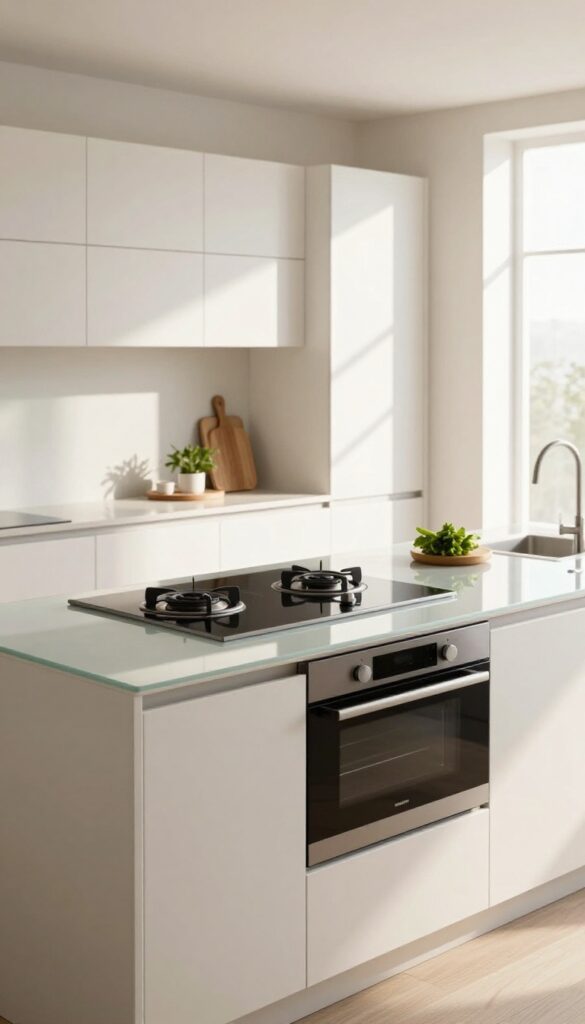
A full range with four burners and a massive oven can feel like overkill when you're cooking for one or two. In a tiny kitchen, every inch of counter space matters, and a standard stove often eats up more than its fair share. A two-burner induction cooktop is a sleek, space-saving alternative that slides right onto your counter and can be tucked away in a cabinet when you're not using it.
Pair it with a compact convection or toaster oven for baking, and you've got a fully functional kitchen without the bulk.
Swapping a traditional range for a two-burner cooktop frees up valuable counter space and gives your tiny kitchen a cleaner, more open look. Induction models heat up fast and cool down quickly, so you're not waiting around for burners to warm up or cool off. Since they don't produce ambient heat like gas or electric coils, they're also safer in tight quarters and easier to clean—just wipe down the smooth surface.
For baking, a countertop convection oven handles everything from cookies to roasted vegetables, and it doubles as an extra warming drawer when you need it. This setup is especially great for studio apartments, tiny houses, or any kitchen where you want to maximize prep space without sacrificing cooking ability.
Best Placement
Install your induction cooktop flush with the countertop for a seamless look, or keep it portable so you can move it to a different spot when you need the counter for chopping or serving. If you choose a built-in model, position it near your sink and prep zone to create a compact work triangle. A slide-out cutting board or butcher block right next to the cooktop gives you a handy surface for slicing and dicing.
What To Look For
- Focus on induction cooktops with at least two power levels and a boost function for high-heat cooking. Look for models with a slim profile (under 2 inches tall) so they store easily. Some portable versions come with a carrying case, which is perfect if you plan to take your cooktop outdoors or on trips.
- Make sure your cookware is induction-compatible—magnetic stainless steel, cast iron, or enameled cast iron work best.
Styling Tip
Keep your cooktop area looking tidy by storing your compact convection oven on a rolling cart or in a cabinet with a pull-out shelf. When not in use, the cooktop itself can double as extra prep space—just lay a large cutting board over it. A small magnetic knife strip mounted on the backsplash nearby keeps tools within reach without cluttering the counter.
7. Add Magnetic Strips for Knives and Tools
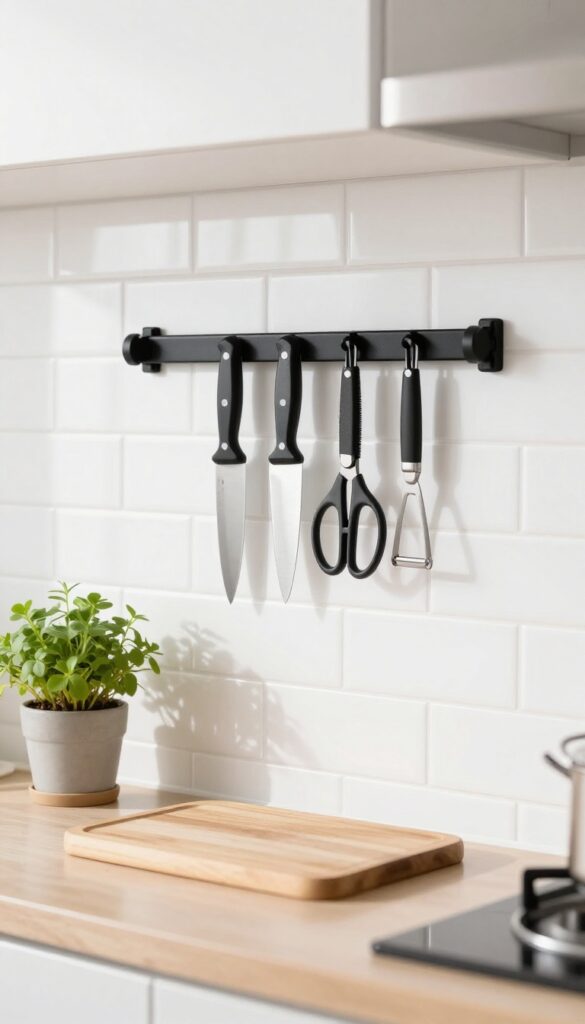
Counter space is precious in a tiny kitchen, so anything that frees it up is a win. Magnetic strips let you store knives and metal tools vertically on the wall or inside a cabinet door, making them instantly accessible without taking up any workspace. It’s one of those small changes that makes your kitchen feel more open and organized.
Mounting a magnetic strip is a simple DIY project that instantly clears your countertops. Place it on the backsplash above your counter or on the inside of a cabinet door for hidden storage. The key is choosing a strip long enough to hold your most-used tools—think chef’s knife, paring knife, scissors, and maybe a vegetable peeler.
Go for a slim, modern strip in matte black or brushed stainless steel to keep the look sleek and intentional.
Best Placement
- The most popular spot is along the backsplash between the counter and upper cabinets. This keeps knives within arm’s reach while prepping food. If you’d rather keep things out of sight, mount the strip inside a cabinet door near your prep zone.
- Just make sure the cabinet door can close without hitting anything.
Styling Tip
To keep the strip from looking too utilitarian, choose one with a slim profile and rounded edges. Pair it with a matching magnetic hook for small metal tools like measuring spoons. The clean lines and uniform finish help the strip blend into the background while still serving a purpose.
Safety Note
Make sure the strip is strong enough to hold your heaviest knife securely. Test it by giving each tool a gentle tug after mounting. Also, place the strip high enough that kids or pets can’t reach it, but still convenient for you.
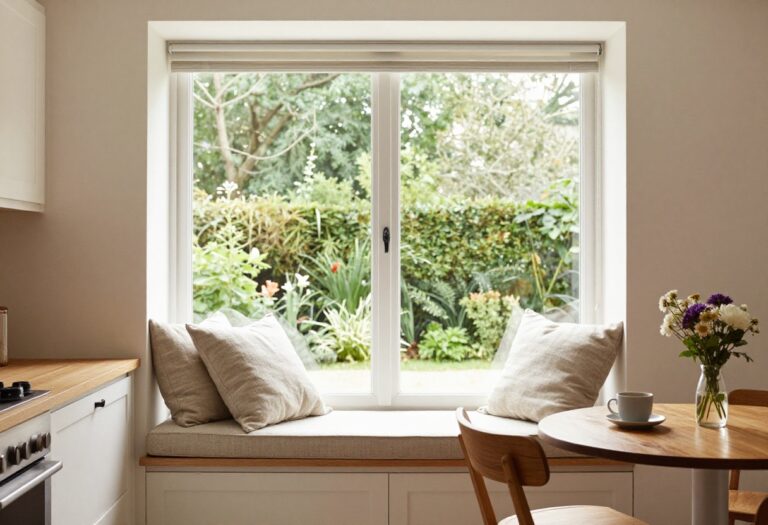
8. Use a Fold-Down Table or Counter
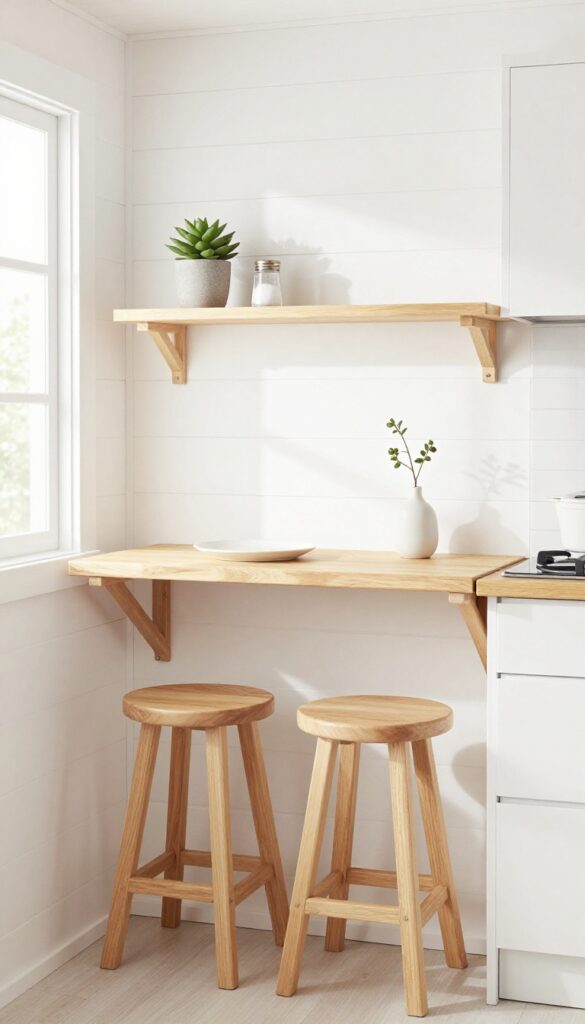
A wall-mounted fold-down table is one of those ideas that feels like cheating—you get a full dining spot or extra prep area without permanently sacrificing floor space. When not in use, it folds flat against the wall, leaving your kitchen open and uncluttered. Pair it with a couple of stools that tuck underneath, and you’ve got a breakfast nook that disappears in seconds.
This setup works especially well in galley kitchens or along a blank wall near the window. Look for a table with a built-in shelf or lip to keep items from sliding off. For a cohesive look, choose a wood tone that matches your cabinets or go with a contrasting color like black or white for a graphic pop.
Best Materials
Solid wood with a durable finish (like teak or oak) offers warmth and longevity. For a more modern vibe, try a glossy laminate or powder-coated metal. Avoid raw MDF—it won’t hold up to moisture or heavy use.
Small-space Fix
Mount the table at bar height (about 42 inches) so it doubles as a casual eating spot and extra counter space. Use backless stools that slide completely under the table to keep the walkway clear.
Styling Tip
Keep the wall above the table bare or add a slim floating shelf for a small plant or a salt and pepper set. When the table is folded down, the shelf becomes a subtle decorative element that doesn’t interfere with the fold.
9. Incorporate a Window Sill Garden
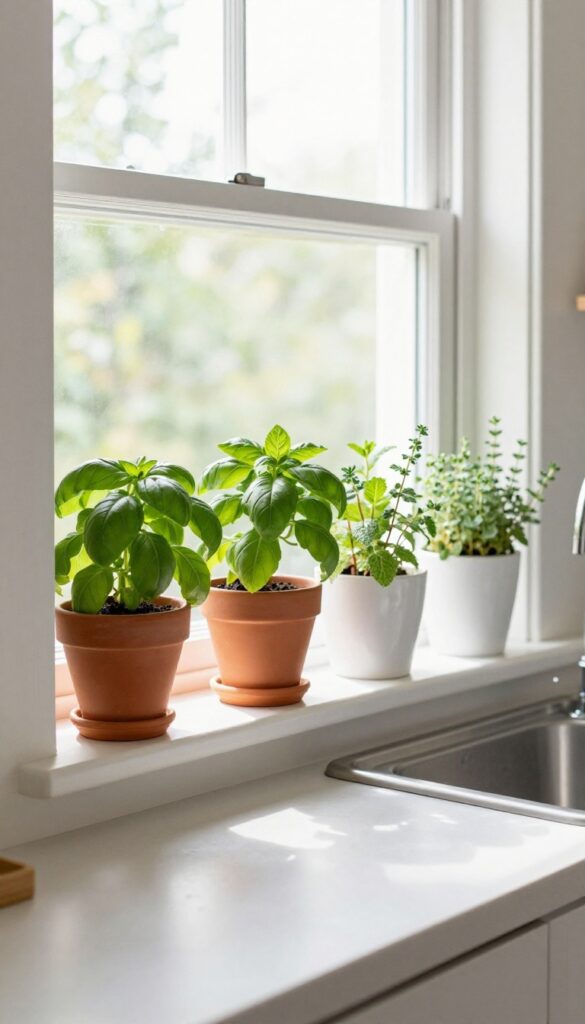
Even the tiniest kitchen can feel alive and productive with a window sill garden. If you have a window above the sink, that ledge is prime real estate for growing fresh herbs. Small pots of basil, mint, or thyme not only add a pop of green but also give you instant access to flavorful ingredients.
It's a practical, stylish way to bring nature indoors without sacrificing counter space.
A window sill garden turns an often overlooked spot into a functional, living decor element. The key is choosing compact pots that fit snugly on the sill without blocking the view. Terracotta, ceramic, or even small mason jars work well—just ensure they have drainage.
Place the herbs in a sunny window (south- or west-facing is ideal) and water them when the soil feels dry. Snip leaves as needed for cooking, and the plants will keep producing. This setup adds texture, color, and a delightful scent to your kitchen, making it feel more spacious and connected to the outdoors.
Best Herbs For Small Spaces
- Stick with compact, slow-growing herbs that thrive in pots. Basil, mint, thyme, chives, and parsley are excellent choices. Avoid sprawling plants like dill or cilantro unless you have a very wide sill.
- Group herbs with similar water needs together to simplify care.
Styling The Sill
Keep the look cohesive by using pots in the same color family or material—white ceramic or natural terracotta creates a clean, airy feel. Add a small wooden tray underneath to catch drips and unify the arrangement. For extra charm, tuck in a tiny watering can or a decorative plant marker.
Maintenance Tips
- Water consistently but avoid overwatering—most herbs prefer slightly dry soil. Rotate pots every few days so all sides get sunlight. Pinch off flowers to encourage leaf growth.
- If your sill is narrow, use magnetic herb planters that attach to the window frame for extra space.
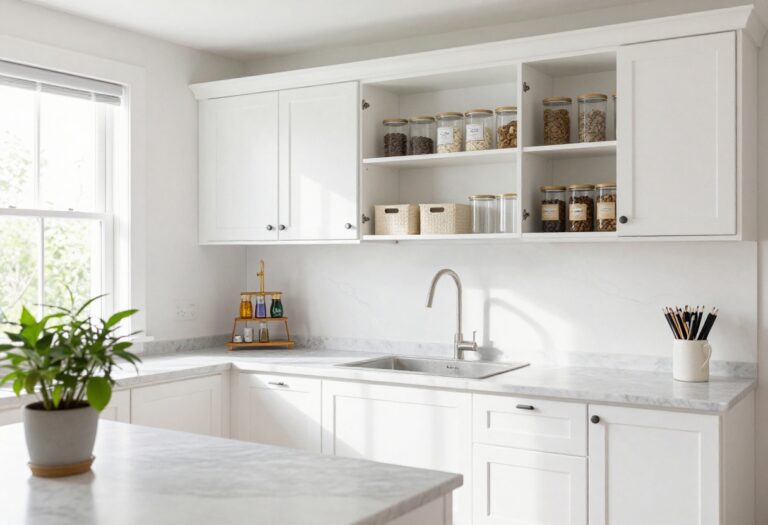
10. Paint with Light, Reflective Colors
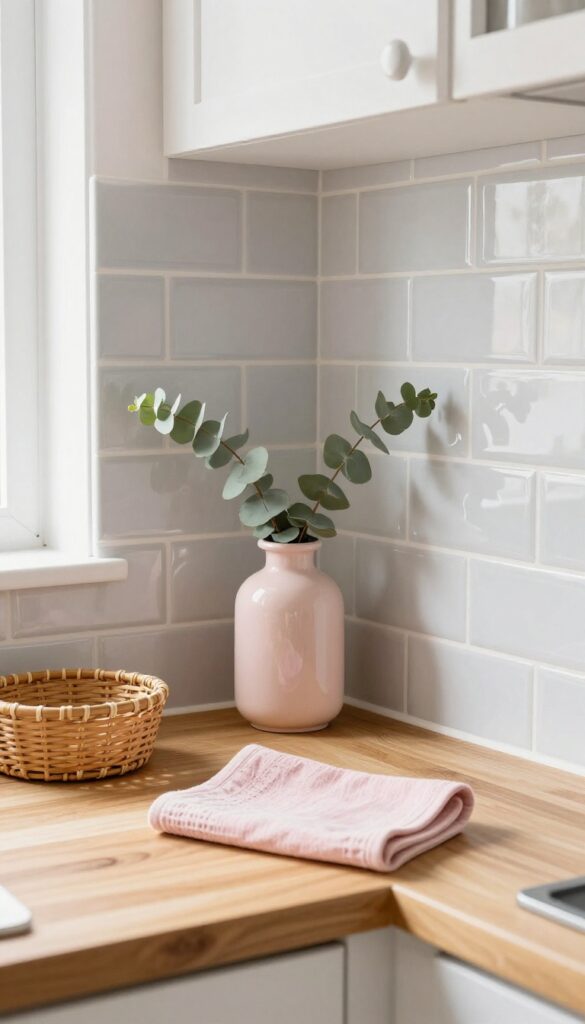
White kitchens are classic for a reason, but there's a fine line between airy and sterile. The trick is to use light colors that bounce natural light around the room while layering in warm textures and small pops of color. Think pale gray, soft cream, or a whisper of blush on the walls, then finish with glossy subway tile or high-sheen paint to maximize reflection.
This approach makes a tiny kitchen feel open and bright without looking like a hospital waiting room.
Light colors like white, pale gray, or soft pastels make a small kitchen feel bigger and brighter. Use glossy paint or tile to reflect light. Add a pop of color with accessories like a tea towel or small appliance to keep it from feeling sterile.
Best Colors For Maximum Light
- Stick with cool or neutral pale tones: warm white (like Benjamin Moore's White Dove), pale greige, or a very light sage. These shades read as fresh and clean without feeling cold. Avoid stark bright white, which can look harsh in small spaces.
- A soft pastel like powder blue or blush pink adds personality while still reflecting light well.
Glossy Finishes That Work
- High-gloss paint on cabinets or walls bounces light around the room, making it feel larger. Glossy ceramic or glass subway tile on the backsplash does the same. If you prefer a matte look, use a satin finish on walls and pair it with a glossy tile backsplash for contrast.
- The key is to have at least one reflective surface to amplify natural light.
Add Warmth With Accessories
Once your palette is light and bright, bring in warmth with natural wood cutting boards, a woven basket, or a linen tea towel. A single colorful appliance—like a mint green toaster or a yellow kettle—gives the eye a place to rest. Keep countertops mostly clear to maintain that open, airy feel.
FAQ
What is the best layout for a tiny house kitchen?
A galley layout works well in tiny houses because it uses two parallel walls for counters and appliances, leaving a clear walkway. Alternatively, an L-shaped layout can fit into a corner and open up the rest of the space.
How can I maximize storage in a small kitchen?
Use vertical space with shelves and hooks, install pull-out drawers in cabinets, and add magnetic strips for knives. Also consider multi-functional furniture like a rolling island with built-in storage.
What size refrigerator fits a tiny house kitchen?
Look for a compact refrigerator under 10 cubic feet, often called an apartment-size or mini fridge. Some models have a separate freezer compartment. Counter-depth models also save space.
Can I have a dishwasher in a tiny kitchen?
Yes, consider a countertop dishwasher that sits on the counter and connects to the faucet. Some models are as small as 18 inches wide and can fit under a standard counter.
What flooring is best for a tiny house kitchen?
Durable, water-resistant materials like luxury vinyl plank or tile are ideal. They are easy to clean and can visually expand the space if laid in a diagonal pattern or with large tiles.
Conclusion
Making a tiny house kitchen work is all about smart choices and creative thinking. Each of these ideas helps you carve out more function and style without needing extra square footage. Start with one or two changes that feel most doable, and build from there.
Your small kitchen can be just as inviting and efficient as any larger space. With a little planning and a few clever upgrades, you'll wonder how you ever thought you needed more room.