13 Kitchen Wall Shelf Decor Ideas That Bring Everyday Charm to Your Space
Kitchen wall shelves are the unsung heroes of home decor. They offer a chance to show off your personality while keeping everyday essentials within arm's reach.
But styling them can feel tricky—too cluttered and it looks messy, too sparse and it feels unfinished. The secret lies in layering pieces that feel both practical and personal.
Think warm wood tones, soft textiles, and a mix of open and closed storage. These 13 ideas will help you create a kitchen that feels cozy, lived-in, and effortlessly stylish.
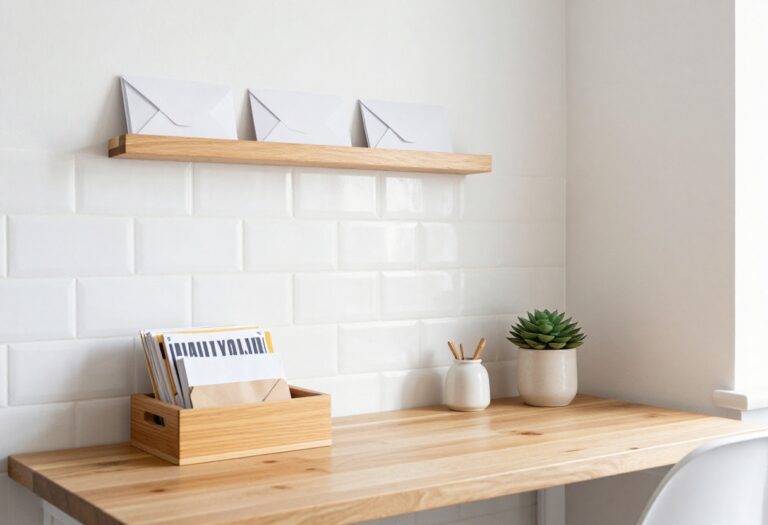
1. Start With a Neutral Base of White Ceramics and Wood
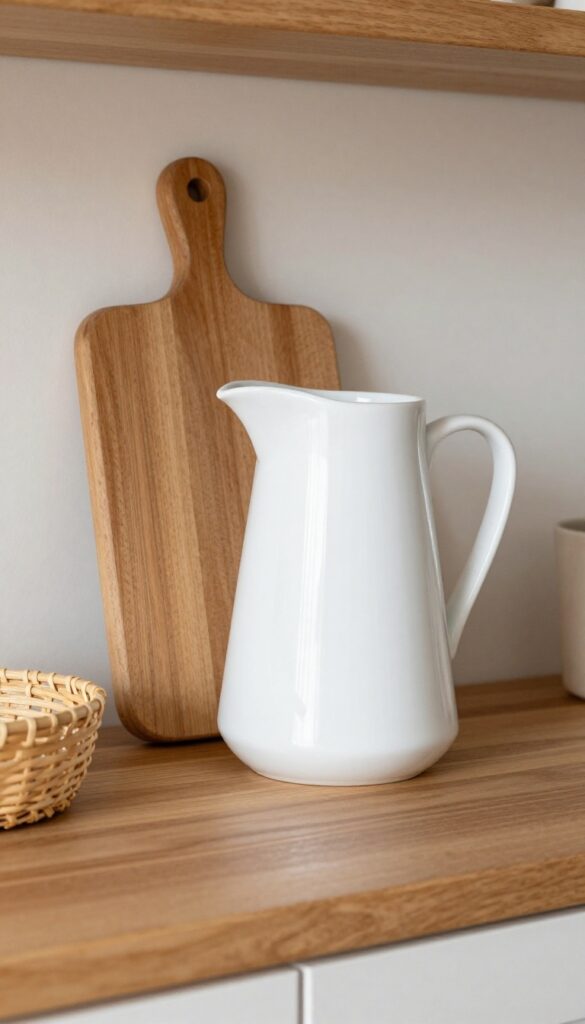
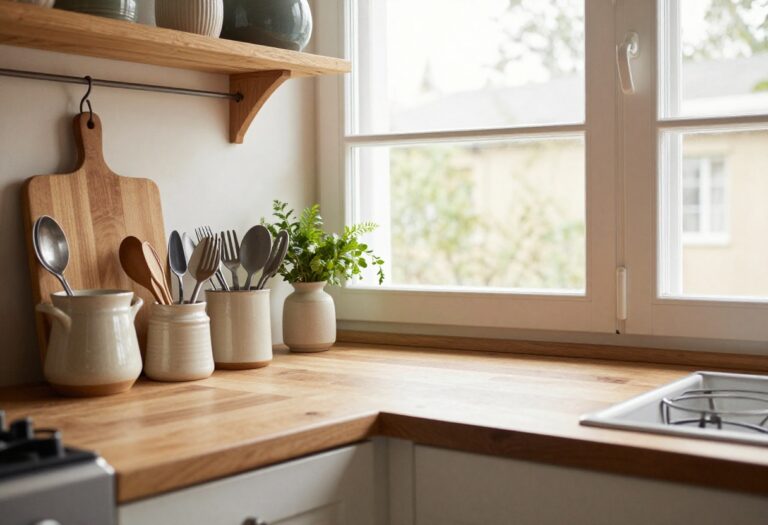
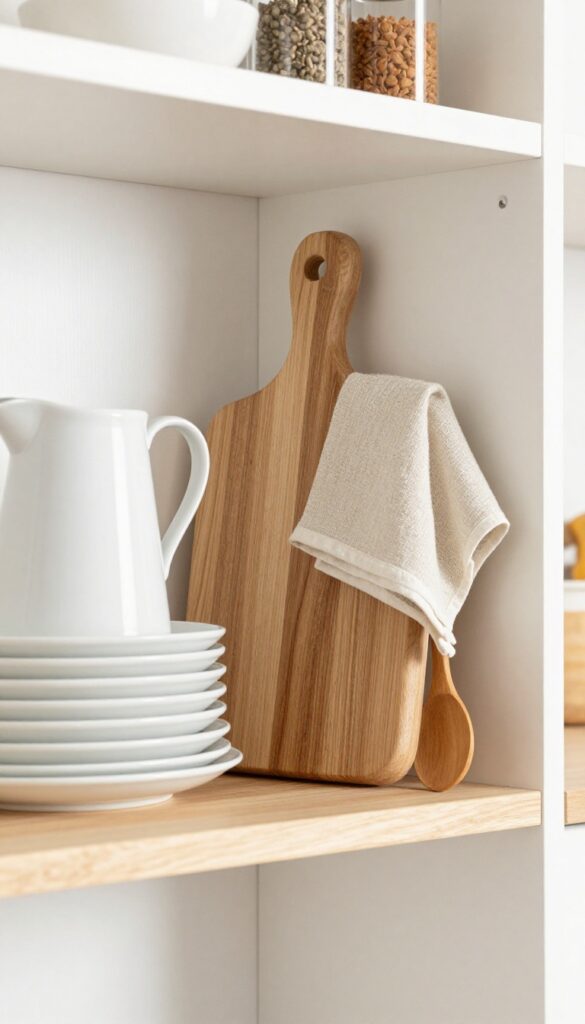
There's a reason white ceramics and wood show up in so many styled kitchens—they just work. The combination is timeless, warm, and incredibly forgiving. White pieces reflect light and keep shelves from feeling cluttered, while wood adds natural texture that softens the look.
Together, they create a foundation that feels both clean and cozy, and you can layer in seasonal accents without the whole display feeling chaotic.
Anchor your shelves with white ceramic pieces—pitchers, bowls, or small canisters—paired with wooden cutting boards or a wooden utensil holder. This combo feels clean and warm, and it's easy to swap out seasonal accents. The key is to vary the shapes and heights so the arrangement has rhythm.
A tall pitcher next to a low bowl, with a round cutting board leaning behind them, creates visual interest without clutter. Stick to warm wood tones like oak or walnut to keep the look inviting.
Best Materials
Glossy white ceramic works best for reflecting light, while matte finishes feel more rustic. For wood, go with natural, unfinished pieces or those with a light oil finish—avoid heavy stains that can look too dark or formal. Mix in a few woven elements like a small basket or rattan coaster for extra texture.
Layout Tip
- Group items in odd numbers and vary the heights. Place the tallest piece at the back or off-center, then layer shorter pieces in front. Leave some empty space—about one-third of the shelf—to let the eye rest.
- Avoid lining everything up in a row; instead, cluster a few items together and leave breathing room on the other side.
Seasonal Swap Strategy
Keep the white ceramics and wood as your permanent base, then swap in small seasonal accents like a mini pumpkin in fall, a sprig of eucalyptus in spring, or a tiny ceramic tree in winter. This way you refresh the look without having to restyle the entire shelf each time.
2. Layer in Greenery With Trailing Plants and Small Herbs
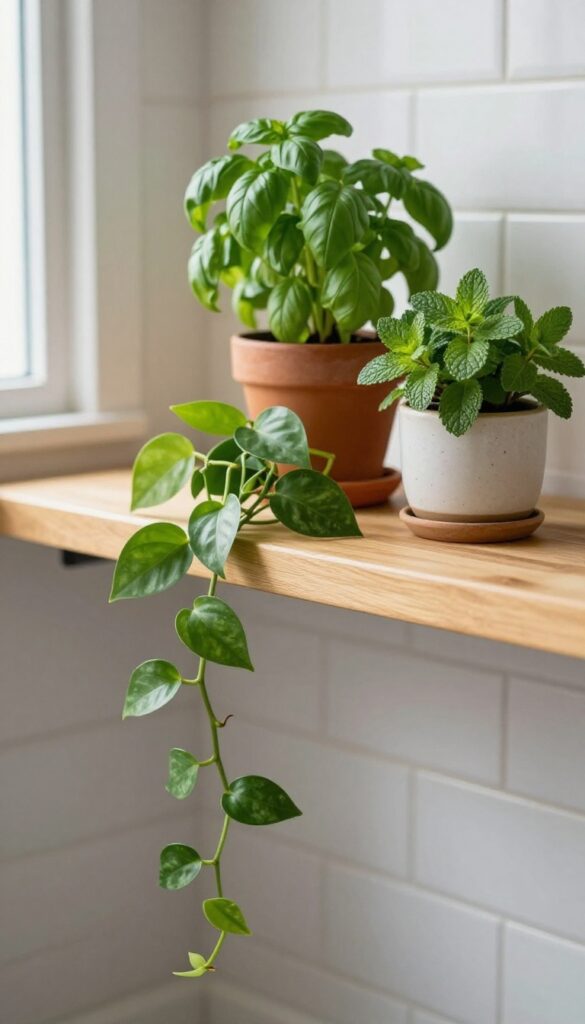
Plants instantly warm up a kitchen shelf, softening all those hard edges and adding a living texture that no decor item can replicate. A mix of trailing pothos and small potted herbs like basil or mint brings both beauty and function. The cascading vines create a natural curtain, while the herbs offer a fresh scent and a handy garnish.
Simple terracotta or ceramic pots keep the look grounded and unpretentious, letting the greenery shine.
For a cozy, layered effect, group plants at different heights. Place a trailing pothos on an outer edge so its vines can spill down, then tuck a compact herb pot slightly behind it. This creates depth and makes the shelf feel lush without being overcrowded.
Choose pots with saucers to protect the shelf from water rings, and consider a small watering can nearby as a practical prop. The green tones work with any color scheme, but they really pop against white subway tile or warm wood shelves.
Best Plant Combos
- Pair a fast-growing pothos or philodendron with a bushy herb like basil or mint. The trailing habit contrasts nicely with the upright herb growth. For low-light kitchens, opt for a snake plant or ZZ plant instead of herbs.
- Keep the pots within a similar color family—terracotta, cream, or matte black—to unify the look.
Shelf Styling Tip
- Avoid lining plants in a row. Stagger them by placing one at the front edge, another slightly back, and a trailing one at the end. This creates a natural rhythm and makes the shelf feel curated.
- Leave a little negative space so the plants have room to breathe and grow.
Care And Maintenance
- Group plants with similar watering needs together. Herbs like basil prefer consistent moisture and bright light, while pothos tolerates lower light and drier soil. Use a small watering can with a narrow spout to water directly at the soil line, avoiding wet leaves.
- Rotate pots weekly so all sides get light.
3. Mix Open Baskets for Storing Produce and Linens
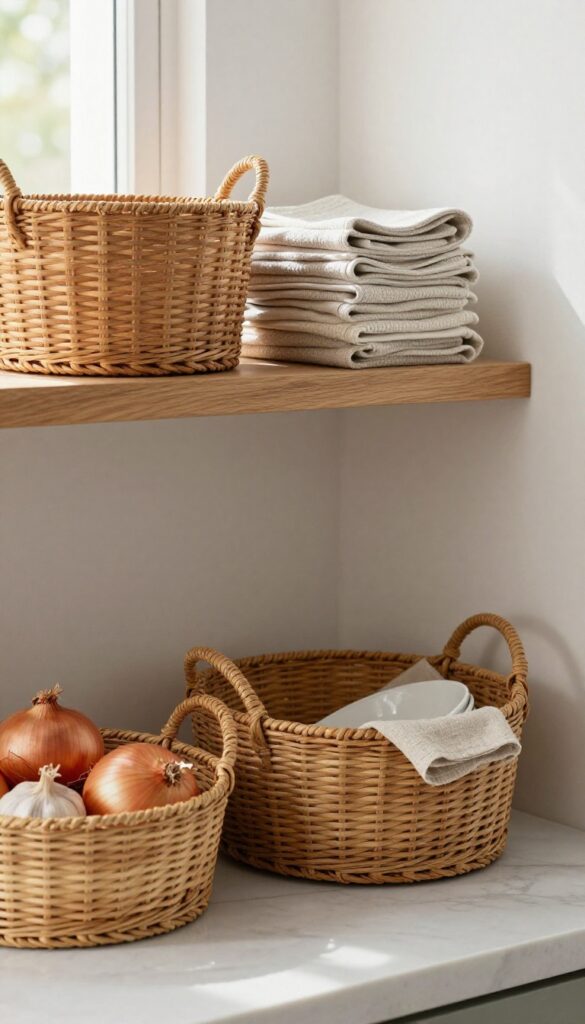
Woven baskets bring an instant layer of warmth and texture to open kitchen shelving. Instead of lining up jars or canisters, try mixing a few open baskets in natural fibers like seagrass, rattan, or bamboo. They soften the hard edges of dishes and appliances while keeping everyday essentials close at hand.
The key is balancing practicality with that cozy, collected look—baskets hide the clutter of onions, garlic, or folded towels while adding visual depth to your shelves.
Using open baskets on your kitchen wall shelves is a simple way to blend storage with style. Place one basket on a lower shelf for easy access to produce like onions, potatoes, or garlic—they need airflow, and open weave baskets provide just that. Another basket on a higher shelf can hold neatly folded dish towels or cloth napkins.
The contrast between the rustic texture of the baskets and the sleekness of your dishes or countertops creates a layered, lived-in feel. Stick to natural tones like warm browns, tan, or off-white to keep the look cohesive and grounded. For an extra cozy touch, line a basket with a small linen napkin peeking over the edge.
Best Materials
- Stick with natural fibers that breathe and add texture. Seagrass is sturdy and has a golden hue, while rattan offers a tighter weave and a lighter color. Bamboo baskets are great for a more structured look.
- Avoid shiny or synthetic materials—they can feel out of place in a cozy kitchen. Mix two or three different weaves on the same shelf for a collected, not matched, vibe.
Layout Tip
- Group baskets in odd numbers—one on a lower shelf and two on an upper shelf, or vice versa. Keep the heaviest basket on a lower shelf for safety and visual balance. If your shelf is narrow, choose baskets that are slightly shorter than the shelf depth so they don't protrude.
- Leave a little breathing room around each basket to let the shelf's material show through.
Finishing Touch
Tuck a small sprig of dried lavender or eucalyptus into the top of a basket for a subtle, natural accent. It adds a whisper of color and a gentle scent without overwhelming the practical purpose. This little detail makes the shelf feel styled, not just stored.
4. Display a Collection of Vintage-Inspired Jars and Canisters
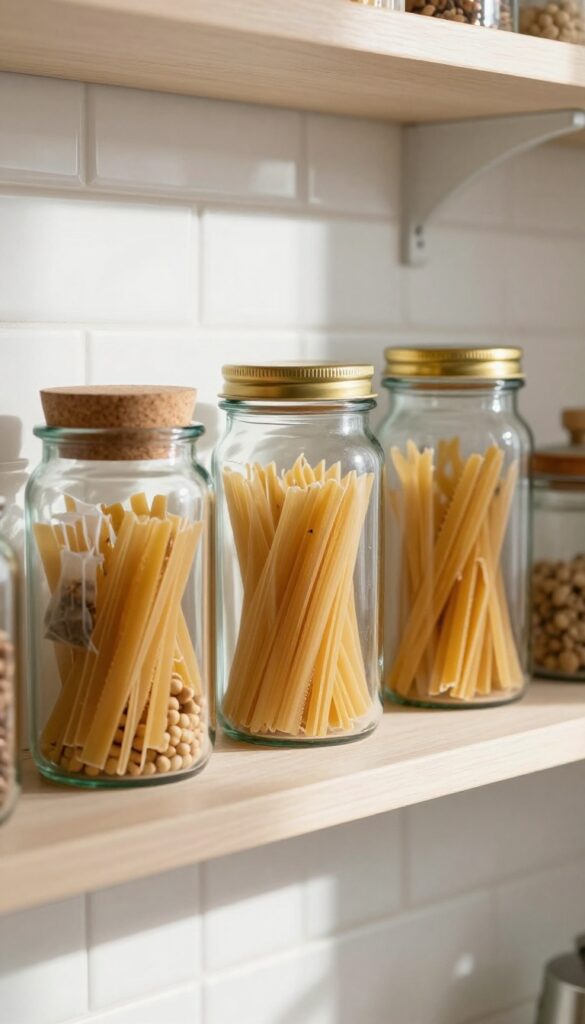
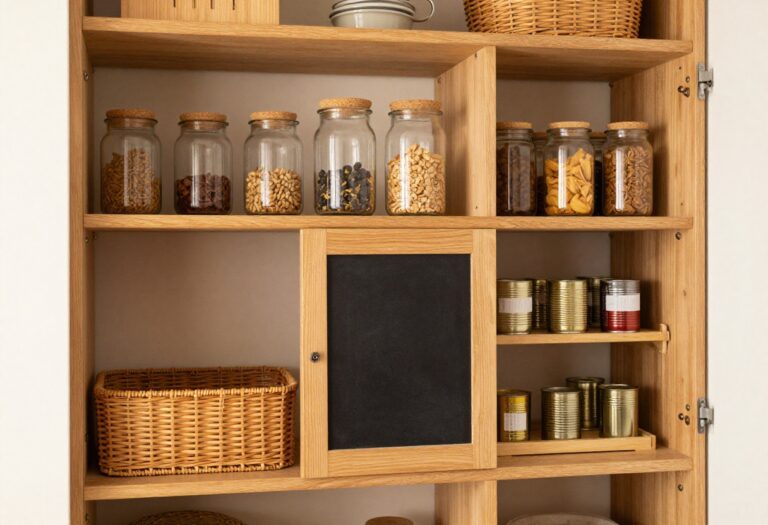
There’s something about a row of glass jars lined up on a shelf that just feels right. They catch the light, show off their contents, and add a layer of texture that plain boxes or plastic containers just can’t match. Vintage-inspired jars with cork or metal lids bring a nostalgic feel to your kitchen without looking like a museum piece.
They’re practical too—you can see exactly how much pasta or coffee you have left at a glance.
Grouping these jars together creates a uniform, curated look that instantly makes your shelf feel intentional. Choose jars in similar shapes and sizes for a cohesive display, or mix a few different heights for visual interest. Fill them with everyday staples like dried beans, rice, tea bags, or even colorful pasta.
The key is keeping the contents visible—clear glass is your best friend here. Place the jars on a shelf where you can easily grab them while cooking, like above your counter or near the stove. This idea works especially well on open shelving, where the jars become part of the decor rather than hidden away in a cabinet.
Best Materials And Finishes
- Look for jars with a slight tint—amber, blue, or green glass adds a vintage touch. Pair them with natural cork lids or matte metal lids in brass or nickel. Avoid plastic lids if you want that old-world charm.
- The finish should feel slightly rustic but still refined, like something you’d find at a flea market. Mixing glass types (ribbed, smooth, or patterned) keeps the display from looking too uniform.
Shelf Styling Tip
- Arrange the jars in a tight cluster rather than spacing them evenly across the shelf. This creates a collected, lived-in look. Add a small plant or a wooden cutting board next to the jars to break up the glass and add warmth.
- Keep the shelf itself simple—a white or natural wood shelf lets the jars stand out. If your shelf is against a tile backsplash, the jars will reflect the tile pattern, adding another layer of visual interest.
Where To Place Them
- This display works best on a shelf that’s at eye level or slightly above, so you can easily see and reach the jars. A shelf above your coffee station or near the sink is ideal. Avoid placing them directly above the stove, where heat and steam can affect the contents.
- If you have a narrow shelf, stick to smaller jars (like spice jars) to keep the scale right.
5. Add a Small Art Piece or Framed Print for a Personal Touch
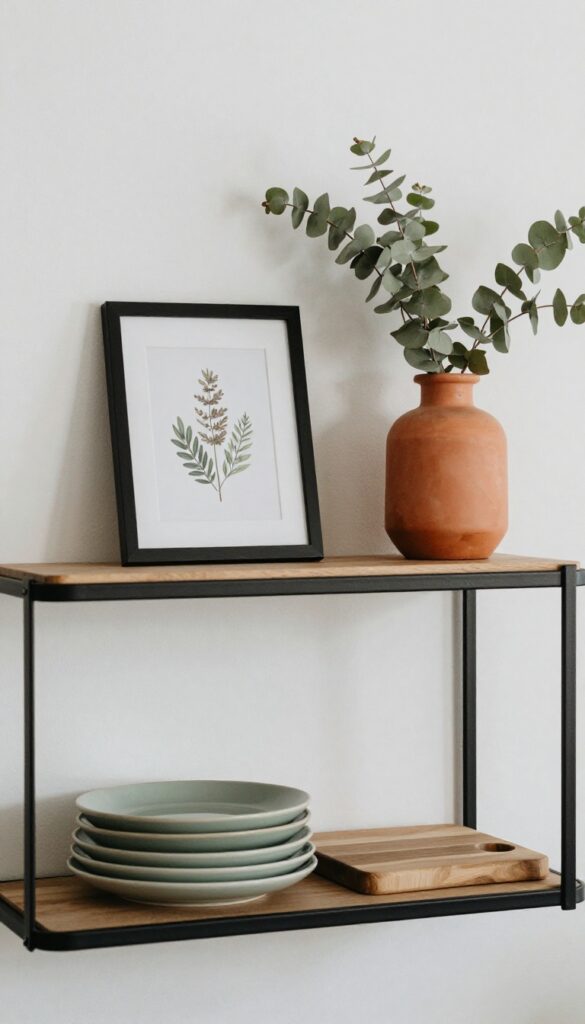
Art isn't just for living room walls. A small framed print or original artwork leaned against the back of a kitchen shelf brings a gallery feel to the heart of your home. It softens the utilitarian edge of cookware and spices, making the space feel more lived-in and curated.
Choose a subject that ties into the kitchen's rhythm—botanical prints, simple still lifes of fruit, or even a minimalist line drawing of a coffee cup. The key is keeping the scale modest so it doesn't crowd the shelf or compete with functional items.
The beauty of this idea is how effortlessly it layers personality into your kitchen. Unlike hanging art, a leaned piece can be swapped out seasonally or whenever you crave a change. It also plays well with other shelf decor: prop it behind a small vase or a stack of plates to create depth.
For a cohesive look, pick a frame that echoes the kitchen's hardware or cabinet finish—black, brass, or natural wood. The art itself should feel relaxed, not precious; think unframed prints, postcards, or even a child's drawing in a simple clip frame. This approach keeps the kitchen from feeling too staged while still looking intentional.
Best Colors And Subject Matter
- Stick to muted, earthy tones that complement your kitchen palette. Botanical greens, soft terracotta, warm neutrals, and faded blues work beautifully. Subjects like herbs, citrus slices, or a single flower stem feel natural in a kitchen setting.
- Avoid overly busy patterns or dark, heavy imagery—they can make the shelf feel cluttered. A black-and-white line drawing or a sepia-toned botanical print adds sophistication without overwhelming.
Placement And Styling Tip
- Lean the art against the back wall of the shelf, slightly angled toward the center. Pair it with a small object in front—a ceramic salt pig, a stack of cookbooks, or a tiny potted succulent. This creates a layered vignette that draws the eye.
- Keep the art at eye level or just below, so it's visible without being in the way. If your shelf is above a counter, ensure the print doesn't block access to items you use daily.
Budget-Friendly Swap
- Don't have original art? Frame a page from a vintage cookbook, a seed packet, or a botanical calendar. Thrift stores often have inexpensive frames you can paint to match your kitchen.
- Another idea: print a high-resolution photo of a farmer's market or a herb garden from free stock sites. The goal is personal and charming, not expensive.
6. Use a Tiered Spice Rack to Keep Seasonings Handy
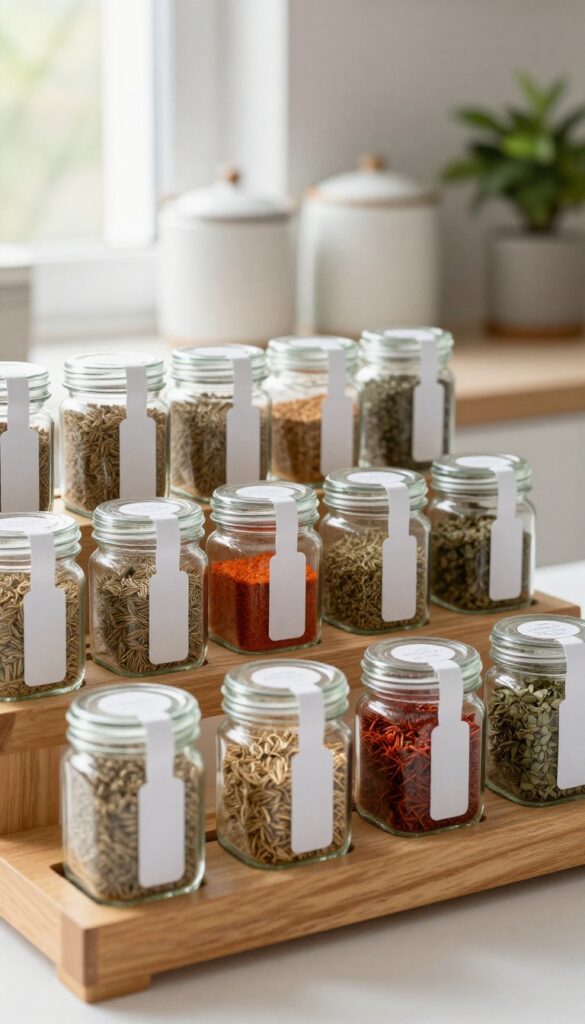
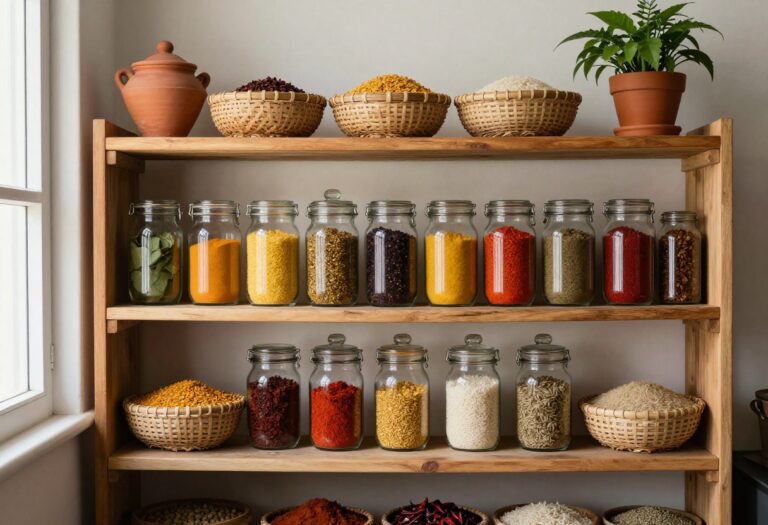
A tiered spice rack is one of those small additions that instantly makes a kitchen feel more put-together. It turns a jumble of mismatched jars into a neat, organized display that's also incredibly functional. The angled tiers let you see every label at a glance, so you're not digging through a cabinet to find the cumin.
Plus, the layered look adds a subtle architectural detail to an otherwise flat shelf.
Installing a small tiered rack on a kitchen shelf is a simple way to keep your most-used spices within arm's reach. The key is to choose uniform jars—either clear glass with white labels or matching ceramic pots—to create a clean, cohesive look. This setup works especially well on a shelf near the stove or above a coffee station, where you need quick access to seasonings.
The vertical layers not only save space but also add visual depth, making the shelf feel intentionally styled rather than cluttered.
Best Materials
- For a warm, cozy kitchen, opt for a wooden tiered rack with a natural or stained finish. It pairs beautifully with ceramic or glass spice jars and softens the look of metal appliances. If your kitchen leans modern, a sleek metal rack in black or brushed brass offers a more streamlined feel.
- Avoid plastic racks—they can look flimsy and don't age as well.
Layout Tip
Place the rack on a shelf that's at eye level or just below so you can easily read the labels. Group spices by frequency of use: keep everyday staples like salt, pepper, and garlic powder on the front row, and specialty blends toward the back. Leave a little breathing room around the rack—don't cram it with other items, or the visual effect gets lost.
Finishing Touch
Add a small plant or a wooden spoon holder next to the rack to anchor the display. A trailing herb like thyme or a tiny succulent in a terra-cotta pot brings in life and softens the hard edges of the jars. This little detail makes the whole shelf feel curated rather than just organized.
7. Stack Cookbooks Horizontally With a Bookend
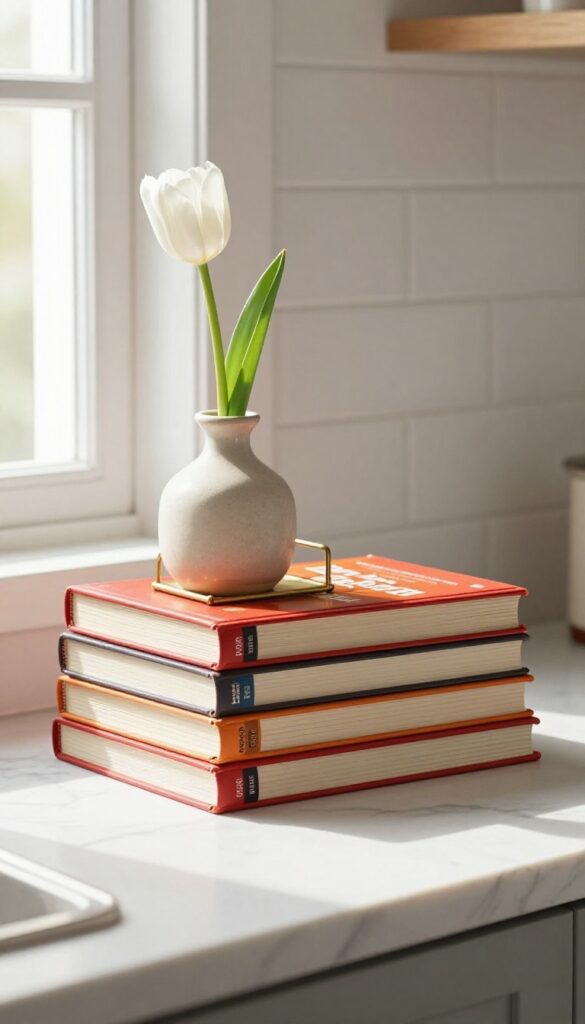
Cookbooks are some of the most colorful and personality-packed items in a kitchen, yet they often get shoved into a cabinet or piled vertically on a shelf where the spines barely show. Stacking them horizontally changes everything. It turns a practical storage choice into a deliberate styling moment that feels both cozy and curated.
The flat stacks break up vertical lines on a shelf, add visual weight, and let you play with color blocking or texture contrasts. Topped with a simple vase or candle, the arrangement feels finished without trying too hard.
The trick is to keep the stacks intentional. Choose three to five cookbooks with covers that coordinate or contrast nicely with your kitchen's color palette. Stack them flat, then lean a bookend against the side to keep everything tidy.
The bookend itself can be a decor piece—think marble, brass, or carved wood. On top of the stack, place a small ceramic bud vase with a single stem or a slim taper candle in a neutral holder. This setup works best on open shelving, a floating shelf above the counter, or even on a windowsill ledge.
It brings a lived-in, layered look that feels personal and approachable.
Best Colors
Stick with cookbook covers that share a common undertone—warm reds and oranges for a cozy feel, or soft blues and greens for a calm, collected look. If your kitchen has neutral cabinets, let the cookbooks add the pop of color. For a more monochromatic scheme, choose books in shades of white, cream, and beige, then add a single accent color with the vase or candle.
Shelf Styling Tip
- Vary the height of the stacks across the shelf. Place one stack of three books next to a taller stack of five, and leave some breathing room between them. This prevents the shelf from looking too uniform.
- Add a small plant or a wooden cutting board leaning against the wall to balance the visual weight.
Finishing Touch
The object on top of the stack should be lightweight and simple. A small brass animal figurine, a single seashell, or a minimalist salt cellar all work beautifully. Avoid anything too tall or bulky, as it will overpower the books and make the shelf feel cluttered.
8. Incorporate a Small Cutting Board as a Shelf Liner
Sometimes the simplest additions make the biggest difference. Laying a slim wooden cutting board on a kitchen shelf instantly warms up the space and gives your items a natural, grounded base. It’s like creating a little stage for your dishes or jars—without any permanent commitment.
You can even lean the board against the back wall for a relaxed, casual look that feels effortless.
This trick works especially well on open shelving where you want a layered, lived-in feel. The wood adds texture and contrast against white or neutral shelves, and it helps define separate zones on a longer shelf. Choose a board with a light finish for a Scandinavian vibe or a darker walnut for more richness.
The best part? It’s practical too—you can grab it for last-minute chopping and pop it back when done.
Best Wood Tones
For a cohesive look, match the cutting board’s tone to your other wooden elements—like butcher block counters or open shelving. Light maple or birch keeps things airy, while walnut or cherry adds depth. If your kitchen has mixed metals, a medium oak bridges warm and cool tones nicely.
Shelf Styling Tip
Use the board as a foundation for a small stack of plates, a ceramic pitcher, or a couple of spice jars. Keep the arrangement low so the board remains visible. If you lean the board, place a taller item like a vase or utensil crock in front to anchor it.
Finishing Touch
Add a linen towel draped over one corner of the board or a small wooden spoon resting on it. These tiny details reinforce the cozy, layered look without cluttering the shelf.
9. Hang a Small Hook Under the Shelf for Mugs or Utensils
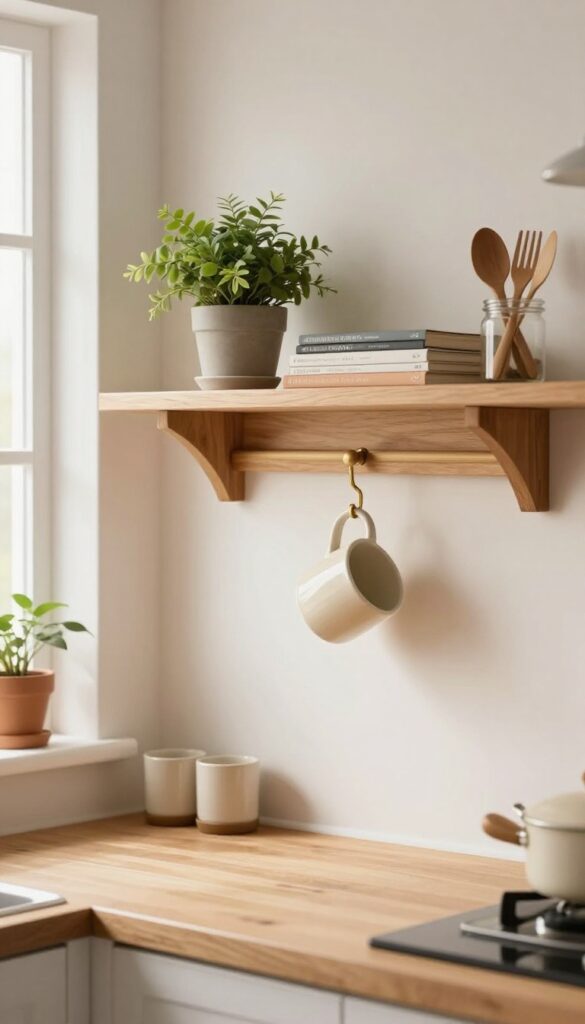
That empty space under your wall shelf? It's prime real estate for a simple hook or two. This tiny addition turns a flat surface into a vertical storage spot, perfect for mugs, measuring cups, or even small utensils.
It feels like a secret trick—practical without cluttering your counter or shelf top. The best part? It adds a cozy, lived-in vibe that makes your kitchen feel more personal.
Adding hooks under a shelf is one of those small changes that makes a big difference. It keeps frequently used items within easy reach while freeing up shelf space for jars, plants, or cookbooks. Plus, it adds visual interest—mugs hanging in a row create a charming, café-like look.
For a cohesive feel, choose mugs in a coordinated color palette, like soft earth tones or matte pastels. You can also use the hooks for measuring spoons, small ladles, or even tea towels. The key is to keep it intentional—don't overcrowd, and let the hooks serve both function and style.
Best Materials For The Hooks
Brass or copper hooks add warmth and pair beautifully with wooden shelves. Black metal hooks work well in modern or industrial kitchens, while matte nickel blends into most styles. For a budget-friendly option, adhesive hooks can hold lightweight mugs, but screw-in hooks are more secure for daily use.
Styling Tip: Coordinate Your Mugs
Stick to 2–3 colors that repeat across your kitchen decor. For example, cream, sage green, and terracotta mugs create a soft, cohesive look. If you prefer a more eclectic style, mix patterns but keep the mug shapes similar—like all round or all angular—to avoid visual chaos.
Small-space Fix: Use Double Hooks
In a tiny kitchen, maximize every inch by using double hooks. Each hook can hold two mugs or a mug and a utensil. This works especially well under a shelf above a coffee station or near the stove for easy access to spatulas and tongs.
10. Group Similar Items in Odd Numbers for Visual Balance
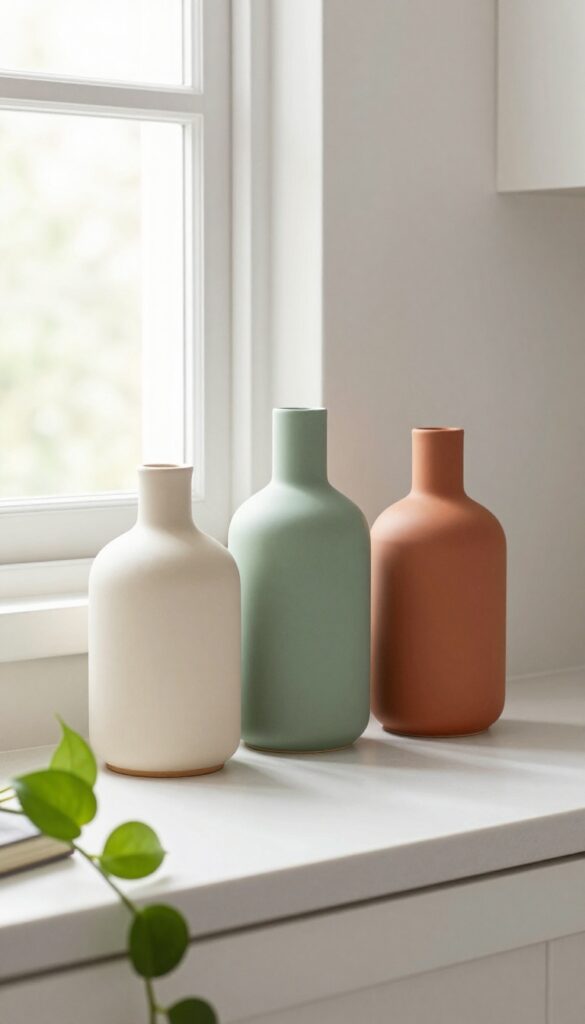
There’s a reason why designers love odd numbers—they just look right. When you cluster three similar objects on a shelf, your eye naturally moves across them, creating a sense of rhythm and harmony. It’s a simple styling trick that makes any shelf feel intentional, not cluttered.
Start by picking three items that share a common theme: same color family, same material, or same function. Think small ceramic vases, wooden salt cellars, or matching ramekins. Place them close together but vary the heights slightly—maybe one is taller, one is mid-height, and one is short.
This slight variation keeps the grouping dynamic while still feeling orderly. The odd number prevents a rigid, symmetrical look and adds that cozy, layered feel you want in a lived-in kitchen.
Best Colors
Stick to a monochromatic palette or soft neutrals for a calm, cohesive look. Cream, sage green, and terracotta work beautifully together. If you want a pop of color, use one bold piece and keep the other two muted.
Layout Tip
Place the grouping slightly off-center on the shelf, not dead center. This creates a more relaxed, natural arrangement. Leave some breathing room on either side so the cluster stands out without feeling crowded.
Finishing Touch
Add a small plant or a single cookbook leaning nearby to anchor the grouping. A trailing pothos or a slim herb book adds texture and keeps the display from feeling too curated.
11. Add a Small Lamp or Battery-Operated Candle for Warm Lighting
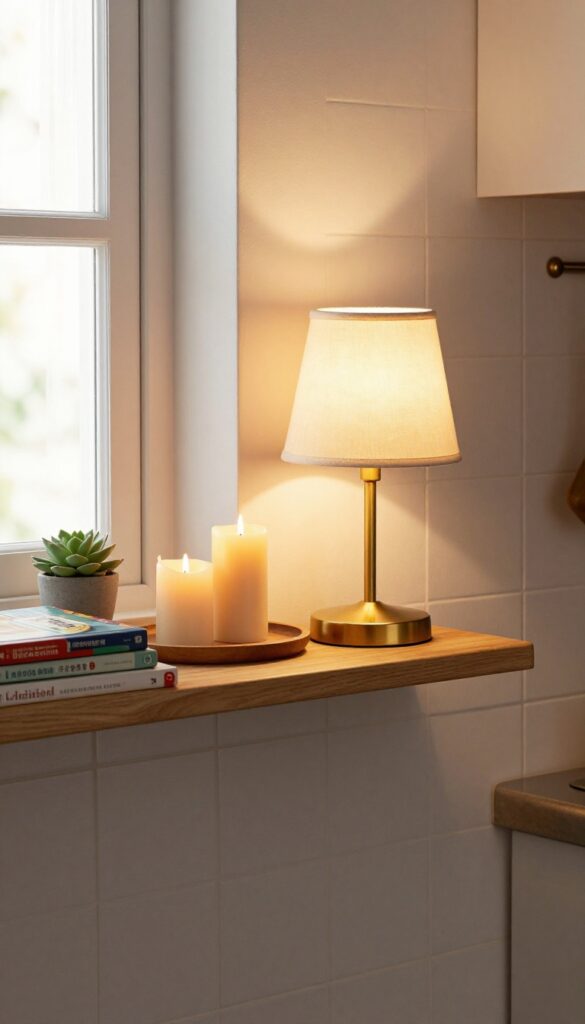
A kitchen can feel a little too bright and clinical once the overhead lights go on. That's where a small lamp or a cluster of flameless candles on a shelf changes everything. The soft glow makes the space feel instantly more inviting, especially during evening hours when you want to wind down with a cup of tea or a late-night snack.
Warm-toned bulbs are key here—they cast a cozy, golden light that makes even the simplest shelf look like a curated vignette.
This idea works best on a shelf that's not directly under a cabinet, so the light can spread and create a gentle ambiance. A tiny desk lamp with a fabric shade or a brass base adds a touch of personality, while a trio of battery-operated candles in different heights brings a flickering warmth without any fire hazard. Place them near a stack of cookbooks or a small plant to create a little scene that feels intentional and lived-in.
The result is a kitchen that feels more like a gathering spot than just a workspace.
Best Lamp Styles
- Look for small-scale lamps that won't overwhelm the shelf—think mini banker lamps, ceramic table lamps, or even clip-on lights designed for desks. A lamp with a dimmer switch is a bonus, letting you adjust the brightness based on the time of day. For a cohesive look, choose a lamp that complements your kitchen's hardware or cabinet color.
- Brass or matte black finishes work well with most styles, while a white ceramic lamp keeps things light and airy.
Candle Placement Tips
- Group two or three flameless candles on a small tray or a wooden coaster to anchor them visually. Vary the heights by using candle holders or pillar candles of different sizes. Place them near the edge of the shelf so the light reflects off the wall, but keep them away from curtains or paper goods.
- Opt for candles with a warm white or amber LED—avoid cool blue tones that can feel harsh. Remote-controlled options make it easy to turn them on without reaching.
Cozy Finishing Touch
- Add a small decorative object next to the lamp or candles to complete the scene—a tiny vase with dried flowers, a ceramic dish, or a stack of coasters. The goal is to make the shelf feel like a mini still life, not just a surface with lights. Keep the rest of the shelf relatively uncluttered so the lighting remains the focal point.
- This little detail can make your kitchen feel like a cozy café corner.
12. Use a Narrow Shelf for a Coffee or Tea Station
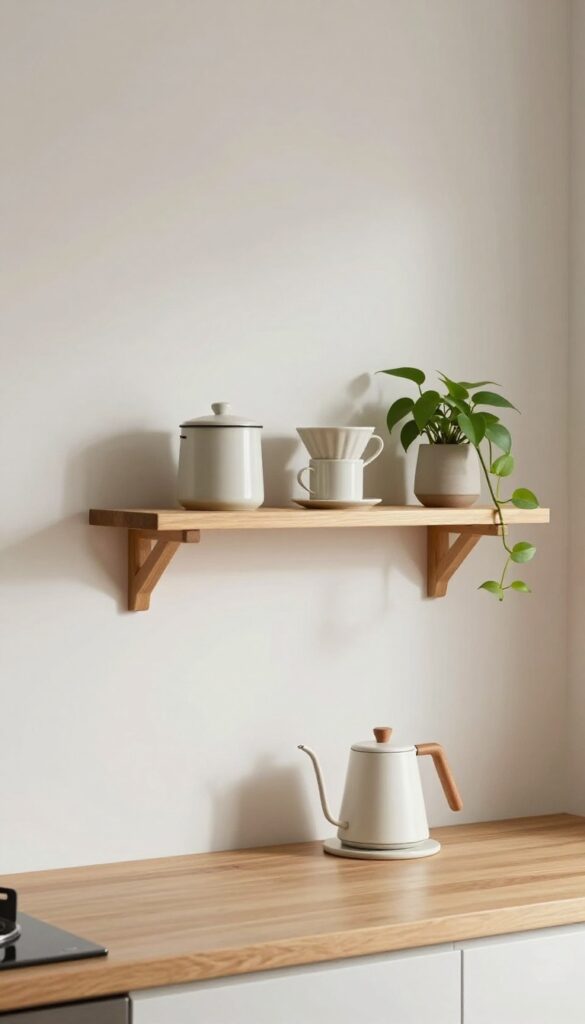
A narrow wall shelf above the counter can transform a blank stretch of wall into a purposeful morning station. By dedicating that slim ledge to just coffee or tea essentials, you create a visual anchor that feels both intentional and inviting. The key is restraint—a few well-chosen items, not a full collection.
This setup works especially well in smaller kitchens where counter space is precious. A single shelf, around 6 to 8 inches deep, holds a small canister of beans or tea bags, a couple of favorite mugs, and a pour-over dripper or French press. Keep it minimal so it reads as a deliberate vignette rather than a crowded shelf.
The result is a dedicated spot that makes your morning ritual feel special without adding visual noise.
Best Materials
A warm wood shelf (walnut or oak) adds a cozy, organic feel that pairs well with ceramic mugs and glass canisters. For a more modern look, go with a black metal or matte white shelf that blends into the wall. The material should complement your existing kitchen finishes—if you have brass hardware, a brass-rimmed shelf ties it together nicely.
Layout Tip
Position the shelf at eye level or slightly above, about 12 to 18 inches above the counter. Leave enough clearance below for a small electric kettle or a tray that catches drips. Group items in odd numbers—three mugs and one canister, for example—to keep the composition balanced but not symmetrical.
Cozy Detail
Add a small plant or a single stem in a slim vase to soften the utilitarian feel. A trailing pothos or a sprig of eucalyptus brings life without taking up much room. The greenery contrasts nicely with the hard edges of mugs and metal, making the station feel more like a styled corner than a storage spot.
13. Rotate Seasonal Decor Like Mini Pumpkins or Pinecones
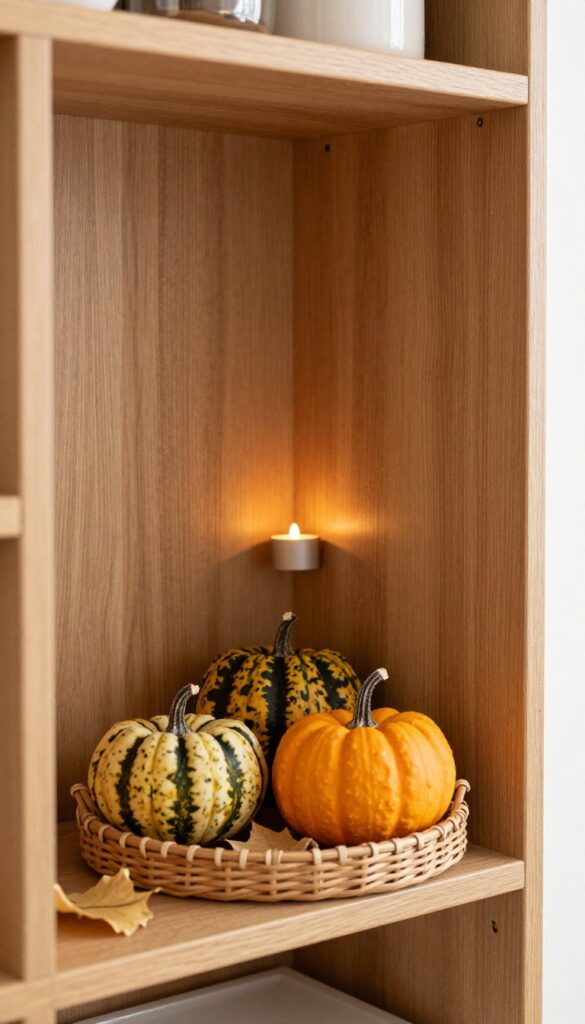
One of the easiest ways to keep your kitchen shelves from feeling stale is to swap out small seasonal touches. Think mini pumpkins in fall, pinecones in winter, or seashells in summer. These little changes cost almost nothing and instantly refresh the whole look.
Plus, they make your kitchen feel connected to the world outside—cozy and current without a full redesign.
Rotating seasonal decor is a low-effort, high-impact trick that works on any shelf. The key is to keep it simple: a few small objects grouped on a tray or in a shallow bowl. This way, you can swap everything in minutes.
In fall, cluster mini pumpkins with dried leaves. In winter, add pinecones and a sprig of evergreen. Come spring, switch to pastel eggs or tiny flower pots.
Summer calls for seashells or smooth river stones. The tray keeps the display tidy and makes the switch feel intentional, not cluttered.
Best Materials
- Stick with natural, textural items that feel grounded. Wood, ceramic, stone, and dried botanicals work beautifully. Avoid plastic or overly shiny pieces—they can look cheap next to your everyday dishes.
- A small wooden tray or a woven basket adds warmth and keeps everything corralled.
Layout Tip
- Place the tray toward the front of the shelf so it's easy to reach. Layer items by height: put the tallest piece in back, medium in the middle, and smallest in front. This creates depth and keeps the display from looking flat.
- If your shelf is narrow, use a single row of three items instead of a tray.
Finishing Touch
Add a small LED candle or a tiny string of fairy lights behind the seasonal display. The soft glow highlights the textures and makes the shelf feel like a little vignette. It's a cozy detail that works year-round and makes the seasonal swap feel even more special.
FAQ
How do I keep my kitchen shelves from looking cluttered?
Stick to a color palette and use a mix of open and closed storage. Group similar items together and leave some empty space. Rotate items seasonally to keep the look fresh without overcrowding.
What are the best materials for kitchen shelf decor?
Natural materials like wood, ceramic, glass, and woven fibers work well. They add warmth and texture. Avoid plastic or overly shiny finishes that can feel cheap.
How many items should I put on a single shelf?
Aim for 3 to 5 items per shelf, depending on length. Use odd numbers for visual balance. Vary heights and shapes to create interest without clutter.
Can I use wall shelves in a small kitchen?
Absolutely. Wall shelves save counter space and make a small kitchen feel larger. Keep them shallow and use vertical space wisely.
Stick to a few key pieces to avoid a cramped look.
How do I style shelves without damaging the wall?
Use removable adhesive hooks or brackets if you're renting. For heavier items, install shelves into studs. Use shelf liners or felt pads to protect surfaces from scratches.
Conclusion
Kitchen wall shelves are a wonderful way to blend function with personality. By layering everyday items with a few special touches, you can create a space that feels warm, inviting, and uniquely yours. Start with a few of these ideas and adjust as you go—the best decor evolves with your needs.
Remember, the goal isn't perfection but a kitchen that makes you smile every time you walk in. So take your time, experiment, and enjoy the process of making your kitchen feel like home.