10 Budget-Friendly Kitchen Ideas to Make Fridge Corners More Useful and Cozy
That narrow gap next to your fridge often becomes a dumping ground for random bottles or forgotten spices. But with a little creativity, it can turn into one of the most charming spots in your kitchen.
The best part? You don't need a big renovation or a fat wallet to make it happen.
These 10 ideas are all about working with what you have, adding warmth, and making every inch count. Whether you're renting or own your home, there's something here that'll fit your space and your budget.
1. Slim Rolling Cart for Extra Storage
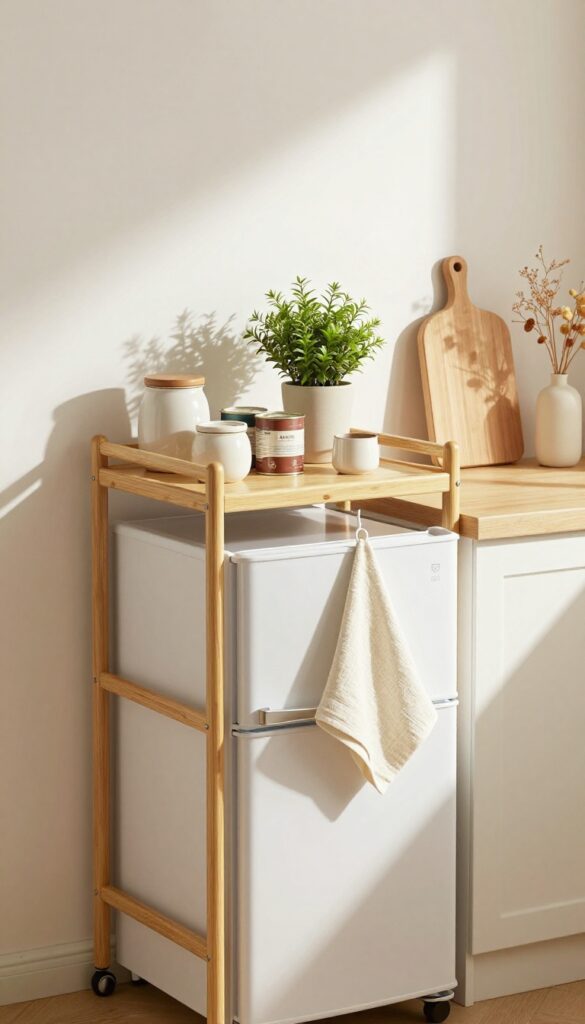
That awkward gap beside your fridge often becomes a dust trap or a sad spot for a recycling bin. But with a slim rolling cart, you can turn that narrow space into a functional storage zone. It’s a budget-friendly fix that adds both style and practicality, especially in smaller kitchens where every inch counts.
A narrow rolling cart slides perfectly into the gap beside your fridge. Use it for pantry staples, spices, or even a mini coffee station. Look for one with wheels so you can pull it out easily for cleaning.
Best Materials For A Warm Look
To keep the cozy vibe, choose a cart with a natural wood finish or a warm metal like brass or copper. Avoid cold stainless steel or glossy black—they can feel too industrial. A bamboo or oak cart adds warmth and blends well with most kitchen styles.
Storage Tip: Layer Your Items
Use small baskets or ceramic jars on the cart to corral loose items like tea bags, snacks, or measuring spoons. Stack canned goods on the lower shelf and keep frequently used oils or spices on top. This keeps the cart looking tidy and makes everything easy to grab.
Budget-Friendly Swap
If a ready-made cart feels pricey, repurpose a narrow bookshelf or a wooden crate on casters. Paint it in a soft cream or sage green to match your kitchen. Add a small hook on the side for hanging dish towels or a mini utensil holder.
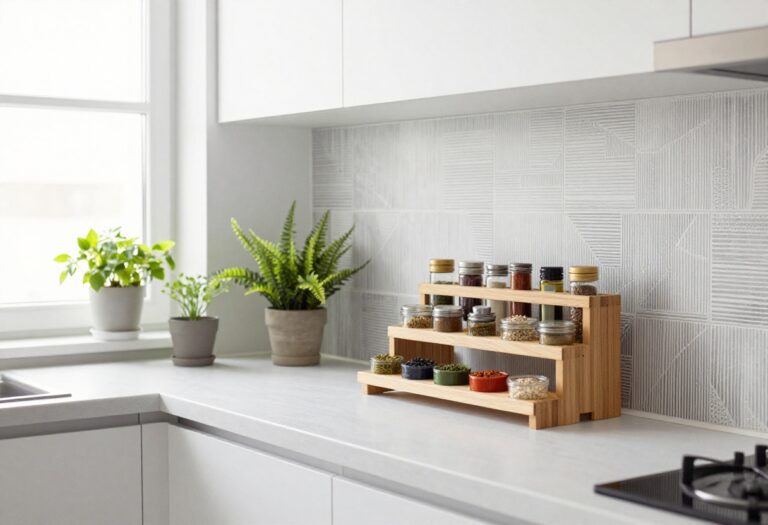
2. Magnetic Side Rack for Spices and Tools
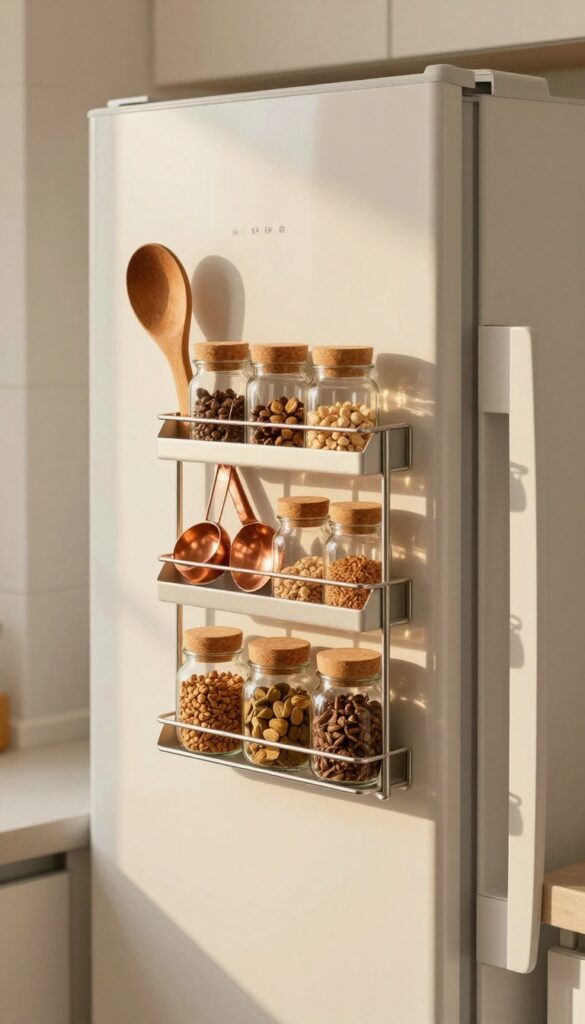
That big metal side of your fridge is prime real estate just waiting to be used. A magnetic rack or strip turns an empty surface into a handy spot for spices, measuring spoons, or kitchen shears. It's one of those budget-friendly tweaks that makes cooking feel smoother and your countertops look less cluttered.
Plus, it adds a cozy, lived-in touch when you fill it with warm-toned jars and wooden tools.
Stick a magnetic strip or small rack to the side of your fridge, then load it up with everyday essentials. Think spice jars, measuring spoons, or even a pair of kitchen shears. Everything stays within arm's reach while your counters breathe easier.
For a warm and cozy look, choose spices in glass jars with cork lids or copper accents, and hang wooden spoons or a small cast-iron skillet hook. This idea works especially well in small kitchens where every inch counts, and it costs next to nothing if you already have magnets or a basic strip.
Best Colors And Materials
- Stick with natural materials to keep the warm vibe going. Wooden spice jars, cork-topped bottles, and copper or brass measuring spoons look lovely against the fridge's metal. If your fridge is white or stainless, the contrast is subtle but charming.
- Avoid plastic containers if you can—they tend to feel cold and cheap. Instead, reuse small glass jars from jam or sauce, and label them with a piece of twine and a tag.
Layout Tip
- Place the rack at eye level or slightly lower so you can easily grab what you need. Leave the top third of the fridge side free for notes or a magnetic calendar if you like. Group spices by frequency of use—keep salt, pepper, and your favorite seasoning at the front.
- For tools, hang the most-used ones like tongs or a spatula, and store backups inside a drawer.
Budget-Friendly Swap
- Don't want to buy a fancy magnetic rack? Use a few strong neodymium magnets glued to a wooden board or even a repurposed metal baking sheet. Attach it to the fridge side with heavy-duty magnetic tape.
- Or simply stick adhesive magnetic strips directly on the back of your spice jars. Total cost can be under $10, and it looks custom.
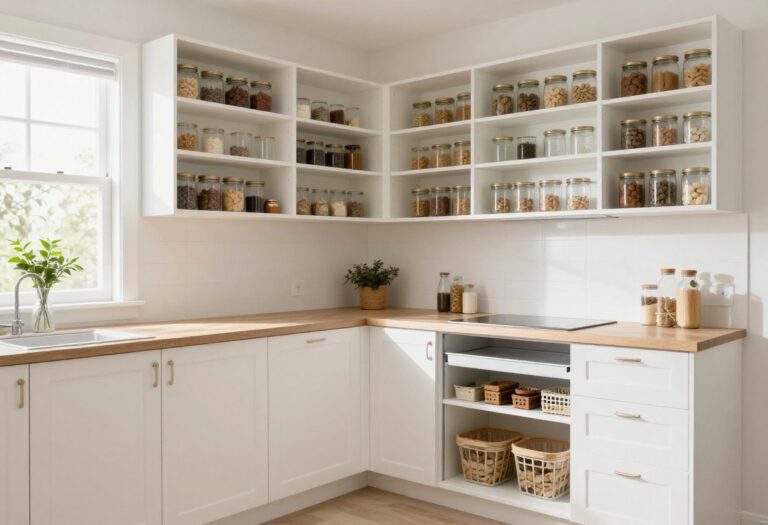
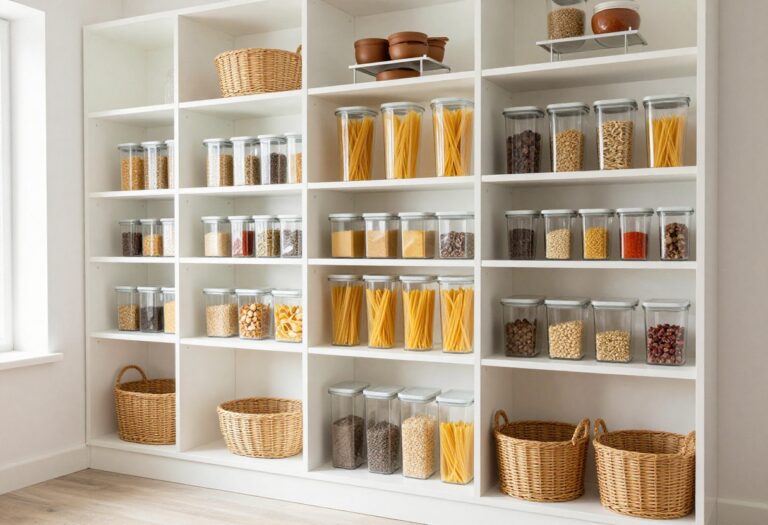
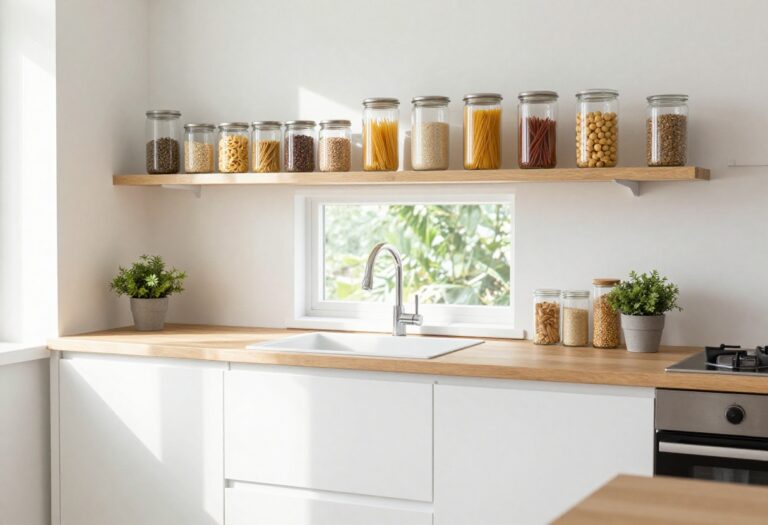
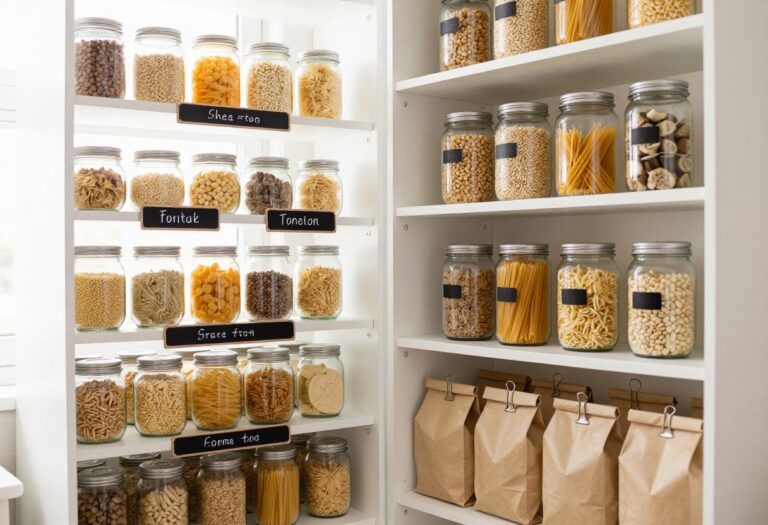
3. Over-the-Fridge Shelf for Baskets
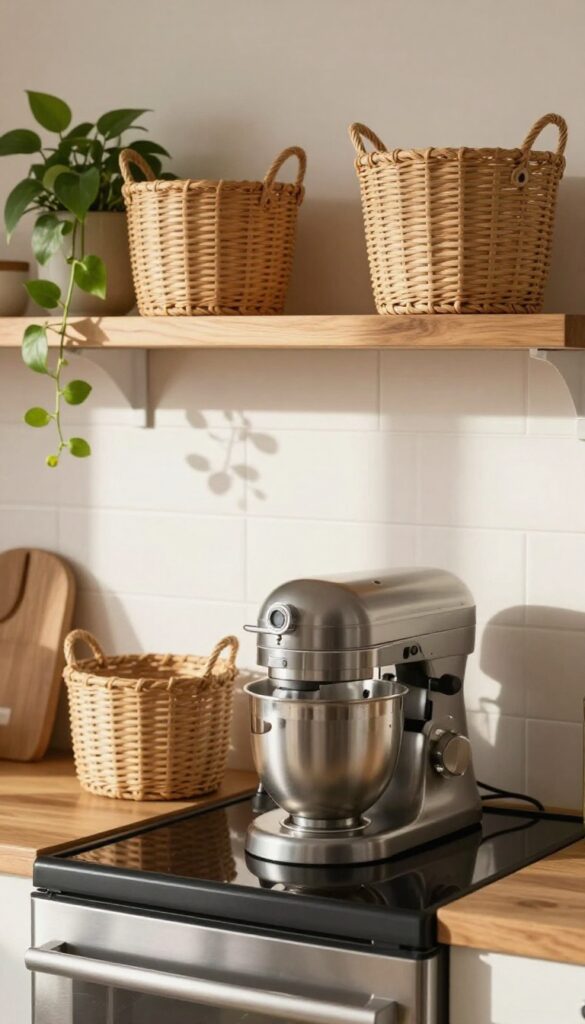
That empty gap above the fridge is prime real estate just waiting to earn its keep. A simple shelf turns dead air into storage that actually looks intentional. Toss a few woven baskets up there, and suddenly you have a spot for the stand mixer you only use at Thanksgiving or that bulk bag of rice.
Best part? You can pull this together for under $50 if you already have baskets lying around.
A floating shelf above the fridge instantly adds both function and warmth. The baskets hide mismatched items and keep dust off, while the natural texture softens the hard lines of your kitchen. It is one of those budget-friendly moves that makes the whole room feel more put together without a major renovation.
Budget-Friendly Swap
Skip the custom cabinetry and grab a basic wooden shelf from any home store. Paint or stain it to match your existing cabinets or go for a contrasting tone like walnut to add richness. Thrift stores are goldmines for baskets—just spray them with fabric freshener and they are good to go.
Shelf Styling Tip
Keep baskets uniform for a tidy look, or mix two similar sizes with one slightly different for subtle interest. Leave a little breathing room between baskets so the shelf does not feel crammed. If your fridge has a gap on top, add a slim piece of trim to close it off for a built-in feel.
Storage Tip
Use this spot for items you reach for less than once a month: extra serving bowls, a second coffee maker, or holiday bakeware. Label the baskets with chalk tags or simple woven labels so you are not digging through three baskets to find the pie dish.
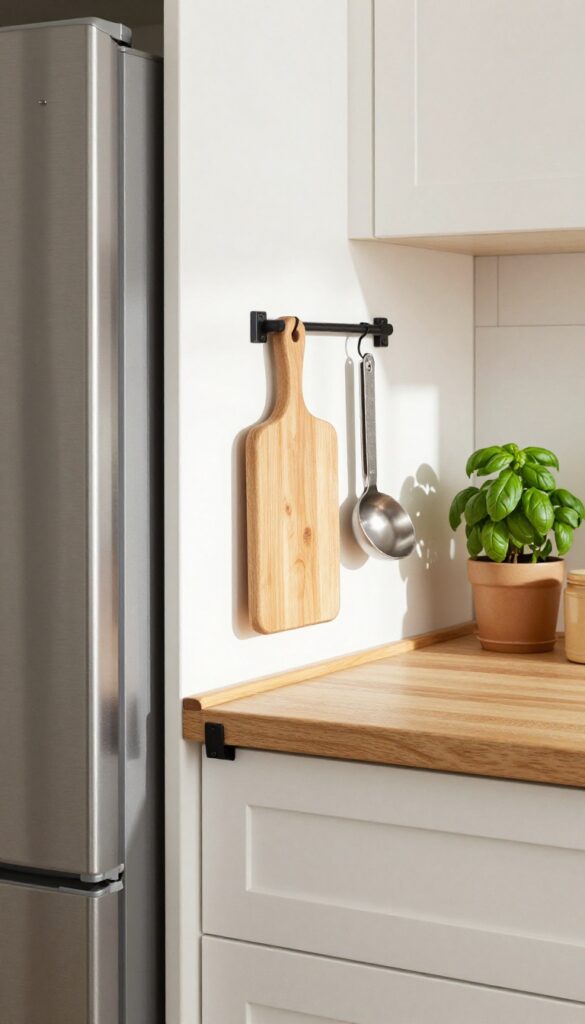
4. DIY Pegboard for Hanging Utensils
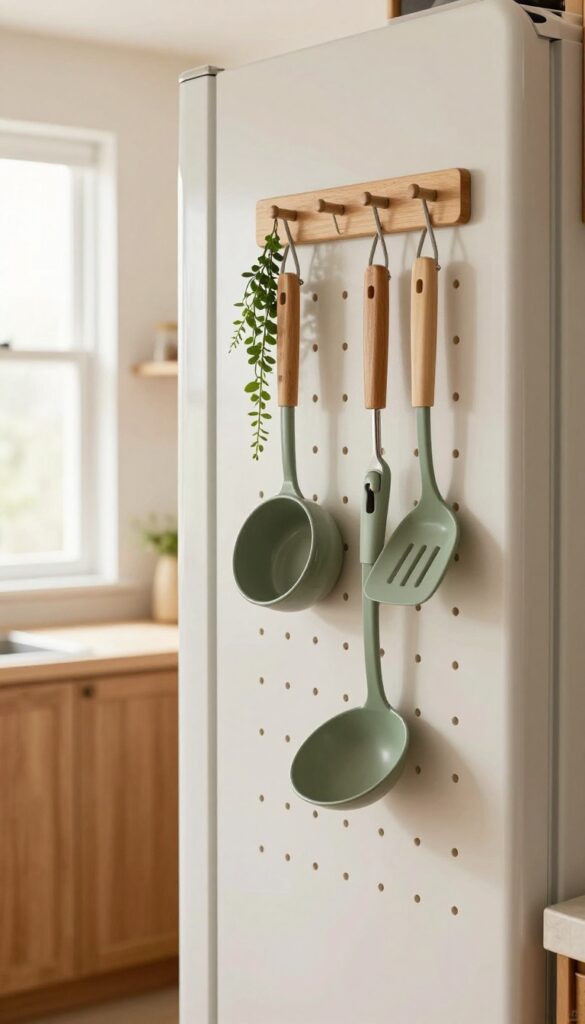
That narrow wall beside the fridge often ends up as dead space. A small pegboard turns it into a functional display for your most-used tools. Plus, it adds a cozy, handmade touch that fits right into a warm kitchen palette.
Mount a small pegboard on the wall beside the fridge. Hang pots, ladles, or even small plants. Paint it a warm color like sage green or mustard to tie into your kitchen palette.
Best Colors
Stick with warm, earthy tones that complement your existing cabinets and backsplash. Sage green, mustard yellow, or a soft terracotta work beautifully. If your kitchen leans neutral, a deep olive or burnt orange adds just the right pop without overwhelming the space.
Layout Tip
Position the pegboard so it's easily reachable from the fridge and prep area. Leave a few inches of clearance between the board and the fridge door to avoid bumping. Arrange hooks in a balanced grid, grouping similar items like spatulas together for a tidy look.
Budget-Friendly Swap
- Skip expensive custom boards and buy a standard pegboard from the hardware store. Cut it to size yourself or ask for a free cut. Use spray paint for an even, chip-resistant finish.
- Total cost? Under $20, including hooks.
5. Cozy Coffee or Tea Nook
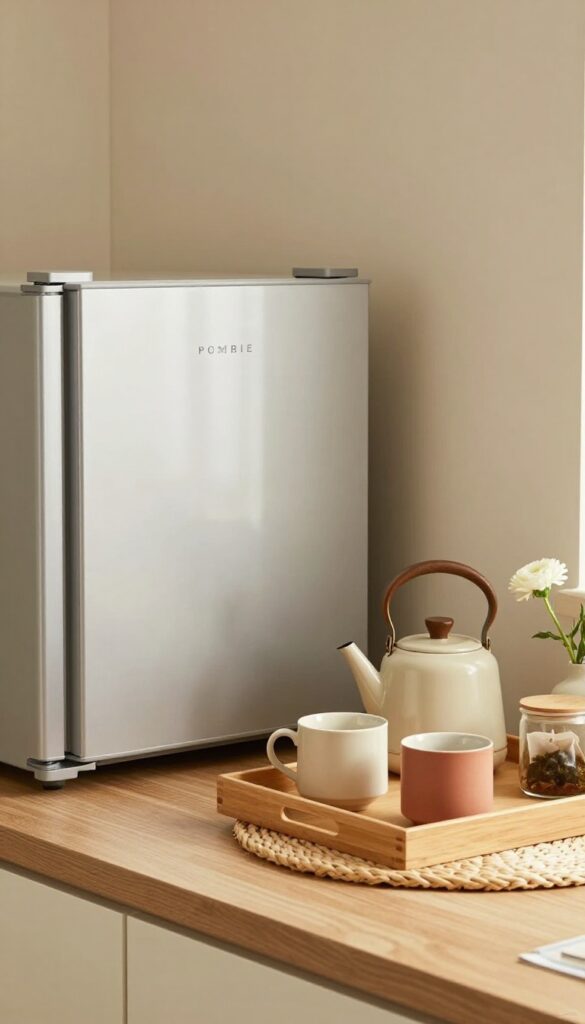
That awkward fridge corner can easily become your new favorite spot in the kitchen. By tucking in a tiny coffee or tea station, you turn wasted space into a warm, welcoming nook that feels intentional and inviting. It’s perfect for those slow mornings when you want everything within arm’s reach without cluttering the main counter.
Setting up a mini beverage station in a fridge corner is both practical and charming. You don’t need much—just a small tray, a kettle or coffee maker, and a few mugs. The key is to keep it simple so the corner feels curated, not cramped.
Add a jar of tea bags or coffee beans, and maybe a tiny plant or a framed photo to soften the look. This setup makes your morning routine feel like a little ritual, and it’s a budget-friendly way to add personality to your kitchen.
Best Colors
- Stick with warm, earthy tones to keep the nook cozy. Think soft cream, warm beige, or muted terracotta for the tray and accessories. If your fridge is stainless steel, a wooden tray or a woven basket adds natural texture.
- Avoid cool grays or stark whites—they can make the corner feel sterile instead of snug.
Budget-Friendly Swap
- You don’t need a fancy espresso machine. A simple stovetop kettle or a French press costs under $30 and looks beautiful on a tray. Thrift stores are goldmines for vintage mugs and small ceramic jars.
- A single fresh flower in a tiny vase can replace an expensive plant and still bring life to the corner.
Layout Tip
Keep the tray shallow so it doesn’t stick out past the fridge edge. Place the kettle or coffee maker on the side closest to the outlet, and stack mugs on a small riser or a pretty plate to save space. Leave a clear spot for your hand to pour without knocking anything over.
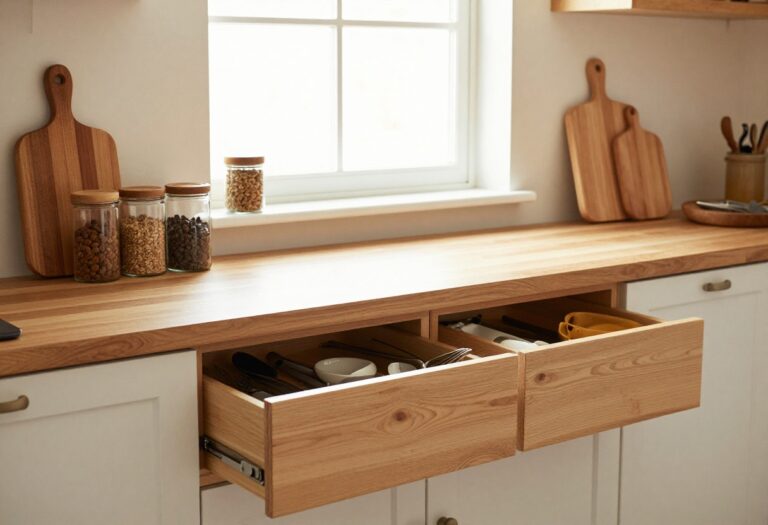
6. Slim Pull-Out Pantry Drawer
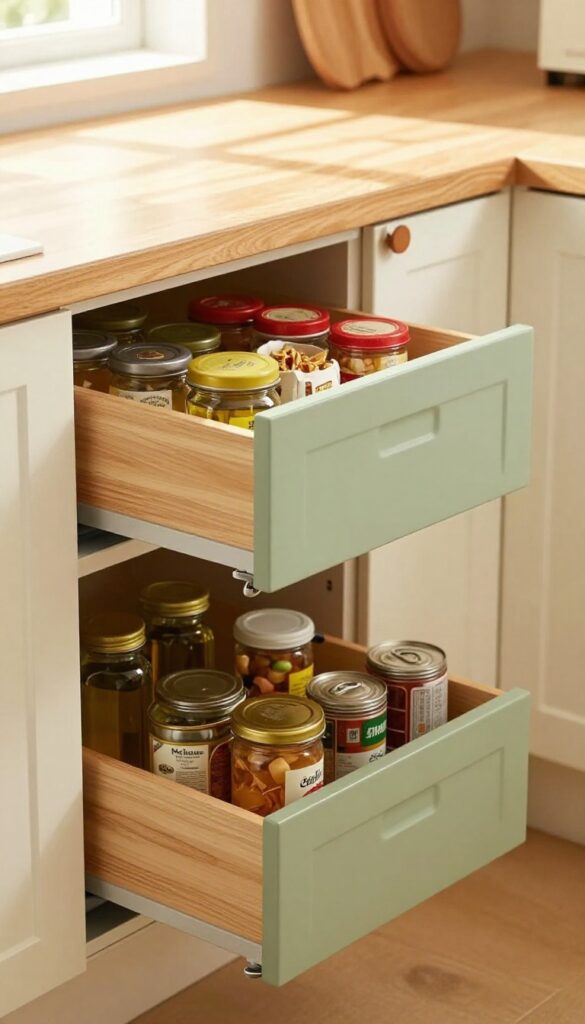
Even a narrow gap between your fridge and the wall can become valuable storage space. Instead of letting that awkward spot collect dust bunnies, turn it into a slim pull-out pantry drawer. This idea works especially well in smaller kitchens where every inch counts.
The best part? It's a budget-friendly DIY project that adds both function and a custom look to your kitchen.
A pull-out drawer on casters slides out easily, giving you access to oils, canned goods, snacks, or spices. You can build one yourself using a simple wooden crate and a set of wheels—no fancy tools required. Paint or stain the crate to match your kitchen cabinetry for a cohesive feel.
For a warm and cozy look, choose a soft sage green or a warm wood tone that complements your existing decor.
Best Materials
- Go for a sturdy wooden crate or build a simple box from plywood. Add heavy-duty casters that can support the weight of canned goods. For a polished finish, sand the edges and apply a coat of paint or stain.
- A matte finish in a warm neutral like cream or light gray keeps the look soft and inviting.
Storage Tip
Use small baskets or dividers inside the drawer to keep items upright and organized. Group similar items together—oils and vinegars on one side, snacks on the other. Label the front of the drawer with a chalkboard tag for easy identification.
Budget-Friendly Swap
If you don't want to build from scratch, repurpose an old wooden wine crate or a narrow bookshelf. Attach casters to the bottom and add a simple handle. This keeps costs low and adds a charming, rustic touch to your kitchen.
7. Wall-Mounted Fold-Down Table
That narrow spot next to the fridge often ends up as dead space or a catch-all for random items. Instead of letting it go to waste, consider a wall-mounted fold-down table. It gives you an instant surface for meal prep, a coffee station, or even a quick breakfast spot—and when you're done, it folds flat against the wall, reclaiming every inch of floor space.
This is especially handy in smaller kitchens where every square foot counts.
A wall-mounted fold-down table is a budget-friendly way to add function without a full renovation. You can find ready-made options at home stores or DIY one from a piece of plywood and some folding brackets. The key is to mount it at a height that works for standing or perching on a stool, and to keep the area around it clear so the table can fold down easily.
When not in use, it disappears visually, especially if you paint it to match the wall or the cabinet color.
Best Materials
- For a warm and cozy feel, go with a solid wood top like pine or oak. If you're on a tight budget, a butcher block countertop remnant works perfectly. Paint the brackets in a matte black or brass for a touch of contrast, or keep them white to blend in.
- A sealed wood surface is easy to wipe down and holds up to daily use.
Styling Tip
When the table is folded down, add a small hook or magnetic strip on the wall above to hold a lightweight cutting board or a set of measuring spoons. This keeps the area looking intentional even when the table is stowed. For a cozy touch, place a small potted herb or a warm-toned ceramic jar on the shelf when it's open.
Layout Tip
Position the table so it doesn't block the fridge door swing or any major walkway. Ideally, it should be next to the fridge on the handle side, so you can set down groceries or ingredients right away. If space allows, pair it with a slim rolling cart underneath for extra storage that can be moved aside when the table is in use.
8. Hanging Tiered Basket for Produce
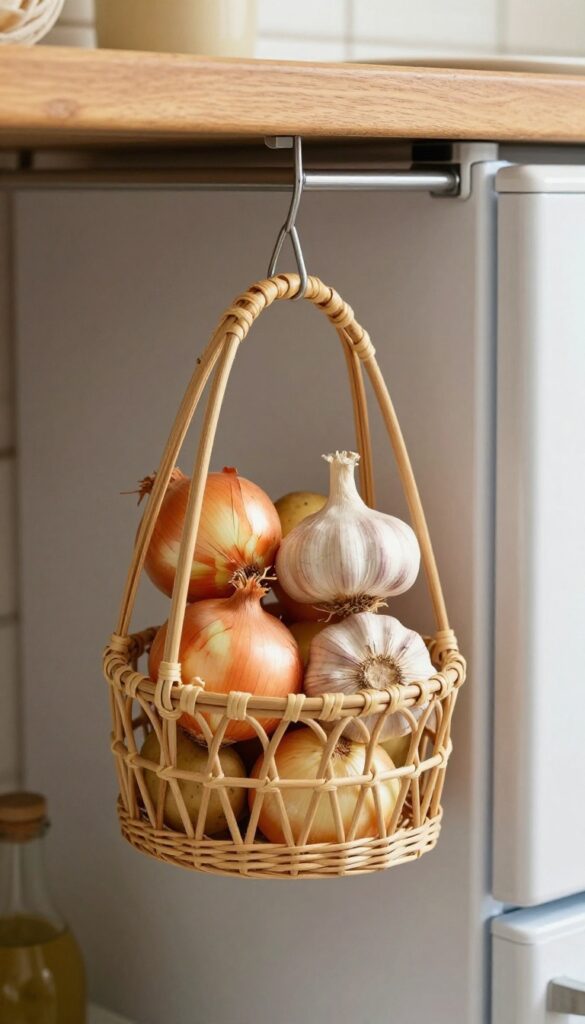
That awkward fridge corner can actually become a charming little market display. A hanging tiered basket makes use of vertical space that’s otherwise wasted, and it keeps your onions, garlic, and potatoes within easy reach. The wire or rattan texture adds warmth and a touch of rustic farmhouse style without costing much.
Instead of shoving produce into a dark drawer where it gets forgotten, hang it right where you can see it. A tiered basket suspended from the ceiling or a sturdy shelf above the fridge creates a natural focal point. It’s especially handy if you buy in bulk or like to keep cooking staples visible.
The open wire design allows air to circulate, which helps your produce stay fresher longer. Plus, you can easily grab a potato or onion without rummaging through a bin. To keep the look cohesive, choose a basket finish that complements your hardware—black metal for modern kitchens, brass for a warmer vibe, or natural rattan for a cozy, organic feel.
Best Materials
- Wire baskets with a powder-coated finish are durable and easy to clean. For a softer look, go with rattan or seagrass—they add texture and feel more rustic. If your kitchen leans industrial, galvanized steel is a great budget-friendly option.
- Avoid plastic, as it can trap moisture and look cheap.
Budget-Friendly Swap
Instead of buying a new tiered basket, repurpose an old hanging planter or a set of wire fruit baskets. You can spray-paint them to match your kitchen’s color scheme. Another trick: use S-hooks and chain to hang individual baskets at different heights for a custom look that costs under $15.
Finishing Touch
Tuck a few sprigs of fresh herbs or a small trailing plant like ivy into the top basket. It softens the utilitarian look and adds a pop of green. Keep the produce arranged loosely—don’t overfill—so the baskets still feel airy and styled.
9. Decorative Ladder Shelf
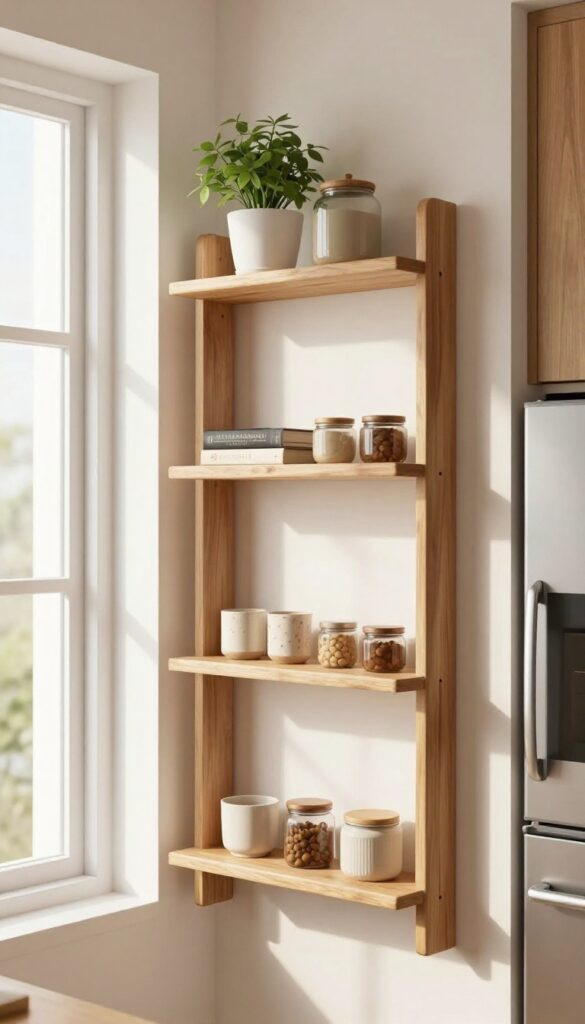
That narrow gap beside the fridge often goes unused, but a slim ladder shelf turns it into a charming display spot. The open, airy design keeps the kitchen from feeling cluttered while adding warmth and personality. It’s a budget-friendly way to bring in storage and style without any major renovation.
Lean a slim ladder shelf against the wall next to the fridge. Display cookbooks, small plants, or decorative jars. The open design keeps the area feeling airy and warm.
Best Colors
Stick with natural wood tones like pine or oak for a warm, cozy feel. If your kitchen has darker cabinets, a white or light gray ladder shelf keeps the contrast soft and inviting.
Shelf Styling Tip
Layer items by height: place a tall plant or vase on the top shelf, cookbooks in the middle, and small jars or baskets on the bottom. This creates visual balance and makes the shelf feel intentional.
Budget-Friendly Swap
Instead of buying a new ladder shelf, repurpose an old wooden ladder by sanding it down and adding a coat of stain or paint. Lean it at a slight angle and rest small boards on the rungs for instant shelving.
10. Chalkboard Wall for Notes and Recipes
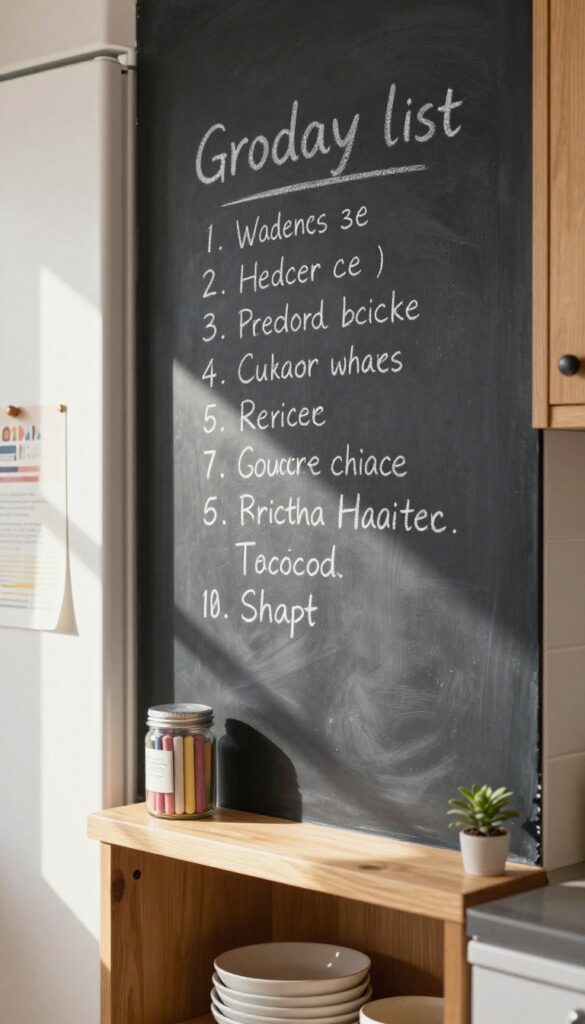
That little wall beside the fridge often ends up as dead space. But with a coat of chalkboard paint, you can turn it into a command center for your kitchen. It's a budget-friendly way to add function and a cozy, personal touch without any major renovation.
Painting a section of wall with chalkboard paint creates a spot for grocery lists, meal plans, or quick reminders. It keeps your kitchen organized and adds a playful, warm element that feels right at home. The dark matte finish also contrasts nicely with lighter cabinets or open shelving.
Best Colors And Finish
Classic black or dark green chalkboard paint works best for visibility and contrast. For a warmer look, try a deep charcoal or navy. Use a matte finish to avoid glare and keep the surface easy to write on.
Size And Placement Tip
A rectangle about 2 feet by 3 feet is plenty for notes. Position it at eye level beside the fridge, leaving enough space for a small shelf or magnetic strip for chalk holders. This keeps everything within reach and looks intentional.
Budget-Friendly Swap
Instead of buying a pre-made chalkboard, use leftover chalkboard paint from another project. You can also frame the painted area with inexpensive trim or washi tape for a polished look without spending much.
FAQ
What is the best way to use a narrow gap beside the fridge?
A slim rolling cart or a pull-out drawer works great for narrow gaps. You can store spices, oils, or canned goods, and it's easy to access and clean.
How can I make a fridge corner look cozy on a budget?
Add warm textures like woven baskets, a small plant, or a soft runner. Use warm lighting like a clip-on lamp or fairy lights. Stick to a cohesive color palette with earthy tones.
Are magnetic racks safe for the side of the fridge?
Yes, as long as you don't overload them. Use them for lightweight items like spice jars or measuring spoons. Avoid heavy pots or glass containers.
Can I install a pull-out drawer without damaging the floor?
Absolutely. Use a ready-made rolling cart or build a simple wooden crate on casters. No permanent installation needed, and it's easy to move if you rearrange.
What if my fridge corner is very small?
Even a tiny gap can hold a magnetic strip or a hanging tiered basket. You can also mount a small shelf or pegboard on the wall above the gap to maximize vertical space.
Conclusion
Making your fridge corner more useful doesn't have to be complicated or expensive. With a few smart additions, you can turn that awkward spot into a warm, functional part of your kitchen.
Start with one idea that fits your space and budget, and build from there. Small changes can make a big difference in how your kitchen feels and works every day.