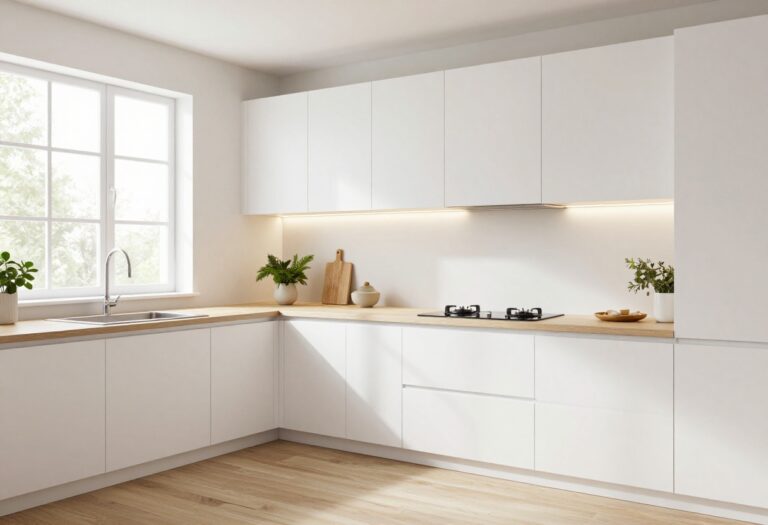
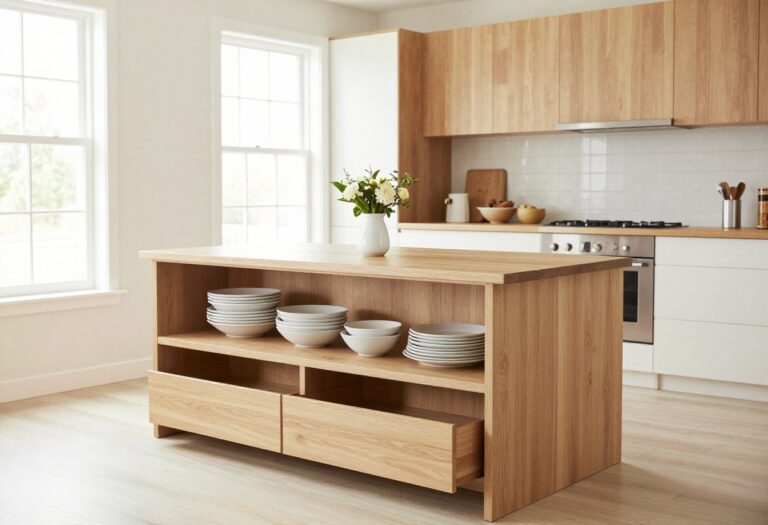
13 Budget-Friendly Upper Kitchen Cabinet Ideas to Make Use of Empty Wall Space
That empty strip of wall between your upper cabinets and the ceiling can feel like a design dilemma. You want it to look intentional, not like you forgot about it. But filling it doesn't have to mean spending a lot or committing to something permanent.
With a little creativity, you can turn that awkward gap into one of the most charming spots in your kitchen. The key is choosing pieces that feel natural and collected, not staged.
Think items you already own or can pick up for cheap at a thrift store. Let's walk through 13 wallet-friendly ways to style that space so it feels like it was always meant to be there.
1. Trailing Plants for a Soft Green Touch
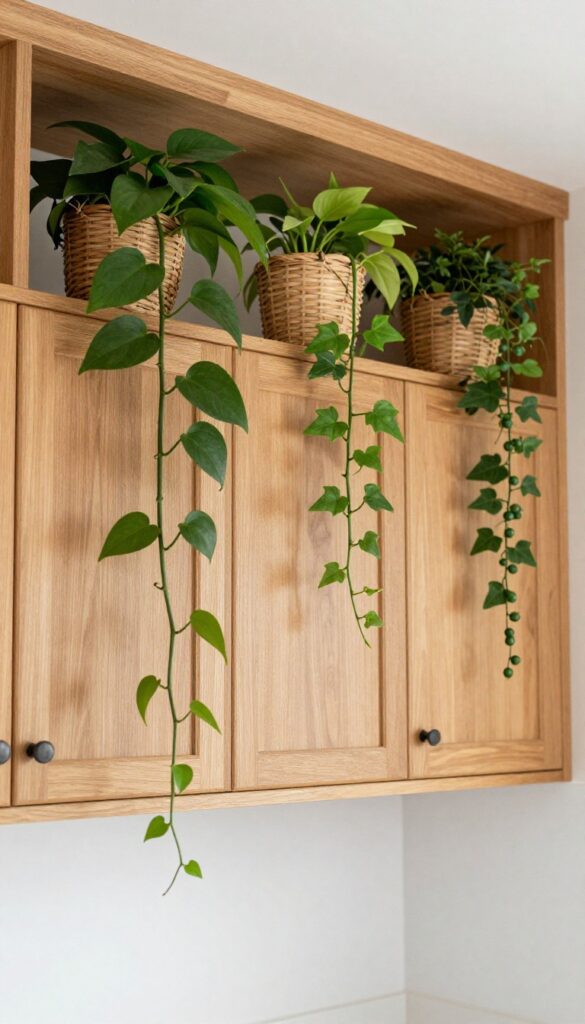
Cascading greenery is one of the easiest ways to soften the hard lines of upper cabinets. Pothos, ivy, or string of pearls spill over the edges, drawing the eye upward and making the kitchen feel more alive. It's a low-commitment, high-impact move that works in any style kitchen, from modern to farmhouse.
Placing a few trailing plants on top of your upper cabinets instantly adds a layer of texture and color that feels organic and calming. The vines break up the monotony of cabinet fronts and create a gentle, living frame around your kitchen. Best of all, you don't need expensive planters or rare species—common houseplants thrive in the indirect light most kitchens offer.
Stick to low-maintenance varieties, and you'll have a lush look with minimal effort.
Best Plant Choices
Pothos is the MVP here—it's nearly impossible to kill, grows fast, and comes in variegated varieties like marble queen or neon. English ivy adds a classic, trailing silhouette, while string of pearls offers a unique bead-like texture. All three tolerate the warm, sometimes dim conditions near cabinet tops.
Planter Ideas On A Budget
- Skip the expensive ceramic pots. Simple nursery pots with a decorative cachepot from a thrift store work perfectly. Or tuck plastic nursery pots inside woven baskets for a warm, textural look.
- Just make sure each pot has a saucer to catch any drips, especially if you water in place.
Styling Tip
Group three to five plants of varying heights along the cabinet run instead of spacing them evenly. Cluster a tall pot in the middle with smaller ones on either side for a more natural, curated feel. Let the longest vines drape down to the top of the cabinet doors for a cohesive look.
2. A Row of Vintage Cookbooks
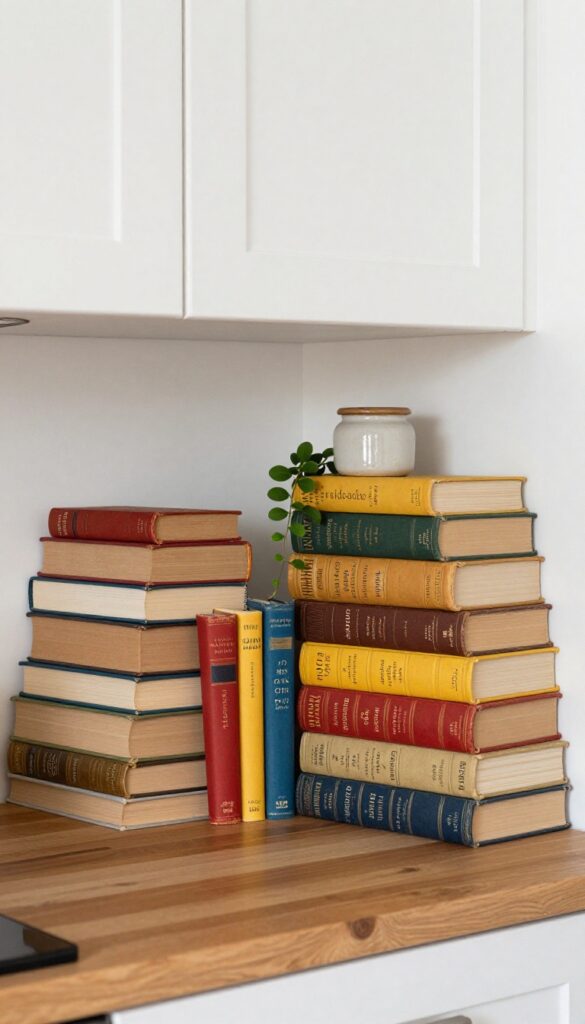
Stacking old cookbooks on top of your upper cabinets brings instant warmth and personality to a kitchen. Those worn spines and faded covers add color and texture without costing much—perfect for a budget-friendly refresh. Hit up garage sales or library sales for cheap finds that feel curated, not cluttered.
Vintage cookbooks work especially well in kitchens with open space above cabinets, turning dead air into a cozy display. The mix of heights and colors creates visual interest, and the books are easy to swap out seasonally. Just keep them dust-free with a quick wipe now and then.
Best Colors
Look for books with warm reds, mustard yellows, or soft blues to complement your kitchen's palette. Earthy tones like olive green and rust also blend nicely with wood cabinets or butcher block counters.
Shelf Styling Tip
Vary the heights by stacking some books flat and leaning others upright. Tuck a small plant or ceramic jar between stacks for added texture. Keep the arrangement loose—too perfect looks staged.
Budget-Friendly Swap
If you can't find vintage cookbooks, use thrifted hardcovers with similar color schemes. Remove dust jackets for a more uniform, aged look. You can also spray-paint the spines a cohesive color for a custom feel.
3. Woven Baskets for Warmth and Storage
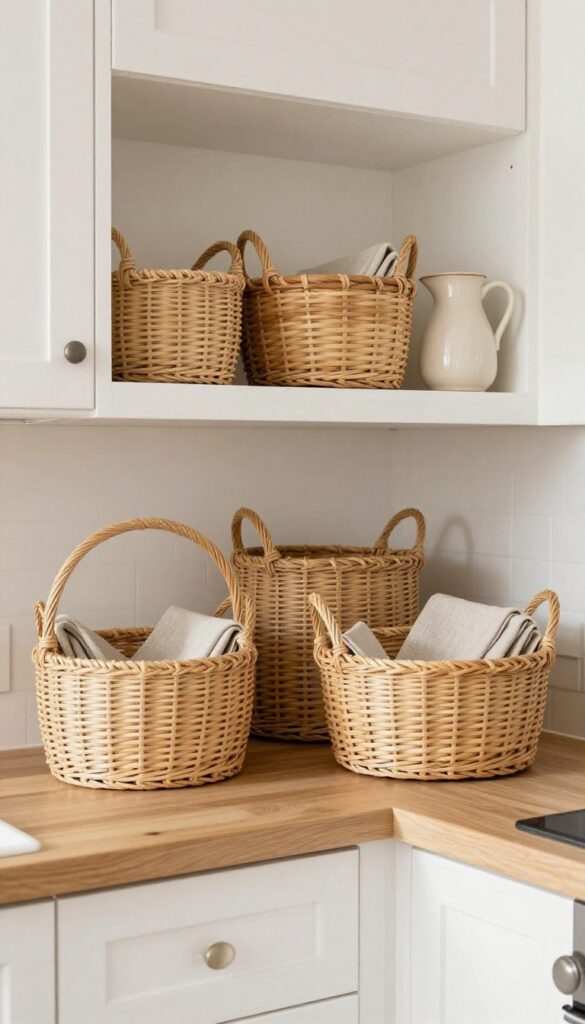
Woven baskets are one of those decor pieces that do double duty without trying too hard. Tucked on top of upper cabinets, they soften the hard lines of your kitchen while giving you a spot to stash rarely-used items like extra linens, small appliances, or holiday platters. The natural texture of seagrass, rattan, or bamboo adds warmth that balances out sleek countertops and stainless steel.
And since baskets come in all shapes and sizes, you can mix and match for a collected-over-time look that feels personal, not staged.
The beauty of using woven baskets above cabinets is how effortlessly they blend function with style. Unlike closed bins or bulky containers, baskets let you see what you have at a glance while keeping things tidy. They also introduce an organic element that makes a kitchen feel cozier and less like a showroom.
For the best effect, stick to a cohesive color palette—think natural browns, creams, or soft grays—and vary the heights and weaves to create visual rhythm. If your cabinets don't go all the way to the ceiling, baskets are the perfect way to fill that awkward gap without making the space feel cluttered.
Best Materials And Textures
- Stick with natural fibers like seagrass, rattan, water hyacinth, or bamboo for an earthy, warm look. These materials add texture without overwhelming the space. If your kitchen leans modern, try baskets with a tighter weave or a darker stain.
- For a farmhouse or boho vibe, go for looser weaves and lighter tones. Mixing two or three different weaves keeps the display interesting without feeling chaotic.
Styling And Arrangement Tips
- Group baskets in odd numbers—three or five work well—and vary their sizes to create depth. Place larger baskets at the ends and smaller ones in between, or stagger them front to back if the space is deep. Leave a few inches of breathing room between each basket so they don't look crammed.
- You can also lean a small cutting board or a framed photo against a basket to break up the shapes and add a personal touch.
Budget-Friendly Swap
- Thrift stores, flea markets, and discount home stores are gold mines for affordable woven baskets. You can often find them for a couple of dollars each. If a basket is a little worn, spray paint it in a neutral color or add a fabric liner to freshen it up.
- This keeps the look intentional and budget-friendly at the same time.
4. Open Wooden Crates for a Farmhouse Vibe
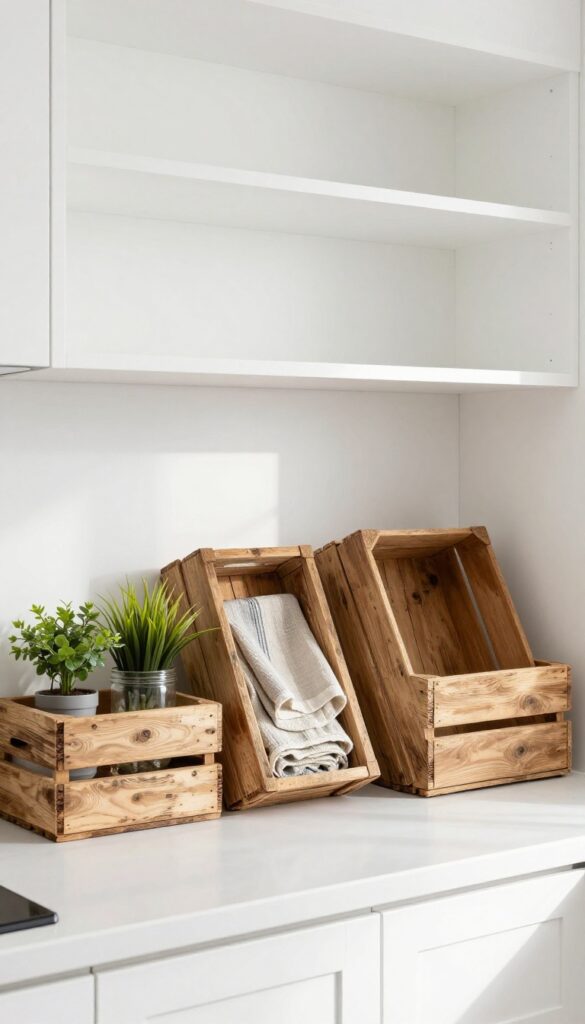
Old wooden crates bring instant warmth and character to a kitchen without costing much. They lean nicely against the wall above cabinets, adding a casual, collected-over-time look. The rough texture of the wood contrasts beautifully with sleek countertops or modern appliances, making the space feel lived-in and inviting.
Plus, they're incredibly easy to find—check flea markets, garage sales, or even your own recycling pile.
Repurpose old wooden crates as display shelves. Lean them against the wall or stack them horizontally. Fill with jars, small plants, or kitchen linens.
This budget-friendly idea works especially well above upper cabinets where you'd normally leave the space empty. The crates add storage and visual interest without requiring any permanent installation—just arrange them until they look right.
Best Way To Arrange Them
- For a relaxed farmhouse feel, lean crates at slight angles rather than lining them up perfectly. Stack two or three horizontally for a longer shelf effect, or prop one vertically to break up the line. Mix in a few smaller crates or wooden boxes to vary the heights.
- Leave some crates empty for a clean look, and fill others with items in similar tones—think white ceramics, clear glass jars, or neutral linens.
Budget-Friendly Swap
- If you can't find vintage crates, new unfinished pine crates from craft stores work just as well. Stain them in a weathered gray or warm walnut to mimic aged wood. You can also distress them lightly with sandpaper for an instant antique effect.
- The total cost for a set of three crates is usually under $20, making this one of the cheapest ways to fill that awkward gap above your cabinets.
Styling Tip For A Cohesive Look
- Keep the color palette simple so the crates don't feel cluttered. Stick to two or three colors—like white, green, and natural wood—and repeat them across the items you display. Add a small trailing plant like pothos that can drape over the edge of a crate for a soft, organic touch.
- If your kitchen has warm brass or black hardware, echo those finishes in any metal accents inside the crates, like a small tin or a wire basket.
5. A Collection of White Ironstone Pitchers
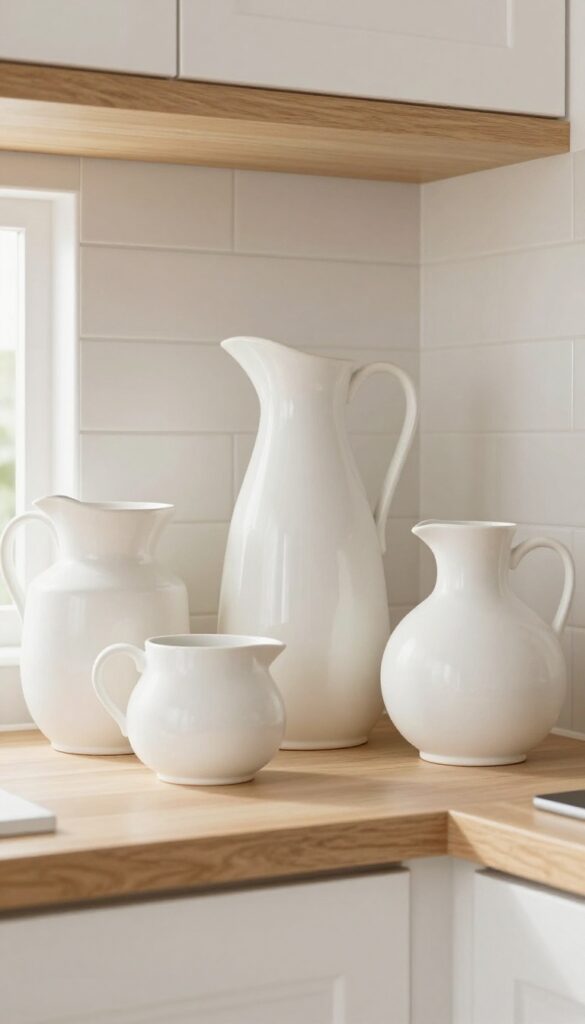
White ironstone pitchers have a quiet charm that fits almost any kitchen. Their creamy, off-white color softens the hard lines of upper cabinets and adds a touch of vintage warmth without feeling fussy. Because they’re neutral, they blend with farmhouse, modern, or eclectic styles and make the wall above your cabinets feel intentional rather than empty.
Scout flea markets, thrift stores, or online resale shops for a mix of white ceramic pitchers and jugs. Look for variations in size, shape, and handle detail—some tall and slender, others round and squat. Arrange them in a loose cluster on top of your upper cabinets, varying the heights so the display feels organic.
The key is keeping them all white or off-white so the collection reads as calm and cohesive, not cluttered. This is a budget-friendly way to fill empty space because you can add pieces slowly over time. Plus, the pitchers are useful: you can grab one for flowers or serving, then put it back when you’re done.
Where To Find Them On A Budget
Start at local thrift stores and estate sales—white ironstone reproductions are common and cheap. Online marketplaces like Facebook Marketplace or eBay often have lots of three or four pitchers for under $20. Don’t worry about chips or crazing; those imperfections add character and keep the price low.
Arrangement Tips For A Relaxed Look
Place the tallest pitcher at the back or center, then stagger shorter ones around it. Leave a few inches between each piece so they don’t look crowded. If your cabinet tops are dusty, wipe them first and consider adding a thin shelf liner to prevent scratches.
Finishing Touch
Tuck a small faux greenery sprig or dried lavender into one of the pitchers for a soft natural accent. Keep it simple—the pitchers should stay the main focus.
6. Framed Art or Prints Leaning Casually
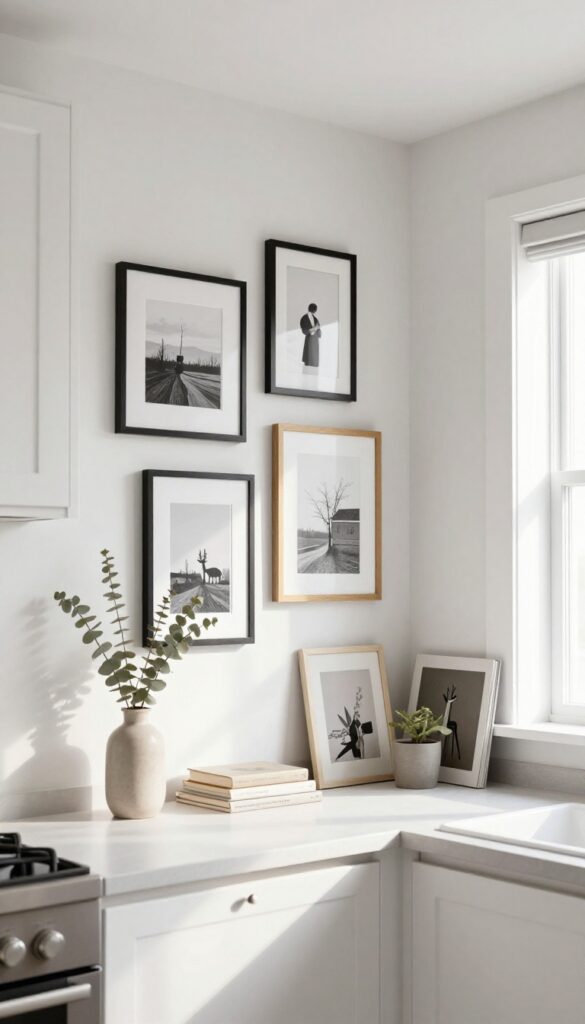
Not every piece of art needs to be nailed to the wall. Leaning a few framed prints or small canvases on top of your upper cabinets adds an effortless, gallery-like feel without any commitment. It’s a budget-friendly way to bring personality to that awkward gap between the cabinets and ceiling, and you can swap pieces out whenever the mood strikes.
The casual lean keeps the space from feeling too precious or overstyled.
This trick works especially well in kitchens where the upper cabinets don’t go all the way to the ceiling. Instead of leaving that empty strip bare or filling it with dusty fake plants, lean a couple of frames against the wall at slightly different angles. The look is relaxed and collected, like you’ve been curating pieces over time.
Stick to a cohesive color palette—maybe black and white prints with natural wood frames—to keep things from getting chaotic. You can also layer in a small vase or a stack of cookbooks for extra depth.
Best Frames For The Look
- Thrift stores and discount home stores are your best friends here. Look for frames with a similar finish—matte black, white, or light wood—to create a unified display even if the sizes vary. Mismatched frames can look intentional if they share a common color or material.
- Avoid heavy, ornate frames that might feel too formal for a kitchen setting.
Placement And Styling Tip
- Lean the frames so they rest against the wall at a slight angle, not flat against the backsplash. This creates shadows and dimension. For a balanced look, group two or three frames together rather than spacing them out evenly.
- You can also lean a single larger piece off-center for a more modern feel. Just make sure the frames are stable and won’t tip over when you open cabinet doors.
Budget-Friendly Swap
If you don’t want to spend on new art, print your own photos or download free printables online. Use simple clip frames or even washi tape to mount paper directly on the wall for a super low-cost version. The casual lean hides any imperfections, so you don’t need museum-quality framing.
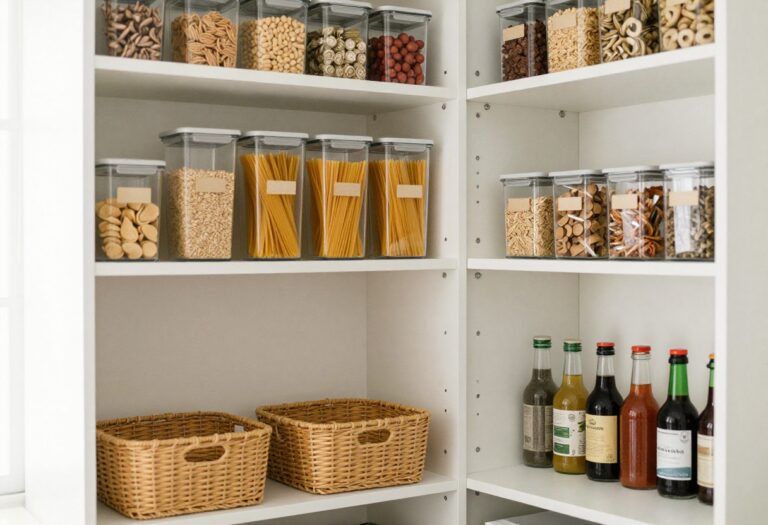
7. Glass Jars Filled with Pasta or Beans
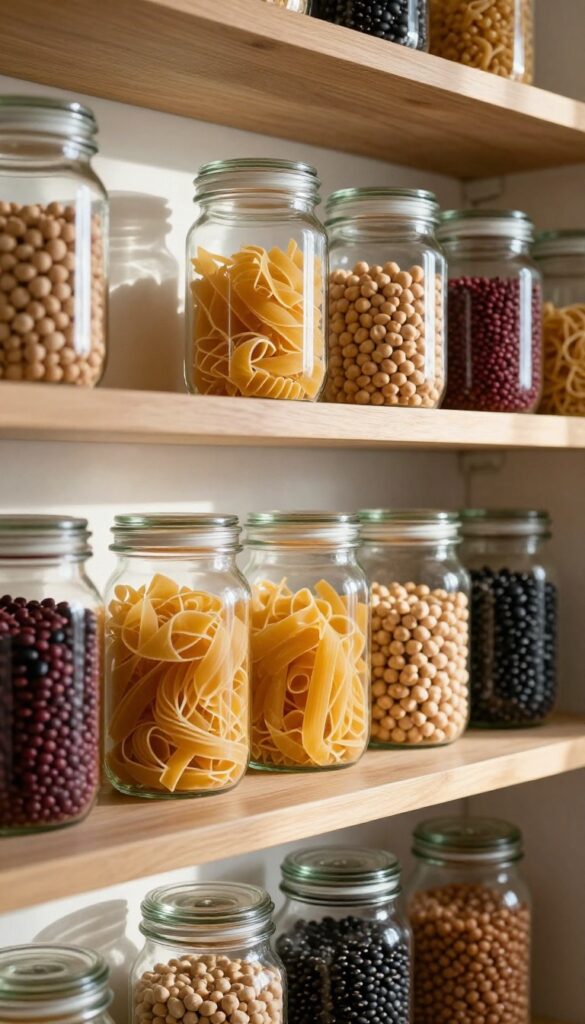
Sometimes the best decor is hiding in your pantry. Glass jars filled with dried pasta, beans, or lentils bring unexpected warmth and texture to upper cabinets. The natural colors—amber, cream, deep red, speckled black—create a subtle palette that feels intentional without trying hard.
It's a zero-cost way to fill empty wall space and make your kitchen look styled, not staged.
This idea works because it's both functional and decorative. You get to see exactly what you have in stock while adding visual interest to bare upper shelves or open cabinets. The key is using uniform jars with clean lines—think mason jars, recycled pasta sauce jars, or thrifted apothecary bottles.
Group them in odd numbers (three or five) for the most pleasing arrangement. Keep the fill levels consistent so the jars look like a curated set. This trick is especially effective in kitchens with open shelving or glass-front cabinets, but it also works on top of upper cabinets if you have a gap between the cabinet and ceiling.
Best Fillings For Visual Impact
- Choose items with contrasting colors and textures. Dried chickpeas are pale and matte, while black beans are glossy and dark. Red lentils add a warm pop, and tri-color rotini brings playful shape variation.
- For a more neutral look, stick with one type like orzo or pearl couscous. Avoid anything that might attract pests—sealed jars are fine, but skip open containers.
Arrangement And Height
- Vary the jar heights to create rhythm. Place taller jars at the back or center, shorter ones in front or on the ends. Use small wooden risers or inverted ramekins to lift some jars slightly.
- This prevents a flat, monotonous line and makes the display feel layered. Leave a few inches of breathing room between jars so each one stands out.
Budget-friendly Styling Tip
- No need to buy new jars. Wash and dry old spaghetti sauce jars, remove labels with hot water and baking soda, then fill with pantry staples. For a cohesive look, add matching lids or tie twine around the necks.
- If you want a more polished finish, spray-paint the lids in a single metallic or matte shade.
8. A Single Long Shelf with Minimal Styling
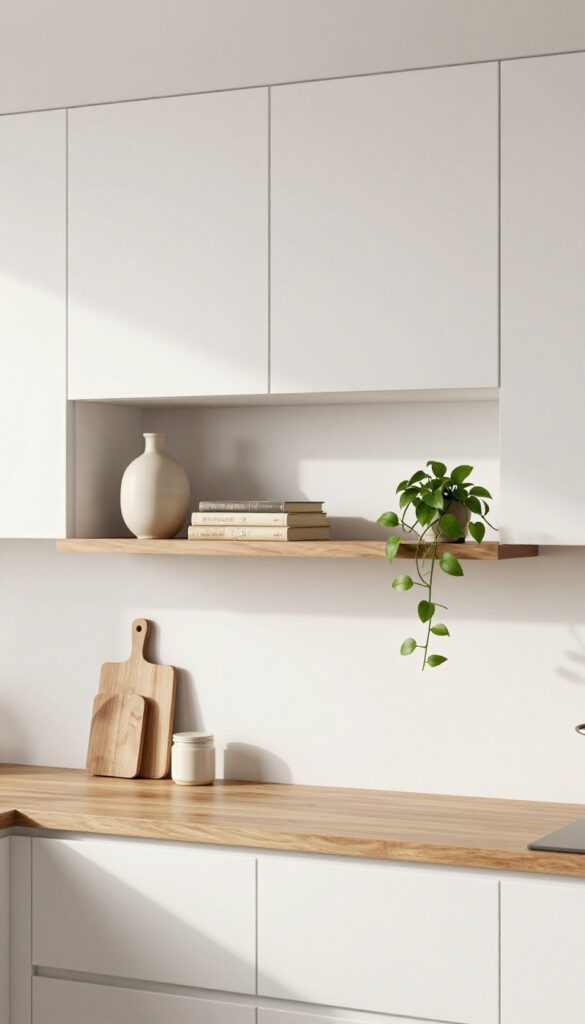
Sometimes the most striking look is the simplest. A single floating shelf running the length of your upper cabinets creates a clean, horizontal line that draws the eye across the kitchen. The key is restraint—just a few carefully chosen pieces that feel intentional, not cluttered.
This approach works especially well in modern or minimalist kitchens where every item earns its place.
Install one long floating shelf above your cabinets and style it with just two or three objects. A ceramic vase in a neutral tone, a small stack of vintage books, and a trailing pothos plant create a calm vignette. The empty space around each piece is just as important as the objects themselves.
This idea is budget-friendly because you likely already own the decor items, and a single shelf costs less than multiple smaller ones. It also makes cleaning easier—fewer items mean less dusting.
Best Materials
Stick with natural wood for warmth or a painted shelf that matches your cabinet color for a seamless look. A white shelf on white cabinets feels airy, while a walnut shelf adds contrast against light cabinets. Avoid glossy finishes that show fingerprints.
Shelf Styling Tip
Keep the tallest item on one end and the lowest on the other to create a gentle slope. A trailing plant draped over the edge softens the straight lines. Leave at least a few inches of empty shelf between objects so the arrangement breathes.
Budget-Friendly Swap
Instead of buying new decor, shop your own home. A simple glass bottle, a single stem, or a small ceramic dish can work. If you need a shelf, check thrift stores for solid wood boards and sand them down for a custom look.
9. Vintage Cutting Boards Leaning Against the Wall
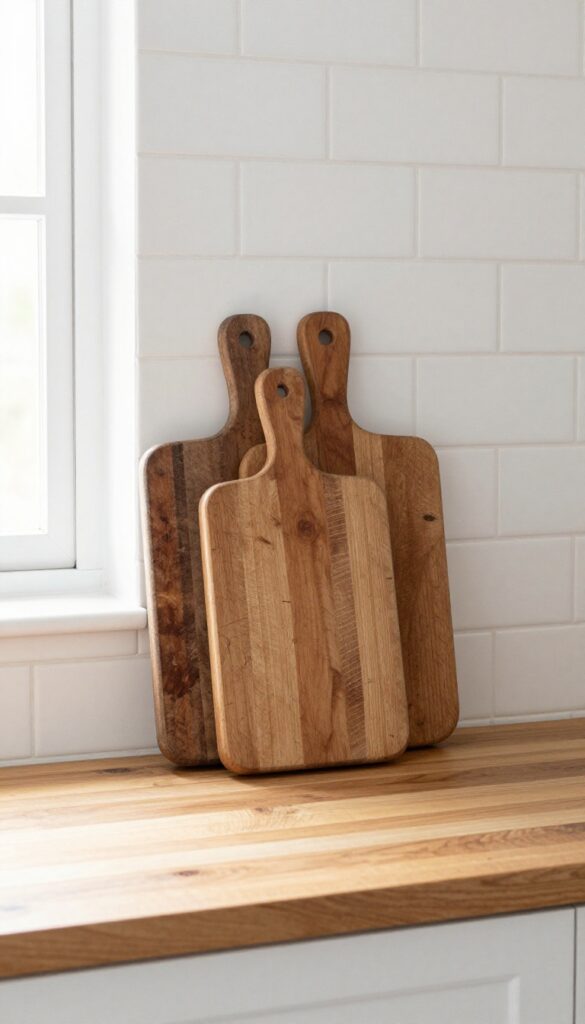
Sometimes the simplest styling trick makes the biggest impact. Leaning a couple of old wooden cutting boards or breadboards against the backsplash instantly warms up that empty wall space above your upper cabinets. It’s an easy, budget-friendly move that adds texture and a hint of nostalgia without any installation or commitment.
Thrift stores and flea markets are goldmines for worn wooden boards with character. Look for pieces with visible grain, dark patina, or even a few knife marks—those imperfections tell a story. Arrange them at slightly different angles, maybe overlapping just a bit, to create a casual, collected look.
The warm wood tones contrast nicely with cool subway tile or painted drywall, and they work in both modern and rustic kitchens. Swap them out seasonally if you want, or just let them sit and add quiet charm year-round.
Best Wood Types
Maple, walnut, and teak are sturdy and develop a rich patina over time. Look for boards with visible grain or a slightly worn surface—new boards can look too polished for this relaxed style.
Arrangement Tip
Lean the tallest board closest to the wall, then place a shorter one in front at a slight angle. This creates depth and keeps the display from looking flat. If you have three boards, stagger them like steps.
Budget-Friendly Swap
Can’t find vintage boards? Sand down a new unfinished cutting board with medium-grit sandpaper, then rub in a little mineral oil and let it sit in the sun for a day. The slight weathering mimics that thrifted look.
10. A Row of Small Terracotta Pots
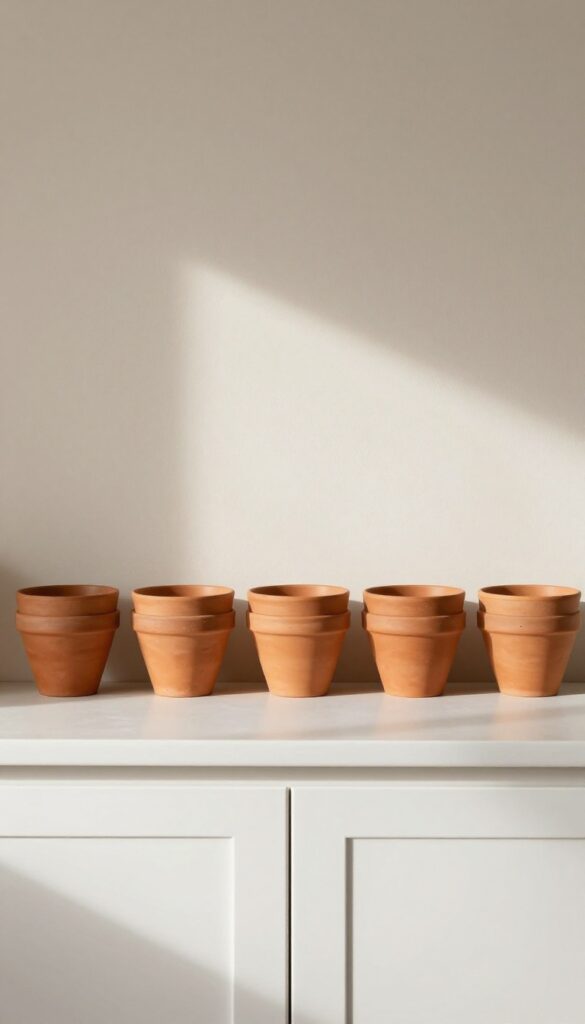
Tiny terracotta pots lined up on a high shelf or the top of your upper cabinets bring a warm, natural touch to the kitchen. The earthy orange-brown color stands out beautifully against white or neutral walls, and the repetition of shapes creates a clean, intentional look. It’s one of those budget-friendly ideas that feels more like a curated design choice than a filler.
You can use them empty for a minimalist, sculptural effect, or pop in a small succulent or air plant for a hint of green. The key is keeping the spacing even and the pots uniformly sized—mixing too many sizes can look messy. This works especially well in kitchens with open shelving or glass-front cabinets, where the terracotta adds warmth without cluttering the view.
Best Colors
Terracotta pairs naturally with warm whites, soft beiges, sage green, and dusty blue. Avoid placing them against bright red or orange walls—the contrast can feel overwhelming. For a modern twist, paint the pots in a matte black or cream, but keep at least a few in their natural clay finish to preserve the earthy feel.
Shelf Styling Tip
Space the pots about two inches apart for a tidy row. If your upper cabinets have a gap above them, line the pots directly on top of the cabinet—just make sure they’re stable and not blocking any vents. For a fuller look, alternate with a small stack of neutral cookbooks or a single wooden cutting board.
Budget-Friendly Swap
Skip the expensive designer planters and grab a pack of basic terracotta pots from a garden supply store—they usually cost under a dollar each. You can also distress them lightly with sandpaper for a vintage vibe, or seal them with a matte spray to prevent dust buildup.
11. Decorative Tray with Everyday Items
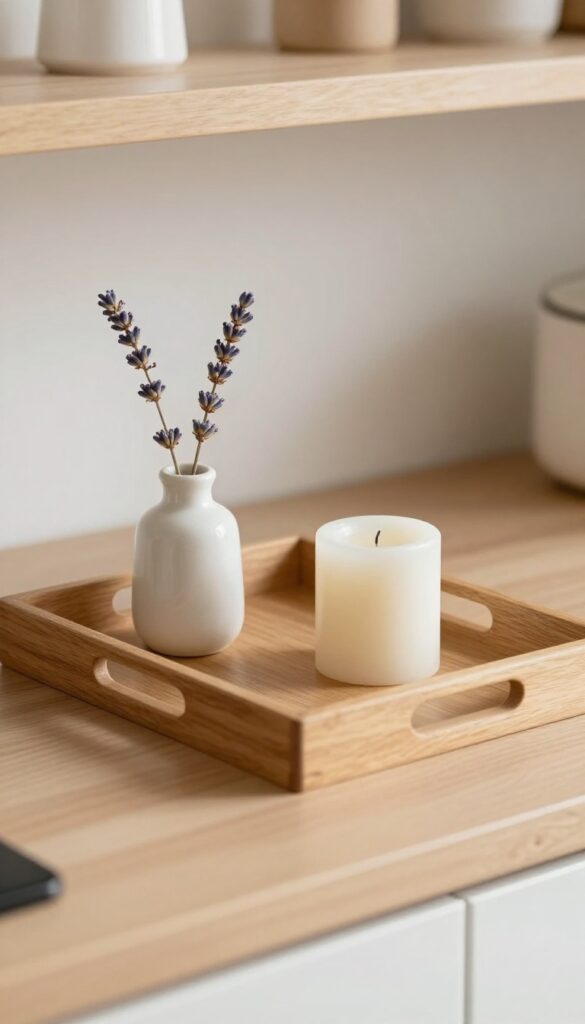
That empty strip above your upper cabinets can feel like a no-man's-land—too high to reach easily, but too visible to ignore. A simple tray solves that by giving you a contained spot to corral a few everyday items. It keeps the look intentional and easy to swap out when you want a refresh.
Grab a tray that fits the space—wooden, metal, or woven—and place it on top of the cabinets. Then add a few small items you already use: a salt cellar, a tiny vase with a single stem, a candle, or a small stack of plates. The key is to keep it sparse and purposeful.
This trick works especially well in kitchens with open shelving or glass-front cabinets, where the top of the cabinets becomes part of the visual flow. Because the tray catches dust and makes cleaning a breeze, it's practical too. Stick to a neutral palette for a calm look, or add a pop of color with the tray itself.
Either way, it's an affordable way to turn dead space into a subtle focal point.
Best Materials
- A wooden tray adds warmth, especially in kitchens with butcher block or wood accents. For a more modern feel, try a sleek metal tray in brass or black. Woven seagrass or rattan trays bring texture and work well in farmhouse or boho kitchens.
- Whatever you choose, make sure it's sturdy enough to hold a few items without wobbling.
Styling Tip
- Keep the items low-profile so they don't block the ceiling line. A salt cellar, a small vase with dried lavender, and a taper candle in a simple holder make a classic trio. Stick to odd numbers for visual balance.
- And don't forget to dust the tray when you clean the cabinets—it'll stay looking fresh.
Budget-Friendly Swap
- You don't need to buy anything fancy. A thrifted wooden cutting board or a shallow baking sheet can double as a tray. Just give it a quick sand or a coat of paint to match your kitchen.
- Pair it with items you already own—a pretty salt shaker, a tea tin, or a small plant—and you're done.
12. A Collection of Copper or Brass Pieces
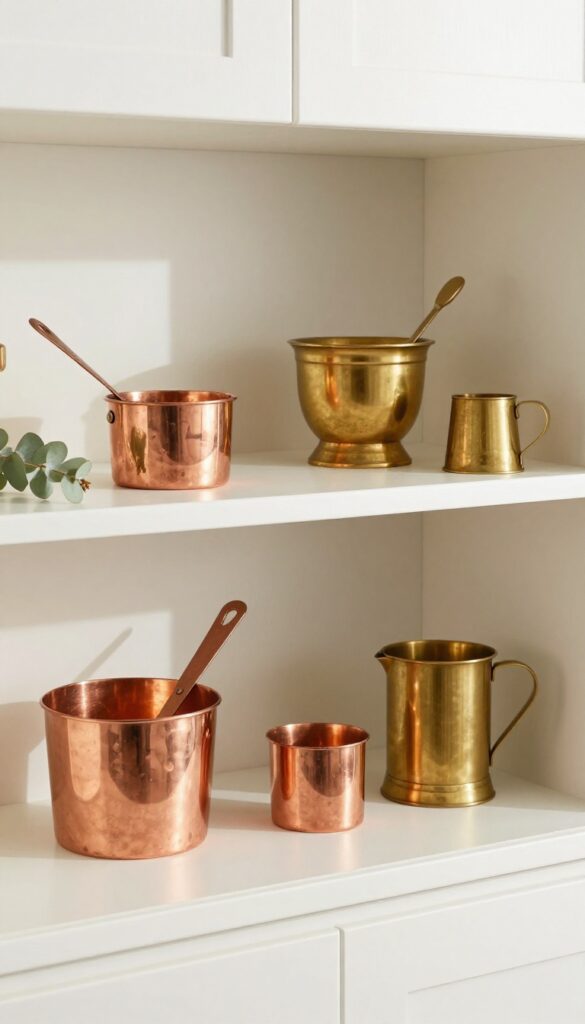
Copper and brass have a warm, reflective quality that instantly makes a kitchen feel more polished. You don’t need expensive decor—just a few small metal items grouped together on the upper cabinet shelf. The mix of shapes and metallic sheen catches the light and adds a subtle, elegant focal point without overwhelming the space.
It’s a low-cost way to bring in texture and a touch of luxury.
Gather copper or brass pieces you already own or can find cheaply: measuring spoons, a small mortar, a tiny pot, or even a vintage cup. Arrange them on a shelf or the top of your upper cabinets in a loose cluster. The key is to vary heights and shapes so the collection feels curated, not cluttered.
This works especially well in kitchens with neutral cabinets or white walls, where the warm metal pops. For a cohesive look, stick to one metal tone—either all copper or all brass—rather than mixing both.
Best Placement
Place the collection on the top shelf of upper cabinets or on open shelving near the window. The natural light will hit the metal and create a soft glow. Avoid putting them too close to the stove or sink where steam and grease could dull the finish.
Budget-Friendly Swap
If you don’t have real copper or brass, look for thrifted items with a metallic finish or spray-paint inexpensive finds with a copper or brass metallic paint. Even plastic or ceramic pieces can be transformed with a single coat of spray paint.
Finishing Touch
Add a small plant or a sprig of dried eucalyptus next to the metal items. The green softens the metallic look and makes the arrangement feel more natural and lived-in.
13. A Single Large Statement Piece
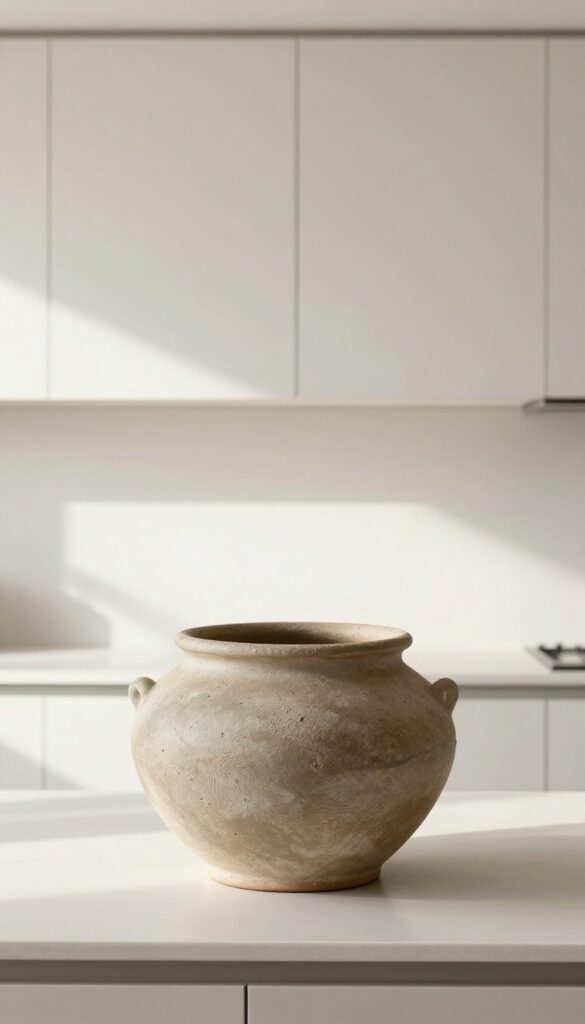
Sometimes the most impactful move is also the simplest. Instead of filling that empty wall space above your upper cabinets with a bunch of small knickknacks, try placing one oversized item. A large ceramic urn, a big wooden bowl, or a vintage clock can turn an awkward gap into a deliberate focal point.
This approach feels curated and uncluttered, and it’s surprisingly budget-friendly because you only need one piece.
The trick is scale—go big enough that the item fills the visual space without looking lost. A single statement piece also cuts down on dusting and styling time, which is a win for any busy kitchen. Plus, it draws the eye upward, making your ceiling feel higher and the whole room more intentional.
Best Materials For The Look
- Natural textures work beautifully here. Think weathered wood, matte ceramic, or woven rattan. These materials add warmth and contrast against glossy cabinets or tile backsplashes.
- A large woven basket or a chunky wooden bowl brings organic texture without feeling heavy. If your kitchen leans modern, a sleek metal sculpture or a oversized black-and-white clock can keep the look crisp.
Budget-Friendly Swap
- You don’t need to spend a lot. Thrift stores, flea markets, and even discount home stores often have oversized vases or urns for under $20. A large decorative urn from a craft store can be spray-painted in a matte finish to match your palette.
- Another cheap trick: group a few large pinecones or dried branches in a tall vase for a sculptural effect that costs almost nothing.
Styling Tip: Keep It Centered
Place your statement piece slightly off-center for a more relaxed look, or dead center if your cabinets are symmetrical. Make sure it’s not too close to the edge—leave a few inches of breathing room on each side. If the item is lightweight, secure it with museum putty to prevent it from tipping when you open cabinet doors.
FAQ
Do I need to fill the entire space above my kitchen cabinets?
Not at all. Sometimes leaving parts of that area empty creates a cleaner, more modern look. Focus on one or two sections rather than covering every inch.
How do I keep dust off items placed above cabinets?
Use items that are easy to wipe down, like glass jars or ceramic pieces. Avoid fabric or delicate items. A quick dusting every couple of weeks keeps things fresh.
Can I use real plants above my cabinets if there's no natural light?
Real plants need some light, but low-light varieties like pothos or snake plants can survive with artificial kitchen light. If your kitchen is very dark, consider high-quality faux plants instead.
What if my cabinets go all the way to the ceiling?
If there's no gap, you can still add decor on top of the cabinets themselves. Just keep it low-profile so it doesn't look cluttered or interfere with opening doors.
How do I style the space without it looking messy?
Stick to a cohesive color palette or material theme. Group items in odd numbers and vary heights. Less is often more—edit ruthlessly and leave breathing room between pieces.
Conclusion
Decorating the space above your kitchen cabinets doesn't have to be expensive or complicated. With a little creativity and a trip to the thrift store, you can turn that empty strip into a personal gallery that reflects your style. The best part?
You can switch it up whenever the mood strikes without guilt. So take a look at what you already have, mix in a few budget finds, and enjoy the process of making your kitchen feel more like home.