13 Kitchen Ideas on a Budget That Still Feel Designed
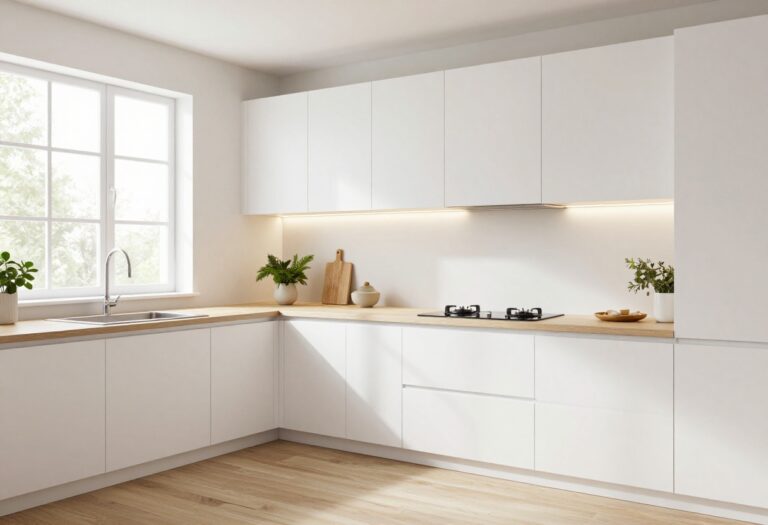
A beautiful kitchen doesn't have to come with a designer price tag. With a little creativity and some smart swaps, you can give your cooking space a whole new personality without draining your savings. Small kitchens especially benefit from thoughtful, low-cost changes that make a big visual impact.
The key is focusing on details that add warmth and character—think texture, lighting, and clever storage. You don't need a full renovation to make your kitchen feel intentional and inviting.
These 13 ideas are all about achieving that designed look on a real-world budget. They're perfect for small spaces and lean into a cozy, lived-in feel that never goes out of style.
1. Swap Out Cabinet Hardware for an Instant Facelift

Replacing old knobs and pulls with modern or vintage-inspired hardware is one of the cheapest ways to transform your kitchen. Choose warm brass or matte black for a designer touch. This small swap makes a big visual impact without breaking the bank.
Cabinet hardware is like jewelry for your kitchen. It’s a small detail that instantly updates the whole room. Whether you go for sleek bar pulls or classic cup pulls, the change is immediate and satisfying.
Plus, it’s a weekend project you can tackle yourself with just a screwdriver.
Best Materials For A Warm Feel
- For a cozy, inviting look, warm brass or brushed nickel are top choices. They add a soft glow that complements wood tones and warm paint colors. Avoid shiny chrome if you’re going for a snug vibe—it can feel cold.
- Instead, look for unlacquered brass that will patina over time for extra character.
Small-space Fix: Scale Matters
- In a small kitchen, oversized hardware can overwhelm the space. Stick to slender pulls or small knobs that don’t compete with the cabinets. For upper cabinets, consider knobs instead of pulls to keep the visual weight low.
- This trick makes the kitchen feel more open and less cluttered.
Budget-friendly Swap Tip
- You don’t need to buy high-end designer hardware to get the look. Check online retailers or home improvement stores for budget-friendly options in the same finishes. Mixing knobs and pulls can also save money—use knobs on doors and pulls on drawers.
- Just make sure the finishes match for a cohesive look.
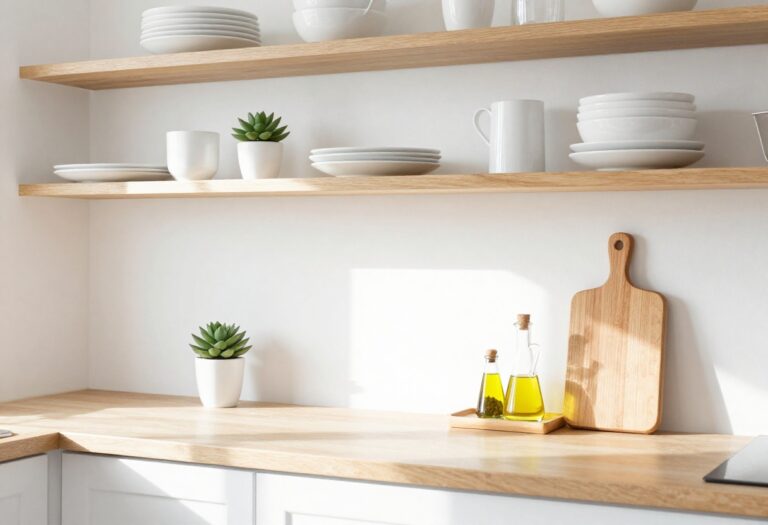
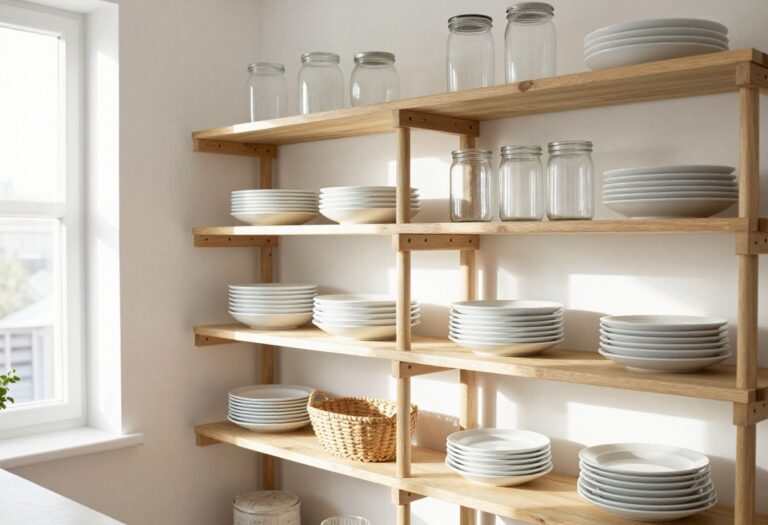
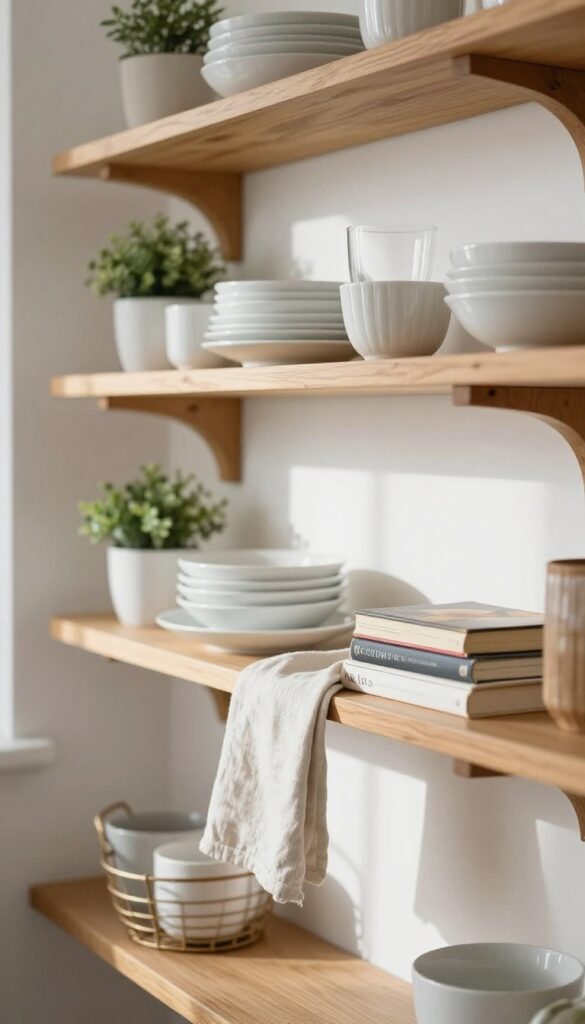
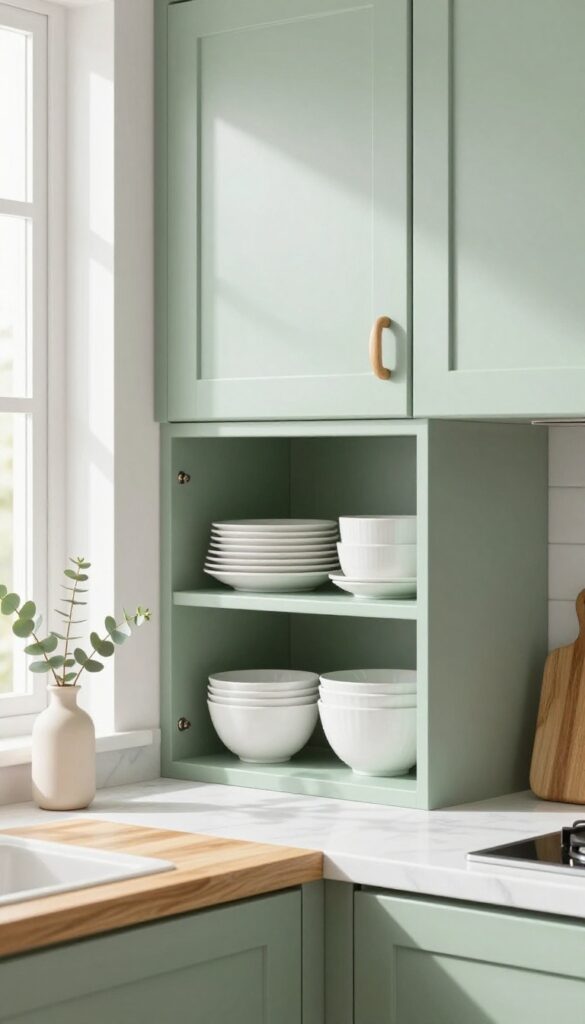
2. Add Open Shelving for Airy Storage
If your kitchen feels boxed in by heavy upper cabinets, taking a few doors off can instantly open things up. Open shelving makes the room feel larger and gives you a chance to display your prettiest everyday items. It's a budget-friendly swap that adds character without a full renovation.
Open shelving works best when you keep the color palette tight. Stick to white or cream dishes, clear glassware, and maybe a few neutral ceramics. This keeps the look cohesive even when shelves get a little lived-in.
Mix in a few wooden cutting boards or a small plant for warmth. The key is to edit ruthlessly—only keep what you use and love. For a cozy feel, choose warm wood shelves or paint them in a soft off-white.
This small change makes the kitchen feel curated, not cluttered.
Best Materials
Solid wood shelves in oak or walnut add warmth and contrast nicely with white walls. If your kitchen leans modern, try floating shelves in a matte black or brass finish. For a budget-friendly option, use reclaimed wood boards or even painted MDF.
Small-space Fix
In a tiny kitchen, open shelving eliminates visual bulk. Keep items grouped by color or function—like all white plates on one shelf, glass jars on another. This creates a sense of order and makes the room feel more spacious.
Styling Tip
Layer in texture with a linen dish towel draped over a basket or a small ceramic vase. Avoid overcrowding; leave some breathing room between objects. A few cookbooks stacked horizontally add a lived-in, cozy vibe.
3. Use Peel-and-Stick Backsplash for Instant Pattern
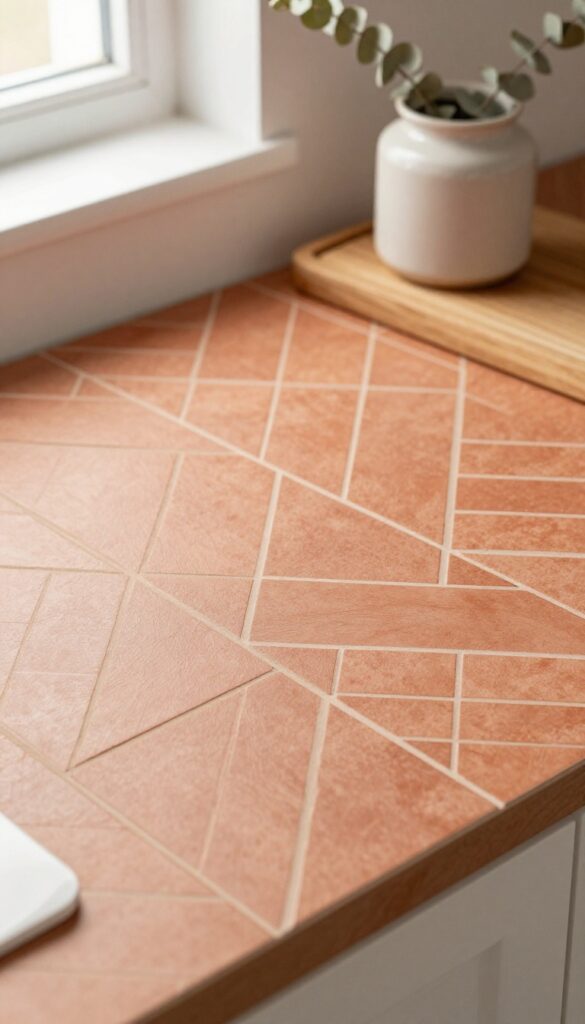
A backsplash can define a kitchen, but real tile installation is messy, expensive, and permanent. Peel-and-stick tiles flip that script entirely. They go up in an afternoon, cost a fraction of the real thing, and if you rent or change your mind later, they peel right off without damaging the wall.
For small kitchens especially, this is a game-changer. You get the visual impact of a tiled wall without losing your security deposit or blowing your budget. And because the options have come a long way, you can find warm terracotta tones, classic subway shapes, or even geometric patterns that add texture and depth.
It’s an instant upgrade that feels intentional, not temporary.
Peel-and-stick backsplash tiles are one of the most renter-friendly and budget-savvy moves you can make in a kitchen. They mimic the look of ceramic, stone, or glass tile, but come in lightweight sheets that you simply stick to a clean wall. The best part?
You can take them with you when you move. For a warm and cozy kitchen, look for tiles in earthy shades like rust, clay, or soft cream. A herringbone pattern in a matte finish adds subtle movement without overwhelming a small space.
If you prefer a more modern vibe, geometric hexagons in muted sage or blush can soften the room while still feeling fresh. The key is to choose a color that ties into your existing cabinets and countertops. Since the material is vinyl or similar, it’s also easy to cut with a utility knife around outlets and corners—no wet saw required.
Best Colors For A Cozy Kitchen
- Warm neutrals are your friend here. Think sandy beige, dusty rose, or a soft terracotta. These shades absorb light and make a small kitchen feel enveloping rather than stark.
- If you want a bolder move, a deep olive or navy can work as an accent behind the stove, but keep the rest of the wall light to avoid closing in the space. For a cohesive look, pull one color from your countertop or cabinet hardware and echo it in the backsplash.
Small-space Layout Tip
- In a compact kitchen, run the peel-and-stick backsplash from countertop to just below the upper cabinets—or all the way to the ceiling if you have open shelving. This vertical line draws the eye upward, making the ceiling feel higher. Avoid busy patterns on every wall; instead, focus on one focal area, like behind the sink or stove.
- A single accent wall of pattern keeps the room from feeling cluttered.
Finishing Touch For A Polished Look
- Peel-and-stick tiles often have a slight gap between them. Use a matching caulk or grout pen to fill those seams for a seamless, built-in appearance. Add a slim, white metal trim piece along the top edge where the backsplash meets the wall.
- This small detail elevates the whole installation from DIY to designer.
4. Paint Cabinets a Cozy Neutral or Deep Hue
A fresh coat of paint is one of the most budget-friendly ways to transform your kitchen, and it can instantly shift the mood from stark to snug. Soft sage, warm beige, or a deep navy create a cozy backdrop that feels both intentional and inviting. Satin finish is your best bet here—it’s easy to wipe down and holds up well to daily cooking splatters.
Painting cabinets is a weekend project that delivers a designer look without the designer price tag. The key is choosing a color that complements your countertops and backsplash while adding warmth. For small kitchens, lighter neutrals like creamy beige or pale sage keep the space feeling open, while deeper hues like navy or charcoal add richness and hide everyday wear.
A satin or semi-gloss finish ensures durability and makes cleaning a breeze. Don’t forget to label your cabinet doors during removal to avoid confusion when rehanging.
Best Colors For A Cozy Vibe
- Stick with warm undertones to keep the space inviting. Soft sage green pairs beautifully with wood accents and white countertops. Warm beige or greige (beige-gray) feels timeless and works with almost any backsplash.
- For drama, deep navy or charcoal adds sophistication—just ensure your kitchen gets enough natural light or add under-cabinet lighting to prevent it from feeling too dark.
Prep And Paint Tips
- Proper prep makes all the difference. Clean cabinets thoroughly with a degreaser, sand lightly, and apply a high-quality primer. Use a foam roller for smooth, brush-mark-free surfaces, and paint in thin, even coats.
- Let each coat dry fully before the next. For small spaces, painting only the upper cabinets in a light color and the lowers in a darker shade can create depth without overwhelming the room.
Finishing Touch
Swap out old hardware for new knobs or pulls in a finish that complements your paint color—brass or matte black adds a polished look. If your cabinets have glass fronts, consider painting the interior a lighter shade to keep the contents visible but not cluttered. A fresh coat of paint on the walls in a slightly lighter tone than the cabinets ties the whole look together.
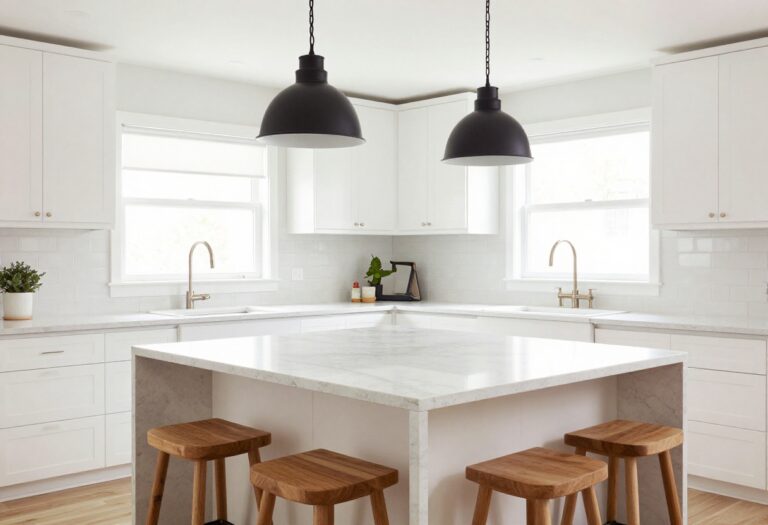
5. Layer Lighting with Plug-In Pendants
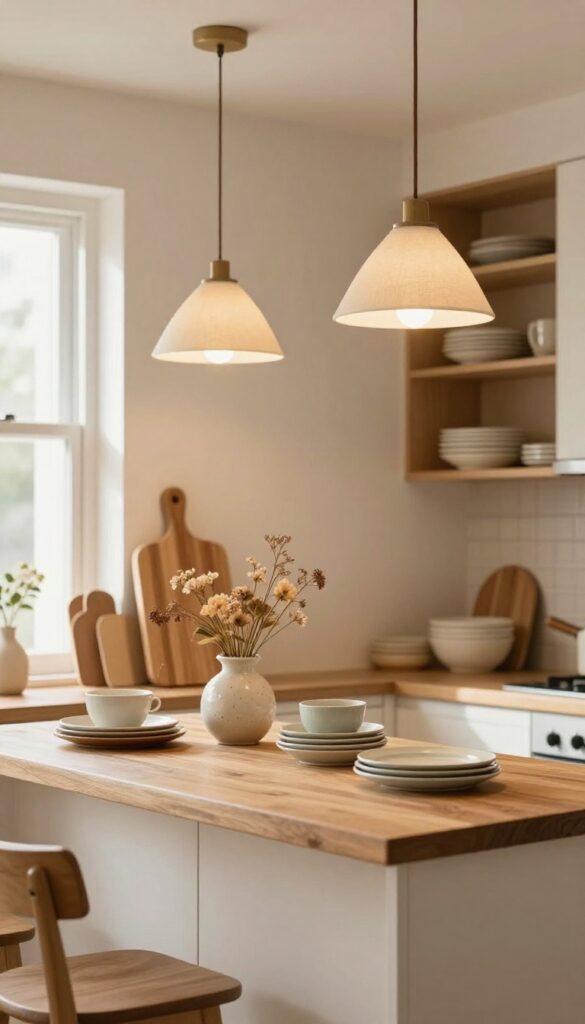
Overhead lighting can feel harsh and flat, especially in a rental or a budget kitchen where you’re stuck with a boob light. Plug-in pendants are an easy fix—no electrician needed. Hang one or two over your sink or island to create a warm, focused glow that instantly makes the space feel more intentional.
Fabric shades in cream or linen soften the light and add a cozy, lived-in texture.
Swapping out a basic ceiling fixture for a plug-in pendant is one of the quickest ways to upgrade your kitchen’s atmosphere without any wiring. These lights come with a long cord and a plug, so you just hang them from a hook or a swag hook and route the cord to a nearby outlet. For small kitchens, a single pendant over the sink draws the eye to that area and makes dish duty feel less like a chore.
Over an island or peninsula, two pendants spaced evenly add balance and a sense of purpose. Choose fabric shades in neutral tones like cream or linen to keep the look soft and inviting—they diffuse the light beautifully and make the whole room feel warmer.
Best Placement For Small Kitchens
- In a compact kitchen, every inch counts. Hang a plug-in pendant directly over the sink or the main prep area to create a focused task light. If you have a small island, center one pendant above it—this gives you a clear visual anchor without overwhelming the space.
- Keep the bottom of the shade at least 30 inches above the counter so it doesn’t block your view or feel intrusive.
Cord Management Tips
- To keep the cord from looking messy, use a cord cover that matches your wall color or paint it to blend in. Run the cord along the ceiling edge or down the corner of a cabinet. You can also use a swag hook to direct the cord neatly to an outlet.
- If the cord is too long, coil it gently behind a cabinet or use a small clip to hold the excess out of sight.
Fabric Shade Choices For A Cozy Glow
- Linen and cotton shades give off a soft, diffused light that feels cozy and inviting. Cream, beige, or light gray shades work with almost any kitchen color scheme. Avoid dark or shiny fabrics—they can make the light feel harsh or dim.
- A drum or bell shape adds a classic touch, while a tapered shade feels more modern. Either way, the fabric texture adds warmth that glass or metal shades can’t match.
6. Incorporate a Small Rug for Color and Softness
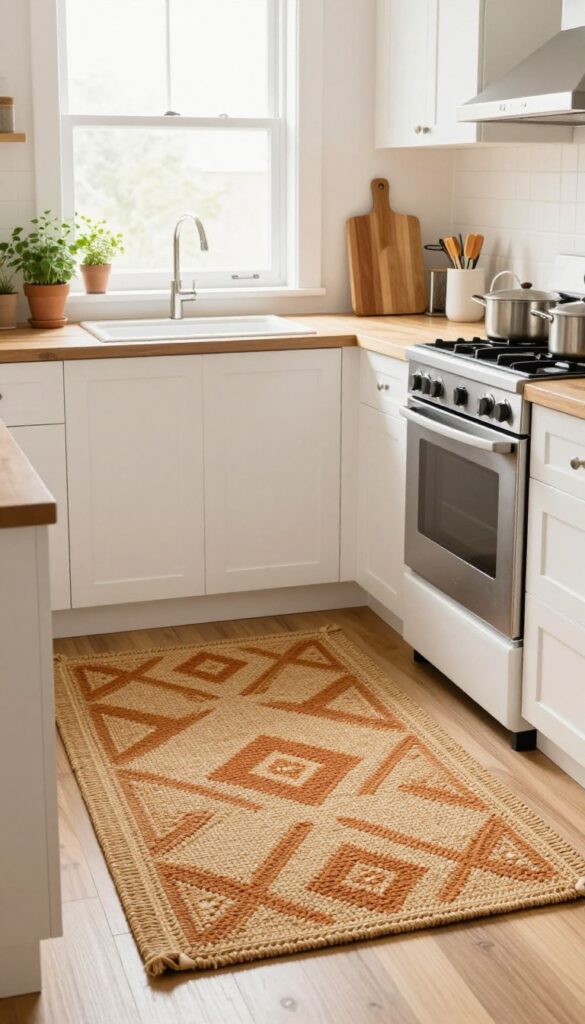
A kitchen doesn't have to feel cold or sterile just because it's a high-traffic, mess-prone space. Dropping a small rug or washable runner onto the floor instantly brings warmth, texture, and a hit of personality. It softens the hard surfaces—tile, wood, or laminate—and makes the room feel more inviting, especially in smaller kitchens where every inch counts.
Plus, it's an easy, low-commitment way to experiment with color or pattern without repainting cabinets or replacing countertops.
Think of a kitchen rug as an anchor for your cooking zone. In an open layout, a runner can visually separate the kitchen from the dining or living area, creating a defined workspace without building walls. For galley or L-shaped kitchens, a small mat in front of the sink or stove adds comfort underfoot during meal prep.
The key is choosing the right material and size so it enhances the space rather than becoming a tripping hazard or a dirt magnet.
Best Colors And Patterns
- Stick with warm, earthy tones to match the cozy style profile. Rust, mustard, olive, or terracotta bring in that snug, lived-in feel. If you prefer patterns, go for geometric or subtle tribal designs—they hide stains better and add visual interest without overwhelming a small kitchen.
- Avoid overly busy prints that can make the floor look cluttered.
Material Matters
- Low-pile or flat-weave rugs are your best bet. They're easier to clean, less likely to catch crumbs, and won't bunch up underfoot. Look for washable options—many brands now offer machine-washable runners in natural fibers like cotton or wool blends.
- Stay away from high-pile shag or delicate silks that trap spills and require professional cleaning.
Placement And Size Tips
- In a small kitchen, a 2×3 or 2×4 foot rug works well in front of the sink or stove. For a runner, aim for a length that leaves at least 6 inches of bare floor on each side to avoid a cramped look. Make sure the rug doesn't interfere with cabinet doors or appliance openings.
- Use a non-slip pad underneath to keep it secure, especially in high-traffic zones.
7. Display a Collection of Wooden Cutting Boards
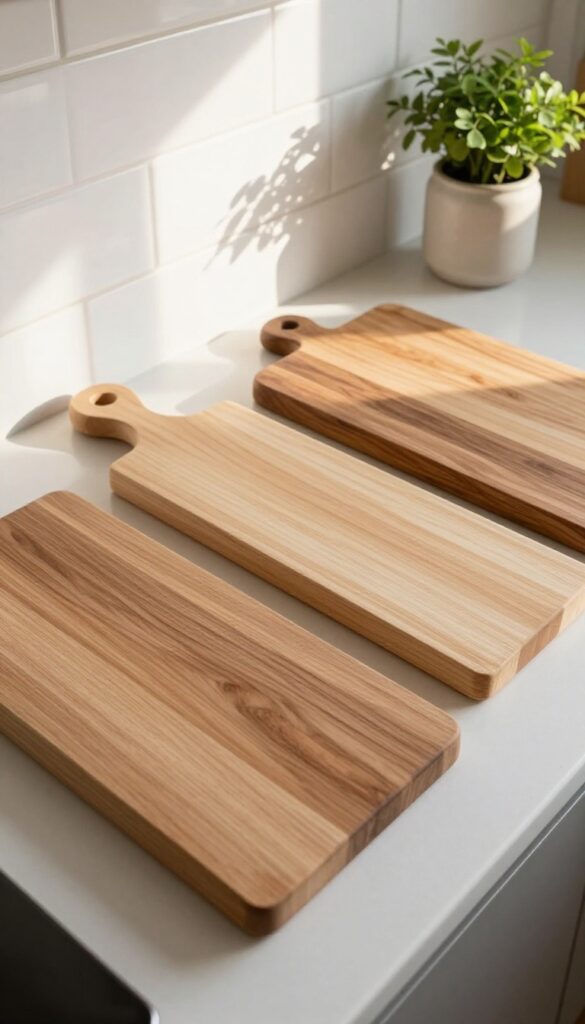
Wooden cutting boards do double duty as kitchen tools and decor. Leaning a few against the backsplash or propping them on the counter adds natural texture and warmth without taking up much space. In a small kitchen, this trick brings in cozy, organic vibes that make the room feel more inviting.
Mixing sizes and wood tones creates depth, so the display looks curated rather than accidental. Plus, they're practical—grab one when you need to chop, then put it back on display.
A small collection of wooden cutting boards can transform a bare counter into a styled vignette. The key is variety: combine a large end-grain board with a slim rectangular one and a small round board. Lean them at slightly different angles against the backsplash or a cookbook stand.
This approach works especially well in tight spaces because it uses vertical real estate without cluttering the counter. The warm wood tones soften the hard surfaces of tile and stainless steel, making the kitchen feel more lived-in and cozy.
Best Wood Tones For Warmth
Stick with a mix of light and medium woods like maple, beech, and acacia. Avoid overly dark or red-toned woods that can feel heavy in a small kitchen. The contrast between a pale end-grain board and a honey-toned acacia board adds visual interest without looking busy.
Small-space Styling Tip
If counter space is limited, use a wall-mounted magnetic knife strip to hold smaller boards vertically. Or lean them against a backsplash behind the sink where they won't interfere with prep work. Keep the display to three boards maximum to avoid a cluttered look.
Finishing Touch
Pair the boards with a small wooden spoon or a ceramic jar filled with wooden utensils. This creates a cohesive warm-and-cozy corner. Every few weeks, oil the boards to keep them looking fresh and to prevent drying or cracking.
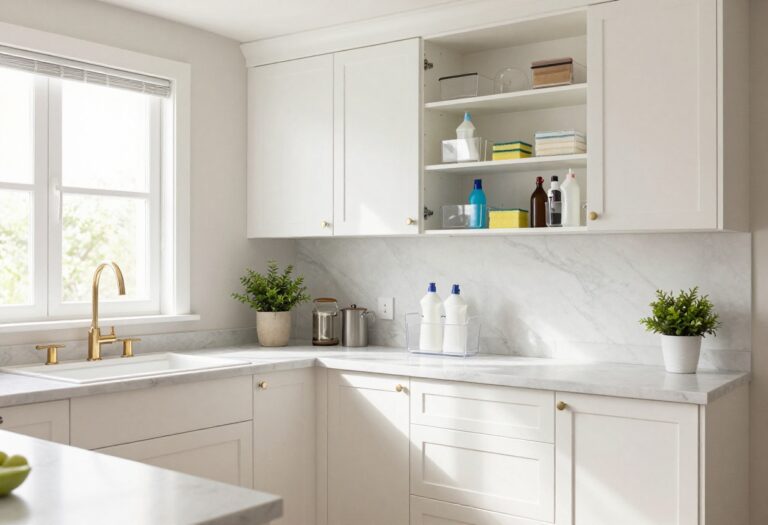
8. Add a Magnetic Knife Strip to Free Counter Space
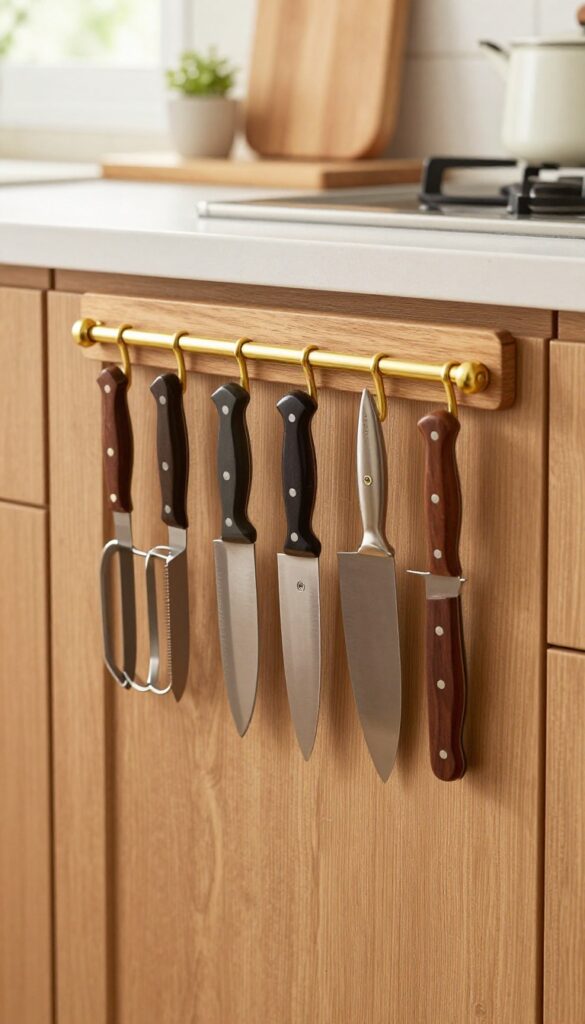
Knife blocks take up valuable counter real estate and can be a pain to clean. A magnetic strip mounted on the wall does the same job without sacrificing an inch of workspace. Plus, it turns your everyday knives into a display of functional art.
In a small kitchen, every square inch counts, and this swap instantly opens up your counter while adding a sleek, modern touch.
Mounting a magnetic knife strip is one of those small changes that makes a big difference. It clears out a clunky block or a messy drawer, and it keeps your knives within easy reach while cooking. The visual effect is clean and intentional—a row of handles lined up against the wall feels almost sculptural.
For a warm and cozy kitchen, choose a wooden strip with brass hardware or a matte black steel option that blends into the backsplash.
Best Materials
Wood strips (walnut, oak, or bamboo) add warmth and pair beautifully with brass or copper accents. If your style leans more industrial, a stainless steel or black powder-coated strip works well. For a softer look, go with a white or light wood strip that fades into the wall.
Placement Tip
Mount the strip on a section of wall that's easy to reach from your main prep area, but not directly above the stove (heat and grease can dull blades). A spot between the counter and upper cabinets is ideal. Make sure it's secured into studs or use heavy-duty anchors.
Styling Detail
Keep the knives spaced evenly for a balanced look. Mix in a magnetic hook or two for small metal utensils like kitchen shears or a peeler. The strip itself becomes a subtle design line, so keep the surrounding area uncluttered to let it stand out.
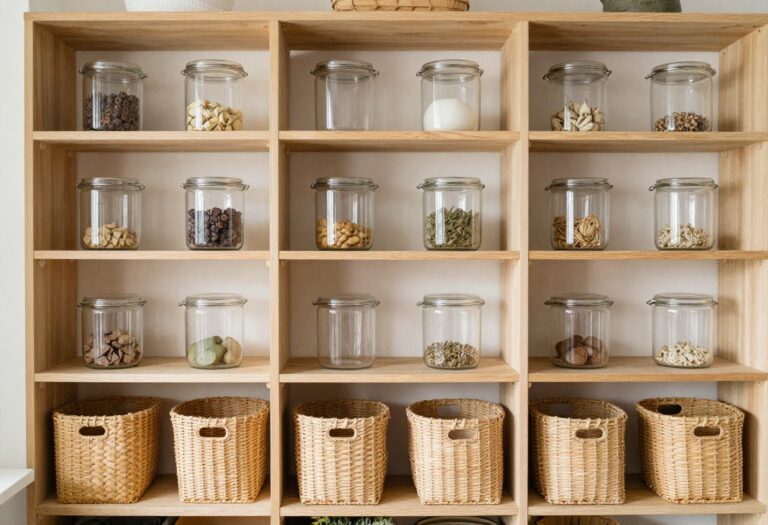
9. Use Baskets for Open Pantry Storage
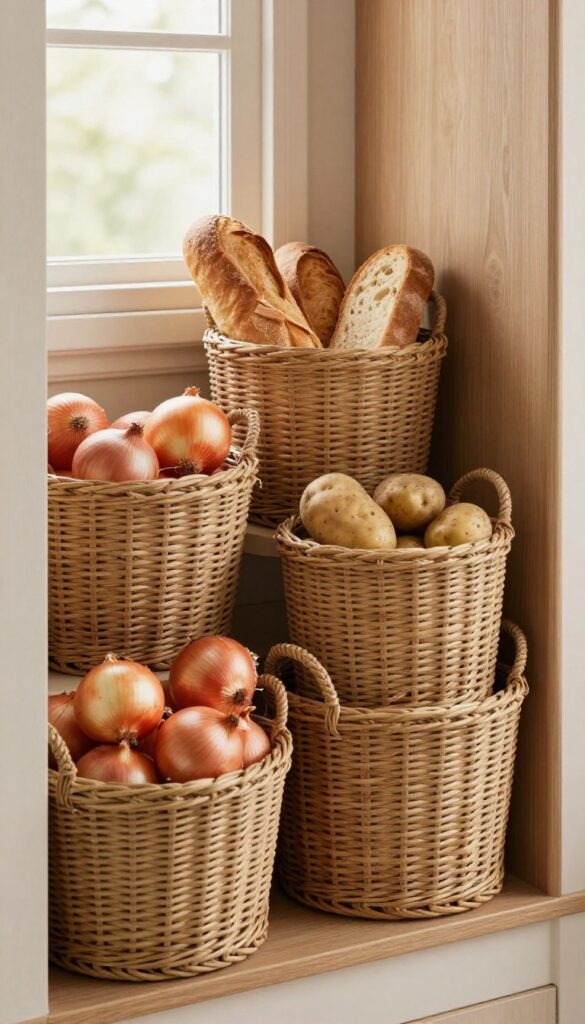
Open shelves can feel like a styling challenge, but baskets make them instantly organized and inviting. Instead of stacking cans and boxes in plain sight, corral them in woven baskets that hide the chaos while adding warmth. This trick works especially well in small kitchens where every inch counts—baskets turn bare shelves into a cohesive, textured display that feels intentional.
Woven baskets are a budget-friendly way to bring order and texture to open pantry storage. They keep everyday staples like potatoes, onions, bread, and snacks neatly contained while adding a natural, cozy feel. Stick to natural fibers like seagrass or rattan for a warm look that pairs well with wood tones and neutral walls.
Place them on open shelves, under counters, or even on top of cabinets to maximize vertical space. The key is to choose baskets that fit your shelf depth and have handles for easy access. Mix sizes for visual interest, and label them with chalk tags for a personal touch.
This small swap instantly makes your kitchen feel more designed without a major renovation.
Best Materials For A Cozy Look
- Seagrass and rattan are top choices because they bring warmth and texture without feeling heavy. Seagrass has a tighter weave and a lighter color, while rattan offers a more open, airy feel. Both are durable and easy to clean with a quick dusting.
- Avoid plastic or synthetic baskets if you want that warm, natural vibe—they can look cheap and clash with the cozy aesthetic.
Small-space Placement Tips
- In a compact kitchen, use baskets on the top shelf of open shelving to store less-used items like extra bags of rice or pasta. Place a large basket on the floor next to the pantry for bulk produce like potatoes or onions. For under-counter storage, choose shallow baskets that slide out easily—perfect for holding snacks or baking supplies.
- This keeps everything accessible while hiding the mess.
Styling With Labels And Liners
- Add a cohesive look by lining baskets with fabric or paper in a neutral tone—this softens the interior and prevents small items from slipping through. Use simple chalk labels or wooden tags to identify contents, which also adds a decorative touch. Group baskets by function: one for baking, one for snacks, one for produce.
- This system makes grabbing ingredients quick and keeps the pantry visually calm.
10. Hang a Pot Rack for Vertical Storage
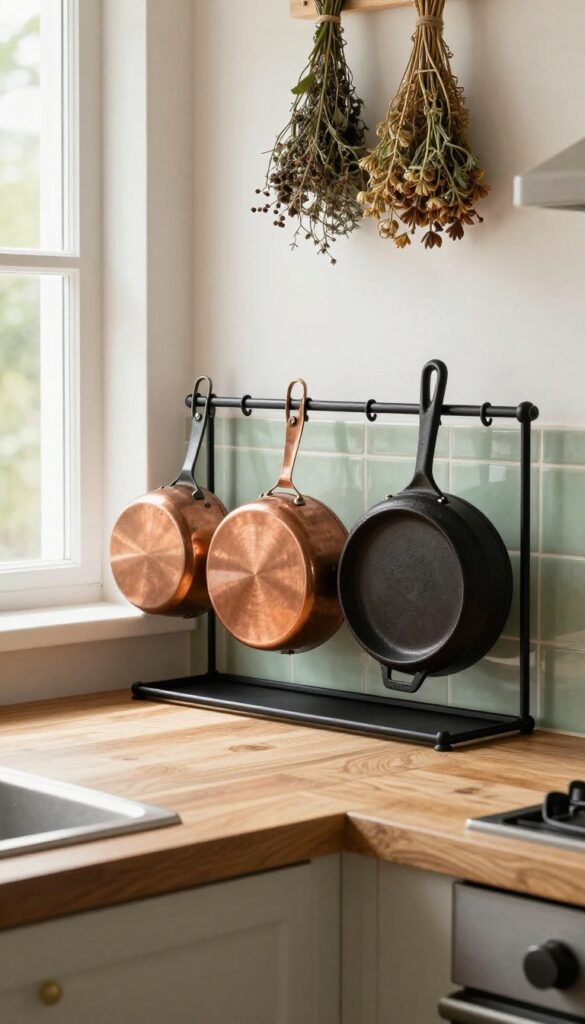
If your cabinets are bursting at the seams, look up. That empty ceiling or wall space above your counter is prime real estate for storing pots and pans. A pot rack not only frees up cabinet space but also puts your cookware on display, adding a warm, professional feel to any kitchen.
For small spaces, it’s a game-changer—turning awkward vertical gaps into functional storage that keeps everything within arm’s reach.
A wall-mounted or ceiling pot rack keeps cookware accessible and adds a rustic, professional feel. It frees up cabinet space and becomes a focal point. Opt for a simple iron or wood rail to match your warm and cozy style.
Arrange pots by size, with the most-used pieces hanging at the front. The visual weight of the rack draws the eye upward, making the kitchen feel taller and more open. Plus, the clatter of pots when you grab one adds a homey, lived-in soundtrack to your cooking space.
Best Materials For A Cozy Look
- For a warm and cozy kitchen, choose a matte black iron or reclaimed wood rack. Iron feels sturdy and timeless, while wood adds natural texture. Avoid shiny stainless steel—it can feel cold and commercial.
- A wooden rail with iron hooks blends both materials beautifully and softens the industrial edge.
Small-space Installation Tip
- In a small kitchen, mount the rack over an island or a narrow counter where you prep food. Keep it low enough to reach easily but high enough to avoid bumping your head. If you have low ceilings, a wall-mounted rail works better than a ceiling rack.
- Place it above the stove or sink where you use pots most.
Styling Your Pot Rack
- Group similar-sized pans together and hang utensils from the rack hooks for extra convenience. Add a few dried herb bundles or a small hanging plant to soften the look. The mix of metal, wood, and greenery keeps the display from feeling too utilitarian.
- Keep the rack tidy—clutter defeats the purpose of open storage.
11. Style Countertops with Trays and Jars
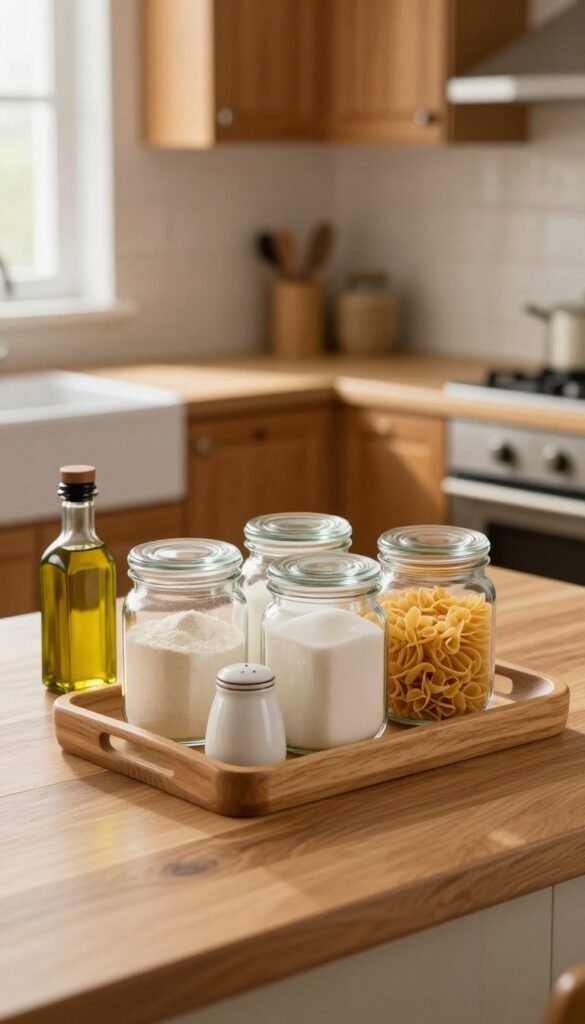
A cluttered countertop can make even the coziest kitchen feel chaotic. But with a simple tray and a few glass jars, you can turn everyday essentials into a curated display. This trick works especially well in small kitchens, where every inch of counter space counts.
By grouping oils, salts, and utensils on a tray, you create a visual anchor that feels intentional and warm.
Start by choosing a tray that fits your countertop’s dimensions—wooden, ceramic, or metal all work, depending on your palette. For a warm, cozy feel, go with a natural wood or a matte terra-cotta tray. Then, fill it with a few glass jars for dry goods like flour, sugar, or pasta, and add a small bottle of olive oil and a salt cellar.
Keep the grouping tight: three to five items is plenty. This not only corrals clutter but also makes your counter look styled, like a still life. Plus, it’s a budget-friendly swap for expensive countertop accessories—most trays and jars can be found at thrift stores or big-box retailers for under $20.
The key is to edit ruthlessly: only keep out what you use daily, and store the rest away. This approach works beautifully in galley kitchens or on a small island, where a single tray can define the space without overwhelming it.
Best Materials For A Cozy Look
- Stick with natural textures to reinforce the warm, cozy vibe. A wooden tray (walnut or acacia) paired with clear glass jars and a ceramic salt pig feels grounded and inviting. If you prefer a lighter look, try a woven seagrass tray with white porcelain jars.
- Avoid shiny metals or bright plastics, which can feel cold and clash with the neutral palette. The goal is to create a tactile, lived-in feel that makes the kitchen feel like the heart of the home.
Small-space Layout Tip
- In a small kitchen, place the tray near your primary prep zone—next to the stove or beside the sink. This keeps frequently used items within arm’s reach while preventing them from spreading across the counter. If counter space is extremely tight, use a narrow rectangular tray that fits behind the faucet or along the backsplash.
- You can also mount a small shelf above the counter and set the tray there, freeing up workspace while still enjoying the styled look.
Finishing Touch: Add A Plant Or Candle
- To elevate the display, tuck a small potted herb (like rosemary or thyme) or a taper candle in a simple holder at one end of the tray. This adds a living element and a soft glow, making the arrangement feel complete. Just keep it low-profile so it doesn’t block your view or get in the way during cooking.
- A tiny succulent or a miniature vase with a single stem works wonders too.
12. Add Greenery with Low-Light Plants
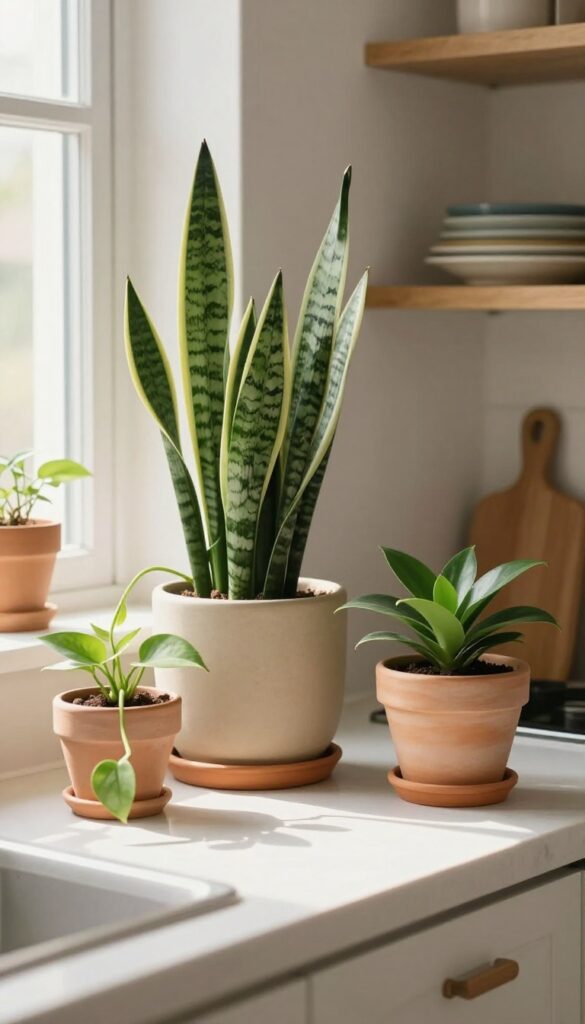
Even the coziest kitchen can feel a little flat without a touch of green. Plants soften hard surfaces, add a pop of color, and make the space feel lived-in without much effort. The trick is choosing varieties that thrive on neglect—especially if your kitchen doesn't get tons of natural light.
Low-light plants like snake plants, pothos, or ZZ plants are practically indestructible and look great on countertops or open shelves. For a more functional twist, pot up some herbs like basil or mint on a sunny windowsill. They're easy to grow, smell amazing, and you can snip them straight into your cooking.
Stick with ceramic pots in warm earth tones—terracotta, sandy beige, or muted clay—to keep the look cohesive and cozy.
Plants are one of the easiest ways to add life and warmth to a small kitchen without spending much. They don't require a total remodel or a big budget—just a few pots and the right greenery. Low-light plants are especially forgiving, so even if your kitchen has only one small window, you can still enjoy a lush look.
Group a few pots together on a counter or shelf to create a mini indoor garden. Mix different leaf shapes and heights for visual interest. A tall snake plant next to a trailing pothos, for example, gives you both vertical and cascading elements.
If you have a windowsill, herbs are a smart choice because they double as decor and ingredients. Just keep them trimmed so they stay bushy and don't get leggy. For the pots, stick with warm, earthy tones that match your kitchen's color palette.
Avoid glossy or bright colors—they can feel jarring in a cozy space. Instead, go for matte finishes in terracotta, sand, or soft clay. These materials also help regulate moisture, which is great for plant health.
Finally, remember that even low-light plants need some indirect light, so place them near a window or under a grow light if needed. A simple LED grow bulb in a regular lamp works wonders and keeps your plants happy year-round.
Best Plants For Low-light Kitchens
- Snake plants, pothos, ZZ plants, and philodendrons are all top choices for kitchens with minimal natural light. They tolerate low light, irregular watering, and even a bit of neglect. For a functional twist, try growing basil, mint, or chives on a windowsill—they need a bit more light but reward you with fresh herbs.
- If your kitchen is really dark, consider a small grow light to supplement. A clip-on light attached to a shelf works perfectly.
Pottery And Color Flow
- Choose pots in warm earth tones like terracotta, sandy beige, or muted clay to tie into a cozy kitchen aesthetic. Matte finishes feel more natural and blend well with wood countertops or open shelving. Group pots of different heights and textures for a collected look.
- Avoid glossy or bright colors that can feel out of place in a warm, relaxed space.
Placement And Styling Tips
- Cluster plants on a counter corner, windowsill, or an open shelf to create a focal point. Use a small tray to corral pots and catch water drips. For trailing plants like pothos, let them cascade over the edge of a shelf for a soft, organic feel.
- Keep taller plants like snake plants near the back or on the floor to add height without taking up counter space. Rotate pots occasionally so all sides get light.
13. Update Your Faucet for a Focal Point
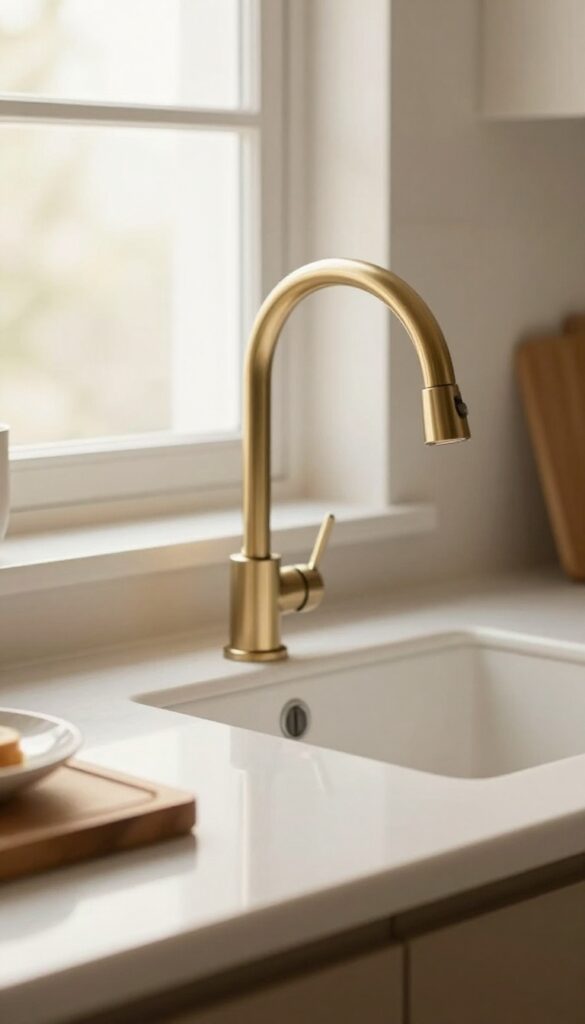
Swapping a standard faucet for a gooseneck or bridge model in brushed brass or matte black instantly upgrades the sink area. It's a single change with high visual payoff. In a small kitchen, this swap draws the eye upward and adds a sculptural element without taking up counter space.
A new faucet is one of those upgrades that feels bigger than it costs. It changes how you use the sink and how the whole kitchen looks. For a warm and cozy feel, choose a finish like brushed brass or oil-rubbed bronze.
These tones add a soft glow that fits perfectly with natural wood and warm whites. If your kitchen is compact, a gooseneck design gives you more room to wash large pots, and the curved shape softens hard edges. A bridge faucet with exposed pipes adds a touch of vintage charm that makes the space feel lived-in and inviting.
Best Finishes For Warmth
- Brushed brass is the top pick for a cozy kitchen. It patinas over time and pairs beautifully with marble, butcher block, and cream cabinets. Oil-rubbed bronze is another warm choice that hides water spots well.
- Avoid polished chrome or stainless steel if you want that soft, lived-in look.
Small-space Fix
In a small kitchen, a high-arc gooseneck faucet with a pull-down sprayer is a space-saver. It clears the sink area for washing produce or filling pots while keeping the counter free. A single-handle model also reduces visual clutter compared to widespread designs.
Installation Tip
- Most faucet swaps are DIY-friendly if you have basic tools. Turn off the water supply, disconnect the old lines, and follow the new faucet's instructions. If your sink has three holes, a bridge faucet or a deck plate can cover the extras.
- For a seamless look, choose a faucet with a matching soap dispenser.
FAQ
What is the cheapest way to update a small kitchen?
Painting cabinets and swapping hardware are the most cost-effective updates. Both can be done in a weekend and dramatically change the look without a full remodel.
How can I make my kitchen feel warmer on a budget?
Add warm textures like wood cutting boards, woven baskets, and a soft rug. Warm lighting from plug-in pendants or under-cabinet strips also makes a big difference.
Are peel-and-stick backsplashes durable for kitchens?
Yes, quality peel-and-stick tiles are water-resistant and easy to clean. They hold up well in most kitchens, especially behind stoves and sinks, but avoid direct heat exposure.
What colors work best for a cozy small kitchen?
Soft neutrals like warm white, beige, sage green, and muted navy create a cozy feel without overwhelming a small space. Pair with natural wood accents for extra warmth.
How do I style open shelves without clutter?
Group items by color or material, and leave some breathing room. Use a mix of functional pieces like plates and jars, and add a small plant or cookbook for visual interest.
Conclusion
Making your kitchen feel designed on a budget is all about focusing on the details that matter most. Small swaps like new hardware, layered lighting, and natural textures can completely shift the energy of the room without requiring a major investment. Remember, a cozy kitchen isn't about perfection—it's about creating a space that feels warm, functional, and truly yours.
Start with one or two ideas that excite you, and build from there. Your dream kitchen is closer than you think.