10 Bloxburg Kitchen Ideas for Cute Roblox Home Builds
Building a kitchen in Bloxburg is one of the most fun parts of designing your dream home. But let's be honest—without smart storage, even the prettiest kitchen can feel cluttered and chaotic. That's where these ideas come in.
We're focusing on storage-smart solutions that keep your kitchen looking polished while making sure everything has a place. Whether you're into modern minimalism or cozy farmhouse vibes, these tips will help you maximize space without sacrificing style.
Ready to transform your Bloxburg kitchen into a functional and beautiful space? Let's dive into ten ideas that blend clever storage with fun decor.
1. Open Shelving with Baskets
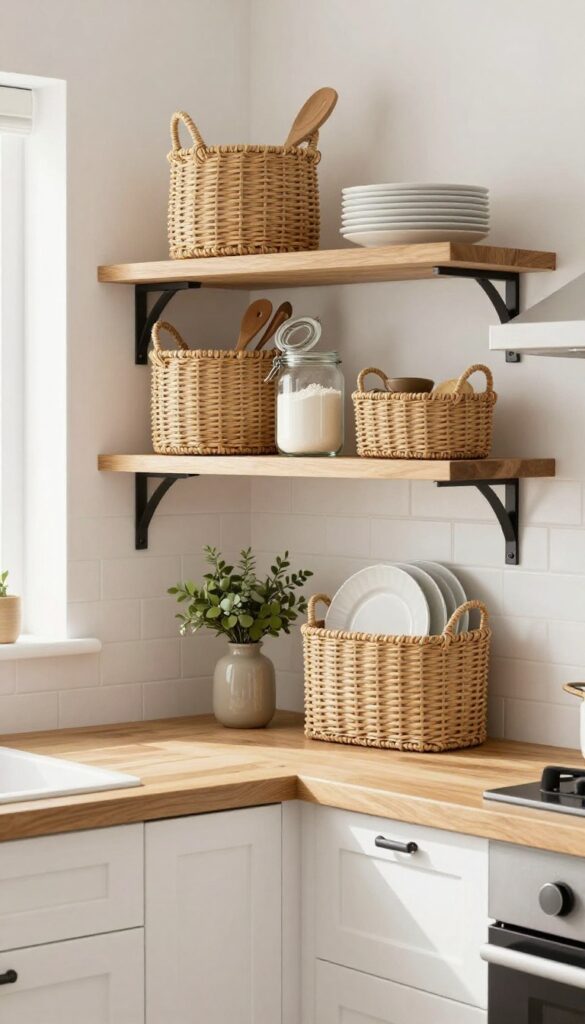
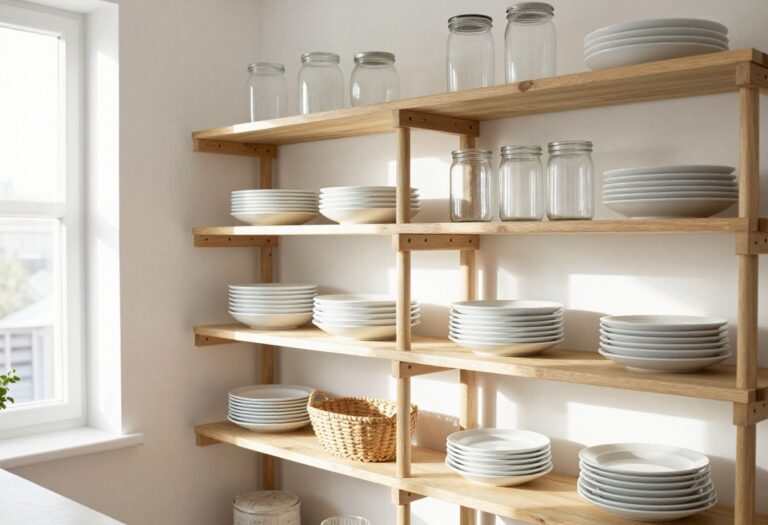
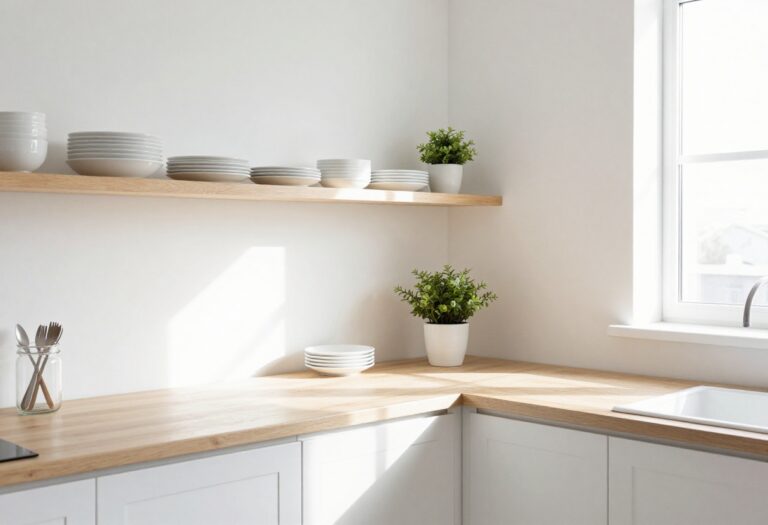
Upper cabinets can make a kitchen feel boxed in, especially in smaller Bloxburg builds. Swapping them out for open shelves instantly opens up the room and gives you a chance to show off your style. Adding woven baskets keeps the look tidy while introducing natural texture that softens the overall feel.
Open shelving with baskets is a storage-smart move that blends practicality with a relaxed, airy vibe. Instead of hiding everything behind doors, you keep daily-use items within arm's reach but neatly corralled in baskets. This setup works especially well in Bloxburg kitchens where you want to avoid a cluttered look but still need easy access to cooking essentials.
The baskets add warmth and contrast against painted shelves, making the space feel curated rather than chaotic.
Best Materials
Stick with natural materials for the baskets—seagrass, rattan, or water hyacinth. These bring organic texture that plays nicely with wood or white shelves. For the shelves themselves, solid wood in a light oak or whitewashed finish keeps things bright, while black metal brackets add a subtle industrial edge.
Storage Tip
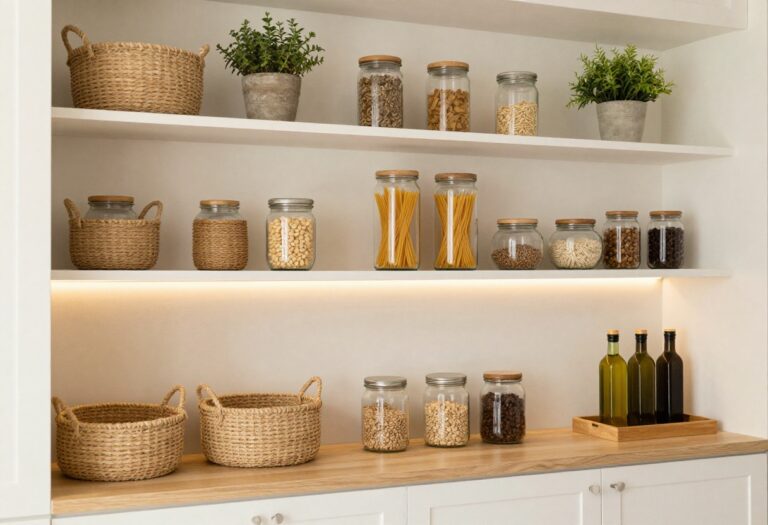
Use baskets to group similar items: one for dry goods like pasta and rice, another for utensils or napkins, and a third for small decor pieces like faux plants or cookbooks. Labeling the baskets with simple tags or chalkboard labels makes finding things even easier.
Styling Note
Leave some space between baskets to place a few open items—a pretty jar of flour, a small vase, or a stack of plates. This keeps the shelves from looking too uniform and adds visual interest. Stick to a neutral color palette for the baskets to maintain a calm, cohesive look.
2. Hidden Pantry Behind a Barn Door
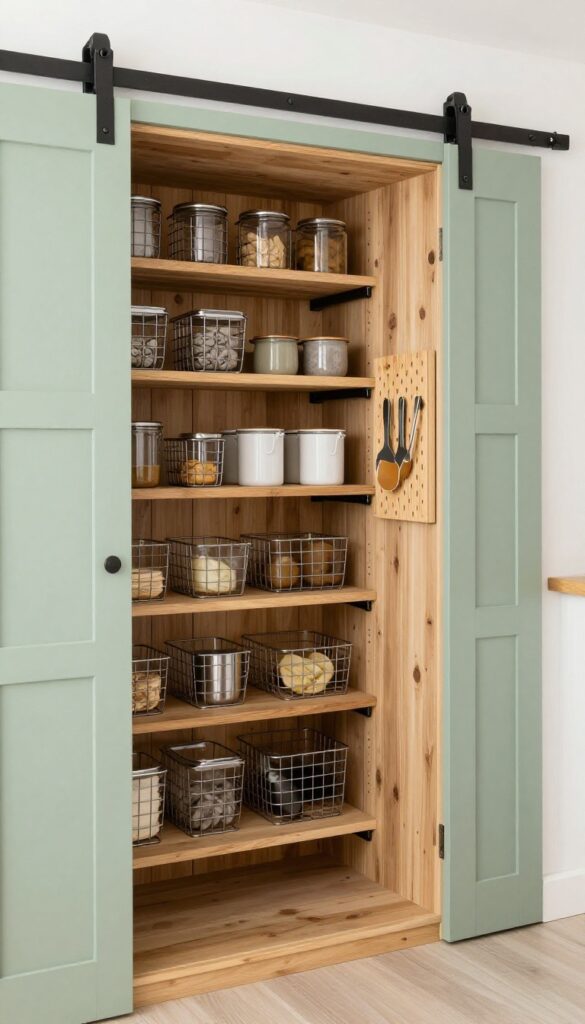
A sliding barn door adds instant farmhouse charm while hiding a practical pantry. This trick keeps your main kitchen looking tidy and spacious, because all the small appliances, dry goods, and overflow items stay tucked away. It's a clever storage-smart move that also brings in a rustic texture contrast against sleek cabinetry.
The idea is simple: carve out a narrow alcove or repurpose a closet next to the kitchen, then mount a barn door on a track. Inside, floor-to-ceiling shelves hold everything from cereal boxes to a stand mixer. The door slides shut, and suddenly the mess disappears.
You get the visual warmth of wood or metal without sacrificing an inch of storage. This works especially well in galley kitchens or open-concept layouts where every surface is visible.
Best Materials
- Go with a solid wood barn door for durability and a cozy feel. If your kitchen leans modern, try a metal-framed door with wire mesh or frosted glass. For the shelves inside, sturdy wire shelving keeps things airy, while closed cabinets hide smaller items.
- Mix open bins for produce with labeled baskets for snacks.
Storage Tip
Use clear bins and stackable canisters so you can see what's inside without pulling everything out. Add a small pegboard on the back wall for hanging measuring cups, spoons, and oven mitts. This turns every inch of the pantry into functional space.
Finishing Touch
Paint the barn door in a soft neutral like sage green or warm gray to tie into your kitchen palette. Add a magnetic strip on the inside wall for knives or spice tins. A small battery-operated puck light on the ceiling makes the pantry easy to use even in the evening.
3. Island with Drawers and Shelves
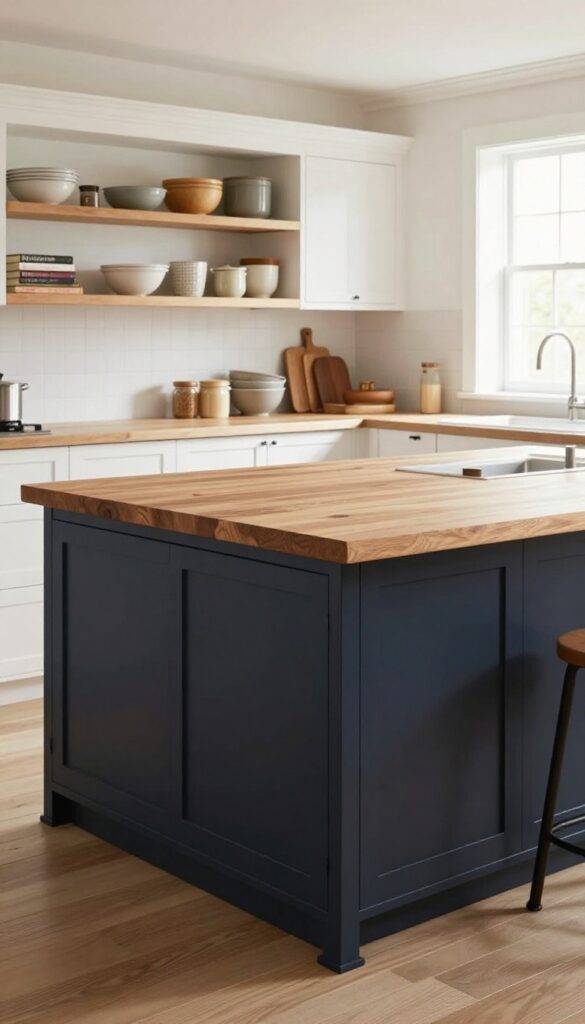
A kitchen island that pulls double duty is a game-changer in any Bloxburg build. This design gives you a sturdy prep surface, hidden storage on one side, and open shelving on the other. It’s perfect for stashing pots and pans while keeping cookbooks or your favorite mugs on display.
The mix of closed and open storage makes the kitchen feel organized but not too boxy.
The island becomes the heart of the kitchen, offering extra counter space for chopping or serving. The drawers on one side are great for utensils, linens, or small appliances, while the open shelves on the opposite side let you show off pretty dishware or baskets of produce. It’s a smart way to keep everything within reach without cluttering the counters.
Best Colors
Stick with light wood tones or white for the open shelves to keep the look airy. Darker drawer fronts (like navy or charcoal) add contrast and ground the island. A butcher-block top in warm oak ties everything together and feels cozy.
Layout Tip
Place the island so the drawers face the main cooking zone and the shelves face the dining area. That way, you can grab a pan while cooking, and guests can easily snag a plate or a cookbook from the other side.
Storage Idea
Use the open shelves for items you reach for daily: mixing bowls, cutting boards, or a few pretty jars. Reserve the deep drawers for heavier pots and lids. Add small dividers inside the drawers to keep everything tidy.
4. Corner Cabinet Carousel
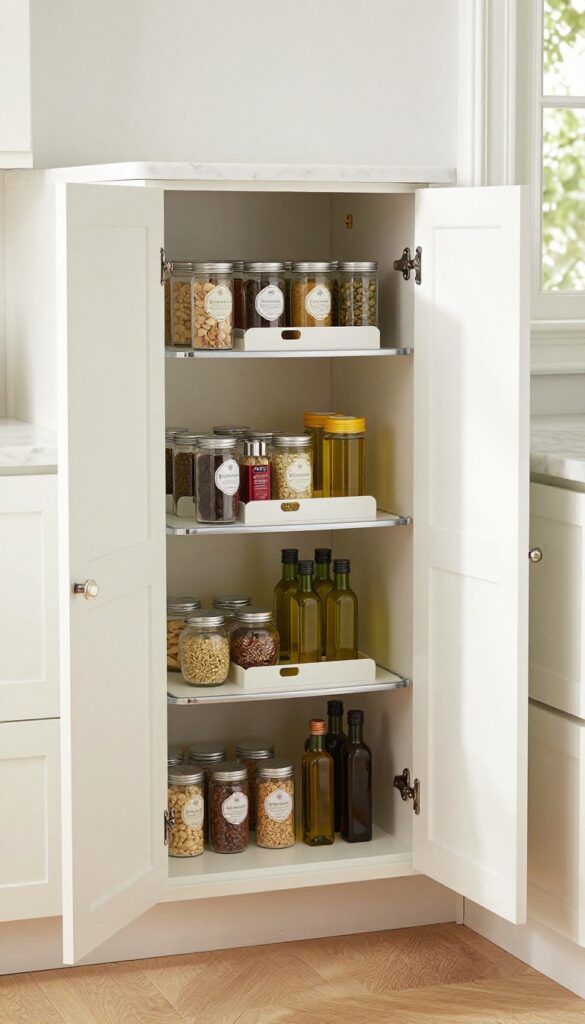
Corner cabinets are notorious for becoming black holes where small kitchen tools and spice jars go to disappear. But with a simple lazy Susan or carousel insert, that awkward dead space turns into one of the handiest spots in your kitchen. It's a small upgrade that makes a big difference in how you cook and organize—no more digging around in the back for that jar of cumin.
Installing a carousel in your corner cabinet is a storage-smart move that instantly improves kitchen flow. Instead of stacking items and hoping for the best, you get easy access to everything with a quick spin. This idea works especially well in Bloxburg kitchens where every square inch counts, but it's just as practical in real-life homes.
The key is choosing the right size carousel so it fits your cabinet dimensions without wasting space. Go for a two-tier model if you have the vertical room—it doubles your storage without taking up extra floor area. Use the top tier for everyday spices and oils, and the bottom for backup bottles or larger condiment jars.
To keep things looking tidy, group similar items together and use small trays or bins on the shelves to corral loose packets and smaller containers. The result is a corner cabinet that actually works for you, not against you.
Best Materials
Look for carousels made from sturdy materials like chrome, stainless steel, or heavy-duty plastic. Chrome and steel are durable and easy to clean, while high-quality plastic options are lighter and more affordable. Avoid flimsy wire racks that can tip or wobble—you want something that feels solid when loaded with jars and bottles.
Installation Tip
- Measure your cabinet carefully before buying. Most carousels require a minimum diameter of 18 to 20 inches, but some compact models fit smaller cabinets. If your cabinet is unusually shaped, consider a half-moon or kidney-shaped carousel that maximizes space without hitting the door.
- Mounting is usually straightforward—just screw the center post into the cabinet floor and snap on the trays.
Styling Note
Keep the visual clutter low by storing matching or similarly colored containers. Clear glass jars with white lids look clean and cohesive, while a set of small ceramic ramekins adds a warm, earthy feel. Avoid mixing too many different bottle shapes and colors—it can make the cabinet feel chaotic even when organized.
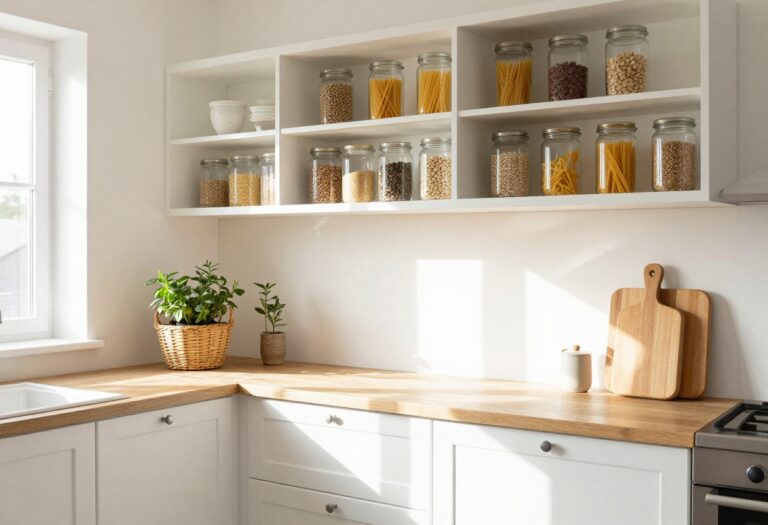
5. Pegboard Wall for Pots and Pans
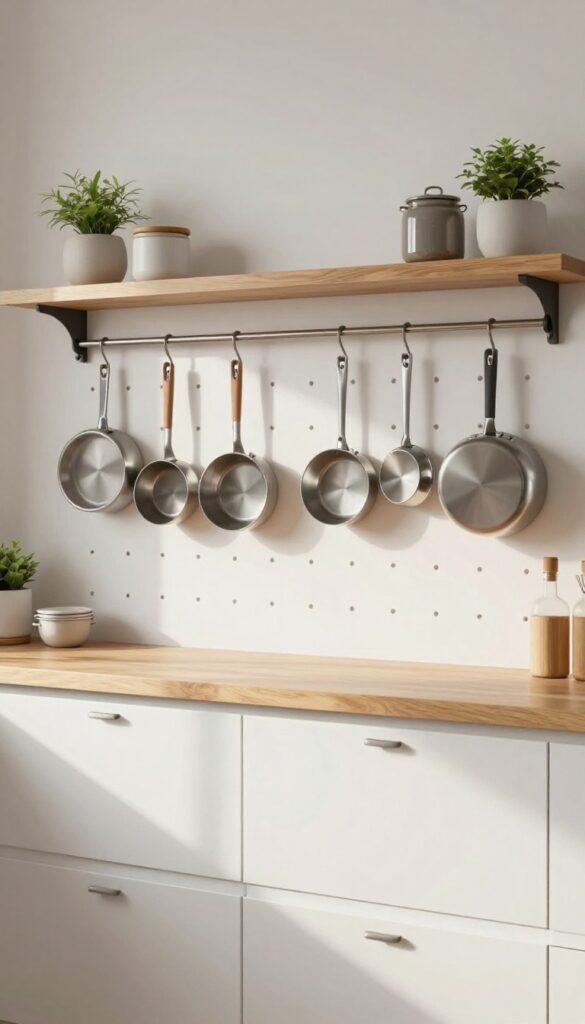
Blank walls in the kitchen are wasted real estate, especially when you're short on cabinet space. A pegboard wall turns that empty area into a functional, stylish display for your cookware. It's a storage-smart move that also gives your kitchen a relaxed, industrial-chic vibe—perfect for Bloxburg builds where every square foot counts.
Mounting a pegboard on an empty wall lets you hang pots, pans, and utensils within easy reach. This frees up cabinet space for other items and adds a decorative element that feels both practical and personal. The key is to keep it organized—group similar items together and leave some negative space so it doesn't look cluttered.
Choose a pegboard color that complements your kitchen palette, like a warm wood tone or a crisp white, and use hooks in different sizes to accommodate various cookware.
Best Materials
- Opt for a sturdy pegboard made from medium-density fiberboard (MDF) or metal. MDF is easy to paint and gives a clean, modern look, while metal offers durability and a more industrial feel. In Bloxburg, you can use the wall-mounted shelf or grid items to mimic a pegboard effect.
- Stick with matte finishes to keep the look understated and let the cookware pop.
Layout Tip
- Plan your layout before hammering in hooks. Arrange your most-used pots and pans at arm's reach, with utensils and smaller items filling in the gaps. Keep heavier pieces lower and lighter ones higher to maintain balance.
- Leave a few empty hooks so you can swap items out easily without rearranging everything.
Finishing Touch
Add a small shelf above the pegboard for cookbooks or a trailing plant to soften the industrial edge. A warm-toned cutting board leaning against the wall can also break up the metal and hooks. This little detail makes the setup feel intentional and cozy, not just utilitarian.
6. Under-Cabinet Lighting with Storage Rails
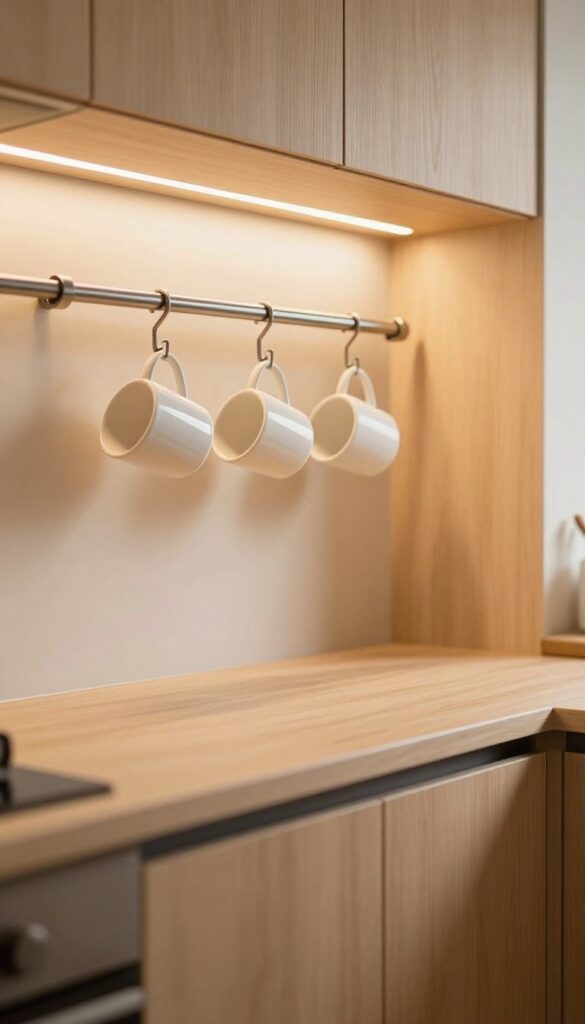
A kitchen that works hard should also look good doing it. Under-cabinet lighting paired with a simple rail system pulls double duty: it brightens your countertops for food prep while giving you a spot to hang mugs, measuring cups, or small utensils. In a Bloxburg build, this combo keeps the walls clear and the counters clutter-free, which is exactly what a storage-smart kitchen needs.
The warm glow from the lights makes the space feel cozy and intentional, not just functional.
This idea is all about making every inch count. Instead of letting the space under your cabinets go to waste, you install a slim LED strip along the front edge and mount a metal or wooden rail just below it. The rail becomes a home for your most-used tools, keeping them within arm's reach without taking up drawer space.
In Bloxburg, you can use basic shapes to create the rail and small decals or items for the hooks. The lighting effect can be achieved with the in-game light fixtures or by using glowing blocks sized to fit. The result is a kitchen that feels both polished and practical, with a subtle industrial edge that works in modern, farmhouse, or even eclectic builds.
Best Colors And Materials
- Stick with warm white or soft yellow LED strips to keep the kitchen inviting. For the rail, brushed nickel, matte black, or oil-rubbed bronze pair well with most cabinet colors. If your cabinets are white or light wood, a dark rail adds contrast; dark cabinets call for a lighter metal to keep things from feeling too heavy.
- In Bloxburg, use the metal texture option on basic shapes for a realistic look.
Storage Tip
- Hang items you reach for daily: coffee mugs, small spoons, or a garlic press. Leave the rail a few inches away from the counter so mugs don't bump into anything below. For extra utility, add S-hooks or small baskets to hold spice jars or tea bags.
- This keeps the counter clear and makes your morning routine smoother.
Finishing Touch
Tuck the LED strip inside a slim channel or behind a small lip so the light diffuses softly instead of glaring in your eyes. In Bloxburg, you can use a half-block or a thin panel to hide the light source. Add a dimmer switch if your build allows it, so you can adjust the brightness from a bright task light to a soft evening glow.
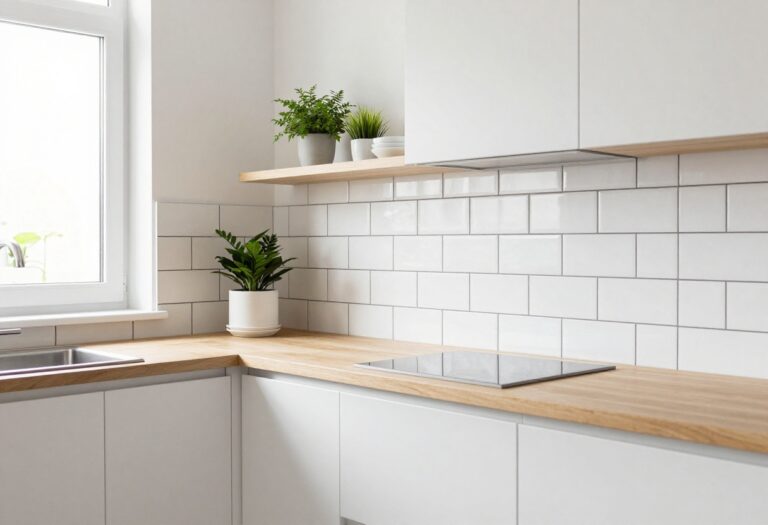
7. Window Sill Herb Garden
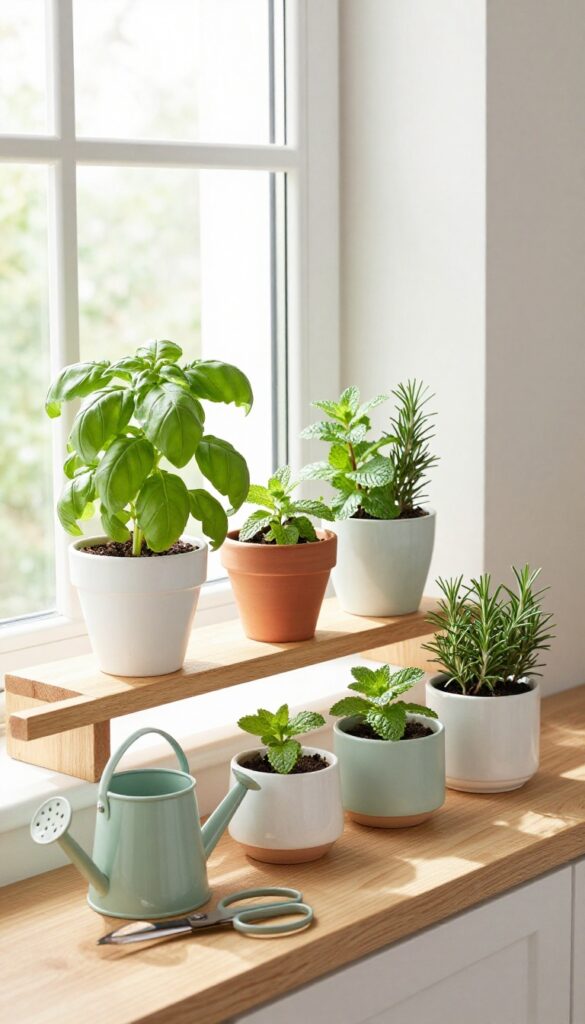
A window sill herb garden is one of those ideas that feels both practical and charming at the same time. By placing a narrow shelf right on the sill, you create a living decor element that adds fresh green texture to your kitchen. It also gives you easy access to basil, mint, or rosemary while making use of vertical space that often goes empty.
The key to making this work is choosing the right shelf and pots. A slim wooden or metal shelf that fits the sill depth keeps things tidy without blocking the window. Use small terracotta or ceramic pots in a unified color—like white or soft sage—to keep the look cohesive.
Place the most-used herbs like parsley and chives closest to the counter for easy grabbing. This setup works best in a kitchen with a south- or west-facing window, but many herbs also do well with a simple grow light if natural light is limited.
Best Herbs To Start With
Basil, mint, chives, and thyme are forgiving choices that thrive indoors. They also smell amazing and add instant freshness to your cooking. Avoid large or sprawling herbs like dill or fennel that might outgrow the shelf quickly.
Shelf Styling Tip
Mix pot heights slightly—taller rosemary in the back, lower thyme in front—to create depth. Add a small watering can or a pretty salt cellar on the shelf for extra personality, but keep it minimal so the herbs stay the star.
Storage Bonus
Use the shelf to store small kitchen tools like herb scissors or a microplane underneath the pots. This keeps them handy without cluttering the counter, making the most of every inch of your window space.
8. Rolling Cart for Extra Storage

A rolling cart is one of those kitchen hacks that feels almost too simple to work—until you try it. Suddenly you have a dedicated spot for fresh produce, a mobile baking station, or a place to stash pantry overflow. The best part?
It slides right under a counter when you need the floor space back. In a Bloxburg kitchen, this trick adds both function and a cozy, lived-in vibe.
A rolling cart brings flexibility to any kitchen layout. Use it to store fruits and vegetables within easy reach, or load it with baking essentials like flour, sugar, and mixing bowls. When not in use, tuck it beneath an island or countertop to keep the room feeling open.
Choose a cart with a butcher-block top for extra prep space, or go with wire baskets for a lighter, airier look.
Best Colors And Materials
For a Bloxburg kitchen, stick with natural wood tones or crisp white to match most color schemes. A bamboo cart adds warmth without feeling heavy, while a metal cart with a matte black finish brings a modern edge. If your kitchen leans farmhouse, go for a distressed wood cart with casters.
Storage Tip
Use the top shelf for items you grab daily—like onions, potatoes, or a coffee station. Reserve the lower shelves for bulkier supplies or extra serving dishes. Baskets or bins keep everything tidy and make the cart feel intentional rather than cluttered.
Small-space Fix
In a narrow kitchen, a slim rolling cart (12–18 inches wide) fits perfectly beside the fridge or between counters. Look for one with a towel bar on the side to hang dish towels or oven mitts—it saves drawer space and adds a handy detail.
9. Magnetic Knife Strip on Backsplash
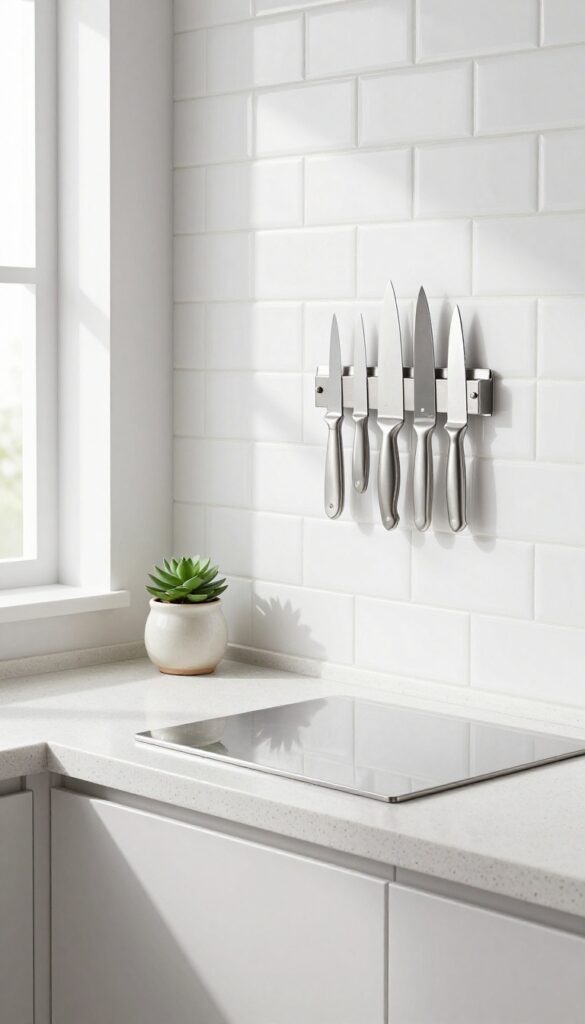
Let your knives become part of the decor. A magnetic strip mounted on the backsplash does double duty: it frees up drawer space and turns your everyday tools into a sleek, modern display. No more digging through cluttered drawers for the right blade—just grab and go.
Plus, it adds an industrial-chic vibe that feels right at home in a Bloxburg kitchen.
Installing a magnetic strip is one of those small changes that makes a big visual impact. Instead of hiding your knives away, you put them front and center as functional art. The clean lines of the strip contrast nicely with tile or painted drywall, and the lack of a bulky knife block means more counter space for prep work.
It's a storage-smart move that also keeps your most-used tools within easy reach.
Best Placement
Mount the strip on the backsplash between the counter and upper cabinets, ideally near your main prep zone. That way, you can grab a knife without reaching across the stove or sink. If your kitchen has a long backsplash, consider a longer strip to hold all your knives plus metal kitchen tools like tongs or peelers.
Material And Finish
Stainless steel strips are the most common and match modern appliances perfectly. For a warmer look, opt for a wooden magnetic strip—it blends into farmhouse or rustic kitchens while still giving you that clean, clutter-free surface. Black or matte finishes work well in industrial or minimalist spaces.
Styling Tip
- Keep the knives organized by size, with the most-used ones in the center. Add a small plant or a ceramic utensil holder nearby to soften the industrial edge. If your knives have mismatched handles, group them by color for a more intentional look.
- Just make sure the strip is strong enough to hold heavier knives securely.
10. Built-In Bench with Storage Underneath
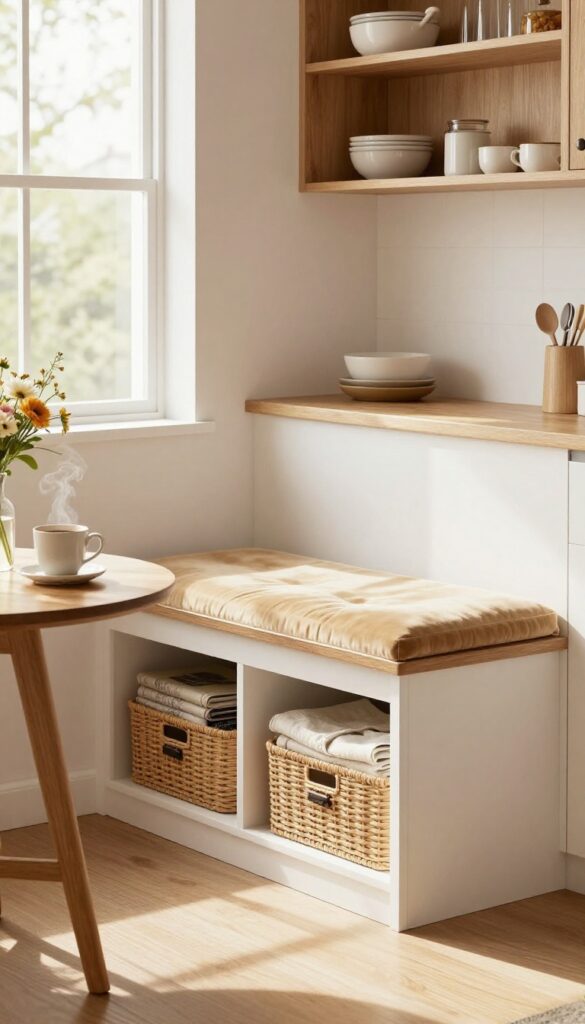
A breakfast nook with a built-in bench instantly makes a kitchen feel more inviting. But when you add storage underneath, it becomes a smart solution for stashing kitchen overflow. Think linens you don't use daily, cookbooks that clutter the counter, or small gadgets that never seem to find a home.
This idea blends cozy seating with hidden organization, perfect for keeping your kitchen looking tidy without sacrificing style.
A built-in bench with storage underneath is the ultimate multitasker for a kitchen that needs both seating and organization. It turns an ordinary nook into a functional zone where you can sit down for coffee while keeping essentials neatly tucked away. The key is to design the bench with either deep drawers or cubbies that match your storage needs.
Drawers work great for flat items like tablecloths and placemats, while cubbies with baskets are ideal for bulkier items like pots or small appliances. To keep the look cohesive, paint the bench the same color as your lower cabinets or trim. Add a cushion in a durable fabric like outdoor-grade linen or performance velvet, and you've got a spot that's as practical as it is pretty.
Best Materials
- Go with plywood or MDF for the bench frame—they're sturdy and easy to paint. For the seat, consider a solid wood top that can handle daily wear. If you want a more polished look, use the same countertop material as your kitchen island for a seamless feel.
- For the storage compartments, soft-close drawer slides are a worthwhile upgrade.
Storage Tip
Divide the space under the bench into a mix of deep drawers and open cubbies. Use the drawers for items you need to grab quickly, like napkins or placemats. Reserve the cubbies for less-frequently used items stored in woven baskets or bins—they add texture and keep the clutter hidden.
Styling The Nook
Keep the bench cushion neutral—cream, gray, or a soft blue—to let the storage underneath blend in. Add a few throw pillows in complementary colors for comfort and visual interest. A small pendant light above the table completes the cozy breakfast nook vibe.
FAQ
How can I make my Bloxburg kitchen look bigger with storage?
Use open shelving to create an airy feel, and choose light colors for cabinets and walls. Vertical storage like pegboards or tall cabinets draws the eye upward, making the space seem larger.
What are the best storage items for a small Bloxburg kitchen?
Baskets, rolling carts, magnetic strips, and under-cabinet rails are great for small spaces. They add storage without taking up floor or counter space.
Can I combine different storage styles in one kitchen?
Absolutely! Mixing open shelves with closed cabinets and adding a pegboard or island creates visual interest and maximizes functionality. Just keep a cohesive color palette.
How do I keep my Bloxburg kitchen organized without it looking cluttered?
Use matching containers and baskets to group items. Hide less attractive items behind cabinet doors, and display only a few decorative pieces on open shelves.
Are there any storage tricks for corner cabinets in Bloxburg?
Yes! Use a lazy Susan or install pull-out shelves to make corner cabinets more accessible. You can also add a small shelf inside the door for spices.
Conclusion
With these ten storage-smart ideas, your Bloxburg kitchen can be both stylish and highly functional. Remember, the key is to think vertically and use every nook and cranny—from walls to islands to window sills.
Experiment with different combinations to find what works best for your build. Happy decorating, and may your virtual kitchen always be clutter-free and beautiful!