11 Storage-Smart Toca Boca Mansion Kitchen Ideas That Actually Work in Real Homes
Toca Boca mansions are known for their bold colors, playful layouts, and surprisingly clever use of space. The kitchens, in particular, pack a lot of personality into every corner.
But what if you could borrow those same storage-smart tricks for your own home? These ideas aren't about copying a virtual world exactly.
Instead, they focus on the real-life principles behind those whimsical designs: making every inch count, keeping things visible yet tidy, and adding a touch of fun without sacrificing function. Whether you have a tiny galley or a sprawling open plan, these 11 concepts can help you cook up a kitchen that feels both efficient and joyful.
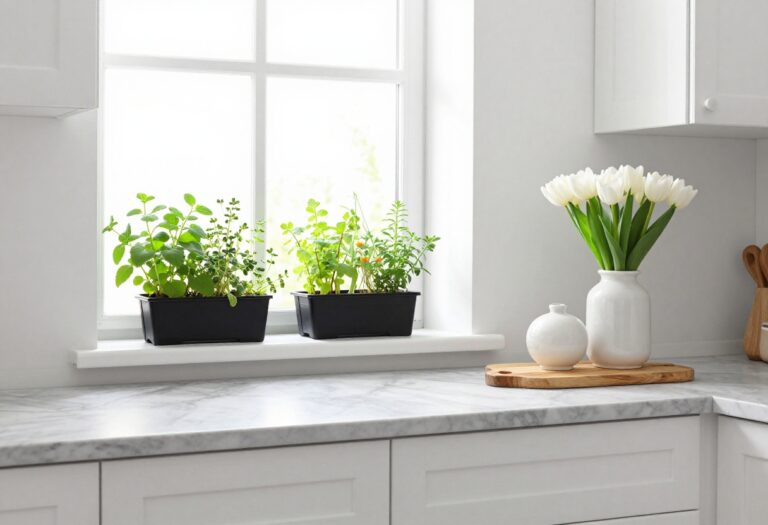
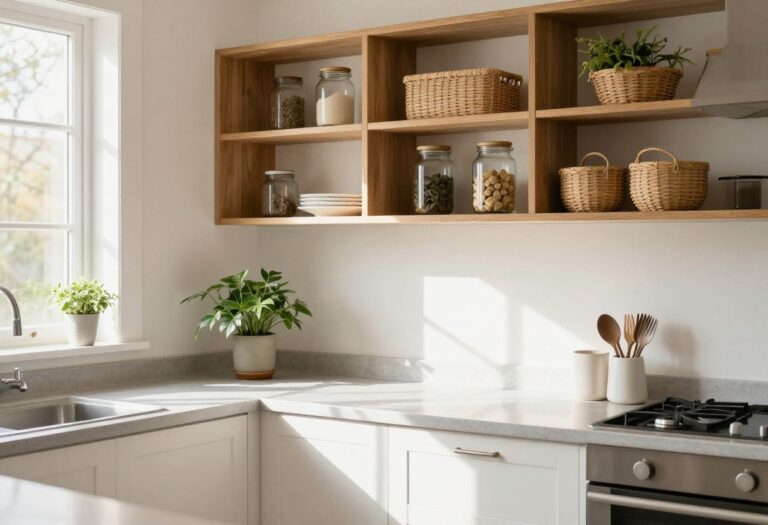
1. Open Shelving with a Pop of Color
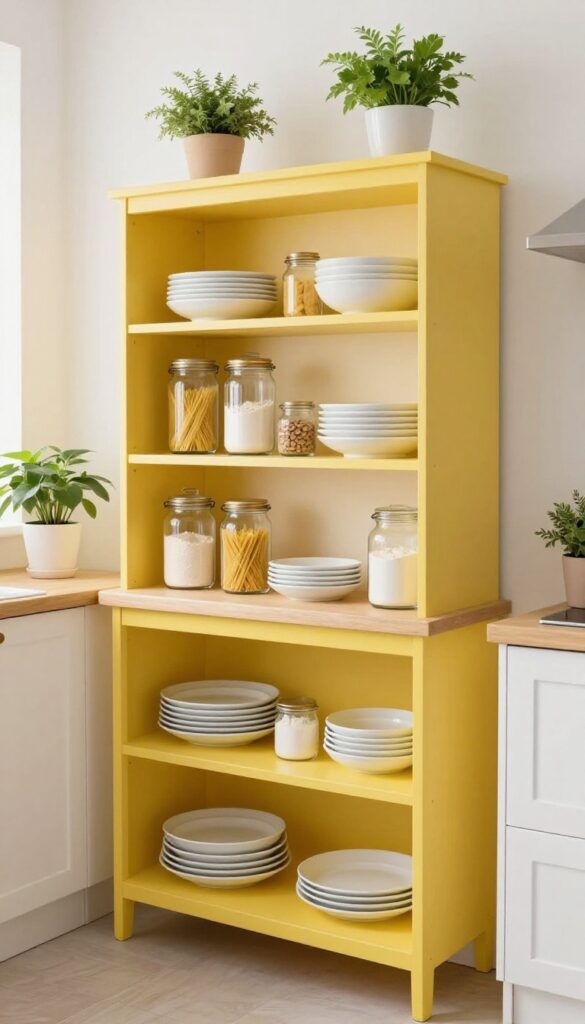
Upper cabinets can make a kitchen feel closed in, especially in smaller spaces. Swapping them for open shelves painted in a cheerful hue instantly lifts the room and adds a playful Toca Boca vibe. The key is choosing a color that energizes without overwhelming—think sunny yellow, soft coral, or mint green.
Open shelving also puts your everyday dishes and jars within easy reach, making cooking and tidying feel more fluid.
Open shelving with a pop of color does more than just store your stuff—it becomes a focal point that sets the tone for the whole kitchen. By painting the shelves themselves (or the brackets) in a bright accent, you draw the eye upward and make the space feel taller and more open. This approach works especially well in kitchens with neutral walls and countertops, where the color can really sing.
To keep the look cohesive, use matching containers for staples like flour, sugar, and pasta, and arrange items by frequency of use. The result is a kitchen that feels both organized and inviting, with that effortless, playful energy you love from Toca Boca.
Best Colors For A Cheerful Pop
- Not every bright shade works in a kitchen. Stick with hues that feel warm and appetizing: butter yellow, peach, sage green, or sky blue. These colors pair well with white or light wood tones and won't clash with your dishware.
- If you're nervous about commitment, test the color on a small section first or use removable peel-and-stick shelf liner for a temporary pop.
Shelf Styling Tip
Group similar items together—mugs on one shelf, bowls on another—and leave a little breathing room between objects. Add a small plant or a cookbook stand for visual interest, but avoid overcrowding. The goal is to make everyday items look like part of the decor, not clutter.
Storage-smart Layout
Keep the most-used items on the lower shelves (plates, glasses, coffee supplies) and reserve higher shelves for less frequent use or decorative pieces. Use clear glass jars for dry goods so you can see what you have at a glance. This layout reduces cabinet rummaging and keeps your countertops clear.
2. A Pegboard Wall for Pots and Pans
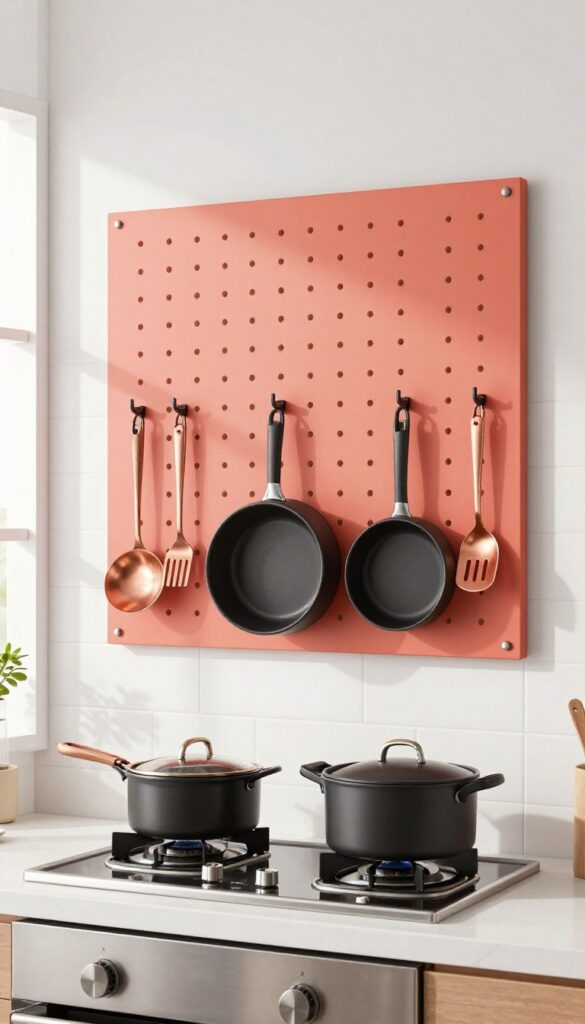
Above your stove or sink, a pegboard wall turns everyday cookware into a playful display. Instead of digging through cabinets, you grab what you need right off the wall. This idea frees up storage and adds a bold pop of color that fits Toca Boca's cheerful vibe.
Choose a bright hue like coral or teal for the pegboard itself, then arrange your pots and pans in a balanced composition. It's functional, yes, but it also makes your kitchen feel more personal and lively.
A pegboard wall is one of those storage solutions that does double duty: it clears out cabinets and adds instant visual interest. The key is to pick a color that contrasts with your backsplash or wall paint—think sunny yellow against a white tile or deep navy on a light wall. Hang your heaviest pots on sturdy hooks near the center, then arrange lighter pans and utensils around them.
Leave a little breathing room between items so the wall doesn't look cluttered. For a cohesive look, stick to cookware in similar finishes, like matte black or copper, so the pegboard remains the star.
Best Colors For The Pegboard
- Bright, saturated colors work best to channel Toca Boca's playful energy. Coral, mustard yellow, or mint green are great choices. If you prefer a more subtle look, go for a pastel shade like blush or soft lavender.
- The pegboard should stand out from the wall, so test a few swatches before committing.
Layout Tip: Balance And Reach
Arrange your heaviest pots at the center or slightly off-center, within easy reach. Lighter items like spatulas and measuring cups can go on the edges. Step back and check the visual weight—aim for a balanced spread that doesn't feel top-heavy or lopsided.
Finishing Touch: Add A Shelf Above
Mount a slim wooden shelf above the pegboard to hold small plants, spice jars, or a cute timer. This adds another layer of storage and completes the look. Choose a shelf in a natural wood tone to warm up the bright pegboard color.
3. Rolling Cart as a Mobile Island
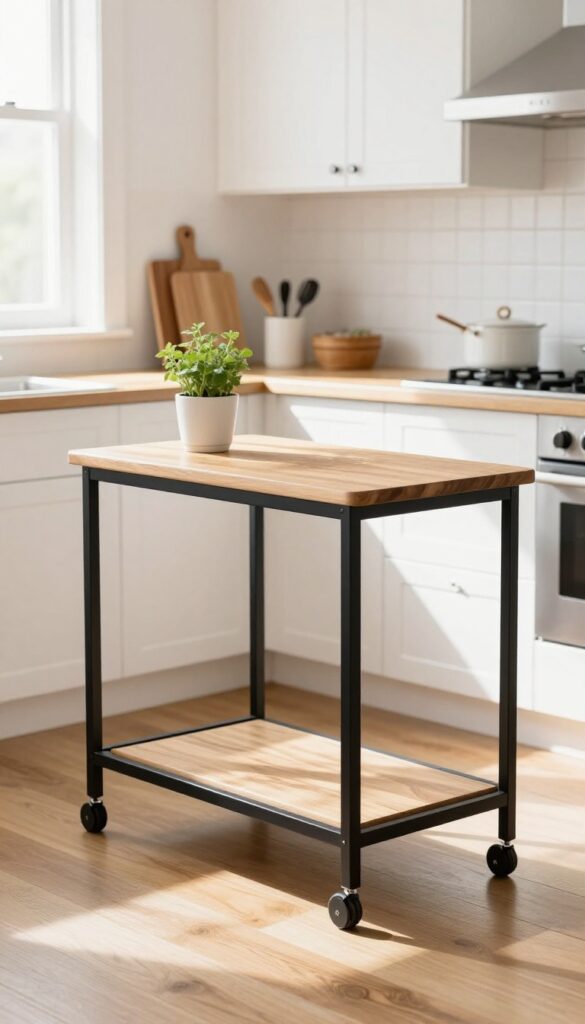
Counter space is a precious commodity in most kitchens, but you don't need a full renovation to add more. A slim rolling cart slides into tight spots and rolls out exactly where you need it—next to the stove for prep, beside the sink for drying, or against a wall for extra storage. It brings flexibility without the commitment of built-in cabinetry.
Think of a rolling cart as your kitchen's secret weapon. It tucks away like a side table but works like a mini island. Park it near your main prep zone when you're cooking, then roll it out of the way when guests gather.
The key is choosing one that complements your existing finishes—wood tones that match your cabinets or a metal frame that echoes your hardware. Keep the surface clear or stage it with a cutting board and a few essentials so it feels intentional, not cluttered.
Best Materials & Colors
- Butcher block tops add warmth and a sturdy chopping surface, while stainless steel shelves keep things industrial and easy to clean. For a softer look, go with a white or cream cart with wooden accents. Dark metal frames (black or bronze) feel modern and grounded.
- Match the cart's finish to your cabinet hardware or light fixtures for a cohesive feel.
Layout Tip
Place the cart within arm's reach of your stove or main counter. If your kitchen has a narrow walkway, keep the cart against a wall when not in use. In galley kitchens, a cart can create a temporary island—just make sure there's enough room to walk around (at least 36 inches of clearance).
Storage Styling
- Use the top tier for daily tools like a knife block, oil bottles, and salt cellar. The lower shelves can hold cookbooks, small appliances, or baskets of onions and garlic. Add a small plant or a jar of utensils for a lived-in look.
- Stick to a color palette of two or three tones to keep the cart from feeling busy.
4. Magnetic Knife Strip on the Backsplash
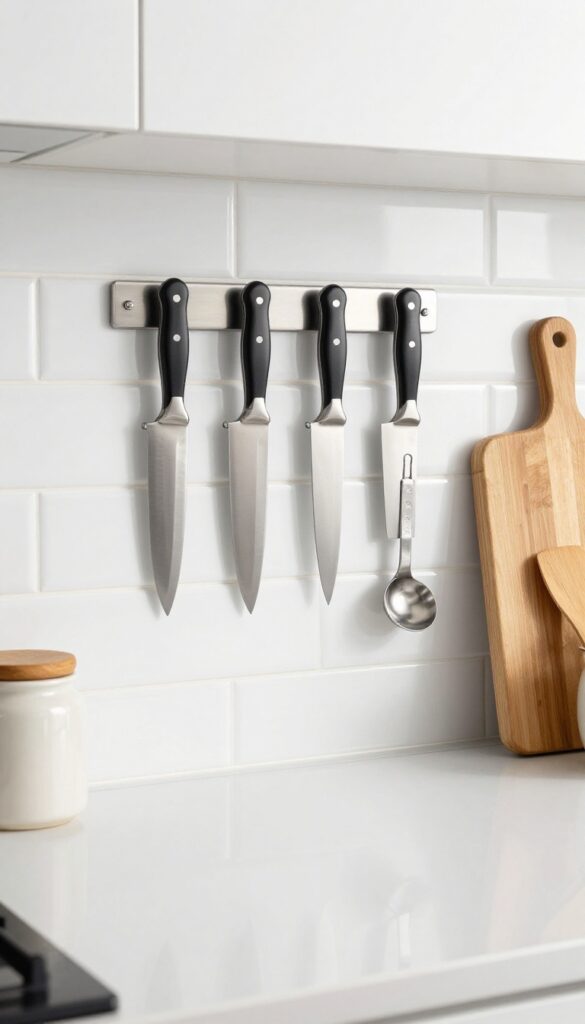
That empty stretch of backsplash above your counter does more than just catch splatters. Mounting a magnetic knife strip there turns unused wall space into a functional display. Knives stay within arm's reach, drawers free up, and the clean metal strip adds a subtle industrial edge to the kitchen.
It's one of those small swaps that makes cooking feel smoother without sacrificing style.
A magnetic strip keeps your most-used knives visible and accessible, so you're not digging through a drawer every time you need to chop an onion. The strip itself is slim and unobtrusive, blending into the backsplash like a modern accent line. For an extra layer of practicality, add a few colorful magnetic hooks beneath it to hold measuring spoons or small tongs.
The look is streamlined, the workflow improves, and the whole setup feels intentional rather than cluttered.
Best Materials
Stainless steel strips are the most common and resist rust well. For a warmer feel, look for a wooden magnetic strip—often walnut or bamboo—that adds texture against tile. If your backsplash is metal or glossy, a matte black strip creates contrast without competing.
Layout Tip
Mount the strip about 6 to 8 inches above the countertop, within easy reach of your prep zone. Keep it away from the stove to avoid heat and grease buildup. If you have a long backsplash, consider two shorter strips spaced apart instead of one continuous bar.
Finishing Touch
Pair the strip with a small wooden cutting board propped nearby and a ceramic jar for spatulas. This creates a cohesive little station that feels styled, not just stored. The magnetic hooks underneath can hold a garlic press or microplane for extra convenience.
5. Under-Shelf Baskets for Extra Storage
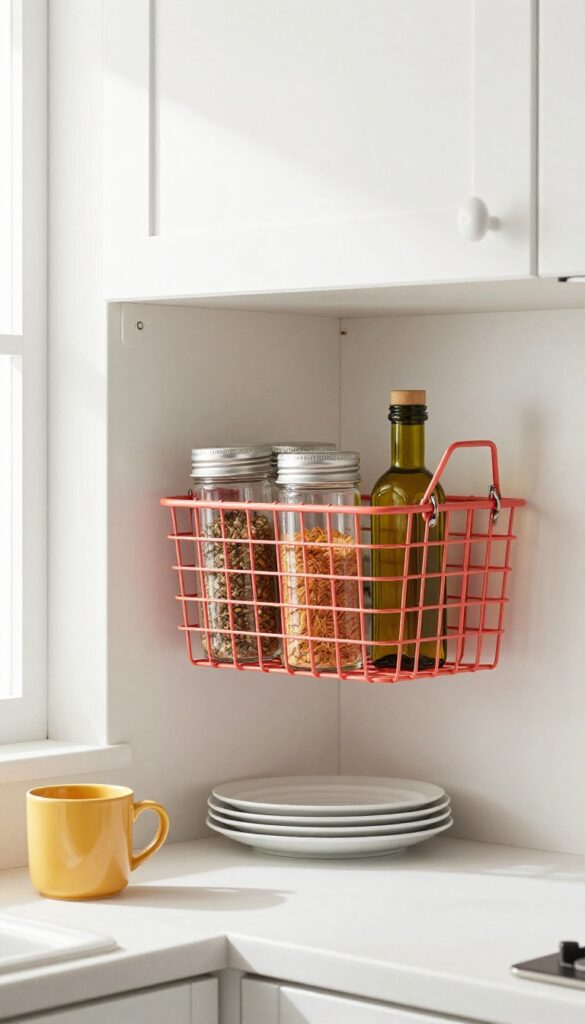
Upper cabinets are prime real estate, but what about the space underneath your shelves? That often-neglected gap is perfect for clipping on wire baskets. They hold spices, tea bags, or small gadgets, instantly doubling your storage without stealing counter space.
For a playful Toca Boca-inspired touch, choose baskets in a bold contrasting color like coral or mustard yellow against white shelving.
Under-shelf baskets are a no-brainer for small kitchens or anyone who needs more room for daily essentials. They slide onto existing shelves with hooks or brackets, so there's no drilling or permanent installation. Use them to store items you reach for often—think olive oil, vinegar, or your favorite mug.
The visual effect is tidy and layered, with baskets adding texture and color right where you need them.
Best Materials And Colors
- Wire baskets with a powder-coated finish are durable and easy to clean. For a Toca Boca vibe, go for bright, saturated hues like teal, red, or lemon yellow against neutral shelves. Alternatively, black or bronze baskets offer a more grounded, industrial look that still feels playful.
- Avoid plastic baskets—they can look cheap and don't hold up well near heat or moisture.
Where To Place Them
Clip baskets under upper cabinets near the stove for spices and oils, or under open shelves near the coffee station for pods and stirrers. In a pantry, they're perfect for holding snack packs or spice blends. Keep them within easy reach—baskets under a sink cabinet can store cleaning brushes, but make sure they don't block plumbing.
Styling And Finishing Touch
Group two or three baskets side by side for a cohesive look, and fill them with items in matching containers (like uniform spice jars or cloth tea bags). Leave a little breathing room between baskets so the shelf doesn't feel overcrowded. Add a small trailing plant on top of the shelf to soften the industrial feel and draw the eye upward.
6. A Drawer for Cutting Boards and Baking Sheets
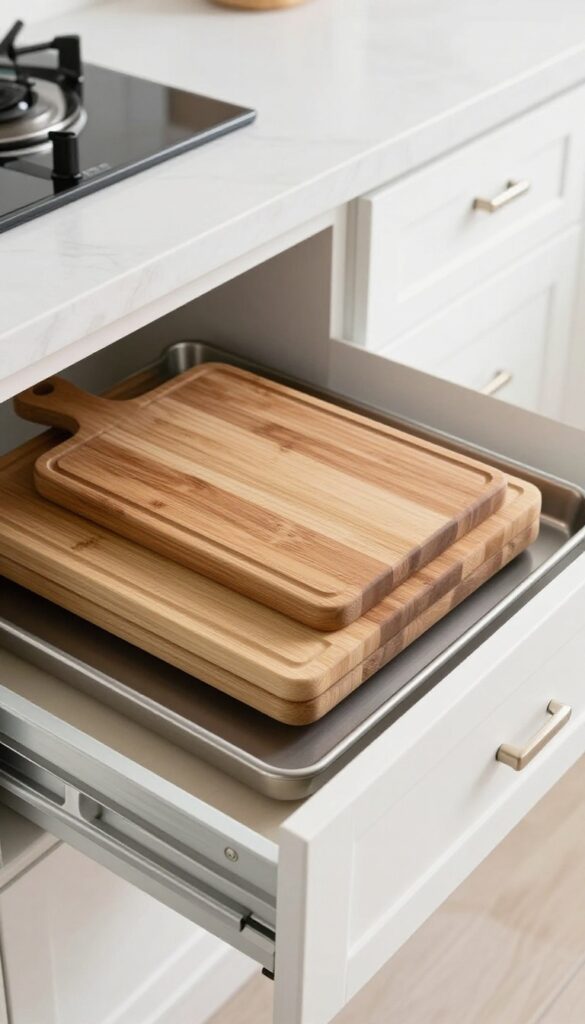
Deep drawers are a kitchen workhorse, but they often become a jumbled mess of mismatched lids and random gadgets. Designating one specifically for cutting boards and baking sheets transforms it into a highly functional station. The key is vertical storage—keeping everything upright so you can slide out exactly what you need without playing a game of 52-card pickup with your sheet pans.
This setup channels the playful yet organized spirit of a Toca Boca kitchen, where everything has its place but still feels lively and accessible.
Start by choosing a deep drawer near your oven or prep zone. Measure the height to ensure it can accommodate your largest baking sheet or cutting board. Install adjustable wooden dividers or metal tension rods to create slots that hold each piece upright.
This prevents items from leaning, sliding, or getting lost behind one another. For a polished look, line the drawer with a non-slip liner or cedar sheets to protect your tools and add a subtle scent. The result is a drawer that opens to reveal a tidy, color-coordinated lineup—think warm wood cutting boards and sleek stainless steel trays standing at attention, ready for action.
Best Materials
Opt for natural wood or bamboo dividers to keep the look warm and inviting, matching the Toca Boca aesthetic. Metal tension rods work well for a more industrial vibe. Inside the drawer, use a soft rubber or cork liner to prevent boards from slipping and to absorb any moisture.
Layout Tip
Arrange items by frequency of use: place your most-used cutting board and go-to baking sheet in the front slots. Group similar sizes together—small boards for fruits and herbs in one section, large boards for roasts in another. This makes grabbing the right tool almost instinctive.
Finishing Touch
Add a small drawer insert for knives or kitchen shears at the front edge, so everything you need for prep is in one pull. A slim compartment for parchment paper rolls or silicone baking mats keeps the drawer fully stocked without clutter.
7. Hanging Fruit Basket from the Ceiling
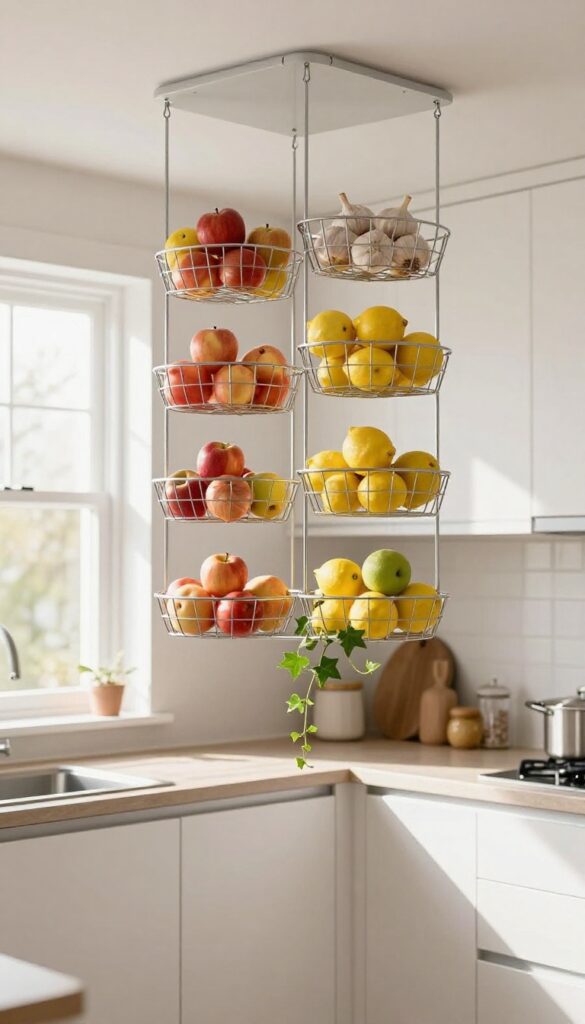
Ceilings are often overlooked for storage, but a hanging fruit basket changes that. Suspending a multi-tiered wire basket from above keeps onions, garlic, and fruits fresh while freeing up precious counter space. It adds a playful, airy feel to the kitchen, drawing the eye upward and making the room feel larger.
A hanging fruit basket is a smart storage solution that also serves as decor. Choose a black or copper wire basket for a modern touch, or go with a natural rattan version for warmth. Hang it over an island, near a window, or in a corner away from direct heat.
The key is to keep it accessible but not in the way. Layer in a few small pots of herbs on the lower tiers for added greenery and function.
Best Placement
Hang the basket over a kitchen island or a prep area where you can easily grab produce. Avoid placing it directly above the stove or sink, where steam and heat can spoil fruits. A spot near a window with indirect light works well for most produce.
Styling Tip
- Mix colors and textures for visual interest. Place bright apples, lemons, or oranges alongside earthy onions and garlic. The contrast makes the basket a focal point.
- Add a small trailing plant like ivy on the bottom tier for a soft, organic touch.
Installation Note
Use a sturdy ceiling hook anchored into a joist or use a toggle bolt for drywall. Ensure the basket is securely fastened and can hold the weight of your produce. A swivel hook allows easy access to all sides.
8. Pull-Out Pantry in a Narrow Gap
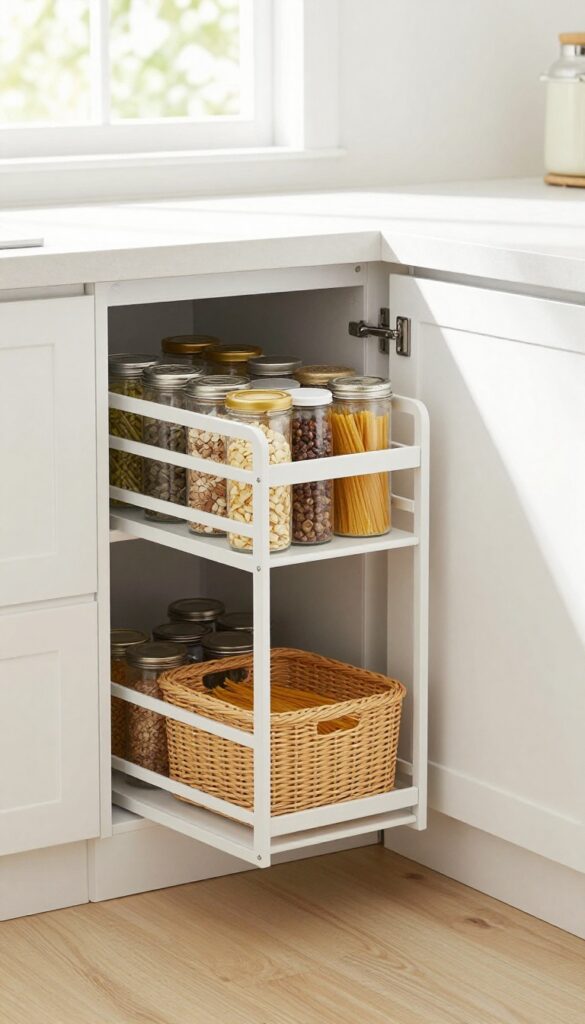
That awkward slim space between your fridge and the wall, or next to a tall cabinet, can actually become one of the most functional spots in your kitchen. Instead of letting it collect dust or random bottles, install a pull-out pantry rack that slides out smoothly to reveal neatly organized cans, spices, and pantry staples. It's the kind of clever storage hack that makes you feel like you've gained an extra cabinet without any major renovation.
A pull-out pantry turns a dead zone into a hardworking storage column. The rack itself is typically a narrow metal frame with adjustable shelves that attach to a sliding mechanism. You can customize the height between shelves to fit tall olive oil bottles or short spice jars.
The best part? Everything is visible at a glance, so you won't forget about that can of beans hiding in the back. This idea works especially well in galley kitchens or any layout where counter and cabinet space is tight.
Best Placement
Look for gaps as narrow as 6 inches wide. Common spots include the space beside the refrigerator, between the stove and a wall, or next to a base cabinet. Measure the depth too — you want the rack to slide out fully without hitting an obstacle.
What To Store
- Use the pull-out for lightweight, everyday items. Canned goods, dry pasta, snack packs, and condiment bottles work well. Avoid heavy glass jars or large bags of flour, as they can make the slide mechanism harder to pull.
- Group similar items together for quick grabbing.
Styling Tip
Keep the look clean by using matching baskets or bins on the shelves. Woven or clear acrylic containers add texture while keeping small items from tumbling. Label the front of each bin if you want that ultra-organized Toca Boca vibe.
9. Color-Coded Container System on Counter
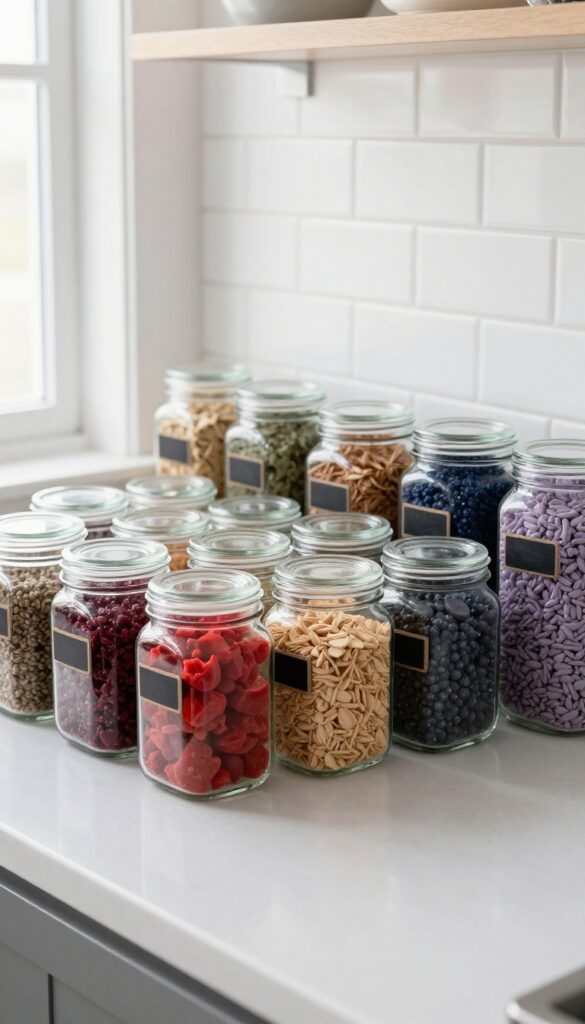
Open shelving and clear jars have become a kitchen staple, but there's a way to take that look further without losing function. By grouping dry goods in color-coded containers right on the counter, you get a tidy, rainbow-like display that feels straight out of a playful Toca Boca world. The trick is choosing containers that are both practical and visually cohesive, so the counter stays usable while doubling as a cheerful focal point.
This idea works best on a stretch of counter near the prep zone or coffee station, where you can grab ingredients without crossing the kitchen. Start with clear glass or BPA-free plastic jars in uniform shapes—square or round with airtight lids. Then assign a color family to each jar: red for pasta and tomato-based items, yellow for grains and oats, green for herbs and teas, blue for snacks, and so on.
The rainbow effect is subtle but intentional, and it makes finding what you need almost instant. Label each jar with a simple chalkboard or vinyl tag for extra clarity, and keep the arrangement tight so it doesn't eat into prep space. A small tray underneath can catch any drips and unify the look.
Best Colors
Stick to a palette of 5–7 colors that naturally appear in your pantry: red, orange, yellow, green, blue, purple, and neutral. Avoid neon or overly saturated shades—think muted tomato red, ochre, sage, and navy. This keeps the rainbow playful but still grown-up enough for a real kitchen.
Storage Tip
Use square or rectangular jars instead of round ones—they pack together without wasted gaps and make the row look more intentional. Measure your counter depth first so the jars don't overhang or block outlets.
Finishing Touch
Add a small plant or a wooden spoon crock at one end to break up the line of jars. This keeps the display from feeling too rigid and adds a natural texture that balances the glossy glass.
10. Corner Lazy Susan for Deep Cabinets
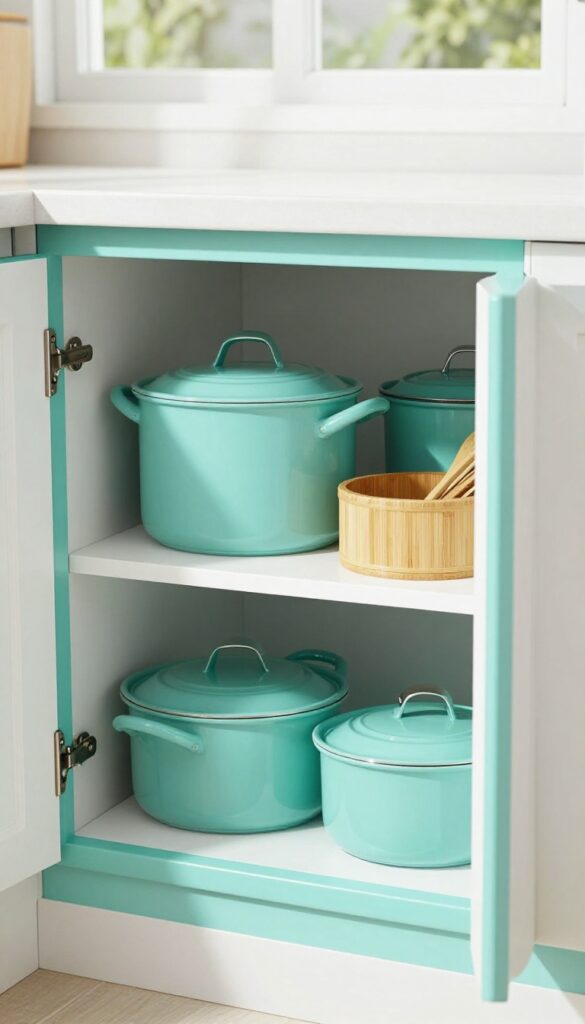
That dark corner cabinet where cookware goes to disappear? A lazy Susan turns it into one of the most functional spots in your kitchen. Instead of stacking pots and lids in a frustrating tower, you get a spinning surface that brings everything front and center.
Choose a bright turntable—like a cheerful turquoise or sunny yellow—so every time you open the door, there's a hidden pop of color waiting.
Corner cabinets often become black holes for mismatched lids and rarely used bakeware. A lazy Susan changes that by making every inch accessible. The circular design lets you store taller pots on one side and smaller pans on the other, with room for lids along the edge.
When you need something, just give it a spin. No more kneeling down and blindly reaching into the abyss. The best part?
You can pick a turntable in a glossy finish that reflects light, making the cabinet feel bigger and brighter. For a cohesive look, match the turntable color to your kitchen's accent shade—like a soft mint green that ties into your backsplash or a bold coral that echoes your counter stools.
Best Materials
- Look for a sturdy plastic or bamboo lazy Susan with a non-slip surface. Plastic versions are lightweight and easy to clean, while bamboo adds warmth and a natural texture. Avoid wire racks, as small items can slip through.
- A raised lip around the edge is a smart feature—it keeps bottles and jars from sliding off when you spin it fast.
Storage Tip
- Group similar items together on the turntable. Keep everyday pots on one side and less-used specialty pans on the other. Use small bins or dividers to separate lids, measuring cups, or spice jars.
- This way, you're not just spinning a jumble—you're spinning a perfectly organized system.
Finishing Touch
Add a small LED puck light inside the cabinet above the lazy Susan. It illuminates the contents instantly, so you can see everything at a glance. The light also makes the bright turntable color pop, turning a practical storage fix into a delightful little surprise every time you open the door.
11. Wall-Mounted Spice Rack with Clear Jars
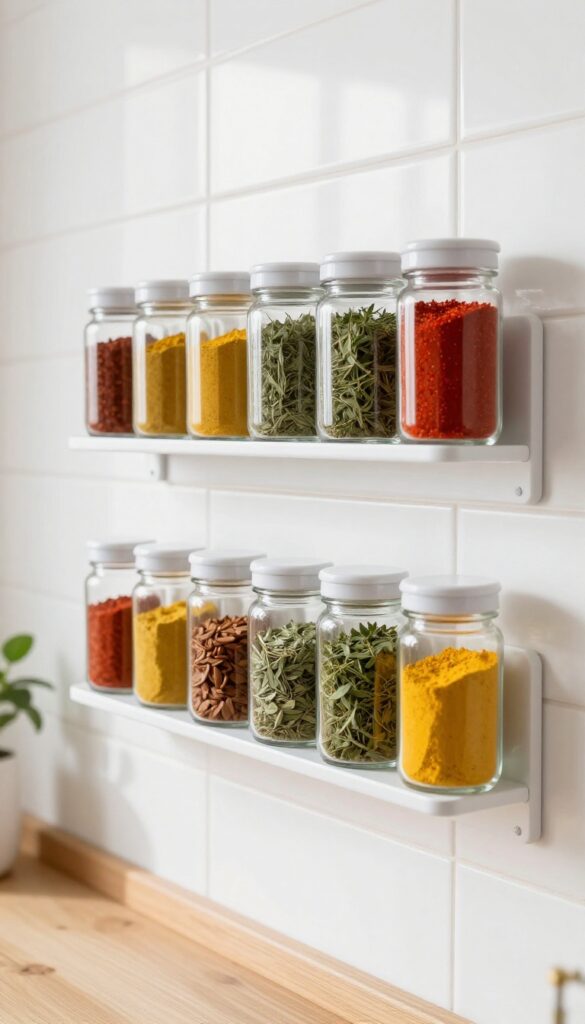
A wall-mounted spice rack with clear jars is one of those small upgrades that makes a big visual and functional difference. Instead of digging through a crowded drawer or hunting for that jar of cumin behind the paprika, everything is right there in plain sight. The clear jars turn your spice collection into a tidy, graphic display that feels intentional rather than cluttered.
It's especially handy in a Toca Boca-inspired kitchen where every inch of counter space is precious and you want things to feel open and airy.
Mounting a narrow spice rack on the wall or inside a cabinet door saves drawer space and adds a neat, graphic element to the kitchen. The key is using uniform clear jars with labels so the rack looks curated, not chaotic. This approach works well above a prep area, next to the range, or even on the side of a cabinet.
The visual rhythm of identical jars lined up creates a sense of order that makes the whole kitchen feel more put together.
Best Location
The most practical spot is on the wall between the counter and upper cabinets, ideally near your main cooking zone. If wall space is tight, the inside of a cabinet door works just as well—just make sure the jars are shallow enough to close the door fully. Avoid placing the rack directly above the stove where heat and steam can affect the spices.
Jar And Label Tips
Choose small glass jars with airtight lids and a uniform shape—round or square both work, but stick to one style for consistency. Labels should be clear and easy to read from a distance; a simple handwritten tag or a printed sticker on the lid works great. For a cleaner look, use white labels with black text or go for a minimalist chalkboard label.
Styling And Finishing Touch
To keep the rack from looking too utilitarian, pick a finish that complements your hardware—black metal for a modern vibe, brass for warmth, or white for a seamless blend. Arrange the jars by frequency of use or by color for an extra visual pop. A small tray underneath can catch any stray spills and makes the setup feel more intentional.
FAQ
Can these ideas work in a small apartment kitchen?
Absolutely. Many of these ideas, like rolling carts, pegboards, and under-shelf baskets, are designed to maximize small spaces without permanent changes.
Do I need to paint my kitchen to get the Toca Boca look?
Not necessarily. Small pops of color through accessories, containers, or a single accent wall can capture the playful vibe without a full renovation.
How do I keep open shelving from looking cluttered?
Stick to a cohesive color palette for dishes and containers. Use baskets or bins to group smaller items, and leave some breathing room between objects.
Are magnetic knife strips safe?
Yes, when properly installed. Choose a strong strip and mount it securely away from children's reach. Keep knives clean and dry to maintain grip.
What if I don't have a corner cabinet for a lazy Susan?
You can use a lazy Susan on an open shelf or inside a standard cabinet to organize spices, condiments, or small jars.
Conclusion
Bringing a touch of Toca Boca into your kitchen doesn't mean sacrificing practicality. These storage-smart ideas prove that playful design and everyday function can coexist beautifully. Start with one or two changes that fit your space best, and watch your kitchen become more organized and inviting.
Remember, the goal is to make your kitchen work for you—with a little extra personality along the way. Whether you add a rolling cart or a hanging fruit basket, each small tweak brings you closer to a space that feels both efficient and joyful.