13 Kitchen Range Ideas That Make the Stove Area Shine
The area around your stove gets a lot of action, but it doesn't have to look purely functional. With a few thoughtful touches, you can turn that spot into something that feels intentional and inviting. And the best part?
Most of these ideas are totally doable over a weekend. Whether you're renting or own your home, there's a range of options that won't require a full renovation. From swapping out hardware to adding a fresh coat of paint, small changes can make a big visual impact.
The key is to keep things practical—after all, this is a high-traffic zone. In this list, you'll find 13 ideas that balance style with everyday use.
1. Add a Peel-and-Stick Tile Backsplash
Peel-and-stick tile has come a long way from the cheap, plasticky options of the past. Today's versions mimic everything from handmade subway tile to natural stone, and they install in a fraction of the time. For the wall behind your range, this is a weekend project that delivers instant character without the dust, grout, or contractor.
A peel-and-stick backsplash is the perfect solution if you want a fresh look behind your stove but aren't ready to commit to a full tile job. The best part? You can change it out whenever your style evolves.
Focus on patterns that add visual interest without competing with your countertops—think subtle herringbone, classic brick lay, or a soft geometric repeat. Stick to matte finishes for a more sophisticated feel, and avoid high-gloss options that can show every speck of grease.
Best Colors And Patterns
- Neutral tones like warm white, soft gray, or pale beige keep the space airy and timeless. For a bolder statement, try a muted terracotta or deep navy. Patterns like herringbone or hexagon add texture without overwhelming the eye.
- If your countertops are busy, go for a solid or simple repeat. If they're plain, a more intricate pattern can become the focal point.
Installation Tips
- Clean the wall thoroughly and let it dry completely before you start. Measure and plan your layout to avoid awkward cuts near the range hood. Use a utility knife and a straightedge for clean edges.
- Press each tile firmly, especially around the edges, to prevent peeling later. For extra durability, seal the edges with clear silicone where the backsplash meets the countertop.
Finishing Touch
Once installed, add a slim metal trim piece at the top edge for a polished look. Choose a finish that matches your hardware—brass, chrome, or matte black. This small detail makes the peel-and-stick read like real tile and keeps the transition to the wall clean.
2. Install a Pot Filler Faucet
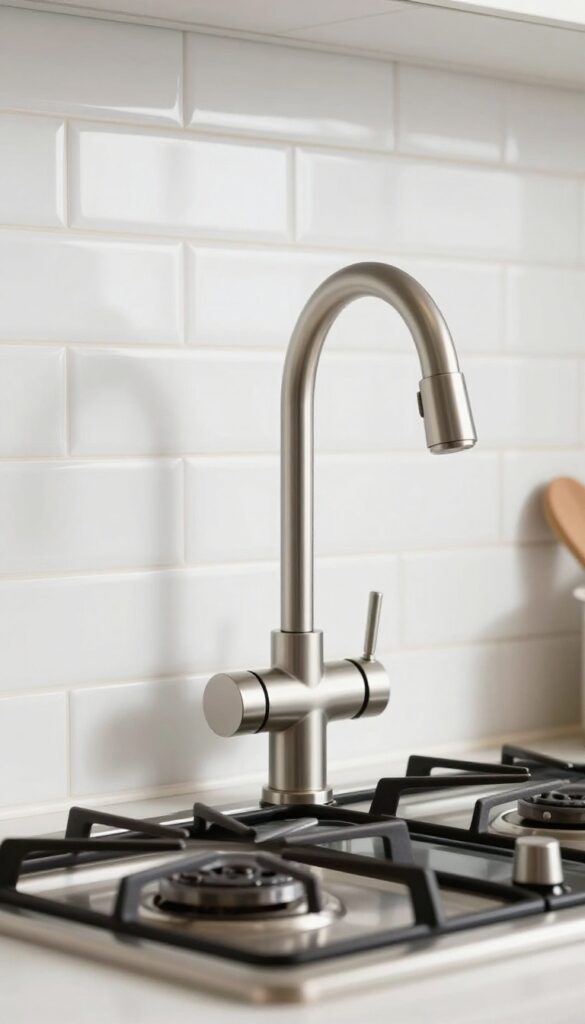
A pot filler faucet mounted right above the stove is one of those upgrades that feels both luxurious and genuinely useful. It eliminates the need to lug a heavy, water-filled pot from the sink to the burner, which is a small but real quality-of-life improvement. Beyond the practicality, it adds a polished, professional look to your cooking zone that instantly elevates the whole kitchen.
For a weekend-refresh project, adding a pot filler doesn't have to mean a full renovation. Many models can be installed by a plumber in a few hours, especially if you already have access to the wall behind the stove. The visual payoff is immediate: a sleek, articulated arm that folds away when not in use, keeping the area clean and uncluttered.
It's a smart choice for anyone who wants a high-end feel without tearing out cabinets.
Best Finishes For A Seamless Look
- Choose a finish that complements your existing faucet and hardware. Brushed nickel and matte black are popular for a modern, understated look, while polished chrome or brass can add a touch of warmth. If your kitchen leans industrial, go for stainless steel.
- The key is to match or coordinate with your sink faucet so the two feel like a set.
Placement And Reach Considerations
Position the pot filler so it swings comfortably over your largest pot, typically centered on the stove and about 8 to 10 inches above the burner grate. Make sure the arm extends far enough to reach the back burners without straining. A double-jointed arm offers more flexibility and is worth the extra cost for serious cooks.
Styling The Wall Behind It
- Since the pot filler draws the eye, treat the backsplash behind it as a focal point. A simple subway tile in a herringbone pattern or a slab of marble-look quartz creates a clean backdrop. If your budget is tight, a peel-and-stick tile with a subtle texture works well for a weekend project.
- Keep the area around the faucet clear of decor so it remains functional and visually crisp.
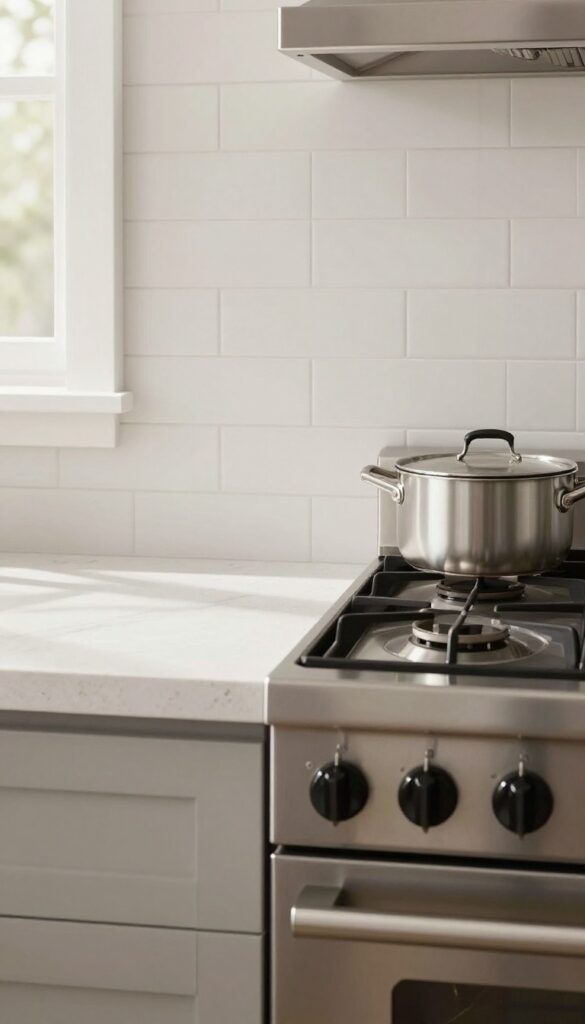
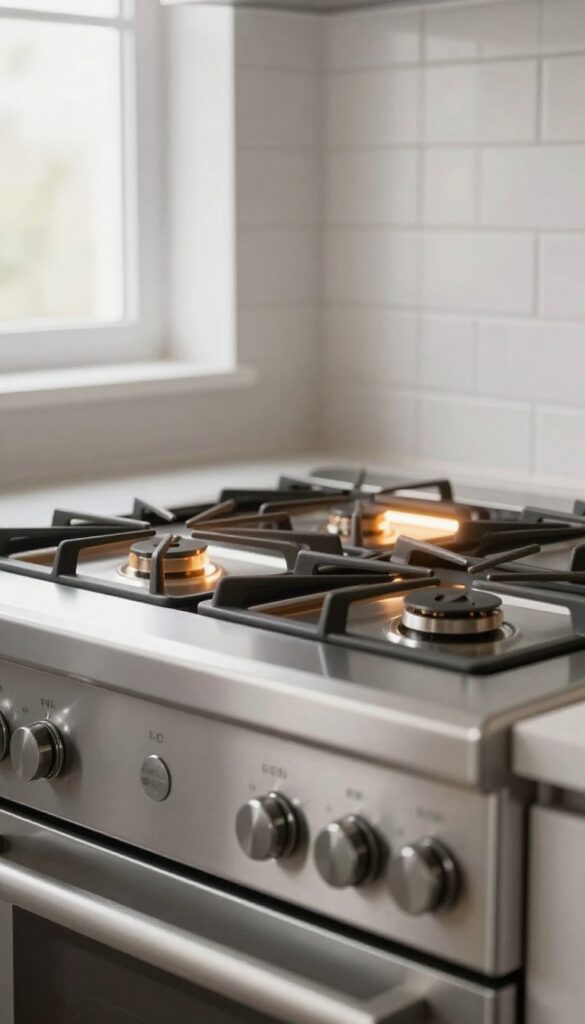
3. Swap Out Range Knobs for a Modern Look
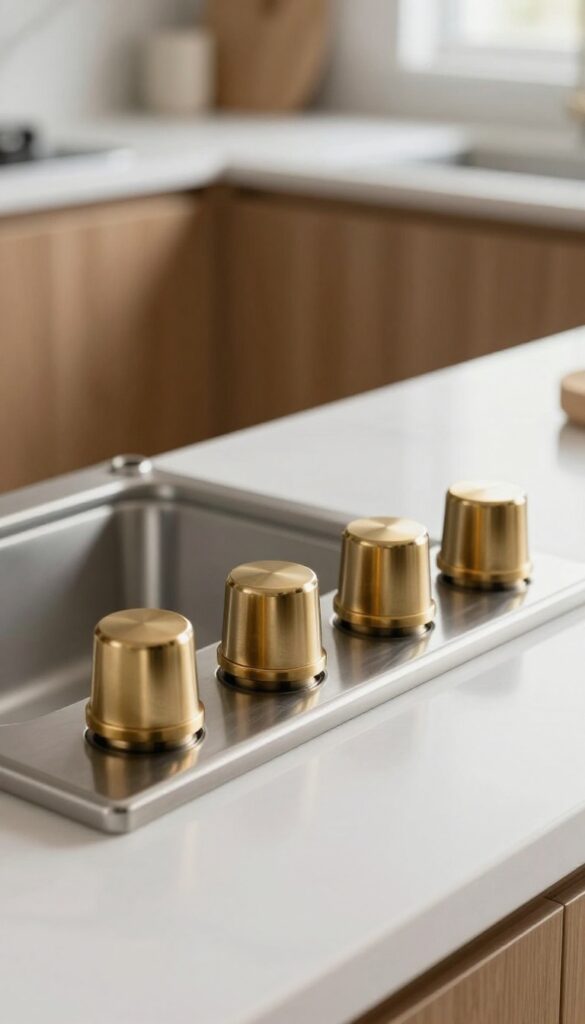
Sometimes the smallest swap makes the biggest visual dent. Your range knobs are something you touch every single day, but they probably blend into the background without a second thought. Replacing those standard plastic or chrome knobs with something more intentional—like brushed brass, matte black, or ceramic—can shift the whole personality of your stove area.
It’s a quick, low-cost upgrade that feels surprisingly satisfying, especially when you’re in the middle of a weekend refresh and want instant results without any tools or mess.
The beauty of this idea is how little effort it takes. Most range knobs simply pull off, so you can measure the stem size (usually D-shaped or round) and order replacements online. No drilling, no wiring, no calling a handyman.
Within five minutes, your range can go from builder-grade to boutique. It’s the kind of detail that catches your eye every time you walk into the kitchen, but in a subtle, “something looks better but I can’t quite place it” way.
Best Materials To Try
- Brushed brass adds warmth and a hint of vintage charm, especially against white or black ranges. Matte black feels sleek and modern, blending in seamlessly with dark appliances or stainless steel. Ceramic knobs with a glossy finish bring a clean, classic look that works well in farmhouse or cottage-style kitchens.
- Just make sure the material is heat-resistant and easy to grip—you’ll be turning these on and off daily.
Small-space Styling Tip
- In a compact kitchen, every surface counts. Matching your new knobs to your cabinet hardware or faucet finish creates a cohesive look that makes the whole room feel more intentional. If you have open shelving nearby, pull the same finish into a small utensil crock or a set of measuring spoons for a coordinated vignette.
- It’s a tiny detail that ties the space together without adding clutter.
Budget-Friendly Swap
- You don’t need to spend a lot to get a big effect. A set of four knobs can cost under $20 on most home decor sites. Look for universal-fit options that include adapters for different stem sizes.
- If you’re renting, keep the original knobs in a drawer so you can swap them back before moving out. That way you get the upgrade now without losing your deposit later.
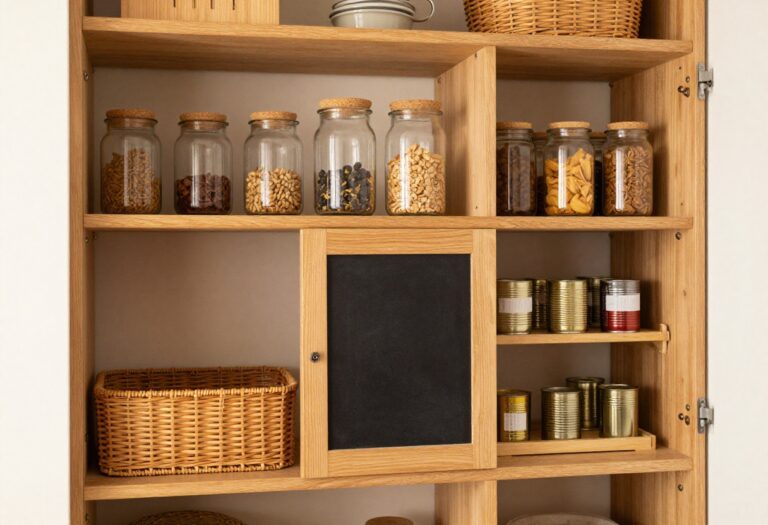
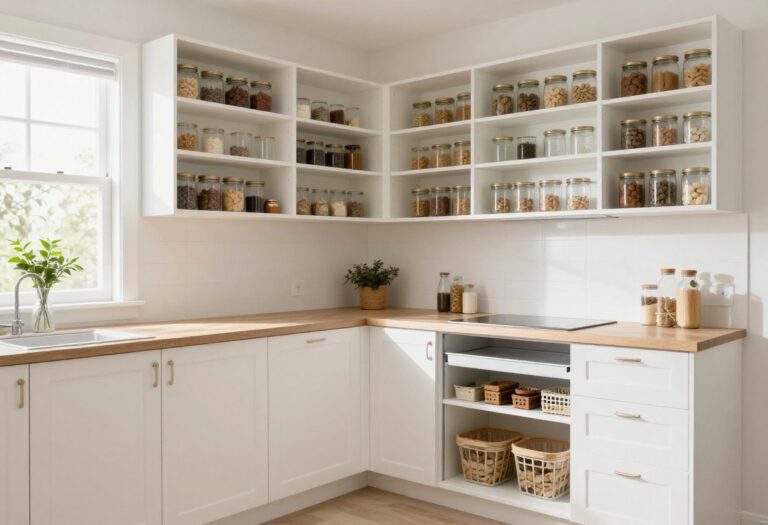
4. Create a Magnetic Spice Rack on the Range Hood

Your range hood is probably one of the most underused vertical surfaces in the kitchen. Attaching magnetic spice tins to its side turns that blank metal into a functional, space-saving storage spot. It keeps your most-used spices right where you need them—above the stove—without cluttering the counter or taking up drawer space.
Plus, it adds a tidy, industrial-chic look that feels intentional and smart.
Magnetic spice racks are a weekend-refresh dream: no drilling, no permanent changes, just strong magnets and metal tins. The key is choosing tins that are uniform in size and shape for a clean, organized appearance. Stick to a cohesive color scheme—black, white, or copper lids work well—and arrange them in a neat row or grid.
This idea shines in small kitchens where every inch counts, but it also works in larger spaces as a stylish way to keep spices visible and accessible. The visual effect is streamlined and modern, with the spices becoming part of the decor rather than clutter.
Best Materials
- Look for tin containers with strong magnetic backs or use adhesive magnetic sheets on regular tins. Metal range hoods are ideal, but if yours is stainless steel, test the magnet strength first. For a cohesive look, choose tins with a matte finish or a uniform color—avoid mixed patterns that can look messy.
- Glass jars with magnetic lids are another option if you prefer to see the spices, but they require careful labeling to stay organized.
Layout Tip
- Arrange spices in order of use frequency: keep salt, pepper, and your go-to seasoning at eye level, and place less-used ones higher or lower. A single row works best for narrow hoods, while wider hoods can accommodate two rows. Leave a small gap between tins for easy grabbing.
- If your hood has a curved side, use smaller tins that conform to the shape.
Finishing Touch
- Add a small magnetic strip on the side of the hood to hold a kitchen timer or a pair of scissors. This creates a mini command center that complements the spice rack. Keep the area around the hood clear of other items to let the magnetic display stand out.
- A matching set of tins with chalkboard labels adds a personalized, polished feel.
5. Hang a Pot Rack Above the Stove
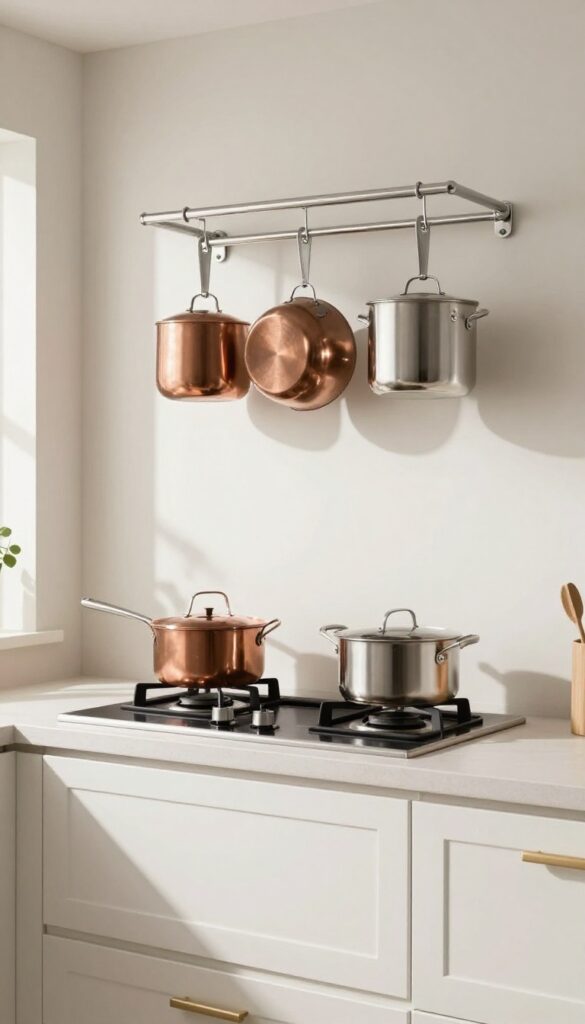
If your upper cabinets are stuffed with pots and pans, it might be time to look up. A hanging pot rack turns that empty airspace above your stove into prime real estate. It keeps your most-used cookware within arm's reach and adds a warm, professional feel to the kitchen.
Whether you go with a sleek stainless steel bar or a rustic wrought iron circle, this is one of those weekend projects that makes a noticeable difference without requiring a full renovation.
A pot rack does double duty: it clears out cabinet clutter and becomes a design feature. The visual weight of hanging pans adds texture and depth, especially in kitchens with neutral backsplashes or simple cabinetry. For a weekend-refresh friendly update, you can install a ceiling-mounted rack in an afternoon with basic tools.
Just make sure it's securely anchored into a ceiling joist—safety first. The key is to choose a rack that complements your kitchen's existing hardware and finishes. If you have brushed nickel faucets, a matching rack ties the look together.
For warmer, farmhouse-style kitchens, black or copper racks add character.
Best Materials For Longevity
- Stainless steel is the most durable and easiest to clean—just wipe it down when you wipe the stove. Wrought iron or matte black racks hide grease better and suit rustic or industrial kitchens. Copper adds warmth but requires occasional polishing to keep its shine.
- Avoid cheap chrome plating that can peel over time.
Layout Tip: Keep It Balanced
Hang the rack so it's centered over the stove, not extending too far to either side. This keeps the visual weight balanced and prevents bumping your head when leaning over the cooktop. If your stove is against a wall, a wall-mounted rack or a shorter ceiling rack works better than a wide one.
Storage Tip: Group By Use
- Hang your most-used pans—skillet, saucepan, stockpot—on the rack. Reserve the hooks for pieces you grab daily. Group similar sizes together for a tidy look.
- Use S-hooks to add extra hanging space for ladles or spatulas. This keeps the rack functional, not just decorative.
6. Add a Decorative Range Hood Cover
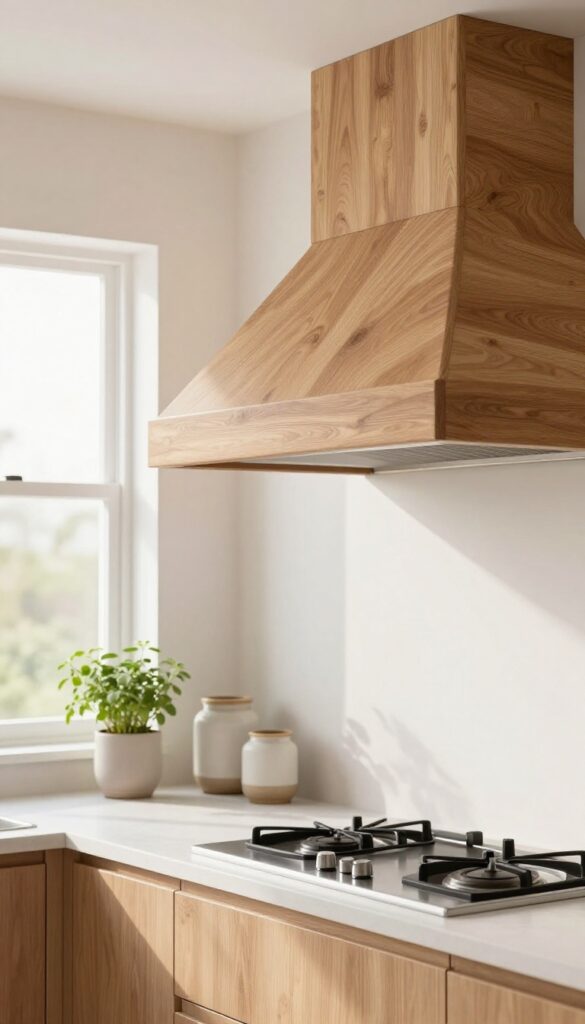
A plain metal range hood does its job but rarely adds personality. Wrapping it in a custom cover—or building a simple wood surround—changes the entire feel of the stove area. Suddenly that functional box becomes a sculptural element that anchors the kitchen.
Best of all, this is a weekend-friendly project that doesn't require a full renovation. Even a basic plywood frame with a fresh coat of paint can make your range look like it was designed by a pro.
A decorative range hood cover turns an overlooked necessity into a design statement. Whether you choose a ready-made insert or DIY a wood surround, the effect is immediate: the stove area feels intentional and polished. For renters or those on a budget, peel-and-stick panels or a simple shelf above the hood can create a similar look without permanent changes.
The key is to match the cover's style to your kitchen's overall vibe—clean lines for modern spaces, reclaimed wood for farmhouse, or a bold color for a pop of personality.
Best Materials
- Wood is the most popular choice because it's easy to work with and can be painted or stained to match existing cabinets. MDF offers a smooth, affordable surface for a painted finish. For a more rustic look, reclaimed barn wood adds texture and warmth.
- If you want something lighter, consider beadboard or shiplap for a classic cottage feel. Metal or stone veneers work for industrial or modern kitchens but require more skill to install.
Sizing And Proportion
- The cover should extend a few inches beyond the hood on each side and sit flush with the bottom of the cabinets above for a built-in look. A good rule of thumb: the width should match or slightly exceed the cooktop below. Height-wise, aim to cover the entire hood and any visible ductwork.
- If your ceiling is high, you can run the cover all the way up to create a dramatic chimney effect.
Finishing Touch
- Add a floating shelf just above the hood cover to display a few small items—a ceramic pitcher, a small plant, or a set of copper measuring spoons. This draws the eye upward and softens the transition between the hood and the wall. Keep the shelf shallow (6-8 inches deep) and the decor minimal to avoid a cluttered look.
- A single trailing plant like pothos adds life without overwhelming the space.
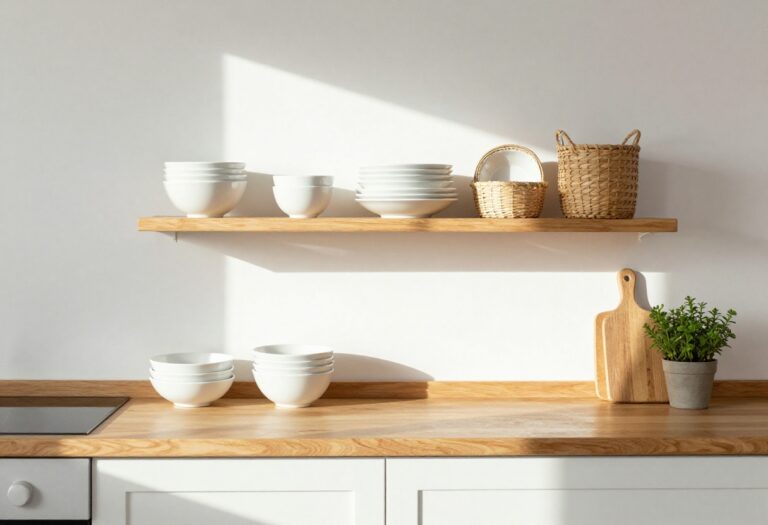
7. Use a Stove Backguard as a Display Shelf
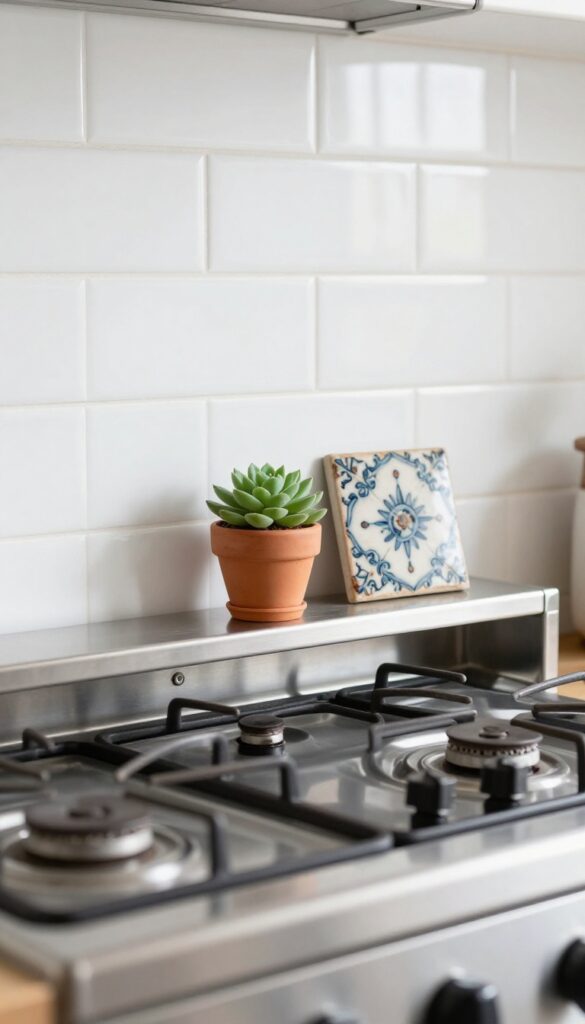
That narrow ledge right behind your burners often goes unnoticed, but it's prime real estate for adding a little personality. Instead of letting it collect dust or random splatters, treat it like a mini shelf. A small leaning piece of art, a salt cellar, or a tiny succulent can make the stove area feel intentional without getting in the way of cooking.
The backguard is the perfect spot for a quick weekend refresh—no drilling, no shopping, just a few thoughtful objects that make you smile every time you cook. Because it's right behind the flames, keep things heat-safe and easy to wipe down. Think ceramic, metal, or glass, not plastic or delicate wood.
The goal is charm without clutter, so limit yourself to two or three small items. A little vignette here adds warmth and makes the stove feel like part of the room, not just an appliance.
Best Materials
- Stick with materials that can handle a little heat and occasional grease. Unglazed ceramic, stoneware, metal, and glass are all good choices. Avoid anything flammable like paper, fabric, or thin wood.
- A small cast-iron salt cellar or a ceramic spoon rest doubles as decor and function.
Styling Tip
Keep the arrangement low and snug against the backguard so it doesn't block your view of pots or get knocked over. Lean a small art card or a vintage tile against the backsplash, then place a tiny plant or salt cellar in front. This creates depth without taking up much space.
Small-space Fix
- In a tiny kitchen, every inch counts. Use the backguard to hold your most-used spatula or a magnetic spice tin. A slim ceramic spoon rest can also live here, keeping counters clear.
- Just make sure everything is easy to grab and won't interfere with cooking.
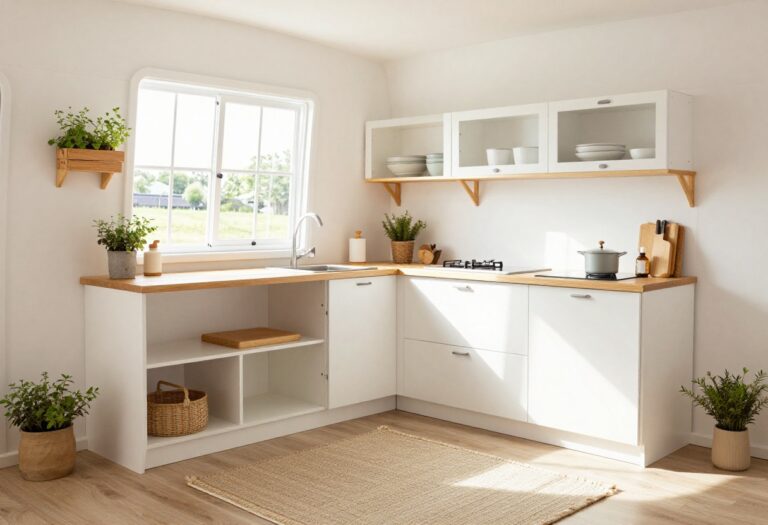
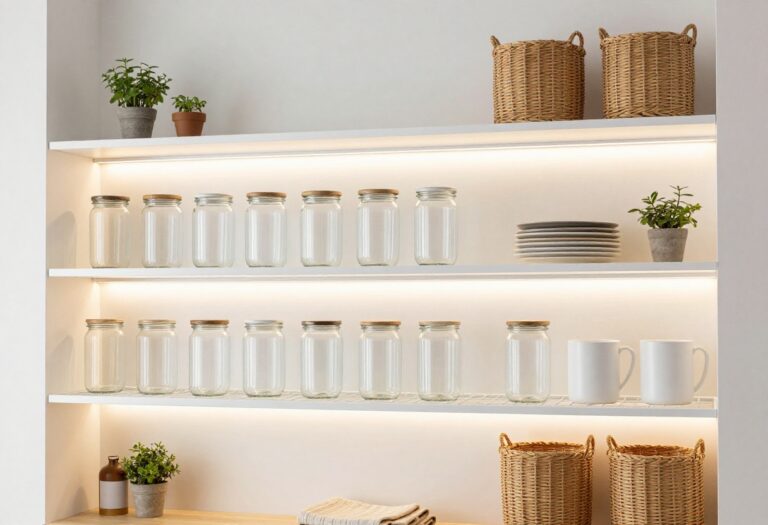
8. Install Under-Cabinet Lighting Above the Range
Even the most beautiful range can get lost in the shadows when overhead lighting is all you have. Under-cabinet lighting changes that completely. It casts a warm, focused glow right where you need it most—over the stove and prep area—making cooking safer and instantly upgrading the entire look of your kitchen.
The best part? It's one of those weekend projects that delivers a huge visual payoff without tearing anything out.
LED strip lights are the go-to choice here because they're slim, energy-efficient, and easy to install with adhesive backing. You can buy plug-in versions that simply stick under the cabinet and plug into an outlet, or hardwired options if you're comfortable with basic electrical work. Dimmable strips give you control over the mood—bright for meal prep, softer for late-night snacks.
Stick to warm white (2700K–3000K) for a cozy feel, or cool white (3500K–4000K) if you want a crisper, more modern look. The light will bounce off your backsplash and make the tile or stone texture pop, so choose a color temperature that complements those materials. Placement matters: mount the strip near the front edge of the cabinet so the light hits the counter and range, not the wall behind them.
Best Materials
For a seamless look, go with LED strip lights that have a silicone diffuser to soften the beam and eliminate harsh dots. If you prefer a more decorative approach, puck lights in brushed nickel or matte black add a subtle hardware-like detail. For a super clean finish, consider linear LED bars that sit flush with the cabinet bottom—they look built-in and professional.
Lighting Tip
- Don't forget to install a dimmer switch. It's a small addition that makes a huge difference in versatility. Being able to dim the lights from bright task mode to a gentle glow turns your kitchen into a welcoming space even after dinner is done.
- If hardwiring a dimmer feels too involved, plug-in dimmable LED strips with a remote are a perfectly good alternative.
Small-space Fix
In a kitchen with limited counter space, under-cabinet lighting visually expands the area by eliminating dark shadows. It makes the counter feel wider and the backsplash more prominent. If you have open shelving above the range, consider adding a small LED strip under the bottom shelf to keep the stove area bright without a bulky fixture.
9. Place a Heat-Resistant Mat or Rug in Front
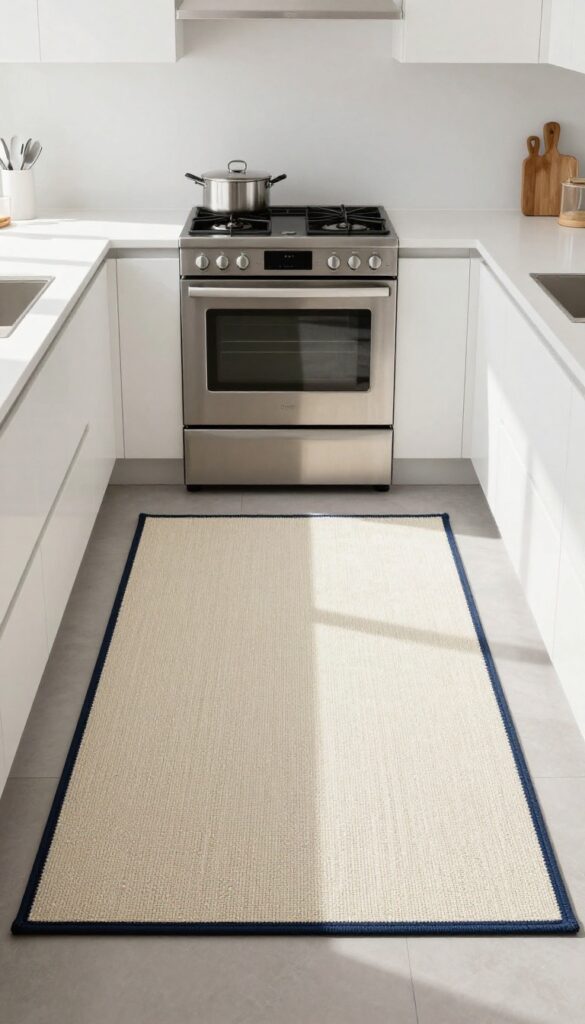
A rug in front of the stove might sound like a hazard, but today's heat-resistant mats are designed exactly for this spot. They add a soft landing for your feet during long cooking sessions and bring a pop of color or pattern to an otherwise utilitarian area. The trick is choosing a material that can handle the occasional splash or dropped utensil without soaking up stains.
A heat-resistant mat does double duty: it protects your floor from spills and makes the cooking zone feel more intentional. Look for flat-weave cotton, recycled plastic, or rubber-backed options that lie flat and won't slide around. Patterns like stripes, geometric prints, or subtle textures can tie into your existing decor without overwhelming the space.
Keep the mat small enough to fit between the stove and counter or island—usually 20" x 32" or similar—so it doesn't become a tripping hazard. Washable is key; toss it in the machine when it gets grimy, and it'll look fresh again in no time.
Best Materials For Safety And Style
- Cotton flat-weave rugs are breathable, washable, and lie flat without curling at the edges. Recycled plastic mats (like those from Ruggable or Mohawk) are stain-resistant and virtually indestructible. Avoid shag or high-pile rugs near the stove—they trap crumbs and are harder to clean.
- A low-profile design with a non-slip backing is the safest bet.
Color And Pattern Tips
Since the stove area is often a neutral zone, this mat is a chance to introduce a bold accent. A deep navy or terracotta runner can anchor the cooking zone, while a subtle checkerboard or stripe adds visual interest without clashing. If your kitchen leans warm, try a mat with rust or ochre tones; for cool-toned spaces, go with sage or slate.
Placement And Maintenance
- Center the mat directly in front of the stove, extending just past the width of the burners. Leave a few inches of bare floor on each side so it doesn't interfere with cabinet doors. Wash it every couple of weeks—more often if you cook daily.
- Spot-clean spills immediately to prevent stains from setting.
10. Style a Small Tray for Oils and Seasonings
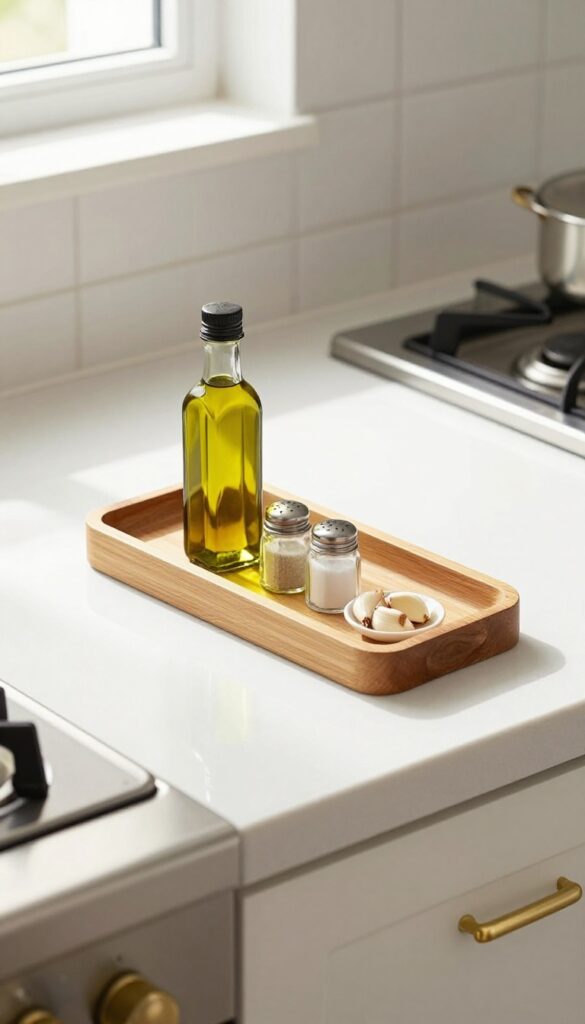
Counter space near the stove gets messy fast. Bottles crowd together, labels face different directions, and the whole area can feel chaotic. A small tray pulls everything together into one tidy, intentional zone.
It’s a quick weekend refresh that makes your everyday cooking setup feel curated, not cluttered.
Choose a tray that fits the gap between your stove and backsplash or on an adjacent counter. A narrow wood or metal tray works well—just wide enough for your olive oil, salt, pepper, and maybe a small dish for garlic or chili flakes. Group items by frequency of use so you’re not digging for the soy sauce mid-stir-fry.
The tray defines the space and catches any drips, keeping your counter clean. For a cohesive look, pick a tray that echoes other finishes in your kitchen—warm brass if your hardware is brass, or a sleek black metal if you have matte black accents. This small styling move makes the stove area feel more polished without a full renovation.
Best Materials
- A wooden tray adds warmth and softens the hard surfaces of a kitchen. Bamboo or acacia are durable and water-resistant with a light seal. For a modern edge, try a slim metal tray in brass, copper, or matte black.
- Avoid ceramic or glass near the stove—they can crack from heat or get knocked over easily.
Layout Tip
- Place the tray slightly off-center so it doesn’t block your cooking zone. If your stove is near a corner, set the tray on the opposite side. Keep the tallest bottles at the back and shorter jars in front so everything is visible.
- Leave a little breathing room around each item—don’t overcrowd.
Finishing Touch
- Add a small spoon or a mini wooden scoop for salt or sugar. A tiny plant like a succulent or a sprig of rosemary in a test tube brings life to the tray. Just make sure it’s not in the direct line of steam or splatter.
- This simple addition makes the tray feel intentional, not just functional.
11. Add a Slim Rolling Cart for Extra Prep Space
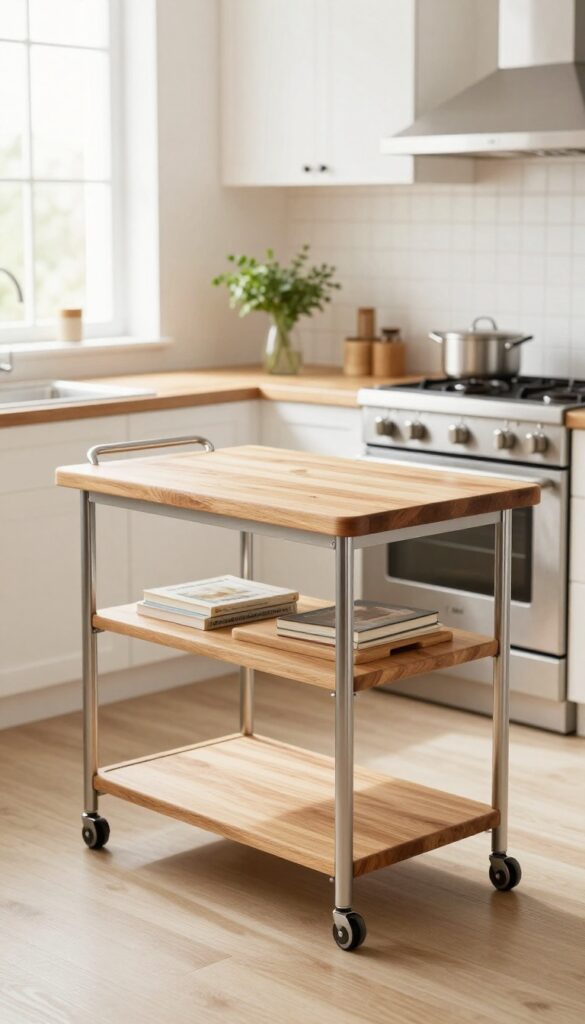
A narrow rolling cart parked next to the range is one of those smart solutions that feels like it was always meant to be there. It slides into tight gaps—between the stove and a wall, or beside an island—and gives you a sturdy surface for chopping, setting down hot pans, or staging ingredients. The best part?
You can wheel it out of the way when you need more floor space, so it never feels permanent or bulky.
The beauty of a slim rolling cart is how it adapts to your cooking rhythm. Use it as a landing zone for pots coming off the burner, or keep your most-used utensils and oils within easy reach. In a small kitchen, it can double as a coffee station or a spot for a microwave.
Look for a cart with a butcher-block top for a warm, natural look that complements most range styles. A lower shelf or drawer adds hidden storage for cutting boards, mixing bowls, or cookbooks. The mobility means you can also roll it to the dining table for serving—a real multitasker that earns its square footage.
Best Materials
- Butcher block is a top pick because it's durable, easy to clean, and adds warmth. Stainless steel is great for a modern, industrial vibe and pairs well with professional-style ranges. For a lighter look, bamboo is sustainable and resists moisture.
- Avoid glass shelves near a stove—they show smudges and can crack with heat.
Layout Tip
Measure the gap between your range and the nearest counter or wall before buying. Leave at least 2 inches of clearance on each side so the cart doesn't trap heat or block airflow. If your range is against a wall, position the cart on the opposite side for a balanced work triangle.
Finishing Touch
Top the cart with a small wooden cutting board that overhangs slightly for extra surface area. Add a few hooks on the side for hanging towels or oven mitts. A slim canister of wooden spoons and a salt cellar keep the look styled but functional.
12. Paint the Range Area Wall an Accent Color
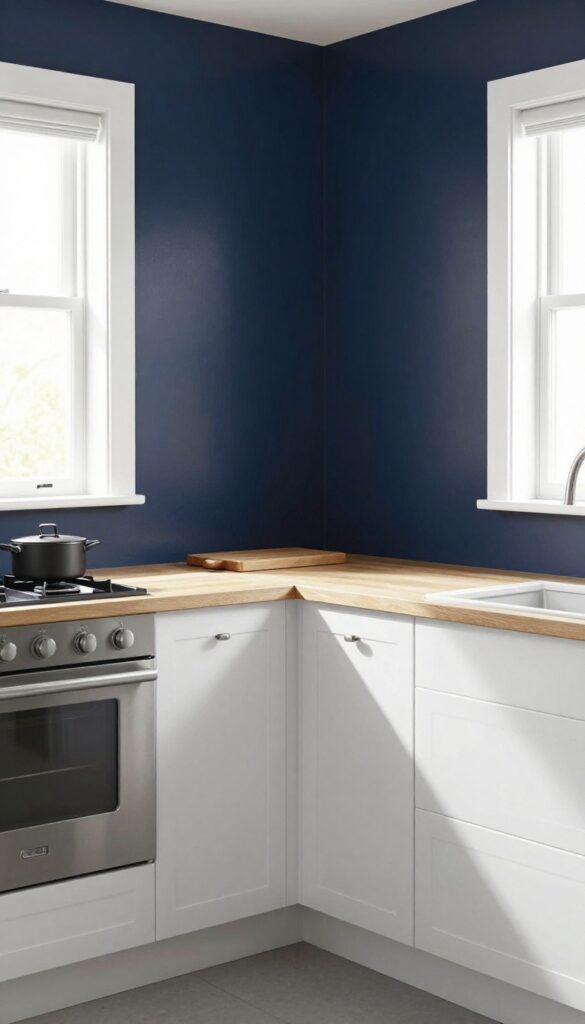
If your stove sits against a plain wall without a backsplash, that empty space is a prime opportunity to add personality without a major renovation. A bold paint color behind the range instantly defines the cooking zone and draws the eye to the heart of the kitchen. It’s a weekend-friendly project that costs next to nothing but delivers a surprising amount of visual impact.
Plus, when you choose a semi-gloss finish, cleaning up splatters is as easy as a quick wipe.
Painting the wall behind your stove is one of the easiest ways to make the range area feel intentional and stylish. It works especially well in kitchens where full tile backsplashes aren’t feasible—whether you’re renting, on a tight budget, or just want a temporary change. The key is picking a color that complements your cabinetry and countertops while standing out just enough to create a focal point.
Deep navy, charcoal, or even a rich olive green can anchor the space without overwhelming it. For a softer look, try a warm terracotta or muted mustard. Just remember to use a semi-gloss or satin paint for durability and easy cleaning.
This trick also helps visually separate the cooking area from the rest of the kitchen, which is especially useful in open-plan layouts.
Best Colors For The Job
- Stick with colors that contrast nicely with your stove and countertops. Dark shades like black, navy, or forest green hide splatters well and create a dramatic backdrop. If your kitchen is small or lacks natural light, a lighter accent like sage green or dusty blue can still make an impact without closing in the space.
- Avoid pure white unless you enjoy frequent scrubbing—it shows every speck of grease.
Prep And Paint Tips
- Clean the wall thoroughly to remove any grease buildup before painting. Use a high-quality primer to ensure even coverage and adhesion, especially if you’re going from a light color to a dark one. Apply two coats of semi-gloss paint for a smooth, wipeable finish.
- Painter’s tape around the stove edges and outlet covers will keep lines crisp.
Finishing Touch
Add a slim floating shelf above the painted area to display a few everyday items like a salt cellar, a small plant, or a favorite cookbook. This draws the eye upward and makes the accent wall feel like a designed feature, not just a painted patch.
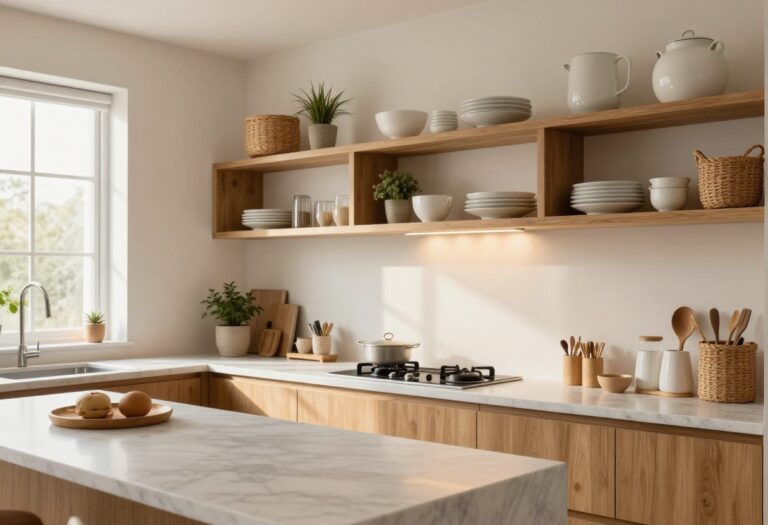
13. Display a Collection of Copper or Brass Cookware
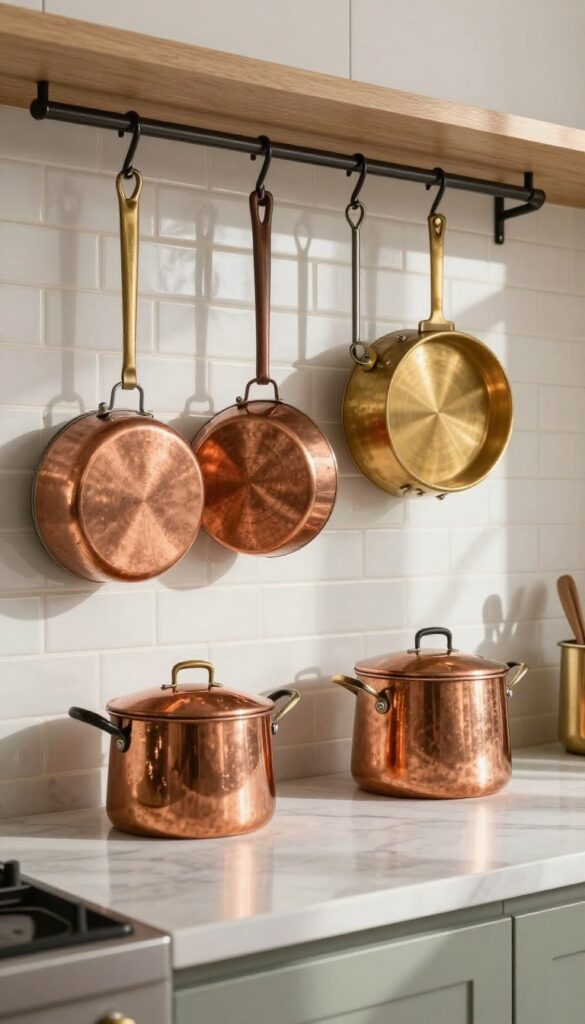
Warm metals like copper and brass bring an instant glow to the kitchen. Hanging a few beautiful pots or pans on the wall or from a rack turns everyday cookware into eye-catching decor. The reflective surfaces catch light and add a cozy, lived-in feel that makes the stove area feel intentional and inviting.
Copper and brass cookware does double duty: it's functional for cooking and stunning as decor. Instead of stashing your best pieces in a cabinet, let them shine. A simple pot rack or a few wall hooks can transform a blank wall into a focal point.
The warm tones pair beautifully with neutral backsplashes, marble countertops, and wood accents. This idea works especially well in kitchens with limited counter space, since it uses vertical real estate. Plus, the patina that develops over time adds character and makes the space feel personal.
Best Metals To Mix
- Stick to copper and brass for a cohesive look, but don't be afraid to mix them. Copper's reddish-orange tone contrasts nicely with brass's golden hue. If you have stainless steel appliances, the warm metals will soften the overall feel.
- Avoid adding silver or chrome pieces to the same display—they can clash with the warm palette.
Hanging Setup Tip
- Install a sturdy pot rack or a set of heavy-duty hooks above the stove or on an adjacent wall. Make sure the rack is securely anchored to studs, as cookware is heavy. Position it low enough to reach easily but high enough to clear your head.
- If you're renting, consider a wall-mounted rail system that's easy to remove and patch.
Small-space Fix
In a tiny kitchen, limit the display to two or three pieces to avoid visual clutter. Choose your most attractive pan or pot—maybe a copper saucepan or a brass skillet—and let it be the star. Hang it alone on a single hook for a minimalist statement that still feels warm and curated.
FAQ
Can I use peel-and-stick tile behind a gas range?
Yes, but make sure the tile is heat-resistant. Most peel-and-stick tiles can handle moderate heat, but keep them at least a few inches away from the burners.
How do I clean a magnetic spice rack on the range hood?
Wipe the tins with a damp cloth regularly. If they get greasy, use a mild degreaser. The magnets should hold securely even with cleaning.
Is it safe to hang a pot rack over a stove?
Yes, as long as it's installed securely into studs and the pots are hung at a safe height—at least 30 inches above the burners.
What kind of rug is safe to put in front of a stove?
Look for rugs made from natural fibers like cotton or wool, or synthetic ones labeled heat-resistant. Avoid shaggy rugs that can trap grease.
Can I paint the wall behind my stove without a backsplash?
Absolutely. Use a semi-gloss or satin finish paint that's easy to wipe clean. Consider a washable paint for high-grease areas.
Conclusion
Updating the area around your stove doesn't have to be a big project. With a few weekend-friendly tweaks, you can make it both more functional and more stylish.
The key is to choose ideas that fit your cooking habits and your home's personality. Whether you add a pop of color, a new shelf, or just a better way to store your spices, each change brings you closer to a kitchen you'll love spending time in.