10 Green and Gold Kitchen Ideas for a Luxe Natural Look on a Budget
Green and gold is a color combo that instantly makes a kitchen feel more refined—like a cozy greenhouse meets a chic boutique hotel. The good news? You don’t need a full renovation or a designer budget to pull it off.
With a few smart swaps and some DIY spirit, you can bring this luxe natural look into your own space without breaking the bank. Think sage cabinets, brass hardware, and leafy accents that feel fresh, not fussy.
Ready to get started? Here are ten ideas that prove style and savings can go hand in hand.
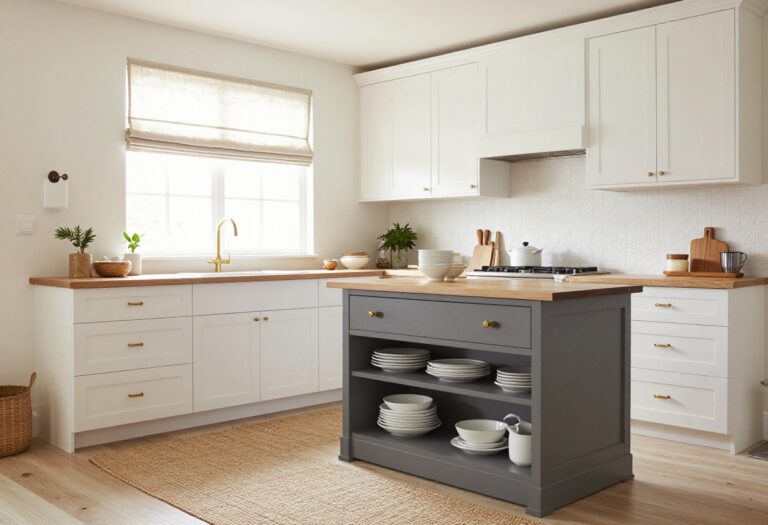
1. Paint Your Lower Cabinets a Soft Sage Green
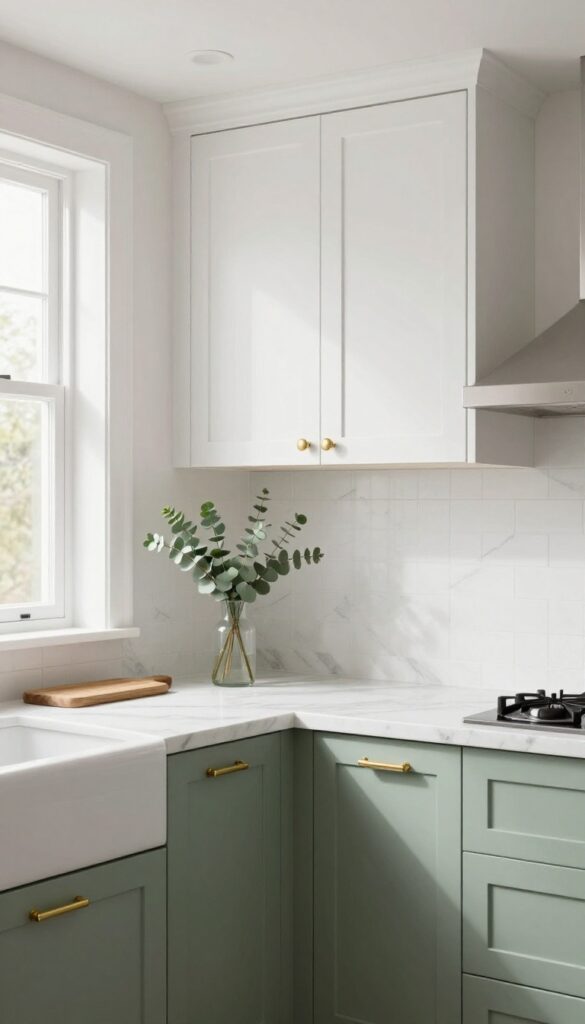
A two-tone kitchen is one of the easiest ways to add personality without a full renovation. By keeping upper cabinets light and painting only the lowers in a muted sage green, you get a grounded, earthy feel that still feels open and airy. This trick works especially well in smaller kitchens where all-dark cabinets might feel heavy, but you still want that touch of nature-inspired color.
Sage green is having a major moment in kitchen design, and for good reason. It pairs beautifully with warm brass or gold hardware, white marble or quartz countertops, and natural wood accents. The key is choosing a sage with enough gray in it so it reads soft and sophisticated, not minty or pastel.
This two-tone approach is also a budget-friendly win: you only need to paint half the cabinets, and you can do it yourself over a weekend. Leave the uppers white, cream, or a light natural wood to bounce light around the room. The contrast adds visual depth and makes the space feel custom without the designer price tag.
Best Colors To Pair
Stick with warm whites like Swiss Coffee or Alabaster for the upper cabinets to keep the look cohesive. For the sage, try Sherwin-Williams 'Sage' or 'Rosemary' – both have enough gray undertone to feel modern. Avoid cool whites or stark brights, as they can clash with the green's warmth.
Hardware And Finishes
- Gold or brass pulls and knobs are the natural partner for sage green. They add a luxe touch that elevates the whole look. For a more industrial vibe, matte black works too.
- Stick with simple, clean shapes so the cabinet color stays the star.
Budget-Friendly Swap
If painting isn't an option, try peel-and-stick vinyl in a sage green finish on just the lower cabinet doors. It's renter-friendly, costs a fraction of paint, and still gives that two-tone effect. Just make sure to clean and measure carefully for a seamless look.
2. Swap Out Cabinet Knobs for Brushed Brass
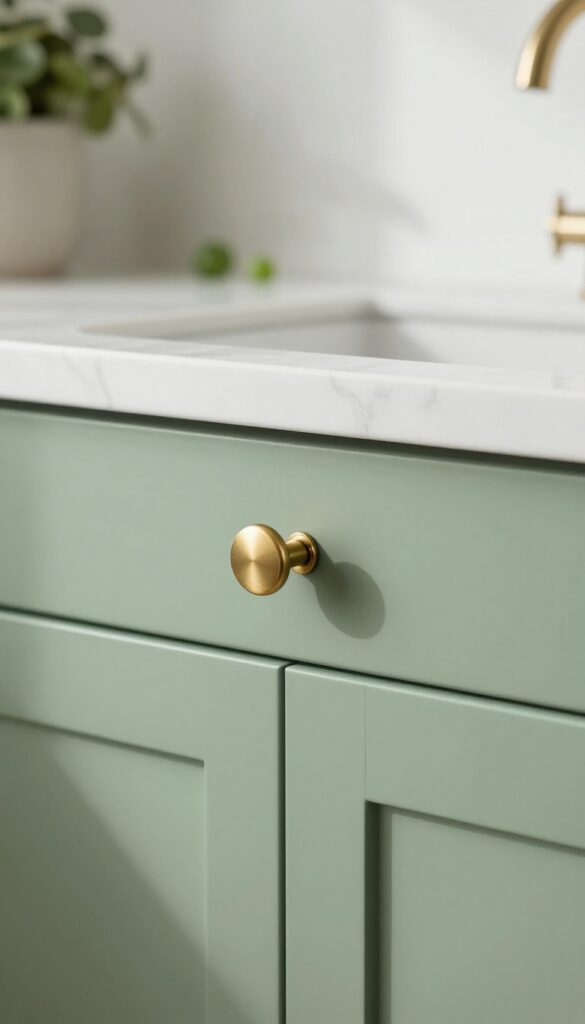
Sometimes the smallest changes make the biggest impact. Cabinet hardware might seem like a minor detail, but it's actually one of the first things your eye lands on in a kitchen. Replacing standard knobs and pulls with brushed brass versions instantly elevates the space, adding warmth and a subtle gleam that plays beautifully against green cabinetry.
The best part? This upgrade costs very little and takes just an afternoon to complete.
Brushed brass has a soft, muted glow that feels both classic and current. It pairs especially well with deep greens like sage, olive, or forest, creating a look that's elegant without being flashy. For a cohesive feel, carry the same finish to your faucet and light fixtures.
If you're on a tight budget, focus on the most visible cabinets—like those on the island or around the sink—and swap the rest later. The transformation is immediate and surprisingly satisfying.
Best Finish To Choose
Look for brushed brass rather than polished or antique brass. Brushed has a satin-like sheen that resists fingerprints and feels more understated. It works with both warm and cool green tones, making it a versatile pick for any kitchen.
Budget-Friendly Swap
- You don't need to replace every knob at once. Start with the most prominent cabinets—like the ones on your kitchen island or the upper cabinets above the sink. Even a partial swap creates a noticeable focal point.
- Buy in bulk online to save, and install them yourself with just a screwdriver.
Styling Tip
To let the brass shine, keep surrounding surfaces clean and uncluttered. Pair with a simple white or marble backsplash to avoid competing finishes. The contrast between the green cabinets and warm gold hardware will feel intentional and polished.
3. Add a Gold-Framed Mirror as a Backsplash Alternative
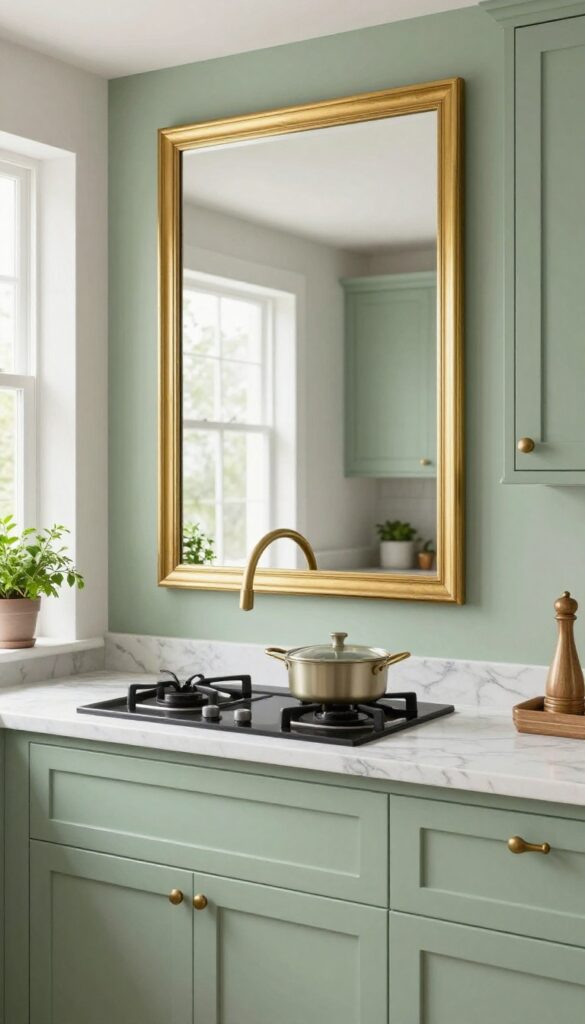
Tiling a backsplash can get expensive fast, especially if you're eyeing those handmade subway tiles or marble mosaics. But what if you could skip the grout and still make a statement? A large gold-framed mirror hung behind your stove or sink does exactly that—it bounces light around the room, visually doubles the space, and adds a touch of glamour without the hefty price tag.
It's unexpected, budget-friendly, and surprisingly practical for a kitchen.
Mirrors aren't just for hallways and bathrooms. In a kitchen, a gold-framed mirror works as a functional backsplash alternative that feels intentional and luxe. The key is choosing a frame with a warm gold finish—brass, antique gold, or champagne tones all pair beautifully with green cabinetry or green accents.
Make sure the mirror is securely mounted with heavy-duty brackets or adhesive strips rated for the weight, and consider using a tempered glass mirror for safety near heat sources. To keep it clean, a quick wipe with glass cleaner and a microfiber cloth does the trick, just like your windows. The result is a stunning focal point that makes your kitchen feel larger, brighter, and more polished.
Best Colors And Finishes
Stick with warm gold tones like brushed brass, antique gold, or rose gold to complement the green palette. A dark green wall behind the mirror creates depth, while lighter sage or mint keeps things airy. Avoid silver or cool-toned metals—they clash with the natural, earthy vibe.
Placement And Safety Tips
Hang the mirror so the bottom edge sits about 6 inches above the countertop to protect it from splashes. Use a mirror with a beveled edge for a refined look, and always secure it with L-brackets or mirror clips rated for at least 20 pounds. For extra safety, choose a lightweight acrylic mirror instead of glass.
Styling The Surrounding Area
Keep the countertop clutter-free to let the mirror shine. Place a small vase of fresh eucalyptus or a single gold candlestick nearby to echo the frame. If your kitchen has open shelves, style them with green glassware or ceramic jars to tie the color scheme together.
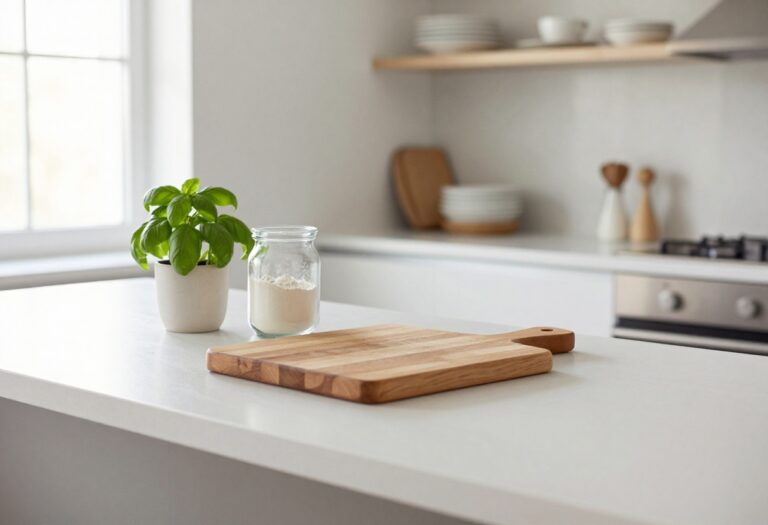
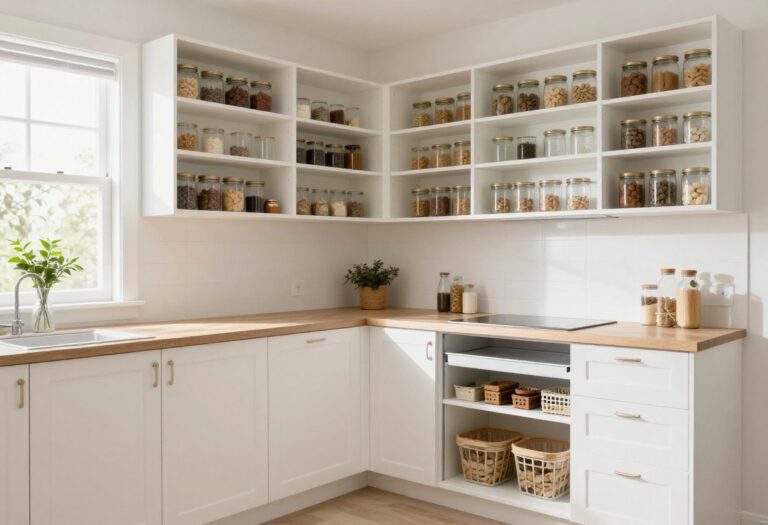
4. Incorporate Open Shelving with Green Accents
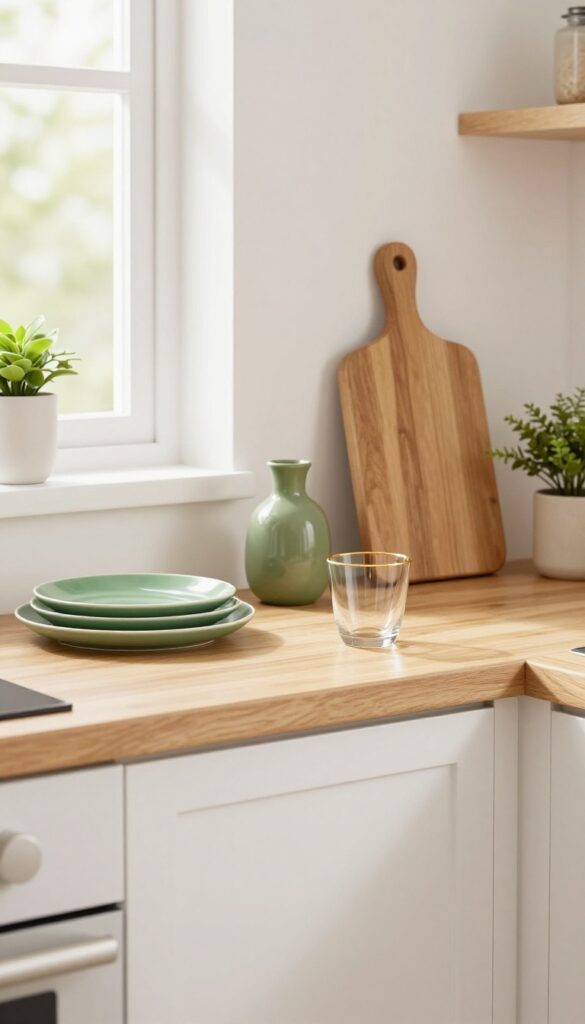
Open shelving is a great way to break up heavy cabinetry and add a personal touch to your kitchen. By focusing on green accents, you can tie the look back to nature without going overboard. The gold trim on glassware and the warm wood of cutting boards create a luxe feel that still feels approachable and budget-friendly.
Install a couple of floating shelves and style them with green dishes, plants, and gold-rimmed glassware. This adds color and shine without a big investment. Mix in wooden cutting boards for warmth and texture.
Best Colors
Stick with sage green, olive, or emerald for dishes and accessories. These shades pair beautifully with warm wood tones and gold accents, creating a cohesive palette that feels both earthy and refined.
Shelf Styling Tip
Group items in odd numbers and vary heights. Place a tall plant on one end, stack a few plates in the middle, and lean a small cutting board against the wall. This creates visual interest without looking cluttered.
Budget-Friendly Swap
You don't need expensive pottery. Thrift stores and discount home goods stores often have green glassware or ceramic pieces. Spray paint old frames or vases in a matte gold for a custom look that costs pennies.
5. Use a Green and Gold Rug to Anchor the Space
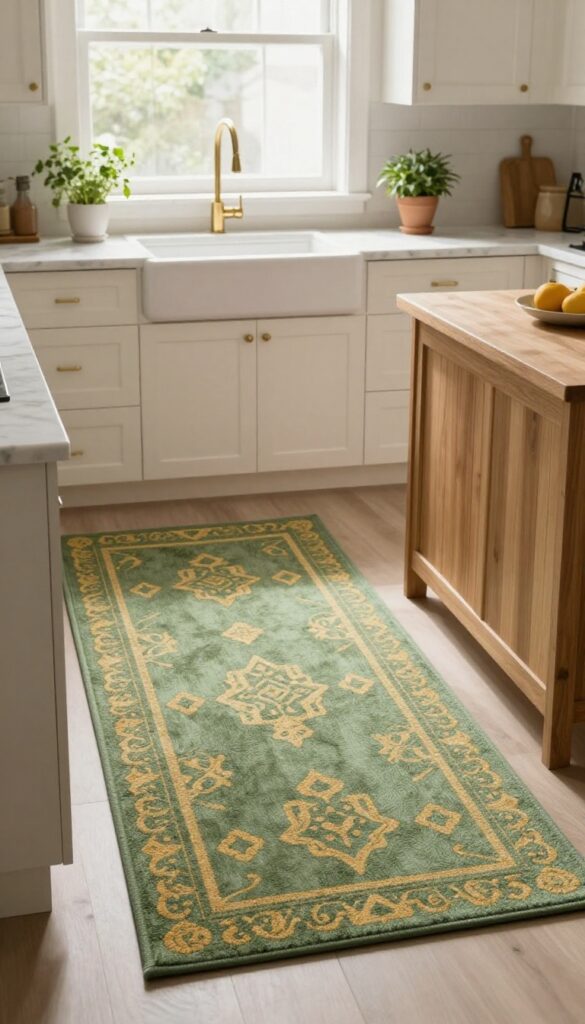
A rug might not be the first thing you think of when planning a kitchen refresh, but it can actually pull the whole room together. A runner or small area rug with a green and gold pattern ties your color scheme into one cohesive look while adding a soft layer underfoot. Since kitchens see a lot of foot traffic and spills, look for washable options that keep things practical.
This is one of those low-commitment moves that lets you test the green-and-gold palette without painting cabinets or swapping out countertops.
A well-chosen rug acts like a foundation for your kitchen’s color story. It visually connects your green cabinets or backsplash with gold hardware or light fixtures, making the whole scheme feel intentional. Plus, it adds warmth and texture to what’s often a hard-surfaced room.
For a budget-friendly approach, skip high-end wool and go for a flatweave or low-pile synthetic that’s easy to clean. Patterns like a subtle trellis, geometric, or botanical print work beautifully—they hide crumbs and minor stains while still looking polished. Place it in front of the sink, stove, or along a long island to define the work zone and make the space feel more inviting.
Best Colors And Patterns
- Stick with shades like sage, olive, or deep emerald for the green, paired with warm gold or brass tones in the pattern. Avoid anything too bright or neon—it can clash with the luxe natural vibe. A faded oriental or a modern abstract print with gold flecks adds interest without overwhelming the room.
- If your kitchen is neutral, a bolder pattern can become the statement piece. For a more subtle look, choose a rug with a gold border and a green center.
Budget-Friendly Swap
- Instead of a custom or high-end rug, look for washable runners from brands like Ruggable or Loloi. They’re affordable, durable, and come in green-and-gold designs that mimic the look of expensive natural fiber rugs. You can also layer a smaller green or gold rug over a larger neutral one to create depth and save money.
- This way, you get the color pop without the splurge.
Placement And Styling Tip
- For maximum impact, place the rug in a high-traffic zone like in front of the sink or stove. Make sure it’s long enough to extend past the work area—at least 2 feet on each side of the sink or stove. If you have an island, a runner along one side can define the prep space.
- Use a rug pad underneath to prevent slipping and add cushioning. And remember, a slightly imperfect placement—like not perfectly centered—can look more relaxed and lived-in.
6. Display Gold Utensils in a Green Ceramic Crock
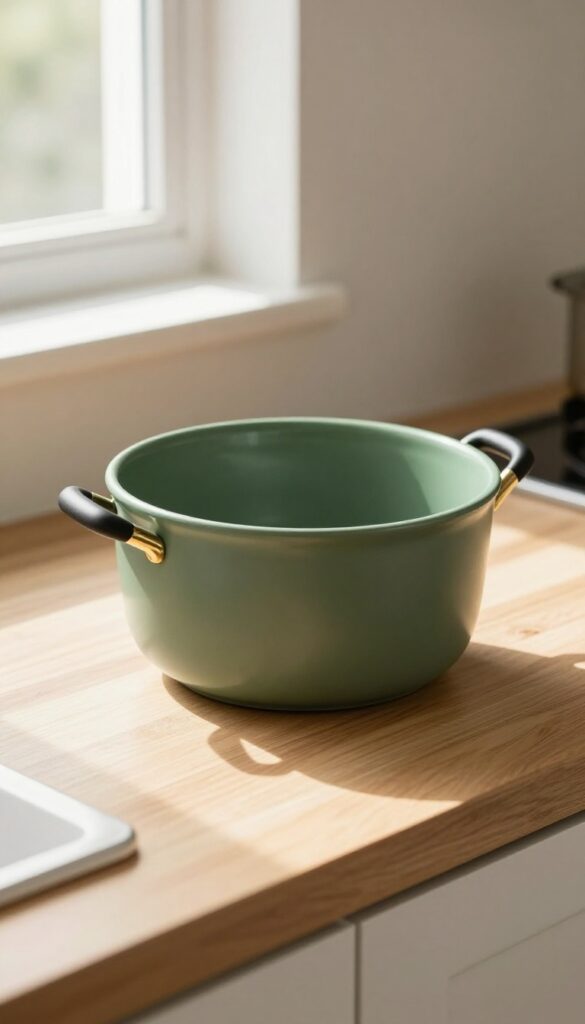
You don't need a full remodel to bring the green and gold trend into your kitchen. Sometimes the smallest swaps make the biggest impact. A simple ceramic crock filled with everyday tools can do double duty: it keeps your counter organized and reinforces your color scheme with zero effort.
The trick is choosing pieces that feel intentional, not accidental. A matte green crock paired with gold-accented utensils instantly reads as curated, even if you picked them up on a budget.
This idea is all about making your daily tools part of the decor. Instead of hiding spatulas and whisks in a drawer, display them proudly. The green ceramic crock anchors the look, while the gold details on the utensils catch the light and add a subtle luxe feel.
It's practical—you grab what you need while cooking—and it keeps your countertops from looking cluttered. Best of all, you can find affordable options at home goods stores or online, so it's an easy win for any kitchen.
Best Colors
- Stick with a deep sage or olive green for the crock—it feels earthy and sophisticated. For the utensils, look for matte black handles with gold ferrules or all-gold metal ends. Avoid shiny bright green or yellow-gold that might clash.
- The contrast between the muted crock and the warm metallic accents is what makes this combo work.
Budget-Friendly Swap
- If you're on a tight budget, start with a plain green crock from a discount store and a set of basic stainless steel utensils. Then add a thin coat of gold spray paint to the handles—just tape off the functional ends. It takes 10 minutes and costs a few dollars.
- You'll get the same high-end look without the price tag.
Styling Tip
- Place the crock near the stove or prep area so it's within arm's reach. To keep it from looking messy, limit the number of utensils to five or six—choose the ones you use most. Stick to a uniform color palette for the handles (gold or black with gold) and avoid mixing in plastic or brightly colored tools.
- A little curation goes a long way.
7. Hang a Pair of Gold Pendant Lights Over the Island
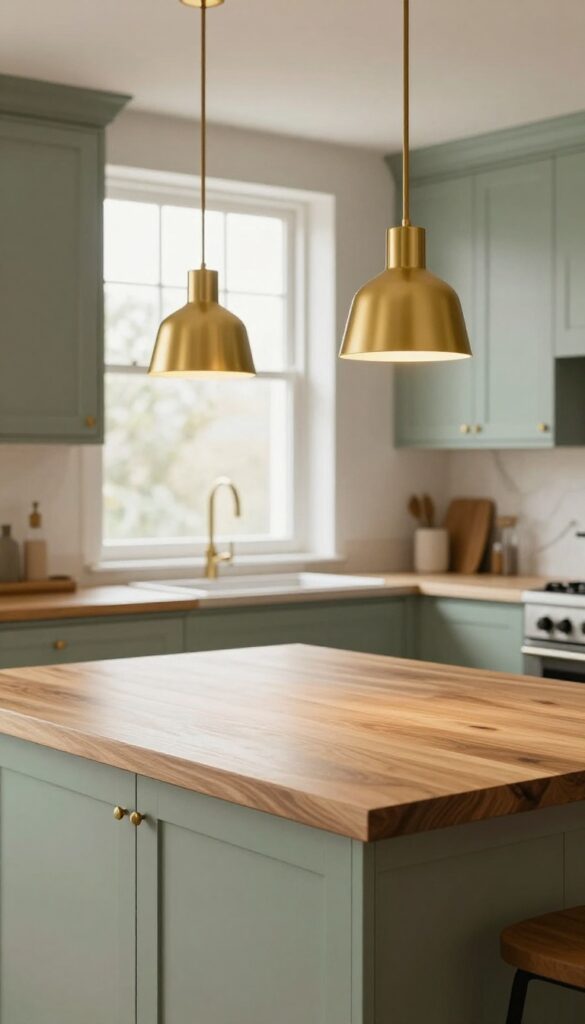
Lighting does double duty in a kitchen—it brightens your workspace and sets the whole mood. Gold pendants, in particular, bring a subtle warmth that plays beautifully with green tones. Whether your kitchen leans sage, olive, or deep emerald, a pair of metallic pendants adds instant polish without a full renovation.
Swap out basic light fixtures for affordable gold pendants. They become a sculptural element and cast a warm glow. Even one statement pendant can elevate the whole kitchen.
Check secondhand stores or online sales for deals.
Best Materials
- Brass and brushed gold finishes work best—they resist tarnish and blend with both modern and farmhouse styles. Look for metal shades with an open bottom to let light spill downward. Avoid shiny, mirror-like finishes that show every fingerprint.
- A matte or satin gold feels more understated and practical for daily use.
Placement Tip
- Hang pendants about 30 to 36 inches above the counter or island surface. For a standard 6- to 8-foot island, two pendants spaced evenly apart create balance. If your island is longer, consider three smaller pendants.
- Keep the bottom of the shades at eye level when seated to avoid glare.
Budget-Friendly Swap
You don't need custom fixtures to get the look. Check Facebook Marketplace, Habitat for Humanity ReStore, or online discount sites for brass pendants under $100 each. Spray painting an old fixture with metallic gold paint is another quick fix—just use a primer made for metal and let it cure fully.
8. Add a Green Marble-Look Backsplash with Gold Grout
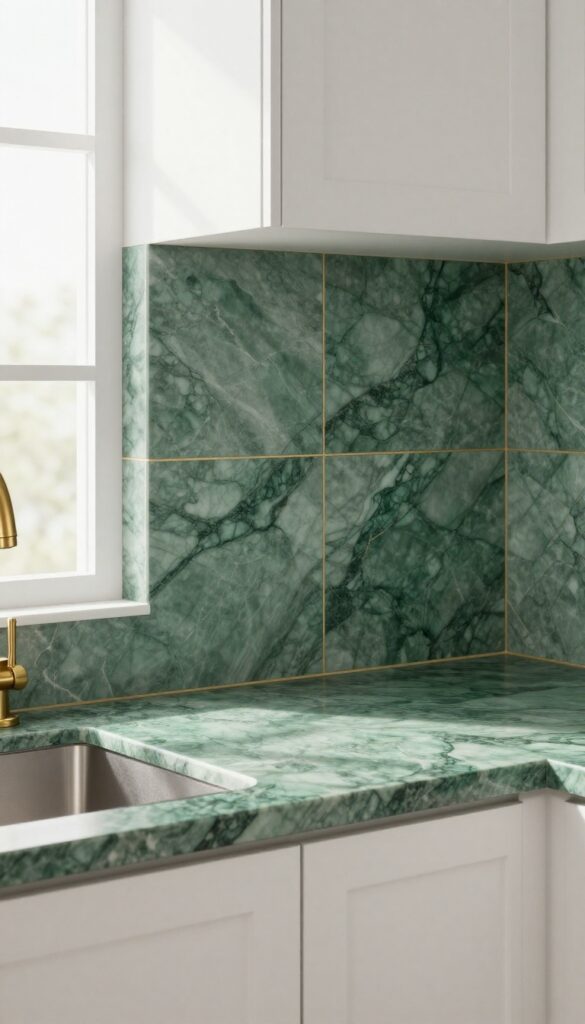
A backsplash is one of those kitchen features that can completely change the room’s personality without a full renovation. Green marble-look peel-and-stick tiles give you that high-end stone vibe without the high-end price tag. Pair them with gold grout, and you get a luxe, cohesive look that ties directly into the gold hardware and fixtures you already love.
This budget-friendly hack is perfect for renters or anyone who wants a dramatic upgrade over a weekend. The tiles are easy to cut and apply, and the gold grout adds just enough shimmer to make the green pattern pop. It’s a practical choice that feels anything but ordinary.
Best Colors
Stick with deep emerald or sage green marble patterns for a rich, natural feel. The gold grout should be a warm, brushed gold tone—not too shiny or yellow. White or light gray cabinets let the backsplash take center stage, while black or dark wood cabinets create a moody, dramatic contrast.
Budget-Friendly Swap
Peel-and-stick tiles cost a fraction of real marble and are renter-friendly. Look for brands with a realistic printed pattern and a slight texture to mimic stone. Gold grout is available in pre-mixed tubes, so you don’t need to mix powder or buy extra tools.
Finishing Touch
Seal the grout lines with a clear grout sealer to protect against stains and moisture. This step keeps the gold color from dulling over time. Pair the backsplash with gold cabinet pulls and a gold faucet for a pulled-together, intentional look.
9. Style Open Shelves with Gold Canisters and Green Plants

Open shelving in the kitchen is a great way to show off your style, but it can quickly look messy if you're not intentional. The trick is to mix materials that feel both polished and relaxed. Gold canisters paired with trailing green plants strike that balance perfectly—they bring a touch of luxury without feeling fussy, and the greenery keeps things fresh and alive.
Group a few gold canisters with trailing green plants like pothos or ivy on open shelves. The mix of metal and living greenery creates a curated, organic feel. Stick to a few pieces to avoid clutter.
This styling works especially well on shelves that are at eye level, so the plants can cascade down and soften the hard lines of the cabinetry. For a budget-friendly approach, look for gold-toned canisters at thrift stores or spray-paint plain ones in a warm metallic finish. The plants themselves are inexpensive and easy to propagate, so you can fill out the look without spending much.
Best Materials
Choose canisters with a warm gold finish—brass or champagne gold works beautifully against green cabinets or neutral backsplashes. For the plants, go with low-maintenance trailing varieties like pothos, ivy, or string of pearls. They thrive in indirect light and are forgiving if you forget to water them occasionally.
Shelf Styling Tip
Keep the arrangement simple: place the canisters toward the back or center of the shelf, and let the plant trail over the front edge. Use odd numbers—three canisters or two plants plus one canister—for a more natural, balanced look. Leave some empty space between items so the shelf doesn't feel crowded.
Budget-Friendly Swap
If real gold canisters are out of budget, try spray-painting glass jars or thrifted metal tins with a gold metallic paint. For the plants, snip a few cuttings from a friend's pothos and root them in water—you'll have a full plant in no time at almost no cost.
10. Paint an Accent Wall in Deep Forest Green
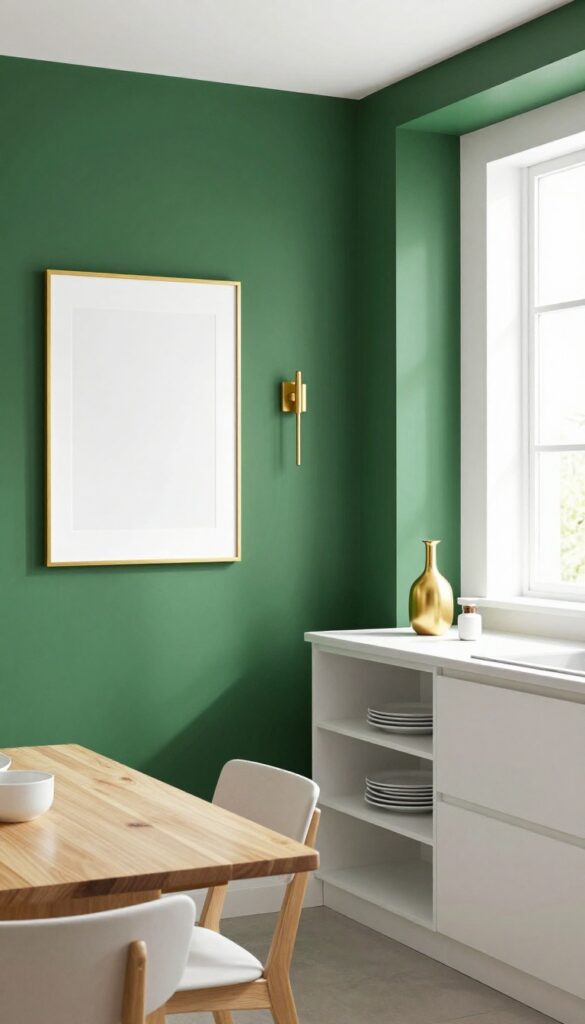
A deep forest green accent wall brings instant drama to your kitchen without a full renovation. The rich, moody hue pairs beautifully with gold accents, creating a luxe natural look that feels both grounded and glamorous. Best of all, it’s a budget-friendly project that can be completed in an afternoon.
Pick the wall that makes the most sense—maybe behind your dining table, next to open shelving, or on a pantry end. The deep green acts like a neutral backdrop, letting gold hardware, light wood, and white countertops pop. It’s a bold move, but the payoff is a kitchen that feels intentional and curated.
Best Paint Finishes
Go with a matte or eggshell finish for the wall—it hides imperfections and gives the color a soft, velvety look. Avoid high gloss unless you want a more reflective, modern vibe. Brands like Farrow & Ball (Hague Blue or Studio Green) or Behr (Forest Court) offer great deep greens.
Gold Accent Pairing
Once the paint is dry, add a gold-framed art piece or a sleek gold wall sconce. The warm metallic cuts the darkness of the green and adds a touch of elegance. Even a small gold mirror can work wonders, bouncing light around the room.
Budget-Friendly Swap
If you’re on a tight budget, use a sample pot of paint for a smaller accent area—like the inside of a pantry niche or the back of a shelving unit. You’ll still get the visual impact without buying a full gallon. Pair with thrifted gold frames for an affordable luxe finish.
FAQ
Can I mix different shades of green in my kitchen?
Absolutely. Layering different greens—like sage cabinets with a forest green accent wall—adds depth and interest. Just keep the undertones similar (warm or cool) to maintain a cohesive look.
What gold finishes work best for a budget-friendly kitchen?
Brushed brass and antique gold are forgiving with fingerprints and hide wear well. They also pair nicely with both warm and cool greens. Look for affordable options at home improvement stores or online.
How can I add green and gold without painting or tiling?
Use removable items like a green rug, gold utensil holder, plants in gold pots, and green dish towels. These can be swapped out easily and still create a strong color story.
Will green and gold work in a small kitchen?
Yes. Lighter greens like sage or mint keep the space feeling open, while gold accents add warmth without overwhelming. Use mirrors and good lighting to enhance the sense of space.
Is it expensive to achieve a luxe look with green and gold?
Not at all. Many ideas here cost under $100, like painting cabinets, swapping hardware, or adding a rug. Focus on a few key pieces rather than a full overhaul to keep costs down.
Conclusion
Bringing green and gold into your kitchen doesn’t have to mean a full-scale remodel or a hefty price tag. With a little creativity and some smart choices, you can create a space that feels both luxurious and natural—without the luxury price.
Start with one or two ideas that speak to you, and build from there. Your kitchen will thank you.