13 Shabby Chic Kitchen Ideas for Soft Vintage Character
Shabby chic is all about embracing imperfection with grace. It’s the style that makes a kitchen feel like it has stories to tell—without trying too hard. Think worn wood, gentle florals, and finishes that look like they’ve been loved for decades.
What makes shabby chic so appealing is how approachable it feels. You don’t need a full renovation to capture that vintage spirit. A few thoughtful touches can soften a modern kitchen or breathe new life into a tired one.
In this list, you’ll find 13 ideas that lean into light, airy vibes while keeping things practical. Each one is meant to inspire, not overwhelm. Let’s bring some gentle character into your cooking space.
1. Distressed Cabinet Doors With a Soft White Wash
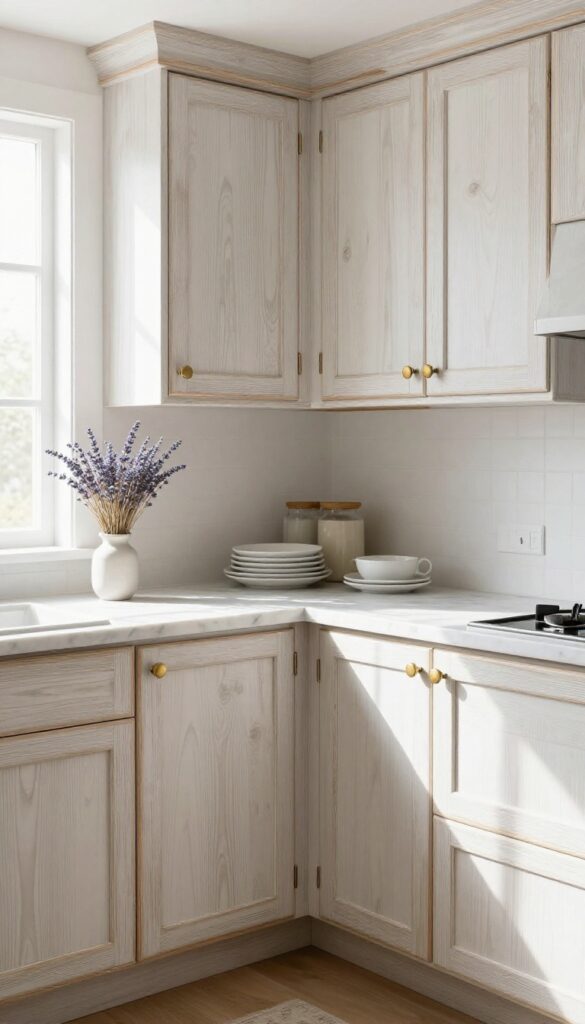
There’s something effortlessly charming about cabinets that look like they’ve been loved for decades. A soft white wash over wood grain creates that lived-in feel without going full shabby. It keeps the kitchen bright and open while adding just enough texture to make the space feel warm and collected.
Start with solid wood or wood-veneer cabinet doors—nothing too slick. Lightly sand the edges and corners to mimic natural wear, then wipe on a diluted white paint (about one part paint to two parts water). Let it soak in for a minute, then wipe off the excess.
The result is a translucent, milky finish that lets the wood grain peek through. The sanded edges catch more paint and look intentionally aged. Pair these cabinets with simple brass or nickel cup pulls for a soft contrast.
Keep countertops light—marble, quartz, or even a white butcher block—to maintain that airy feel. This look works best in kitchens with good natural light, but even a smaller galley kitchen can pull it off if you balance it with open shelving or glass-front upper cabinets.
Best Wood Types For The White Wash
Oak, pine, and birch take the white wash beautifully because their open grain soaks up the paint unevenly, which adds to the distressed look. Maple and cherry are tighter-grained and may need a light sanding to help the wash adhere. If your cabinets are laminate, skip the wash and consider a chalky paint with a sanded finish instead.
Finishing Touch: Sealing The Look
Once the wash is dry, seal with a matte polyurethane or wax to protect the finish without adding shine. A clear matte sealer keeps the soft, flat appearance and makes cleaning easier. Avoid glossy topcoats—they’ll ruin the vintage vibe.
Styling Tip: Mix With Open Shelving
Balance the distressed lowers with a few upper cabinets swapped for open shelves. Display white dishes, glass jars, and a trailing plant like pothos. The mix of solid and open storage keeps the kitchen from feeling too heavy and reinforces the light, breezy character.
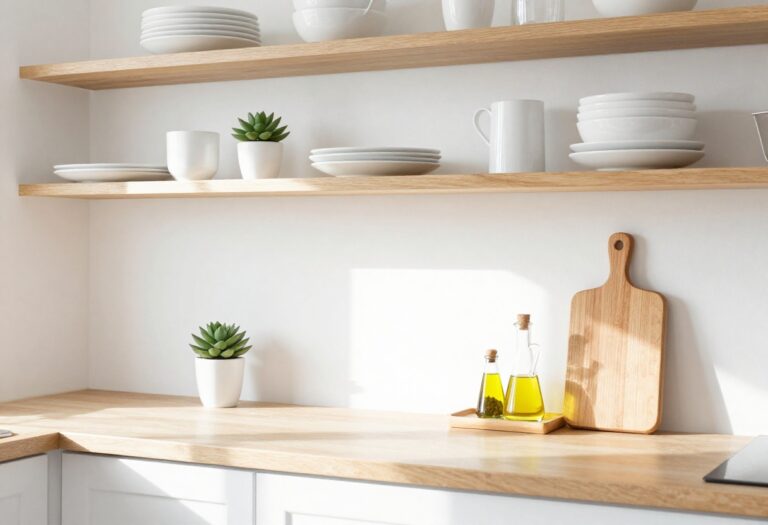
2. Open Shelving With Scalloped Edges
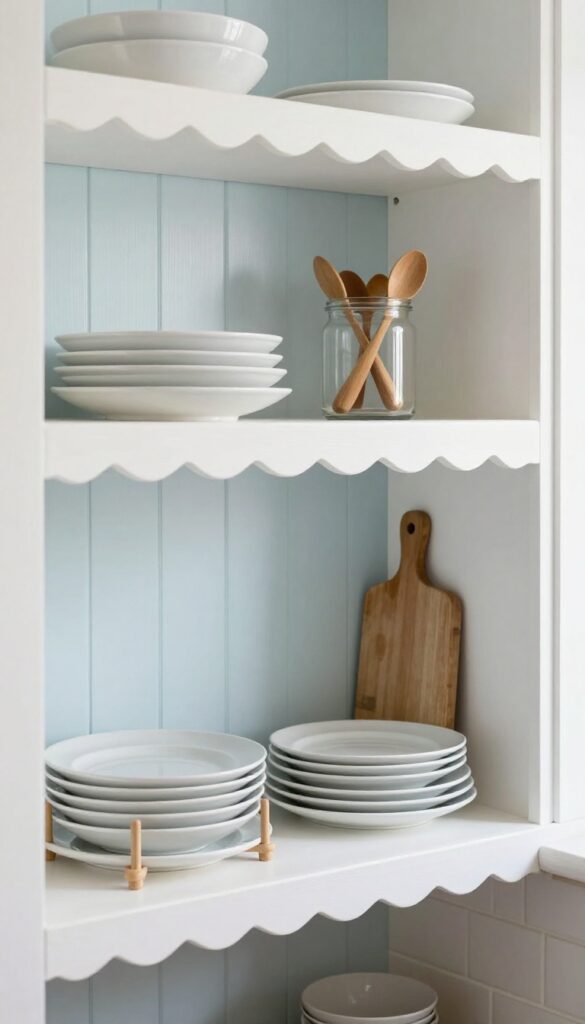
Upper cabinets can make a kitchen feel boxed in, especially in a shabby chic space where light and airiness are key. Swapping them for open shelves with delicate scalloped trim instantly softens the room and adds that cottage-like charm. The scalloped edge—often seen on vintage tablecloths or café curtains—brings a playful, feminine touch that feels curated, not cluttered.
Plus, open shelving forces you to edit your dishware, keeping only the prettiest pieces on display.
This idea works best in a kitchen that gets decent natural light, as open shelves can feel sparse in a dim room. The scalloped detail doesn't have to be over-the-top; a subtle wave along the front edge is enough to evoke that shabby chic spirit. Pair the shelves with a light backdrop—think white subway tile or pale blue beadboard—so the scallops stand out without competing.
The result is a kitchen that feels open, personal, and gently lived-in.
Best Materials
Go with wood shelves painted in a soft matte finish—white or a pale pastel like sage green or buttery yellow. The scalloped trim can be cut from MDF or pine, then painted to match. For a more vintage look, consider reclaimed wood with a distressed paint finish that shows a bit of grain underneath.
Shelf Styling Tip
Keep it airy by grouping items in odd numbers and varying heights. Stack a few white dinner plates on a wooden stand, add a glass jar filled with wooden spoons, and lean a small vintage cutting board against the wall. Leave about 30 percent of the shelf empty to avoid a crowded feel.
Finishing Touch
Install a small brass or nickel rail under the bottom shelf to hang teacups or small utensils. This adds function without breaking the visual lightness, and the metal hardware ties into the shabby chic look nicely.
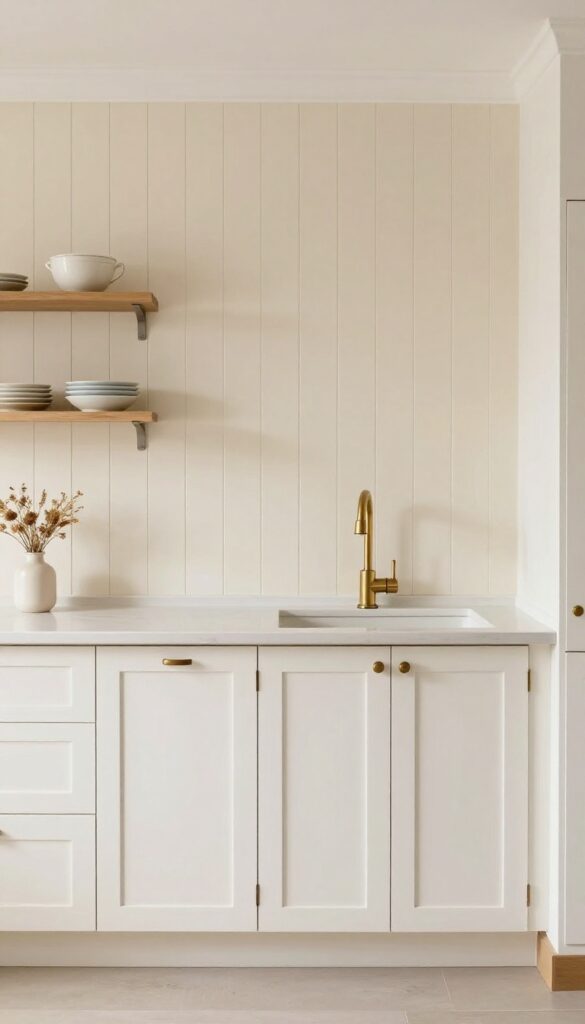
3. A Farmhouse Apron Sink in Pastel Blue

There’s something instantly calming about a pastel blue farmhouse sink. It’s not just a workhorse for washing dishes—it becomes the heart of the kitchen, drawing the eye and setting a soft, vintage tone. The deep basin is practical for big pots, but the color is what makes it special.
Paired with simple white countertops and a classic gooseneck faucet, this sink feels both nostalgic and fresh, like a piece of countryside charm dropped into a modern home.
A pastel blue apron sink brings a whisper of color into a light and airy kitchen without overwhelming the space. The soft hue works beautifully with white shaker cabinets, open shelving, and natural wood accents. It’s a statement piece that still feels serene, perfect for anyone who wants vintage character without going full rustic.
The deep basin is surprisingly practical for everyday cooking—fits large baking sheets and stockpots with ease. Pair it with unlacquered brass or brushed nickel fixtures to lean into the farmhouse vibe, or go with polished chrome for a cleaner look.
Best Colors And Finishes
- Stick with muted pastels: powder blue, sage, or blush. These tones keep the kitchen feeling open and airy. For the countertops, white marble or quartz with subtle veining maintains the light look.
- If you want contrast, a warm butcher block countertop adds coziness and complements the blue beautifully.
Styling Around The Sink
- Keep the area around the sink clutter-free to let the color shine. A simple wooden dish drying rack, a small vase of fresh flowers, and a classic soap dispenser are all you need. Avoid busy patterns nearby—let the sink be the focal point.
- A window above the sink is ideal; natural light makes the pastel shade glow.
Finishing Touch
Add a gooseneck faucet with a side sprayer for that classic farmhouse feel. Choose a finish that echoes other hardware in the room—matte black for a modern twist, or unlacquered brass for warmth. A bridge faucet also pairs nicely with apron sinks and reinforces the vintage aesthetic.
4. Vintage Glass Knobs on Drawers and Doors
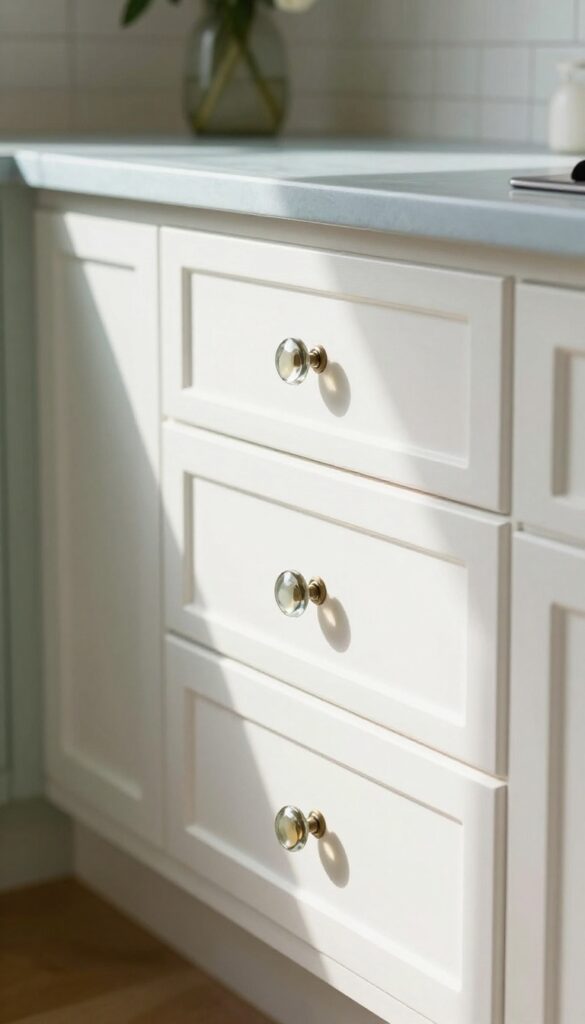
Sometimes the smallest swap makes the biggest impact. Replacing plain hardware with vintage glass knobs is one of those five-minute upgrades that instantly softens a kitchen. Faceted glass or cut-crystal knobs catch the light and throw tiny rainbows across your countertops, adding a delicate, old-world sparkle that feels straight out of a countryside cottage.
They work especially well in light, airy kitchens where every reflective surface helps bounce brightness around.
Standard metal knobs can feel a bit cold or generic, especially in a shabby chic kitchen where warmth and character matter. Vintage glass knobs bring back that handcrafted feel—each one slightly unique, with subtle variations in color and cut. They pair beautifully with painted cabinets in soft whites, pale blues, or muted greens, and they instantly elevate plain cabinetry without requiring a full renovation.
Whether you swap out all the hardware or just use them on a few key drawers and doors for a mixed-metal look, these little gems add charm and personality.
Best Colors And Finishes
- Clear crystal knobs are the most versatile—they work with any cabinet color and let the light do the talking. For a warmer vibe, look for knobs with a slight amber or champagne tint. If you want a touch of color, pale pink, mint green, or soft blue glass knobs can tie into your existing palette without overwhelming the space.
- Avoid dark or opaque glass if you're aiming for that light and airy feel; transparency keeps things breezy.
Installation And Styling Tip
- Mixing glass knobs with a few brass or nickel pulls can create a curated, collected-over-time look. Install them on upper cabinet doors and use longer pulls on drawers for visual rhythm. Make sure the screws are the right length—glass knobs often come with shorter screws than standard metal ones.
- A quick trip to the hardware store for the correct size saves you from stripped threads and wobbly knobs.
Where To Find Them
- Vintage glass knobs are surprisingly easy to source. Check Etsy or eBay for antique originals—they often have a warm patina that new ones lack. If you prefer new, many home improvement stores carry reproduction styles in the cabinet hardware aisle.
- Look for knobs with a faceted or diamond cut for maximum sparkle. A set of ten usually runs under $30, making this a budget-friendly way to add instant vintage charm.
5. Floral Print Roman Shades at the Window
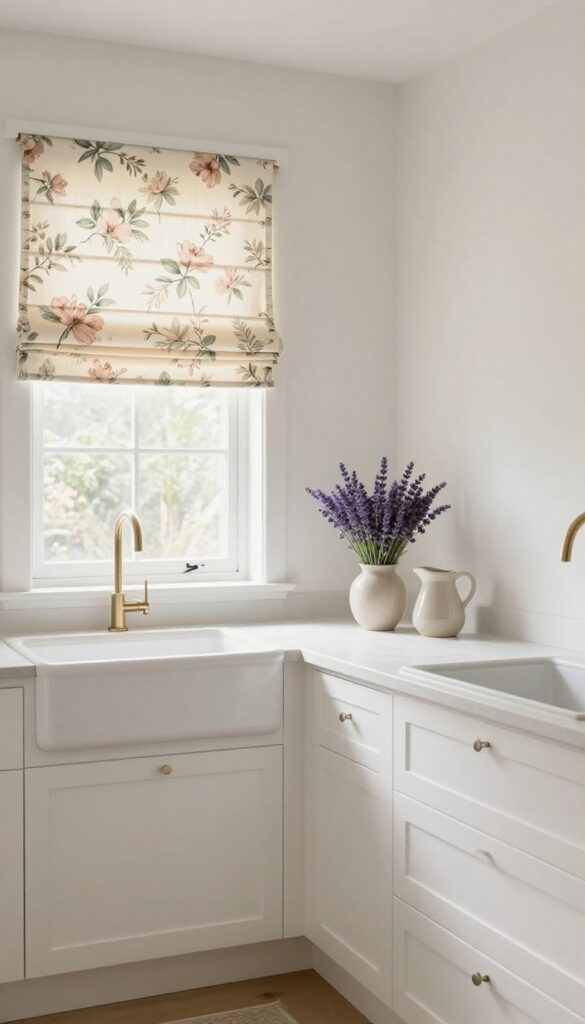
Windows in a shabby chic kitchen deserve something softer than standard blinds. Roman shades in a floral print add pattern and color without overwhelming the space. The key is choosing a muted, romantic print that feels light and airy instead of busy.
Floral Roman shades bring a gentle vintage feel to the kitchen while keeping the look clean and uncluttered. The fabric softens the hard edges of cabinets and countertops, and the shades can be raised or lowered to control light and privacy. This window treatment works especially well in kitchens with neutral walls or white cabinetry, where the floral pattern becomes a focal point without competing with other elements.
Best Colors And Prints
- Stick with small-scale floral prints in soft, faded tones. A cream or off-white background with muted rose, lavender, or sage green flowers feels romantic and timeless. Avoid large, bold florals that can look too busy or modern.
- For a more subtle take, try a toile pattern in a single soft color.
Fabric And Light Control
- Choose a cotton or linen blend fabric that lets some light filter through for a soft, diffused glow. Lined shades offer more privacy and light blocking if needed. The fabric should feel soft to the touch and hang smoothly without stiffness.
- For a truly shabby chic look, consider a slightly wrinkled or slubbed texture.
Styling Tip: Pair With Simple Hardware
Keep the rest of the window area minimal to let the shades shine. Use a simple wooden or white metal rod if you prefer a top treatment, or mount the shades inside the frame for a clean, built-in look. Avoid heavy valances or elaborate cornices that compete with the floral pattern.
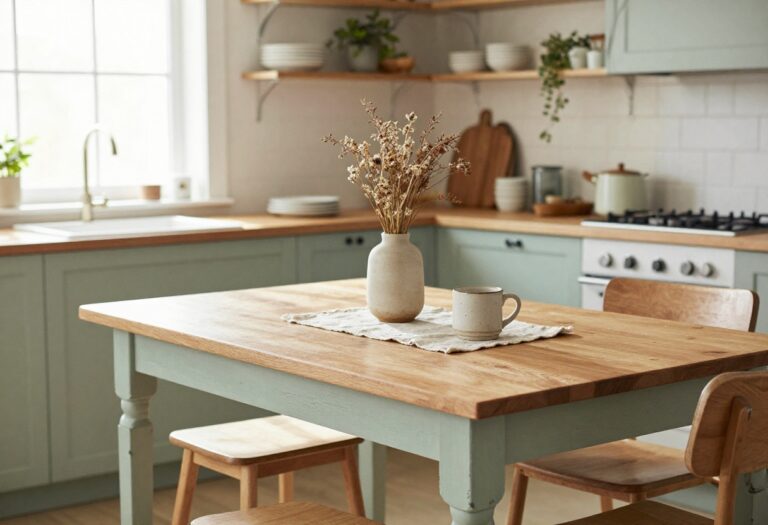
6. A Weathered Wood Island With Turned Legs
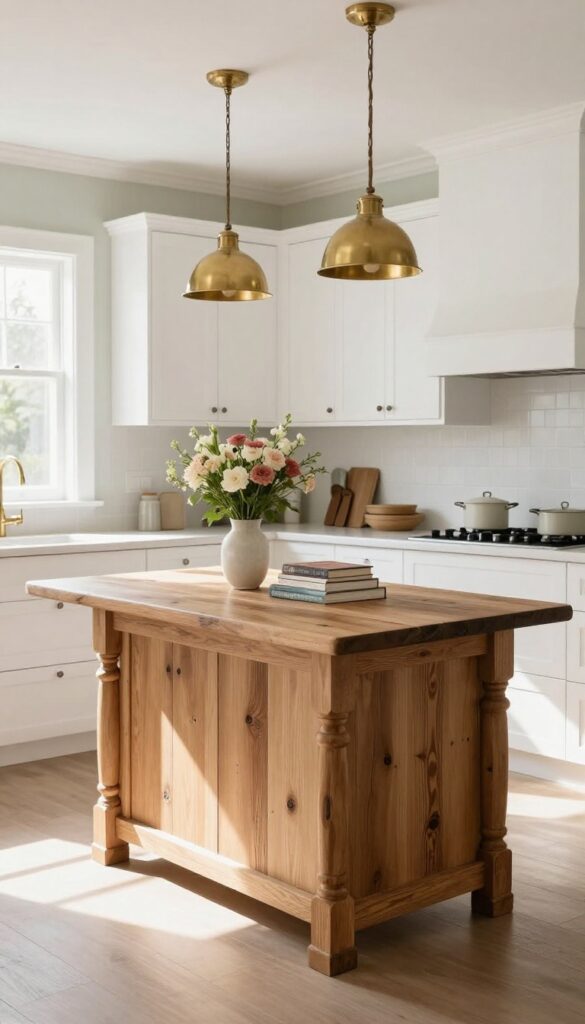
If your kitchen feels like it's missing a focal point, a chunky wood island with turned legs might be exactly what it needs. The beauty of this piece lies in its imperfections—visible grain, a few knots, and a matte finish that lets the natural character shine through. It's the kind of island that feels like it has a story, grounding the room with warmth and a soft, vintage soul.
A weathered wood island acts as both a workhorse and a statement piece. The turned legs add a touch of elegance that keeps the rustic look from feeling too heavy, while the matte sealant protects the surface without glossing over its history. This island works beautifully in light and airy kitchens, balancing the softness of white cabinetry or pastel walls with a solid, organic anchor.
Use it for prep work, casual dining, or as a landing spot for a vase of fresh flowers and a stack of cookbooks.
Best Colors
Stick with natural wood tones—think oak, pine, or ash with a whitewash or light stain. If you prefer a painted finish, opt for soft sage, pale blue, or creamy white, then sand the edges to reveal the wood underneath for that shabby chic wear.
Layout Tip
Place the island in the center of the kitchen with at least 36 inches of clearance on all sides. For a more intimate feel, offset it slightly toward the cooking zone so it doesn't block the main walkway but still anchors the room.
Finishing Touch
Hang a pair of small, aged-brass pendant lights above the island to highlight the wood grain and turned legs. Choose lights with a soft, warm glow to enhance the weathered look without overpowering it.
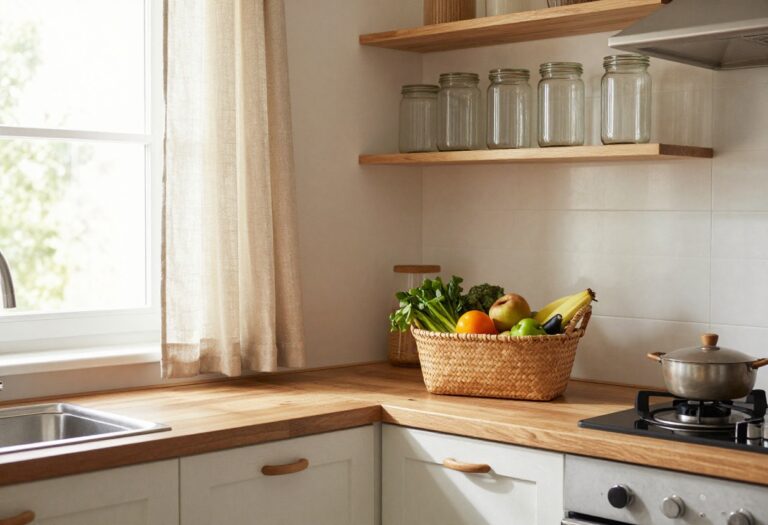
7. Open Cubbies Filled With Linen and Lace
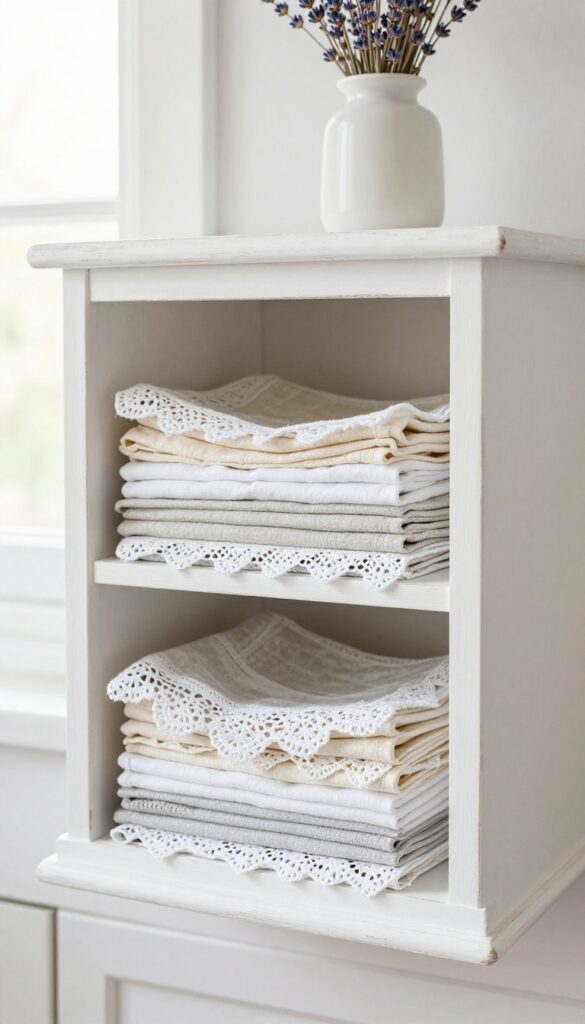
A small open cubby unit tucked into a corner or mounted on a wall instantly brings softness and character to a shabby chic kitchen. Stacking folded linen napkins, lace doilies, and cotton dish towels turns storage into a display of texture and warmth. The mix of white and cream fabrics against painted wood creates that light, airy feel you want in a vintage-inspired space.
Open cubbies let you treat everyday linens like decor. Instead of hiding them in a drawer, you can layer folds of fabric for a cozy, lived-in look. The key is to keep the palette neutral—think soft whites, warm ivories, and pale grays—so the cubbies feel serene, not busy.
Add a few lace-trimmed pieces for that delicate, romantic touch that defines shabby chic.
Best Fabrics For The Look
- Stick with natural fibers like cotton, linen, and lace. Cotton dish towels with a subtle stripe or checkered pattern add gentle contrast without overwhelming the space. Lace doilies can be folded or draped over the edge of a stack for a soft, feminine detail.
- Avoid synthetics—they don't have the same soft drape or breathable feel.
Shelf Styling Tip
- Don't overfill the cubbies. Leave a little breathing room between stacks so each piece feels intentional. Vary the height by placing a folded towel stack next to a rolled bundle of napkins.
- A small vase of dried lavender or a single ceramic pitcher on top of the cubby unit ties the display together.
Where To Place It
A wall-mounted cubby unit works beautifully above a counter or next to the sink, where you can grab a towel quickly. If you have a narrow gap between cabinets and an island, a freestanding cubby shelf fits perfectly. Keep it away from the stove to avoid grease and moisture.
8. A Chandelier With Candle-Style Bulbs

Lighting can make or break that soft, lived-in feel you're going for. A petite chandelier with curved arms and candle-shaped bulbs does more than just brighten the room—it adds a delicate, almost romantic focal point. Hang one over the sink or a small island, and suddenly the whole kitchen feels a little more special.
The trick is choosing a fixture that feels airy, not heavy. Wrought iron in a matte black or aged bronze keeps the look grounded without overpowering the space. For a lighter touch, go with a distressed white or pale blue finish that echoes the shabby chic palette.
The candle bulbs themselves should be warm-toned—around 2700K—to cast that soft, flattering glow. Position the chandelier so it hangs about 30 to 36 inches above the counter or sink, and make sure it's centered over the area you want to highlight. If your kitchen has lower ceilings, look for a flush-mount version with the same candle-style details; you'll still get the charm without the drop.
Best Finishes For The Look
Stick with finishes that feel gently aged. Distressed cream, antique brass, and weathered pewter all work beautifully with shabby chic cabinetry and open shelving. If you prefer a bit of contrast, a dark bronze or matte black chandelier can anchor the room and make the white or pastel elements pop.
Where To Hang It
The spot above the kitchen sink is a natural choice—it turns a chore zone into a vignette. Over a kitchen island or peninsula works too, especially if you have bar stools. Just make sure the fixture is scaled to the surface: a 20- to 24-inch wide chandelier is usually right for a standard sink or small island.
Styling Tip
Keep the area underneath simple so the chandelier stays the star. A clear glass vase with a few fresh flowers or a small wooden cutting board on the counter is enough. Avoid cluttering the space with too many accessories—the light itself does the heavy lifting.
9. Beadboard Backsplash Painted in Cream
A beadboard backsplash brings instant cottage charm without the weight of full shiplap. The vertical grooves catch light softly, adding a gentle rhythm to the wall that feels both classic and calming. Painted in a warm cream, it keeps the kitchen light and airy while giving the space a soft, lived-in texture that pairs beautifully with distressed cabinets and open shelving.
Beadboard is an affordable way to add architectural interest to a kitchen backsplash. The panels install directly over drywall, making it a weekend-friendly project. Cream paint reflects natural light, making the room feel larger and brighter.
The subtle texture works especially well in galley kitchens or breakfast nooks where you want a cozy, nostalgic feel without going full farmhouse. Pair it with unlacquered brass or oil-rubbed bronze fixtures for a gentle contrast.
Best Paint Finishes
- For durability in a kitchen, choose a satin or semi-gloss finish. These are easier to wipe clean than matte and still have a soft sheen that plays up the beadboard's texture. Stick with warm cream tones—avoid anything too yellow or too white.
- Look for shades like 'Creamy' by Sherwin-Williams or 'Swiss Coffee' by Benjamin Moore.
Installation Tip
- Beadboard comes in 4×8 sheets or individual planks. For a backsplash, sheets are faster and have fewer seams. Use construction adhesive and a brad nailer to attach them, then caulk the top edge where it meets the countertop.
- Let the paint cure for at least 48 hours before cooking to avoid sticking.
Styling The Countertop
Keep the countertop clutter-free to let the backsplash shine. A simple ceramic pitcher with fresh herbs or a wooden cutting board leaning against the beadboard adds warmth without competing. Avoid busy patterns on the counter—solid butcher block or white quartzite keeps the look calm and cohesive.
10. A Mix of Open and Closed Storage With Glass Doors
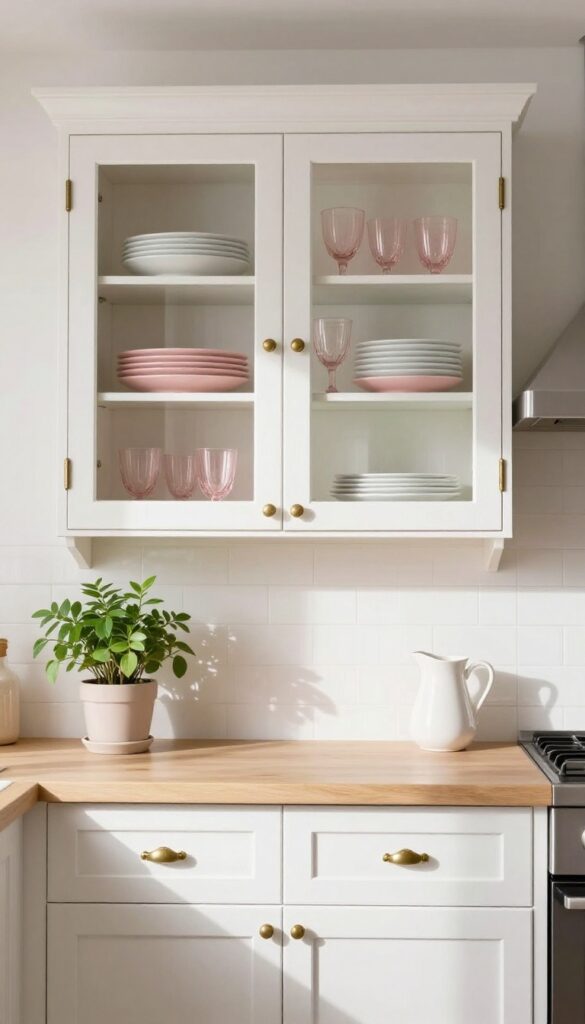
Upper cabinets can sometimes feel like a missed opportunity—especially when they’re just solid doors hiding everything inside. Swapping a few doors for glass fronts changes the whole vibe. You get to show off your prettiest dishes while keeping the mismatched mixing bowls and stack of takeout containers out of sight below.
Paint the inside of those glass cabinets a pale pink or soft blue, and suddenly the whole kitchen feels lighter and more intentional.
This idea works best when you pick one or two upper cabinets to feature—usually the ones above the sink or counter where you’d naturally reach for a glass or plate. Leave the rest closed for practical storage. The mix of open and closed keeps the room from looking cluttered while still adding that cozy, collected feel.
Plus, the painted interior adds a surprise color pop every time you open the door, which is a small detail that makes a big difference in a shabby chic kitchen.
Best Colors For The Interior
- Pale pink and soft blue are the go-to choices here because they complement white dishware and add a gentle vintage touch. If you want something a little warmer, try a buttery cream or a muted sage green. The key is to keep it light and airy so the glass front still feels open, not heavy.
- A matte finish works best to avoid glare and keep the look soft.
Cabinet Styling Tip
- Group similar items together—white plates, clear glassware, or a stack of vintage teacups. Leave a little breathing room between pieces so it doesn't look crammed. Add a small plant or a pretty ceramic pitcher for visual interest.
- Avoid overcrowding; the goal is to look curated, not stuffed.
Budget-Friendly Swap
If replacing cabinet doors isn't in the budget, try removable glass-like inserts or even open shelving on one upper cabinet. You can also paint the inside of an existing cabinet and just leave the door open or remove it entirely for a similar effect. It’s an easy weekend project that instantly adds character.
11. A Small Bistro Table With Wicker Chairs
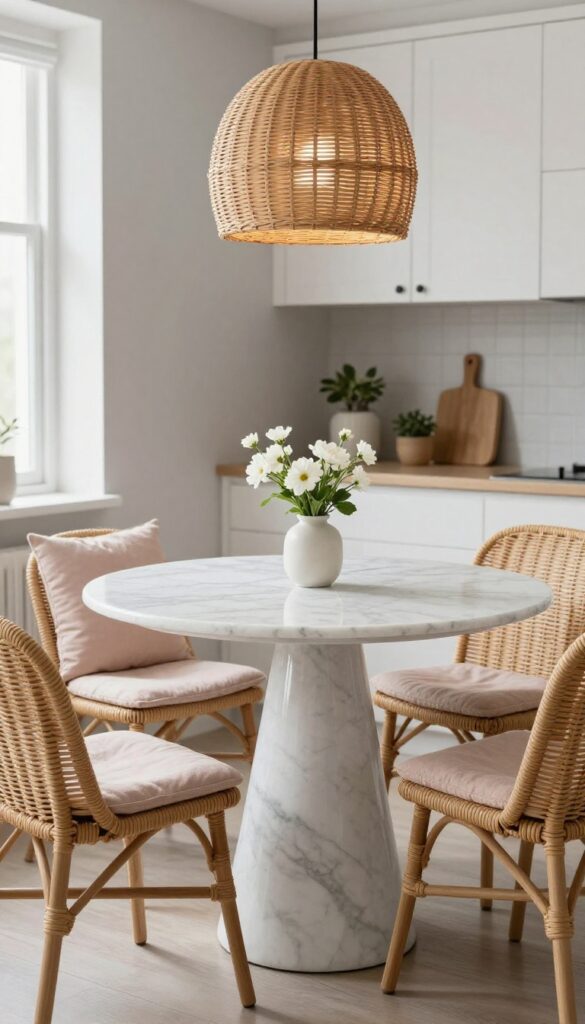
Tuck a round marble-top bistro table and two wicker chairs into a corner. It creates a cozy breakfast nook that feels straight out of a French countryside cottage. The compact footprint makes it perfect for tight kitchens where a full dining set won't fit, but you still want a spot to sip coffee and read the morning paper.
This setup brings a light and airy vibe to any kitchen. The marble top reflects light, making the space feel bigger, while the natural texture of wicker adds warmth without weighing things down. Choose a table with a pedestal base so you can slide chairs in easily and maximize floor space.
Pair with a soft linen cushion on each chair for extra comfort and a touch of softness against the hard surfaces. A small vase of fresh flowers or a single potted herb on the table completes the look.
Best Colors
Stick with a white or pale gray marble top to keep the airy feel. For the wicker, natural honey tones or a light whitewash work beautifully. If you want a pop of color, add it through cushions or a table runner in soft pastels like blush, sage, or butter yellow.
Small-space Fix
Measure your corner before buying. A 24- to 30-inch round table fits most nooks without crowding. Opt for chairs with a slim profile and no arms so they tuck completely under the table when not in use.
Finishing Touch
Hang a small pendant light or a mini chandelier above the table to define the nook. A woven rattan shade echoes the wicker chairs and adds another layer of texture. Keep the bulb warm white (2700K) for a cozy glow.
12. Ruffled Valance Over the Sink Window
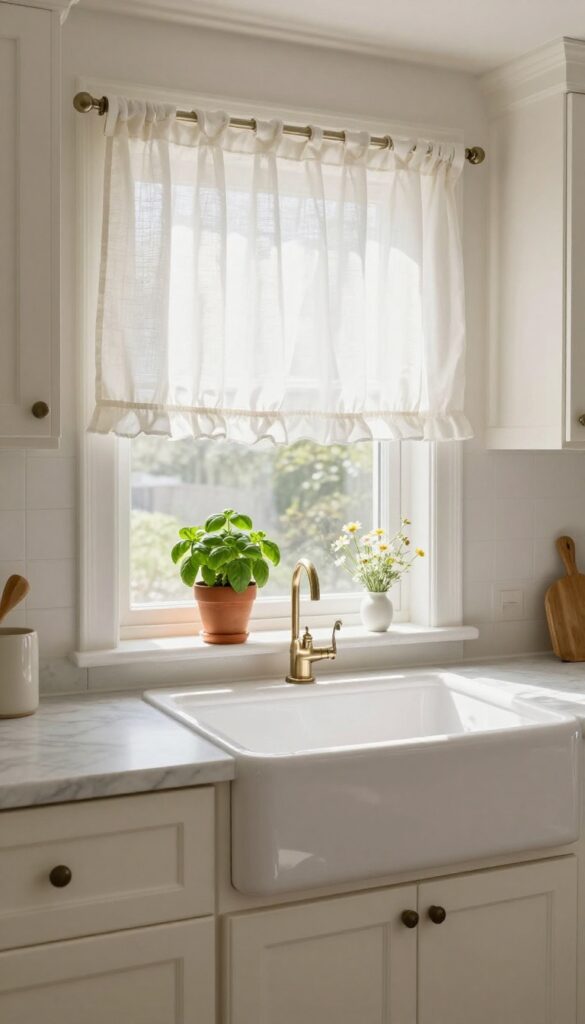
That window above the kitchen sink is prime real estate for a little softness. A ruffled valance in white cotton or linen instantly dials up the shabby chic charm without overwhelming the room. It’s one of those details that feels both intentional and effortless, like something your grandmother might have sewn on a lazy afternoon.
Plus, it’s a surprisingly easy DIY project that even a beginner can tackle in an afternoon.
A ruffled valance softens the hard edges of a kitchen window and adds a layer of texture that balances out sleek countertops and cabinets. The key is keeping it light and airy—think white or cream fabric with a subtle ruffle along the bottom edge. This simple addition makes the sink area feel cozier and more inviting, turning a utilitarian spot into a little vignette.
Pair it with a few potted herbs or a small vase of flowers on the windowsill, and you’ve got a picture-perfect corner that still functions beautifully.
Best Fabrics And Colors
- Stick with natural fabrics like cotton, linen, or a cotton-linen blend. They hang nicely and wash well, which matters in a kitchen. White is the classic choice, but a soft cream or pale ivory works too if you want a slightly warmer look.
- Avoid anything too heavy or stiff—the whole point is that breezy, relaxed feel.
Sewing Tips For Beginners
- This is a great starter sewing project. Measure your window width and add about 1.5 times that for gathering. Cut a rectangle of fabric to that width plus seam allowances, hem the sides and bottom, then sew a casing at the top for a curtain rod.
- For the ruffle, cut a strip of fabric twice the valance width, gather it, and stitch it to the bottom edge. That’s it—no complicated patterns needed.
Styling The Sill
- Don’t let the windowsill go bare. A couple of clear glass jars with fresh herbs, a small ceramic pitcher, or a single trailing plant like pothos adds life and complements the valance. Keep it simple so the window remains the focal point.
- If you have a deep sill, a stack of vintage cookbooks can also work nicely.
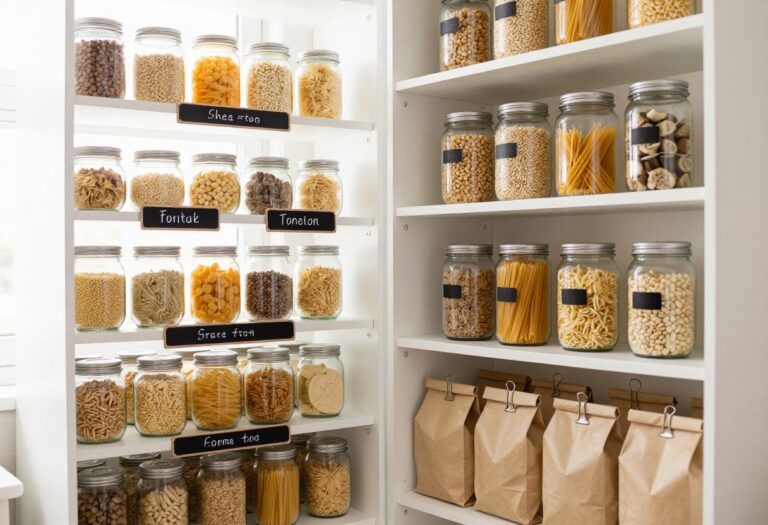
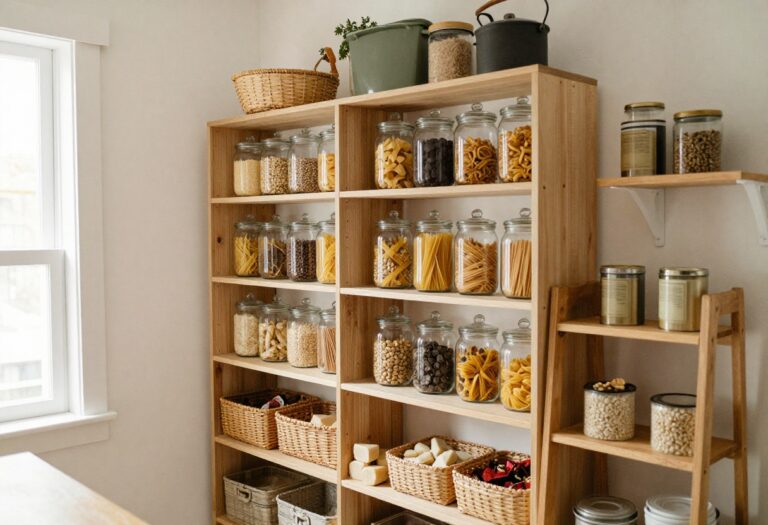
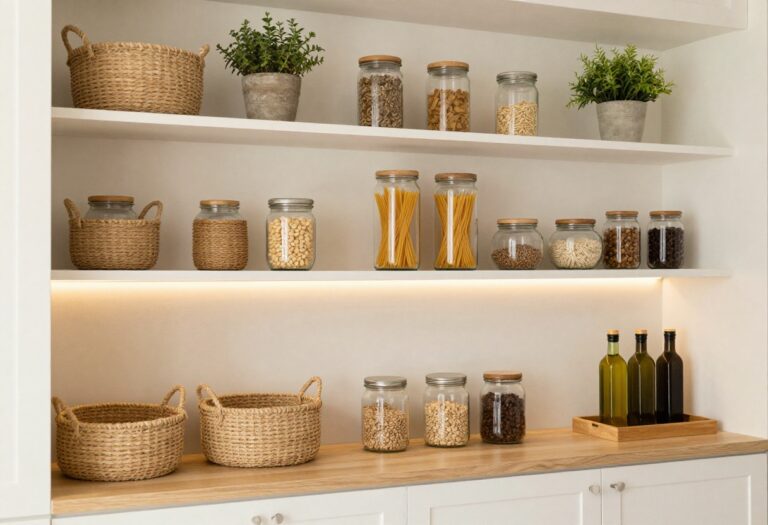
13. Vintage-Inspired Canisters and Crocks on the Counter

Countertops are prime real estate in any kitchen, and what you set out there sets the tone for the whole room. Instead of hiding everything away, try grouping a set of vintage-inspired canisters and crocks for a look that’s both practical and charming. Think soft florals, transferware patterns, or creamy ceramic finishes that echo the shabby chic aesthetic without feeling fussy.
These containers do double duty—they keep your flour, sugar, and tea within easy reach while adding a gentle dose of old-fashioned character.
The key is to choose canisters that feel cohesive but not matchy-matchy. A set of three or four in graduated sizes works beautifully, especially if they share a common color palette like soft blues, creams, or muted greens. Look for hand-painted details or classic transferware motifs like roses, lavender sprigs, or delicate vines.
Place them near your coffee station or baking area so they’re easy to grab. The visual weight of the ceramics anchors the counter and brings a cozy, collected feel to the space.
Best Colors And Patterns
- Stick with light, airy tones that keep the kitchen feeling open. Cream, pale blue, soft sage, and buttery yellow are all shabby chic staples. For patterns, go with floral motifs, toile-inspired scenes, or simple stripes.
- Avoid anything too bold or modern—the goal is a gentle, timeworn look.
Where To Place Them
Group your canisters on a corner of the counter near the stove or sink, but keep them away from direct heat or splashes. They also look lovely on a baker’s rack or open shelving if counter space is tight. Just make sure they’re easy to lift and use daily.
Styling Tip
Mix in a small wooden spoon or a vintage measuring cup next to the canisters for added texture. A sprig of dried lavender or a few fresh herbs tucked behind the largest crock softens the look even more. Keep the arrangement simple—too many items can feel cluttered.
FAQ
What colors work best for a shabby chic kitchen?
Soft whites, pale pinks, muted blues, and creamy ivories are the foundation. These colors keep the space light and airy while allowing distressed finishes and vintage accents to stand out.
Can I do shabby chic on a budget?
Absolutely. Thrift stores and flea markets are goldmines for vintage dishes, glassware, and small furniture. A coat of chalk paint can transform old cabinets or a table for under $50.
How do I keep shabby chic from looking messy?
Stick to a cohesive color palette and edit your displays. Too many patterns or knick-knacks can feel chaotic. Aim for a curated look with plenty of negative space.
Is shabby chic outdated?
Not at all—it’s evolved. Modern shabby chic leans more minimalist with cleaner lines and softer finishes. It’s less about frills and more about gentle, lived-in beauty.
What flooring works with shabby chic decor?
Wide-plank wood floors in a whitewashed or light gray finish are ideal. Alternatively, black-and-white checkerboard tile adds a classic vintage diner feel that complements the style.
Conclusion
Shabby chic is about creating a kitchen that feels welcoming and gently worn, like it’s been part of your family for generations. The best part is that you can start small—swap out hardware, add a floral curtain, or distress a single cabinet door. Let your kitchen evolve at its own pace.
With these ideas, you’ll build a space that’s soft, character-filled, and unmistakably yours. Happy decorating!