15 Cute Small Kitchen Ideas With Bright Little Details
Small kitchens come with big challenges, but they also offer a chance to get creative with every inch. You don't need a massive renovation to make your space feel fresh and functional—sometimes the smallest tweaks make the biggest difference. Think bright colors, smart storage, and details that bring a smile.
This list is all about ideas that are both cute and practical. We're focusing on storage-smart solutions that keep your counters clear and your essentials easy to grab. No fluff, just real tips you can try this weekend.
Ready to give your kitchen a little personality boost? Let's dive into 15 ideas that prove small spaces can be both stylish and super organized.
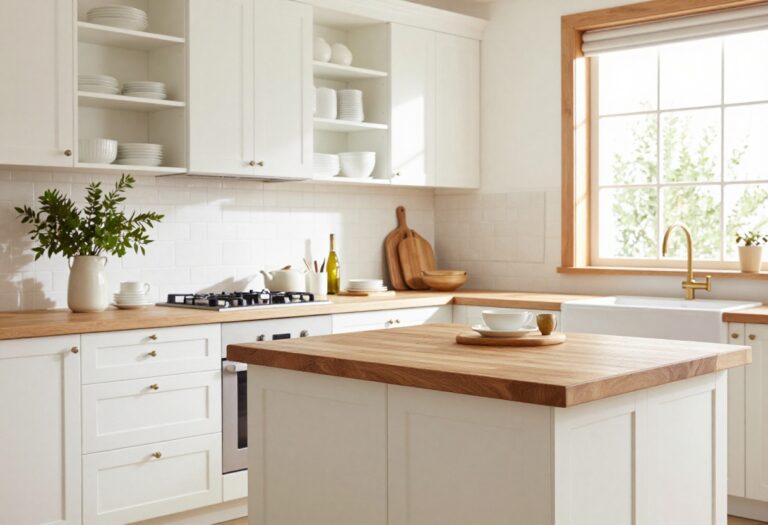
1. Open Shelving With a Pop of Color
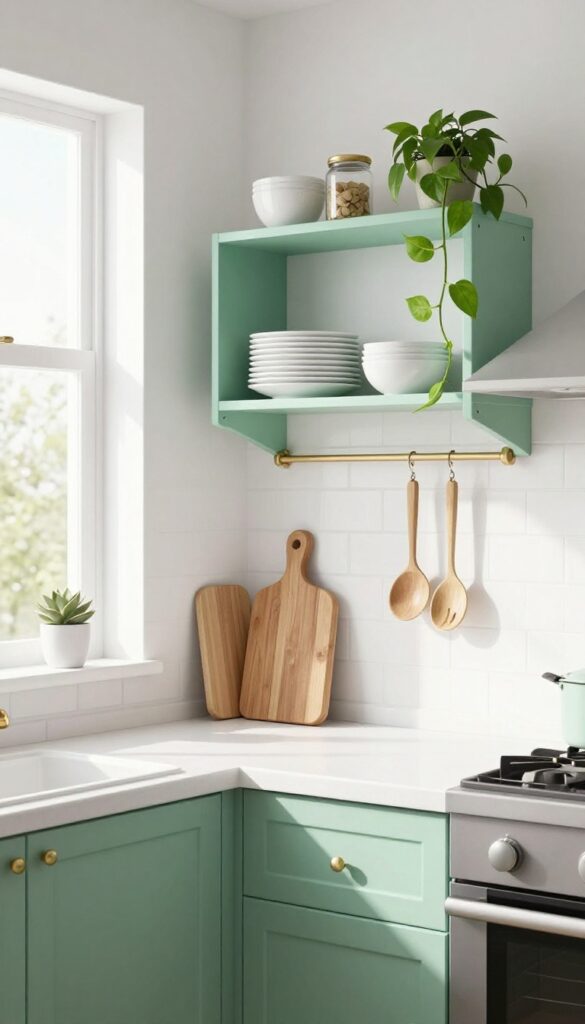
Upper cabinets can make a small kitchen feel closed in. Swapping them for open shelves instantly opens up the room and gives you a chance to show off your favorite dishes. Painting those shelves a cheerful color like mint or coral adds personality without overwhelming the space.
It’s a simple swap that makes the whole kitchen feel lighter and more inviting.
Open shelving is a go-to trick for small kitchens because it removes visual bulk and makes the room feel bigger. By choosing a bright color for the shelves themselves, you add a focal point that draws the eye upward and creates a sense of height. This works especially well in galley kitchens or L-shaped layouts where wall space is limited.
The key is to keep the shelves tidy—display everyday items you use often, like white plates, glass jars, and a few small plants. The color pop becomes a deliberate design choice, not an afterthought.
Best Colors
- Stick with one saturated shade that complements your countertops and backsplash. Mint green feels fresh and pairs well with white subway tile or butcher block. Coral adds warmth and looks great with brass fixtures or warm wood tones.
- If you want something bolder, try a deep navy or mustard yellow for a more dramatic contrast.
Shelf Styling Tip
- Group items in odd numbers and vary heights. Stack plates on a small stand, add a short vase with a single stem, and lean a cutting board against the wall. Leave some empty space so the shelves don’t look cluttered.
- A trailing plant like pothos softens the edges and adds life.
Budget-Friendly Swap
You don’t need custom carpentry. Buy basic floating shelves from a hardware store, paint them yourself with a high-gloss enamel, and mount them with hidden brackets. The whole project can be done in a weekend for under $50.
2. Magnetic Knife Strip on the Backsplash
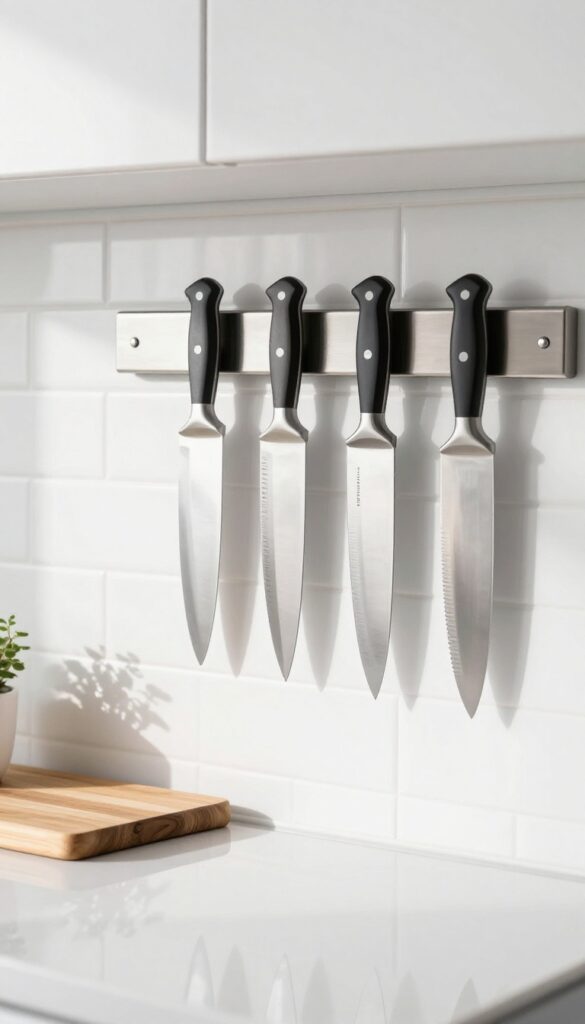
You know that empty stretch of backsplash between the counter and the upper cabinets? It’s prime real estate for one of the handiest kitchen upgrades around. A magnetic knife strip does more than just free up drawer space—it turns your everyday tools into a sleek, modern display.
Plus, no more digging through a jumbled drawer for the right blade.
Mounting a magnetic strip on the backsplash is one of those small changes that makes a big difference in a small kitchen. It keeps your most-used knives right where you need them, within easy reach while you’re prepping. And because it’s out in the open, you’ll actually want to keep your knives clean and organized.
The look is clean, minimal, and a little bit chef-y—in the best way. It works especially well in galley kitchens or any layout where counter and drawer space is tight. Just make sure you mount it securely into studs or use heavy-duty anchors, because the last thing you want is a strip full of knives crashing down.
Best Materials
Look for a strip made from stainless steel or coated steel—something that’s strong enough to hold a heavy chef’s knife but won’t rust over time. Wood or bamboo strips are also available if you prefer a warmer look, but make sure the magnet is strong enough. A strip with a rubber or silicone coating helps protect your knife blades from scratches.
Placement Tip
Mount the strip about 6 to 8 inches above the countertop so it’s easy to grab knives but still leaves room for small appliances or a cutting board below. Avoid placing it directly above the stove or sink, where heat and moisture can affect the adhesive or the knives themselves. A spot between the stove and the sink is ideal.
Styling It
Keep the knives spaced evenly—about an inch apart—for a clean, intentional look. If you have a mix of blade sizes, arrange them from smallest to largest or group by type. The strip itself should blend into the backsplash: go with a finish that matches your faucet or cabinet hardware for a cohesive feel.
3. Under-Shelf Baskets for Extra Storage
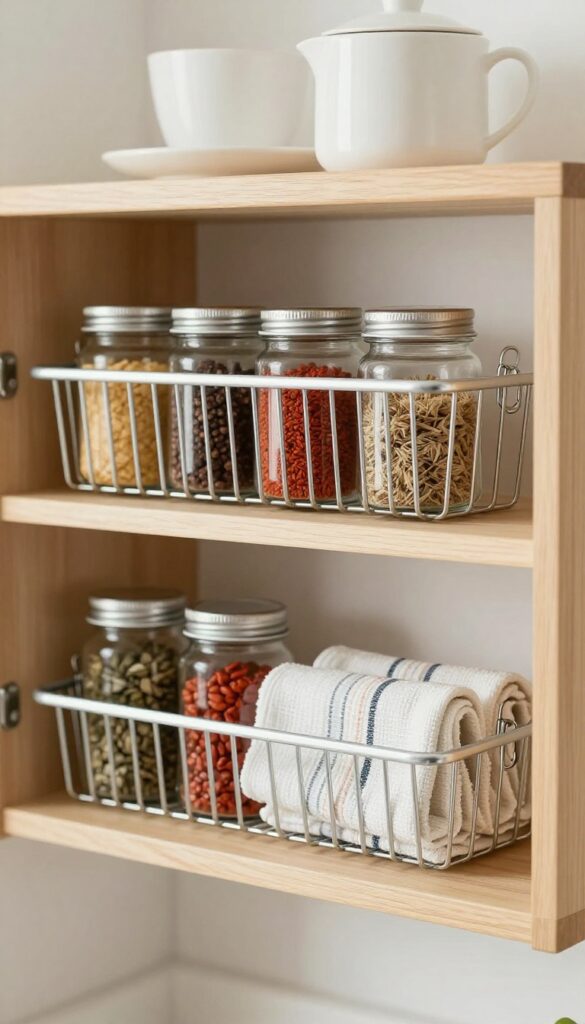
If your kitchen feels tight on storage but you're not ready to gut the cabinets, look up. The space under your existing shelves is prime real estate that often goes ignored. Clip-on wire baskets turn that empty gap into a home for spices, tea towels, or small jars—no tools, no drilling, just an instant storage boost that doesn't eat into your counter space.
Under-shelf baskets are one of those ideas that make you wonder why you didn't try them sooner. They attach with simple clips that grip the shelf above, so you can pop them in place in seconds. Use them in your upper cabinets to store coffee pods or ramekins, or hang them under open shelving to keep everyday spices within easy reach.
The wire construction keeps things visible and airy, so your kitchen still feels open and uncluttered. Plus, they're budget-friendly—a set of two usually runs under $20. For the best look, stick with black or white wire to match most shelf styles, or go with brushed brass for a warmer, more curated feel.
Best Spots To Hang Them
- Think about your workflow. Hang a basket under the cabinet above your coffee station to store pods, stir sticks, and sweeteners. In the cooking zone, use one near the stove for oils and spices you grab daily.
- Over the sink, a basket can hold dish soap, scrub brushes, or a small plant for a pop of green. The key is placing them where you reach most—no point storing rarely used items out of sight.
Styling Tip: Keep It Light
- Because these baskets are open, what you store becomes part of your decor. Stick to items that look good together: matching spice jars, neatly folded tea towels, or a stack of small white bowls. Avoid cramming in mismatched plastic containers or half-empty bags.
- The goal is a curated, intentional look that feels like a design choice, not a last resort.
Budget-Friendly Swap
- If you're not ready to commit to permanent clips, try adhesive under-shelf hooks or magnetic baskets on a metal shelf. Both options are removable and renter-friendly. For a DIY version, repurpose small wire bins from the dollar store and attach them with heavy-duty command hooks.
- It's a five-minute project that costs next to nothing.
4. Pegboard Wall for Pots and Pans
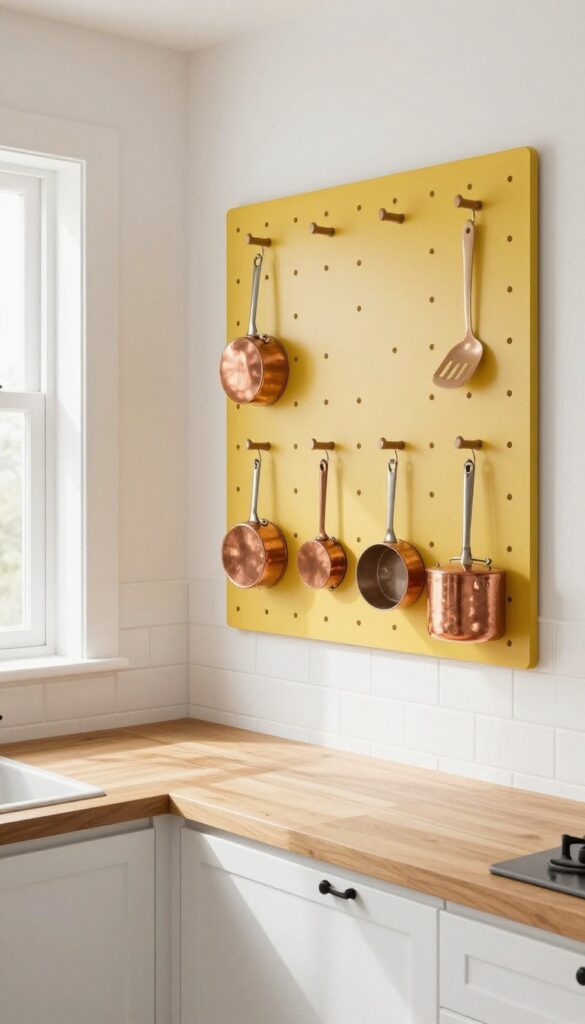
Blank walls in a small kitchen are wasted real estate. Instead of leaving that empty spot next to the stove or above the sink, turn it into a functional display with a pegboard. It’s one of those ideas that looks intentional and polished, not makeshift.
Paint the pegboard a cheerful shade like mustard yellow or soft mint, and suddenly your pots and pans become part of the decor. The best part? You can rearrange the hooks anytime your cookware collection changes.
A pegboard wall keeps your most-used pots, pans, and utensils within arm’s reach while freeing up cabinet space for less frequently used items. The key is choosing a bright color that contrasts with your wall—think coral against white subway tile or navy blue on a pale gray wall. This turns a purely practical solution into a visual anchor.
Stick to a cohesive palette for the items you hang: copper, matte black, or stainless steel all work well. Avoid overcrowding; leave some negative space so the wall doesn’t feel chaotic.
Best Colors And Finishes
- For a small kitchen, a high-contrast pegboard color makes the biggest impact. Try a glossy lacquer finish in a bold hue like tangerine or emerald green. If you prefer a softer look, pastel pink or powder blue adds a playful touch without overwhelming the room.
- Match the pegboard’s finish to your cabinet hardware or faucet for a cohesive feel.
Layout And Spacing Tips
- Place the pegboard on the most accessible wall, ideally between counter height and eye level. Use a mix of long and short hooks to accommodate different pot sizes. Group similar items together—all skillets on one row, lids on another.
- Leave a few inches between hooks so pans don’t clang into each other. A small shelf at the top can hold spice jars or a small plant.
Finishing Touch
Add a slim LED strip light above the pegboard to highlight the display and make the kitchen feel larger. Choose a warm white tone to keep the space cozy. If the pegboard is near a window, natural light will make the colors pop even more.
5. Slim Rolling Cart Between Counter and Island
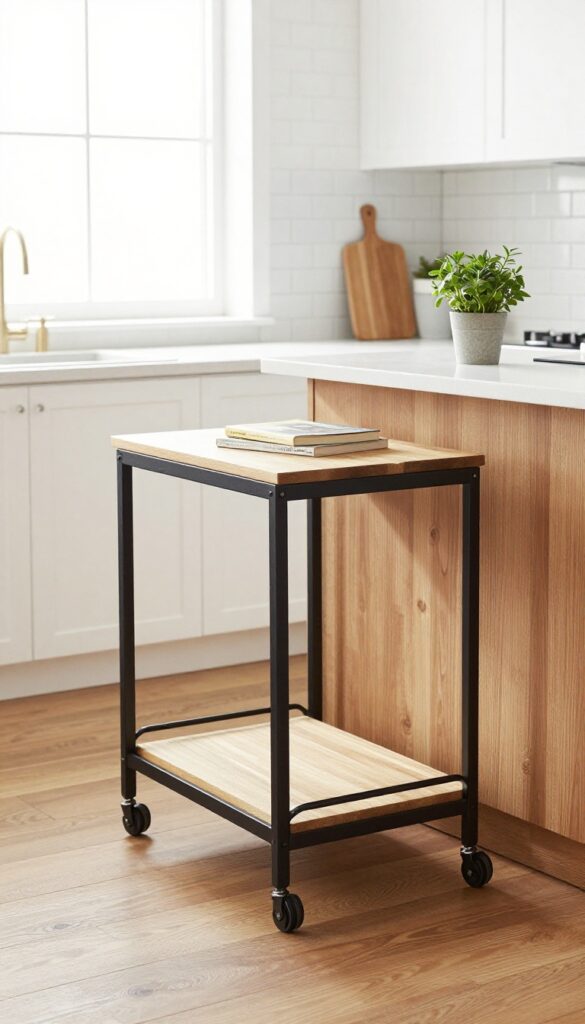
That narrow gap between your counter and island often goes unused, but it’s prime real estate for a slim rolling cart. These compact carts slide right into tight spaces, adding extra prep surface and storage without blocking traffic. They’re perfect for stashing everyday items you want close at hand, like fresh produce, cookbooks, or bar tools.
The best part? You can roll them out when you need them and tuck them away when you don’t, keeping your kitchen feeling open and uncluttered.
A slim rolling cart turns an awkward gap into a hardworking station. Look for one that’s narrow enough to fit your specific space—typically 12 to 18 inches wide. Wire or metal designs keep the look airy, while wooden carts add warmth.
Use the top tier for a cutting board or a small prep area, the middle for frequently used ingredients, and the bottom for heavier items like bottles or cookware. This idea works especially well in galley kitchens or L-shaped layouts where every inch matters.
Best Materials
- For a relaxed, kitchen-friendly look, choose a cart with a natural wood top and a metal frame. The wood adds warmth and a sturdy surface for chopping, while the metal keeps the cart lightweight and easy to roll. If your kitchen leans modern, go for an all-metal cart in matte black or brushed brass.
- For a more traditional vibe, a solid wood cart with open shelves blends in seamlessly.
Storage Tip
- Use the cart’s tiers to group items by use. Keep everyday produce like onions, garlic, and potatoes in baskets on the bottom shelf. Stock the middle shelf with a few go-to cookbooks or a small tray of bar tools.
- Reserve the top for a wooden cutting board or a plant that adds a fresh touch. This way, everything has a spot, and you can grab what you need without digging through cabinets.
Small-space Fix
- If your gap is especially tight, look for a cart with locking casters so it stays put when you need it. You can also add a thin magnetic strip to the side for holding knives or spice tins. Another smart trick: hang a small basket from the cart’s handle to corral kitchen towels or reusable bags.
- Every inch counts, and this cart makes the most of a space that usually goes to waste.
6. Cabinet Door Spice Rack
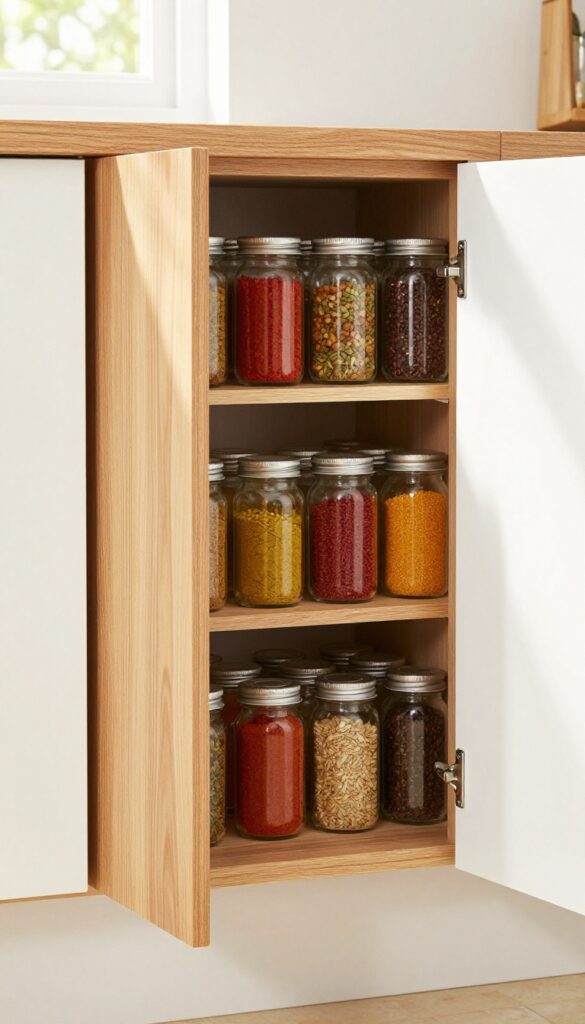
Tucked away yet totally within reach—that is the beauty of a cabinet door spice rack. Instead of digging through a crowded drawer or hunting for that jar of cumin at the back of a shelf, you can open any lower or upper cabinet and find everything lined up and ready to grab. It is one of those storage tricks that feels almost too simple, but once you try it, you will wonder why you did not do it sooner.
Plus, it keeps your counters clear and your spices out of direct sunlight, which actually helps them stay fresh longer.
Attaching small racks to the inside of cabinet doors turns dead space into prime real estate for spices, oils, and condiments. The best part is that you can customize the setup based on what you use most. For example, a narrow wire rack works perfectly for standard spice jars, while a deeper shelf can hold taller bottles of olive oil or soy sauce.
If you cook often, grouping spices by cuisine—like all Italian herbs together, or all Asian sauces on one door—makes meal prep faster. And because the racks are hidden when the cabinet is closed, your kitchen stays looking clean and streamlined.
Best Materials
Look for racks made of stainless steel or coated wire that can handle humidity and occasional splashes without rusting. Adhesive-backed options are great for renters, but if you own your cabinets, screw-mounted racks are more secure and can hold heavier bottles. Avoid plastic racks that can warp or stain over time.
Layout Tip
Install the rack on the inside of a cabinet door near your stove or prep area. That way, you can grab a pinch of oregano or a dash of hot sauce without crossing the kitchen. If you have deep cabinets, consider stacking two racks vertically on the same door for double the storage.
Small-space Fix
In a tiny kitchen, use the door of a base cabinet for bulky items like cooking oils and vinegars. This frees up shelf space for pots and pans while keeping your most-used condiments visible. Just make sure the cabinet has enough clearance to close properly with the rack loaded.
7. Bright Backsplash Tile Accent
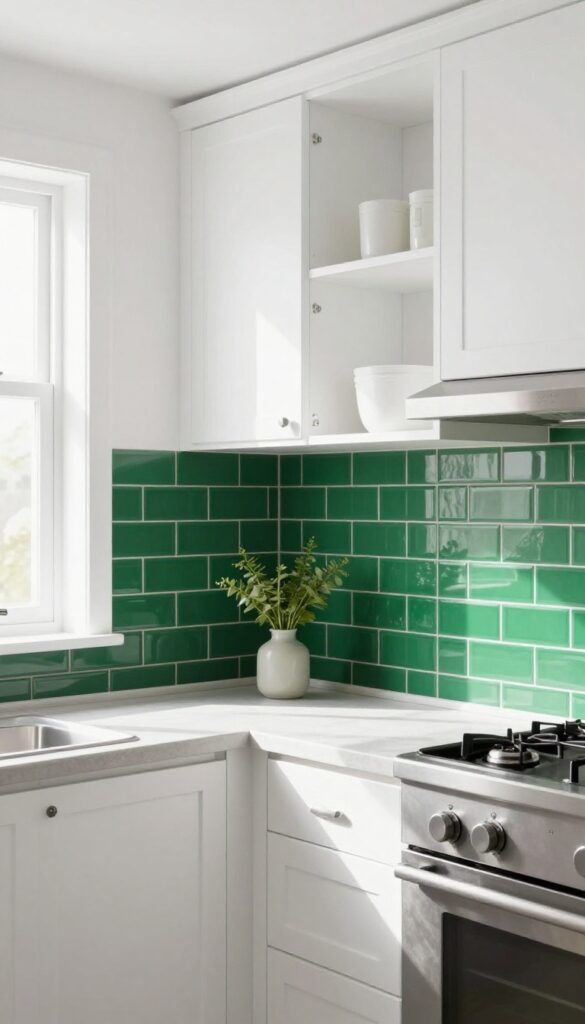
A small kitchen can feel bigger when you give the eye a single bright spot to land on. That’s exactly what a colorful tile accent behind the stove or sink does—it draws attention without making the room feel busy. Think of it as a tiny burst of personality that breaks up all the white or neutral cabinetry, and suddenly your kitchen has a focal point that feels intentional, not cramped.
You don’t need a full backsplash to make an impact. A vertical strip of glossy subway tile in a pop color—like emerald green, deep navy, or warm terracotta—running from counter to hood is enough to transform the whole look. It’s a small commitment that pays off visually, and because it’s contained, it’s easy to clean and maintain.
Pair it with simple white cabinets and open shelving to keep the space airy, and let that tile do the talking.
Best Colors For A Small Kitchen
- Stick with one saturated hue rather than a pattern. Jewel tones like sapphire blue or amethyst add depth, while warm shades like mustard or coral keep things cheerful. If you prefer something softer, a pale mint or blush still reads as colorful without overwhelming.
- Avoid dark, moody colors in a very tiny kitchen—they can shrink the space instead of opening it up.
Layout And Placement Tip
Install the tile strip directly behind the stove or sink, where it naturally becomes a focal point. Keep it about 18 to 24 inches wide—wide enough to notice, narrow enough to feel like an accent. If your kitchen has an island, consider a matching tile strip on the front of the island for a cohesive look that ties the whole room together.
Finishing Touch
Add a slim floating shelf above the tile strip to display a few everyday items—a small plant, a salt cellar, or a pretty olive oil bottle. This draws the eye upward and makes the ceiling feel higher. Just keep it minimal so the tile remains the star.
8. Hanging Fruit Basket From the Ceiling
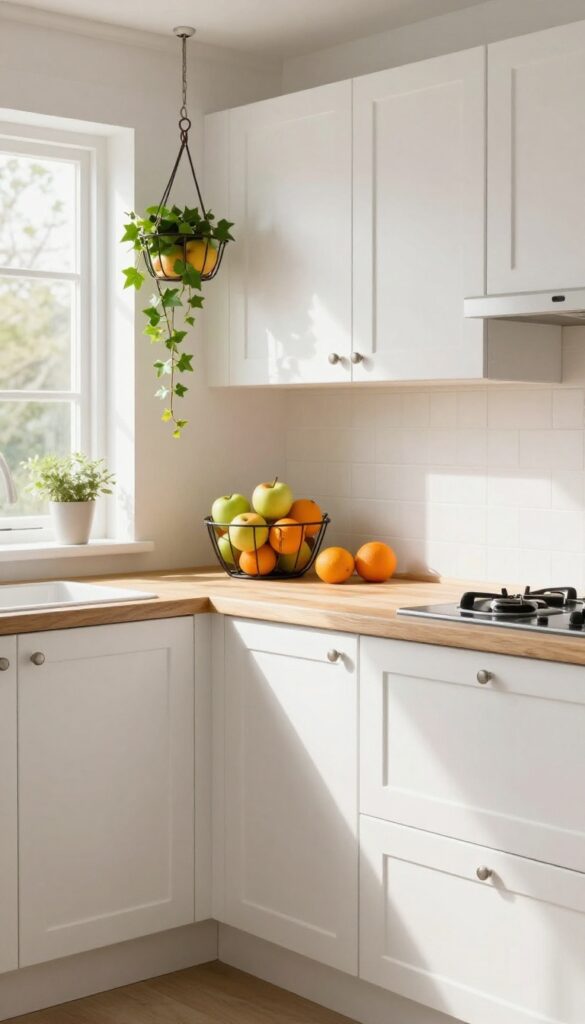
Ceilings are often overlooked in small kitchens, but they offer prime real estate for storage. A hanging fruit basket does double duty: it keeps produce within easy reach while adding a charming, rustic focal point. This idea works especially well in kitchens with high ceilings or awkward corners where a floor basket would just get in the way.
Suspend a wire basket from the ceiling to store onions, garlic, or fruit. It frees up counter space and adds a rustic, playful vibe. The key is choosing a basket that feels substantial enough to hold produce but light enough to hang securely.
Wrought iron or galvanized steel options work great for a farmhouse look, while a simple woven rattan basket brings warmth. Hang it near a window or above a prep zone so you can grab ingredients without reaching too far.
Best Materials
- Go for metal or natural fibers. Wrought iron or steel baskets feel sturdy and industrial, while rattan or seagrass adds texture and warmth. Avoid plastic—it can look cheap and doesn't breathe well for produce storage.
- If you want a pop of color, spray-paint a metal basket in a cheerful shade like mustard yellow or sage green.
Hanging Tip
- Use a sturdy ceiling hook rated for at least 10 pounds. Make sure it's anchored into a joist or use a toggle bolt for drywall. Adjust the chain length so the basket hangs at eye level or slightly above—too low and it becomes a head hazard, too high and it's hard to reach.
- A simple S-hook makes it easy to remove the basket for cleaning.
Styling Note
Layer in a few small potted herbs or a trailing plant like ivy around the basket for an extra touch of green. Keep the produce organized by type: onions and garlic in one basket, apples and citrus in another. This not only looks tidy but also helps with airflow and ripening.
9. Drawer Dividers for Utensils and Gadgets
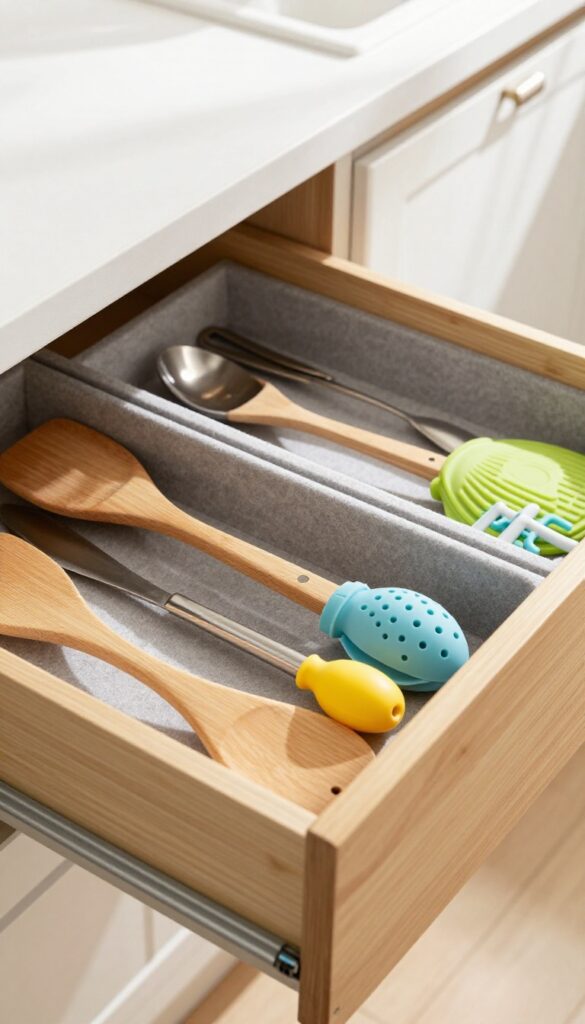
You know that feeling when you open a drawer and everything is just… chaos? Spatulas tangled with tongs, measuring spoons hiding under a pile of garlic presses. It's a small frustration that adds up, especially in a tiny kitchen where every second counts.
Adjustable drawer dividers are the quiet heroes of kitchen organization. They turn a messy jumble into a neatly arranged toolkit, so you can grab the whisk or peeler you need without a single rummage.
Adjustable dividers are incredibly versatile and easy to install. They come in materials like bamboo, plastic, or metal, and most expand to fit different drawer widths. The trick is to group your items by function—baking tools in one section, everyday utensils in another, and specialty gadgets in a third.
This way, you're not just organizing; you're creating a system that makes cooking faster and more enjoyable. Plus, a tidy drawer looks surprisingly satisfying every time you open it.
Best Materials
- Bamboo dividers are a popular choice because they're lightweight, durable, and add a warm natural texture to your drawers. For a more modern look, go with clear acrylic or sleek metal. If you're on a budget, expandable plastic ones work just fine and are easy to clean.
- The key is to pick a material that complements your kitchen's style and feels sturdy enough to stay in place.
Layout Tip
- Start by taking everything out of the drawer and grouping items by size and use. Place the most-used tools toward the front, and keep bulky gadgets like potato mashers or pizza cutters in deeper sections. Use smaller dividers for measuring spoons and peelers, and larger ones for spatulas and tongs.
- Don't be afraid to adjust the layout a few times until it feels intuitive.
Finishing Touch
Add a drawer liner underneath the dividers to protect your tools and keep them from sliding around. A non-slip liner in a neutral color or a fun pattern can add a pop of personality that you'll see every time you open the drawer. It's a small detail that makes the whole setup feel more polished and intentional.
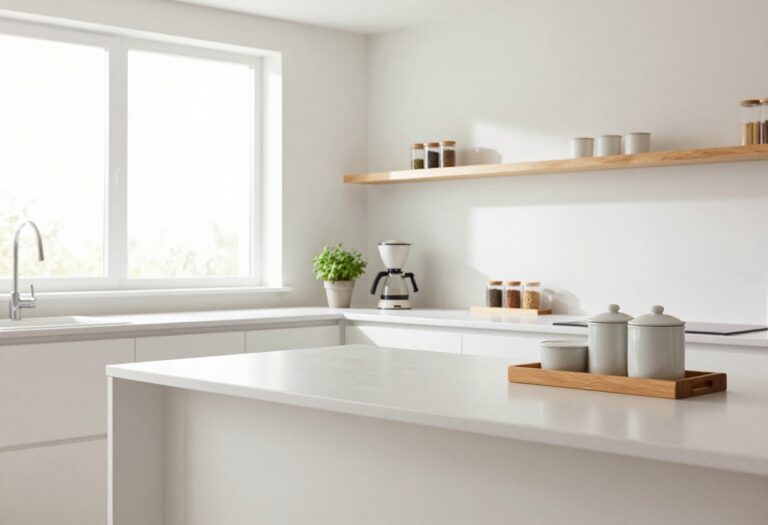
10. Corner Shelf for Coffee Station
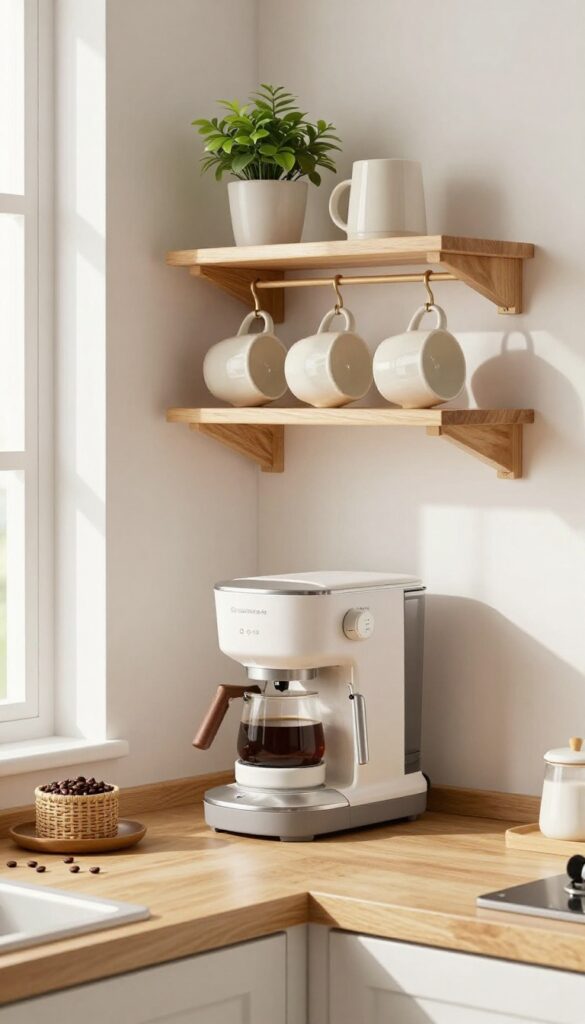
Every kitchen has that one corner that feels a little awkward—too shallow for a cabinet, too narrow for a cart. Instead of leaving it empty, turn it into a dedicated coffee station. A simple wall-mounted shelf or a slim corner unit instantly transforms dead space into a functional morning hub.
The best part? You don’t need a big renovation or a lot of money. Just a shelf, a few hooks, and your favorite mugs can create a spot that feels intentional and inviting.
A corner coffee station is one of those ideas that makes you wonder why you didn’t try it sooner. It keeps your countertops clear while giving your morning routine a designated home. Whether you’re a pour-over purist or a pod person, this setup works.
Start with a shelf that fits the corner snugly—floating shelves look clean and modern, while a small corner cabinet offers hidden storage. Place your coffee maker on the shelf, hang mugs underneath, and store beans or pods in a small basket. Add a tiny tray for sugar and spoons, and you’ve got a station that’s both pretty and practical.
Shelf Styling Tip
Keep the shelf visually balanced by grouping items in odd numbers. A coffee machine on one side, a stack of two mugs in the middle, and a small plant or jar of stir sticks on the other side creates a pleasing composition. Use a small riser or stand to add height variation—this prevents the shelf from looking flat.
Best Materials
- For a relaxed, warm look, go with a natural wood shelf. If your kitchen leans modern, a white or black floating shelf with clean lines works beautifully. Metal brackets add an industrial touch, while a marble or butcher-block shelf brings a hint of luxury.
- Match the shelf finish to your existing hardware or cabinet pulls for a cohesive feel.
Small-space Fix
- In a tiny kitchen, every inch matters. Choose a corner shelf that’s at least 12 inches deep to fit a standard coffee maker. If your corner is extra tight, look for a triangular shelf designed specifically for corners—it maximizes space without sticking out too far.
- Add a small hook underneath for a dish towel, and you’ve turned a forgotten corner into a hardworking zone.
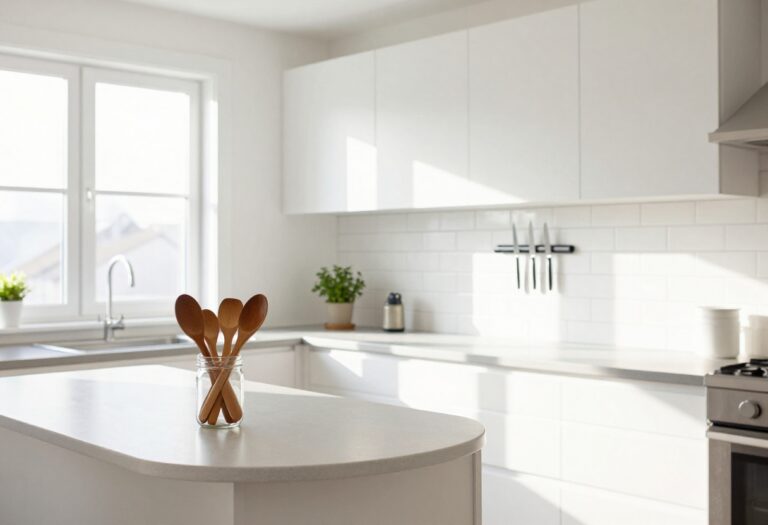
11. Window Sill Herb Garden
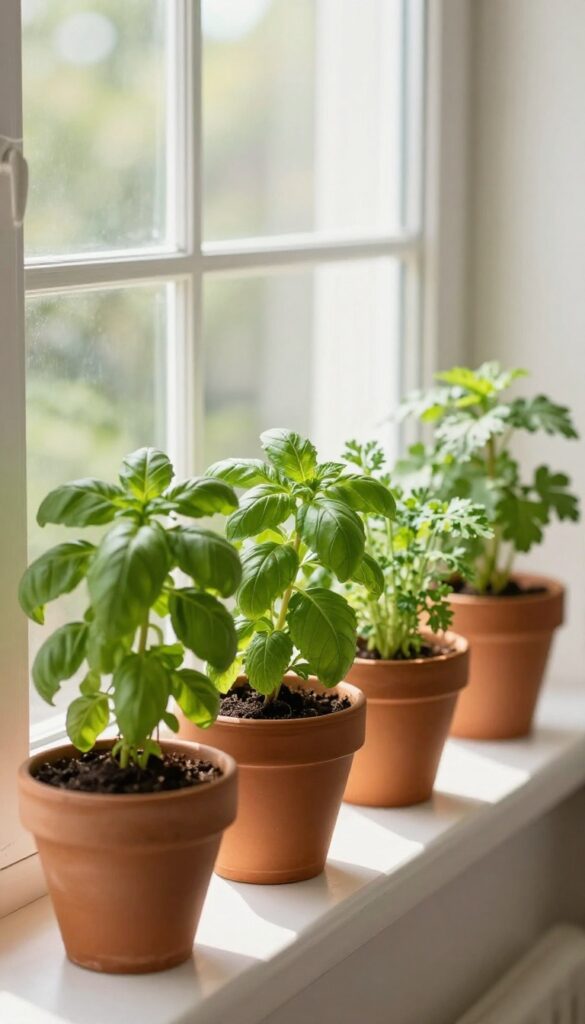
Imagine reaching over while you're cooking to snip a few fresh basil leaves or a sprig of rosemary. That's the kind of small luxury a window sill herb garden brings. It's not just about having fresh herbs on hand—it's about turning a tiny strip of space into something that feels alive and intentional.
Even in the smallest kitchen, a row of petite pots along the sill adds greenery, fragrance, and a practical touch that makes everyday meals feel a little more special.
A window sill herb garden is one of those ideas that checks every box: it's pretty, useful, and takes up zero counter space. The key is choosing the right herbs and containers so the display looks curated rather than cluttered. Think small terra-cotta pots or uniform ceramic planters lined up neatly.
Basil, mint, chives, thyme, and parsley are all easy to grow indoors and get plenty of light on a sunny sill. The visual effect is soft and inviting—a ribbon of green against the window glass that softens the kitchen's hard edges. Plus, having herbs within arm's reach makes you want to cook more, which is never a bad thing.
Best Herbs To Start With
- Stick with herbs that thrive in bright, indirect light and don't outgrow their space too quickly. Basil, chives, mint, parsley, and thyme are all great choices. Avoid dill or cilantro, which tend to get leggy indoors.
- If your sill gets direct afternoon sun, rosemary and oregano are more forgiving. Mixing leaf textures—like fuzzy sage next to smooth basil—adds visual interest even when the plants are small.
Container Styling Tip
- Uniform pots create a clean, cohesive look, but a mix of neutral tones (white, terra-cotta, soft gray) can also work if the shapes are similar. Use small saucers to catch water and protect your sill. For a budget-friendly swap, repurpose small tin cans or glass jars painted in matte finish.
- Just add drainage holes or a layer of pebbles at the bottom.
Storage-smart Placement
- Since this idea is all about making the most of limited space, keep the sill clear of other items. Move salt and pepper shakers or dish soap elsewhere so the herbs can shine. If your sill is narrow, choose slim rectangular planters that fit flush against the window.
- This maximizes planting area without blocking the view or light.
12. Over-the-Sink Drying Rack
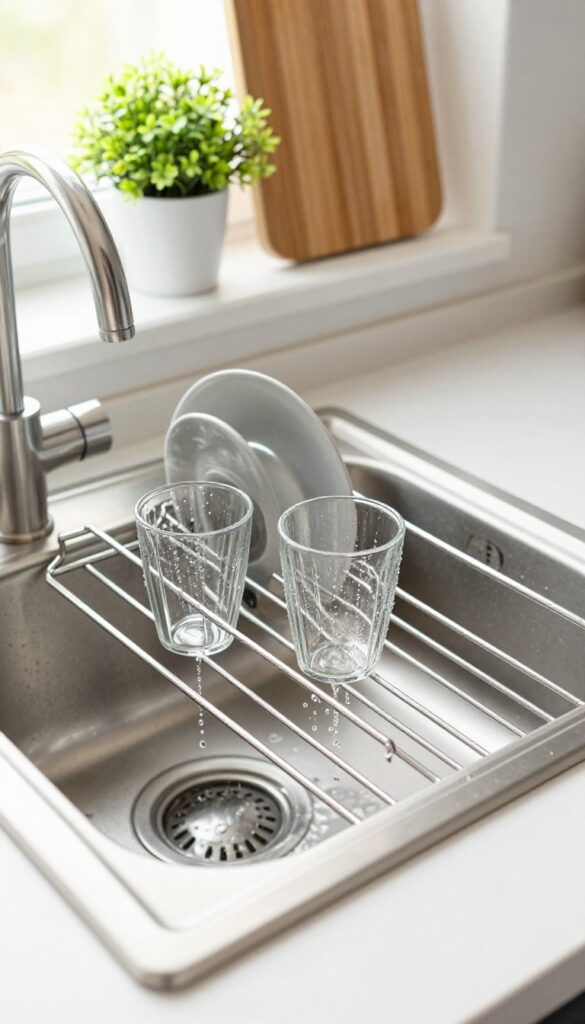
Drying dishes can take over your counter space fast, especially in a small kitchen. An over-the-sink drying rack solves that by perching right above the basin, catching drips directly into the sink. It’s one of those storage-smart swaps that instantly frees up prep area without sacrificing function.
A collapsible rack that spans your sink keeps wet dishes out of the way and folds flat when you’re done. Look for a stainless steel or bamboo version that matches your faucet finish or adds a warm natural tone. The best part?
You can still use the sink underneath for rinsing produce or washing hands—just slide the rack aside or fold it up.
Best Materials
Stainless steel racks feel sleek and modern, resist rust, and often come with a non-slip coating. Bamboo brings warmth and a natural look, but make sure it’s sealed to handle moisture. For a pop of color, some silicone-coated racks are dishwasher-safe and gentle on glassware.
Small-space Fix
If your sink is extra narrow, look for an expandable rack that adjusts to fit. Some models include a utensil caddy or a side hook for scrubbing brushes—bonus storage without taking up any counter real estate. When not in use, fold it and tuck it behind the faucet or store it under the sink.
Finishing Touch
Pair the rack with a slim dish mat underneath to catch any stray drips, and keep a small countertop compost bin nearby for food scraps. This combo keeps your drying zone tidy and your counters clear for cooking.
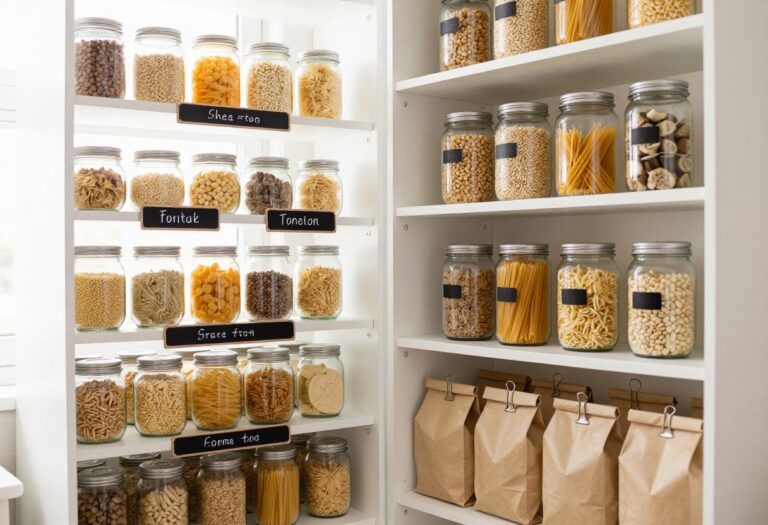
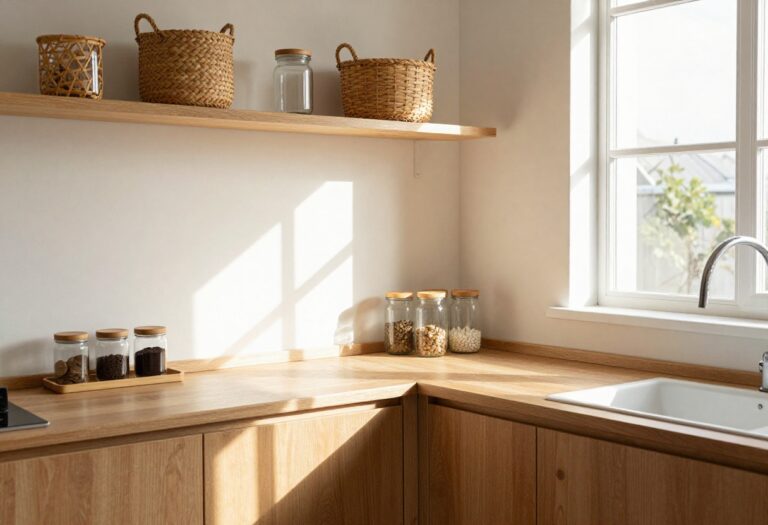
13. Colorful Canisters on Open Shelves
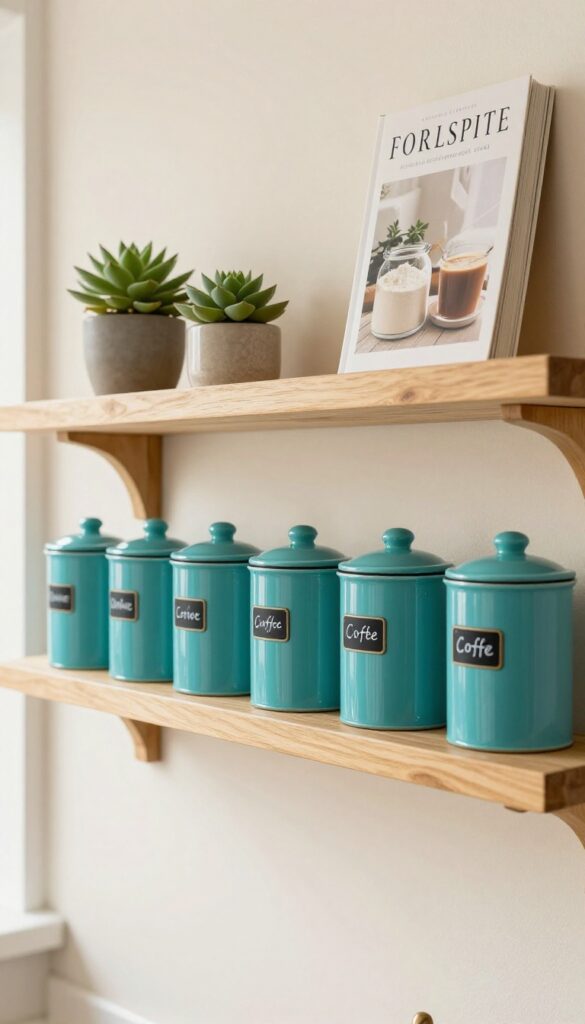
Open shelving is already a favorite for small kitchens, but it can sometimes look cluttered or mismatched. The trick is to use it as a stage for intentional, colorful storage. Matching bright canisters filled with everyday staples like flour, sugar, and coffee create a cohesive, cheerful display that’s both practical and pretty.
The pop of color draws the eye upward, making the kitchen feel taller and more organized.
Instead of hiding dry goods in cabinets, put them on display in a set of colorful canisters. The repetition of shape and color creates a clean, graphic look that anchors the shelves. It also makes cooking easier—you can grab exactly what you need without digging through bags and boxes.
Plus, the airtight seals keep ingredients fresh longer, so nothing goes to waste.
Best Colors For A Small Kitchen
- Stick with one bold hue for all the canisters to keep the look unified. Bright red, sunny yellow, or deep teal work well against neutral walls. If your kitchen has warm wood tones, try a soft sage or mustard.
- For a more modern feel, go with glossy white or black—still colorful in their own way, but understated.
Shelf Styling Tip
Place the canisters on the middle or upper shelf so they’re easy to reach but also visible. Leave a little breathing room between each one, and add a small plant or cookbook on the side for balance. Avoid overcrowding—this idea works best when the canisters are the star of the shelf.
Storage Tip
Label each canister with a chalkboard tag or simple sticker so you never mix up the flour and powdered sugar. Keep the most-used items like salt and coffee on the lower shelf, and less frequent ones like pasta or beans up top. This setup saves time and keeps your countertops clear.
14. Under-Cabinet Lighting With Warm Glow
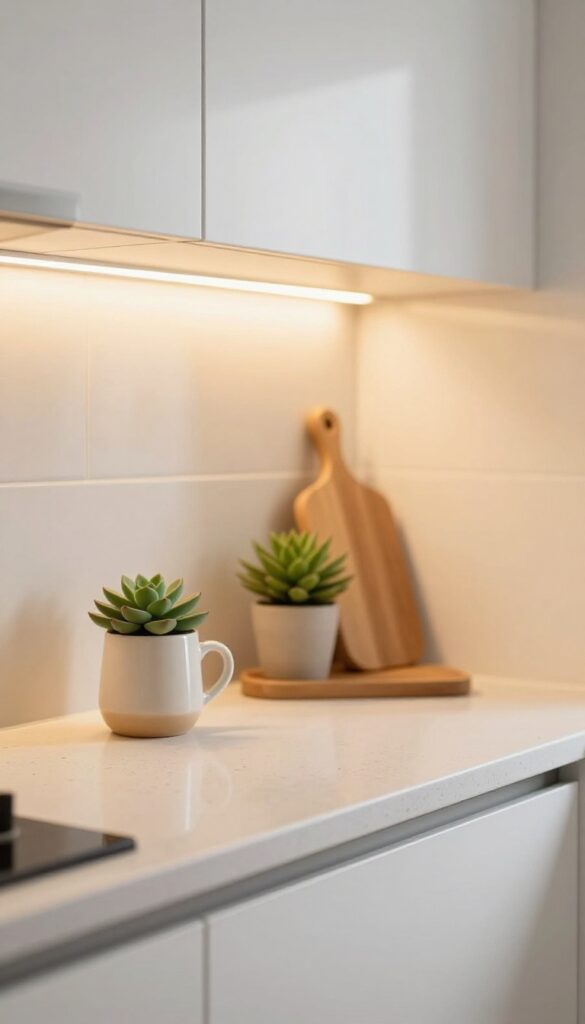
Brightening up your countertops doesn't have to mean harsh overhead lights that wash everything out. Under-cabinet LED strips with a warm glow create a soft, inviting ambiance while making meal prep safer and easier. The gentle light bounces off surfaces, making the whole kitchen feel larger and cozier at the same time.
It's one of those small upgrades that instantly changes how a space feels, especially in a small kitchen where every lighting choice matters.
Under-cabinet lighting is a practical upgrade that also adds a layer of warmth and depth to your kitchen. By installing LED strip lights beneath your upper cabinets, you eliminate shadows on countertops and create a more functional workspace. The warm color temperature (around 2700K to 3000K) mimics the glow of sunset, making the room feel inviting rather than clinical.
This is especially effective in small kitchens where overhead lighting alone can feel flat and unflattering. The strips are easy to install with adhesive backing and can be cut to fit your exact cabinet length. Many options come with dimmers or remote controls, so you can adjust the brightness depending on the time of day or mood.
Pair them with light-colored countertops to maximize the reflective effect and make the space feel even more open. For a cohesive look, choose strips that match the finish of your cabinet hardware or go with a discreet white or black casing that blends in. The result is a kitchen that feels both polished and welcoming, with a gentle glow that highlights your decor without overpowering it.
Best Placement
- Install the strips near the front edge of the upper cabinets, about an inch back from the lip. This positioning casts light directly onto the countertop without shining into your eyes. For corner cabinets, use flexible strips or connector pieces to maintain a continuous line of light.
- If your cabinets have a recessed bottom, the strips can be hidden inside the channel for a seamless look.
Warm Vs. Cool Light
- Stick with warm white (2700K–3000K) for a cozy, residential feel. Cool white or daylight tones (4000K+) can make a small kitchen feel sterile and harsh. Warm light also complements wood tones, brass fixtures, and earthy color palettes commonly found in storage-smart kitchens.
- If you want flexibility, choose a strip with adjustable color temperature.
Smart Storage Pairing
- Use the glow to highlight your storage solutions. Place frequently used items like spices, oils, or cutting boards on the counter directly under the light. The illumination makes them easy to grab and adds a styled vignette.
- For open shelving above, add a second strip to showcase glass jars or ceramic canisters, tying the whole storage-smart look together.
15. Small Rug With Bold Pattern
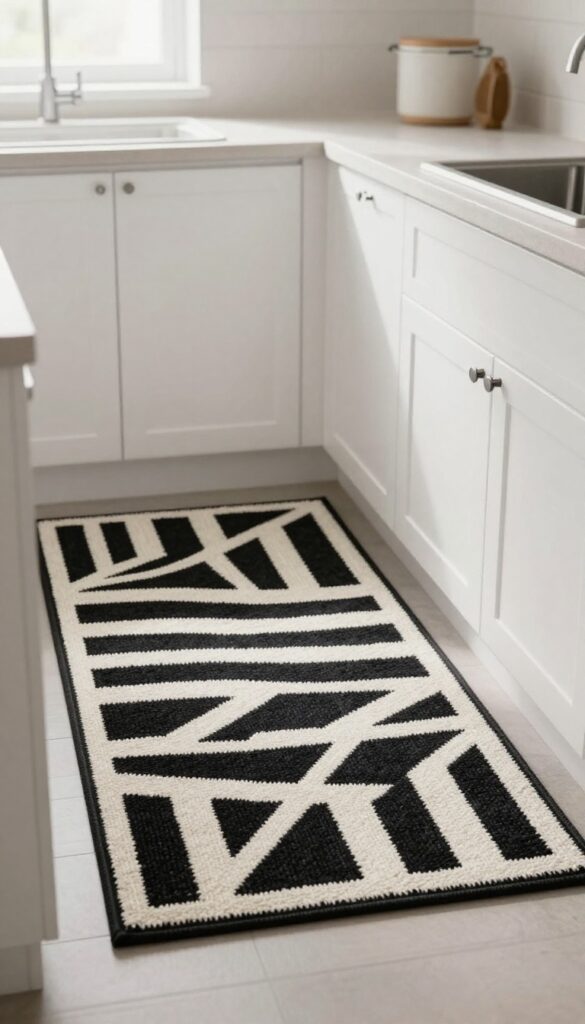
A small rug might seem like an afterthought, but in a tiny kitchen, it can pull the whole look together. A bold pattern adds instant personality, and placing it in front of the sink or stove defines the work zone without taking up any counter space. Plus, it’s easy to toss in the wash when things get messy.
Lay a patterned runner in front of the sink or stove. It adds color, defines the zone, and is easy to wash.
Best Colors & Patterns
Go for a high-contrast pattern like black-and-white geometric, a vibrant kilim, or a graphic stripe. These hide stains well and create a focal point in an otherwise neutral kitchen. If your cabinets are dark, try a rug with warm tones like rust or mustard to brighten the space.
Size & Placement
A runner about 2×3 feet works perfectly in front of a standard sink or stove. Make sure it’s long enough to stand on comfortably but not so long that it interferes with cabinet doors. Use a non-slip pad underneath to keep it secure, especially in high-traffic spots.
Material Matters
Choose a flat-weave or low-pile rug made from cotton, wool, or a synthetic blend. These dry quickly and are easy to vacuum or machine wash. Avoid thick shag rugs that trap crumbs and moisture—they’re a pain to clean in a kitchen.
FAQ
How can I make a small kitchen look bigger without renovating?
Use light colors on walls and cabinets, add mirrors or reflective surfaces, and keep counters clutter-free. Open shelving and under-cabinet lighting also help create an airy feel.
What are the best storage solutions for a tiny kitchen?
Maximize vertical space with pegboards, magnetic strips, and hanging baskets. Use drawer dividers, under-shelf baskets, and slim rolling carts to fill gaps.
Can I add color to a small kitchen without making it feel cramped?
Absolutely. Stick to one or two bright accents like a colorful backsplash, rug, or canisters. Keep the base neutral to maintain openness.
How do I keep open shelving from looking messy?
Group similar items, use matching containers, and leave some empty space. Rotate decor seasonally to keep it fresh.
What's a cheap way to update a small kitchen?
Paint cabinets or add new hardware. Swap out light fixtures, add a peel-and-stick backsplash, or introduce a colorful rug for instant impact.
Conclusion
Small kitchens don't have to feel cramped or boring. With a few smart storage tricks and some playful details, you can create a space that's both functional and full of personality. The key is to choose ideas that work for your daily routine and make you smile every time you walk in.
Start with one or two changes and see how they transform your cooking space. Whether it's a bright backsplash or a clever cart, every little detail adds up to a kitchen that feels bigger, brighter, and totally yours.