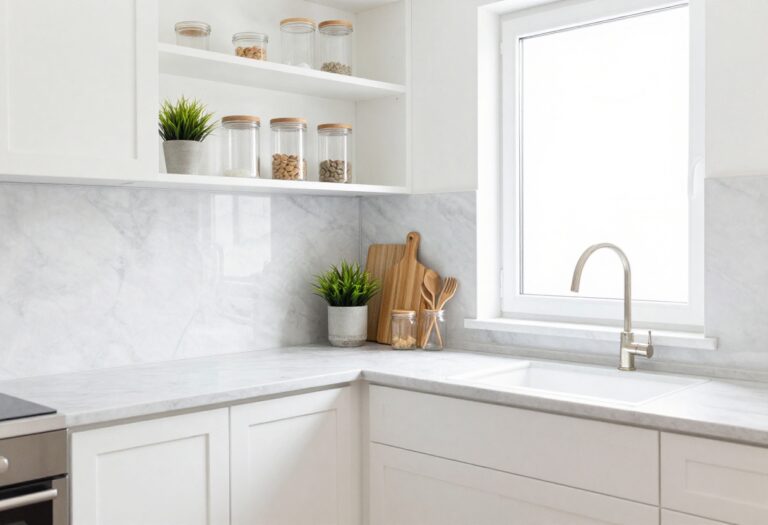
15 Kitchen Storage Ideas Organizing Every Awkward Spot
Every kitchen has those spots that seem impossible to use—the narrow gap between the fridge and wall, the deep corner cabinet where things disappear, or the empty space above the upper cabinets. Instead of letting them collect dust, you can turn them into clever storage zones that actually work for you.
The trick is choosing solutions that feel intentional and keep your kitchen looking clean and warm, not cluttered. These 15 ideas focus on making the most of every inch while maintaining a modern, cozy vibe.
Whether you're dealing with a tiny galley kitchen or a sprawling layout with odd angles, there's something here to help you organize smarter.
1. Pull-Out Shelves for Deep Corner Cabinets

Deep corner cabinets are notorious for swallowing up pots, pans, and small appliances. You know the drill: you shove something in, and it disappears for months. But with pull-out shelves or a lazy Susan, that awkward dead zone becomes one of the most functional spots in your kitchen.
The best part? You can see everything at a glance and grab what you need without playing hide-and-seek.
Installing pull-out shelves transforms a frustrating corner into a hardworking storage area. They slide out smoothly, giving you full access to items tucked in the back. A lazy Susan is another great option, especially for round or angled cabinets.
Both solutions keep your cookware, mixing bowls, or pantry staples organized and easy to reach. For a modern and clean look, choose sleek metal or wood shelves that match your cabinet interiors. Warm it up with natural wood tones or soft white finishes that feel cozy and inviting.
Best Materials For Durability And Style
Go with sturdy materials like birch plywood or wire baskets for a balance of strength and airy feel. Wood shelves add warmth, while chrome or stainless steel wire baskets keep the look light and industrial. If your kitchen leans warm and cozy, stick with wood or bamboo—they bring a natural texture that softens the modern lines.
Layout Tip: Measure Before You Buy
- Corner cabinets come in different shapes—L-shaped, diagonal, or with a blind spot. Measure the depth, width, and height carefully. For pull-out shelves, check that the slides can handle the weight of your heaviest pots.
- A pro tip: install full-extension slides so you can access every inch without straining.
Styling Your Pull-out Shelves
- Keep it tidy by grouping similar items together. Use clear bins or small baskets for spice jars, lids, or measuring cups. Arrange pots and pans by size, with the most-used ones in front.
- Add a liner to the shelves to prevent slipping and protect the finish. A little organization goes a long way in making your kitchen feel calm and put-together.
2. Slim Rolling Cart for the Gap Between Fridge and Wall
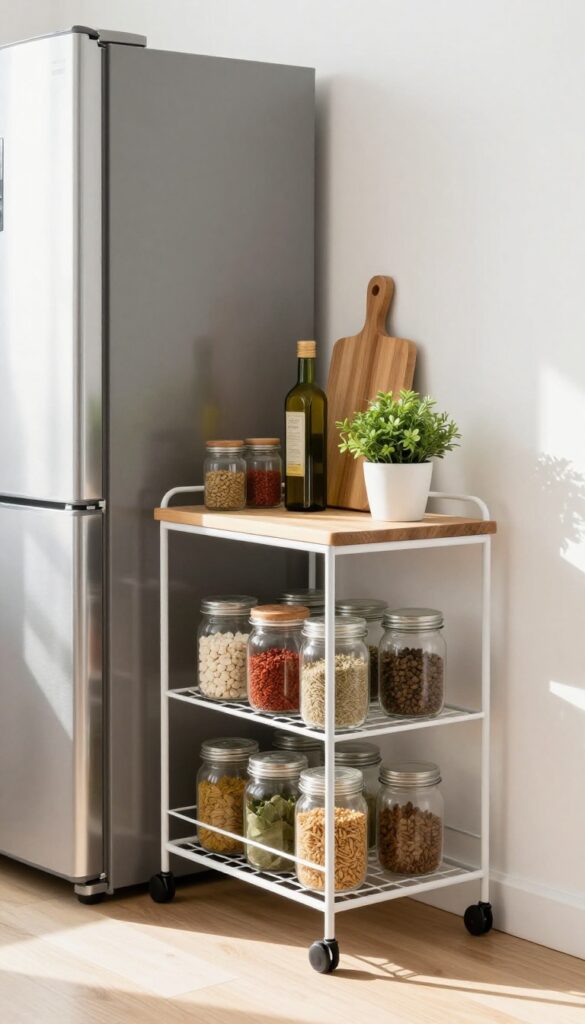
That narrow gap between your fridge and the wall is prime real estate just waiting to be used. Instead of letting dust bunnies collect there, a slim rolling cart slides right in and gives you instant pull-out storage. It keeps spices, oils, or cleaning supplies neatly tucked away yet easy to grab.
The best part? It rolls out smoothly so you can access everything without playing fridge Tetris.
A slim rolling cart is a lifesaver for awkward gaps that are too small for furniture but too big to ignore. Look for a cart that's just a few inches wide—typically 4 to 6 inches—and tall enough to fit under standard counter height. The rolling function means you can pull it out fully to see everything, then push it back out of sight.
It's perfect for storing pantry overflow, extra spices, or even a collection of olive oils and vinegars. For a modern and clean look, choose a cart in a neutral tone like white, black, or warm wood. To keep the cozy vibe, add a small wooden cutting board on top or a tiny plant to soften the utilitarian feel.
Best Materials
Wire or metal carts feel airy and modern, while bamboo or wood adds warmth. For a clean look, go with a white metal cart that blends into the fridge. If you want a cozy touch, a bamboo cart brings natural texture and pairs well with warm-toned kitchens.
Storage Tip
Use small bins or clear jars to group items by category—spices in one bin, oils in another. This keeps the cart organized and prevents bottles from tipping over when you roll it out. Label the bins for extra convenience.
Finishing Touch
Top the cart with a small tray or a mini wooden shelf to hold a couple of cookbooks or a tiny succulent. This adds a styled look and makes the cart feel intentional, not just a storage afterthought.
3. Magnetic Knife Strip on the Side of a Cabinet
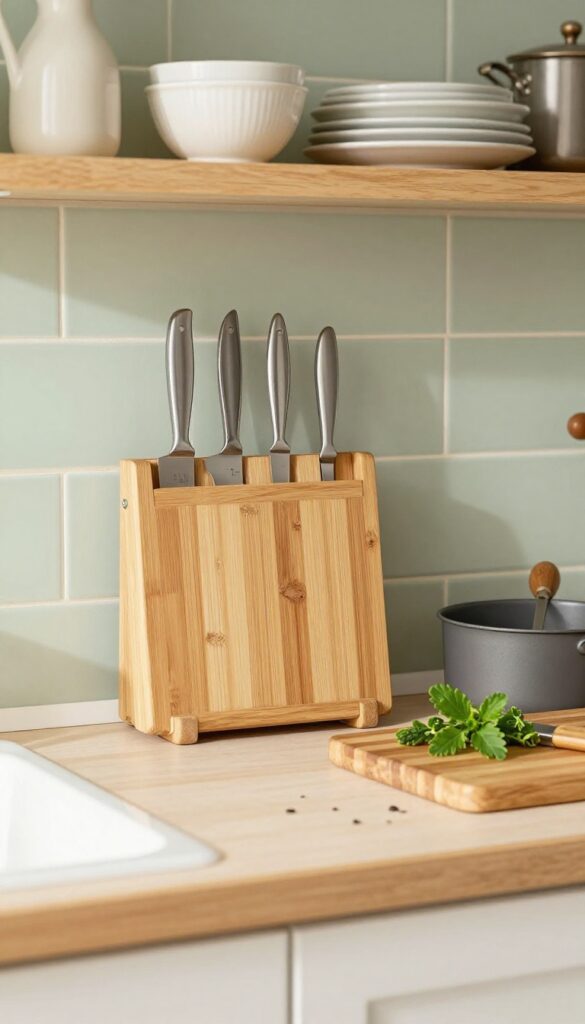
Knife blocks hog counter space and can be a pain to clean. Mounting a magnetic strip on the side of a cabinet or backsplash frees up drawer space and puts your blades within easy reach. The look is sleek and modern, but with the right finish, it can feel warm and inviting too.
A magnetic knife strip is one of those small swaps that makes a big difference in both function and style. By moving knives off the counter and onto a vertical surface, you instantly clear up valuable prep space. Plus, the visual line of knives becomes a subtle design element—especially when you choose a strip that complements your hardware or cabinet finish.
For a warm, cozy kitchen, go with a wooden magnetic strip or a brass-toned one. If your style leans more modern, a slim stainless steel strip blends right in. Mount it on the side of a cabinet near your main prep zone, or on the backsplash between the counter and upper cabinets.
Just make sure it's securely installed and out of reach of little hands.
Best Materials For A Cozy Look
- While stainless steel strips are the most common, they can feel a bit cold. To keep the warm and cozy vibe, look for magnetic strips with a wood veneer or a warm bronze finish. Bamboo strips add a natural texture that pairs beautifully with butcher block counters or open shelving.
- If you prefer metal, choose oil-rubbed bronze or matte black for a softer, more grounded feel.
Placement And Safety Tips
- The best spot is on the side of a cabinet that's close to your cutting board area but not in the main walkway. Avoid placing it directly above the stove where heat and grease can dull the knives or make the strip sticky. Also, make sure the strip is mounted at a height that's easy to reach but not too low if you have kids.
- A good rule: install it about 12 inches above the counter.
Styling The Area Around It
Once the strip is up, keep the surrounding counter clutter-free to let the knives become a feature. Add a small wooden cutting board leaning against the backsplash and a potted herb in a ceramic pot nearby. The combination of natural wood, green leaves, and the sleek metal of the knives creates a balanced, lived-in look that feels both modern and cozy.
4. Under-Sink Drawers for Cleaning Supplies
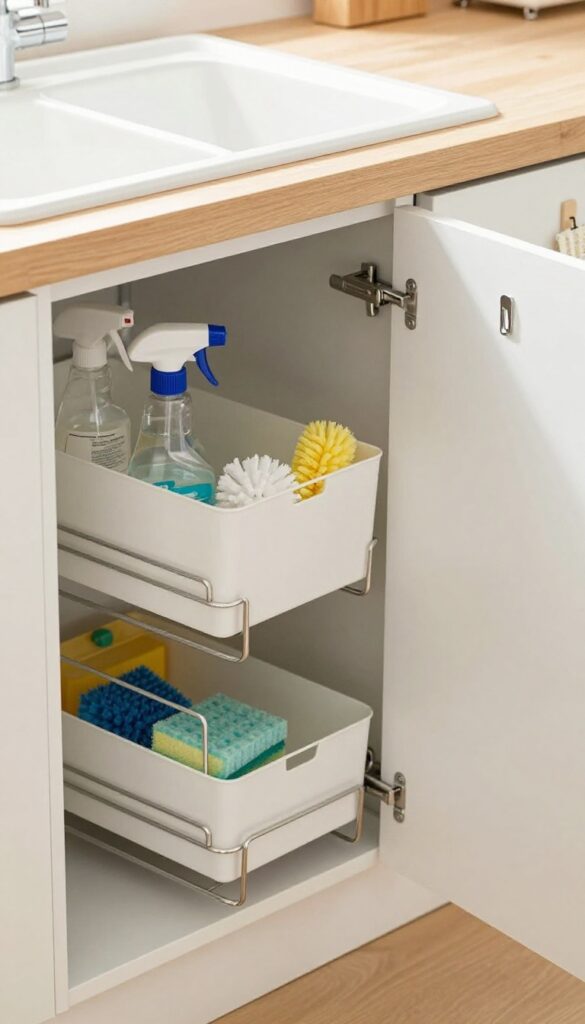
The space under your kitchen sink often becomes a chaotic jumble of bottles, sponges, and mystery drips. But with a simple pull-out drawer or tiered organizer, that awkward nook can transform into one of the most efficient spots in your kitchen. The key is to maximize vertical space while keeping everything visible and within easy reach.
A clean, modern under-sink setup instantly makes the whole kitchen feel more orderly and intentional.
Install a sturdy pull-out drawer or a two-tiered sliding basket system to store sponges, scrub brushes, spray bottles, and dish soap. This keeps everything off the floor of the cabinet and prevents that dreaded pile-up of supplies. Look for a unit with adjustable dividers or removable bins so you can customize the layout to fit your specific bottles and tools.
The result is a tidy, grab-and-go station that makes cleaning feel less like a chore and more like a breeze.
Best Materials
Go for a drawer or organizer made from coated steel or heavy-duty plastic that can handle moisture and occasional drips. Avoid raw wood or particleboard, which can warp or mildew over time. A sleek white or gray finish blends seamlessly with most cabinet interiors and keeps the look clean.
Layout Tip
Place your most-used items—like dish soap and a scrub brush—in the front or top tier. Reserve the back or lower section for backup bottles, extra sponges, and gloves. Use small bins or caddies to group similar items, so nothing gets lost in the shadows.
Finishing Touch
Add a small adhesive hook inside the cabinet door to hang a drying cloth or a pair of rubber gloves. This keeps damp items off the counter and lets them air out. A slim, clear mat underneath the organizer catches any drips and makes cleanup effortless.
5. Over-the-Sink Drying Rack with Storage
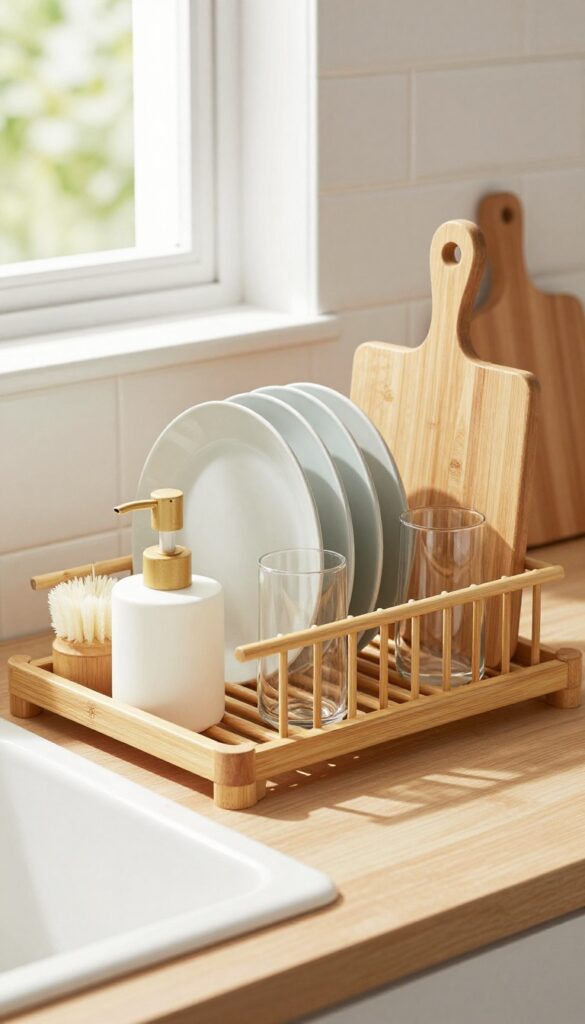
Drying dishes on a countertop mat or a bulky rack eats up precious prep space. An over-the-sink drying rack turns that wasted area into a functional zone, keeping your counters clear and your workflow smooth. Modern versions come with built-in shelves or hooks for sponges, soap, or even a small cutting board, so everything you need is right where you use it.
The look is clean and intentional, not like an afterthought.
An over-the-sink drying rack is one of those small changes that makes a big difference in how your kitchen feels and functions. By using the space above the sink, you free up counter area for chopping, plating, or just having a clear surface. Many designs now include a lower shelf or a sliding tray that holds soap bottles or a dish brush, keeping them off the counter and within easy reach.
When you're not drying dishes, the rack can double as extra storage for produce or a place to set hot pans. Choose a stainless steel or bamboo version with a slim profile so it doesn't block the window or feel bulky. The result is a kitchen that feels more open, organized, and ready for cooking.
Best Materials For A Warm Look
- Bamboo is a top choice if you're going for a warm, cozy feel. It brings natural texture and a light wood tone that pairs well with warm whites, beige, or soft grays. Stainless steel is more modern and sleek, but you can soften it with a wooden cutting board or a linen dish towel draped over the rack.
- For a budget-friendly option, look for a coated wire rack with a matte finish—it resists rust and feels less industrial.
Layout Tip: Measure Your Sink First
- Not all over-the-sink racks fit every sink. Measure the width of your sink basin and the depth from front to back before buying. Some racks are adjustable, but others are fixed.
- Also consider the height: if you have a deep sink, a taller rack might block your view out the window. A low-profile design works best for single-basin sinks, while double sinks may need a rack that spans the divider.
Styling Detail: Keep It Light And Airy
- To maintain a clean, uncluttered look, limit what you store on the rack. A small dish soap pump, a wooden scrub brush, and a few drying dishes are enough. Avoid piling on too many items or letting sponges sit in a wet dish.
- If your rack has a shelf, use it for a small plant or a pretty soap dispenser to add a decorative touch that still feels practical.
6. Pegboard Wall for Pots and Pans
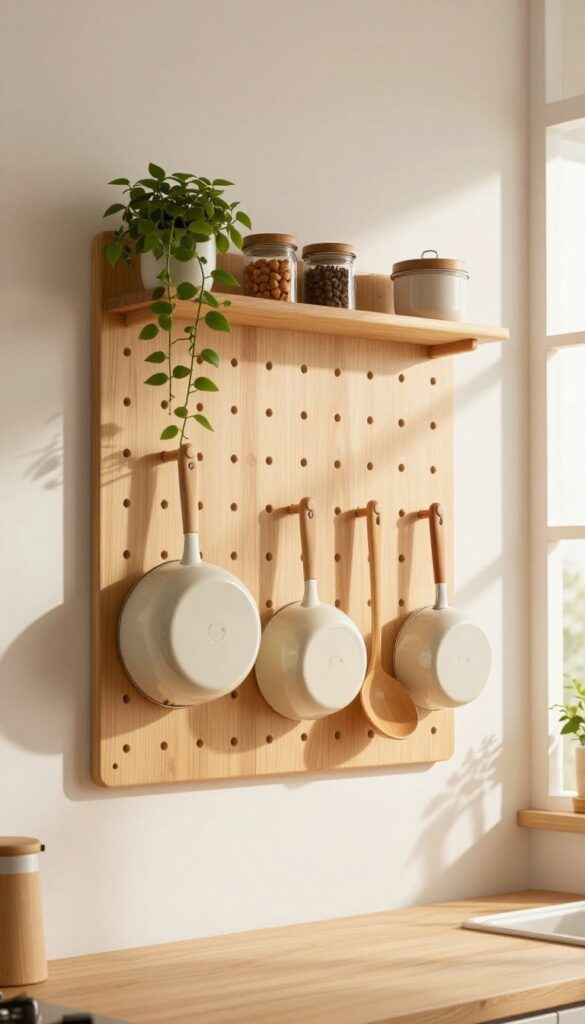
Pots and pans can be bulky and awkward to store, often taking up prime cabinet real estate. A pegboard wall solves this by turning an empty vertical surface into a highly functional, customizable storage system. Plus, it brings an industrial-chic vibe that feels modern yet warm when paired with the right materials.
Install a pegboard on an empty wall or inside a cabinet door to hang pots, pans, and utensils. It’s customizable and adds an industrial-chic look.
Best Materials
Go for a wooden pegboard for a warmer feel, or choose a metal one for a sleeker industrial look. If you want to keep the space feeling cozy, opt for a natural wood finish or paint the pegboard in a soft neutral like warm white or sage green.
Layout Tip
Arrange your most-used pots and pans at easy reach, and use hooks of different sizes to accommodate various handles. Leave some space for utensils or small cutting boards to create a balanced, visually pleasing composition.
Finishing Touch
Add a small shelf above the pegboard for spices or a trailing plant. This softens the utilitarian look and ties the pegboard into the rest of your kitchen decor seamlessly.
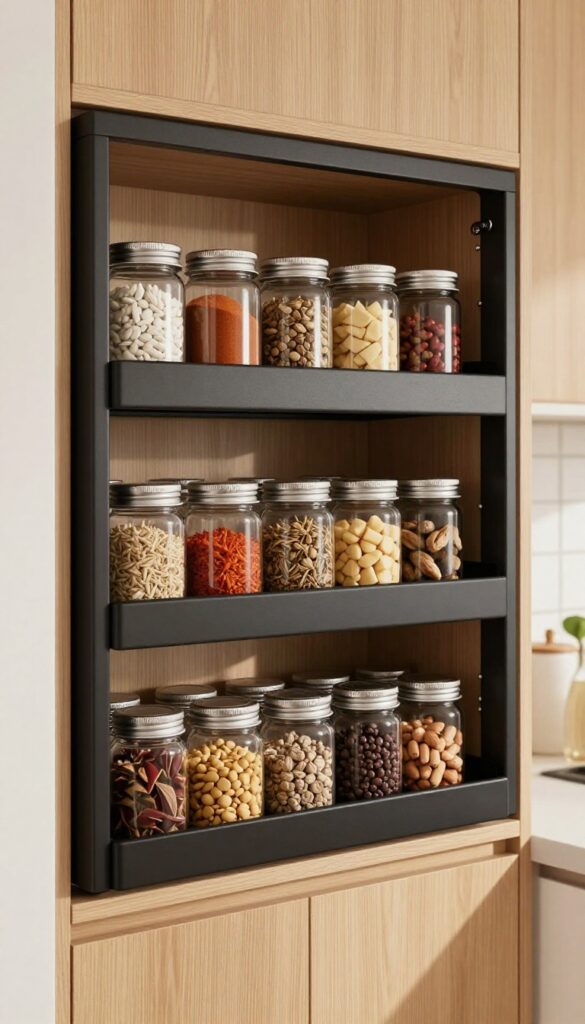
7. Spice Rack Inside a Cabinet Door
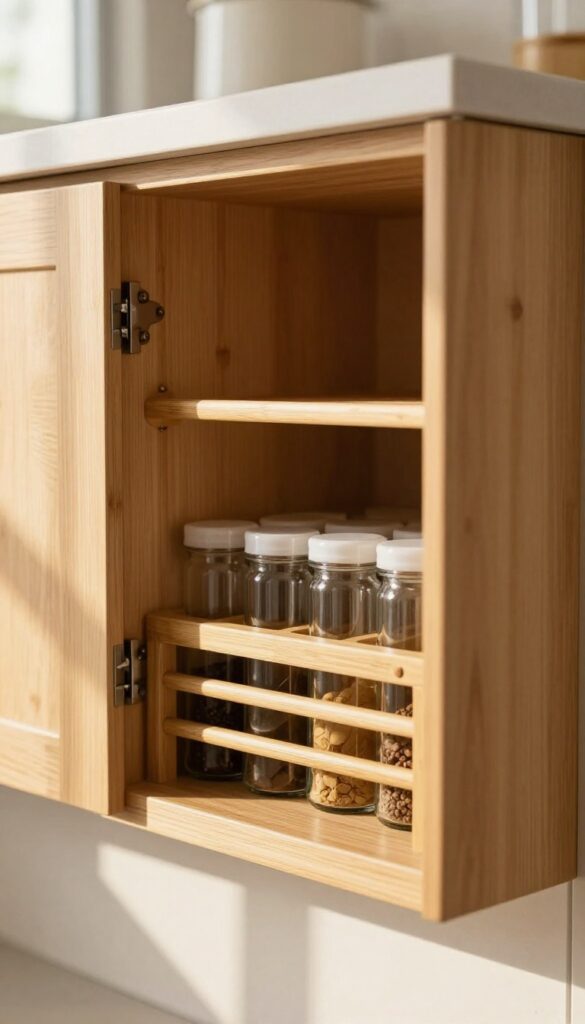
Cooking becomes so much smoother when your spices are right where you need them—no digging through drawers or shuffling bottles around. Mounting a slim rack on the inside of a cabinet door turns dead space into a neatly organized spice station. It keeps countertops clear and makes grabbing oregano or cumin feel effortless, especially when you're mid-recipe.
This trick works best on upper cabinet doors near the stove or prep area. Choose a rack that fits your cabinet depth so the door closes without a fight. Adhesive or screw-in options both work; just make sure the rack is secure enough to hold glass jars.
For a warm, cozy look, go with wood or bamboo racks that add a natural touch against painted cabinets. Arrange spices alphabetically or by frequency of use—whatever feels most intuitive to you. Label the tops of jars so you can spot them from above, and consider using small, uniform containers for a streamlined appearance.
Best Materials
- Bamboo or solid wood racks bring warmth and blend beautifully with warm-toned kitchens. If your cabinet interior is dark, a light wood rack pops nicely. For a more modern vibe, clear acrylic or metal racks keep things sleek and airy.
- Avoid plastic that looks flimsy; go for something that feels substantial when you open the door.
Small-space Fix
- Even the narrowest cabinet door can hold a single-tier spice rack. If you have deep cabinets, consider a two-tier design or a rack with a rail to hang small jars. This idea is a lifesaver in galley kitchens where every inch counts.
- Just make sure the door hinge can handle the extra weight—heavy spices add up.
Finishing Touch
Add a small adhesive label on the cabinet door edge that says "Spices" for a tidy, intentional look. Or line the inside of the cabinet with a peel-and-stick wallpaper in a subtle pattern—like a soft geometric or herb motif—so every time you open the door, it feels like a little discovery.
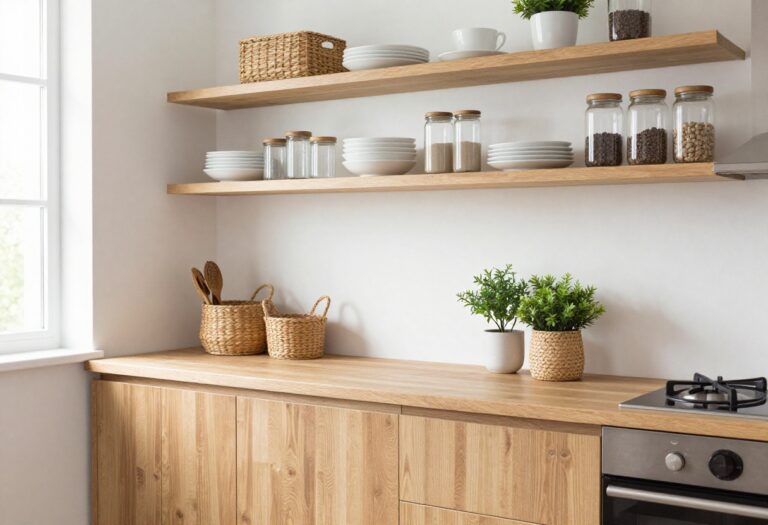
8. Tiered Shelf for Upper Cabinets
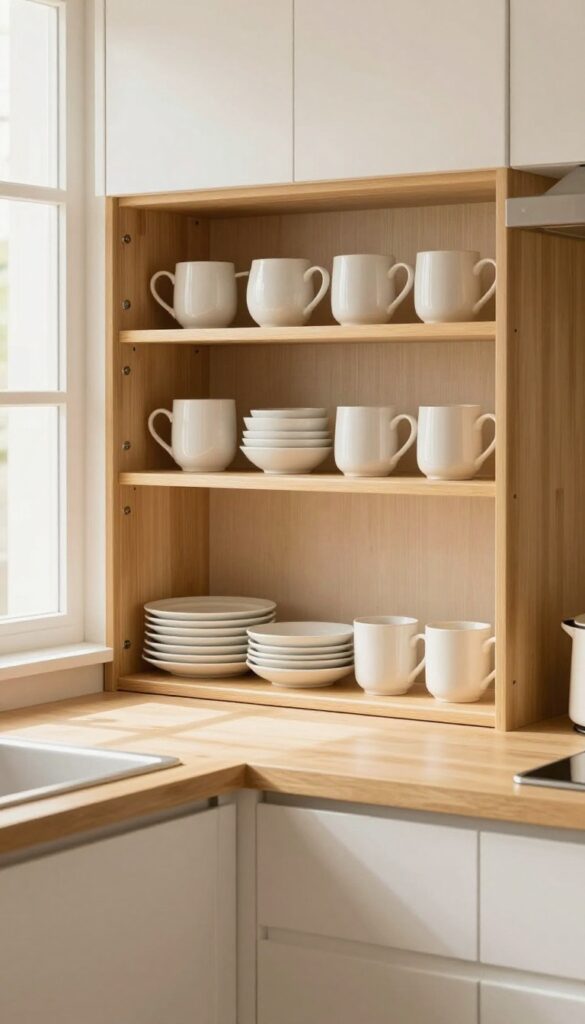
Upper cabinets are notorious for hiding half their contents behind the front row. You stack plates to save space, then end up pulling out the whole stack to grab one bowl from the bottom. A tiered shelf or riser changes that completely.
It lifts the back row so everything stays visible and easy to reach, no more digging or precarious balancing acts. This simple add-on instantly doubles your usable shelf space without any construction or permanent changes.
A tiered shelf is essentially a mini staircase for your dishes. Place it inside an upper cabinet and you can store plates on the lower tier and bowls or mugs on the upper tier. The angled design lets you see every piece at a glance, so grabbing a mug for your morning coffee takes one second.
It also prevents stacking, which means less wear on your dinnerware and no more chipped edges from sliding plates against each other. Look for expandable versions that fit different cabinet widths, or choose a fixed size that matches your shelf depth. Wooden risers add warmth, while clear acrylic keeps the focus on your dishes.
This trick works especially well for cabinets above the counter or near the coffee station, where you want quick access to everyday items.
Best Materials
- Bamboo tiered shelves are a popular choice because they're lightweight, affordable, and bring a natural warmth that fits modern and cozy kitchens alike. For a cleaner, more minimal look, clear acrylic risers let your dishes shine and make the cabinet feel airier. Wire or metal shelves are another option, especially if you want something sturdy and easy to wipe down.
- Avoid anything too thick or bulky, since you still need room to lift items off the top tier.
Layout Tip
- Place the riser toward the back of the shelf so the front tier sits at the edge. This gives you two distinct rows: front for everyday plates, back for bowls or smaller plates. If your cabinet is deep enough, you can even layer two risers side by side for extra capacity.
- Just make sure there's enough clearance above the upper tier to grab items without hitting the shelf above.
Styling Note
- Use the tiered shelf to create a little visual rhythm. Stack plates of the same size on the lower level and line up matching mugs or small bowls on the upper level. The repetition looks intentional and calming.
- If you have a mix of colors, keep the front row neutral and let the back row add a subtle pop. This keeps the cabinet feeling organized rather than chaotic.
9. Drawer Dividers for Utensils and Gadgets
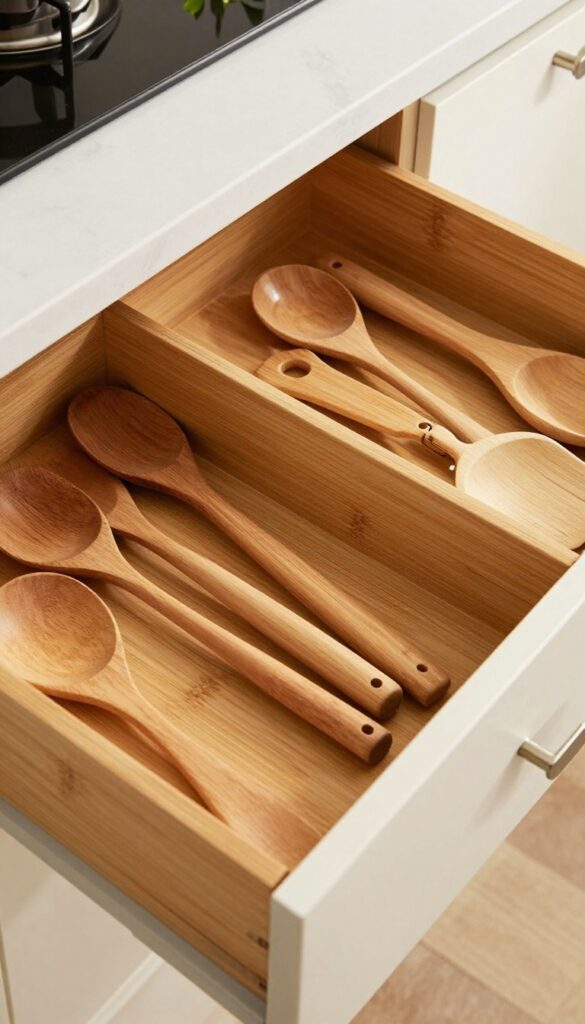
Deep drawers are a dream for storage, but without a system, they quickly become a jumbled mess of spatulas, whisks, and random measuring spoons. Adjustable dividers transform that chaos into a neatly organized space where every tool has its place. The best part?
You can customize the layout to fit your exact collection, so nothing gets buried or forgotten.
Adjustable dividers are a simple, low-cost solution that brings order to deep kitchen drawers. They work especially well for utensils, measuring cups, and small gadgets that tend to tangle. By creating separate compartments, you can group similar items together—like all your wooden spoons in one slot and your tongs in another.
This not only makes cooking more efficient but also keeps your drawers looking tidy and intentional. For a modern and clean look, choose dividers in neutral materials like bamboo or clear acrylic that blend seamlessly with your drawer interior. To keep the warm and cozy vibe, opt for natural wood tones that add a touch of warmth without cluttering the visual space.
Best Materials
- Bamboo dividers are a top choice for a warm, natural feel that complements any kitchen style. They're durable, easy to clean, and adjustable to fit different drawer widths. For a more minimalist look, clear acrylic dividers keep the focus on your tools while maintaining a sleek, modern aesthetic.
- Metal dividers with a matte finish work well in industrial or contemporary kitchens, but they can feel cold, so balance them with wooden utensils or a warm drawer liner.
Layout Tip
- Start by grouping your utensils by function—cooking, baking, serving—and measure the drawer to plan compartments. Place frequently used items like spatulas and ladles near the front, and reserve the back for less-used gadgets. Use adjustable dividers that can be repositioned as your collection grows or changes.
- For deep drawers, consider stacking smaller dividers vertically to create two layers of storage, maximizing every inch.
Finishing Touch
- Line the drawer with a soft, non-slip liner in a warm neutral like beige or light gray. This prevents tools from sliding around and adds a cozy texture. For a pop of personality, choose a liner with a subtle pattern, like a delicate stripe or a heathered weave, that ties into your kitchen's color palette.
- It's a small detail that makes opening the drawer feel like a treat.
10. Tension Rod Under the Sink for Spray Bottles
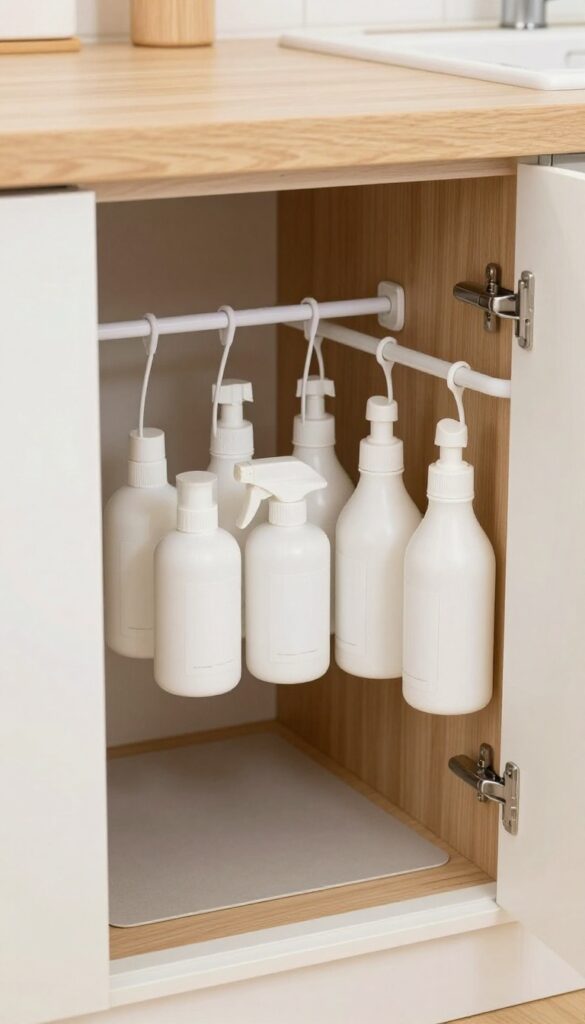
That dark, cramped space under the kitchen sink is often a black hole for cleaning supplies. Bottles get knocked over, leaks go unnoticed, and you end up playing a frustrating game of bottle Jenga every time you need the all-purpose spray. A simple tension rod changes everything by turning that wasted vertical real estate into a neat, accessible storage zone.
It’s a low-cost, no-drill solution that instantly brings order to one of the kitchen’s most awkward spots.
Install a standard tension rod horizontally under the sink, positioning it close to the cabinet ceiling so it doesn’t interfere with pipes or trash cans. Then use spray bottles with trigger nozzles—hook the nozzle over the rod so the bottle hangs upside down. This keeps every bottle visible and within easy reach, while the floor stays clear for a small bin or a mat to catch drips.
The result is a clean, airy under-sink area that feels twice as spacious.
Best Bottles To Use
- Stick with uniform spray bottles in a neutral color palette—white, gray, or clear—to keep the look tidy and modern. Avoid bulky or oddly shaped containers that won’t hang evenly. Glass bottles add a premium feel but are heavier; lightweight PET plastic is more practical for daily use.
- Label each bottle with a simple chalk sticker or a minimalist tag so you can grab the right cleaner at a glance.
Installation Tip
- Measure the width of your cabinet interior and buy a tension rod that extends a few inches beyond that. Position it high enough to clear any plumbing, but low enough that the bottles don’t touch the cabinet floor. For extra stability, choose a rod with rubber ends that grip the cabinet walls firmly.
- No tools, no holes—just twist and lock into place.
Styling The Space Below
- Once the bottles are off the floor, use the freed-up space for a slim pull-out bin or a shallow tray to catch drips. A small bamboo mat or a washable liner adds a warm texture and makes cleanup easy. Keep a microfiber cloth nearby for quick wipe-downs.
- This layered approach turns a purely functional area into a thoughtfully organized nook that feels calm and intentional.
11. Corner Shelf for Blind Corner Cabinets
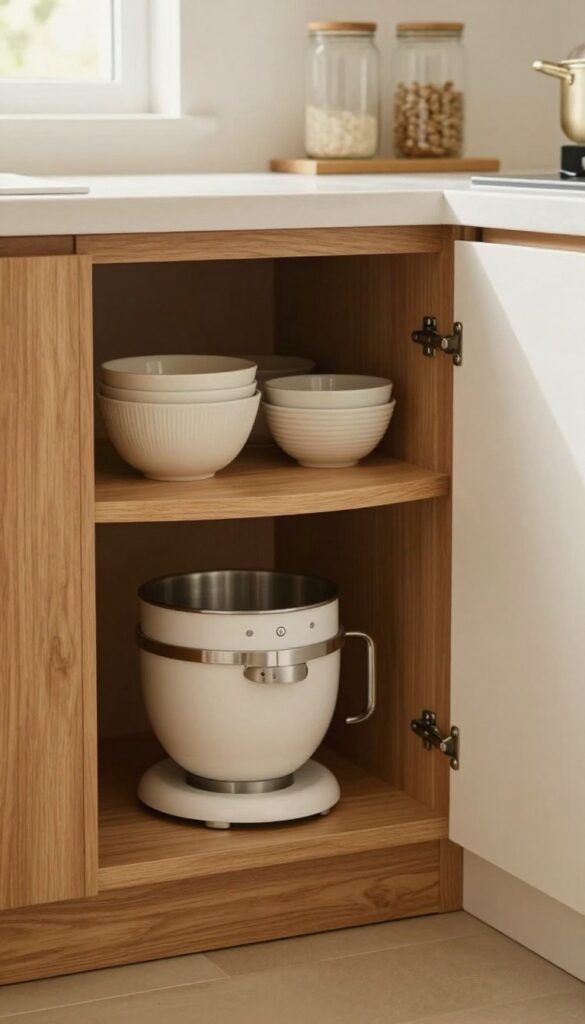
Blind corners are the black holes of kitchen storage—items go in and are never seen again. A corner shelf unit that swings out or uses a half-moon design changes everything. Suddenly, that awkward dead space becomes prime real estate for your stand mixer, slow cooker, or overflow pantry goods.
The best part? It keeps everything visible and within arm’s reach, so you’ll actually use what you have.
A corner shelf for blind corner cabinets is a game-changer for any kitchen with those deep, hard-to-reach cabinets. Instead of digging around in the dark, you can glide out a shelf that brings everything to you. Half-moon shelves are a popular choice because they rotate smoothly and maximize every inch.
Swinging shelves work like a door that pulls forward, revealing multiple tiers. Both options turn wasted space into organized storage. For a modern and clean look, choose shelves in a warm wood tone like oak or walnut to keep the kitchen feeling cozy.
Pair them with simple white or neutral dishware to maintain an airy vibe. The key is to store items you use regularly—like your coffee maker, blender, or a stack of mixing bowls—so the shelf becomes a functional part of your workflow, not just a hiding spot.
Best Materials
- For a warm and cozy feel, go with solid wood shelves. Bamboo is a sustainable option that adds a light, natural texture. If you prefer something easier to clean, opt for coated metal or wire shelves in a matte bronze or brass finish.
- These materials still feel warm while keeping the modern edge. Avoid glossy or high-contrast finishes that can make the space feel cold.
Layout Tip
- Install the shelf at a height that allows you to see all items at a glance. If your blind corner is under a counter, measure the clearance for tall appliances like a food processor. For upper cabinets, half-moon shelves work best for spices, oils, and small jars.
- Group similar items together and use clear containers to keep the look streamlined.
Finishing Touch
- Add a small LED strip light inside the cabinet to illuminate the contents. Warm white lighting enhances the cozy vibe and makes the corner feel intentional. You can use battery-operated puck lights or plug-in strips with a motion sensor.
- This small detail makes the shelf feel like a built-in feature, not an afterthought.
12. Over-the-Door Rack for Pantry or Cabinet
Pantry doors and cabinet doors often go unused, but they’re prime real estate for extra storage. An over-the-door rack turns that blank surface into a handy spot for snacks, spices, or cleaning supplies without taking up any shelf space. It’s a simple swap that instantly cuts down clutter and makes everyday items easier to grab.
Slim wire racks hook right over the top of the door and come with multiple tiers or baskets. Use one on the pantry door for dry goods like granola bars, tea bags, or small jars. In a cabinet, it can hold spices, foil rolls, or even dish towels.
The key is to keep it organized—group similar items together and use small bins to prevent things from sliding around. The visual effect is tidy and intentional, with everything visible at a glance. For a warm, cozy kitchen, choose a rack in a matte black or bronze finish to complement wood tones and avoid a cold, industrial look.
Best Placement Spots
The pantry door is the obvious choice, but don’t overlook the inside of a cabinet door under the sink or near the stove. For a clean, modern look, pick a rack that fits the door width without overhanging. Measure first—most racks fit standard doors, but deeper cabinets may need a slim profile model.
Styling And Organization
Keep the rack from looking chaotic by using matching containers or small baskets. Clear jars for spices and uniform snack bags create a cohesive feel. Add a small hook on the side for a kitchen towel or measuring spoons—it’s a practical touch that keeps the area functional and visually balanced.
Material And Finish Tips
For a warm, cozy kitchen, skip the shiny chrome and go for a rack in matte black, oil-rubbed bronze, or even a soft white. Wire racks with a powder-coated finish are durable and easy to wipe down. If your kitchen leans modern, a stainless steel rack with a brushed finish can still feel warm when paired with wood shelves or warm-toned cabinets.
13. Stackable Bins for Above-Fridge Space
The gap above your refrigerator is one of those awkward spots that tends to collect dust and random clutter. Instead of letting it become a dumping ground, turn it into intentional storage with stackable, clear bins. This approach keeps bulk items like extra pantry goods or seldom-used appliances organized and visible, while the uniform bins create a clean, cohesive look that fits a modern kitchen.
Clear stackable bins make the most of the above-fridge space without hiding what's inside. Choose bins with lids to keep dust off and stack them two or three high depending on your ceiling height. Use them for overflow pantry items, large serving platters, or small appliances you only pull out for holidays.
The transparency helps you grab what you need without pulling everything down. For a warm and cozy feel, opt for bins with a slight tint or natural bamboo lids instead of stark white plastic.
Best Materials
Look for sturdy, BPA-free clear plastic bins with reinforced corners. Slightly frosted or tinted versions hide messes while still letting you see contents. For a warmer look, choose bins with bamboo or wood-toned lids that add texture and soften the modern feel.
Storage Tip
Group similar items together—baking supplies in one bin, party platters in another. Label the fronts with a label maker or chalk stickers so you know exactly what's where. Keep heavier items on the bottom and lighter ones on top for safety.
Styling Note
To keep the area from feeling cluttered, limit yourself to three bins max. Leave a little breathing room around them, and consider adding a small trailing plant on top of the fridge for a soft, cozy touch that balances the clean lines.
14. Wall-Mounted Pot Rack for Ceiling or Wall
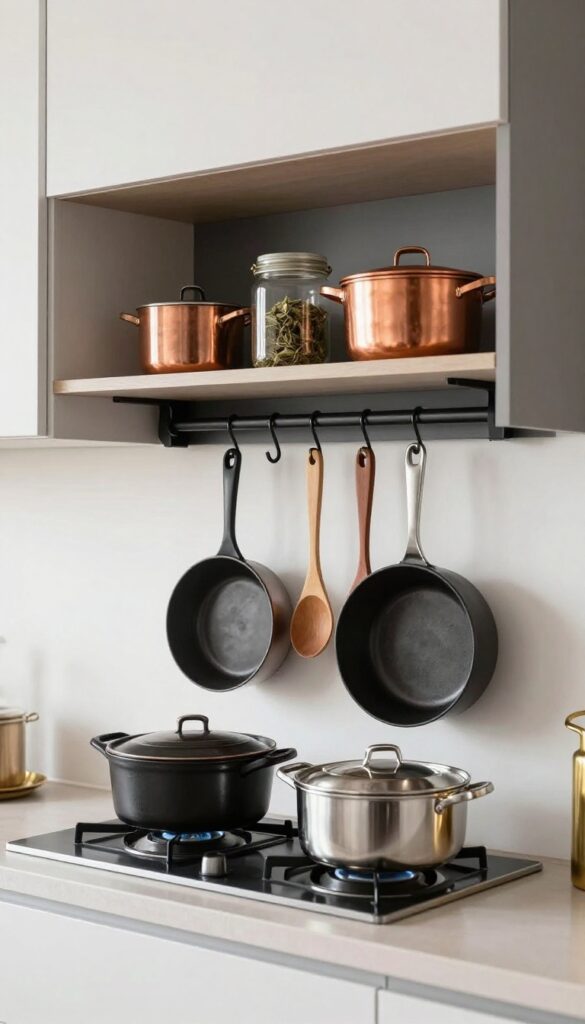
Hanging your pots and pans isn't just for rustic farmhouse kitchens. A sleek wall-mounted or ceiling pot rack can bring a modern, clean look while keeping your most-used cookware within arm's reach. It frees up precious cabinet space and adds a warm, cozy vibe with the glow of copper, brass, or matte black metal against your backsplash or open shelving.
This idea works especially well above a kitchen island or along a blank wall, turning everyday tools into a stylish focal point.
A wall-mounted pot rack is a game-changer for awkward spots like narrow gaps between cabinets or empty wall space above a prep area. It keeps heavy pots and pans out of cabinets, making them easier to grab and adding a touch of curated warmth. For a modern and clean look, choose a linear rack in a matte black or brushed stainless steel finish.
Hang matching cookware—like stainless steel or enameled cast iron—for a cohesive, almost gallery-like display. The key is to keep it organized and not overcrowded; leave some hooks empty to avoid a cluttered feel. This setup also works beautifully in a small kitchen where every inch counts, and it can even double as a decorative element when you mix in a few wooden spoons or hanging herbs.
Best Materials
- Opt for materials that balance durability with style. A wrought iron or steel rack with a matte black or brushed brass finish feels modern yet warm. For a softer look, consider a wooden rail with brass hooks—it adds texture without overwhelming the space.
- Avoid shiny chrome if you're going for a cozy vibe; instead, choose metals that patina or have a slight sheen. Copper is another excellent choice for a warm, lived-in feel.
Layout Tip
- Position the rack where you cook most often—typically above a stove or island. If you have a low ceiling, a wall-mounted rack along a backsplash is safer and still functional. Leave at least 18 inches of clearance between the rack and countertop to avoid bumping your head.
- For a balanced look, center the rack over the work zone and arrange pots by size, with the largest at the ends.
Finishing Touch
- Add a few small hooks for measuring spoons, a garlic keeper, or a small bundle of dried lavender. This breaks up the visual weight of the pots and introduces a soft, cozy detail. If your rack is over an island, hang a pendant light above it to create a warm glow that highlights the cookware.
- The combination of metal, light, and greenery makes the rack feel intentional and inviting.
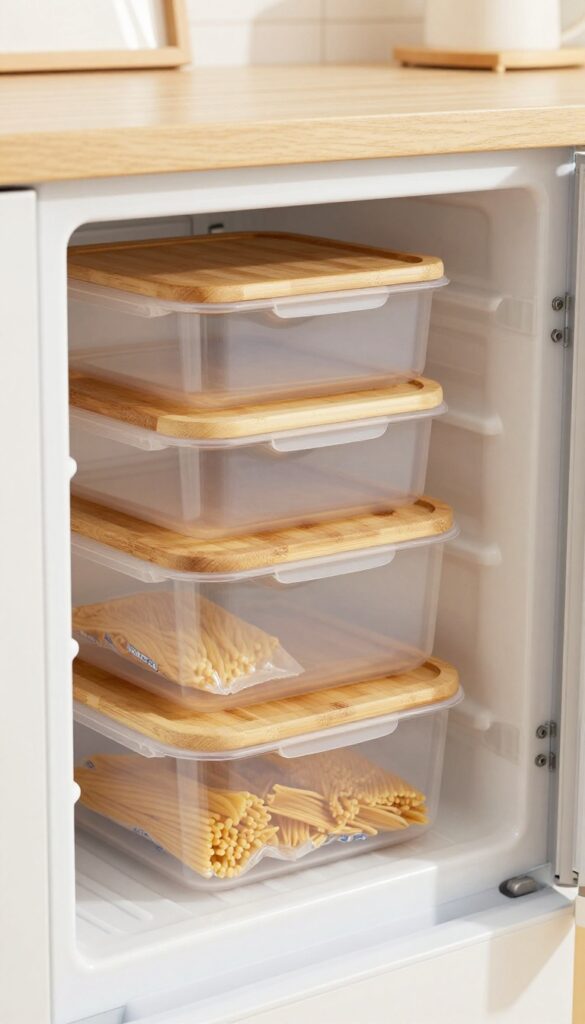
15. Narrow Pull-Out Pantry for Tight Spaces
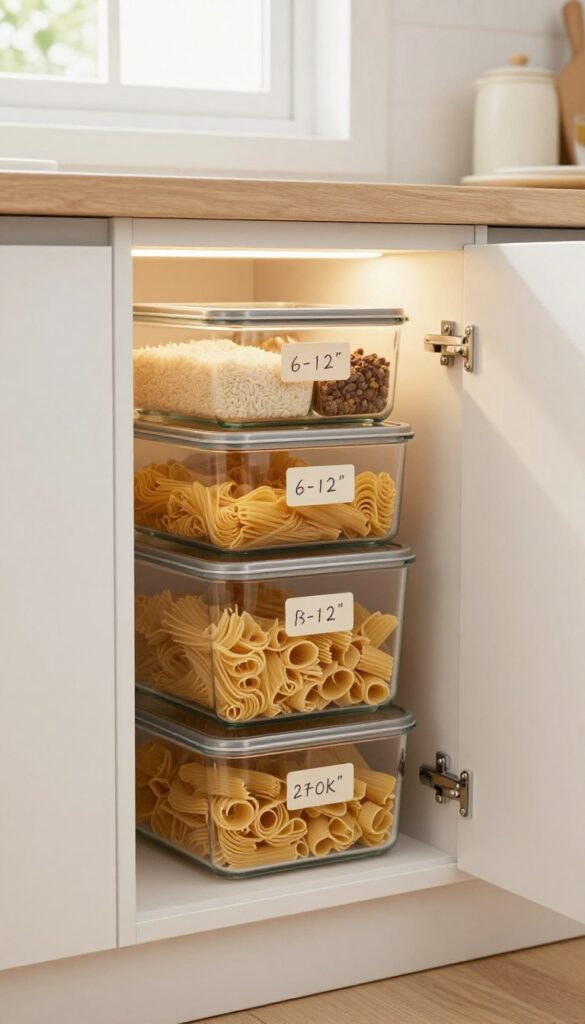
That awkward gap between your fridge and the wall, or the skinny space beside your stove, can finally earn its keep. A slim pull-out pantry slides out smoothly, revealing tidy rows of canned goods, spices, and dry ingredients that were previously crammed into overstuffed cabinets. It’s a smart, space-saving solution that keeps everything visible and within reach, making meal prep feel effortless.
This trick works wonders in galley kitchens, small apartments, or any layout where every inch counts. The unit itself is typically 6 to 12 inches wide, so it fits into spots you might have written off as useless. Once installed, you’ll wonder how you ever lived without it.
The best part? It adds a custom, built-in look without a full renovation.
Best Materials
Opt for solid wood or plywood construction with a smooth, soft-close mechanism. A matte white or light wood finish keeps the space feeling airy and modern, while metal wire baskets offer a more industrial, budget-friendly alternative.
Storage Tip
Use clear, uniform containers for dry goods like pasta, rice, and cereal to maximize visibility and create a clean, cohesive look. Label each container with a simple handwritten tag or a label maker for extra organization.
Finishing Touch
Add a slim LED strip light inside the pull-out unit so you can easily see what’s in the back. A warm light tone (2700K–3000K) keeps the pantry feeling cozy and inviting.
FAQ
What is the best way to organize deep corner cabinets?
Pull-out shelves or a lazy Susan are the most effective. They let you access items at the back without digging. For blind corners, consider a swing-out shelf unit.
How do I store items above the fridge without it looking cluttered?
Use matching, clear stackable bins to group similar items. Keep only infrequently used items there, and wipe the area regularly to prevent dust buildup.
Can I install a pegboard in a rental kitchen?
Yes, use adhesive hooks or a freestanding pegboard that leans against the wall. For a more permanent solution, check with your landlord about drilling small holes.
What are some ideas for narrow gaps between cabinets and appliances?
A slim rolling cart or a pull-out spice rack works well. You can also use a magnetic strip for knives or a narrow shelf for cutting boards.
How do I keep under-sink storage organized?
Use a pull-out drawer or tiered organizer to maximize vertical space. Group similar items in bins, and attach a tension rod for spray bottles.
Conclusion
Making use of every awkward spot in your kitchen doesn't require a major renovation—just a bit of creativity and the right organizers. From pull-out shelves to magnetic strips, these ideas help you reclaim wasted space while keeping your kitchen looking modern and warm.
Start with one or two spots that bother you most, and build from there. Small changes add up to a kitchen that feels bigger, cleaner, and more enjoyable to cook in.