15 Kitchen Peninsula Ideas With Seating for Busy Homes
A kitchen peninsula with seating can turn your busiest room into the place everyone naturally gathers. It’s where homework gets done, coffee is sipped, and quick meals happen without missing a beat. The trick is balancing style with real-life function, especially when mornings are rushed and evenings are full.
You don’t need a massive renovation to make it work. Small tweaks—like the right counter overhang, comfortable stools, or clever storage—can make a peninsula feel like it was always meant to be there.
The best designs feel warm and lived-in, not stiff or showroom-perfect. These 15 ideas focus on what busy homes actually need: easy flow, durable materials, and a welcoming spot to sit.
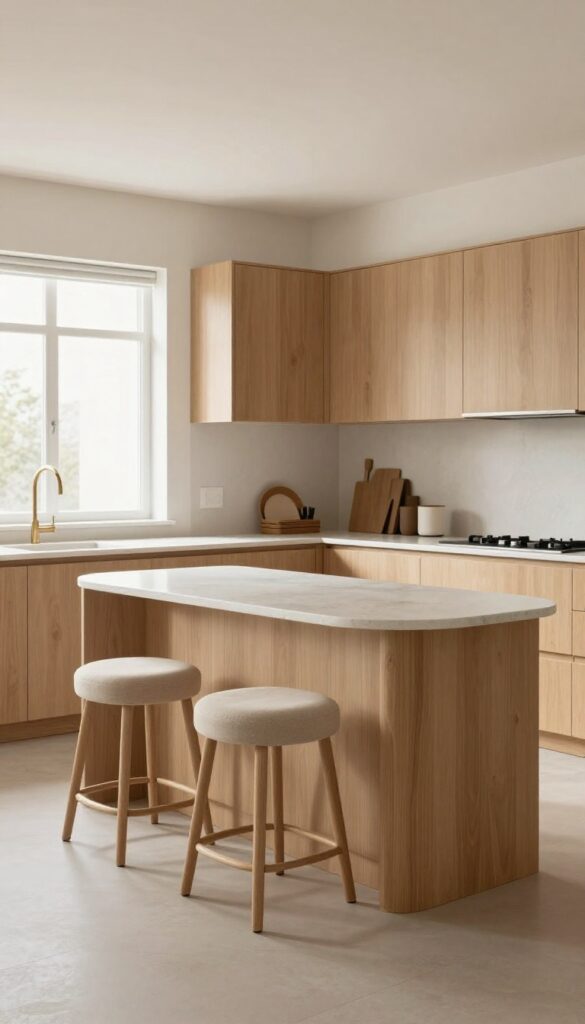
1. Waterfall Edge With Warm Wood Stools
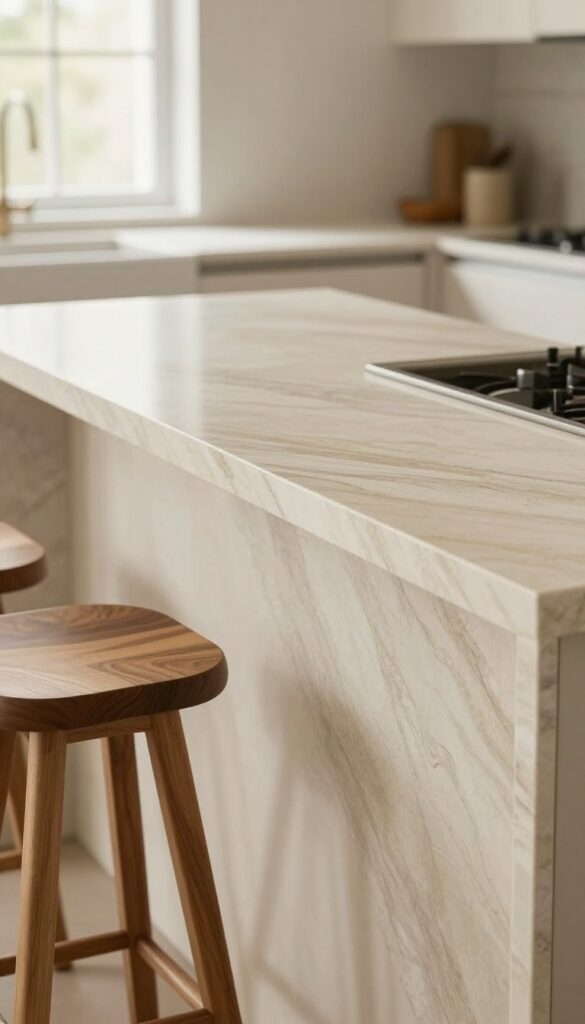
A waterfall countertop—where the surface material flows seamlessly down the sides—instantly elevates a kitchen peninsula into a sculptural centerpiece. The continuous line feels clean and intentional, but it doesn’t have to read cold or minimalist. By choosing a warm-toned stone or quartz and pairing it with honey or walnut stools, you get that sleek silhouette without losing the cozy, lived-in feel.
This combo works especially well in open-plan homes where the peninsula doubles as a visual anchor between cooking and living zones.
The magic of a waterfall edge is how it makes the peninsula feel like a solid, grounded piece of furniture rather than an afterthought. The uninterrupted surface draws the eye downward, creating a graceful column effect that softens the bulk of a large island. To keep the look warm and approachable, opt for a countertop material with subtle veining or speckling in cream, beige, or soft gray—nothing too stark.
Then bring in wooden stools with visible grain and a satin finish. The contrast between the smooth stone and the textured wood adds depth without clutter. For busy homes, this setup is also practical: the seamless edge means no crevices for crumbs to hide, and the stools can be tucked neatly under the overhang when not in use.
Best Materials For The Look
- Quartzite or engineered quartz in a warm ivory or taupe works beautifully for the waterfall surface—it’s durable, stain-resistant, and available in soft, organic patterns. Avoid high-gloss finishes; a honed or leathered texture feels more natural and hides fingerprints better. For the stools, solid wood like oak, walnut, or acacia brings the warmth.
- Look for seats with a slight curve or saddle shape for comfort during long breakfasts or homework sessions.
Layout Tip
Make sure the waterfall drop doesn’t interfere with seating clearance. The overhang should be at least 12 inches deep so knees fit comfortably. If your peninsula is against a wall or has cabinetry on one side, consider a partial waterfall that drops only on the seating side—it saves material costs while keeping the visual impact.
Cozy Detail
Add a low-hanging pendant light with a warm brass or black finish above the peninsula. A single oversized drum shade or a cluster of two smaller ones creates a focal point and makes the seating area feel intimate. Stick to bulbs with a color temperature around 2700K to enhance the wood tones.
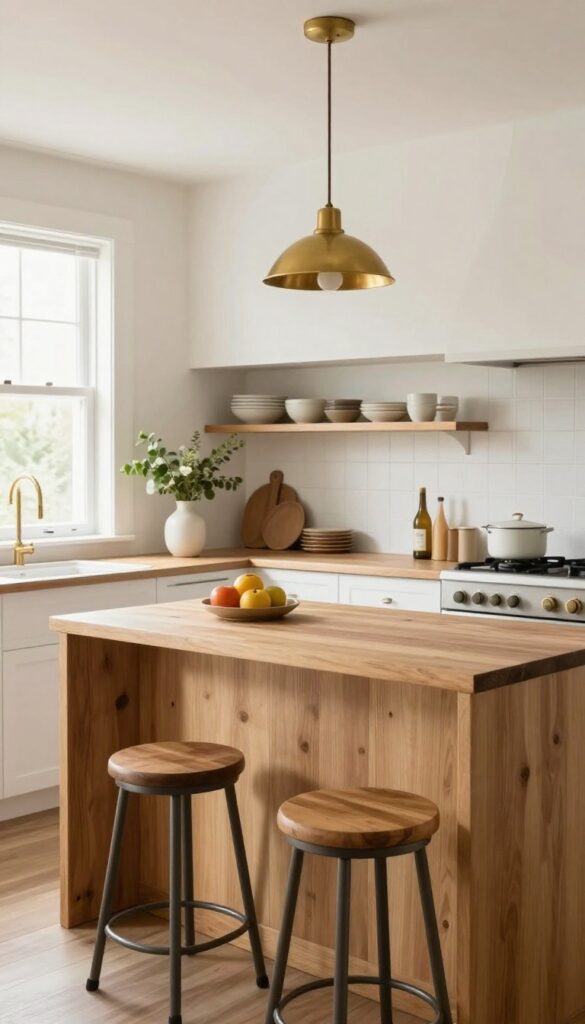
2. Two-Tone Peninsula With Contrasting Seating
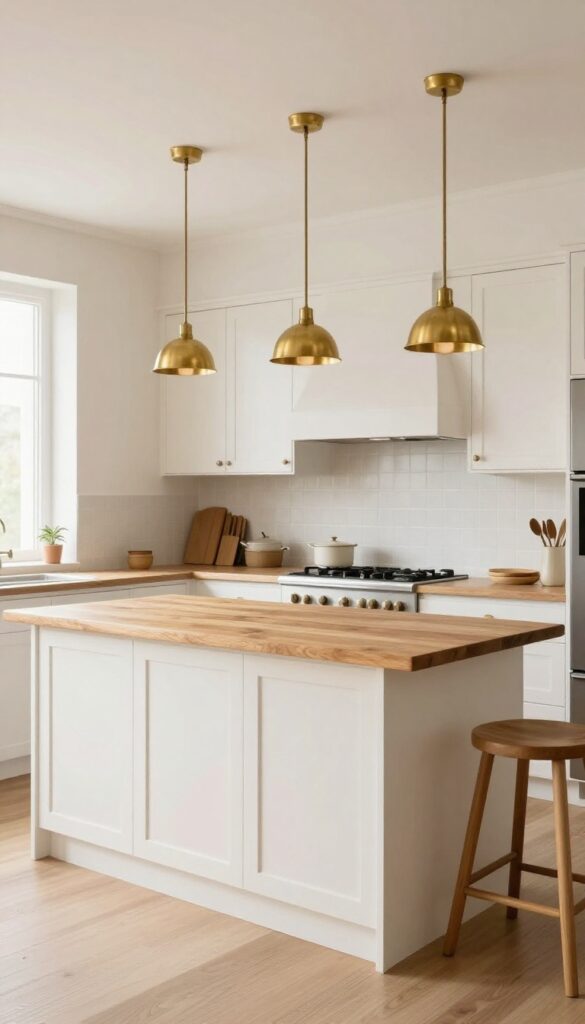
Sometimes the best design tricks are the simplest. A two-tone peninsula does double duty: it breaks up the visual mass of a large island and carves out a clear dining zone without adding a single square foot. By using a different finish on the seating side—a warm butcher block, a rich walnut, or even a deep navy—you get a natural separation that feels intentional, not accidental.
It’s a smart, budget-friendly way to add character and make your kitchen feel more lived-in.
The key is contrast. If your base cabinetry is white or light, go for a darker, warmer top on the eating side—think walnut butcher block or a matte black quartz. If your base is dark, a lighter top like oak or a pale marble-look quartz keeps things airy.
This approach not only defines the seating area but also adds a layer of texture and warmth that a single material can’t achieve.
Best Colors
- Stick to two tones that share an undertone to avoid a jarring clash. For a warm, lived-in feel, pair a creamy white base with a honey-toned butcher block. For a more modern look, try a charcoal base with a warm oak top.
- The contrast should feel complementary, not chaotic.
Layout Tip
Make sure the contrasting top extends at least 12 inches past the seating area to create a clear visual break. This also gives diners a comfortable knee space and makes the peninsula feel like a dedicated table, not just an afterthought.
Finishing Touch
Add a few low-hanging pendant lights over the seating side to anchor the zone. Choose a shade that picks up one of the two tones—like a warm brass or matte black—to tie the whole look together. It’s a small detail that makes the two-tone effect feel polished.
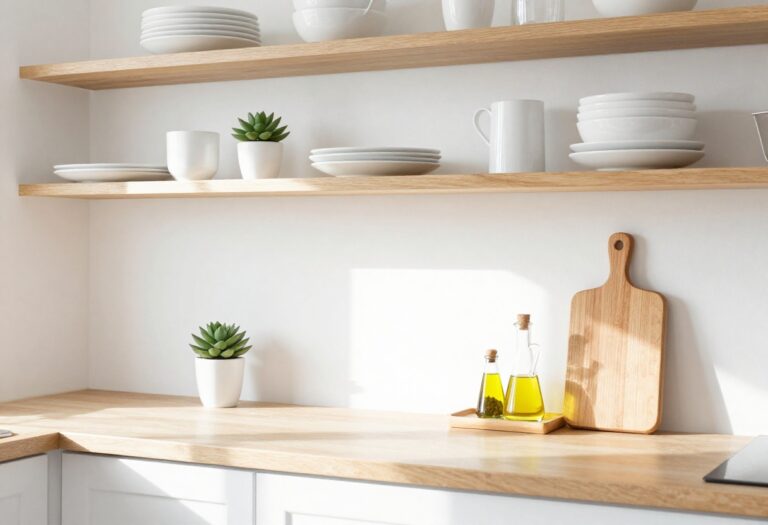
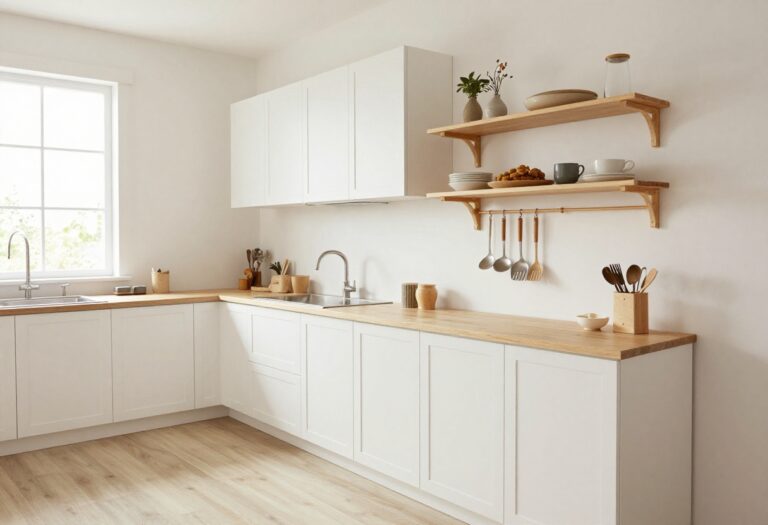
3. Open Shelving Below for Quick-Grab Items
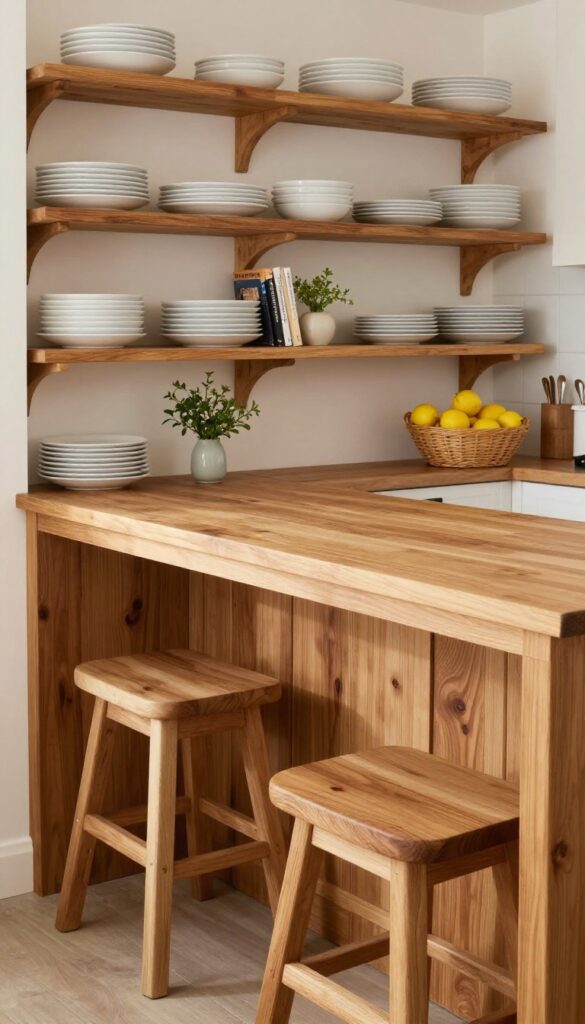
Open shelving on the seating side of a kitchen peninsula turns wasted space into a functional display. It keeps cookbooks, everyday dishes, or baskets of fruit within easy reach while adding a warm, lived-in feel. This setup works especially well in busy homes where you want both style and convenience within arm's length.
Mounting open shelves on the side of the peninsula facing the seating area creates a mini pantry that's always accessible. Instead of digging through cabinets, you can grab a plate or a favorite cookbook while sitting at the counter. The open design also makes the peninsula feel lighter and more integrated with the living space.
For a cohesive look, choose shelves in the same wood tone as your countertops or go for a contrasting metal finish to add an industrial edge.
Best Materials
Solid wood shelves in oak or walnut bring warmth and durability, while powder-coated steel or black iron offers a sleek, modern contrast. For a budget-friendly option, consider floating shelves with a matte laminate finish that mimics natural wood. Whatever material you choose, ensure the shelves are deep enough to hold plates or stacked bowls—12 inches is a good minimum.
Shelf Styling Tip
Mix function with personality: stack everyday white dinner plates next to a small vase of fresh herbs, and lean a few cookbooks between ceramic canisters. Keep the arrangement intentional but not overly curated—a slightly messy stack of linen napkins or a basket of lemons feels more inviting than a rigid display. Rotate items seasonally to keep the look fresh.
Small-space Fix
If your peninsula is narrow, use shallow shelves (6-8 inches deep) to avoid bumping knees. Install a single shelf instead of multiple tiers to keep the space feeling open. Pair with small hooks underneath for hanging mugs or measuring cups, maximizing every inch without clutter.
4. Angled Peninsula for Awkward Layouts
Not every kitchen is a perfect rectangle or L-shape. If yours has an unusual footprint—maybe a diagonal wall or an unexpected jog—an angled peninsula can turn that awkwardness into an asset. Instead of fighting the floor plan, this layout works with it, creating a natural transition between cooking and dining zones.
The angled shape keeps traffic flowing smoothly while still offering plenty of seating for busy mornings or casual meals.
An angled peninsula is a smart solution for kitchens where a standard straight or L-shaped island just won't fit. By following the line of an existing wall or counter, it makes use of space that might otherwise go wasted. The result feels intentional and custom, not like a compromise.
Plus, the angled overhang creates a cozy, slightly tucked-away seating area that invites people to pull up a stool and stay a while.
Best Layout Tip
Align the angled peninsula with your kitchen's main work triangle—sink, stove, fridge—so it doesn't block key pathways. A 45-degree angle often works well, but let your room's shape guide you. Leave at least 36 inches of clearance on the seating side for easy movement.
Seating And Styling
Choose stools that fit the angle's unique lines—round or curved seats soften the geometry. A mix of wood and metal adds warmth without clutter. For the countertop, a warm quartz or butcher block keeps the space feeling lived-in and approachable.
Finishing Touch
Hang a single linear pendant light directly above the peninsula's seating area to define the zone. A warm brass or matte black fixture adds personality without overpowering the room. Keep the shade simple to let the angled shape shine.
5. Deep Drawers Instead of Cabinets
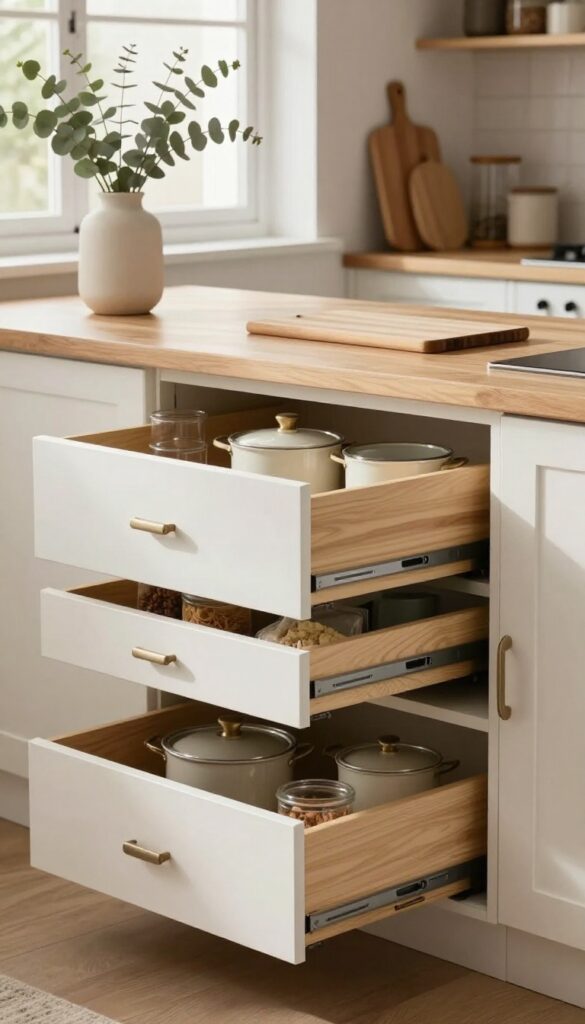
Standard lower cabinets on the seating side of a peninsula can be a pain—you have to lean over the countertop or squeeze around chairs to access them. Swapping those doors for deep pull-out drawers changes everything. You get full visibility and easy reach without bending or stretching, which makes grabbing a pot or a bag of rice feel effortless.
Plus, deep drawers give the whole kitchen a cleaner, more custom look.
Deep drawers are a smart swap for any busy kitchen, especially on a peninsula where seating limits access. They maximize every inch of storage and keep your most-used items within arm's reach. Go for full-extension glides so you can see everything at a glance.
Use drawer dividers to organize pots, lids, or dry goods—no more digging through stacks. The result is a peninsula that works harder for your daily routine.
Best Materials
Solid plywood with a durable melamine or laminate interior is a workhorse choice. For the drawer fronts, match your cabinet style—shaker in painted maple or flat-panel in walnut adds warmth. Soft-close hardware is non-negotiable for a quiet, polished feel.
Storage Tip
Use the deepest drawers (12–24 inches) for bulky pots and small appliances. Add a shallow top drawer for utensils or spice jars. Consider a divided drawer for lids or baking sheets to keep everything upright and easy to grab.
Finishing Touch
Install a slim pull-out trash or recycling bin in one drawer near the sink area. It keeps waste hidden but accessible, and frees up floor space. Match the bin's finish to your hardware for a seamless look.
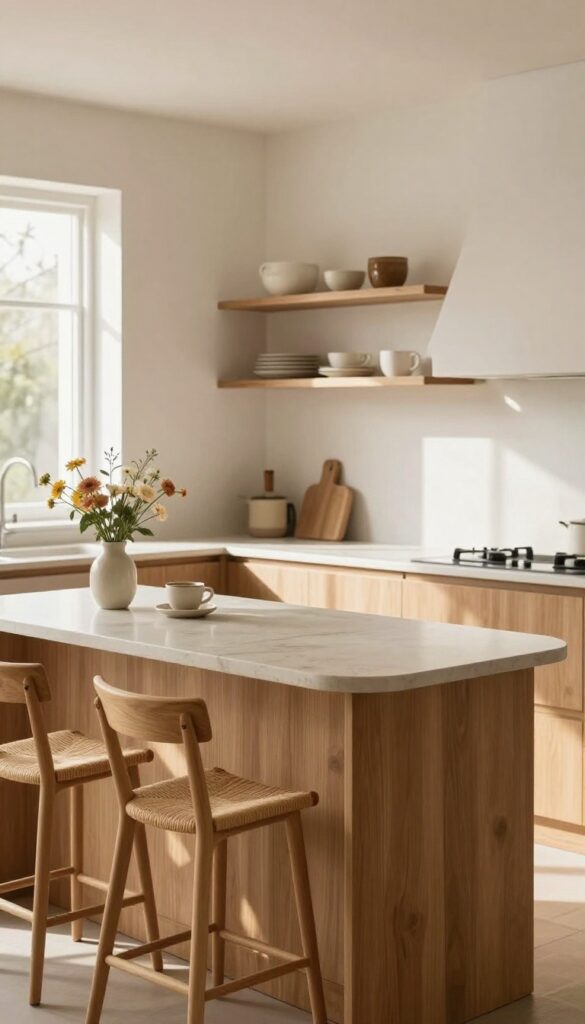
6. Breakfast Bar With a Lower Counter Height
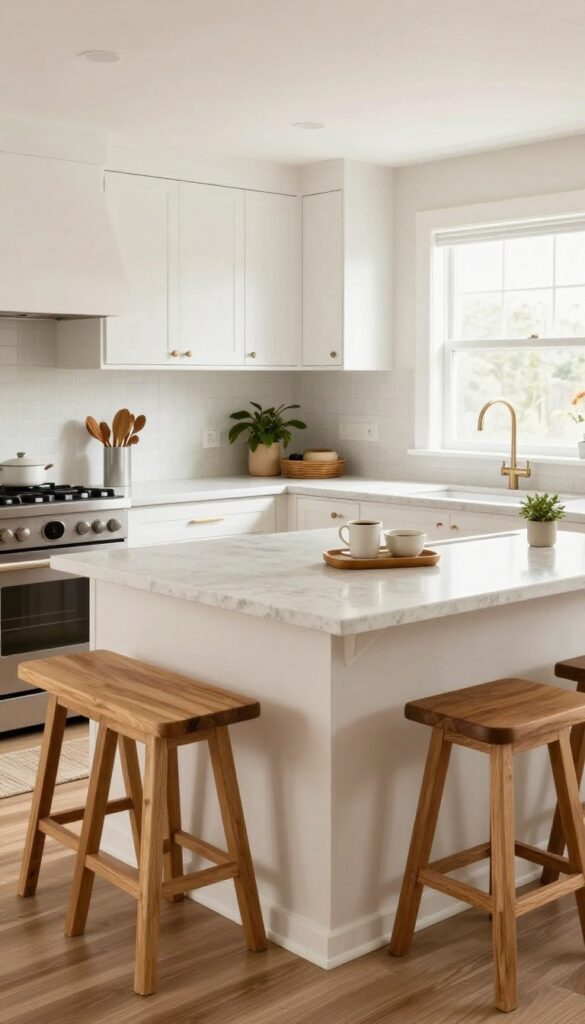
A breakfast bar doesn’t have to sit at the same height as your main counter. Dropping the seating area by a few inches creates a clear visual break between cooking and dining, making the peninsula feel like two distinct zones instead of one long surface. This small shift in height also means you can use standard counter stools instead of awkwardly tall barstools, which tend to feel less stable and harder to slide in and out.
The result is a cozy, approachable spot that invites lingering over coffee without cluttering your prep space.
The lowered breakfast bar works especially well in open-plan kitchens where the peninsula doubles as a room divider. By keeping the cooking side at standard counter height (36 inches) and dropping the seating side to about 30 inches, you create a natural boundary that doesn’t block sightlines. This setup feels more intimate than a raised bar, and it’s easier for kids to climb onto.
Plus, the lower surface makes a great spot for casual meals, homework, or just setting down groceries while you unpack.
Best Materials
- Choose a durable countertop material that can handle spills and daily wear. Quartz or solid-surface materials work well because they’re non-porous and easy to clean. For a warmer look, consider butcher block on the lowered section—it adds texture and feels inviting under elbows.
- Just seal it properly to protect against stains.
Layout Tip
Aim for at least 12 inches of overhang on the seating side so stools can tuck under comfortably. If your peninsula is against a wall, leave enough clearance for chairs to slide in without hitting the cabinets. A 24-inch-deep counter is ideal for two stools side by side.
Finishing Touch
Add a pair of small, adjustable pendant lights directly above the lowered bar. This not only highlights the seating area but also reinforces the separation between cooking and dining zones. Choose warm LED bulbs to keep the space feeling soft and lived-in.
7. Built-In Wine Rack or Stemware Holder
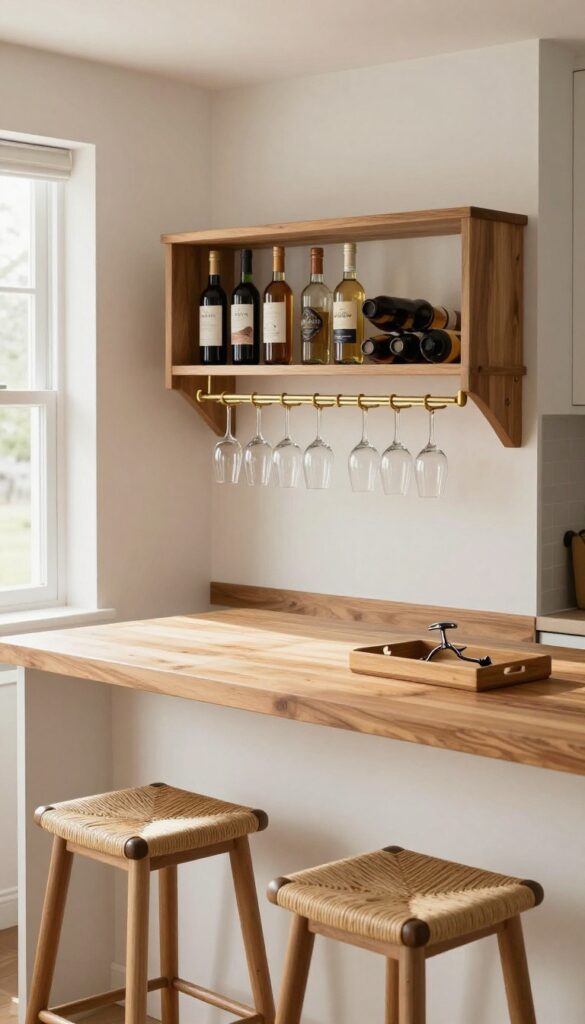
A peninsula with seating already invites people to pull up a chair and stay a while. Adding a slim wine rack or hanging stemware holder under the overhang turns that casual spot into a natural hub for relaxed entertaining. It’s one of those small, smart details that makes the kitchen feel more intentional—and a little bit special—without taking up any extra floor space.
This idea is all about using the often-forgotten vertical space beneath the counter overhang. A narrow wine rack can tuck in flush against the cabinets, holding six to twelve bottles within easy reach. For stemware, a hanging rack mounted under the overhang keeps glasses upside down and dust-free, while adding a subtle gleam of glass and metal.
The result is a peninsula that feels both practical and polished, perfect for homes where wine and conversation flow freely.
Best Materials
Stick with warm, natural materials to keep the look cozy and lived-in. A wooden wine rack in oak or walnut complements most kitchen finishes, while a black or bronze metal rack adds a touch of industrial charm. For stemware holders, choose wood with brass hooks or a simple wrought-iron bar—both feel sturdy and timeless.
Layout Tip
Install the wine rack on the side of the peninsula that faces the cook, not the seating area, so bottles are easy to grab during meal prep. The stemware holder should hang directly over the overhang where guests sit—this puts glasses within arm’s reach and keeps the counter clear.
Finishing Touch
Add a small tray or coaster set on the countertop near the stemware holder for corkscrews and pour spouts. A warm-toned pendant light above the seating area will catch the glass stems and create a soft, inviting glow during evening get-togethers.
8. Mixed Seating: Stools and a Bench
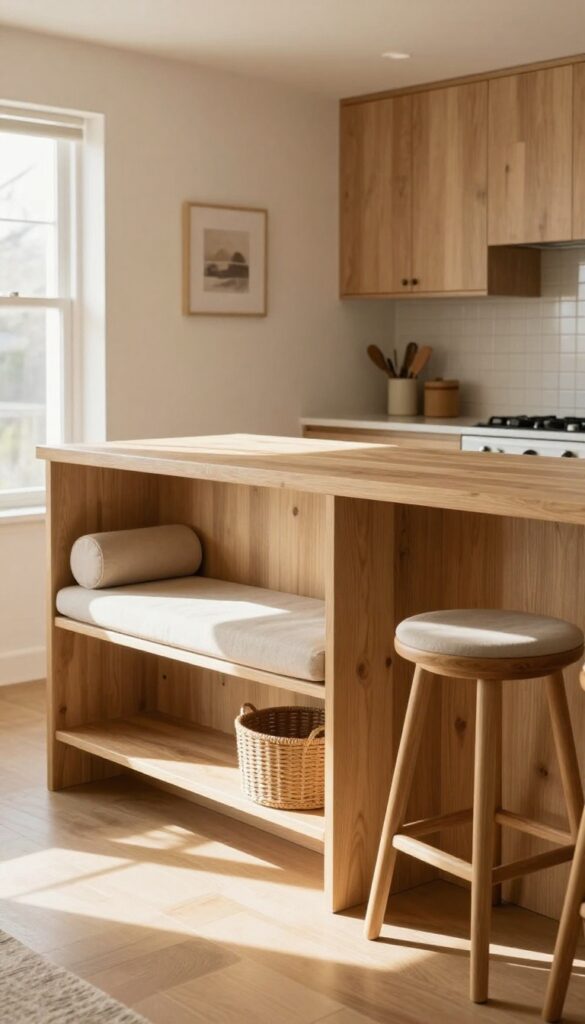
A peninsula with seating doesn't have to be all stools. Mixing a couple of stools with a built-in bench on one side creates a relaxed, family-friendly setup. Kids can slide onto the bench easily, while adults grab a stool for a longer chat.
The combination breaks up the look and makes the whole area feel more intentional and lived-in.
This approach works best in busy kitchens where you need flexible seating. The bench side can tuck under the counter when not in use, saving floor space. Stools on the other side add visual variety and let guests choose their spot.
The result is a peninsula that feels like a real gathering place, not just a counter.
Best Layout
Place the bench on the side closest to the main kitchen traffic so kids can hop on and off without blocking the cook. Stools go on the opposite side, facing the living or dining area. This creates a natural flow and keeps the peninsula from feeling crowded.
Styling Tip
Choose stools with a warm wood or upholstered seat to soften the look, and keep the bench simple with a neutral cushion. Add a small lumbar pillow on the bench for a cozy touch. Stick to a cohesive color palette—say, warm oak and cream—to tie both seating types together.
Storage Idea
If the bench is built-in, use the space underneath for pull-out bins or baskets. This hides kid toys, extra napkins, or cookbooks while keeping them handy. For stools, pick ones with a footrest bar that doubles as a shelf for small trays or folded kitchen towels.
9. Peninsula With a Prep Sink and Seating
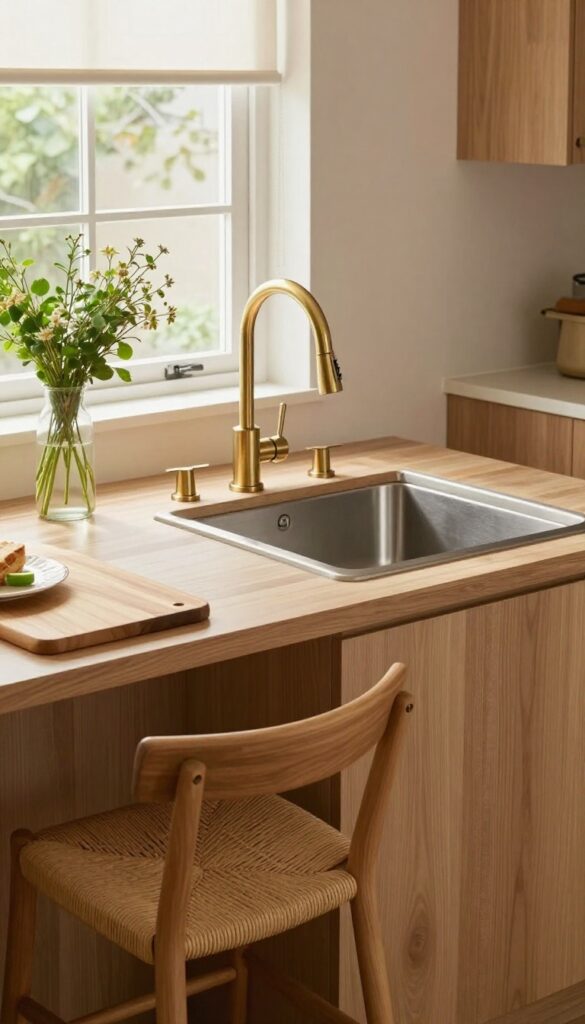
A peninsula can do double duty when you add a small prep sink on the cooking side and keep the seating area completely dry. This setup is a game-changer for busy cooks who want to chat with family or guests while washing veggies, filling pots, or rinsing dishes. It keeps the main sink free for bigger tasks and makes meal prep feel social instead of solitary.
The key is choosing a compact, shallow sink—think bar or prep style—so it doesn't eat into seating space. Position it near the cooktop or fridge for an efficient work triangle. On the seating side, a solid surface overhang (at least 12 inches) gives knee room and feels polished.
Finish with warm wood stools and a gooseneck faucet in brushed brass for that lived-in look.
Layout Tip
Place the prep sink at least 24 inches from the edge where stools sit to avoid splashes. A low-divider or raised lip on the counter helps contain water. If your peninsula is against a wall, consider a gooseneck faucet that swings out of the way when not in use.
Best Materials
Quartz or solid-surface countertops handle moisture well and are easy to clean. For the sink, stainless steel is practical and budget-friendly, while fireclay adds a warm, farmhouse feel. Pair with a matte black or unlacquered brass faucet for subtle contrast.
Styling Detail
Keep a small wooden cutting board that fits over the sink to create extra prep space. Add a vase of fresh herbs or a single trailing plant on the seating side to soften the look. Use woven bar stools to introduce texture and warmth.
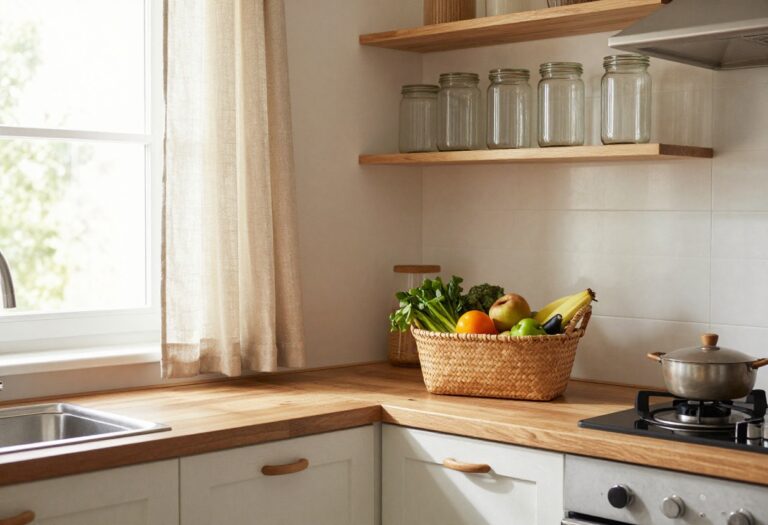
10. Butcher Block Top for a Warm, Workable Surface
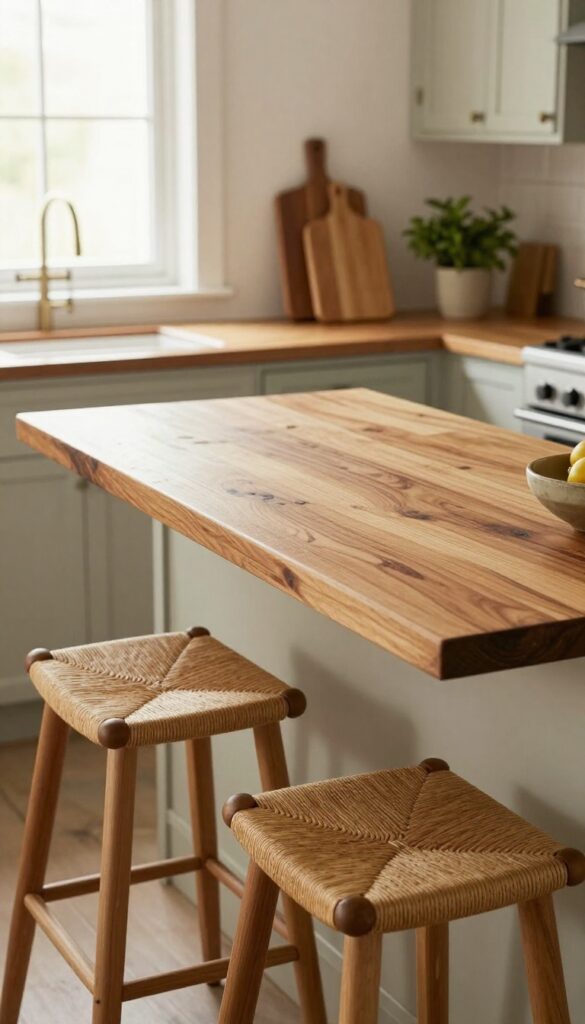
A butcher block counter on the seating side of your peninsula does double duty—it adds natural warmth and gives you a sturdy surface for chopping, serving, or just resting a hot pan. The wood patinas beautifully over time, developing a character that feels inviting and lived-in. It’s a smart choice for busy homes because it’s both practical and visually softening against harder materials like quartz or tile.
Butcher block brings a tactile, organic element to your kitchen peninsula. It’s not just about looks—the wood is forgiving on dropped glasses, gentle on knife blades, and easy to maintain with regular oiling. Over the years, it develops a rich patina that tells the story of your family’s meals.
Pair it with a light-colored base cabinet to keep the space feeling airy, or go for a darker stain to anchor a warm, rustic vibe. The key is to seal it properly so it handles spills and daily wear without warping.
Best Wood Species
Maple and oak are classic choices for butcher block because they’re hard, tight-grained, and resist moisture well. Walnut offers a darker, richer tone that adds instant warmth, while teak is naturally water-resistant and great for high-traffic kitchens. Whatever you choose, make sure it’s end-grain construction for maximum durability and a classic butcher block look.
Sealing And Care
Apply a food-safe mineral oil or beeswax finish every few months to keep the wood hydrated and protected. Avoid leaving standing water or acidic spills (like lemon juice) for long periods. A quick wipe after each use and an occasional light sanding will keep the surface smooth and beautiful for years.
Styling Tip
Let the wood shine by keeping the countertop clutter-free. Add a small wooden cutting board or a ceramic fruit bowl to echo the natural texture. A warm-toned pendant light above the peninsula will highlight the grain and make the whole area feel cozy and inviting.
11. Peninsula With a Built-In Cutting Board Slide
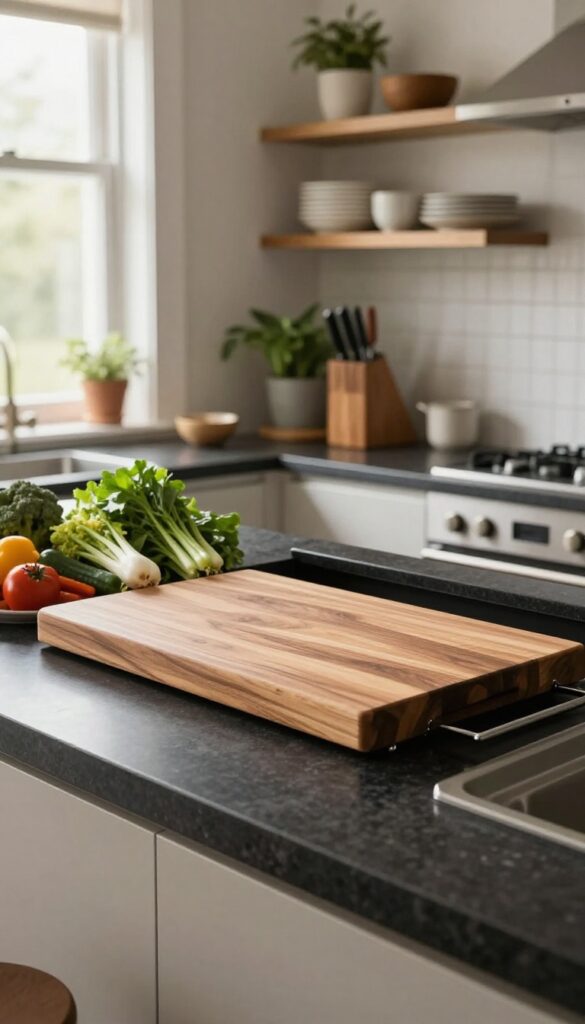
If your kitchen peninsula doubles as your main prep zone, you know the struggle of keeping the surface clear. A built-in cutting board slide solves that by giving you a dedicated chopping area that disappears when you need counter space for serving or homework. It’s one of those smart details that makes a busy kitchen feel more organized without looking clinical.
The idea is simple: a sturdy cutting board that slides out from under the countertop, just above a drawer or cabinet. When not in use, it tucks away completely, leaving your peninsula clean and open. This works especially well in kitchens where every inch of counter space is precious—think narrow galley layouts or open-plan homes where the peninsula also serves as a drop zone for keys and mail.
The slide mechanism should be smooth and lock into place so the board doesn’t wobble while you chop. Choose a board made from end-grain hardwood for durability and a warm, natural look that complements butcher-block countertops or wood accents elsewhere in the room.
Best Materials
Go with a thick hardwood like maple or walnut for the cutting board—it’s gentle on knives and ages beautifully. The slide hardware should be full-extension, soft-close drawer slides rated for heavy use. If your peninsula has a contrasting countertop, like dark quartz, a light wood board adds a warm, inviting pop.
Layout Tip
Position the slide on the side of the peninsula that faces the main cooking zone, so you can chop and toss ingredients directly into a pan. Leave at least 12 inches of clearance underneath for the board to slide out fully without hitting stools or knees.
Finishing Touch
Add a small pull-out trash bin or compost bucket below the cutting board slide. That way, you can scrape scraps straight into the bin without moving from your prep spot—a tiny efficiency that makes a big difference during meal prep.
12. Curved Peninsula for Soft Flow
A curved peninsula isn't just about looks—it changes how you move through the kitchen. That rounded end creates a natural path around the island, so no one's bumping into sharp corners while carrying groceries or reaching for a snack. It also makes the seating area feel more intimate, like a built-in booth rather than a standard counter.
The softer shape invites people to pull up a stool and stay awhile, which is exactly what a busy home needs.
The curved peninsula works best in kitchens where traffic flows past the island on both sides. The rounded end guides movement and reduces bottlenecks, making it a smart choice for open-plan layouts. Visually, it adds a sculptural element that breaks up all the straight lines in a kitchen.
To keep the look warm and lived-in, pair the curve with natural materials like oak or warm-toned quartz. The seating area benefits from a slight overhang—about 12 to 15 inches—so knees fit comfortably. For a cozy touch, choose stools with rounded backs that echo the peninsula's shape.
Best Materials
- A curved peninsula calls for materials that can be smoothly fabricated. Quartz and solid surface are top choices because they can be seamlessly shaped without visible seams. For a warmer look, consider a butcher block or wood countertop that's been custom-cut with a rounded edge.
- If you prefer stone, granite or marble can also be shaped, but they require a skilled fabricator. The base can be painted in a soft neutral or a muted earthy tone to keep the focus on the curve.
Layout Tip
- Leave at least 42 inches of clearance between the curved peninsula and the nearest counter or wall. This gives enough room for someone to walk behind a seated person. If the peninsula doubles as a prep area, position the sink or cooktop on the straight side, not the curve, to maximize workspace.
- The seating should be on the curved end, with stools placed slightly angled toward the center for a more conversational setup.
Cozy Detail
- Add a shallow shelf along the curved side for a few cookbooks or a small plant. This softens the transition and makes the peninsula feel like a piece of furniture. Under-cabinet lighting along the curve highlights the shape and creates a warm glow in the evening.
- For the stools, choose ones with a rounded back or a curved seat to echo the peninsula's silhouette.
13. Peninsula With a Charging Station Drawer
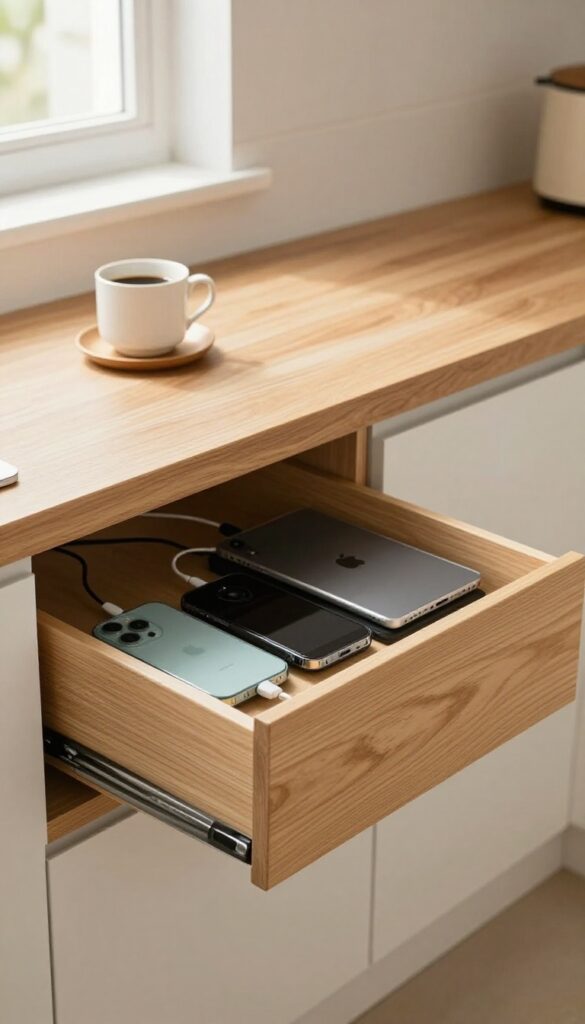
A kitchen peninsula is already a multitasking hero—extra counter space, casual seating, and a natural gathering spot. But the real magic happens when you carve out a dedicated charging drawer on the seating side. This smart, space-aware detail keeps phones, tablets, and even laptops neatly stashed while they power up, so the counter stays clear for homework, meal planning, or just a clutter-free morning coffee.
It's the kind of lived-in upgrade that makes busy mornings smoother and evening homework sessions less chaotic.
Dedicating a shallow drawer on the seating side of your peninsula to a charging station is a game-changer for busy homes. It keeps devices off the counter, reduces cord tangles, and creates a designated spot for everyone to plug in. The drawer should be shallow enough to avoid interfering with knee space, with built-in outlets and USB ports.
Consider adding a small cutout or grommet for cord management. This idea works especially well in open-concept kitchens where the peninsula doubles as a homework hub or family command center.
Best Placement And Depth
- The charging drawer should be installed on the seating side, ideally at a height that's easy to reach from a stool. Keep the drawer shallow—about 3 to 4 inches deep—so it doesn't bump into knees. A cutout at the back or side allows cords to feed through neatly.
- If your peninsula has a raised bar, you can also install a pop-up outlet on the countertop, but the drawer option keeps things cleaner and more discreet.
Materials And Finishes
- Choose a durable, easy-to-clean material for the drawer interior, like a smooth laminate or a removable plastic tray. Match the drawer front to your cabinetry for a seamless look. For a warm, lived-in feel, consider a wood tone that complements your countertop.
- A soft-close mechanism adds a touch of luxury and prevents slamming when kids are in a rush.
Styling And Organization
- Keep the drawer organized with adjustable dividers or small bins for each family member's device. Add a cable management clip to prevent cords from tangling. For a cozy touch, line the bottom of the drawer with a felt pad or a thin cork sheet.
- This not only protects devices but also adds a subtle texture that makes the drawer feel intentional and inviting.
14. Contrasting Countertop Edge for Visual Interest
Sometimes the smallest detail makes the biggest difference. That’s the case with choosing a different edge profile for the seating side of your kitchen peninsula. It’s a subtle move—barely noticeable at first glance—but it adds a layer of thoughtfulness that makes the whole space feel more intentional.
Instead of one uniform slab, you get two distinct personalities: the main counter stays clean and modern, while the seating edge softens or sharpens the look depending on the profile you pick. It’s an easy, low-cost way to elevate your peninsula without a full renovation.
The trick is picking an edge that contrasts just enough without clashing. A beveled edge on the seating side, for example, catches light and adds a gentle gleam, while the main counter stays flat and minimal. A bullnose edge feels softer and more inviting, perfect for homes where the peninsula doubles as a homework station or coffee spot.
The contrast doesn’t scream for attention—it whispers, making your kitchen feel custom and curated. Plus, it’s a practical choice: rounded edges are more comfortable to lean against, and they hide wear and tear better than sharp corners. This idea works in any kitchen style, from modern farmhouse to sleek contemporary, and it’s especially effective on islands with overhangs of 10 inches or more.
Best Edge Profiles To Pair
- For a warm, lived-in kitchen, pair a standard eased edge on the main counter with a bullnose or ogee edge on the seating side. The eased edge is simple and unobtrusive, while the bullnose adds a touch of softness that feels welcoming. If your kitchen leans modern, try a beveled edge for the seating side—it reflects light and adds a subtle geometric detail.
- Avoid pairing two very busy profiles, like a full ogee on both sides, which can look overly ornate. Stick to one statement edge and one quiet one.
Material Considerations
- This trick works best with solid surface materials like quartz, granite, or butcher block. Laminates can work too, but the edge profile options are more limited. If you’re using marble or quartzite, a beveled edge on the seating side adds elegance without competing with the stone’s natural veining.
- For butcher block, a bullnose edge feels warm and organic. Just make sure the fabricator can handle two different profiles—most can, but it’s worth confirming upfront. The cost difference is usually minimal, often just a small upcharge for the additional routing.
Styling The Seating Side
- Once you’ve chosen your edge profile, play up the contrast with your seating. Slim, backless stools in a light wood or metal finish let the countertop edge shine. Add a runner or a few woven placemats to define the eating zone without covering the detail.
- At night, under-cabinet lighting or a pendant light directly above the seating area will highlight the edge’s shape, making it a subtle focal point. Keep the rest of the peninsula clutter-free so the eye naturally lands on that small but special detail.
15. Peninsula With a Fold-Down Extension

A peninsula with a fold-down extension is the ultimate space-saver for kitchens that double as dining spots. When the extra seating isn't needed, the drop-leaf section tucks away neatly, freeing up floor space and keeping the room open. This setup feels especially smart in narrow kitchens or open-plan layouts where every inch counts.
The beauty of a fold-down extension lies in its flexibility. You get the functionality of a full breakfast bar without the permanent footprint. When folded down, the leaf can serve as a compact prep station or a spot for a quick coffee.
When it's up, you can seat two or three people comfortably. Choose a butcher-block top for a warm, lived-in feel that contrasts nicely with painted cabinetry. Add a couple of backless stools that slide completely under the peninsula when not in use, and you've got a setup that adapts to your day.
Best Materials
Solid wood or a wood veneer works beautifully for the drop-leaf surface—it's durable, easy to sand and refinish, and brings natural warmth. Pair it with a painted base in a soft neutral like warm white or sage green to keep the look cohesive. For a more modern touch, consider a matte black or navy base with a light oak top.
Layout Tip
Position the fold-down section on the side facing your dining or living area so it feels like an extension of the room. Make sure there's at least 36 inches of clearance behind the stools for easy movement. If your kitchen is really tight, opt for a 12-inch deep leaf that folds flush against the peninsula when not in use.
Cozy Detail
Hang a small pendant light directly above the fold-down area to define the seating zone. Choose a fixture with a soft, warm glow—like a woven rattan shade or a simple brass dome—to make the spot feel inviting even when the leaf is down. A low-hanging light also signals that this is a place to linger.
FAQ
How much overhang do I need for seating at a kitchen peninsula?
Aim for at least 12 inches of overhang for comfortable legroom, but 15 inches is better if you have taller family members. For counter-height seating (36 inches), 12 inches works; for bar-height (42 inches), go with 10 to 12 inches.
What’s the best stool height for a kitchen peninsula?
Match stool height to your counter height. For a standard 36-inch counter, use 24- to 26-inch stools. For a 42-inch bar-height surface, choose 30-inch stools.
Leave about 10 inches between the seat and the counter underside for comfort.
Can I add seating to an existing peninsula without replacing the whole thing?
Yes, if you have enough overhang. If not, you can extend the countertop with a matching piece or add a drop-leaf extension. You might also consider replacing just the countertop with a larger slab that provides the needed overhang.
How do I keep the peninsula seating area from feeling cluttered?
Use stools that tuck fully under the overhang when not in use. Keep the surface clear of non-essentials, and use the storage underneath (drawers or shelves) for items you need regularly. A small tray for remotes or phones helps contain daily clutter.
What’s the best material for a kitchen peninsula countertop with seating?
Quartz is low-maintenance and durable, while butcher block adds warmth and is gentle on dishes. Granite is heat-resistant but needs sealing. For a budget-friendly option, consider solid-surface or laminate with a wood edge detail.
Conclusion
A kitchen peninsula with seating can be the most used spot in your home, especially when it’s designed with real life in mind. Whether you go for a waterfall edge, built-in storage, or a simple breakfast bar, the key is making it feel like a natural part of your daily rhythm.
Take your time choosing materials and layout that fit how you actually cook, eat, and gather. With the right details, your peninsula will become the warm, welcoming heart of your busy home—no perfection required.