11 Open Kitchen Organization Ideas That Look Neat and Feel Warm
An open kitchen is the heart of the home, but keeping it looking neat without closing off cabinets can feel like a challenge. You want everything within reach, yet still visually calm. The secret is choosing organization that feels warm and lived-in, not sterile or staged.
Think baskets that soften hard edges, jars that double as decor, and countertops that breathe. These ideas focus on real-life solutions that make your kitchen both functional and inviting.
Ready to transform your open kitchen into a space that feels cozy and clutter-free? Let's dive into 11 ideas that balance beauty with everyday practicality.
1. Layer Open Shelves with Baskets and Ceramics
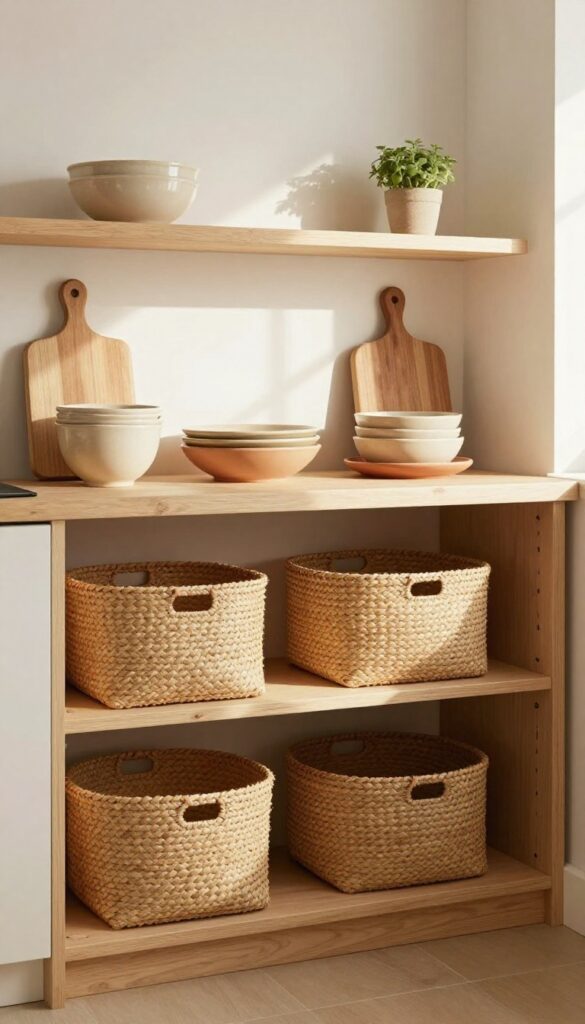
Open shelving can sometimes feel a bit too exposed, especially when you're trying to hide mismatched storage containers or less-than-pretty pantry items. That's where a thoughtful mix of woven baskets and ceramic pieces comes in. This approach keeps your shelves looking curated and cozy, not cluttered or staged.
Start by placing a few sturdy woven baskets on your lower shelves. These are perfect for corralling snacks, baking supplies, or even small appliances you use daily. The natural texture of the baskets softens the look of the shelves and brings warmth to the kitchen.
On the upper shelves, group ceramic dishes, bowls, and mugs in neutral or earthy tones. Leave a couple of everyday plates and bowls accessible for easy grabbing. The contrast between the soft, organic baskets and the smooth, glossy ceramics creates visual interest without feeling busy.
It's a practical way to keep things organized while making your kitchen feel lived-in and inviting.
Best Colors And Textures
- Stick with natural basket tones like seagrass, rattan, or bamboo. For ceramics, choose warm whites, soft beiges, terracotta, or muted greens. The goal is to create a cohesive palette that feels grounded and harmonious.
- Avoid stark white or overly shiny glazes, as they can look cold against the baskets.
Shelf Styling Tip
Vary the heights and shapes of your ceramics to avoid a flat look. Stack a couple of plates on a small wooden stand, lean a cutting board behind a bowl, and place a small plant or herb pot on one end. This adds layers and keeps the eye moving across the shelf.
Storage Tip
Use the baskets for items you reach for often but don't need to see, like tea bags, coffee filters, or packets of oatmeal. Keep the ceramics for items you use daily, like cereal bowls or coffee mugs. This way, the baskets hide the chaos while the ceramics stay functional and decorative.
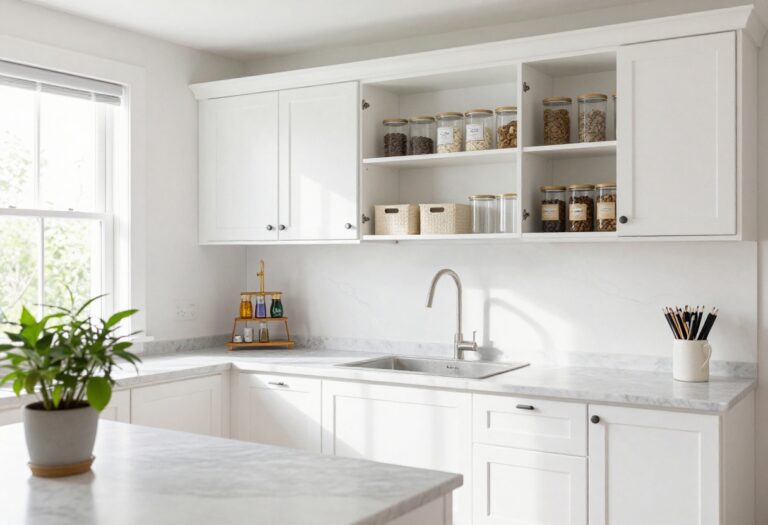
2. Use Glass Jars for Dry Goods with a Personal Touch
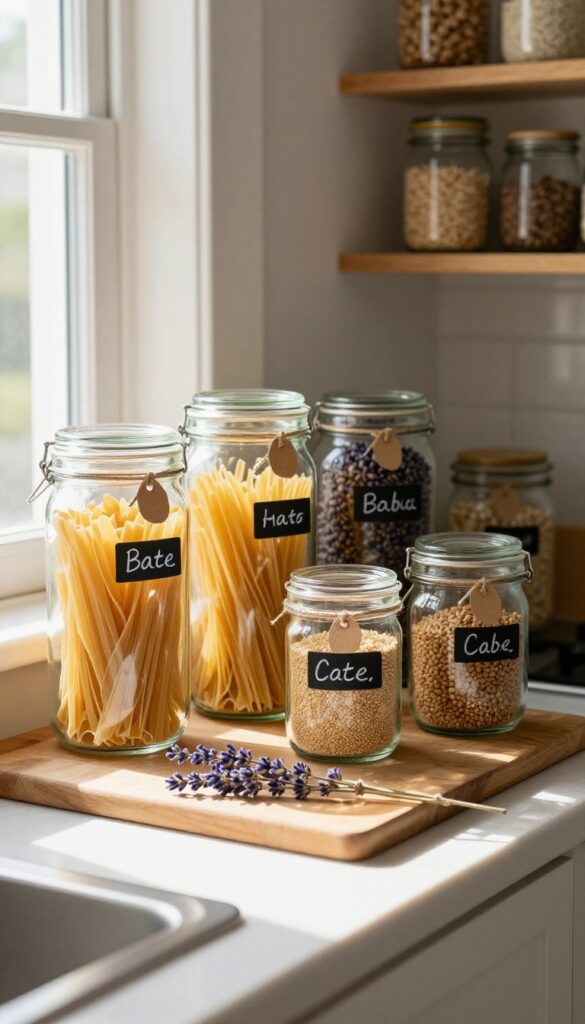
Open shelving and countertops can quickly look cluttered when you have mismatched pasta boxes and cereal bags on display. Glass jars solve that instantly by giving everything a uniform, tidy appearance. But the real charm comes from adding a personal touch—think handwritten labels, vintage tags, or a bit of ribbon.
This approach keeps your kitchen organized while making it feel warm and lived-in, not sterile.
Glass jars are a classic kitchen organization tool, but they can feel cold if you stick to plain labels. The trick is to infuse them with personality. Use chalk labels, washi tape tags, or even small pieces of brown paper tied with twine.
Write the contents in your own handwriting for an imperfect, cozy look. Arrange the jars by height on a shelf or counter to create visual rhythm—tall jars for pasta, shorter ones for grains and snacks. This not only makes everything easy to find but also turns your dry goods into part of the decor.
Best Materials
Look for clear glass jars with airtight lids—either clamp-top or screw-top. Uniform shapes (like all cylinder or all square) create a cohesive look, but mixing a few shapes adds casual charm. Avoid colored glass if you want to see the contents; clear is best for showing off colorful pasta or grains.
Labeling Tip
- Skip printed labels for a warmer feel. Use chalkboard stickers or small kraft paper tags. Write with a white chalk marker or a fine-tip pen.
- Add a tiny doodle (like a wheat stalk for flour) for extra personality. If you prefer a cleaner look, use a label maker with a simple font on clear tape.
Shelf Styling Tip
- Group jars by height on a shelf, with the tallest at the back or one side. Leave a little breathing room between each jar so they don’t look crammed. Tuck a small wooden cutting board or a stack of linen napkins nearby to soften the glass-and-metal feel.
- A small plant or a cookbook on the same shelf adds life.
3. Create a Coffee Station on a Tray
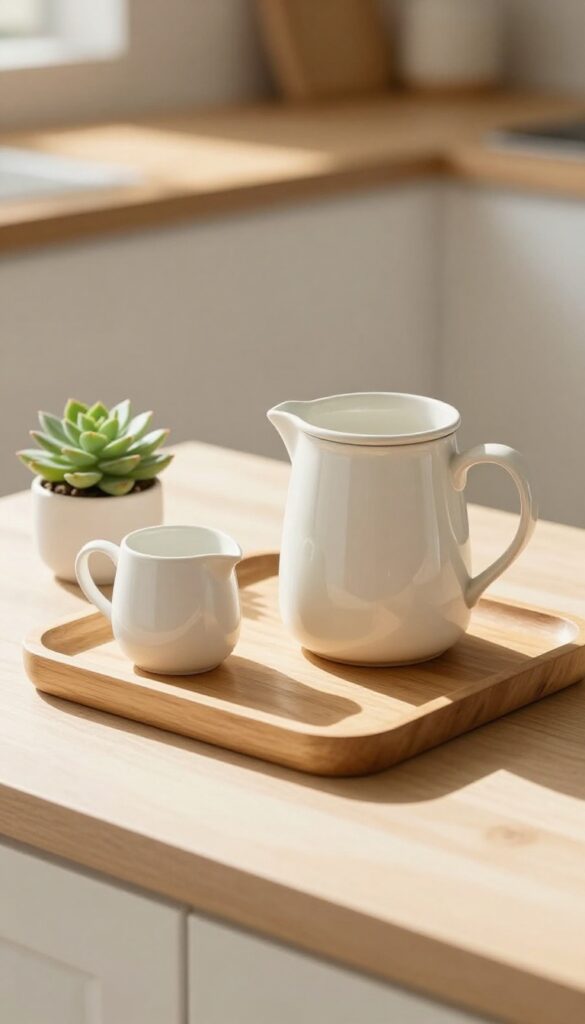
Carving out a tiny coffee station on your counter makes mornings feel a little more special. Instead of digging through cabinets for your grinder or favorite mug, everything lives together on a tray. It’s a small change that adds warmth and intention to your kitchen routine.
A tray corrals all your coffee gear into one neat zone. Choose a wooden or ceramic tray that complements your countertops. On it, place a canister for beans or grounds, a small pitcher for milk or creamer, and your go-to mug.
The tray defines the space visually and keeps spills contained. It also makes it easy to move the whole setup if you need to clear the counter. This idea works best on a stretch of counter near an outlet for your coffee maker or kettle.
Keep the tray simple—overloading it defeats the purpose. A couple of thoughtful pieces create a calm, inviting look.
Best Materials
A wooden tray adds warmth and pairs well with ceramic canisters and glass jars. For a more modern feel, go with a ceramic tray in a soft neutral like cream or sage. Avoid plastic trays—they can look cheap and don't age well in a kitchen setting.
Layout Tip
Place the tallest item (like a coffee canister) at the back of the tray, and the mug in front. Keep a small spoon or stir stick in a cup to the side. This creates a tiered effect that’s easy to grab from and looks balanced.
Finishing Touch
Add a tiny plant or a small candle next to the tray to soften the look. A sprig of eucalyptus or a mini succulent brings life to the station without taking up much space. It’s a subtle detail that makes the setup feel intentional.
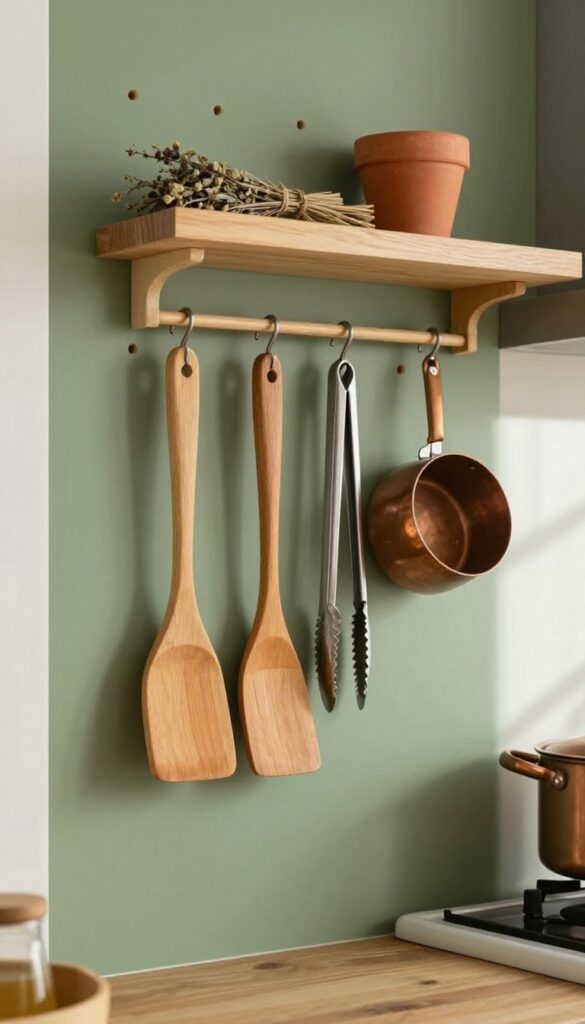
4. Hang Pots and Pans Within Reach
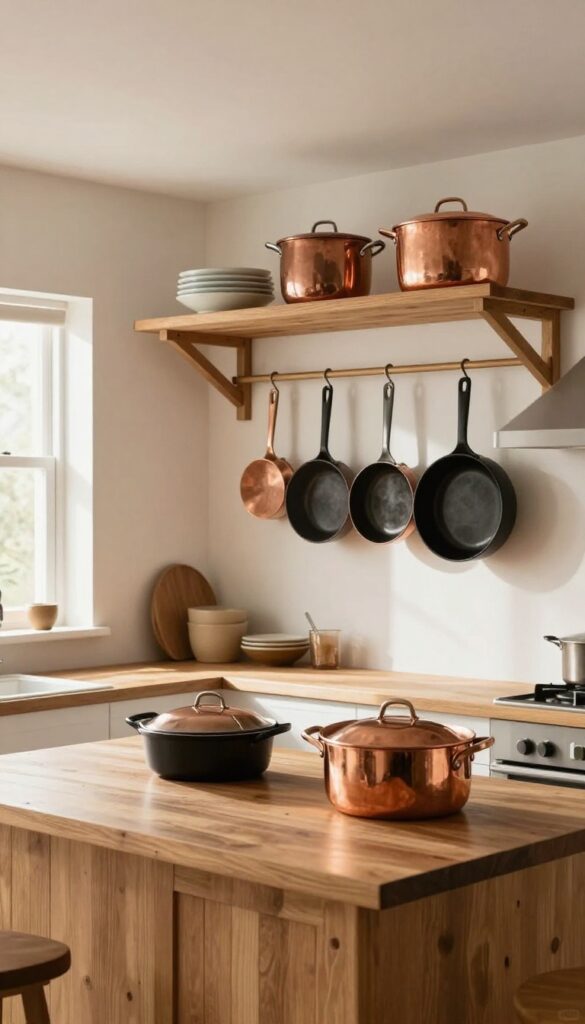
There’s something about a row of gleaming pots hanging overhead that instantly makes a kitchen feel both purposeful and lived-in. Instead of stuffing your cookware into dark cabinets, let it breathe—and work as decor. A wall-mounted rack or ceiling hook system frees up drawer space and puts your most-used pieces right where you need them.
Copper or matte black finishes add a warm, collected look that fits right into a cozy kitchen.
Hanging your cookware is one of those moves that’s equal parts practical and pretty. It saves you from digging through cabinets, and it fills empty wall or ceiling space with something useful. The key is to keep it intentional—hang only the pieces you reach for regularly, like a cast iron skillet, a stainless steel sauté pan, and a few saucepans.
Group similar metals together for a cohesive look, or mix copper and black for contrast. Position the rack near the stove or above a kitchen island so you can grab a pan without crossing the room. The visual weight of hanging cookware also anchors the kitchen, making it feel grounded and welcoming.
Best Materials And Finishes
- Copper brings instant warmth and develops a natural patina over time, which fits the lived-in aesthetic perfectly. Matte black is another strong choice—it’s modern but soft, and it pairs well with wood counters or open shelving. If you prefer a lighter look, brushed brass or nickel offers a subtle glow.
- Avoid high-gloss or overly shiny finishes, as they can feel too formal for a cozy kitchen.
Layout And Placement Tips
- A ceiling-mounted rack works best over an island or a prep area, where it won’t interfere with sightlines. Wall-mounted rails or pegboards are ideal for smaller kitchens or rentals where you can’t drill into the ceiling. Place the rack within easy arm’s reach of your main cooking zone, but leave enough clearance so you don’t bump your head.
- For a balanced look, arrange pans by size, with the largest in the center and smaller ones on the sides.
Finishing Touch
Add a few hooks on the side of the rack for utensils or oven mitts—this keeps everything you need close by and reinforces the warm, lived-in feel. A small hanging herb planter nearby can soften the metal and bring in a touch of green.
5. Add a Rolling Cart for Extra Storage
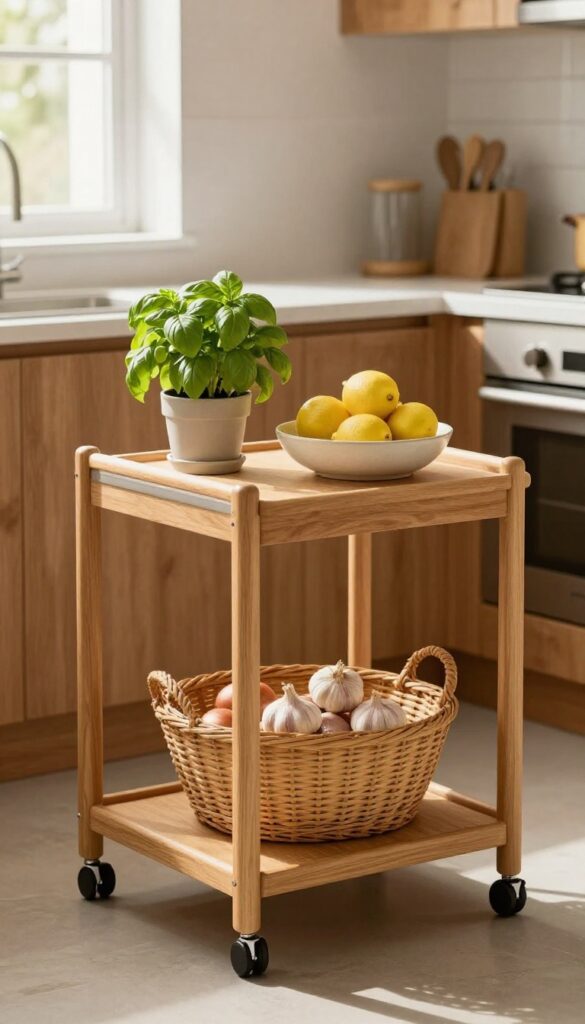
A slim rolling cart is one of those pieces that feels both intentional and flexible. It slides right beside the counter or island, offering a spot for produce, pantry overflow, or even your morning coffee setup. The open shelves keep everything visible and airy, while the wheels let you roll it wherever you need it most.
A rolling cart brings a relaxed, market-style feel to your kitchen. It's perfect for stashing fruits and vegetables you want to grab quickly, or for holding extra spices, oils, and canned goods. Because it's on wheels, you can tuck it away when you need floor space or pull it out as a prep station.
The open design prevents things from feeling cluttered, and the warm wood or metal tones add a cozy touch.
Best Materials
Look for a cart with a warm wood top or shelves, paired with a metal frame in black, brass, or matte white. Wood adds that lived-in feel, while metal keeps it sturdy and easy to clean. Avoid glossy or overly modern finishes if you're going for cozy.
Styling Tip
Use small woven baskets or ceramic bowls on the shelves to corral loose items like garlic, onions, or lemons. Add a small potted herb on the top shelf for a fresh, green accent. Keep the look casual—don't overfill it.
Where To Place It
Slide it next to the counter, at the end of an island, or even in a narrow gap between cabinets. In a small kitchen, it can serve as a portable coffee station or a bar cart for entertaining. Just make sure it doesn't block traffic flow.
6. Display Cookbooks as Decor
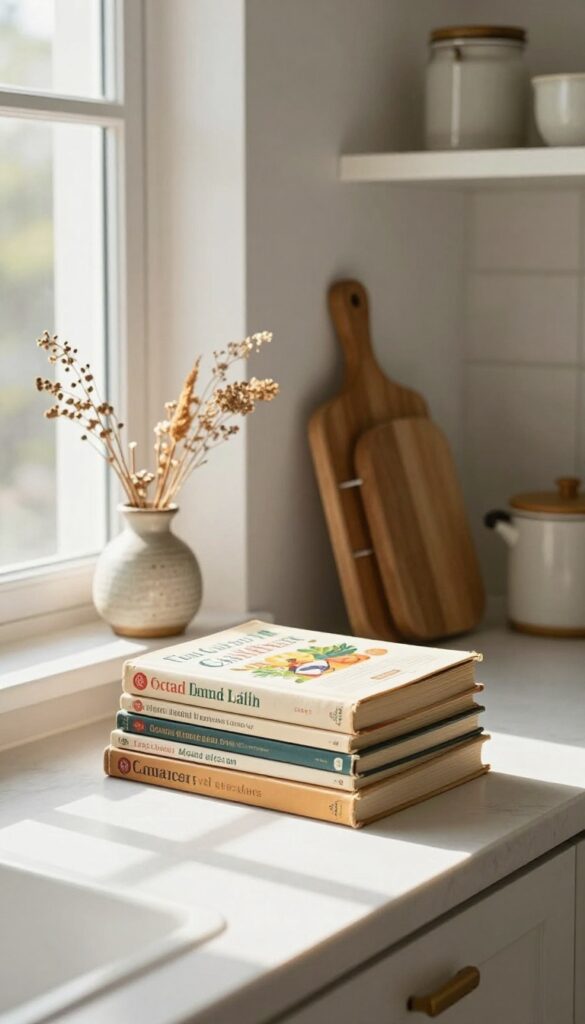
Cookbooks are more than just recipe collections—they're colorful, textural objects that instantly warm up a kitchen. Stacking a few favorites on the counter or a shelf adds personality and makes the space feel lived-in. Plus, when you prop one open to a beautiful page, it doubles as art you'll actually use.
Instead of hiding your cookbooks in a cabinet, treat them like decor. Choose titles with pretty covers or spines that complement your kitchen's color palette. Arrange them in small stacks, sometimes with a wooden cutting board or a small plant on top for extra visual interest.
Propping one open on a stand or leaning it against a jar creates a natural focal point. This works especially well on open shelves, a kitchen island, or a counter near the coffee station. The key is to keep the arrangement intentional—limit to three or four books so it doesn't look cluttered.
The result is a cozy, approachable kitchen that feels personal and inviting.
Best Colors And Covers
- Look for cookbooks with covers that tie into your kitchen's existing palette. Warm tones like terracotta, olive green, or mustard yellow work beautifully in a cozy kitchen. Neutral linen or white spines keep things calm, while a pop of red or blue adds energy.
- If your books are mismatched, you can always remove the dust jackets to reveal simpler cloth covers underneath.
Styling Tip: Layer And Prop
Create depth by layering a large flat book underneath a smaller one, then placing a small object like a salt cellar or a ceramic spoon rest on top. To prop a book open, use a metal or wooden book stand, or simply lean it against a jar of utensils. Choose a page with a beautiful food photo or a striking layout—it becomes instant wall art.
Where To Display
- The best spots are where you naturally pause: next to the coffee maker, on a kitchen island, or on a shelf above the sink. Avoid placing them too close to the stove where grease and heat can damage them. A small shelf or a corner of the counter works perfectly.
- In a small kitchen, one or two books on a floating shelf can make a big impact without taking up valuable counter space.
7. Use a Pegboard for Utensils and Small Tools
Pegboards aren't just for garages—they've become a go-to kitchen solution for keeping tools visible and within reach. Mounting one on a wall or inside a cabinet door turns scattered spatulas and measuring cups into an organized display. The best part?
You can customize it to match your kitchen's vibe, making it feel intentional rather than industrial.
A pegboard keeps your most-used utensils accessible while freeing up drawer space. Choose a warm color like sage or terracotta to soften the look and tie into a cozy kitchen palette. Arrange hooks to hold spatulas, tongs, and even small pots—grouping by size or function makes it easy to grab what you need.
This idea works especially well near the stove or prep area, where you want tools at arm's reach.
Best Colors And Finishes
Paint your pegboard in a warm, muted tone like sage green, terracotta, or soft cream to keep the look inviting. A matte finish reduces glare and feels more natural than glossy. If you prefer a natural look, unfinished wood pegboards add warmth and pair nicely with brass or copper hooks.
Layout And Placement Tips
Install the pegboard on a blank wall between counter and cabinets, or inside a cabinet door for a hidden storage boost. Arrange hooks in a grid or staggered pattern—leave enough space between items so they don't crowd each other. Consider adding a small shelf on top for jars or a small plant to soften the utilitarian feel.
Styling For A Cozy Kitchen
To keep the pegboard from feeling too functional, mix in a few decorative pieces like a small framed photo, a dried herb bundle, or a wooden cutting board. Use matching hooks in brass or black for a cohesive look. This blend of practical and personal makes the pegboard feel like part of your kitchen's personality.
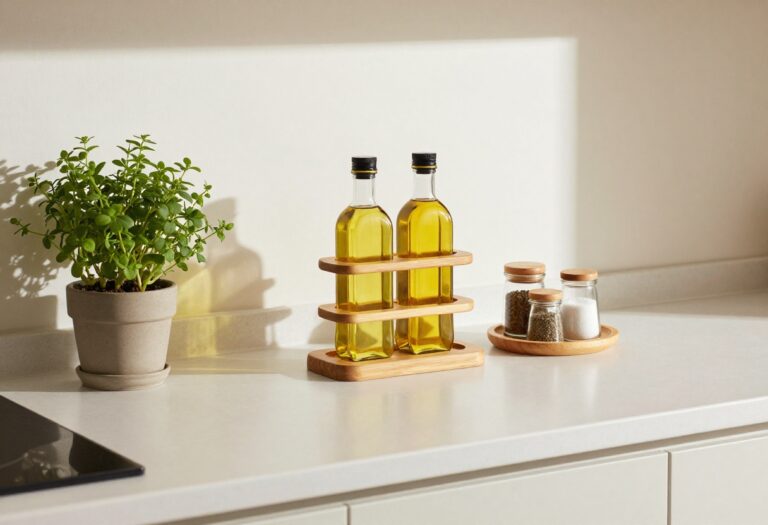
8. Keep a Cutting Board Out as a Prep Station
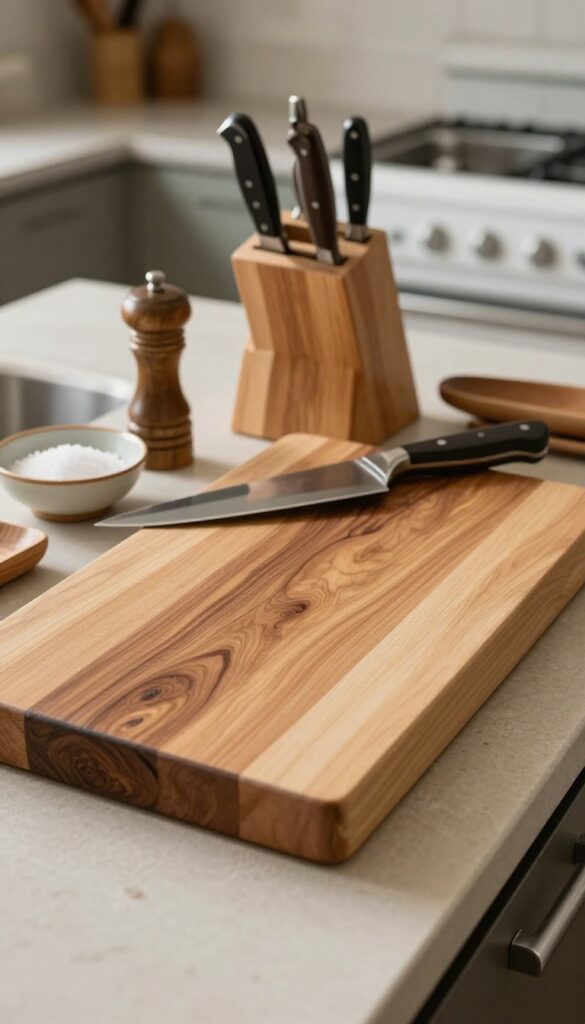
A large wooden cutting board left on the counter does more than just sit there. It becomes an invitation to chop, slice, and prep without pulling out a separate board every time. The natural grain adds warmth and texture, making the kitchen feel more lived-in and ready for action.
Pair it with a nearby knife block, and you've got a functional little station that looks intentional.
Leaving a cutting board out is one of those small tweaks that changes how you use your kitchen. It turns a bare stretch of counter into a dedicated prep zone, which is especially handy if you cook often or like to snack while you work. The key is choosing a board that's nice to look at—think end-grain wood or a live-edge slab—so it earns its spot as a permanent fixture.
Keep it clean and oiled, and it'll develop a patina over time that only gets better. For the full effect, place it near your sink or stove where you naturally gravitate. Add a small bowl of salt, a pepper grinder, or a jar of olive oil nearby to complete the setup without crowding the surface.
Best Materials
- Wood is the go-to for warmth and durability. Look for hardwoods like maple, walnut, or cherry that resist knife marks and age gracefully. Avoid glass or marble for a daily-use board—they dull blades and feel cold.
- A thick board (at least 1.5 inches) won't slide around and feels substantial under your knife.
Layout Tip
- Position the cutting board on the counter between the sink and stove if possible. This creates a natural workflow for washing, chopping, and cooking. Leave about 6 inches of clear counter on either side so you have room to set down ingredients or a bowl.
- If your kitchen is small, choose a board that's just big enough for prep but not so large it dominates the space.
Finishing Touch
Add a small wooden knife block or a magnetic strip on the backsplash to keep knives within arm's reach. A little dish of coarse salt or a wooden spoon rest next to the board adds to the ready-to-cook vibe without clutter. Stick to natural tones—wood, stone, ceramic—to keep the look cohesive and warm.
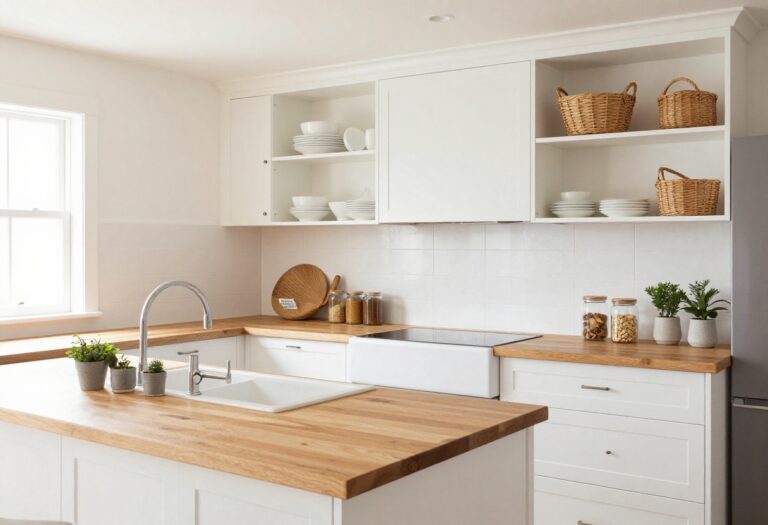
9. Group Like Items in Decorative Bins
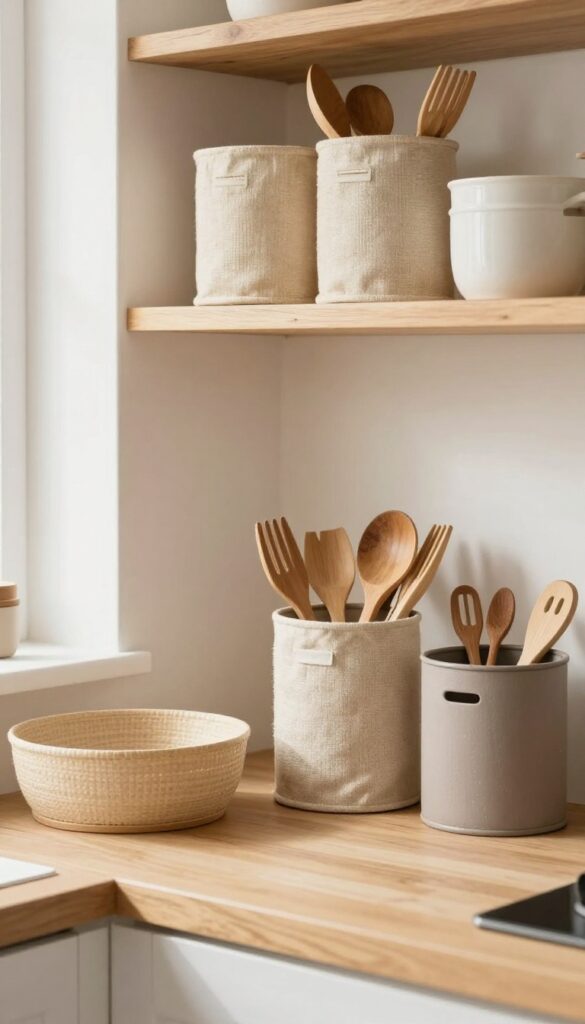
Open shelving is a dream for easy access, but it can quickly look messy if everything is just tossed on. The trick is to corral similar items in beautiful bins or baskets that add texture and warmth. Think seagrass for a natural vibe or soft linen for a cozy, lived-in feel.
This keeps your essentials handy while maintaining that curated, intentional look.
Open bins and baskets are the unsung heroes of kitchen organization. They let you stash snacks, baking supplies, or tea bags without sacrificing style. The key is choosing containers that complement your kitchen's palette—warm neutrals like beige, taupe, or soft cream work beautifully.
Place them on open shelves or countertops where you can easily grab what you need. The visual repetition of similar bins creates a sense of order, while the natural materials soften the overall look.
Best Materials
- Seagrass, rattan, and linen are top choices for a warm, cozy kitchen. Seagrass adds a beachy, organic texture, while linen feels soft and airy. For a more rustic touch, try woven bamboo or water hyacinth.
- These materials age beautifully and blend seamlessly with wood tones and neutral walls.
Storage Tip
Label your bins with chalkboard tags or simple linen labels so everyone knows where the granola bars or coffee pods live. This is especially helpful in a busy household. Keep bins shallow enough that you can see the contents at a glance, and avoid overfilling—leave a little breathing room for a tidy look.
Shelf Styling Tip
- Mix bin sizes and shapes for visual interest. Pair a tall, narrow bin for utensils with a wide, low one for snack bags. Leave some shelf space empty to avoid a cluttered feel, and layer in a small plant or a ceramic jar for a finishing touch.
- The goal is a balanced, lived-in look that feels curated, not stuffed.
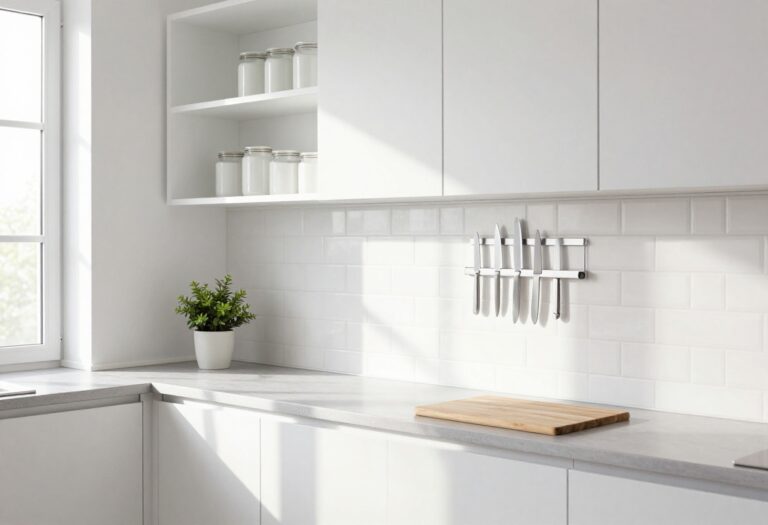
10. Install a Magnetic Knife Strip on the Backsplash

A cluttered countertop can make even the coziest kitchen feel chaotic. Swapping a bulky knife block for a magnetic strip frees up precious workspace and adds a touch of modern warmth. The key is choosing a strip that blends in rather than sticks out—think slim wood or matte metal that complements your backsplash.
It’s one of those small swaps that instantly makes your kitchen feel more open and intentional.
Mounting a magnetic knife strip on the backsplash keeps your most-used tools visible and within arm’s reach, without sacrificing counter space. The visual effect is clean and almost sculptural—knives lined up like art. For a warm, lived-in feel, opt for a wooden-backed strip in walnut or bamboo.
Arrange knives by size, with the largest closest to the cutting board, to create a natural rhythm. This idea works especially well in galley kitchens or any space where counter real estate is precious.
Best Materials For A Cozy Look
- While stainless steel strips are common, they can feel cold in a warm kitchen. Instead, look for a magnetic strip with a wood veneer or a matte black finish. Walnut adds richness, while bamboo keeps things light and airy.
- If your backsplash is tile, make sure the strip comes with adhesive strong enough for the surface, or opt for a screw-mounted version for extra security.
Placement And Layout Tip
- Mount the strip at eye level or slightly below, about 6 to 8 inches above the counter. Position it near your main prep area so you can grab a knife without reaching across the stove or sink. Leave a few inches of space on either side so the strip doesn’t feel cramped.
- For a balanced look, center it over the sink or align it with the upper cabinets.
Finishing Touch
To keep the strip looking neat, only store knives you use regularly—leave the specialty blades in a drawer. Add a small wooden cutting board propped nearby to tie the materials together. A hanging herb planter or a simple ceramic jar for utensils on the opposite side of the sink can echo the same warm, organized vibe.
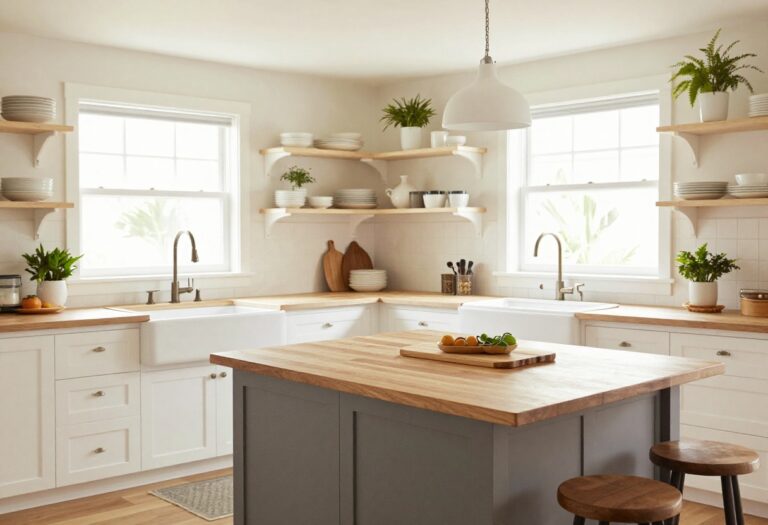
11. Add a Small Herb Garden on the Windowsill
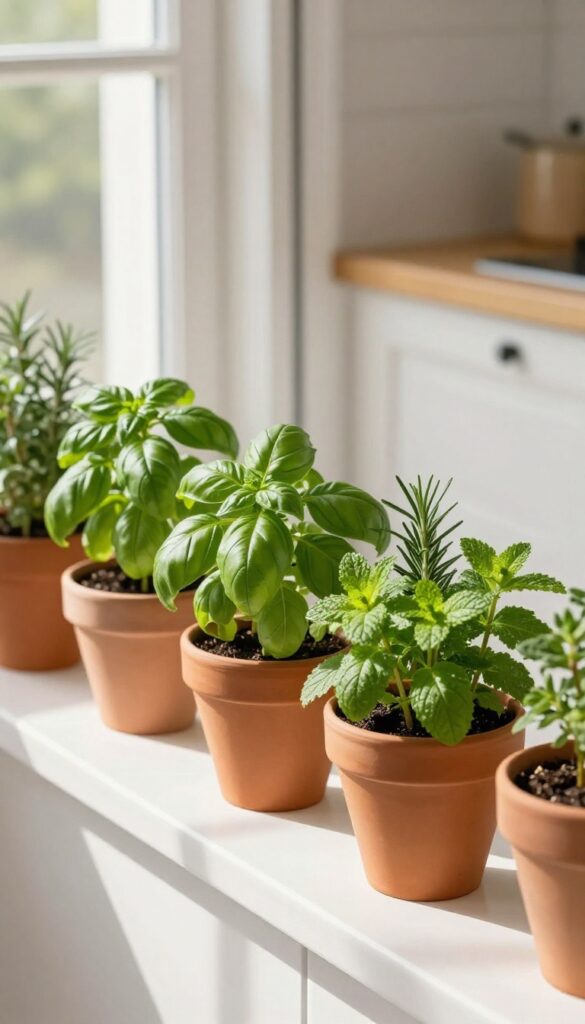
A sunny kitchen windowsill is prime real estate for something green and useful. Instead of letting that ledge collect dust or random bottles, tuck a few potted herbs there. Basil, rosemary, and mint are easy to grow indoors and add instant life to your cooking space.
The best part? You get fresh flavors right at your fingertips, and the greenery softens all those hard kitchen surfaces.
Placing a small herb garden on the windowsill is one of the simplest ways to make your kitchen feel more alive. The contrast of bright green leaves against white or wood window frames brings a natural, organic texture that balances out cabinets and countertops. Plus, having herbs within arm's reach means you'll actually use them—snip some basil for pasta or mint for tea without a trip to the store.
Choose a spot that gets at least four to six hours of sunlight, and group pots together for a cohesive look. Terracotta pots keep roots breathable and have a rustic charm, while glazed ceramic adds a pop of color. Just make sure each pot has drainage holes and a saucer to catch water.
Water when the soil feels dry to the touch, and rotate pots occasionally so all sides get light. This small addition turns a functional ledge into a charming, lived-in feature that feels both intentional and effortless.
Best Herbs To Start With
- Not all herbs thrive indoors, so pick ones that love sunlight and don't mind being in pots. Basil is a top choice—it grows quickly and smells amazing. Rosemary is more drought-tolerant and adds a woody scent.
- Mint is practically unkillable, but keep it in its own pot because it spreads fast. Other good options include thyme, oregano, and chives. Avoid large plants like dill or cilantro unless you have very deep pots and lots of light.
Styling The Windowsill
- Group pots at varying heights using small plant stands or inverted terracotta saucers. Stick to a neutral palette—white, cream, or soft gray pots—to keep the focus on the green leaves. Add a small watering can or a pretty pair of shears nearby for a finishing touch.
- If your windowsill is narrow, use a slim shelf or a magnetic herb rack on the side of a cabinet to save space.
Care Tips For Long-lasting Greenery
- Herbs need consistent moisture but hate soggy roots. Water when the top inch of soil is dry, and always let excess water drain. Fertilize lightly every few weeks with a diluted liquid plant food.
- Pinch off leaves regularly to encourage bushier growth, and don't let flowers develop—they make the leaves bitter. Rotate pots every week so all sides get equal sun.
FAQ
How do I keep open shelves from looking cluttered?
Stick to a color palette and use baskets to hide small items. Leave some empty space between groups so the eye can rest.
What are the best materials for a warm, lived-in kitchen?
Wood, ceramic, woven fibers like rattan or seagrass, and matte metals like copper or brass add warmth and texture.
Can I use open shelving in a small kitchen?
Yes, open shelving can make a small kitchen feel larger by keeping sightlines open. Just keep it edited and functional.
How do I organize a kitchen island without it looking messy?
Use a tray or a small caddy for frequently used items like oils, salt, and pepper. Keep only a few decorative pieces on display.
What's the easiest way to add warmth to a modern open kitchen?
Incorporate natural textures like wood cutting boards, linen towels, and ceramic dishes. Soft lighting also helps create a cozy atmosphere.
Conclusion
An open kitchen doesn't have to feel exposed or chaotic. With a few thoughtful organization choices, you can create a space that's both tidy and welcoming—a place where cooking and gathering feel natural.
Start with one or two ideas that resonate with your style, and let your kitchen evolve. The goal isn't perfection; it's a warm, lived-in home that works for you every day.