15 Crown Molding Ideas to Give Living Room Walls More Charm
Plain white walls can make even a nicely furnished living room feel unfinished, like something is missing above eye level. Crown molding fixes that fast, and it does it without a full remodel or a designer's budget.
The right profile adds weight, shadow, and a little architectural personality to a room that currently has none. Some people want a classic look with deep layered trim, while others just want a clean line that hides a messy ceiling seam.
You can paint it to blend in, contrast it for drama, or run LED strip behind it for a soft glow at night. It also solves real problems, like covering curtain rods and giving wallpaper a clean stopping point.
1. Classic Coffered Ceiling with Crown Molding

A coffered ceiling turns a plain white ceiling into a grid of recessed panels, and crown molding is what makes each panel look intentional. The beams create depth and shadow, while the molding frames every section with a crisp, finished edge. It's a classic move that instantly makes a living room feel more upscale without changing the floor plan.
You don't need a historic home to pull this off. A simple grid of beams, often made from MDF or pine, can be installed over an existing flat ceiling. Once the grid is up, crown molding runs along the inside edge of each coffer, hiding seams and adding a layered profile that catches light.
The result is a ceiling that reads as a design feature, not an afterthought. The trick is keeping the proportions right. Beams that are too wide or too deep can make a room feel heavy, while skinny beams might get lost.
A good rule of thumb is to size the beams based on the room's dimensions and ceiling height, and to match the crown molding scale to the beam width. Paint everything the same color for a seamless look, or contrast the molding for a bolder statement.
Choosing Beam Spacing And Depth
Spacing depends on the size of your living room. In a typical 12×16 room, beams spaced 3 to 4 feet apart create a balanced grid. Deeper beams add more shadow and drama, but they also eat into ceiling height.
If your ceiling is 9 feet or higher, you can go deeper; lower ceilings call for shallower beams to avoid a cramped feel.
Molding Profiles That Work
Not all crown molding suits a coffered ceiling. A simple cove or bed molding keeps things clean and modern, while a more ornate profile with dentil detailing leans traditional. The key is consistency: use the same profile on the beams and the perimeter for a cohesive look.
If you're painting the ceiling white, a medium-complexity profile shows up best.
Paint And Finish Options
The easiest approach is to paint the entire ceiling—beams, molding, and all—in one color, usually a crisp white or soft off-white. That keeps the room bright and makes the grid feel architectural. For a moodier vibe, paint the ceiling and beams a deep color like navy or charcoal, and keep the molding white for contrast.
Either way, a satin or semi-gloss finish helps the molding stand out.
2. Modern Minimalist Crown Molding
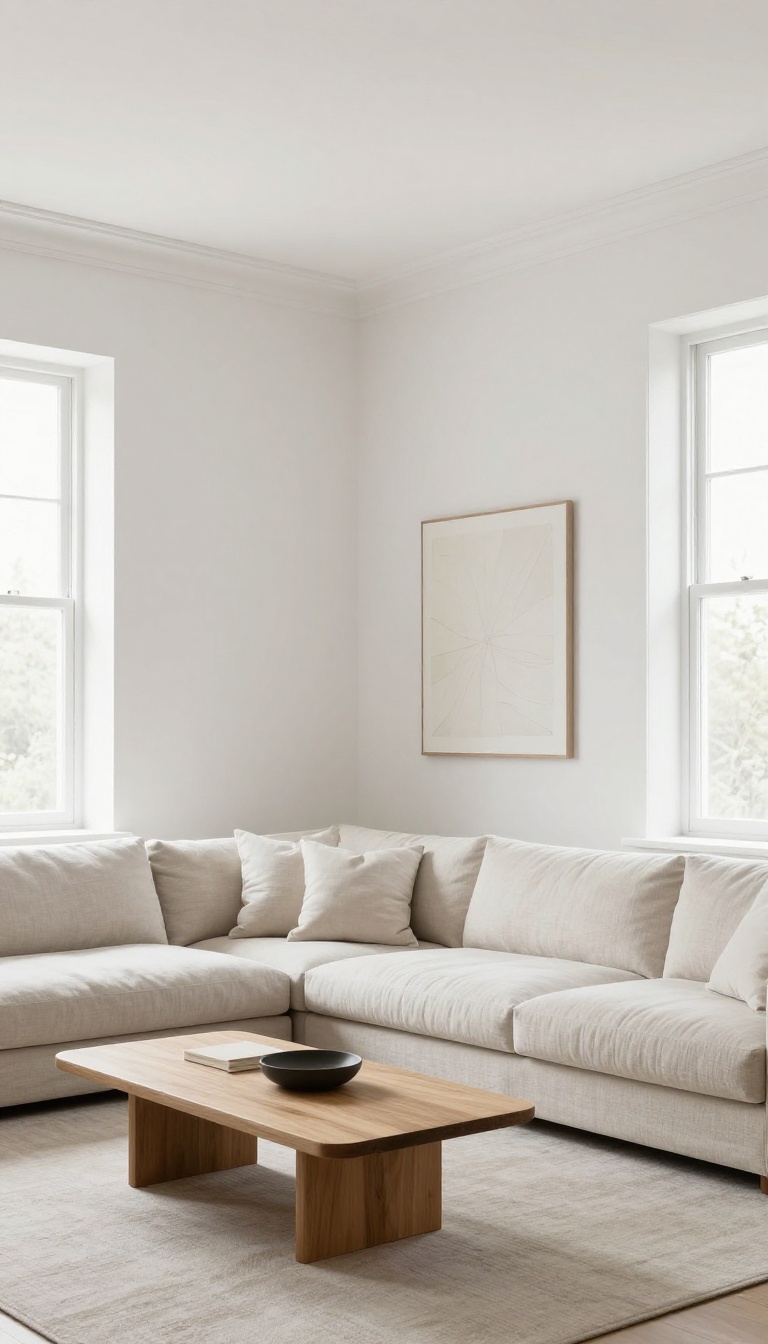
Modern minimalist crown molding strips away the ornate curves and deep profiles that define traditional trim. Instead, it uses a slim, flat or slightly stepped shape that reads as a clean architectural line rather than a decorative feature. The goal is subtle definition—enough to finish the wall-to-ceiling transition without pulling focus from your furniture or art.
A minimalist profile works best when it matches the wall color exactly. That way, the molding disappears into the background except for the soft shadow it casts. You get a crisp edge where the wall meets the ceiling, but the room still feels open and uncluttered.
This approach is especially effective in contemporary living rooms with low ceilings, because a bulky traditional profile would visually lower the space. Slim trim keeps the height feeling generous. You can also pair minimalist crown molding with a flat ceiling and simple baseboards for a cohesive look.
The key is consistency: if the crown is ultra-slim, the baseboards should be similarly restrained. Mixing a skinny crown with chunky baseboards creates an odd visual weight difference that throws off the room's balance. Stick to one family of profiles and repeat it throughout the space.
For a slightly more custom feel, consider a stepped profile that's still narrow but has a small reveal. It adds a touch of depth without crossing into traditional territory. Paint it the same color as the walls and ceiling, and the effect is almost seamless—just a quiet line that makes the room look more finished.
This is a great option if you want the polish of crown molding without committing to a strong architectural statement.
Choosing The Right Profile
Look for profiles under two inches wide. Flat or stepped shapes work better than curved ones. A simple cove or a square-cut profile keeps the look modern.
Avoid anything with dentils, egg-and-dart, or deep scallops—those read as traditional. If you're unsure, ask for samples and hold them against your wall. The right profile should feel almost invisible until you notice the shadow line.
Paint And Color Strategy
Matching the wall color is the easiest way to keep things minimal. Use the same finish as the walls—usually a satin or eggshell—so light reflects evenly. If you want a hint of contrast, paint the crown one shade lighter or darker than the wall.
That creates a subtle boundary without shouting. Avoid stark white trim against dark walls unless you want a graphic, high-contrast look.
Installation Tips For Clean Lines
Minimalist molding leaves no room for sloppy joints. Mitered corners need to be tight, and any gaps will stand out. Caulk the seams and paint over them for a seamless finish.
If your ceiling isn't perfectly level, a slim profile can highlight the unevenness. In that case, use a slightly thicker profile or add a small backer rod to bridge gaps. Hire a pro if you're not confident in your mitering skills.
3. Two-Tone Crown Molding for Contrast

Crown molding doesn't have to match your walls. In fact, painting it a different color is one of the fastest ways to add depth and drama to a living room. The contrast pulls the eye upward, making ceilings feel taller and the room feel more designed.
It's a small change with a big payoff, and you can do it with a single can of paint.
Two-tone crown molding works because it breaks the visual connection between wall and ceiling. Instead of blending in, the trim becomes a deliberate frame. You can go bold with black or navy, or keep it subtle with soft gray or warm white.
The key is choosing a color that feels intentional, not accidental. Pair it with matching baseboards or window trim for a cohesive look, or let the crown stand alone as a statement.
Choosing The Right Contrast
High contrast means dark trim on light walls or vice versa. That's the look you want if you're after drama. For a softer effect, pick a shade that's a few steps darker than your wall color.
Test a few samples in different lighting before you commit. Natural light changes everything, so check how the colors read at morning and night.
Painting Tips For Clean Lines
Tape off the wall and ceiling before you start. Use a high-quality angled brush for the trim and a small roller for the flat parts. Two thin coats beat one thick coat every time.
Let each coat dry fully before adding the next. If you're painting over dark trim, a primer will save you a coat or two.
When To Match Other Trim
If your baseboards and window casings are already a different color, match the crown to them. That creates a consistent border around the room. If they're all white, you can still go two-tone by painting just the crown.
It'll look like a deliberate accent, not a mistake. Just make sure the undertones work together.
4. Crown Molding with LED Backlighting
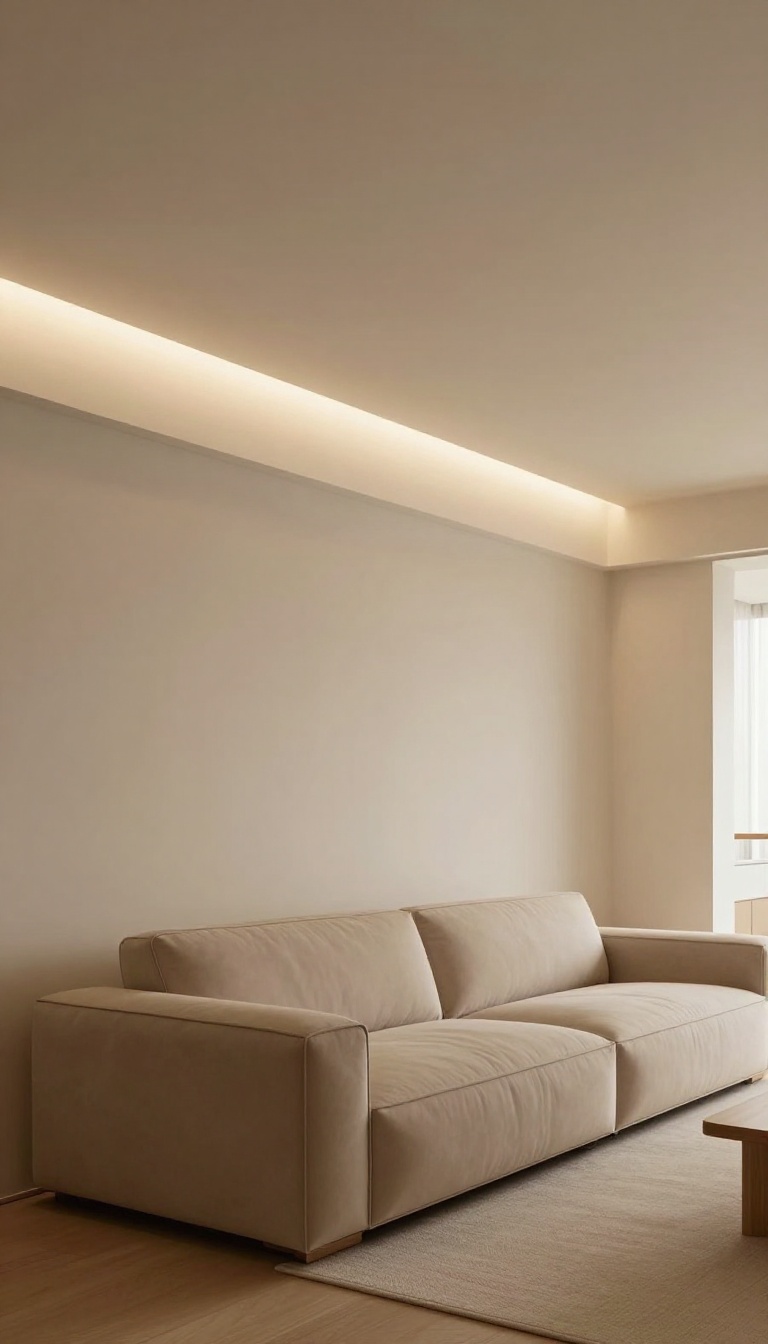
Crown molding with LED backlighting turns your trim into a light fixture. You install a hidden LED strip behind the molding, and it casts a soft glow upward or downward. The result is a living room that feels warm and architectural, even after the sun goes down.
This look works because the light source stays out of sight. You only see the glow, not the strip. It highlights the molding profile and adds depth to the ceiling or wall.
It also doubles as ambient lighting for movie nights or quiet evenings.
How To Hide The Led Strip
Most people tuck the strip into a small channel behind the molding. You can buy crown molding with a built-in channel, or you can create one by leaving a gap between the molding and the wall. The key is to keep the LEDs facing the surface you want to wash with light.
A strip that points straight out will just look like a bright line.
Warm Vs. Cool Light
Warm white LEDs (around 2700K to 3000K) give a cozy, candle-like glow. They work well in living rooms with wood tones or warm paint colors. Cool white (4000K and up) looks more modern and crisp, but it can feel a bit clinical in a relaxing space.
For most living rooms, warm white is the safer bet.
Dimmer And Remote Control
A dimmer is non-negotiable here. You will want to dial the brightness down to a soft glow for evenings, and maybe up a bit for reading. Many LED strips come with a remote that lets you change brightness and even color.
Just make sure the power supply is accessible so you can swap it out if needed.
Wiring And Power Tips
You will need a nearby outlet or a way to hide the power supply. Some people run the cord down a wall and cover it with a paintable raceway. Others hire an electrician to add a recessed outlet behind the molding.
If you are handy, you can also tap into an existing light circuit, but that is a job for a pro.
5. Victorian-Era Layered Crown Molding
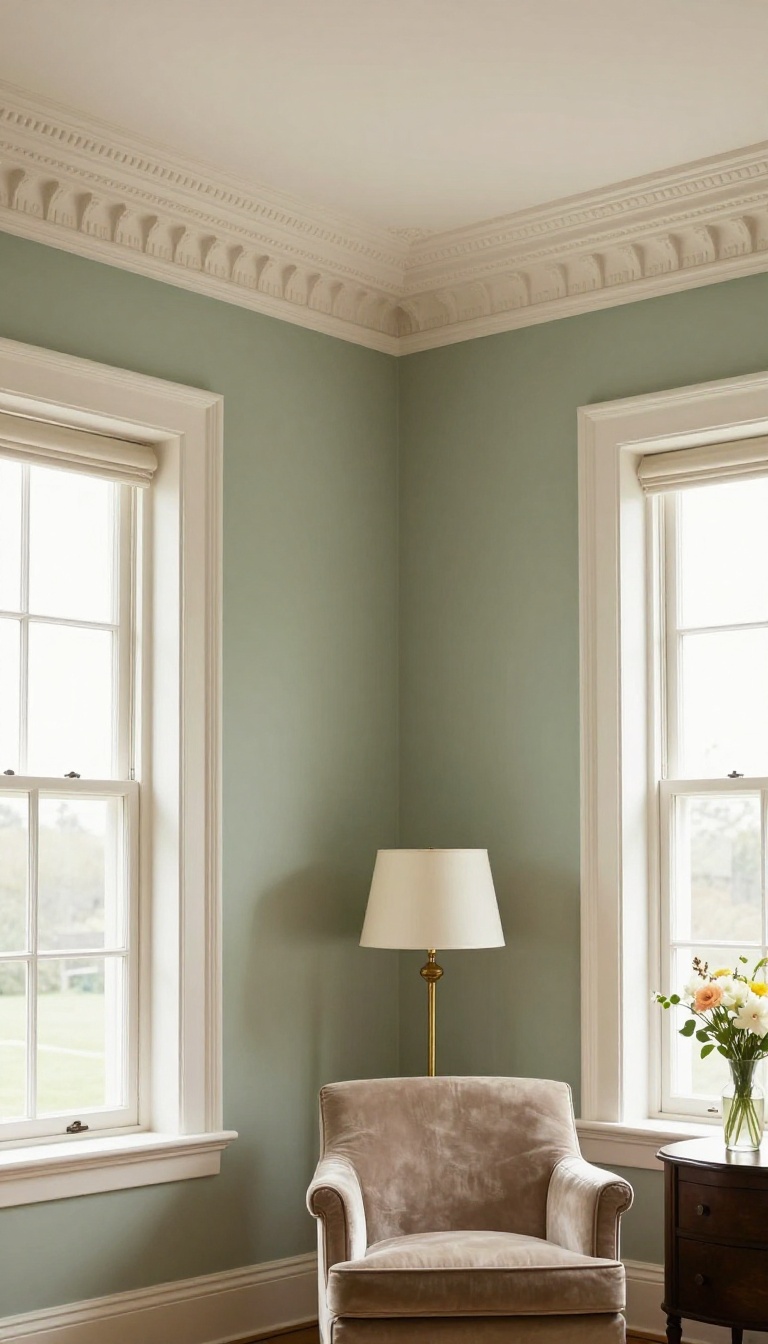
Victorian homes were built to show off, and their trim did a lot of the talking. Instead of one simple strip of molding, builders stacked several profiles on top of each other to create deep, shadowy bands that run along the ceiling. That layered look is what gives these rooms their old-world weight and charm.
You can recreate it today, even if your house is nowhere near a hundred years old.
The magic of Victorian crown molding comes from the stack, not any single piece. Each layer has its own curve or step, and together they build a profile that's several inches tall. That depth catches light in a way a flat board never can, so the trim reads as a real architectural feature rather than an afterthought.
It's a look that rewards a little planning, but the payoff is huge.
How To Build The Stack
Start with a base layer of flat backband against the ceiling and wall. Then add a cove or bed molding, followed by a decorative crown with a curve or dentil pattern on top. The exact order matters less than the overall height and how the shadows fall.
A good rule is to keep the total projection between four and six inches so it feels grand but not overwhelming.
Picking Profiles That Play Well Together
Not every molding combo works. You want pieces that share a similar scale and style, so a delicate dentil looks odd under a chunky ogee. Stick to profiles from the same era or catalog family when you can.
If you're mixing new and old, bring samples home and hold them up together before you commit.
Paint And Finish Tips For Depth
Victorian trim usually looks best painted in a single color, often a soft white or cream, so the shadows do the work. High-gloss or semi-gloss paint helps reflect light and makes the curves pop. If you want a bolder look, paint the deepest layer a shade darker than the rest.
Just avoid flat paint, which can make the layers blur together.
6. Crown Molding as a Picture Rail

Hanging art usually means one of two things: hammering holes into your walls or wrestling with adhesive strips that give up after a few months. Crown molding used as a picture rail solves both problems. Instead of running trim along the ceiling, you mount it lower, about a foot or so below, and hang artwork from it with hooks and wire.
The molding becomes a functional design feature that looks like it was always meant to be there. It's a smart move for renters, old-house lovers, and anyone who likes to rearrange art without patching drywall.
Picture rails aren't a new invention. They were standard in Victorian and Craftsman homes, where plaster walls made nails risky and frequent redecorating was common. Today, you can recreate that look with any crown molding profile, from simple cove to ornate dentil.
The key is placement: high enough to feel architectural, low enough to hang art at eye level. Once installed, you use small S-hooks that grip the top edge of the molding, then suspend your frame with picture wire. No nails, no holes, no regrets.
The molding itself can be painted to match your walls for a subtle look or contrasted for a bolder statement. Either way, it adds a layer of detail that plain walls lack.
Choosing The Right Molding
Not every crown profile works as a picture rail. You want something with a flat top edge or a slight lip that hooks can grab onto. Simple cove molding often has a rounded back that makes hanging tricky.
Look for profiles with a defined shelf or a square-cut top. Poplar and pine are easy to cut and paint, while MDF offers a smooth, budget-friendly option. If you're going for a period look, a small dentil or egg-and-dart pattern adds character without overwhelming the room.
Just avoid anything too deep or bulky, since it will stick out from the wall and might interfere with furniture placement.
Installation Tips For Renters And Diyers
You don't need a contractor to pull this off. Peel-and-stick molding exists, but it won't hold much weight. For a secure rail, use a few finishing nails into studs or drywall anchors.
If you're renting, check your lease first, but small nail holes are usually easy to fill. Measure and mark a level line around the room, then cut your molding with a miter saw for corners. A coping saw helps for inside corners if you want a tight fit.
Once it's up, caulk the top and bottom edges, then paint. The whole project can take a weekend and costs far less than a gallery wall system.
Hanging Art Without The Hassle
The beauty of a picture rail is how easy it makes swapping art. Use brass or nickel S-hooks that fit over the molding's edge. Attach picture wire to your frame, then loop it over the hook.
You can adjust the height by shortening or lengthening the wire. For heavier pieces, use two hooks to distribute the weight. This system lets you change your mind as often as you like.
No spackle, no touch-up paint. It's also great for hanging plates, mirrors, or even lightweight shelves. Just keep the total weight under 20 pounds per hook to be safe.
7. Crown Molding with Wallpaper Above
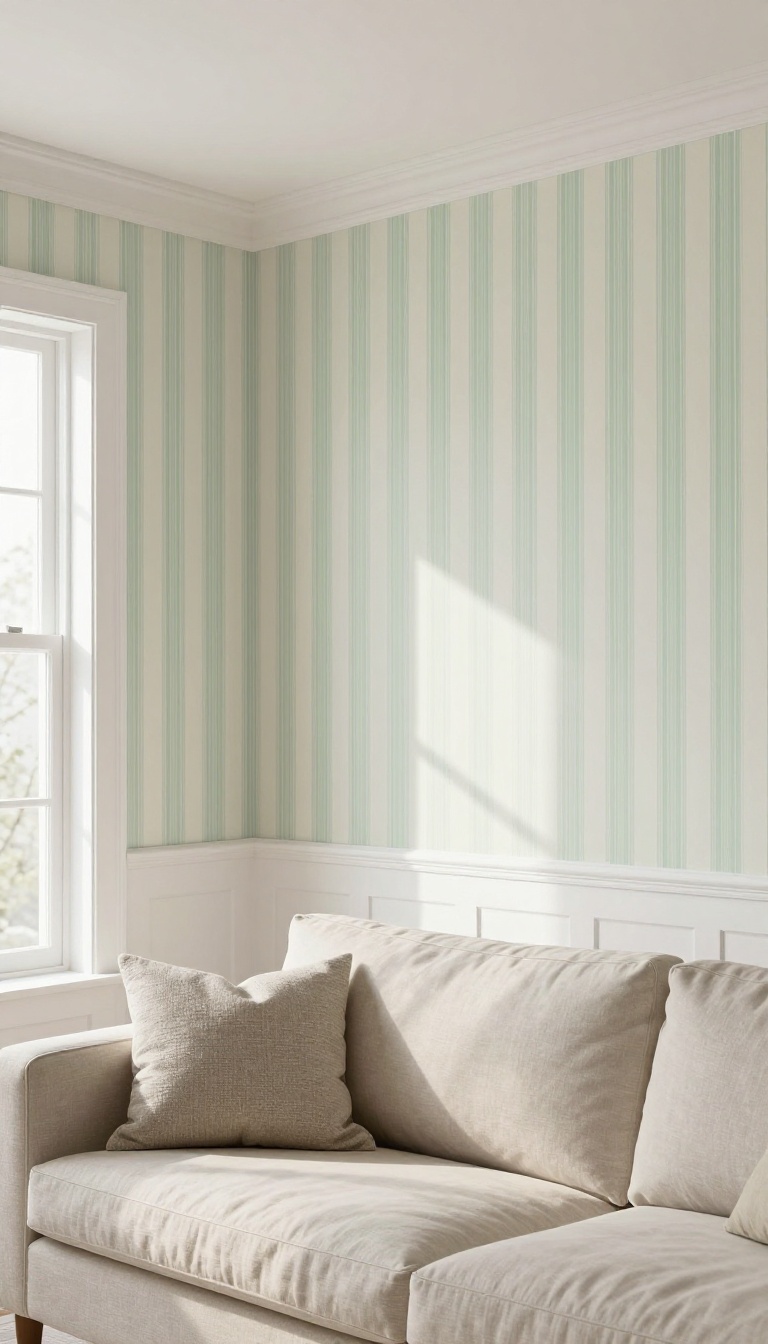
Wallpaper above crown molding flips the usual formula. Instead of papering the whole wall, you stop the pattern at the trim line and let the molding act as a built-in border. The result reads like faux wainscoting, but with less commitment and a lot more pattern payoff.
It's a smart way to add height and interest without overwhelming a living room.
The trick is treating the molding as a visual divider. Below it, you keep things calm with paint or a simple panel. Above it, you let the wallpaper do the talking.
This setup draws the eye upward and makes ceilings feel taller than they are. It also gives you a clean stopping point, so you don't have to worry about pattern matching around furniture or outlets. You get the charm of wallpaper without the chaos of a fully papered room.
Pick A Pattern That Plays Nice
Small-scale prints and subtle textures work best above molding. Think thin stripes, tiny florals, or a soft geometric. These patterns add depth without shouting.
If you want drama, go with a bold damask or a deep-colored chinoiserie, but keep the rest of the room quiet. The molding frames the paper, so the pattern should feel intentional, not accidental. Test a swatch under your actual lighting before you commit.
Get The Height Right
Wallpaper above molding looks best when the papered section is at least 18 to 24 inches tall. Too short and it feels like an afterthought. Too tall and you lose the wainscoting effect.
Measure from the top of the molding to the ceiling, then subtract a few inches for breathing room. If your ceilings are low, stick to the lower end of that range. High ceilings can handle more paper, so go taller if you have the space.
Prep And Install Like A Pro
Clean the wall above the molding and let it dry completely. Prime it with a wallpaper-specific primer to help the paper stick and slide. Cut your strips with a few extra inches at the top and bottom.
Smooth them down with a squeegee, working from the center out. Trim the excess with a sharp blade against a straightedge. If you're using peel-and-stick, press firmly along the edges to prevent lifting.
8. Crown Molding for Hiding Curtain Hardware
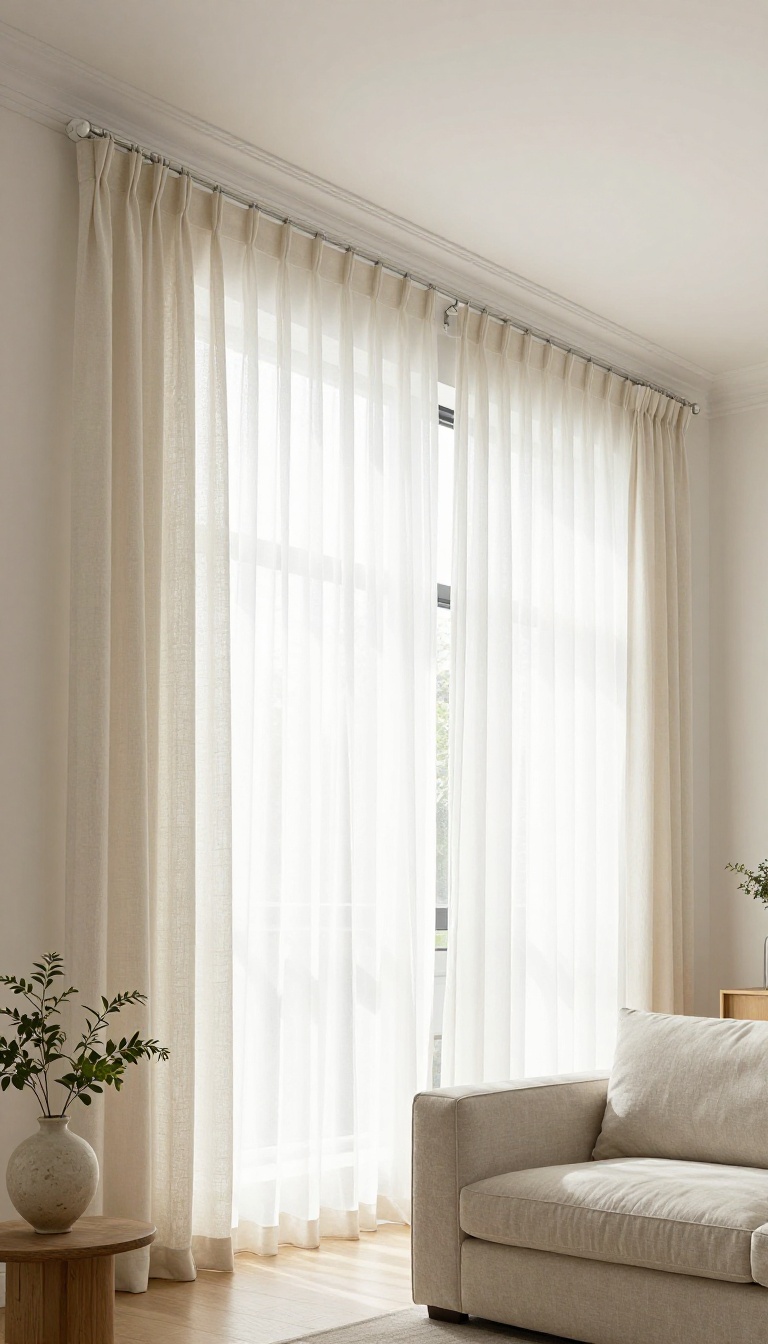
Curtain rods and brackets can ruin the clean lines of a living room, especially when they're mounted high and stick out like sore thumbs. A deep crown molding solves that by acting as a built-in cover for all that hardware. You get the polished look of custom drapery without the custom price tag.
The trick is choosing a molding with enough depth to clear the rod and brackets. Once it's up, the hardware disappears, and your curtains seem to float from the ceiling. It's a simple upgrade that makes a big difference.
Curtain rods and brackets can ruin the clean lines of a living room, especially when they're mounted high and stick out like sore thumbs. A deep crown molding solves that by acting as a built-in cover for all that hardware. You get the polished look of custom drapery without the custom price tag.
The trick is choosing a molding with enough depth to clear the rod and brackets. Once it's up, the hardware disappears, and your curtains seem to float from the ceiling. It's a simple upgrade that makes a big difference.
Choosing The Right Depth
Standard crown molding usually isn't deep enough to hide a curtain rod and its brackets. Look for a profile that's at least 4 to 6 inches deep, or consider a built-up trim made from two or three pieces stacked together. That gives you the clearance you need without looking bulky.
Measure your rod's projection from the wall, then add an inch for breathing room. The molding should extend past that point so nothing peeks out from below. If you're unsure, go deeper—it's easier to hide hardware with extra space than to wish you had more.
Installation Tips For A Clean Look
Mount the curtain rod first, then install the crown molding over it. That way you can position the rod exactly where you want it and adjust the molding to cover it completely. Use a ledger board or blocking behind the molding for secure attachment if you're not hitting studs.
For a seamless finish, caulk the top and bottom edges of the molding where it meets the ceiling and wall. Paint it the same color as your trim or walls to make it blend in. The goal is for the molding to look like it was always part of the architecture, not an afterthought.
When To Skip The Rod Altogether
If you're starting from scratch, you can skip the traditional rod and brackets entirely. Install a ceiling-mounted track system or a simple wire, then hide it behind the crown molding. This works especially well for floor-to-ceiling curtains because there's no visible hardware at all.
Just make sure the molding is deep enough to conceal the track and any glides or carriers. You'll still need to leave a gap for the curtains to pass through, but a deep crown can hide almost everything else. It's a clean, modern approach that keeps the focus on the fabric.
9. Crown Molding with a Painted Accent Edge

A thin line of color along the edge of your crown molding can make the whole room feel custom without a custom price tag. It's a small detail that draws the eye up and gives the trim a crisp, tailored finish. Think of it as eyeliner for your walls—subtle, but it changes everything.
You don't need a bold color to make an impact. A soft contrast—like a pale gray line on white molding—adds depth while keeping things calm. The key is to keep the accent line thin, usually a quarter-inch or less, so it reads as a deliberate detail rather than a paint mistake.
This works on any molding profile, from simple ranch to ornate colonial.
Choosing The Right Color
Pick a shade that relates to something else in the room—a throw pillow, a rug, or even the wall color. If your walls are light and the molding is white, a slightly darker version of the wall color creates a gentle transition. For a bolder look, try a metallic like gold or copper on the very edge; it catches light and adds a hint of glam.
Just avoid neon or overly saturated colors unless you're going for a playful, eclectic vibe.
Tools And Technique
You'll need a steady hand and a good painter's tape. FrogTape or a similar delicate-surface tape works well because it won't pull off the base paint. Apply the tape along the edge where you want the line, press it down firmly, and paint with a small angled brush.
Remove the tape while the paint is still slightly wet to get a clean edge. If you're nervous, practice on a scrap piece of molding first.
Where It Works Best
This trick shines in rooms with high ceilings because it emphasizes the molding's height. It also works in small spaces where you want to add interest without overwhelming the room. If your molding is already a contrasting color, like dark wood, a painted edge might not show up well—stick to light-colored molding for the best effect.
And if you have intricate molding with lots of curves, keep the line simple and follow the main edge.
10. Crown Molding in a Small Living Room
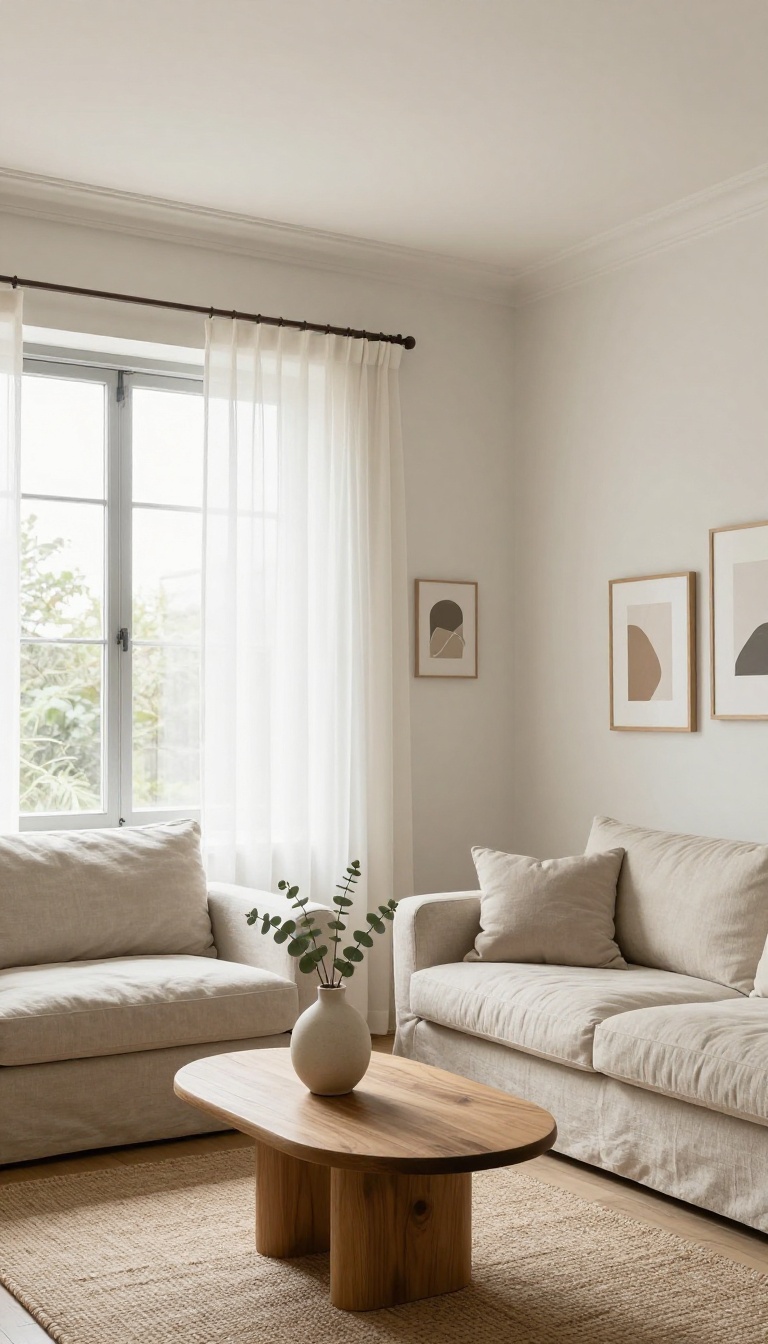
Small living rooms don't need big trim to feel special. A modest crown molding paired with a ceiling-matching paint color can make the walls feel taller and the whole space feel calmer. It's a simple trick that solves two problems at once: visual clutter and low ceilings.
When square footage is tight, every design choice gets amplified. A thick, ornate crown molding can overwhelm a small room and make it feel even more cramped. But a slim, simple profile painted the same color as the ceiling creates a seamless transition that draws the eye upward.
The result is a room that feels taller, cleaner, and more intentional without adding any visual noise.
Pick A Slim Profile
In a small living room, less is more. Go for a crown molding that's 2 to 3 inches wide, with a simple shape like a cove or a basic step. Skip deep layers and heavy ornamentation.
A slim profile keeps the room feeling open and airy while still adding a finished edge where wall meets ceiling.
Match The Ceiling Color
Painting the molding the same color as your ceiling—usually white or a soft off-white—makes it disappear into the background. That might sound counterintuitive, but it works. The eye reads the wall and ceiling as one continuous surface, which visually lifts the ceiling and makes the room feel taller.
It also avoids the busy look of contrasting trim in a tight space.
Keep The Finish Simple
A matte or satin finish works best in small rooms. Glossy paint can reflect light and highlight imperfections, while a subtle sheen keeps things soft and understated. Stick with the same finish on both the ceiling and the molding for a cohesive look that doesn't draw attention to the trim itself.
Avoid Heavy Details
Ornate corbels, dentil blocks, and deep reliefs belong in larger rooms where they have space to breathe. In a small living room, they add unnecessary visual weight. Let the molding do its job quietly—define the edge, add a touch of polish, and then step back.
The room will feel more spacious and put-together without trying too hard.
11. Crown Molding with Corbels for Traditional Flair
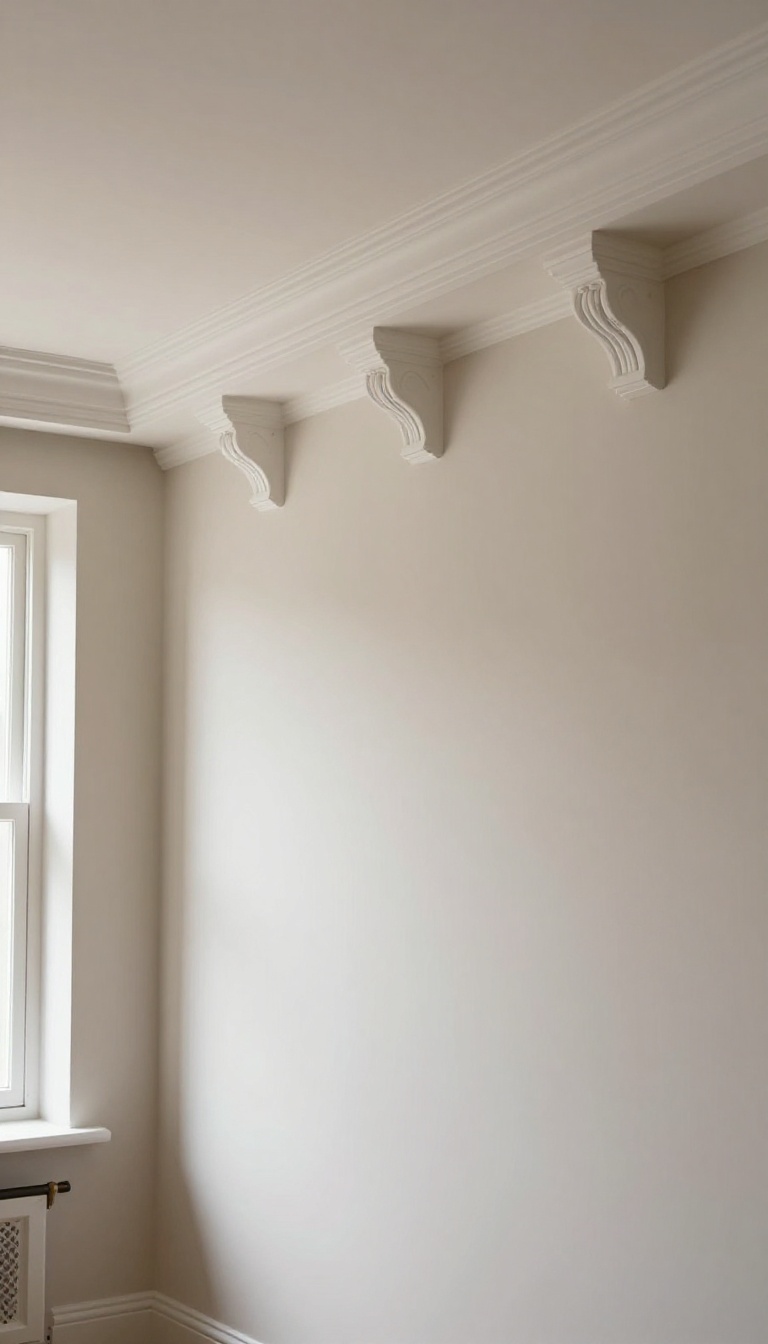
Corbels are those small, carved brackets you often see under mantels, shelves, or door headers in older homes. Placing them beneath crown molding at regular intervals gives the trim a furniture-like quality, as if the ceiling is being held up by little decorative supports. This look leans traditional, but it doesn't have to feel stuffy.
The right size and spacing keep it elegant instead of busy, and you can paint the corbels to match the molding or contrast them for a subtle two-tone effect. It's a detail that rewards a slow, deliberate installation, so measure twice and step back often to check the rhythm.
Corbels add depth and shadow that plain molding can't match. They create a repeating visual beat around the room, which draws the eye upward and makes the ceiling feel taller. In a traditional living room, that extra layer of craftsmanship ties the trim to other woodwork, like window casings or built-ins.
You don't need a full set of corbels on every wall. A few well-placed ones can suggest the look without overwhelming the space or your budget. The key is consistency: same size, same spacing, same finish.
When done right, guests might not know exactly why the room feels more polished, but they'll notice the difference.
Choosing The Right Corbels
Corbels come in wood, resin, and MDF, and each has its place. Wood takes paint and stain beautifully and suits historic homes. Resin offers intricate carvings at a lower cost and handles humidity well.
MDF is budget-friendly and smooth, but it can look flat up close. Match the corbel style to your molding profile. A simple cove or bed molding pairs well with a clean, unadorned bracket.
Ornate crown calls for a corbel with scrollwork or acanthus leaves. Size matters too: the corbel should be about one-third to one-half the height of the crown molding for balanced proportions.
Spacing And Placement That Works
Even spacing is what sells the look. Start by finding the center of each wall, then work outward. A common approach is to place corbels above doorways, at room corners, and at regular intervals along long walls, usually every 24 to 36 inches.
Avoid crowding them near windows or air vents. If a curtain rod or a wall sconce interrupts the line, skip that spot rather than forcing a corbel into a tight space. The goal is rhythm, not rigidity.
Installation Tips For A Clean Finish
Corbels need solid backing. Locate studs or add a wood blocking strip behind the drywall before you start. Attach each corbel with construction adhesive and finish nails, then fill the nail holes and caulk the seams where the corbel meets the wall and molding.
Paint or stain the corbels before installation if you can, then touch up afterward. A light sanding between coats gives a smooth, professional look. If you're staining, test the color on a scrap piece first to make sure it matches the rest of your trim.
Styling The Rest Of The Room
Corbels add traditional flair, so lean into that with your other choices. Warm wood tones, classic furniture lines, and layered lighting all complement the detail. Keep the wall color relatively calm so the trim stands out.
If you want a modern twist, paint the corbels and molding the same color as the walls for a subtle texture, or go bold with a dark contrast. Either way, let the corbels be the quiet star, not a competing focal point.
12. Crown Molding with a Metallic Finish

Metallic crown molding turns a simple trim detail into a light-catching feature. Instead of blending into the ceiling, it bounces light around the room and gives the walls a subtle glow. It works in modern and traditional spaces, and you can go as bold or as quiet as you like.
The finish is what makes this idea stand out. A metallic surface reflects whatever light hits it, so the molding shifts in appearance throughout the day. In the morning it might look soft and silvery, and by evening lamplight it warms up and almost looks like jewelry for the room.
That movement is what separates it from standard painted trim. You do not need a fully metallic room to pull this off. One metallic element along the ceiling line is enough to make the whole space feel more considered.
The trick is choosing the right tone and sheen so it complements your furniture instead of fighting it.
Choosing Your Metal Tone
Silver and chrome lean cool and modern, and they pair well with gray, blue, or black walls. Gold and brass bring warmth, so they look great against cream, green, or deep navy. Copper sits somewhere in between and adds a soft, earthy shimmer that works with wood tones.
Think about the other metals already in the room. If your curtain rods, lamp bases, and drawer pulls are brass, a brass molding ties everything together. Mixing metals can work, but keep it to two tones so the room still feels intentional.
Paint Vs. Metal Leaf
Metallic paint is the easier route. It goes on like regular paint, dries fast, and you can touch it up later without much fuss. A good metallic paint has fine particles that catch light, though it will not have the same mirror-like shine as real leaf.
Metal leaf, also called gilding, gives you a richer, more reflective finish. It takes more time and patience because you apply thin sheets by hand and seal them afterward. If you want the molding to look like a genuine antique detail, leaf is worth the extra effort.
Making It Look Intentional
A metallic finish shows every bump and brushstroke, so prep matters more than usual. Fill nail holes, sand smooth, and prime with a bonding primer before you add the metallic coat. A light sanding between coats helps the surface stay even.
Keep the rest of the trim simpler so the metallic molding stays the star. Matte walls and a flat ceiling paint give it a clean backdrop. Add a warm floor lamp or two nearby, and the finish will reward you every time the light shifts.
13. Crown Molding with Integrated Lighting
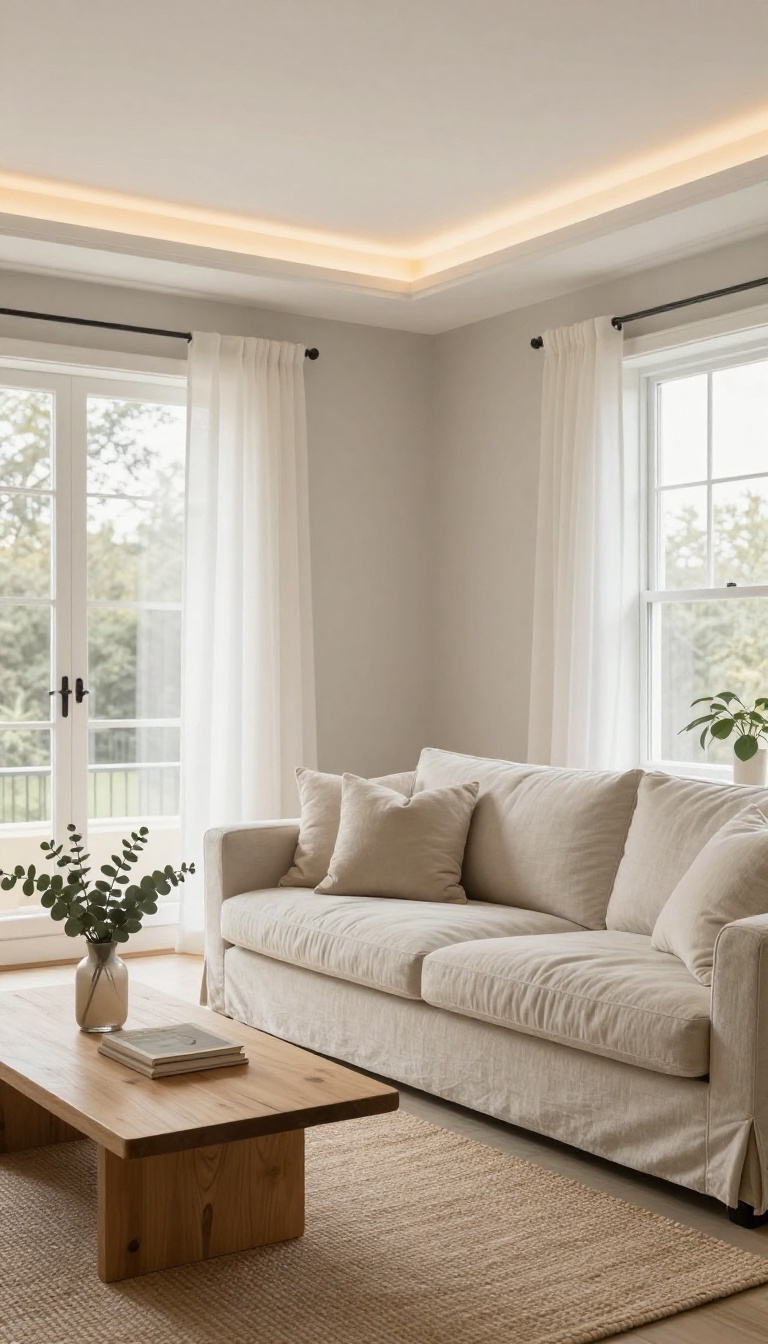
Crown molding with integrated lighting takes two separate jobs—trim and illumination—and merges them into one clean feature. Instead of mounting recessed cans in the ceiling and then adding molding as an afterthought, you build the light source right into the trim profile. The result is a soft wash of light that highlights the molding's shape and adds a warm glow to the room without visible fixtures.
It's a smart upgrade for living rooms that need both architectural interest and better ambient light.
This approach works with a few different setups, but the most common is a cove-style molding with a hidden channel for LED strip lights. The strip sits inside the molding, facing up or down, so you never see the diodes themselves—just the light they throw. Another option is to use a deeper crown profile and tuck small recessed puck lights into the underside, aimed at the walls or ceiling.
Either way, the molding becomes a functional light fixture that doubles as a decorative border.
How It Actually Works
Most integrated lighting setups rely on LED strips because they're thin, flexible, and run cool. You mount the strip inside a groove or channel built into the molding, then hide the wiring behind the trim or inside the wall. A dimmer switch lets you control the mood—bright for reading, low for movie nights.
The light can wash upward to graze the ceiling, downward to highlight artwork, or both if you use a double-channel profile.
Best Rooms And Ceiling Heights
This idea shines in living rooms with standard eight- to nine-foot ceilings, where recessed lights can feel harsh or too close. The indirect glow from molding lighting softens the whole space and makes the ceiling feel taller. It's also a great fix for rooms with no overhead fixture or awkward ceiling beams.
If your living room has a tray ceiling or a coffered design, integrated molding lighting can trace those shapes and turn them into focal points.
Installation Tips And Costs
You'll need a molding profile deep enough to hide the LED channel—usually three inches or more. Pre-made cove molding with a built-in channel saves time, but you can also router a groove into standard trim. Expect to pay $15 to $30 per linear foot for materials and labor if you hire a pro.
DIY kits are cheaper, but you'll still need basic electrical skills to wire the transformer and dimmer safely. Always check that your LED strips are dimmable and rated for indoor use.
14. Crown Molding for a Coastal Look
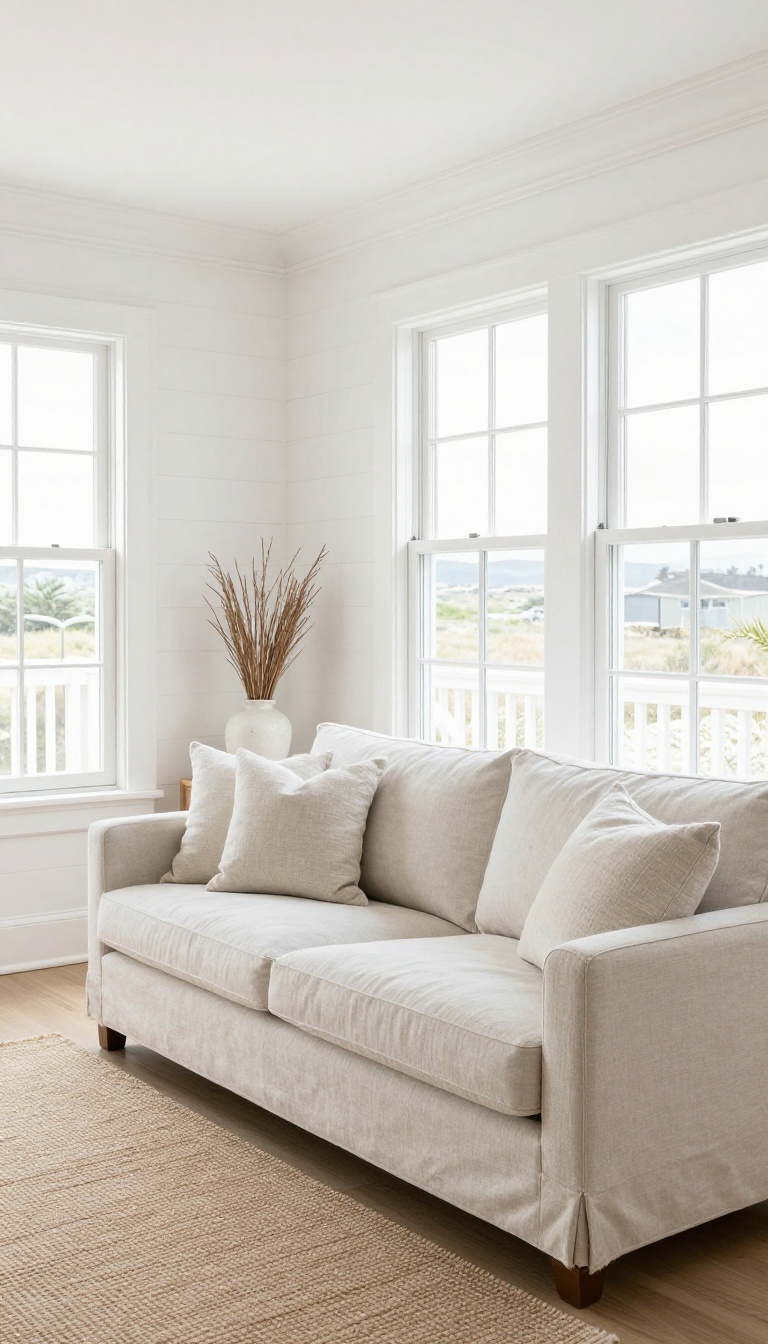
A coastal living room should feel light, airy, and a little undone—like you just walked in from the beach. The right crown molding can pull that off without turning your space into a nautical theme park. The trick is keeping the trim crisp and white while letting the finish look gently worn, then pairing it with shiplap for that breezy, beach-house texture.
Start with a simple profile—nothing too ornate. A basic cove or bed molding in white reads clean and classic, which is exactly what coastal style needs. Then give it a distressed finish so it looks like it has weathered a few salty summers.
You can do this with a dry-brush technique or by lightly sanding edges after painting. The goal is soft, not shabby. Shiplap walls underneath complete the look, especially if you run the planks horizontally to mimic the lines of a boardwalk or a boat hull.
Together, they create a room that feels relaxed but still polished.
Choosing The Right Molding Profile
Less is more here. A narrow, simple profile in white keeps the look airy and won't compete with the shiplap. Skip anything with heavy curves or gold accents—they fight the beachy vibe.
If you want a touch of interest, a slight step or a gentle cove works well without feeling fussy.
Getting The Distressed Finish Right
You're not aiming for a flea-market find. The distress should be subtle: thin the paint, brush it on, then wipe some off before it dries. Or paint a base coat of pale gray, then dry-brush white over it.
Lightly sand the edges once dry. The result is a soft, worn look that still feels clean.
Pairing With Shiplap Walls
Shiplap gives the room instant coastal texture. Run it horizontally for a classic beach-house feel, or vertically if you want a more modern farmhouse twist. Paint it white or a very pale blue-gray.
The crown molding sits on top like a finished edge, tying the wall to the ceiling without a harsh line.
15. Crown Molding with a Dark Ceiling
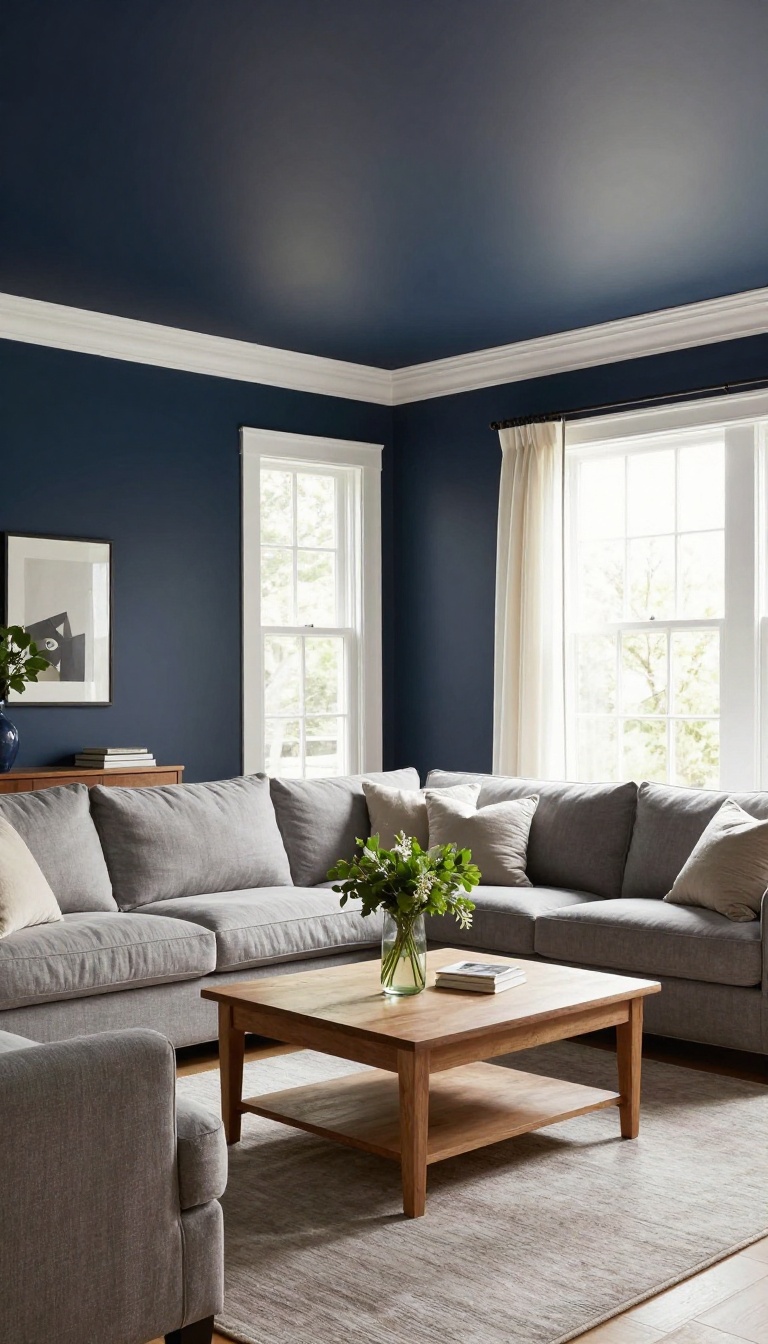
Most people paint ceilings white out of habit, but flipping that script can transform a living room. A dark ceiling paired with light crown molding creates instant contrast that makes the trim pop and pulls your gaze upward. It's a bold move, but it's surprisingly livable when you get the tones right.
The trick is to treat the ceiling as a design feature, not just a lid. Dark paint absorbs light and makes the ceiling feel like it's floating, while light molding acts as a crisp border that defines the room's shape. This combo adds depth and drama without any structural changes.
Choosing The Right Dark Shade
Not all dark colors behave the same on a ceiling. Deep navy, charcoal, and forest green tend to feel rich and cozy, while pure black can be too harsh in low light. Test a few swatches on a large board and hold it up to see how the color shifts throughout the day.
Picking A Molding Color That Pops
Bright white is the classic choice, but soft cream or pale gray can work if your walls have warm or cool undertones. The goal is clear contrast, so keep the molding at least a few shades lighter than the ceiling. A satin or semi-gloss finish will also catch light and emphasize the profile.
Making It Work In Your Space
High ceilings can handle darker, more saturated colors, while lower ceilings benefit from a lighter dark—like slate blue or deep taupe—to avoid feeling cave-like. Pair with light walls and plenty of lamps or sconces to keep the room balanced. If you're nervous, start with a dark ceiling in a smaller area like a hallway to test the effect.
FAQ
What is the best crown molding for a living room?
The best crown molding depends on your style. For traditional rooms, choose a wider, ornate profile. For modern spaces, go with a simple, slim design.
Consider ceiling height and room size when deciding.
How do I choose the right size crown molding?
A good rule of thumb is to use molding that is about 1 inch wide for every 8 feet of ceiling height. For example, an 8-foot ceiling looks good with 1- to 2-inch molding, while taller ceilings can handle wider profiles.
Can I install crown molding myself?
Yes, with some basic carpentry skills and tools like a miter saw and nail gun, you can install crown molding yourself. However, intricate designs or high ceilings may require a professional.
Should crown molding match the walls or ceiling?
It can match either. Painting it the same color as the walls creates a seamless look, while matching the ceiling makes the room feel taller. Contrasting colors make the molding a focal point.
How much does crown molding cost?
Costs vary widely based on material, style, and labor. Expect to pay $5 to $15 per linear foot for materials and installation, with more ornate or custom profiles costing more.
Conclusion
Crown molding rewards you the moment it goes up, even before the paint dries. Choose one idea that matches your room's height, light, and budget, then install a short test section first. Living with it for a few days tells you more than any showroom photo.
Start simple if this is your first project.
A single layer of trim can change how the whole room reads, and you can always add more later. The goal is walls that feel finished, not fussy. Take your time, measure twice, and enjoy the upgrade.