23 Kitchen Deep Cleaning Checklist Tips for Busy Homes
Between work, kids, and everything else, deep cleaning the kitchen often gets pushed to the bottom of the list. But that greasy buildup on cabinets and hidden crumbs in drawers don't disappear on their own.
You need a straightforward plan that tackles the worst spots without eating up your entire weekend. This checklist breaks down 23 targeted tasks—from degreasing cabinet doors to descaling the coffee maker—so you can restore your kitchen to sparkling condition, one manageable step at a time.
No fluff, just practical actions that fit a busy schedule.
1. Clear and Sort Countertops Completely
Countertops collect more than just coffee mugs and mail. Over time, crumbs, sticky spills, and dust settle beneath the items you use daily. Before you can scrub effectively, you need a blank slate.
Removing everything from the counters gives you a clear view of what needs attention and makes the cleaning process far more efficient.
Start by taking every single item off the countertops—appliances, canisters, fruit bowls, decorative pieces, everything. As you go, sort each item into one of three piles: keep (things you use daily and belong on the counter), relocate (items that can live in cabinets or drawers), and toss (expired food, broken gadgets, or things you never use). This quick decluttering step reveals hidden grime and creates space to work.
Once the counters are bare, you can move on to detailed cleaning without obstacles.
Why A Full Clear-out Matters
When you clean around objects, you miss the dirt directly under them. A full clear-out ensures every inch of countertop gets attention. It also forces you to evaluate what really needs to stay out.
Many kitchens have more counter clutter than necessary, which makes daily wiping harder and collects dust faster.
How To Sort Efficiently
Work in sections if the whole counter feels overwhelming. Start with one side of the sink or the coffee station. Have three boxes or bags labeled keep, relocate, and toss.
Be honest about what you actually use. That bread machine from three years ago? If you haven't touched it, it's a relocate or toss candidate.
This step alone can transform how your kitchen feels.
Prep For The Next Steps
Once everything is off the counters, you have a clear surface to spray degreaser or all-purpose cleaner. You can also wipe down backsplash and appliances without moving things around. Keep the keep pile nearby but off the counters until you finish cleaning.
Then return only the essentials to their spots.
2. Degrease Cabinet Doors and Handles
Cabinet fronts take the brunt of cooking splatters, and over time, that greasy film gets tacky and traps dust. It’s one of those spots you might wipe down quickly, but a proper degrease makes a visible difference. Focus on both the flat surfaces and the hardware—handles and knobs are high-touch zones that deserve extra attention.
Start by mixing equal parts warm water and white vinegar in a spray bottle, or use a mild degreaser if you prefer something store-bought. Spray a section of the cabinet door, let it sit for 30 seconds to loosen the grime, then wipe with a microfiber cloth. Work from top to bottom so drips don’t re-soil already clean areas.
For handles and knobs, remove them if possible and soak in warm soapy water for 10 minutes, then scrub with an old toothbrush. If removal isn’t practical, spray the degreaser directly onto a cloth (not the hardware) and wipe each piece thoroughly. Rinse with a damp cloth to remove any residue, then dry with a clean towel to prevent water spots.
Choose The Right Cleaner
Vinegar and water works great for light to moderate grease, but for stubborn buildup, a dedicated kitchen degreaser or a paste of baking soda and water can do the trick. Avoid harsh chemicals that might damage the finish—test any cleaner on an inconspicuous spot first.
Don’t Skip The Hardware
Handles and knobs collect grease, food residue, and bacteria from hands. A quick wipe isn’t enough. Soaking removable hardware in warm, soapy water for 10 minutes loosens grime, then a scrub with a small brush gets into crevices.
Dry thoroughly before reattaching.
Work In Sections
Tackle one cabinet door at a time to avoid spreading grease around. Clean the front, sides, and edges, then move to the next. This method keeps you organized and ensures you don’t miss any spots.
3. Wipe Down Backsplash and Tiles
Your backsplash takes a daily beating from splattering oil, sauce, and steam. Over time, that film turns into a sticky, discolored mess that makes the whole kitchen feel grimy. The good news?
You don’t need harsh chemicals to bring back the shine—just a simple homemade cleaner and a little elbow grease.
The Baking Soda Paste Trick
For tough, baked-on grease, mix equal parts baking soda and dish soap into a thick paste. Apply it to the affected areas with a sponge or soft cloth, let it sit for five minutes, then scrub gently in circular motions. The baking soda acts as a mild abrasive that lifts grease without scratching tiles or grout.
Rinse thoroughly with warm water and dry with a microfiber cloth to prevent streaks.
Don’t Forget The Grout
Grout lines are magnets for grime and can turn dark or moldy if ignored. Use an old toothbrush dipped in the same baking soda paste to scrub along the grout. For extra stubborn stains, add a splash of white vinegar to the paste (but test on a hidden spot first, as vinegar can damage some sealants).
Rinse well and let air dry.
Daily Maintenance Hack
To keep your backsplash looking fresh between deep cleans, wipe it down with a mixture of equal parts water and rubbing alcohol in a spray bottle after cooking. The alcohol cuts grease and evaporates quickly, leaving a streak-free finish. Just a 30-second spray and wipe after dinner prevents buildup from ever taking hold.
4. Deep Clean the Sink and Faucet
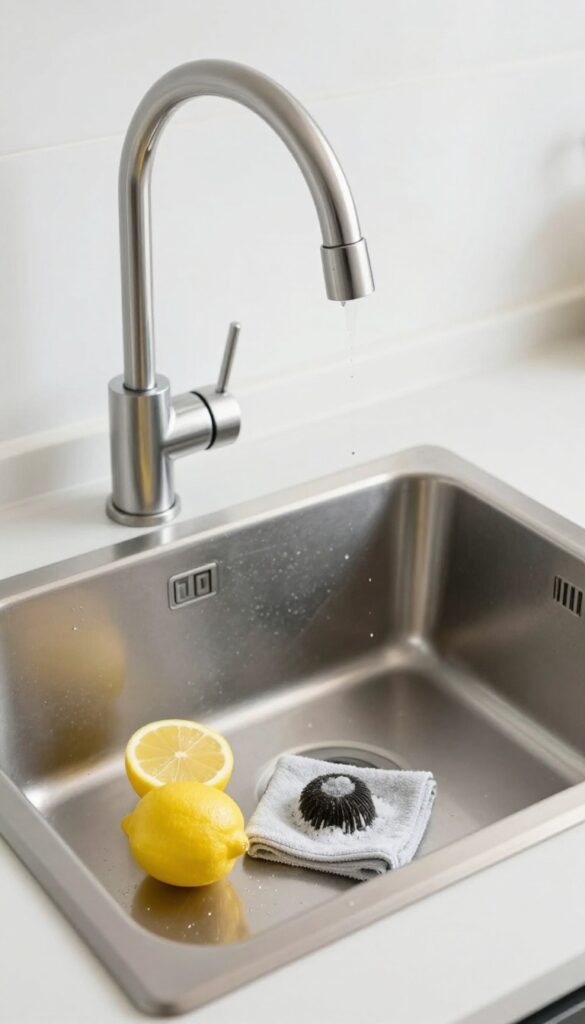
Your kitchen sink sees more action than almost any other surface. It's where you rinse raw chicken, wash dirty dishes, and dump leftover coffee grounds. No surprise it becomes a breeding ground for bacteria and grime.
A thorough clean goes beyond a quick rinse and tackles both the basin and the faucet.
Scrub With Baking Soda And Lemon
Start by sprinkling baking soda generously over the damp sink surface. Cut a lemon in half and use it as a scrubber—the acid cuts through grease while the abrasive baking soda lifts stuck-on residue. Work in circular motions, focusing on the drain area and corners.
Rinse thoroughly with hot water.
Sanitize With Hydrogen Peroxide
After scrubbing, pour a small amount of 3% hydrogen peroxide directly onto the sink surface. Let it sit for 5 minutes to kill germs and whiten the basin. Rinse again with water.
This step is especially important if you've handled raw meat or poultry.
Remove Mineral Deposits From The Faucet
Fill a plastic bag with white vinegar and secure it around the faucet head with a rubber band. Let it soak for 30 minutes to dissolve hard water deposits. Remove the bag, then scrub the faucet with an old toothbrush dipped in vinegar.
Rinse and dry with a microfiber cloth for a streak-free shine.
Polish The Faucet
For a brilliant finish, apply a small amount of olive oil or a dedicated stainless steel polish to a soft cloth. Buff the faucet in the direction of the grain. This not only adds shine but also creates a protective barrier against future water spots and fingerprints.
5. Organize and Wipe Inside Cabinets
Cabinets hide more than just dishes—they collect crumbs, dust, and the occasional forgotten spice jar. When was the last time you actually cleaned inside them? This step is about emptying everything out, giving shelves a proper wipe, and putting things back in a way that actually makes sense for your daily routine.
Pull everything out of your cabinets and set it on the counter or table. Use a vacuum with a crevice tool to suck up crumbs and debris from corners. Wipe all shelves with a damp microfiber cloth and a mild cleaner—avoid harsh chemicals that could damage the finish.
Let shelves dry completely before adding shelf liner if you want extra protection against spills and scratches. When you put items back, group similar things together (baking supplies, canned goods, spices) and place frequently used items at eye level. This not only looks neater but saves time digging for what you need.
Empty And Assess
Take everything out. This is your chance to check for expired items, duplicates, or things you never use. Toss or donate anything past its prime.
You'll be surprised how much space you free up.
Clean And Line Shelves
Vacuum first, then wipe with a damp cloth and a gentle cleaner. Avoid soaking the wood. If you use shelf liner, cut it to size and smooth out air bubbles.
Non-adhesive liners are easier to replace later.
Organize Strategically
Return items in zones: baking goods together, canned goods by type, spices in a small rack or basket. Keep heavy items on lower shelves and light, daily-use items at eye level. Use bins or lazy Susans for corners to maximize space.
6. Scrub the Stovetop and Burners
Burnt-on food doesn't just look bad—it makes your stovetop less efficient and can even affect how your food cooks. A quick deep scrub restores performance and keeps your kitchen looking sharp. Here's how to tackle both gas and electric tops without damaging the surface.
Soak The Grates And Knobs
Remove burner grates, caps, and knobs. Soak them in hot, soapy water for at least 15 minutes to loosen baked-on grease. For stubborn spots, scrub with a non-abrasive sponge or a soft brush.
Rinse and dry thoroughly before reassembling.
Deal With Glass Or Ceramic Tops
For smooth cooktops, let the surface cool completely. Use a razor scraper held at a 45-degree angle to lift burnt-on residue gently. Follow up with a dedicated cooktop cleaner or a mix of baking soda and water.
Buff with a microfiber cloth for a streak-free shine.
Don't Forget The Burner Wells
Lift the cooktop (if possible) or use a vacuum with a crevice tool to remove crumbs and debris from burner wells. Wipe with a damp cloth and dry completely. This prevents odors and ensures even flame distribution on gas stoves.
7. Clean the Oven Interior and Door
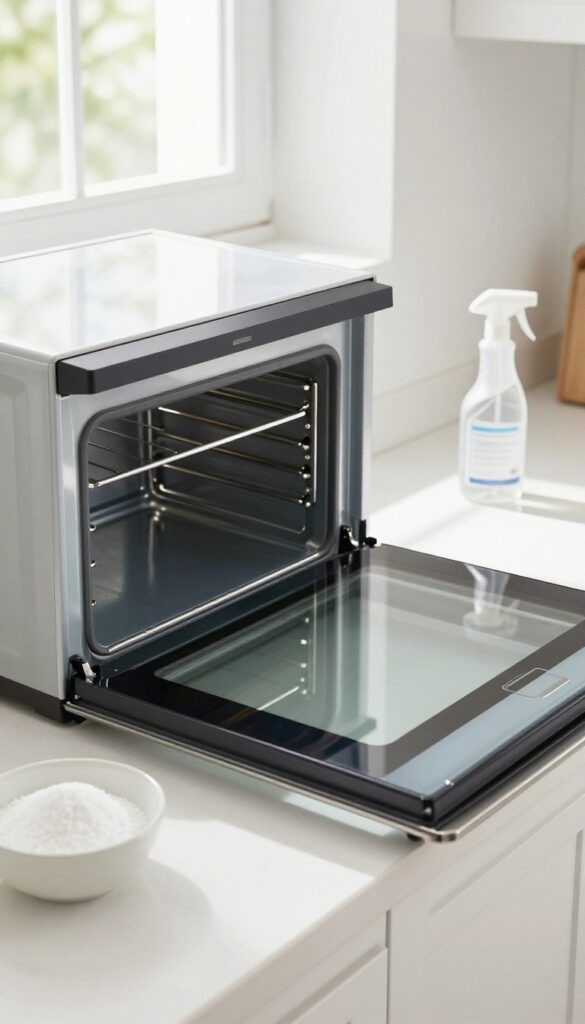
A dirty oven doesn't just look bad—it can mess with your baking. Burnt-on residue creates hot spots, throws off temperatures, and even gives off smoke. The good news?
You don't need harsh chemicals to get it spotless.
Tackling the oven interior is one of those tasks that feels daunting but is surprisingly simple. Start by removing racks and any loose debris. Mix a paste of baking soda and water, spread it over the interior (avoid heating elements), and let it sit overnight.
The next day, spray vinegar over the paste—it will foam up and loosen grime. Wipe clean with a damp cloth. For the oven door glass, use the same paste but scrub gently with a non-abrasive sponge to avoid scratches.
Rinse thoroughly and dry. This natural method cuts through grease without fumes.
Why A Clean Oven Matters For Baking
Baked goods rely on consistent heat. A layer of burnt-on food acts as insulation, causing uneven temperatures. Your cookies might burn on one side and stay doughy on the other.
Plus, old food particles can smoke and impart off-flavors to your dishes. A clean oven ensures reliable results every time.
The Baking Soda Paste Method
Make a thick paste with about half a cup of baking soda and a few tablespoons of water. Apply it to all interior surfaces except the heating elements. Let it sit for at least 12 hours—overnight is best.
The baking soda breaks down grease without scrubbing. After waiting, spray white vinegar over the paste. The fizzing reaction lifts grime.
Wipe away with a damp cloth, repeating as needed. For stubborn spots, let the paste sit longer.
Don't Forget The Oven Door Glass
The glass door gets splattered and greasy, making it hard to check on your food. Apply the same baking soda paste to the glass, let it sit for 15-20 minutes, then scrub gently with a soft sponge or microfiber cloth. Avoid abrasive pads that can scratch the glass.
Rinse with a damp cloth and buff dry for a streak-free shine.
Quick Maintenance Between Deep Cleans
Prevent heavy buildup by wiping up spills as soon as the oven cools. Place a baking sheet on the lower rack to catch drips. Every few months, run a self-cleaning cycle if your oven has one—but be aware it can produce smoke and odor.
For light cleaning, a paste of lemon juice and baking soda works well and leaves a fresh scent.
8. Degrease the Range Hood and Filter
Your range hood works hard pulling grease, smoke, and odors out of the air, but that grease doesn't just disappear. It builds up on the filter and inside the hood, reducing airflow and making your fan work harder. Cleaning it regularly keeps your kitchen smelling fresh and your hood running efficiently.
Start by removing the metal filter (most pop out easily). Fill your sink or a large pot with boiling water and add a generous scoop of baking soda—about half a cup. Submerge the filter and let it soak for 15 to 20 minutes.
The baking soda breaks down the grease without harsh chemicals. While it soaks, wipe down the exterior and interior of the hood with a degreasing cleaner or a mix of vinegar and water. For stubborn grime, use a soft scrub brush.
Rinse the filter thoroughly and let it dry completely before popping it back in.
Why Grease Buildup Matters
A clogged filter forces your range hood to work harder, which can shorten its lifespan and make it noisier. It also reduces its ability to capture smoke and grease, meaning those particles end up on your cabinets and walls instead. Cleaning the filter every month (or more often if you cook a lot) prevents this.
The Soaking Method Works Best
Boiling water and baking soda is a powerful combo that cuts through grease without scrubbing. If your filter is especially grimy, add a few drops of dish soap to the soak. For aluminum filters, avoid bleach or ammonia—they can cause discoloration.
Just a simple soak and rinse will restore it to like-new condition.
Don't Forget The Hood Interior
While the filter soaks, tackle the inside of the hood. Use a microfiber cloth and a degreaser to wipe down the fan blades and housing. Grease can accumulate there too, leading to unpleasant odors when you turn the fan on.
A quick wipe every time you clean the filter keeps it fresh.
9. Defrost and Deep Clean the Freezer
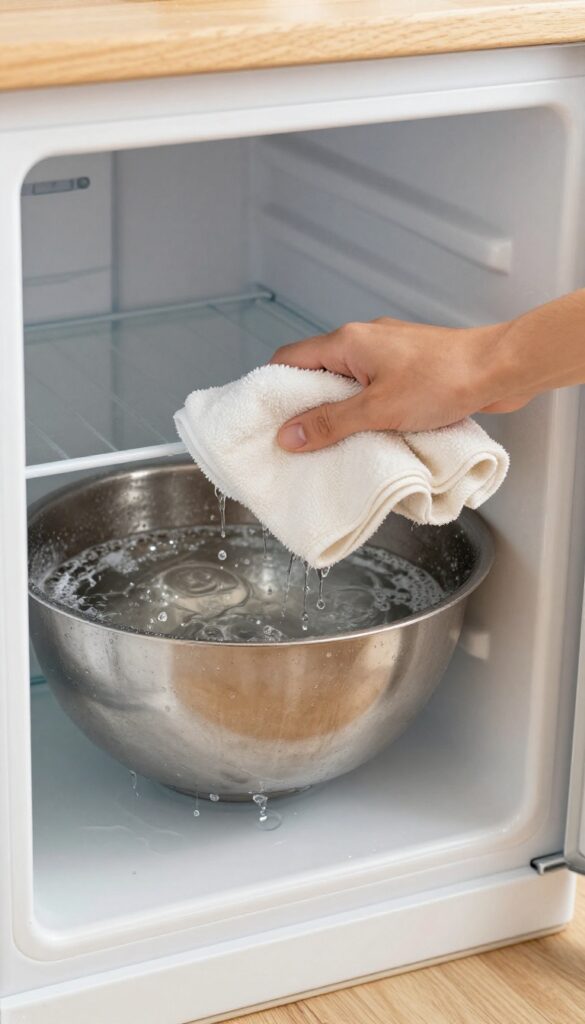
Ice buildup in your freezer isn’t just annoying—it makes the appliance work harder and drives up your energy bill. A thick layer of frost reduces efficiency by blocking airflow. Defrosting and cleaning the freezer gives you a chance to toss old food and start fresh.
Start by unplugging the freezer or turning it off. Remove all food and store it in a cooler with ice packs. Leave the door open so the ice melts naturally—never use a sharp object to chip it away, as you could damage the coils.
Once the ice is gone, wipe down all surfaces with a mixture of warm water and mild dish soap. Pay extra attention to the door seals; a dirty seal can cause air leaks. Dry everything thoroughly before turning the freezer back on.
While it’s empty, check expiration dates on any items you kept and reorganize by category. Group meats, vegetables, and frozen meals so you can find things quickly. This not only saves energy but also helps reduce food waste.
Why Defrosting Matters
Frost buildup acts as an insulator, making your freezer run longer to maintain temperature. According to energy experts, even a quarter-inch of ice can increase energy consumption by up to 30%. Defrosting regularly keeps your appliance efficient and extends its lifespan.
Step-by-step Defrosting
Turn off the freezer and remove all contents. Place towels on the floor to catch melting water. For faster defrosting, set a bowl of hot water inside and close the door for 15 minutes.
Never use a knife or ice pick—you risk puncturing the refrigerant lines. Once all ice is gone, clean with a baking soda solution (1 tablespoon per quart of water) to neutralize odors.
Organizing After Cleaning
Use clear bins or baskets to group similar items. Label shelves or bins with categories like “vegetables, ” “meat, ” and “ready meals. ” Keep a list of what’s inside on the door. This simple system prevents food from getting lost and forgotten, saving you money and reducing waste.
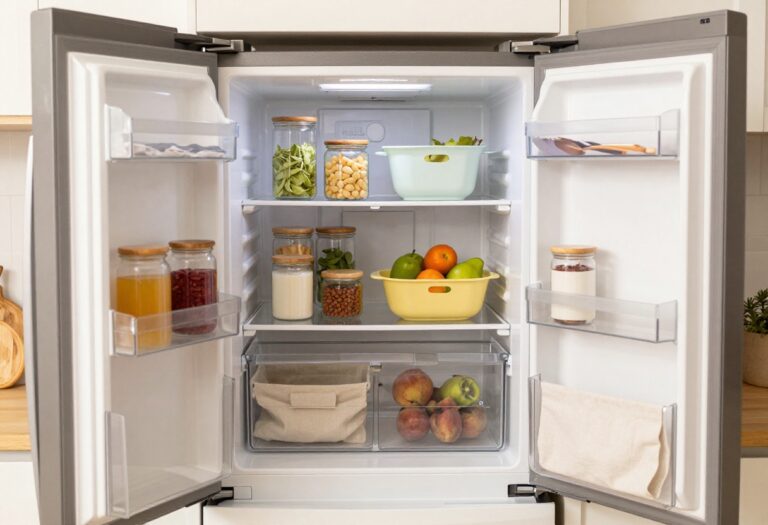
10. Wipe Down Refrigerator Shelves and Drawers
The fridge is a magnet for spills, sticky spots, and mystery crumbs that settle in drawers and under shelves. Over time, these hidden messes can cause odors and even affect food freshness. A quick deep clean of the interior makes a huge difference.
Start by removing all shelves and drawers. Wash them in warm, soapy water, then rinse and dry completely before putting them back. While they're out, wipe down the interior walls and seals with a mild cleaner.
This not only sanitizes but also helps your fridge run more efficiently.
Why Shelves And Drawers Need Special Attention
Spills from produce, sauces, and dairy often seep into crevices. If left, they can harbor bacteria and create stubborn stains. Removing the components allows you to reach every corner and prevents cross-contamination.
Step-by-step Cleaning Method
First, empty the fridge and group items in a cooler. Pull out all removable parts. Wash them in the sink with dish soap and warm water, using a soft sponge.
For stuck-on gunk, let them soak for a few minutes. Rinse well and air dry on a towel. Meanwhile, wipe the fridge interior with a solution of water and vinegar or a gentle all-purpose cleaner.
Drying And Reassembly Tips
Moisture is the enemy—it can lead to mold and ice buildup. Ensure every shelf and drawer is bone-dry before sliding them back in. Use a microfiber cloth to speed up drying.
Once reassembled, organize items so spills are easier to spot next time.
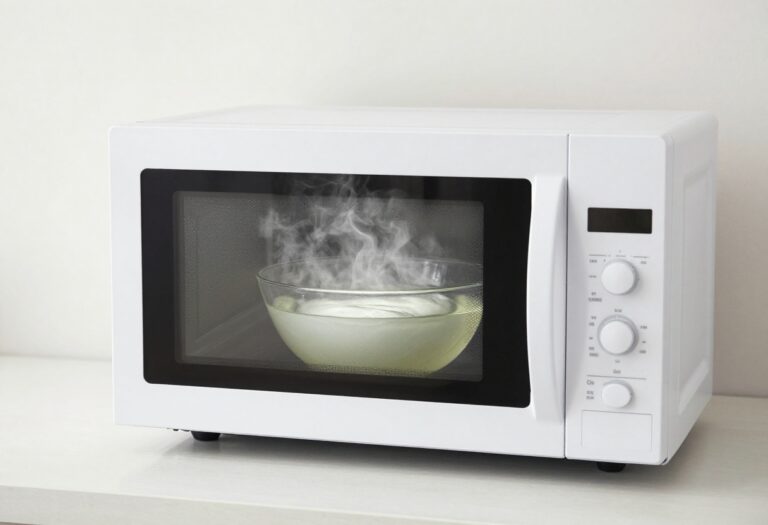
11. Clean the Microwave Inside and Out
Microwaves take a beating from splatters and spills, but a quick steam trick makes cleanup almost effortless. Instead of scrubbing rock-hard food residue, use steam to loosen it first. This method saves time and elbow grease, leaving your microwave fresh and functional.
Steam Clean The Interior
Fill a microwave-safe bowl with 1 cup of water and add a few lemon slices or a tablespoon of vinegar. Microwave on high for 5 minutes, then let it sit for 2 more minutes without opening the door. The steam will soften any stuck-on gunk.
Carefully remove the bowl (it will be hot) and wipe down the interior walls, ceiling, and floor with a damp cloth. The lemon or vinegar also helps neutralize odors.
Don't Skip The Turntable And Door Seal
Take out the glass turntable and wash it with warm, soapy water, or place it in the dishwasher if it's dishwasher-safe. While it's out, clean the roller ring and the floor underneath. For the door seal, use a soft cloth dipped in mild detergent to wipe around the rubber gasket—this area collects crumbs and grease that can prevent the door from closing properly.
Wipe Down The Exterior And Keypad
The outside of the microwave gets just as dirty as the inside, especially the handle and control panel. Use a damp microfiber cloth with a little dish soap to clean the exterior surfaces. For the keypad, spray a cloth with cleaner (never spray directly onto the buttons) and gently wipe to avoid moisture seeping in.
Finish by drying with a clean cloth to prevent streaks.
12. Descale the Coffee Maker and Kettle
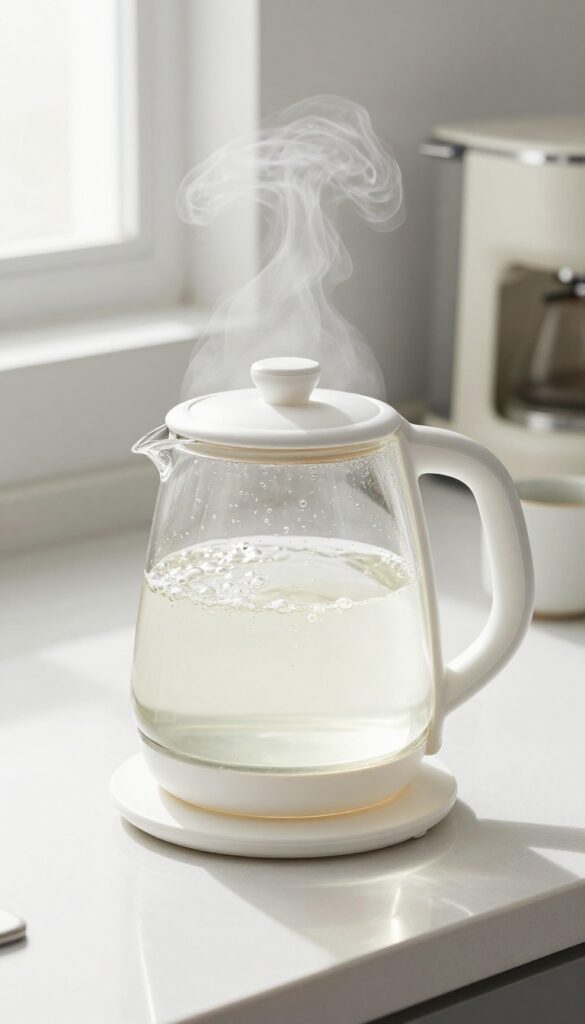
Mineral deposits from hard water don't just look unappealing—they actually mess with the taste of your coffee and tea and make your appliances work harder. If your coffee takes longer to brew or your kettle sounds like it's boiling rocks, it's time to descale. This quick fix restores performance and keeps your morning routine running smoothly.
Descaling is a simple process that uses common household ingredients. For coffee makers, run a cycle with equal parts white vinegar and water, then two cycles with fresh water to rinse. For kettles, boil a vinegar-water solution, let it sit for 15 minutes, then rinse thoroughly.
Do this monthly if you have hard water, or every three months otherwise.
Why Descaling Matters
Limescale buildup acts as an insulator, making your appliances use more energy to heat water. It also traps bacteria and alters the flavor of your beverages. Regular descaling extends the life of your coffee maker and kettle, saving you money and ensuring a better cup every time.
Step-by-step For Coffee Makers
Fill the reservoir with a mixture of equal parts white vinegar and water. Start a brew cycle, then pause halfway through to let the solution sit for 30 minutes. Finish the cycle, then run two full cycles with fresh water to remove any vinegar taste.
Wipe down the carafe and exterior.
Step-by-step For Kettles
Fill the kettle halfway with equal parts water and white vinegar. Bring it to a boil, then turn it off and let it sit for 15–20 minutes. Discard the solution, then boil fresh water twice and discard to rinse.
For stubborn deposits, use a descaling powder or lemon juice instead of vinegar.
How Often To Descale
If you have hard water, descale monthly. For soft or filtered water, every three months is usually enough. Signs it's time: slow brewing, unusual noises, or visible white flakes in your drink.
Set a calendar reminder so you don't forget.
13. Sanitize the Dishwasher Filter and Seal
Your dishwasher works hard every day, but it can't do its job properly if the filter is clogged with food particles and grime. A dirty filter not only reduces cleaning power but can also leave a musty smell on your dishes. And that rubber seal around the door?
It's a prime spot for mold and mildew to hide.
Start by locating the filter at the bottom of the dishwasher—usually a cylindrical mesh or flat screen. Twist it out and rinse it under hot water, using a soft brush to dislodge stuck-on debris. For stubborn buildup, soak it in a mixture of warm water and vinegar for 10 minutes before rinsing.
Wipe down the door seal with a damp cloth and a drop of dish soap, paying attention to the folds where gunk collects. Finally, run an empty cycle with a cup of white vinegar placed on the top rack or a specialized dishwasher cleaner. This simple routine keeps your dishwasher fresh and efficient.
Locate And Remove The Filter
Most dishwashers have a filter at the bottom, under the spray arm. Check your manual if you're unsure. Twist or lift it out—some have a handle, others require a gentle pull.
Don't force it; if it's stuck, it might need a slight turn.
Clean The Filter Thoroughly
Rinse the filter under hot running water while scrubbing with a soft brush or an old toothbrush. For greasy residue, soak it in hot water with a few drops of dish soap or vinegar for 10 minutes. Rinse well and let it dry before reinstalling.
Wipe Down The Door Seal
The rubber gasket around the door is a magnet for mold and food particles. Use a damp microfiber cloth with a little dish soap to wipe it clean. For tough spots, dip a toothbrush in diluted bleach or vinegar and scrub gently.
Rinse with a clean damp cloth.
Run A Cleaning Cycle
Place a cup of white vinegar on the top rack and run a hot water cycle. Or use a commercial dishwasher cleaner following the package directions. This removes any lingering odors and mineral deposits inside the machine.
14. Wash Trash and Recycling Bins
Trash and recycling bins are the unsung heroes of the kitchen, but they can quickly become a source of foul odors and bacteria. A quick wipe-down isn't enough—you need to give them a proper deep clean. This task only takes about 15 minutes but makes a huge difference in how fresh your kitchen smells.
Take Bins Outside First
Before you start, move both the trash and recycling bins outside. This prevents any spills or splashes from dirtying your kitchen floor. It also gives you room to work without worrying about making a mess.
If you have a small yard or balcony, that works too—just find a spot where you can spray water without causing a puddle.
Spray And Scrub Thoroughly
Use a disinfectant spray or a mixture of vinegar and water to coat the inside and outside of the bins. Let it sit for a couple of minutes to break down grime. Then, grab a stiff-bristled brush or an old sponge and scrub every surface—pay extra attention to the bottom and corners where residue tends to build up.
For stubborn stains, a little baking soda paste works wonders.
Rinse And Dry Completely
Rinse the bins thoroughly with a garden hose or in a utility sink. Make sure all soap residue is gone. Then, let them dry completely in the sun before relining.
Moisture trapped under a new liner can lead to mold and mildew, so this step is non-negotiable. If you're in a hurry, wipe them down with a dry cloth and leave the lid off for an hour.
15. Clean Small Appliances (Toaster, Blender, etc.)
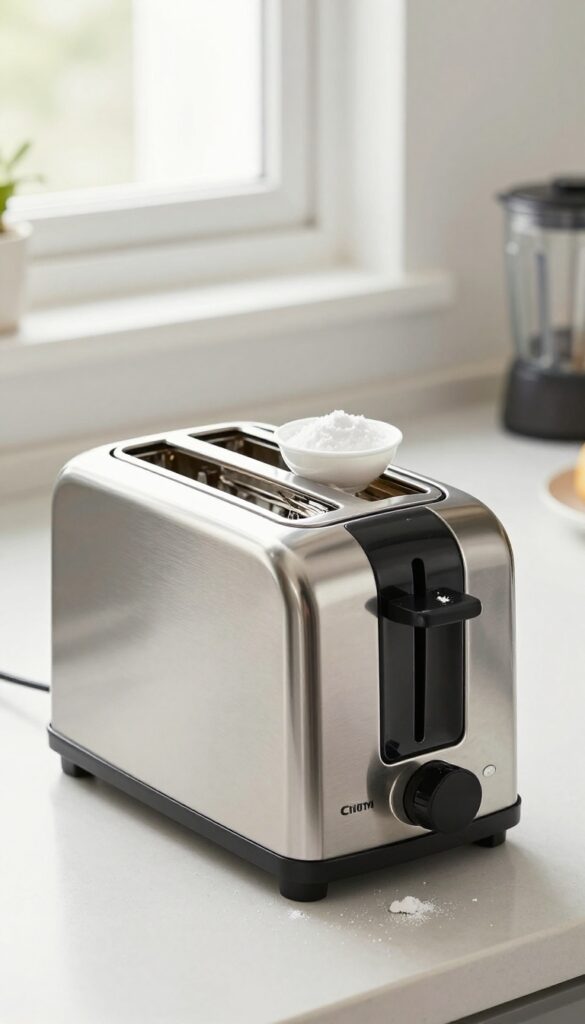
Small appliances like toasters and blenders see daily use but rarely get a proper cleaning. Crumbs can burn inside the toaster, and blender jars develop a filmy residue that affects taste. A few minutes of attention keeps them working well and looking clean.
Toaster: Shake, Wipe, And Deodorize
Unplug the toaster and remove the crumb tray. Shake out loose crumbs over the sink, then wash the tray with warm soapy water and dry thoroughly. Wipe the exterior with a damp cloth, and use a soft brush to dislodge crumbs stuck inside.
For lingering odors, place a small bowl of baking soda inside the toaster (unplugged) overnight.
Blender: The Warm Soapy Water Trick
Fill the blender jar halfway with warm water and add a drop of dish soap. Blend on high for 30 seconds, then rinse thoroughly. For stubborn residue, add a tablespoon of baking soda or white vinegar before blending.
Don't forget to scrub the lid's gasket and the blade assembly with a small brush.
Coffee Maker: Descaling Is Key
Mineral buildup from hard water affects taste and performance. Run a cycle with equal parts water and white vinegar, then two cycles with fresh water to rinse. For daily upkeep, wipe the warming plate and carafe after each use to prevent stains.
Microwave: Steam Clean In Minutes
Place a microwave-safe bowl with 1 cup of water and a few lemon slices inside. Run on high for 3 minutes, then let it sit for 2 minutes. The steam loosens food splatters, making them easy to wipe away with a damp cloth.
Wipe the door seal and turntable as well.
16. Wipe Baseboards and Window Sills
Baseboards and window sills in the kitchen collect dust, grease, and grime that often go unnoticed until you really look. They can make the whole room feel dingy, even if the counters are spotless. Giving them a quick wipe during your deep clean makes a big difference.
Baseboards and window sills are surfaces that catch airborne grease and dust, so they need more than just a dry dusting. For baseboards, a microfiber cloth with an all-purpose cleaner cuts through the residue. For window sills, vacuum up loose debris first, then wipe with a damp cloth.
Pay attention to corners where grime builds up.
Start With A Dry Dust
Before applying any cleaner, use a microfiber duster or a vacuum with a brush attachment to remove loose dust and crumbs. This prevents turning dirt into mud when you wipe. Focus on the top edge of baseboards and the crevices of window sills.
Use The Right Cleaner
A simple all-purpose spray works for most baseboards and sills. For stubborn grease, add a drop of dish soap to warm water. Avoid harsh chemicals that could damage paint or wood.
Test on an inconspicuous spot first if you're unsure.
Don't Forget The Tracks
Window sill tracks collect dust and dead bugs. Use a small brush or an old toothbrush to loosen debris, then vacuum or wipe with a damp cloth. For metal tracks, a little vinegar solution helps remove mineral deposits.
17. Wash Windows and Glass Surfaces
Streaky windows can make even the cleanest kitchen feel dull and grimy. Over time, cooking grease and steam create a stubborn film on glass that regular wiping just smears around. A proper window wash lets in more light and gives the whole room a fresh, open feel.
Gather The Right Tools
For spotless glass, skip paper towels—they leave lint. Grab a squeegee or a microfiber cloth, a spray bottle, and a bucket. Mix equal parts white vinegar and warm water, or use a few drops of dish soap in water.
Avoid ammonia-based cleaners on tinted windows.
Work From Top To Bottom
Start at the top corner of the window. Spray the solution generously, then use the squeegee in a reverse-S pattern, wiping the blade with a dry cloth after each pass. For small panes or doors, a microfiber cloth works well—buff in circular motions, then finish with horizontal strokes to avoid streaks.
Don't Forget Both Sides And The Sill
Clean the interior and exterior sides for maximum brightness. While you're at it, wipe down the window sill and track with a damp cloth or old toothbrush to remove dust and grime. This prevents dirt from transferring back onto the glass.
18. Scrub the Kitchen Floor (Under Appliances Too)
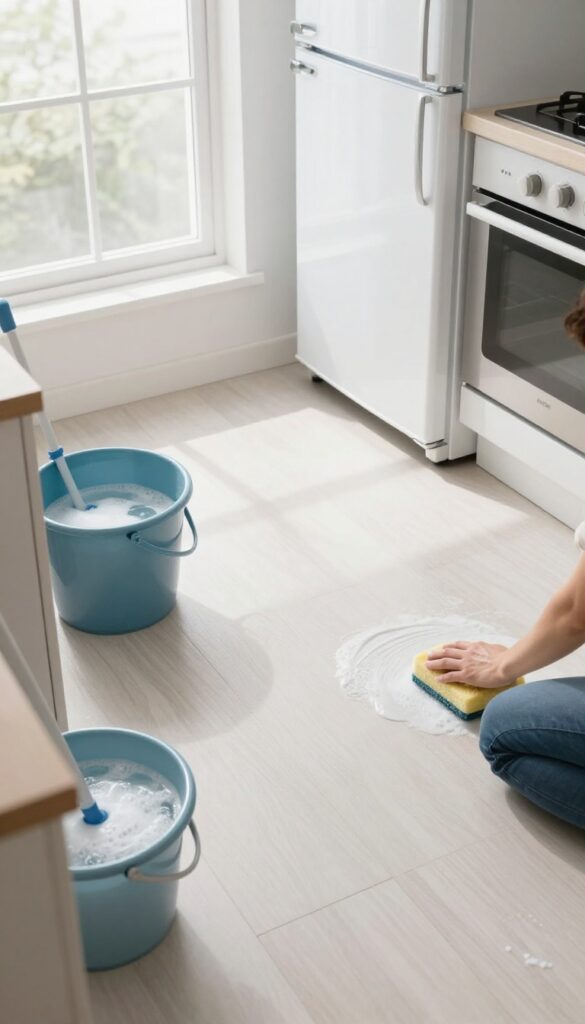
The kitchen floor takes a beating from dropped food, spills, and foot traffic, but the dirtiest spots are often hidden beneath your appliances. Moving the fridge and stove—when possible—reveals years of crumbs, dust, and grime that can attract pests and cause odors. A thorough scrub here makes a surprising difference in how clean your whole kitchen feels.
Prep And Move Appliances
Before you start, clear the area around your fridge and stove. Unplug the fridge if you need to pull it out, and be careful not to damage the flooring or the appliance. For heavy units, slide them out gently or use appliance sliders.
If moving isn't possible, use a long-handled duster or vacuum attachment to reach underneath as far as you can.
Sweep And Vacuum First
Start by sweeping or vacuuming the entire floor to remove loose debris. Pay extra attention to corners, under cabinets, and along baseboards where dirt accumulates. Use a crevice tool for tight spaces.
This step prevents you from pushing dirt around when you mop.
Mop With The Right Cleaner
Choose a cleaner suitable for your floor type—whether it's tile, vinyl, or hardwood. For tile and grout, a mild degreaser works wonders. Mop in sections, rinsing the mop head frequently to avoid spreading grime.
Don't forget the areas under appliances; use a sponge or cloth to wipe those spots manually if needed.
Dry And Return Appliances
Let the floor air dry completely before sliding appliances back into place. This prevents moisture from getting trapped underneath, which can cause mold or damage. Once dry, carefully move the fridge and stove back, and give the floor a final quick sweep to catch any last bits.
19. Disinfect Light Switches and Outlets
Light switches and electrical outlets are among the most frequently touched surfaces in the kitchen, yet they’re often overlooked during deep cleaning. Every time you flip a switch with greasy or food-contaminated hands, you transfer bacteria and grime. A quick disinfecting step can significantly reduce germ buildup without taking much time.
Start by turning off the circuit breaker for the kitchen to eliminate any risk of electric shock. Use a disinfectant wipe or spray a microfiber cloth with a gentle cleaner—avoid spraying directly onto outlets or switches. Wipe down each switch plate, outlet cover, and the surrounding wall area.
For stubborn grime around outlets, use a cotton swab dipped in rubbing alcohol. Let everything air dry completely before restoring power. Make this a monthly habit to keep high-touch areas sanitary.
Why Light Switches And Outlets Need Attention
Studies show that light switches can harbor as many germs as a trash can lid. In the kitchen, switches near the sink or stove collect even more bacteria from food preparation and hand contact. Regular wiping prevents cross-contamination when you touch them after handling raw ingredients.
Safe Cleaning Methods For Electrical Fixtures
Always use a dry cloth or wipe that is only slightly damp—never wet. For outlets, insert a plastic outlet cover or use a child safety plug to prevent moisture from entering. If you notice discoloration or sticky residue, a mild degreaser on a cloth works well.
Avoid abrasive cleaners that can damage the plastic.
How Often To Disinfect
In a busy kitchen, aim for weekly disinfection of light switches and outlets near food prep areas. For less-used switches, monthly cleaning is sufficient. Add this task to your regular kitchen cleaning checklist so it doesn't get forgotten.
20. Clean and Organize Pantry Shelves
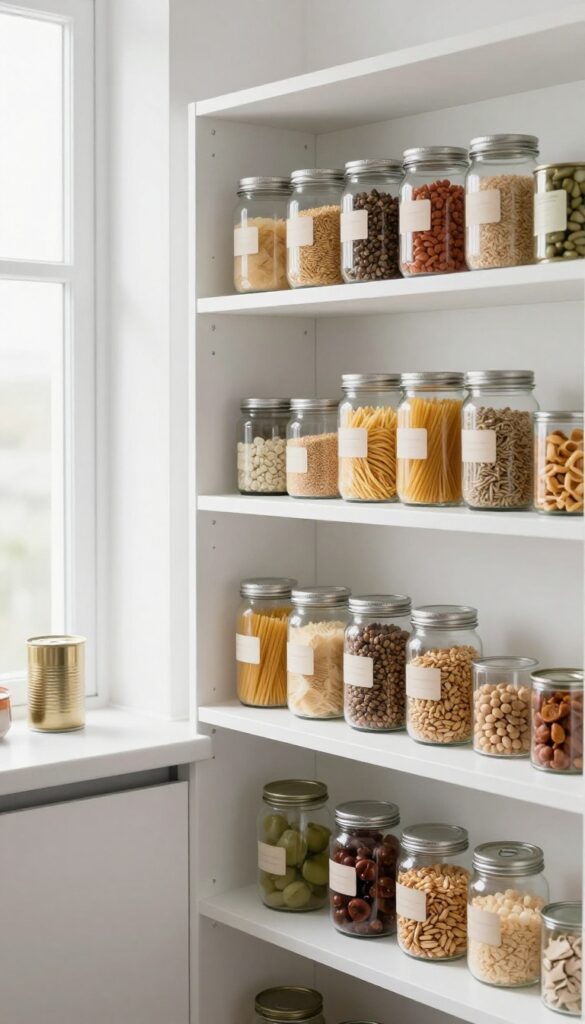
Pantry shelves tend to become a chaotic jumble of half-used bags and forgotten cans. A deep clean here not only makes cooking easier but also helps you avoid buying duplicates and wasting food. Tackling this task can feel overwhelming, but breaking it into simple steps makes it manageable.
Start by taking everything off the shelves. As you go, check expiration dates on every item and toss anything past its prime. Wipe down all surfaces with a gentle cleaner to remove crumbs and sticky spots.
Once the shelves are dry, group similar items together—canned goods, pasta, baking supplies, snacks. Use clear bins or baskets to corral small packets and loose items, which keeps everything visible and tidy. Finally, label shelves or bins if that helps your household maintain the system.
Sort And Purge First
Empty the pantry completely. Check each item’s expiration date and discard anything expired or stale. Donate unopened non-perishables you know you won’t use.
This step instantly frees up space and reduces clutter.
Deep Clean Shelves And Surfaces
Vacuum or sweep out crumbs and debris. Then wipe shelves with a damp cloth and mild soap or a vinegar-water solution. Pay extra attention to corners and edges where spills often hide.
Let shelves dry fully before restocking.
Organize By Category And Frequency Of Use
Group similar items together—canned vegetables, grains, snacks, baking ingredients. Place frequently used items at eye level or within easy reach. Store heavy items on lower shelves to prevent accidents.
Use clear containers for staples like flour and sugar to keep them fresh and visible.
Use Storage Solutions To Maintain Order
Invest in clear bins, baskets, or lazy Susans for small packets, spice packets, and condiments. Shelf risers double your vertical space for cans and jars. Label everything so family members can find and return items to the right spot.
21. Polish Stainless Steel Surfaces
Stainless steel looks sleek when it's clean, but fingerprints, water spots, and smudges show up fast. The good news is that polishing doesn't take long if you use the right technique. A quick once-over can make your entire kitchen look noticeably brighter.
Start by wiping down all stainless steel surfaces—appliances, sink, faucet—with a damp microfiber cloth to remove loose dirt and grease. Then apply a small amount of olive oil or a dedicated stainless steel cleaner to a fresh microfiber cloth. Always wipe in the direction of the grain (the subtle lines in the metal) to avoid streaks.
Buff lightly until the surface shines. For stubborn spots, a little white vinegar on a cloth can cut through grime before polishing. Finish by wiping with a dry cloth to remove any excess oil.
Choose The Right Cleaner
You don't need a fancy product. Olive oil works great and is already in your pantry. If you prefer a commercial cleaner, look for one that's specifically labeled for stainless steel and avoid bleach or ammonia, which can damage the finish.
Find The Grain Direction
Look closely at your appliances—you'll see fine lines running in one direction. Wiping against the grain creates streaks. Always polish parallel to those lines for a uniform, mirror-like shine.
Maintain Between Deep Cleans
Keep a microfiber cloth handy for quick daily wipes. A drop of mineral oil on a cloth every few weeks helps repel fingerprints and keeps the surface looking polished longer.
22. Freshen the Garbage Disposal
Garbage disposals can get pretty rank after weeks of grinding food scraps. That smell isn't just unpleasant—it can linger in your kitchen and even attract pests. The good news is you can freshen it up with items you already have in your pantry.
Start by running cold water and dropping in a handful of ice cubes along with a few lemon or citrus peels. The ice helps knock off residue from the blades while the citrus oils deodorize. Let it run for about 30 seconds, then turn it off.
For a deeper clean, pour half a cup of baking soda down the drain, followed by a cup of white vinegar. Let the fizzing action work for a few minutes, then flush with hot water. This combination cuts through grease and neutralizes odors without harsh chemicals.
Why Ice And Citrus Work
Ice cubes are abrasive enough to dislodge stuck-on food particles without damaging the blades. Citrus peels release natural oils that leave a fresh scent and have antibacterial properties. Together, they provide a quick maintenance clean that keeps your disposal running smoothly.
The Baking Soda And Vinegar Boost
Baking soda is a mild abrasive that scrubs away grime, while vinegar creates a fizzy reaction that helps dislodge debris and deodorize. This combo is especially effective for tackling stubborn smells from fish or spoiled leftovers. Just be sure to use cold water during the ice step and hot water for the final flush to avoid solidifying any grease.
Monthly Deep Clean Routine
Incorporate this deep clean into your monthly kitchen maintenance. A quick ice-and-peel freshening can be done weekly, but the baking soda and vinegar treatment should happen at least once a month. This prevents buildup and keeps your disposal smelling neutral between uses.
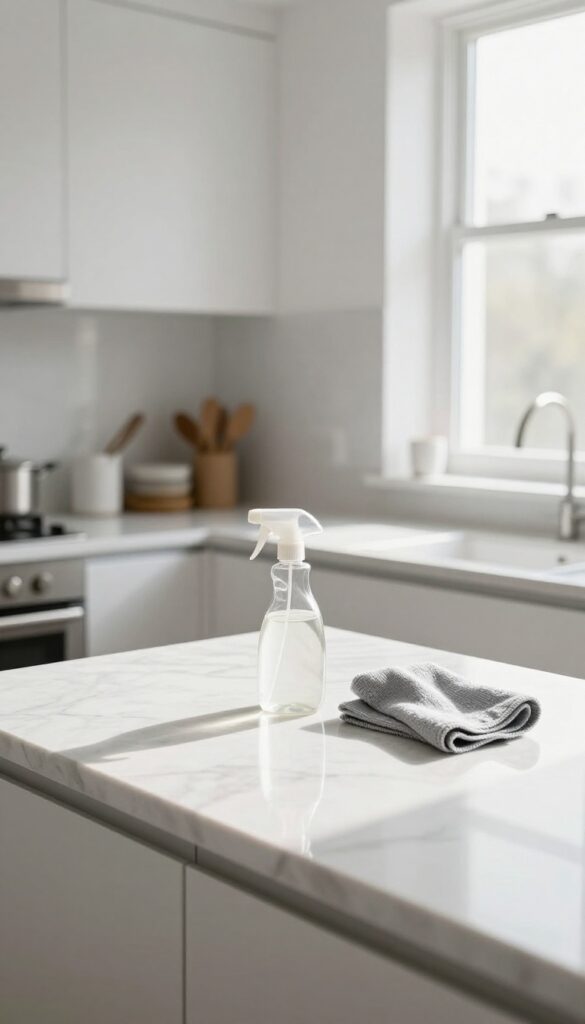
23. Final Wipe-Down of All Surfaces
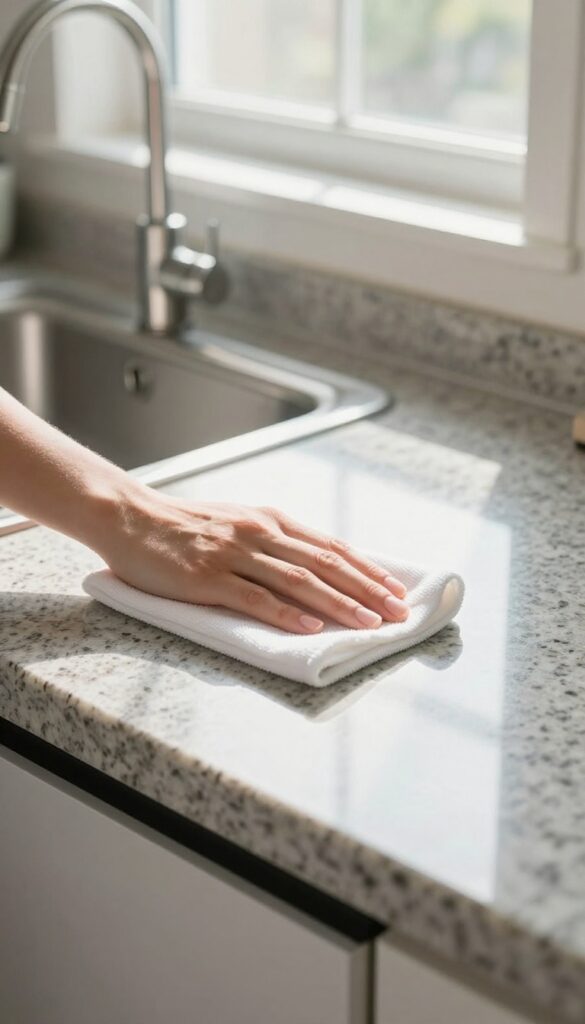
After tackling every nook and cranny, it's time for the victory lap. A final wipe-down ensures no residue or missed spots linger, leaving your kitchen truly clean and ready for daily use. This quick pass ties everything together and gives you that satisfying, just-deep-cleaned feeling.
Grab a microfiber cloth and your preferred all-purpose disinfectant. Start with the highest surfaces—like the top of the fridge or cabinets—and work your way down to counters and tables. Pay special attention to high-touch areas: cabinet handles, faucet knobs, light switches, and appliance doors.
These spots collect germs and fingerprints fast, so a thorough wipe here makes a big difference. Don't forget the backsplash and any exposed wall areas near the stove. Grease splatters often go unnoticed until they've baked on.
A quick spray and wipe now will keep them from becoming stubborn stains later. Finally, give the sink a once-over with a disinfectant spray, including the rim and drain area.
Work Top To Bottom
Start with overhead cabinets, the top of the refrigerator, and any high shelves. Dust and grease accumulate there, and wiping them first prevents debris from falling onto already-cleaned lower surfaces. Use a damp microfiber cloth with a mild degreaser for best results.
Focus On High-touch Zones
Door handles, cabinet pulls, light switches, and appliance buttons are germ magnets. Give them extra attention with a disinfectant wipe or spray. These are the first things you touch when entering the kitchen, so keeping them clean reduces the spread of bacteria.
Finish With Counters And Sink
Wipe down all countertops with a disinfectant, moving from back to front. Then tackle the sink—scrub the basin, faucet, and handles. A final rinse with hot water leaves everything sparkling.
Dry with a clean cloth to prevent water spots.
FAQ
How often should I deep clean my kitchen?
Aim for a full deep clean every 3-6 months. Busy homes may need a lighter version monthly, focusing on high-traffic areas like the sink and stovetop.
What’s the best natural cleaner for kitchen grease?
A mix of equal parts white vinegar and water with a few drops of dish soap works well. Baking soda paste is great for stubborn spots.
How do I clean a glass stovetop without scratching it?
Use a razor scraper at a 45-degree angle for burnt-on food, then wipe with a soft cloth and a cleaner made for glass cooktops.
Can I use bleach on kitchen surfaces?
Bleach is effective for disinfecting but can damage some surfaces. Use it sparingly on non-porous areas like sinks, and always rinse thoroughly.
How do I remove hard water stains from faucets?
Soak a cloth in white vinegar and wrap it around the faucet for 15 minutes. Scrub gently with an old toothbrush, then rinse and dry.
Conclusion
A deep clean doesn't have to happen all at once. Tackle one zone at a time, and soon your kitchen will feel like a brand-new space. These 23 tips give you a clear path to follow, so you can make real progress without burning out.
Start with the areas that bother you most and build from there. Your busy schedule can handle a little at a time, and the results will make every meal feel a bit more enjoyable.