20 Kitchen Cleaning Ideas for a Fresh Everyday Space
A clean kitchen doesn't require hours of scrubbing—just the right habits. From wiping countertops after every meal to freshening the garbage disposal with citrus, these 20 ideas target the spots that collect grime daily.
Each tip is quick, practical, and designed to keep your space fresh without overwhelming your schedule. Ready to transform your kitchen into a space you'll love spending time in?
Let's dive into the simple routines that make a big difference.
1. Wipe Down Countertops After Every Meal
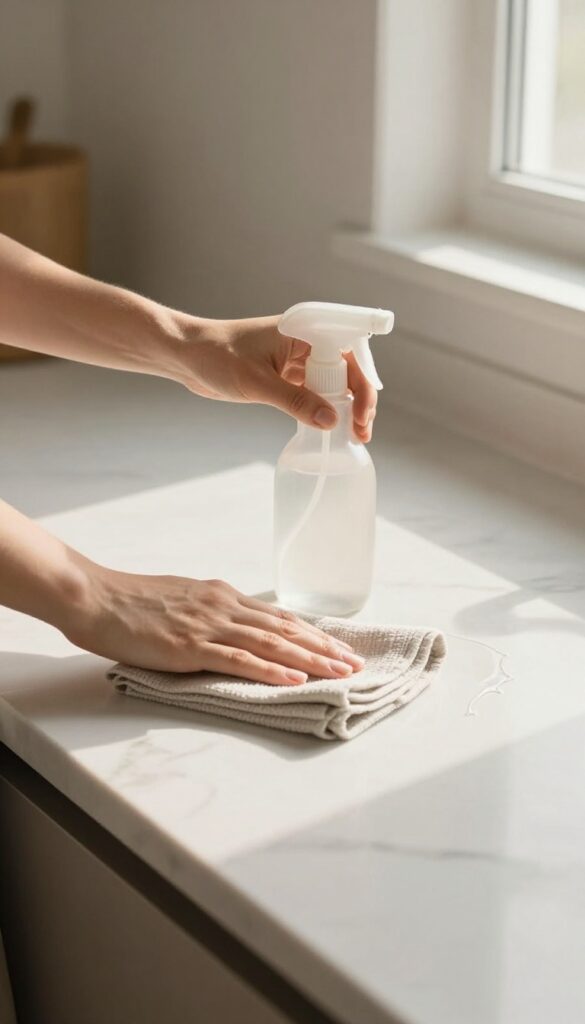
It sounds simple, but this one habit can change how your kitchen looks and feels all week long. When you make wiping counters part of your post-meal routine, you stop grime before it has a chance to settle. No more sticky spots or mysterious stains that need heavy scrubbing later.
Get into the habit of clearing and wiping counters immediately after cooking. A quick spray and wipe prevents stains, crumbs, and sticky residue from building up. Choose a multi-surface cleaner that’s safe for your countertop material, or make your own with vinegar and water.
Keep a clean dish towel or microfiber cloth handy for daily use. This small investment of time saves you from deeper cleaning sessions down the road.
Pick The Right Cleaner
Not all countertops are the same. Granite needs a pH-neutral cleaner, while laminate can handle mild soap. For butcher block, use a food-safe oil and mild soap.
Keep a spray bottle under the sink so you can grab it without searching.
Make It A Family Habit
Get everyone involved. Assign a “counter wiper” after meals, or set a timer for two minutes. When it becomes routine, no one thinks twice.
You’ll walk into a clean kitchen every morning.
2. Use a Daily Sink Scrub
Your sink sees more action than almost any other surface in the kitchen. A quick scrub after each round of dishes stops grime from building up and keeps odors at bay. It takes less than a minute but makes a huge difference in how fresh your kitchen feels.
Why Baking Soda Works Best
Baking soda is mildly abrasive, so it lifts stuck-on food without scratching stainless steel or porcelain. Sprinkle a generous amount over the wet sink, then scrub with a soft sponge or cloth. Rinse thoroughly and dry with a towel to prevent water spots.
Don't Forget The Drain
Odors often start in the drain or garbage disposal. After scrubbing the basin, pour a cup of baking soda down the drain, followed by a cup of white vinegar. Let it fizz for five minutes, then flush with hot water.
This clears out residue and leaves everything smelling clean.
Make It A Habit With A Caddy
Keep a small container of baking soda and a dedicated scrub brush under the sink or on the counter. When you finish washing dishes, grab them and do a quick pass. Turning this into a daily routine takes almost no extra effort and keeps your sink looking like new.
3. Clean the Microwave with Steam
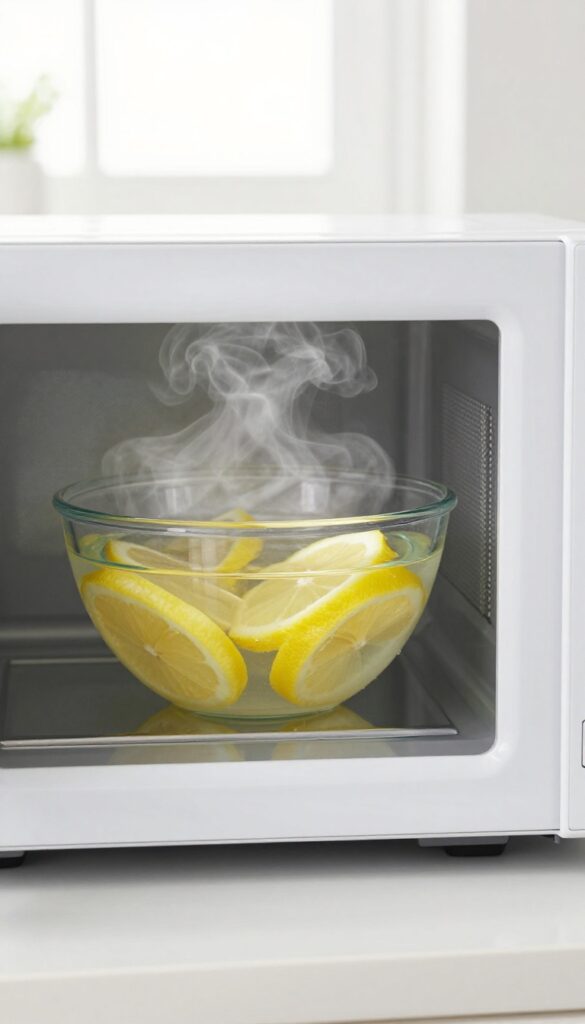
Microwaves are magnets for dried-on splatters and mystery stains. Instead of scrubbing for ages, let steam do the heavy lifting. This method is fast, uses ingredients you already have, and leaves your microwave spotless with almost no effort.
Why Steam Works So Well
Steam softens stuck-on food and grease, turning crusty residue into something you can wipe away with a cloth. The heat also helps sanitize the interior, killing germs without chemical sprays. Adding lemon gives a fresh, clean scent and helps cut through grease naturally.
What You'll Need
You only need a microwave-safe bowl, water, and a few lemon slices (or a splash of vinegar if you're out of lemons). A sponge or microfiber cloth is all you'll need for wiping. That's it—no special tools or harsh cleaners required.
Step-by-step Instructions
Fill the bowl with about a cup of water and add 3-4 lemon slices. Microwave on high for 3 minutes. Let it sit for another 2 minutes without opening the door so the steam can continue to work.
Carefully remove the bowl (it will be hot), then wipe down the interior with a sponge. The grime should come off easily. For stubborn spots, dip your sponge in the warm lemon water.
4. Degrease the Stovetop Weekly
The stovetop takes the brunt of cooking splatters and grease buildup. A quick weekly degreasing keeps it looking clean and prevents burnt-on residue from becoming a scrubbing nightmare. You don't need harsh chemicals—simple household items work wonders.
Regular degreasing prevents stubborn stains and keeps your stovetop functioning well. A dedicated weekly routine takes just a few minutes and saves you from heavy-duty scrubbing later.
Choose Your Degreaser
You can use a commercial degreasing spray or make a paste with baking soda and water. Both options cut through grease effectively. For tough buildup, let the paste sit for 5–10 minutes before wiping.
Wipe In The Right Direction
Always wipe with the grain of the surface—especially on stainless steel or glass cooktops. Use a soft cloth or sponge to avoid scratches. For stubborn spots, a non-abrasive scrubber works well.
Don't Forget The Knobs And Grates
Remove knobs and grates if possible and soak them in warm, soapy water. Wipe them dry before reattaching. This prevents grease from building up in hard-to-reach areas and keeps your stovetop looking uniform.
5. Freshen the Garbage Disposal with Citrus
Your garbage disposal works hard, but it can get smelly fast. Food particles get trapped in the blades and crevices, leading to unpleasant odors that linger in the kitchen. Instead of harsh chemicals, try a natural solution that leaves your disposal smelling like a citrus grove.
Using citrus peels is a simple, eco-friendly way to deodorize and clean your garbage disposal. The natural oils in lemon, lime, or orange peels break down grease and kill bacteria, while the abrasive texture helps scrub the blades. Plus, the fresh scent instantly brightens your kitchen.
To do this, save peels from your citrus fruits—lemons, oranges, or even grapefruits work great. Toss a handful of peels into the disposal, turn on cold water, and run the disposal for about 30 seconds. The cold water helps solidify any grease so it gets chopped up and flushed away.
Follow up with a few ice cubes to further sharpen the blades. For an extra boost, add a tablespoon of baking soda after the peels, then run the disposal with cold water. Baking soda neutralizes odors and combines with citrus for a deep clean.
Repeat this once a week to keep your disposal fresh and functioning smoothly.
Why Citrus Works So Well
Citrus peels contain d-limonene, a natural solvent that cuts through grease and leaves a clean scent. The oils also have antibacterial properties that help reduce odor-causing bacteria. Unlike chemical cleaners, citrus is safe for your pipes and the environment.
Step-by-step Citrus Clean
Collect peels from a few lemons or oranges. Remove any large chunks of fruit to avoid clogging. Drop the peels into the disposal, turn on cold water, and run the disposal for 20–30 seconds.
You can also add a handful of ice cubes to scrub the blades. Finish by running cold water for another 10 seconds.
Pro Tips For Best Results
Avoid using too many peels at once—stick to a handful. Never put whole citrus fruits down the disposal. For a stronger scent, use a mix of lemon and orange peels.
If you have a septic system, citrus peels are safe in moderation. Combine with baking soda for extra odor control.
6. Organize the Fridge with a Weekly Sweep
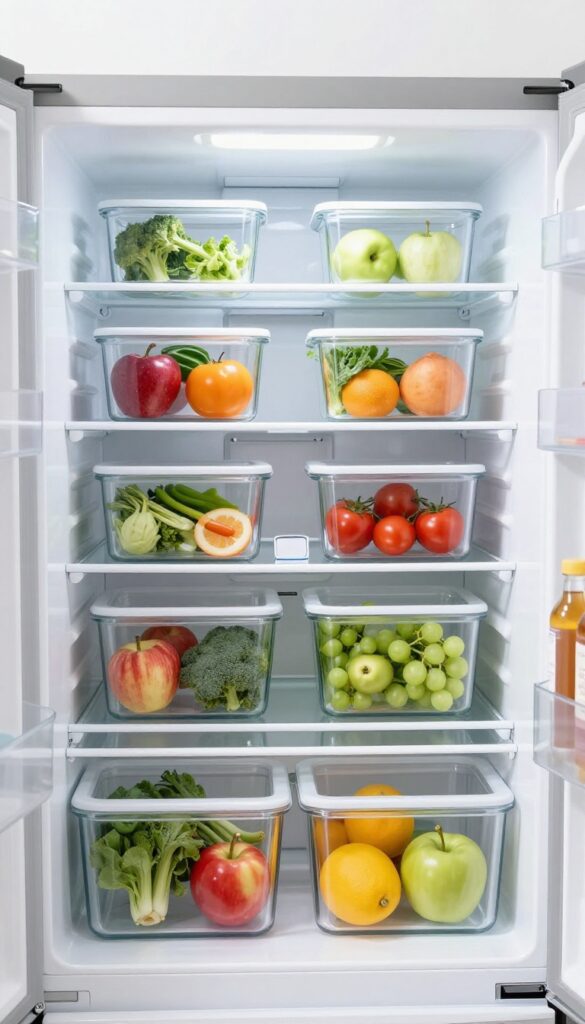
The fridge is a catch-all for leftovers, condiments, and forgotten produce. A quick weekly sweep keeps it from turning into a science experiment. Dedicate ten minutes—maybe right before your grocery run—to clear out anything past its prime and give the shelves a gentle wipe.
This small routine stops sticky spills from hardening and keeps odors at bay, making your fridge a pleasant place to reach into every day.
Set A Regular Day
Pick one day each week for your fridge sweep—Sunday evening or Friday morning works well. Consistency builds the habit. When you know it's coming, you're less likely to let leftovers linger.
Toss And Sort First
Before you wipe anything, pull out every item. Check expiration dates and sniff test anything questionable. Group similar items together—dairy, veggies, condiments—so you can see what you actually have.
This also makes it easier to spot what needs using up.
Wipe With A Mild Cleaner
Use a solution of warm water and a few drops of dish soap, or a 50/50 vinegar-water mix. Avoid harsh chemicals near food. Wipe shelves, drawers, and door bins.
For stubborn spills, let the cleaner sit for a minute before scrubbing. Dry with a clean cloth to prevent moisture buildup.
Freshen With Baking Soda
Place an open box of baking soda on a shelf to absorb odors. Replace it every three months. For extra freshness, tuck a few coffee beans or a lemon half in the door—just swap them out weekly.
7. Deep Clean the Oven Door
The oven door is a window to your cooking, but it's also a magnet for baked-on grease and grime. A cloudy, splattered glass door makes your whole kitchen feel less clean, even when everything else sparkles. The good news is you don't need harsh chemicals to get it looking like new again.
A simple paste of baking soda and water can cut through the toughest oven door grime without scratching the glass. This method is gentle yet effective, and it takes just a few minutes of active work.
Make The Paste
Mix three tablespoons of baking soda with a few drops of water until it forms a spreadable paste. You want it thick enough to stick to the glass but not so dry that it crumbles. Adjust the water slowly to get the right consistency.
Apply And Wait
Spread the paste evenly over the inside of the oven door glass, avoiding the edges where it might seep into the door. Let it sit for 15 minutes—this gives the baking soda time to break down the grease. For stubborn spots, you can leave it on for up to 30 minutes.
Wipe Away For A Streak-free Shine
Dampen a microfiber cloth with water and wipe the paste off in circular motions. Rinse the cloth frequently to avoid redepositing grime. For the final polish, use a dry microfiber cloth to buff the glass until it's completely streak-free.
Your oven door will look brand new.
8. Sanitize Cutting Boards
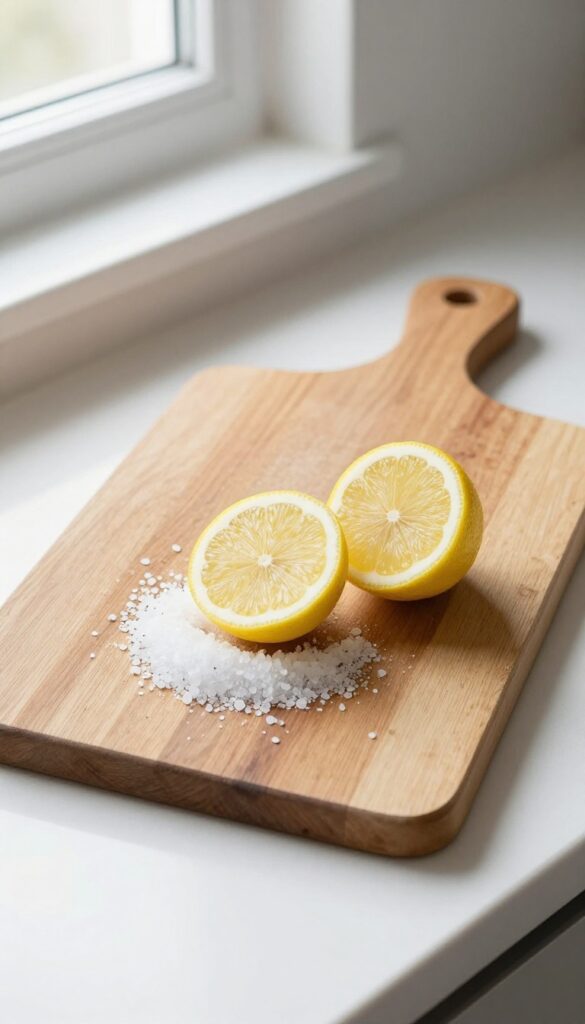
Cutting boards see a lot of action—chopping veggies, slicing meat, and mincing herbs. Over time, they can develop deep knife grooves where bacteria hide. Regular washing with soap and water isn't always enough to keep them truly clean.
A quick sanitizing step after each use makes a big difference in food safety and board longevity.
For wooden boards, scrub the surface with coarse salt and half a lemon. The salt acts as a gentle abrasive, while the lemon's acidity helps kill germs and neutralize odors. Let it sit for a few minutes, then rinse with hot water.
For plastic boards, a diluted bleach solution (1 teaspoon bleach per quart of water) works wonders. Apply it, let it stand for two minutes, then rinse thoroughly. Never mix bleach with other cleaners, and always air-dry boards upright to prevent moisture buildup.
Why Salt And Lemon Work
Salt is a natural scrubber that lifts stuck-on particles without scratching the surface. Lemon juice contains citric acid, which breaks down grease and has antibacterial properties. Together, they create a simple, non-toxic paste that freshens and sanitizes.
This method is especially good for wooden boards, as it doesn't dry out the wood like harsh chemicals can.
Bleach Solution For Plastic Boards
Plastic cutting boards are non-porous, so they can handle a stronger sanitizer. A bleach solution kills most bacteria and viruses quickly. After scrubbing with soap and water, apply the solution, let it sit for two minutes, then rinse well.
Make sure to dry the board completely to prevent warping or mold. Never use bleach on wooden boards, as it can damage the wood.
When To Replace Your Board
Even with regular sanitizing, cutting boards wear out. Deep grooves, cracks, or warping create hiding spots for bacteria. If your board has excessive knife marks or splits, it's time for a new one.
A good rule of thumb: replace wooden boards every 1-2 years, and plastic boards when they become heavily scored or stained.
9. Tackle Cabinet Handles and Knobs
Cabinet handles and knobs are some of the most touched surfaces in your kitchen, yet they're easy to overlook during a quick wipe-down. Over time, they collect grease, food residue, and everyday grime from hands. A quick weekly clean keeps them looking new and prevents buildup that can feel sticky or unsanitary.
The Right Tools For The Job
You don't need special cleaners. A microfiber cloth with warm soapy water works well for most finishes. For metal handles, a disinfectant wipe or a cloth with a bit of rubbing alcohol can cut through grease without damaging the surface.
Avoid abrasive sponges that can scratch or dull the finish.
Don't Forget The Backsplash Area
The area around handles often gets splattered with food or sauce. While cleaning the handles, take a moment to wipe the nearby backsplash or cabinet door. This prevents sticky spots from becoming a magnet for dust and bacteria.
A Quick Weekly Routine
Incorporate handle cleaning into your weekly kitchen reset. Spray a bit of all-purpose cleaner on a cloth, not directly on the handle, to avoid drips inside cabinets. Wipe each handle front and back, then dry with a clean cloth to prevent water spots.
10. Use a Lint Roller for Crumbs in Drawers
Drawer crumbs are one of those annoyances that seem impossible to fully eliminate. No matter how careful you are, tiny bits of food and dust find their way into the corners and under the liner. A lint roller is the perfect tool to tackle this without making a bigger mess.
Instead of pulling everything out and wiping down each drawer, simply run a lint roller over the liner and along the edges. The sticky sheets grab crumbs and dust quickly, leaving the surface clean. It's especially handy for utensil drawers and snack drawers where small particles accumulate fast.
Why It Works So Well
Lint rollers are designed to pick up fine particles from fabric, but they work just as well on smooth surfaces like drawer liners. The adhesive grabs crumbs without scattering them, unlike a dry cloth that might push debris around. Plus, you can tear off the used sheet and move on—no rinsing or wringing required.
Best Drawers For This Trick
Focus on drawers that hold loose items like plastic lids, takeout packets, or small tools. The silverware drawer is another prime candidate because crumbs from bread or crackers often settle there. Avoid using a lint roller on drawers with rough wood or unfinished surfaces, as the adhesive might leave residue.
How To Make It A Routine
Keep a lint roller in a nearby cabinet or under the sink so it's easy to grab. Once a week, give each drawer a quick pass. You'll be surprised at how much dust and debris you collect, and the process takes less than a minute per drawer.
11. Steam Clean the Tile Grout
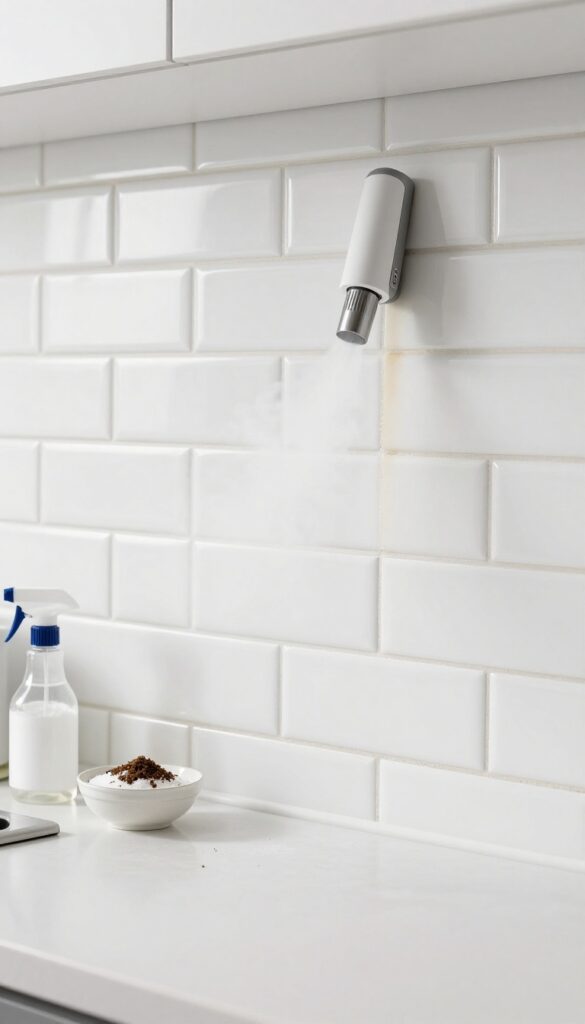
Grout lines love to trap grease, food splatters, and everyday grime. Over time, that light-colored grout turns dingy and dark, making even a clean backsplash look tired. You don't need harsh chemicals or a professional scrub—just a little steam or a simple pantry mixture can bring it back to life.
Start by using a handheld steamer. The hot steam loosens dirt deep inside the porous grout without scrubbing. If you don't have a steamer, make a paste with baking soda and water, apply it to the grout lines, then spray white vinegar on top.
The fizzing action lifts embedded grime. Let it sit for five minutes, then scrub with a stiff brush and wipe clean. For stubborn spots, add a few drops of dish soap to the paste.
This method works wonders on kitchen backsplashes and countertop edges.
Why Steam Works Best
Steam penetrates the tiny pores of grout, softening years of buildup in seconds. It's chemical-free, so you don't have to worry about residue near food prep areas. A handheld steamer costs around $30 and pays for itself in saved elbow grease.
Diy Paste For Tough Stains
Mix three parts baking soda with one part water to form a thick paste. Spread it over the grout lines, then spritz with vinegar. The reaction creates a gentle abrasive action that breaks down grease and discoloration.
Let it sit for 10 minutes before scrubbing with an old toothbrush.
Seal Grout After Cleaning
Once the grout is dry, apply a grout sealer. This creates a protective barrier that repels future stains and makes next cleaning much easier. A small bottle costs under $10 and can cover an entire backsplash.
12. Polish Stainless Steel Appliances
Stainless steel looks sleek, but it shows every fingerprint and smear. The trick is using the right product and technique to restore that mirror-like finish without streaks. A little effort here goes a long way in making your whole kitchen feel cleaner.
Choose Your Polish
You don't need a fancy spray. Olive oil, baby oil, or a dedicated stainless steel cleaner all work well. Avoid abrasive cleaners or rough sponges—they scratch the surface and make smudges worse.
Wipe With The Grain
Look closely at your appliance; you'll see fine lines running in one direction. Always wipe along those lines, not against them. This hides minor scratches and gives a uniform sheen.
Buff For A Smudge-free Finish
After applying the polish, use a dry part of the microfiber cloth to buff the surface. A final light wipe with a clean, dry cloth removes any excess oil and leaves it streak-free.
13. Descale the Coffee Maker Monthly

Your coffee maker works hard every morning, but mineral deposits from water can build up inside and affect both performance and flavor. Descaling once a month keeps the machine running smoothly and your coffee tasting fresh. It's a simple process that takes less than an hour and uses ingredients you probably already have.
Why Descaling Matters
Over time, calcium and lime deposits accumulate in the water reservoir and internal tubing. This buildup can slow down brewing, cause strange noises, and even lead to a burnt or bitter taste in your coffee. Regular descaling prevents these issues and extends the life of your machine.
The Vinegar Method Step By Step
Fill the water reservoir halfway with white vinegar and top it off with water. Run a full brew cycle without coffee grounds. Let the mixture sit for 15 minutes, then run two more cycles with fresh water to rinse thoroughly.
Your coffee maker will be clean and ready for the next morning.
When To Descaling More Often
If you have hard water or use your coffee maker multiple times a day, consider descaling every two weeks. You can also use a commercial descaling solution if you prefer, but vinegar works just as well and is much cheaper.
14. Wash Dish Racks and Sponges
Dish racks and sponges are workhorses that rarely get the attention they deserve. Over time, food particles and moisture create a breeding ground for bacteria and mold. A quick weekly reset keeps both items fresh and functional.
Soak And Scrub The Rack
Remove all dishes and utensils. Fill your sink or a large basin with hot water and a squirt of dish soap. Submerge the rack and let it soak for 10–15 minutes to loosen grime.
Use a stiff brush or an old toothbrush to scrub the corners and crevices where gunk hides. Rinse thoroughly and let it air dry completely before putting it back.
Sanitize Sponges In The Microwave
Sponges harbor bacteria even after rinsing. To kill germs, wet the sponge thoroughly (it must be damp, not dry) and microwave it on high for 1 minute. Let it cool before handling—it will be hot.
This simple step reduces odor and extends the sponge's life. Replace sponges every two weeks for best hygiene.
15. Vacuum Under and Behind Appliances

Out of sight often means out of mind—until you pull out the fridge and find a dust bunny convention. Those crumbs, pet hair, and mysterious debris lurking under and behind your major appliances do more than just look gross. They can block airflow, make your appliances work harder, and even become a fire hazard.
Every few months, make it a point to slide out your fridge, stove, and dishwasher. A quick vacuum with a crevice tool removes the buildup that can trap heat and force compressors and fans to strain. In gas stoves, dust near the pilot lights or burners increases fire risk.
For the fridge, clean coils improve efficiency and can lower your electric bill. It's a small effort that pays off in safety, performance, and peace of mind.
Why It Matters
Dust and debris act like insulation, trapping heat around appliances that need to stay cool. Refrigerator coils, for instance, release heat to keep the inside cold. When coated in dust, they can't do their job, making the compressor run longer and use more energy.
In ovens and stoves, accumulated crumbs near gas lines or electrical components can ignite, turning a simple cleaning task into a fire-prevention measure.
How To Do It Safely
Before moving heavy appliances, unplug them if possible. For refrigerators, switch off the ice maker and disconnect the water line if you need to pull it far. Use a dolly or slide-out mats to avoid scratching floors.
Vacuum all visible dust, then wipe down the floor and walls with a damp cloth. For hard-to-reach spots, a long, flexible dusting wand works wonders. Once everything is clean, push the appliance back gently, making sure not to pinch cords or hoses.
How Often To Clean
Aim for every three to six months, depending on your household. If you have pets or a dusty environment, lean toward every three months. Set a reminder on your phone or tie it to a seasonal chore like changing smoke alarm batteries.
Regular cleaning keeps your appliances running efficiently and extends their lifespan, saving you money and hassle.
16. Clean the Exhaust Fan Filter
Your kitchen exhaust fan works hard to pull out smoke, steam, and cooking odors, but the filter traps grease and dust over time. A clogged filter not only reduces efficiency but can also become a fire hazard. Giving it a regular deep clean keeps your fan working properly and your kitchen air fresh.
Why It Matters
A dirty filter forces the fan motor to work harder, which can shorten its lifespan. Grease buildup also recirculates into your kitchen, settling on cabinets and countertops. Cleaning the filter every few months prevents these issues and keeps the air cleaner.
How To Do It Right
Remove the filter according to your model's instructions—most slide out or are held by clips. Soak it in hot water mixed with a few drops of dish soap or a degreasing cleaner for 15 minutes. For stubborn grime, add baking soda or use a soft brush to scrub gently.
Rinse thoroughly and let it dry completely before reinstalling.
Pro Tips For Maintenance
If you cook frequently, clean the filter monthly. Some filters are dishwasher-safe—check your manual. Replace disposable filters every 6 to 12 months for best performance.
A clean filter also reduces kitchen odors and keeps your fan quieter.
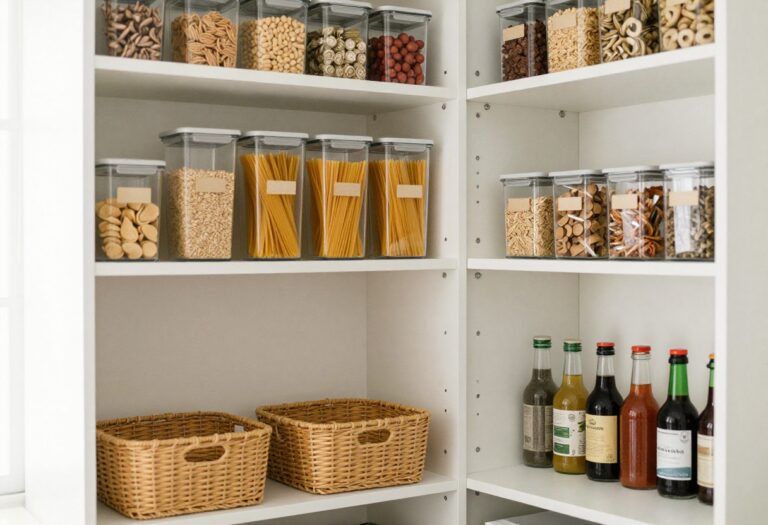
17. Use Shelf Liners for Easy Cleanup
Cabinets and pantry shelves take a surprising amount of abuse. Crumbs, sticky spills, and dust settle into corners, making deep cleaning a chore. Shelf liners solve this by creating a removable barrier that catches messes before they reach the wood or paint.
When you line shelves with washable material, cleanup becomes a quick lift-and-wipe motion. No more scrubbing grooves or waiting for stains to set. Choose non-adhesive liners that stay put with grip texture, so you can swap them out without residue.
Pick The Right Material
Vinyl or rubberized mesh liners work best for kitchens. They’re waterproof, easy to cut to size, and can be wiped down with soapy water. Avoid paper or fabric liners that absorb spills and become breeding grounds for bacteria.
Install Without Adhesive
Measure each shelf and cut the liner slightly smaller than the surface. Let it rest flat for a few hours so it conforms to the shelf. No glue means you can remove and wash the liner whenever needed—no sticky residue left behind.
Maintain With A Quick Routine
Once a month, pull out the liners and give them a rinse in warm, soapy water. Let them air dry completely before putting them back. This simple habit keeps your cabinets fresh and prevents buildup from becoming a scrubbing nightmare.
18. Wipe Down Light Switches and Outlets
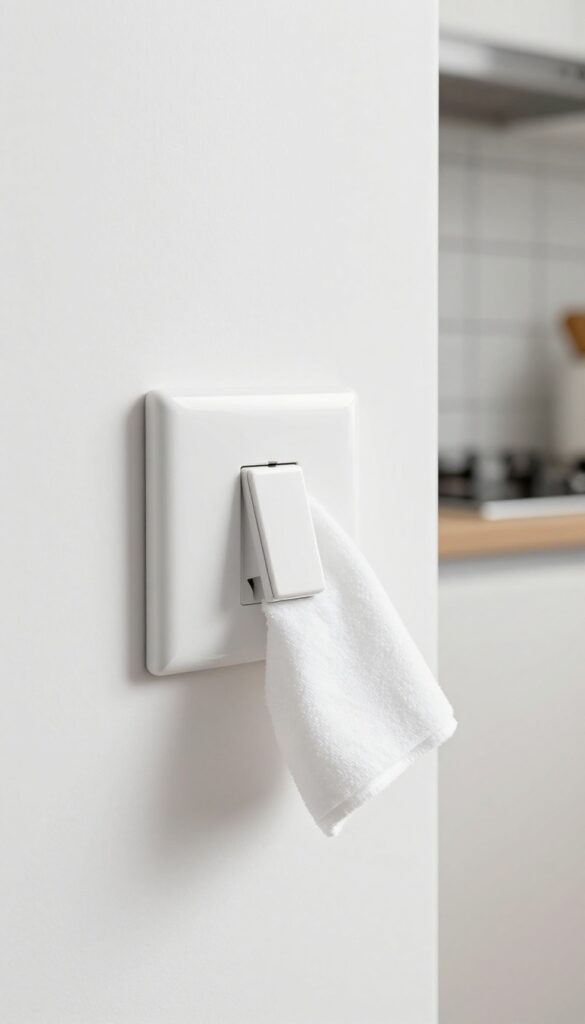
Light switches and electrical outlets are some of the most touched surfaces in your kitchen, yet they rarely get cleaned. Grease, dust, and fingerprints accumulate quickly, especially near the stove or sink. A quick wipe-down takes seconds and makes a noticeable difference in how fresh your kitchen feels.
Grab a microfiber cloth or soft rag and dampen it with a little warm water and a drop of dish soap. Wring it out well so it's just barely damp—you don't want moisture seeping into the electrical components. Gently wipe the switch plate, the surrounding wall area, and the outlet cover.
For stubborn grime, use a cotton swab dipped in soapy water to get into the crevices around the switch. Dry everything with a separate cloth to prevent streaks. Make this a weekly habit, and you'll keep those high-touch spots looking clean without any extra effort.
Why They Get So Grimy
Think about how often you flip a light switch or plug in an appliance. Each touch transfers oils from your hands, and cooking grease in the air settles on every surface. Over time, that buildup becomes sticky and attracts more dust.
It's a cycle that's easy to break with regular cleaning.
Quick Safety Tips
Always use a damp—not wet—cloth to avoid any risk of electric shock. Never spray cleaner directly onto the switch or outlet. If you see any signs of damage or discoloration, turn off the circuit breaker and replace the plate.
Keeping them clean also helps you spot potential issues early.
Make It Part Of Your Routine
Tackle light switches and outlets right after you wipe down countertops. That way, you're already in cleaning mode and have a damp cloth handy. It takes less than a minute per switch, and the visual payoff is immediate.
Your kitchen will feel noticeably fresher.
19. Deodorize the Trash Can
Your trash can works hard, but it can also work against you when odors linger. A simple sprinkle of baking soda at the bottom of the can before adding a new bag absorbs moisture and neutralizes smells before they start. Monthly deep cleaning keeps the can itself fresh, so you're not just masking odors.
Baking soda is a natural deodorizer that traps odors without harsh chemicals. Sprinkle a thin layer at the bottom of the can each time you change the bag. For a monthly refresh, wash the can with warm soapy water, rinse well, and dry completely before adding a new liner.
This routine prevents smells from building up and keeps your kitchen smelling clean.
Why Baking Soda Works
Baking soda neutralizes acidic and alkaline odor molecules, making it effective against common trash smells like food scraps and moisture. It's safe, cheap, and won't leave residue. Just sprinkle a thin layer—about a tablespoon—at the bottom before inserting a new bag.
Monthly Deep Clean
Once a month, take the can outside or to a utility sink. Spray it with a mixture of dish soap and warm water, scrub with a brush, and rinse thoroughly. Let it air dry completely before putting a new bag in.
This removes any sticky residue or bacteria that cause lingering smells.
20. Keep a Cleaning Caddy Handy
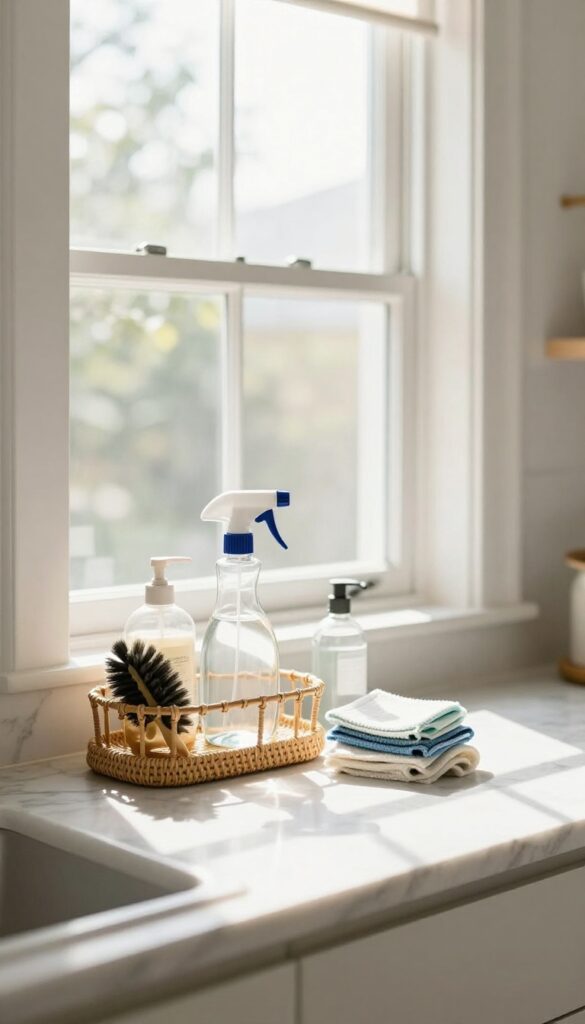
Nothing kills a cleaning streak faster than hunting for supplies. A caddy solves that by keeping everything you need in one portable spot. You'll be more likely to tackle spills immediately when your spray bottle and cloth are already within reach.
What To Stock Inside
Fill your caddy with an all-purpose cleaner, a glass spray, microfiber cloths, a scrub brush, and disposable gloves. Add a small bottle of dish soap and a sponge for quick counter wipes. Keep it minimal—only daily essentials, not deep-cleaning tools.
Where To Store It
Park your caddy on the counter near the sink or under the cabinet closest to high-traffic areas. If your kitchen is small, tuck it on a shelf inside the pantry. The key is visibility—out of sight often means out of mind.
When To Refill
Check your caddy once a week. Replace empty bottles, toss worn cloths, and restock anything running low. A quick Sunday reset ensures you're never caught without what you need during the week.
FAQ
How often should I deep clean my kitchen?
Aim for a deep clean every 1-3 months, focusing on appliances, cabinets, and floors. Daily and weekly maintenance will keep it fresh between deep cleans.
What's the best natural cleaner for kitchen surfaces?
A mix of white vinegar and water (1: 1) works well for most surfaces, but avoid vinegar on stone countertops. Baking soda paste is great for scrubbing.
How do I remove stubborn grease from cabinets?
Use a degreasing dish soap mixed with warm water, or a paste of baking soda and oil. Apply with a soft cloth, let sit, then wipe off.
Can I use bleach on my kitchen counters?
Only if the manufacturer recommends it. Bleach can damage some surfaces like granite or stainless steel. Stick to mild soap or a diluted vinegar solution.
How do I keep my kitchen smelling fresh all day?
Simmer cinnamon sticks or citrus peels in water on the stove. Also, empty the trash daily and clean the sink and disposal regularly.
Conclusion
A clean kitchen doesn't require a full-day overhaul. By sprinkling these 20 ideas into your weekly routine, you'll maintain a fresh space without the burnout. Start with the tip that solves your biggest annoyance and go from there.
Small changes add up fast. Pick two or three hacks to try this week, and notice how much better your kitchen feels. Your future self will thank you every time you walk in.