13 Clever Pantry Floor Ideas That Make Shelves Work
That bottom shelf of your pantry—the one you have to kneel to reach—often becomes a chaotic dumping ground. Bags of rice get shoved to the back, and heavy cans pile up without any system.
But the floor of your pantry holds serious potential if you treat it like prime real estate. These 13 ideas turn that awkward low space into organized, accessible storage that actually works.
From pull-out bins to rolling carts, each solution targets a specific problem so you can stop digging and start grabbing.
1. Pull-Out Floor Bins for Heavy Staples
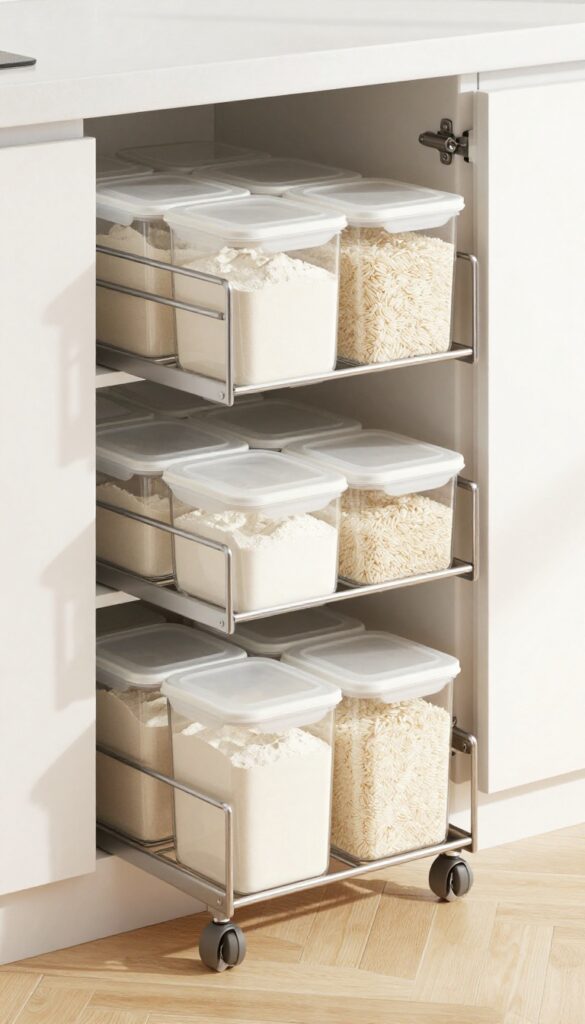
Heavy bags of flour, rice, or pet food are a pain to drag out from the bottom shelf. Pull-out floor bins solve this by letting you slide the whole bin forward. No more digging or lifting—just pull and grab.
These bins sit directly on the floor, so they handle serious weight without wobbling. Look for bins with sturdy metal frames and smooth-gliding wheels or slides. Use them for bulk staples, canned goods, or even large kitchen tools you don't use daily.
The key is to keep each bin focused on one category so you always know where things are.
What To Look For
Choose bins with a weight capacity of at least 50 pounds. Metal frames with reinforced corners last longer than plastic. Smooth-rolling casters make a big difference when the bin is fully loaded.
Best Uses
Flour and sugar in sealed containers, 20-pound bags of rice, bulk pet food, or even heavy canned vegetables. Group similar items so you can pull one bin for baking and another for dinner prep.
Installation Tips
Measure your pantry floor space before buying. Leave a few inches of clearance around the bin so it slides out without scraping. If your floor is uneven, look for bins with adjustable feet or shims.
2. Rolling Carts for Flexible Storage
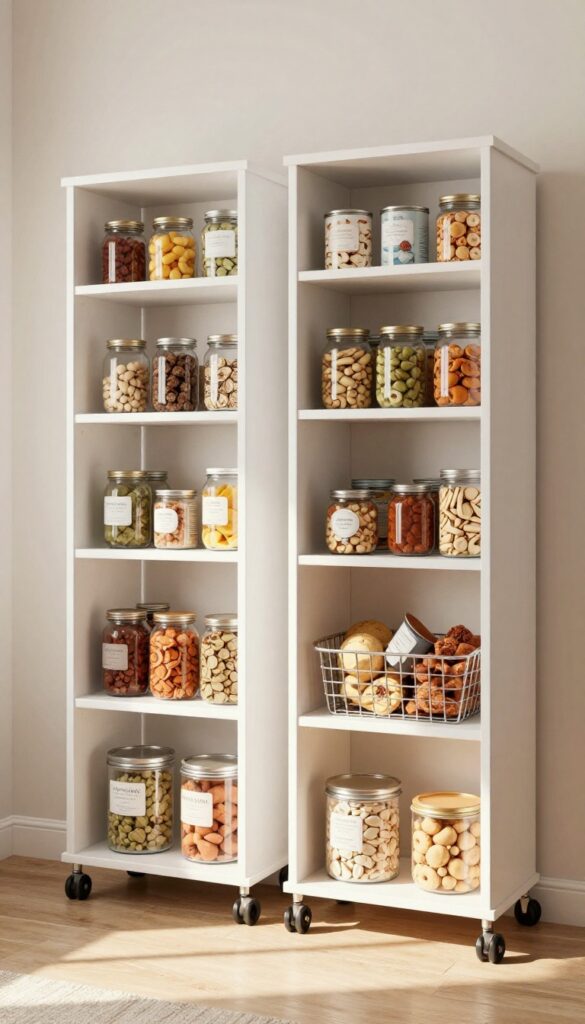
A narrow rolling cart can slide right into that gap between shelves or next to a wall. It gives you instant extra storage without any installation, and you can wheel it out whenever you need to grab something from the back. Perfect for snacks, canned goods, or even cleaning supplies that always seem to get lost in the shuffle.
Choosing The Right Cart
Look for a cart that's slim enough to fit in your pantry floor space but tall enough to hold multiple tiers. Wire carts are great because they let you see what's on each shelf, and they're lightweight to pull out. If you store heavy jars or cans, go for a sturdier metal or wood cart with locking wheels so it stays put when you don't need to move it.
What To Store On A Rolling Cart
Use the top shelf for everyday items like cooking oils, spices, or snacks you reach for often. The middle shelf can hold canned goods or jars, and the bottom is perfect for heavy bags of rice or potatoes. You can also dedicate one cart entirely to cleaning supplies—sprays, sponges, and gloves—so they're easy to grab when you need to wipe down the kitchen.
Maximizing Accessibility
Position the cart so it's easy to pull out without hitting other shelves or the door. If your pantry is deep, consider a cart with a handle on the end for easy grabbing. For extra organization, add small bins or baskets on the cart shelves to keep similar items together—like a bin for tea bags or a basket for individual snack packs.
3. Tiered Shelf Risers for Canned Goods
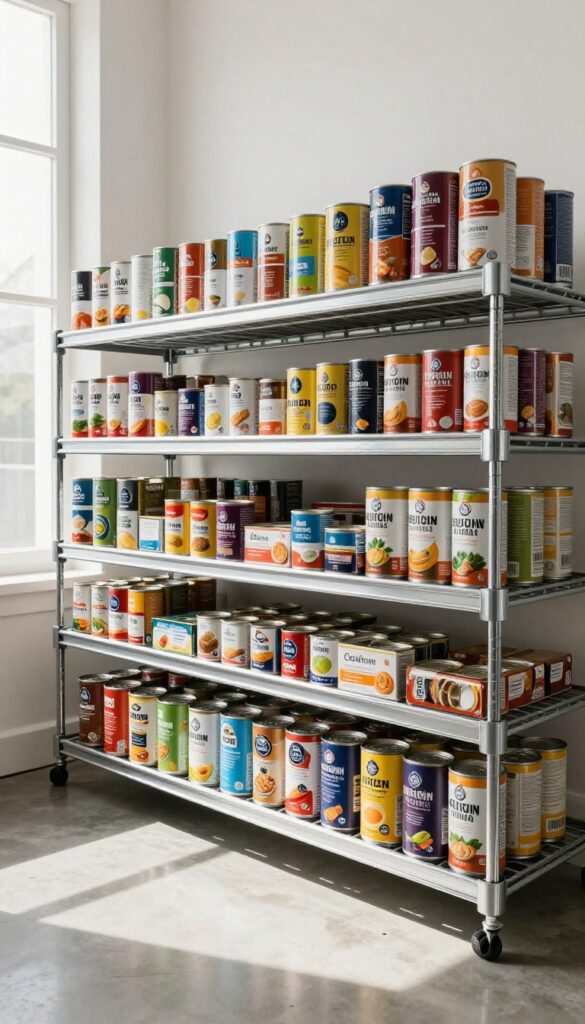
Canned goods are pantry staples, but they're also some of the hardest items to keep organized on a low shelf. Stacking them just leads to a game of Jenga every time you need a can of tomatoes. Tiered shelf risers change everything by creating stadium-style seating right on the floor.
These simple wire or plastic risers let you see every label at a glance. You can grab what you need without bending all the way down or pulling out a dozen cans. It's a small upgrade that makes a huge difference in daily usability.
Tiered risers are designed to hold cans at an angle, so each row is slightly higher than the one in front. This means every can gets its own spot, and you can see the label on each one without moving anything. They're perfect for the floor of your pantry because they elevate cans just enough to make them accessible without taking up extra horizontal space.
Most risers come in widths that fit standard pantry shelves, but you can also find adjustable versions. For floor use, look for sturdier models with non-slip feet so they don't slide around when you grab a can. Some even have built-in dividers to keep different types of cans separate.
One of the best things about tiered risers is how they prevent the "out of sight, out of mind" problem. When cans are hidden behind each other, you forget what you have and end up buying duplicates. With a tiered setup, you see everything at once, making meal planning and inventory checks much easier.
Choosing The Right Size
Measure the depth of your pantry floor space before buying risers. Standard risers are about 12 inches deep, but deeper options exist for larger cans. Also check the height clearance above the floor—if you have a shelf above, make sure the riser plus the tallest can fits underneath.
For floor use, you don't have that constraint, so you can go with taller risers that hold more cans.
Grouping By Category
Use separate risers for different food groups: vegetables in one, soups in another, beans in a third. This makes it even faster to find what you need. You can also arrange them by frequency of use, with everyday items on the front rows and backup supplies toward the back.
Label the front edge of each riser with a small chalkboard sticker for extra clarity.
Maintenance And Rotation
Tiered risers make first-in, first-out rotation simple. When you buy new cans, add them to the back of the riser and pull older ones forward. Every few months, wipe down the risers with a damp cloth to keep them clean.
Check for any dented or expired cans while you're at it—this system makes it easy to spot problems.
4. Floor-to-Ceiling Pull-Out Drawers
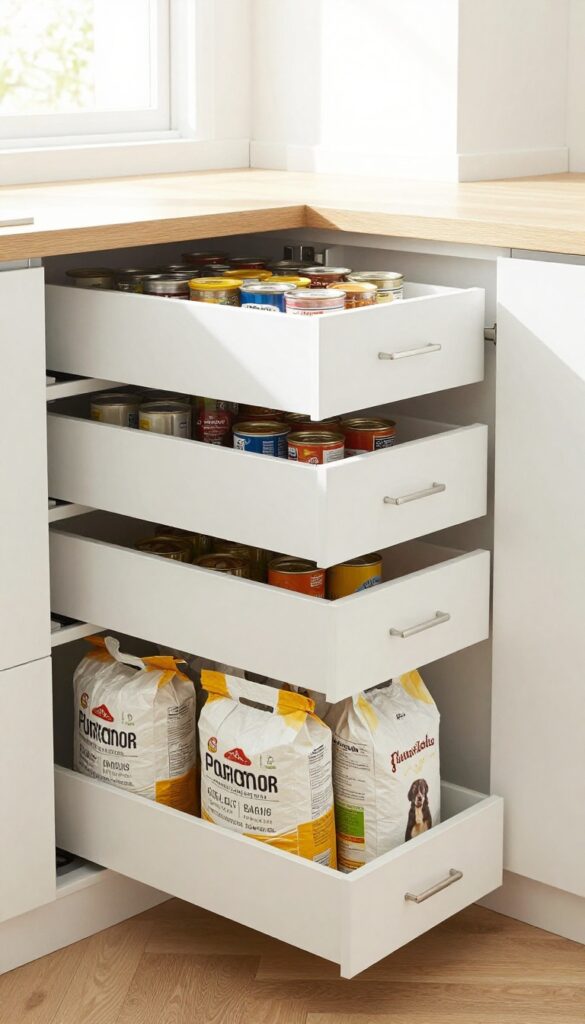
A tall pull-out drawer system that sits on the floor changes the game. Instead of stacking things and playing Tetris, you pull one handle and everything slides out. It's like having a dresser for your pantry, with deep drawers that handle heavy bags at the bottom and shallow ones for spices up top.
Why It Works So Well
Full-extension slides let you see every item at a glance. No more forgotten cans or expired boxes. The floor-level drawers are perfect for 20-pound bags of flour or dog food because you can roll them out instead of lifting.
And since the unit goes floor-to-ceiling, you use every inch of vertical space.
Customizing The Drawer Heights
Not all drawers need to be the same depth. Reserve the bottom two drawers for tall, heavy items like cereal boxes or bulk snacks. The middle drawers work for canned goods and jars.
Top drawers, which you might need a step stool for, are ideal for rarely used items or backup spices.
Installation Tips For Diyers
Measure your pantry width carefully—most pull-out systems come in standard widths like 12, 18, or 24 inches. You'll need to secure the unit to the wall studs to prevent tipping, especially if you have kids. Use heavy-duty slides rated for at least 100 pounds per drawer.
If you're not handy, many companies offer pre-assembled units that just need to be screwed in place.
5. Wire Baskets for Airflow and Visibility
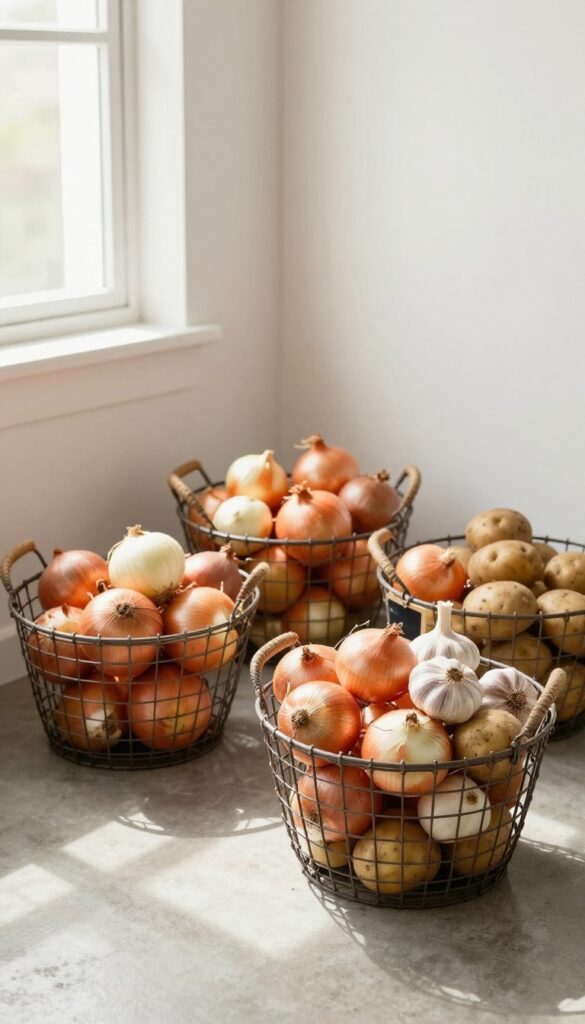
Produce like onions, potatoes, and garlic need to breathe. Storing them in plastic bags or closed bins traps moisture and speeds up spoilage. Wire baskets solve this by letting air circulate freely around each vegetable.
Place a few sturdy wire baskets directly on the pantry floor. Their open weave keeps air moving, which helps prevent mold and sprouting. Plus, the see-through design means you can spot exactly how many onions or potatoes you have left without digging around.
Stack them if you need to save floor space, or keep them side by side for easy grabbing.
Choose The Right Size
Look for baskets that are wide enough to hold a week's worth of produce but not so deep that items get buried. A depth of 8 to 10 inches works well for most kitchens. Metal wire with a coated finish resists rust and is easy to wipe clean.
Label For Rotation
Use a simple tag or chalk label to note the purchase date. This encourages first-in, first-out usage and reduces waste. Attach the label to the basket handle so it's easy to see.
Pair With A Liner (optional)
If you're storing loose garlic or shallots that might fall through wider gaps, line the bottom with a piece of mesh or a thin tea towel. This still allows airflow while keeping smaller items contained.
6. Lazy Susans for Corner Floor Spaces
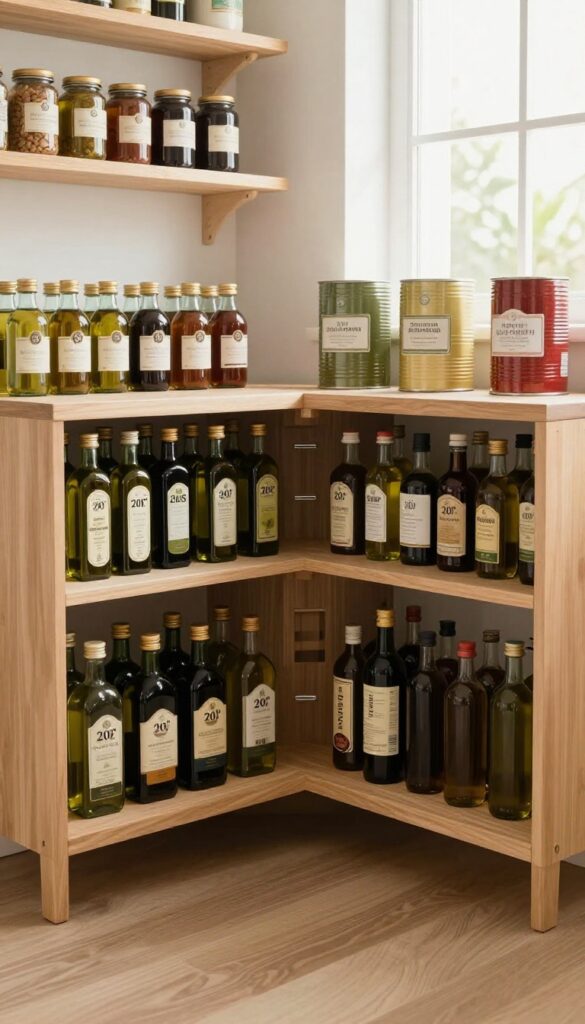
Corners are the Bermuda Triangle of pantries—stuff goes in and never comes out. A large lazy Susan placed right on the floor changes that. It spins smoothly, bringing every item within reach and turning a dead zone into prime real estate.
Floor-level lazy Susans work best for heavy, bulky items like jugs of oil, bulk spices, or large cans. Choose one with a sturdy base and a non-slip surface so bottles don't topple during rotation. Look for diameters of 18 to 24 inches to maximize corner space without blocking adjacent shelves.
Place it in a corner that's hard to reach otherwise, and spin it to grab what you need—no more digging or forgetting what's hiding in the back.
Size And Material Matter
A flimsy plastic lazy Susan can warp under weight. Go for a heavy-duty metal or thick bamboo turntable that can handle several gallons of liquid without wobbling. Clear acrylic options let you see contents from above, which is handy when you're scanning from eye level.
Group Similar Items Together
Use the lazy Susan to corral a category: all your vinegars and oils, or a collection of canned tomatoes. When everything on the turntable serves the same purpose, you grab one and spin—no hunting. Label the surface with a small sticker if you share the pantry with others.
Pair With A Low Shelf Above
If your corner has a shelf above, adjust its height so the lazy Susan can spin freely underneath. This double-decker setup uses vertical space efficiently: the shelf holds lighter jars and the floor turntable handles the heavy stuff.
7. Stackable Plastic Bins with Labels
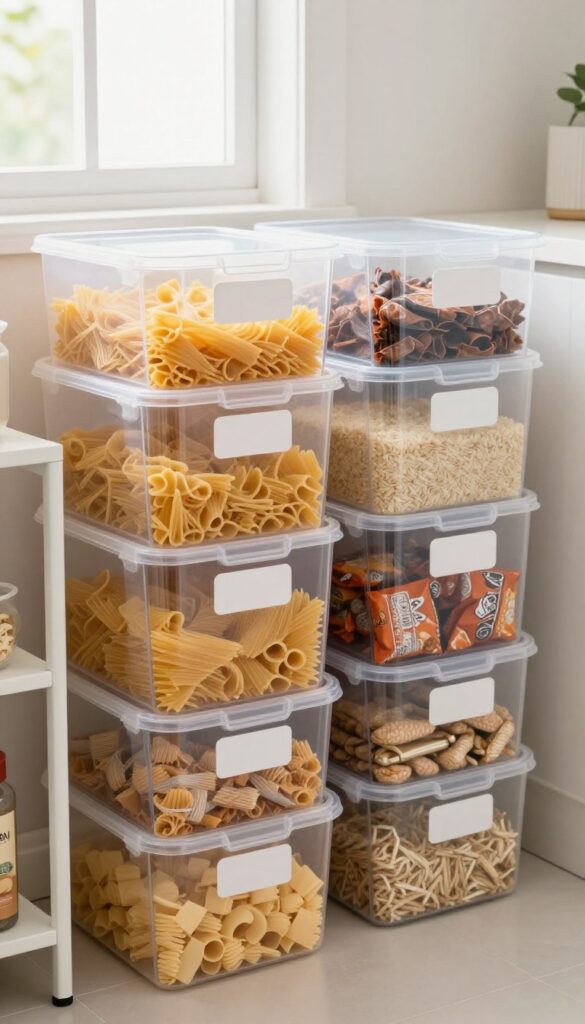
Clear plastic bins are a lifesaver for floor-level pantry storage. They keep items visible and protected from dust, while stacking maximizes vertical space. Pair them with labels, and you'll never have to dig through a pile again.
Group By Category
Sort your pantry staples into logical groups: baking supplies, snacks, canned goods, pasta and rice, or breakfast items. Assign each group its own bin. This way, you can grab the entire bin when cooking instead of hunting for individual items.
Label Everything Clearly
Use a label maker or simple chalkboard stickers to mark each bin. Include the category name and, if helpful, an expiration date reminder. Labels make it easy for everyone in the household to find and return items to the right spot.
Stack Strategically
Place heavier bins on the bottom and lighter ones on top. For frequently used items, keep them in a middle stack for easy access. Consider using bins with snap-tight lids to prevent tipping when you pull out a lower bin.
8. Over-the-Door Shoe Rack for Small Items
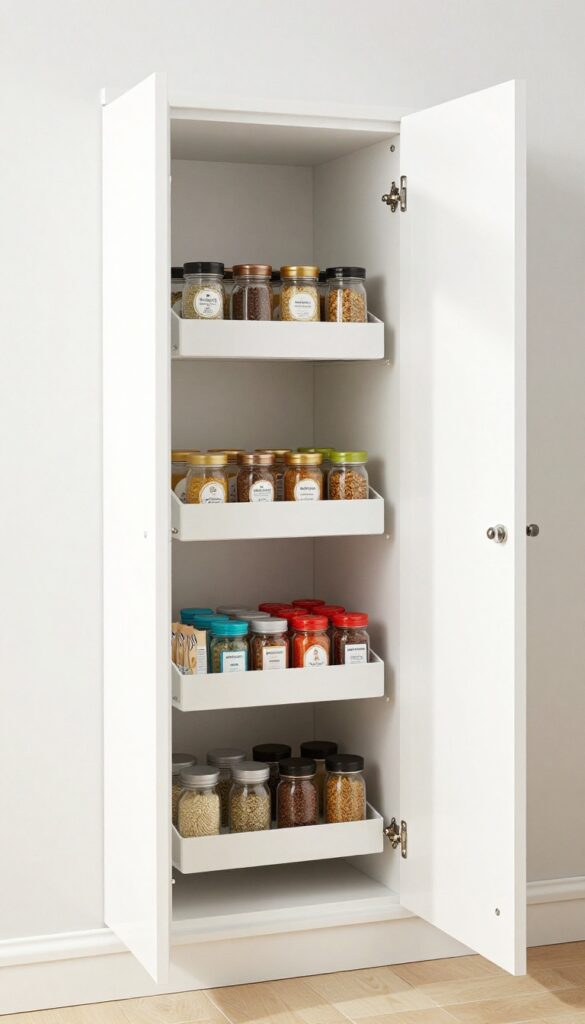
Pantry doors are often overlooked, but they offer prime vertical storage. An over-the-door shoe rack, typically used for footwear, can be repurposed to hold spices, seasoning packets, and small jars. This keeps tiny items off the floor and organized at eye level, freeing up valuable shelf space for larger staples.
By hanging a clear or mesh shoe rack on the inside of your pantry door, you transform dead space into a highly accessible storage zone. Each pocket can hold a different category—spices on one side, sauce packets on another. This method is especially useful for pantries with limited floor space, as it utilizes the door's full height without taking up any floor area.
Choosing The Right Rack
Opt for a rack with small, clear pockets so you can see contents at a glance. Mesh racks are breathable but may let small items slip through. Ensure the rack has sturdy hooks that fit over your door without damaging it.
Measure the door's thickness and clearance to avoid interference with shelves or hinges.
Organizing By Frequency
Place everyday items like salt, pepper, and cooking oil in the lower pockets for easy reach. Reserve higher pockets for less frequently used spices or backup packets. Group similar items together—baking spices in one column, Italian seasonings in another—to speed up meal prep.
Weight And Stability Tips
Avoid overloading the rack, as heavy jars can cause it to sag or pull the door off balance. Stick to lightweight items like spice jars, seasoning envelopes, and small tea bags. If the rack feels unstable, use adhesive hooks or a tension rod at the bottom to secure it against the door.
9. Under-Shelf Baskets for Extra Floor Clearance
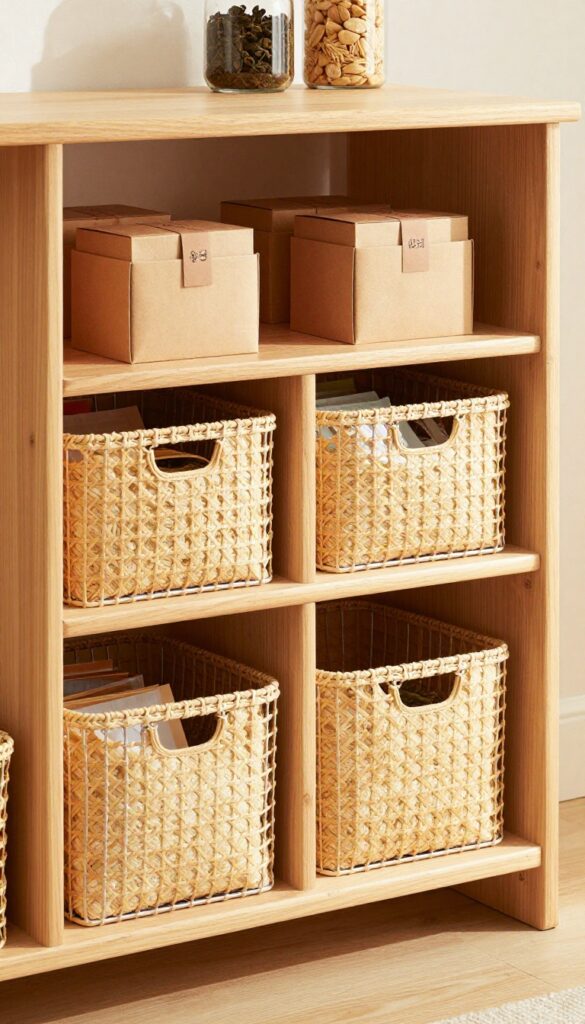
If your pantry shelves are fixed and you're short on floor space, look up. The underside of each shelf is a blank canvas waiting to hold lightweight items. Under-shelf baskets slide right onto the shelf above, hanging down to create a second layer of storage without touching the floor.
They're perfect for tea bags, spice packets, or snack bars—things you grab often but don't need a whole bin for.
These baskets are a quick fix for reclaiming vertical real estate. They attach with hooks or clips that grip the shelf edge, so no drilling required. Because they hang, they keep the floor clear for larger items like bulk bags or small appliances.
Stick to lighter items to avoid sagging, and you'll double your storage in seconds.
Easy Installation, No Tools
Most under-shelf baskets come with adjustable hooks that fit standard shelf thicknesses. Just slide them on and they're secure. You can reposition them anytime without leaving marks.
It's a rental-friendly solution that takes two minutes per basket.
Best For Light, Daily-use Items
Resist the urge to load these with canned goods. They work best for lightweight pantry staples like tea, coffee filters, instant oatmeal packets, or small spice jars. Keep them near the front so you can grab what you need without moving other things.
Combine With Shelf Risers For Double Duty
For even more efficiency, use shelf risers on top of the shelf and under-shelf baskets below. This creates three tiers of storage in the same vertical space. The top holds taller items, the middle catches everyday staples, and the basket stores the smallest items.
10. Magnetic Strips for Metal Lids and Tools
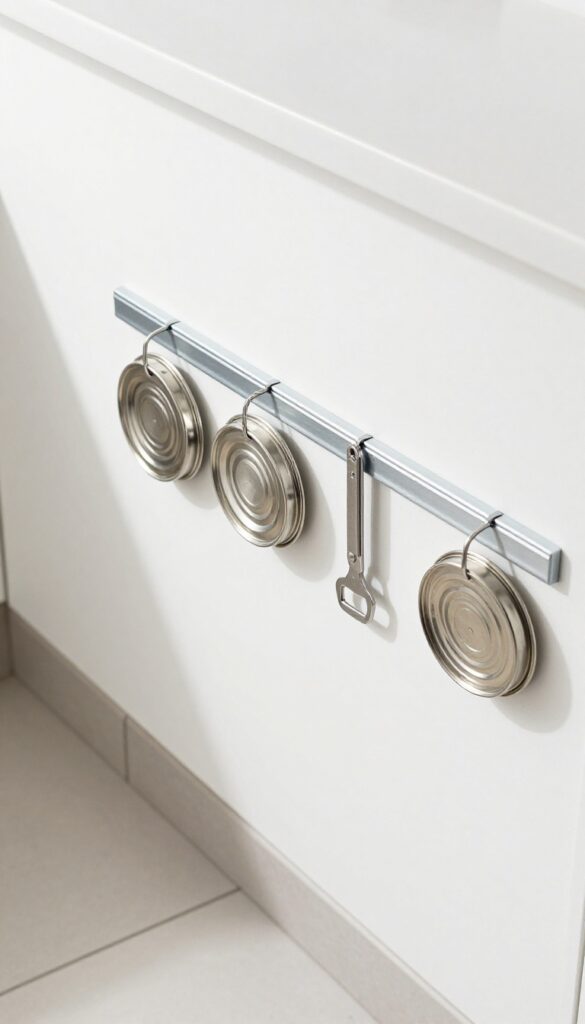
That awkward gap between the bottom shelf and the floor can become a tiny command center with a magnetic strip. Instead of letting metal lids, bottle openers, or small tools clutter the floor, mount a strip on the wall just above the baseboard. It's a zero-effort way to keep frequently used items within easy reach without taking up any shelf space.
Magnetic strips are cheap, easy to install, and surprisingly versatile. They work best on walls near the floor where you'd otherwise have to bend down to grab things. Use them to hold metal jar lids so you can quickly find the right size, or clip on bottle openers and small kitchen shears.
The key is to keep the strip low enough to be accessible but high enough to avoid kicking items off.
What To Store On The Strip
Think about the metal items you use often but hate digging for. Metal measuring spoons, small tongs, jar openers, and even lightweight metal spice tins can hang neatly. For pantry staples like canned goods, you can attach the lids of frequently used cans (like tomato paste or coconut milk) so you never lose them.
Installation Tips For Low Walls
Use heavy-duty adhesive strips or screws if your wall can handle them. Place the strip at least 4 inches off the floor to avoid dust and moisture. Test the strength by sticking a few heavy lids before loading it up.
If you're renting, command strips work fine for lighter items.
Alternative Uses Beyond Lids
Don't limit yourself to lids. You can also hang small metal baskets (using magnetic hooks) to hold packets of seasoning or tea bags. Or attach a magnetic knife strip to keep paring knives off the counter and within reach near the pantry floor.
11. Floor Mat with Drainage for Wet Items
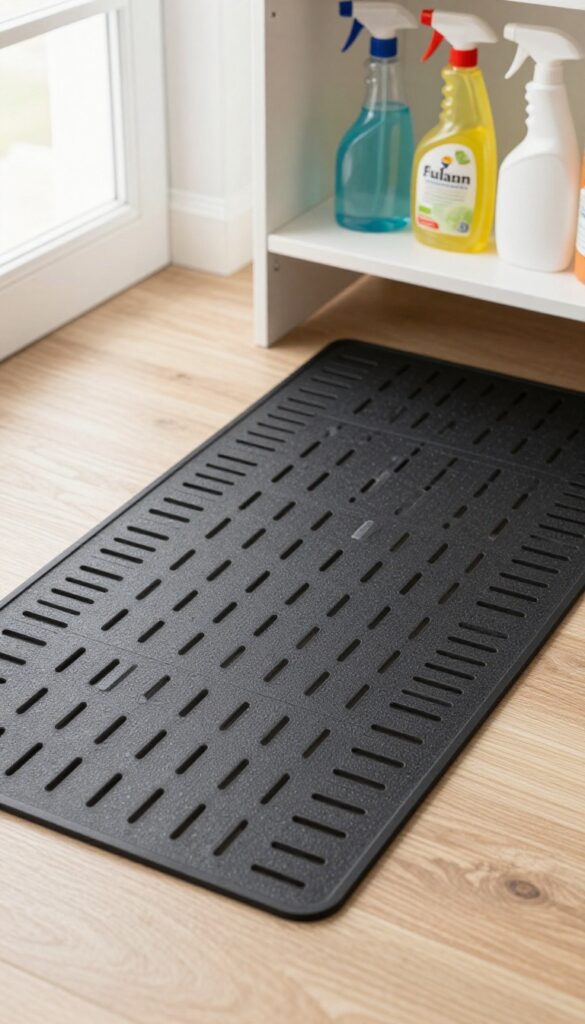
Pantry floors often take a beating from damp bottles and muddy shoes. A simple rubber mat with drainage holes solves that problem neatly. It catches drips and lets air circulate underneath, so moisture doesn't pool and cause mildew or warping.
This is a low-cost upgrade that makes a big difference in high-traffic pantries or mudroom-adjacent spaces. The mat sits flat on the floor and channels water away from stored items, keeping everything dry and clean. It's especially handy if you stash rain boots, cleaning supplies, or reusable water bottles near the pantry.
Why Drainage Matters
Solid mats trap moisture underneath, which can lead to mold growth and floor damage over time. A mat with drainage holes allows air to flow freely, so water evaporates quickly. This simple design choice extends the life of both the mat and your pantry floor.
Best Spots For This Mat
Place it near the entrance of the pantry if you often come in with wet shoes or dripping umbrellas. It also works great under a shelf where you store spray bottles or plant misters. The mat catches any accidental leaks and keeps the floor from getting slippery.
Maintenance Tips
Rinse the mat with a hose or in the shower every few weeks to remove dirt and debris. Let it dry completely before putting it back. For extra freshness, scrub with a mild soap solution once a month.
This keeps the mat functional and odor-free.
12. Corner Pull-Out Shelves for Deep Cabinets
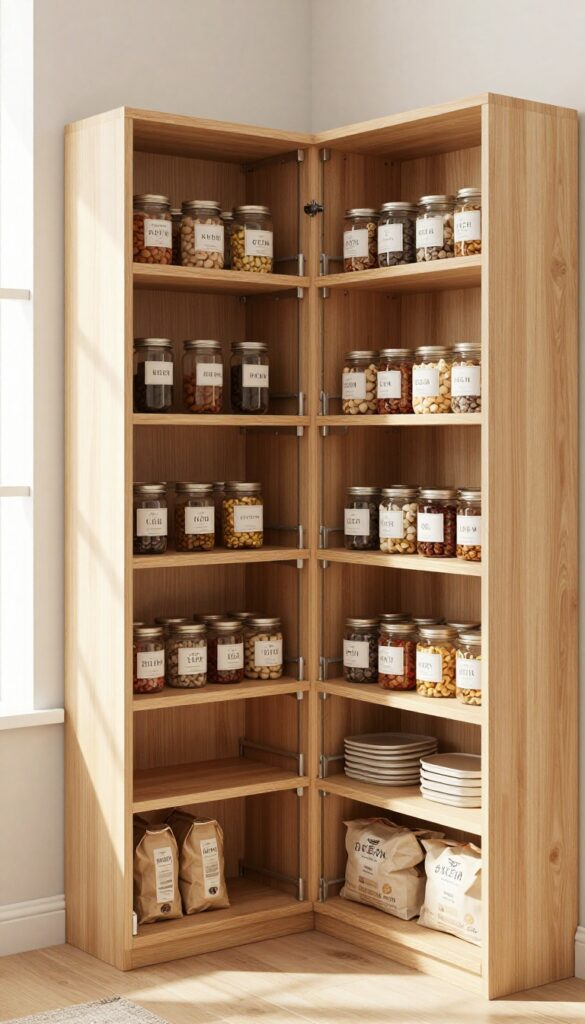
Deep corner cabinets are notorious for swallowing items whole. You stash a bag of lentils in the back, and it doesn't reappear until you move out. A corner pull-out shelf system that sits on the floor changes all that.
It uses a sliding mechanism to bring hidden items forward, making deep corners fully accessible. No more kneeling, groping, or losing things to the abyss.
These systems are designed to fit into standard corner cabinets, but they can also be installed in deep pantries with a corner layout. The shelves are typically made of sturdy wire or solid wood, and they glide out smoothly on full-extension slides. You can load them with heavy cans, jars, or bulk bags without worrying about stability.
The key is to measure your cabinet depth and width accurately before buying. Many kits come with adjustable shelves, so you can customize the height to fit tall bottles or short spice jars. Installation is straightforward if you have basic tools, but you can also hire a handyman for a perfect fit.
Why Floor-mounted Pull-outs Work Best
Floor-mounted systems are more stable than ones that hang from the shelf above. They can handle heavier loads without sagging, and they don't require you to drill into the cabinet top. The slides are attached to the floor of the cabinet, so the entire unit sits solidly.
This is especially useful for corner cabinets where the floor is often the only flat, level surface.
Choosing The Right System
Look for systems with full-extension ball-bearing slides for smooth operation. Soft-close features are a nice bonus if you want to avoid slamming. Wire shelves are lightweight and allow air circulation, while solid shelves are better for small items that might fall through.
Measure the diagonal opening of your corner cabinet to ensure the shelves will clear the door frame when pulled out.
Installation Tips For A Diyer
Start by removing the cabinet door and any existing shelves. Assemble the pull-out unit according to the instructions, then slide it into the cabinet. Use a level to make sure it's straight before securing the slides to the floor.
Most kits include screws, but you may need a drill and a screwdriver. If your cabinet floor is uneven, use shims to level the slides. Test the movement before adding weight.
13. Pegboard Wall for Hanging Floor-Level Tools
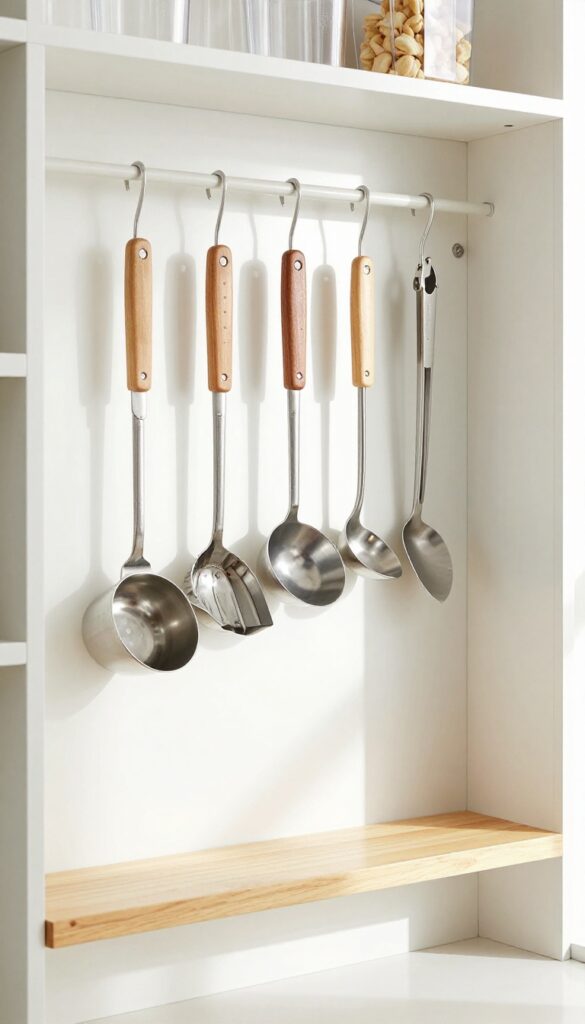
Pegboards aren't just for workshops. Mount one low on your pantry wall, right above the floor, and you've got a customizable spot for all those awkward kitchen tools that never seem to fit in drawers. Measuring cups, funnels, scoops, and even small tongs can hang within easy reach without taking up any shelf space.
This idea works best if you have a bare wall section near the floor—maybe beside a lower cabinet or in a narrow gap. The pegboard keeps items visible and accessible, so you're not rummaging through a drawer every time you need a measuring spoon. Plus, it frees up shelf space for bulkier items.
Choose a pegboard with a lip or small ledge at the bottom to catch anything that might slip off.
Choosing The Right Pegboard
Look for a pegboard that's moisture-resistant, especially if your pantry tends to be humid. Plastic or coated metal pegboards hold up better than raw wood. You can also paint a wooden one with a durable enamel to match your pantry.
Size-wise, a 2×2-foot panel is usually enough for a focused tool station.
What To Hang
Stick with lightweight, frequently used items: measuring cups and spoons, a kitchen scale, a funnel, a garlic press, or a zester. Avoid heavy cast-iron pieces that could pull the pegboard off the wall. Use peg hooks with rubber tips to keep tools from sliding off.
Installation Tips
Mount the pegboard so its bottom edge is about 6 inches off the floor. This leaves room for a small catch tray or a low basket underneath. Use wall anchors rated for the weight of your tools, and make sure the board is level.
Add a small LED strip above for extra visibility.
FAQ
How do I keep pantry floor storage from getting dusty?
Use bins with lids or baskets with liners. Wipe down the floor regularly and consider a small mat to catch debris.
What's the best way to store heavy items on the pantry floor?
Use pull-out bins or rolling carts so you don't have to lift heavy bags. Store heavier items lower to prevent tipping.
Can I use floor storage in a small pantry?
Absolutely. Use vertical pull-out drawers or narrow rolling carts to maximize every inch without cluttering the floor.
How do I prevent moisture damage on the pantry floor?
Use wire baskets or bins with ventilation. Place a moisture absorber or dehumidifier nearby if your pantry is prone to dampness.
What should I avoid storing on the pantry floor?
Avoid storing items that are prone to pests (like open bags of flour) without sealed containers. Also, keep chemicals away from food.
Conclusion
Your pantry floor doesn't have to be a black hole of forgotten items. With a few smart additions like pull-out bins, rolling carts, or tiered risers, you can turn that space into a functional storage hub. Each idea helps you see and reach everything with ease.
Start with one or two changes that fit your pantry's layout. Small tweaks can make a big difference in how your shelves—and your floor—work for you.