13 Clever Camper Pantry Ideas for Easier Everyday Meals
You pull into a campsite after a long drive, hungry and ready to cook. But opening the pantry door reveals a jumble of cans, bags, and boxes that makes finding anything a chore. A well-organized camper pantry changes that—it turns meal prep from a frustrating hunt into a quick, easy process.
The best camper pantry ideas don't require a big budget or major renovations. They're about smart choices: using vertical space, choosing the right containers, and rethinking how you store everyday staples. These 13 ideas are designed for real-world camper life.
Each one solves a common problem—limited space, odd-shaped cabinets, or the need to keep food secure while driving. Let's dive in.
1. Use Magnetic Spice Jars on the Fridge or Wall
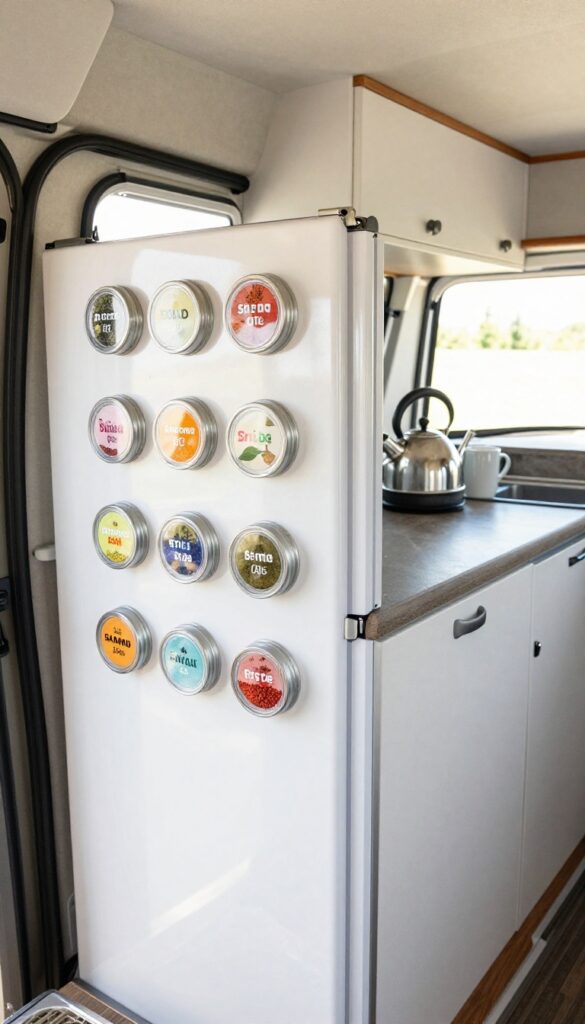
Spices are essential for turning simple camp meals into something flavorful, but they take up a lot of cabinet space. Magnetic spice jars solve this by sticking right to your fridge or a metal strip mounted on the wall. This keeps your spices visible and within reach, without cluttering your limited pantry shelves.
Magnetic spice jars are a game-changer for camper vans and RVs. They use the vertical space that's often wasted, like the side of your fridge or a narrow wall strip. Plus, they keep your spices secure during travel—no more rattling bottles or spilled cumin.
Choose small, clear tins with labels on top so you can grab what you need at a glance.
Choosing The Right Jars
Look for small, round tins with strong magnets. Avoid glass if you're worried about breakage—plastic or metal tins are safer. Make sure the lids seal tightly to keep moisture out.
Clear lids or labels help you identify spices quickly.
Mounting Options
You can attach a metal strip to any wall or cabinet door using adhesive. Some fridges are magnetic, but if yours isn't, a self-adhesive metal sheet works great. Just stick it on, and your jars will hold firmly.
Organization Tips
Group spices by use—like all Italian herbs together or taco seasoning near chili powder. Arrange them in rows or a grid so you can see everything at once. This setup also makes it easy to grab a jar and cook without digging through cabinets.
2. Install Pull-Out Wire Baskets for Deep Cabinets
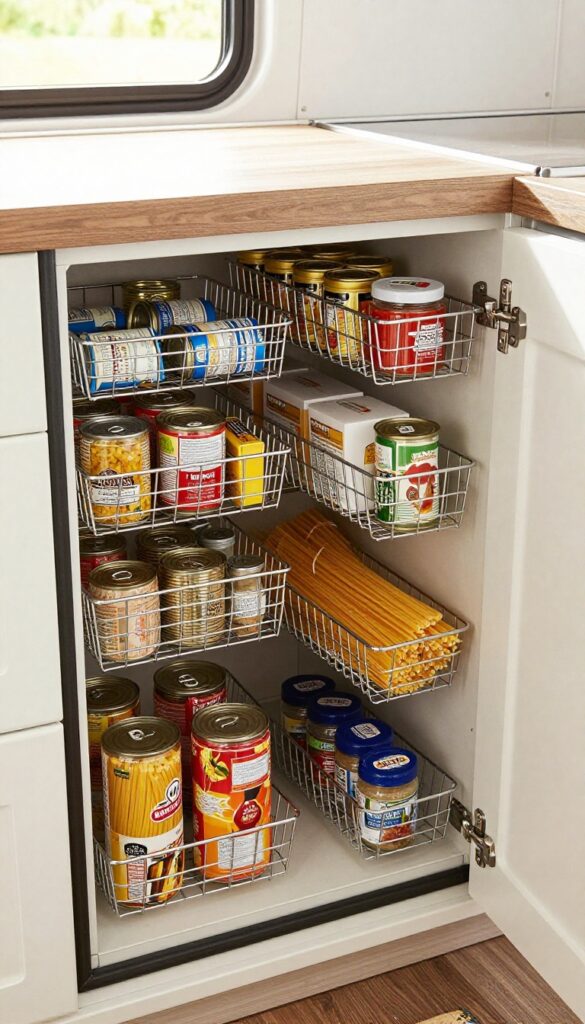
Deep cabinets in campers are black holes for food. You stash a can of beans in the back, and it disappears for weeks—until you find it expired. Pull-out wire baskets fix that by bringing everything into view.
They slide out smoothly, so you can grab what you need without playing hide-and-seek.
Pull-out wire baskets are a game-changer for deep camper cabinets. They let you see and reach every item, reducing food waste and meal prep frustration. Installation is straightforward: measure your cabinet depth and width, choose baskets that fit, and attach them to a sliding track system.
Many RV supply stores sell pre-made kits, or you can DIY with drawer slides and wire baskets from a hardware store. Once installed, organize by category—canned goods in one basket, pasta and rice in another. The baskets also allow airflow, which helps keep dry goods fresh.
For a budget-friendly option, consider using stackable wire bins that slide out manually without a track system.
Measuring And Choosing The Right Baskets
Start by measuring your cabinet's interior width, depth, and height. Standard wire baskets come in sizes like 12×12 inches or 16×16 inches. Make sure to account for the slide mechanism—it adds about an inch on each side.
If your cabinet is unusually narrow, look for slim baskets or consider a custom solution. Heavy-duty baskets with a coated finish resist rust and hold up to the bumps of the road.
Installation Tips For Diyers
Installing pull-out baskets is a weekend project. First, remove cabinet doors for easier access. Attach slide rails to the cabinet floor using screws—make sure they're level.
Then, secure the baskets to the slides. Test the sliding motion before loading. If your cabinet has a lip at the front, you may need to add a spacer to clear it.
Use a level and measure twice to avoid crooked slides.
Organizing Your Pull-out Baskets
Group similar items together: one basket for canned vegetables, another for soups, and a third for dry goods like pasta and rice. Use small bins or dividers inside the baskets to keep smaller packets upright. Label the front of each basket with a chalkboard tag or simple sticker so you know what's inside at a glance.
This system also makes restocking easier—just slide out and see what's low.
3. Store Dry Goods in Clear, Airtight Containers
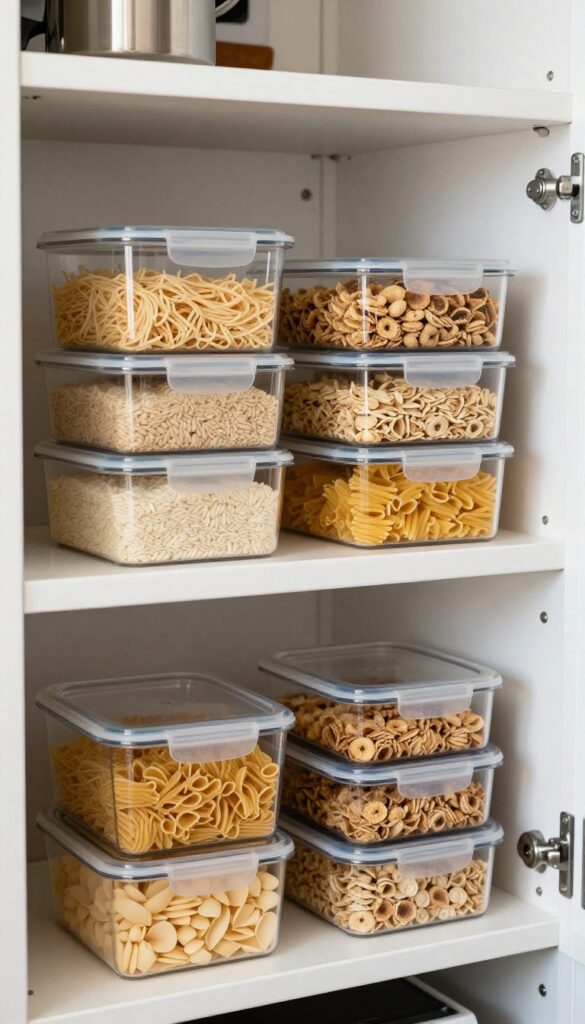
Dry goods like pasta, rice, and snacks are camper pantry staples, but their original packaging is a nightmare on the road. Boxes get crushed, bags spill, and you can never tell how much is left without digging around. Clear, airtight containers solve all that in one tidy system.
Transferring dry goods into clear containers keeps everything fresh longer, prevents messes when you hit a bump, and lets you see at a glance what you have. Stackable shapes make the most of vertical space, and uniform containers create a clean, organized look that makes meal prep feel effortless.
Choose The Right Shapes And Sizes
Square or rectangular containers stack more efficiently than round ones. Look for sets with multiple sizes—small ones for spices or nuts, medium for pasta or cereal, large for flour or rice. Airtight lids with snap locks or gaskets are essential for keeping out moisture and pests.
Label Everything Clearly
Even though containers are clear, labels help you grab what you need without squinting. Use a label maker or waterproof markers on removable tape. Include the contents and the date you transferred them, so you can rotate stock easily.
Maximize Pantry Real Estate
Stack containers on shelves or use tiered racks to see everything at once. If your pantry is deep, pull-out bins or lazy Susans work great. For narrow spaces, use slim containers that fit side by side.
Keep frequently used items at eye level.
4. Hang a Tension Rod for Spray Bottles and Tall Items
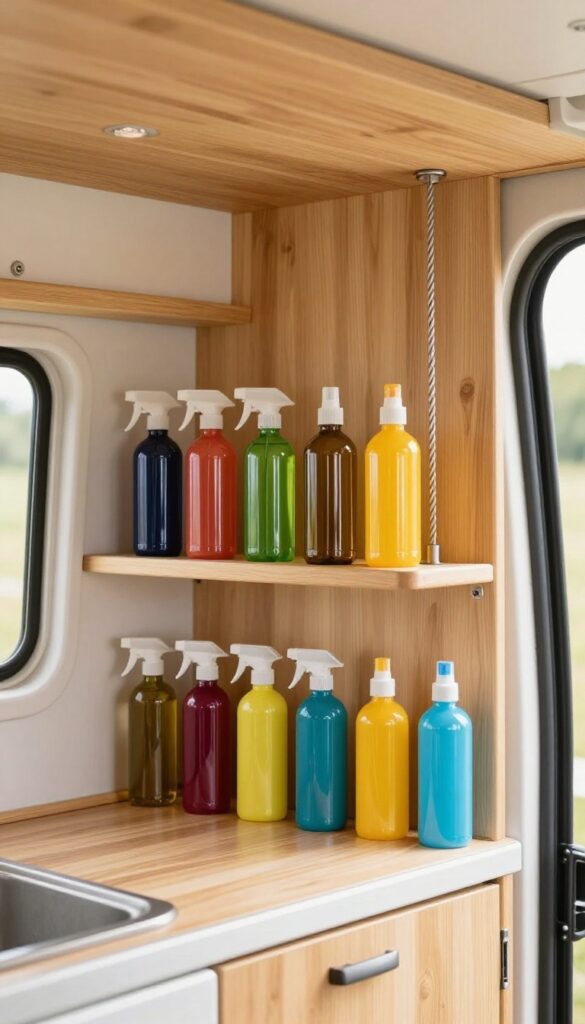
Spray bottles, oil cans, and tall spice jars are notorious for tipping over while you're driving. A simple tension rod can solve that problem in seconds. You can install it vertically or horizontally inside a cabinet to create a stable barrier that keeps everything upright.
This trick works especially well in deep cabinets where tall items tend to fall forward. By wedging a tension rod between the shelf and the cabinet ceiling, you create a custom divider that holds bottles in place. No drilling, no hardware—just a rod that adjusts to fit your space.
Vertical Placement For Maximum Stability
Place the tension rod vertically from the shelf to the cabinet ceiling. This creates a narrow channel that holds spray bottles and tall containers snugly. It's perfect for cabinets that are deeper than they are tall.
You can adjust the rod's length to fit multiple bottles side by side.
Horizontal Placement For A Bottle Barrier
For cabinets with a single row of tall items, install the tension rod horizontally across the front of the shelf. This acts like a guardrail, preventing bottles from sliding forward when you brake or turn. Make sure the rod is tight enough to stay put but not so tight that it damages the cabinet.
5. Use Over-the-Door Organizers for Cans and Jars
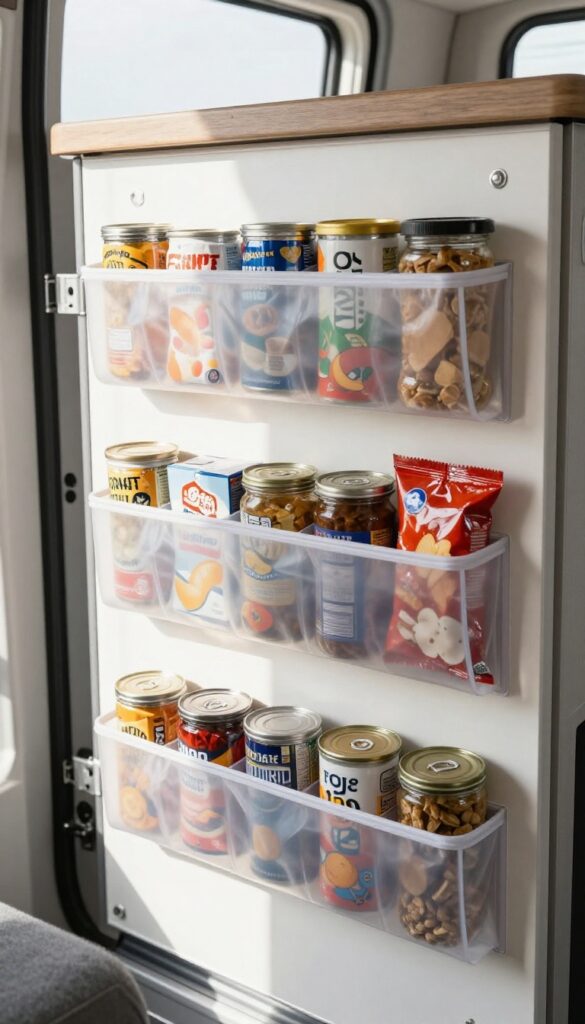
Cabinet doors are often overlooked real estate in a camper pantry. That flat vertical surface can hold a surprising amount of weight if you use the right organizer. A clear over-the-door shoe rack is the perfect solution for stashing canned goods, jars, and snack packs.
Hang a clear over-the-door shoe organizer on the inside of a cabinet door. Each pocket holds cans, jars, or snack packs, maximizing vertical space. This keeps items visible and accessible, preventing the dreaded "where did that can of beans go?
" shuffle. The clear pockets let you see everything at a glance, so you can grab what you need without rummaging.
Choose The Right Organizer
Look for a clear, lightweight shoe organizer with deep pockets—at least 4 inches deep to hold standard cans. Avoid fabric ones that can sag or hide contents. Measure your cabinet door height and width first to ensure a good fit.
Some organizers come with hooks that slip over the top of the door, no drilling required.
Weight And Stability Tips
Don't overload the organizer. Cans and jars are heavy, so stick to one item per pocket and avoid oversized containers. Distribute weight evenly across the door to prevent it from sagging or swinging.
If the door feels too heavy, use the organizer for lighter items like snack packs, spice jars, or condiment packets.
What To Store Where
Use the top pockets for small, frequently used items like spice jars or snack bars. Middle pockets are ideal for standard cans (beans, tomatoes, soup). Bottom pockets can hold heavier jars (pasta sauce, pickles) or larger snack bags.
This setup keeps everything organized by frequency of use.
6. Add a Slim Rolling Cart for Extra Counter Space
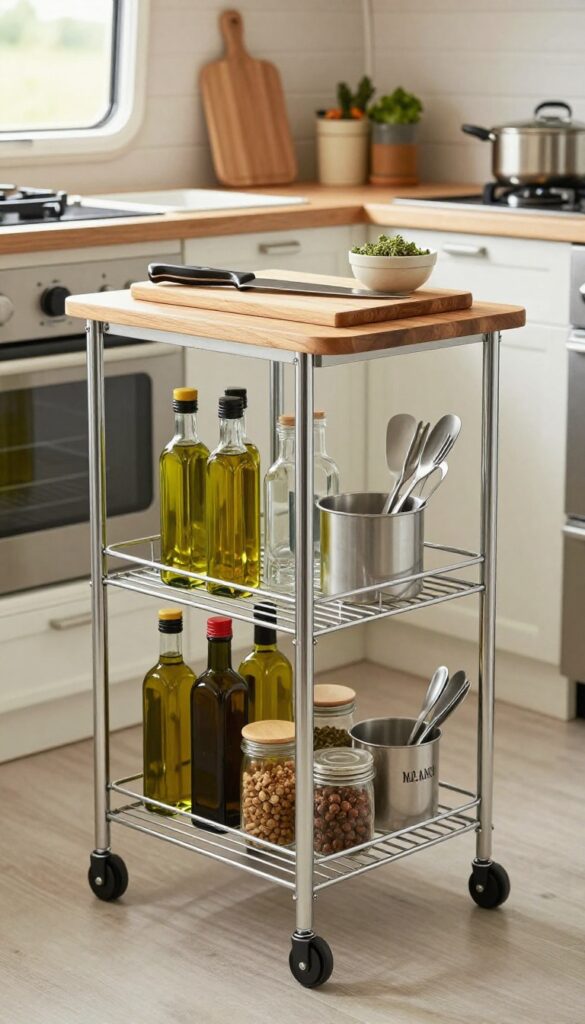
Counter space is prime real estate in a camper, especially when you're cooking multiple dishes. A slim rolling cart slides into narrow gaps between counters or next to the stove, giving you an instant extra surface. Load it with your most-used cooking essentials—oils, spices, utensils—so everything is within arm's reach.
When you're done, roll it back into its spot.
A slim rolling cart is one of the most versatile additions to a camper kitchen. It provides extra counter space exactly where you need it and keeps frequently used items organized and accessible. Look for a cart that's narrow enough to fit in unused gaps—typically 6 to 12 inches wide—and has locking wheels so it stays put while driving.
Use the top surface for a cutting board or hot pads, and the shelves below for jars, bottles, and tools. This idea works especially well in campers with galley-style kitchens where counter space is tight.
Choosing The Right Cart
Measure the gap where you plan to store the cart. Most campers have a space between the counter and the wall or between the stove and the sink. Look for a cart with a weight capacity that can handle your daily cooking items.
Stainless steel or coated wire shelves are easy to clean and resist rust. Make sure the wheels lock securely to prevent movement during travel.
What To Store On It
Keep the cart focused on items you reach for constantly. Oils, vinegar, soy sauce, and cooking spray are perfect for the top shelf. Spices in small jars or tins fit neatly on a middle shelf.
Utensils like spatulas, tongs, and ladles can hang from hooks on the side or sit in a crock on the top. Reserve the bottom shelf for heavier bottles or a small trash bin.
Using It As A Prep Station
When cooking, roll the cart next to the stove or your main prep area. The top surface becomes extra counter space for holding ingredients, a cutting board, or a hot pan. After the meal, roll it back to its parking spot.
This keeps the cooking zone clutter-free and makes cleanup faster.
7. Label Everything with a Label Maker
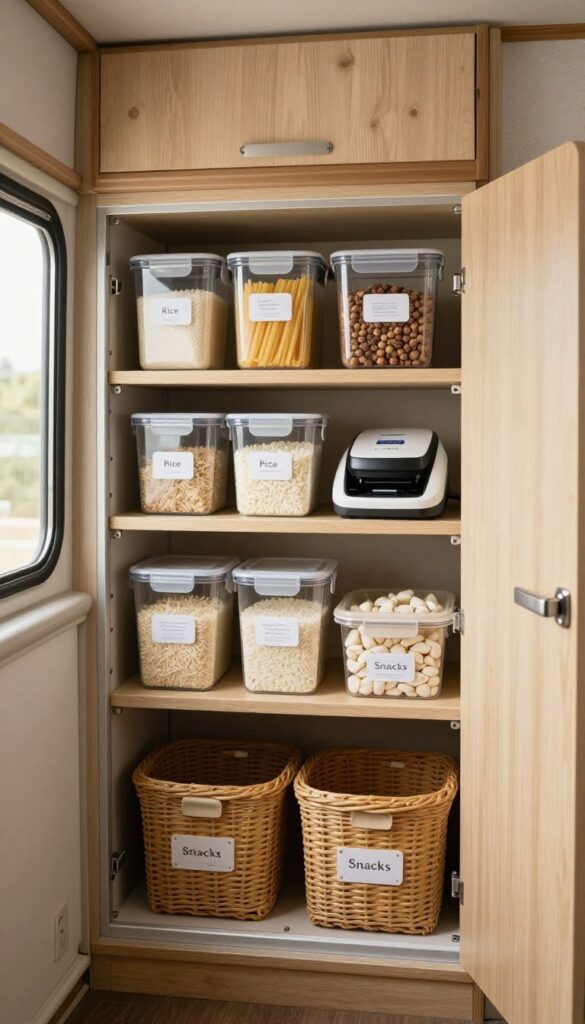
A label maker might seem like overkill for a camper pantry, but it's one of the most practical tools you can buy. When every inch counts, knowing exactly where things belong saves time and frustration. Labels also help everyone in the family stick to the system, so your organization lasts longer than one trip.
Labeling isn't just about aesthetics—it's about efficiency. When you label shelves, bins, and containers, you eliminate the guesswork during meal prep. No more pulling out five containers to find the rice.
Plus, after restocking, anyone can put items back in the right spot without asking where things go. This simple habit keeps your pantry orderly even when you're in a hurry.
Label Shelves For Quick Scanning
Start by labeling the shelves themselves. Use a label maker to print clear, readable text for categories like "Canned Goods, " "Pasta & Rice, " or "Snacks. " This way, you can grab what you need without rummaging.
If you have deep cabinets, shelf labels act like a map, guiding you to the right zone instantly.
Label Containers For Easy Identification
Transfer dry goods into clear containers and label each one with its contents and expiration date. This prevents mix-ups—like grabbing salt instead of sugar—and helps you rotate stock. Use waterproof labels or a label maker with durable tape so they don't peel off in humid conditions.
Label Bins And Baskets For Family Buy-in
If you share the camper with others, labeled bins and baskets make it easy for everyone to maintain order. Assign a bin for "Breakfast Items" or "Baking Supplies. " When everyone knows the system, you spend less time reorganizing and more time enjoying your trip.
8. Use Collapsible Silicone Containers for Leftovers
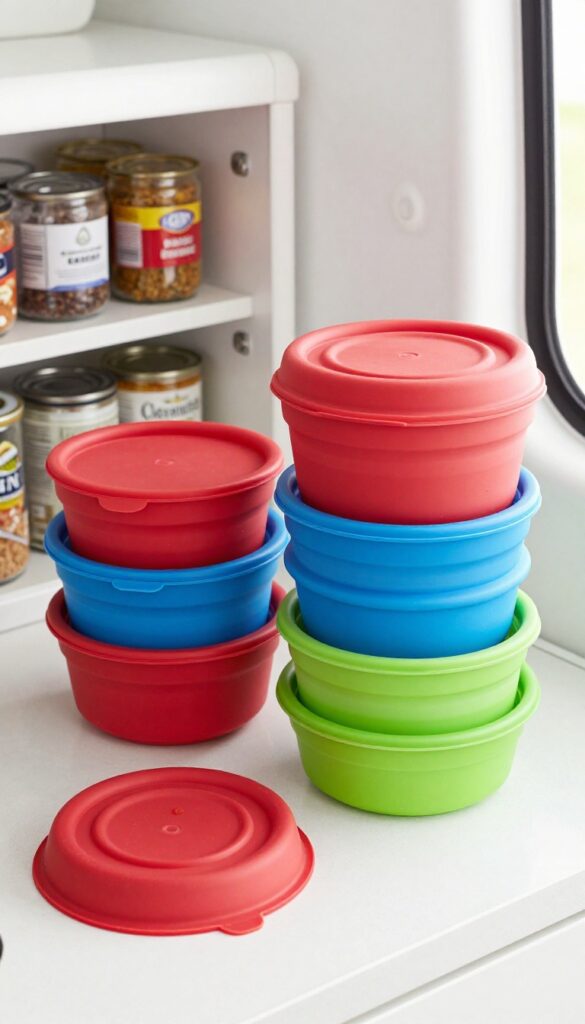
Leftovers are a camper's best friend—they save time, reduce waste, and make for easy lunches. But storing them in bulky containers eats up precious pantry space. Collapsible silicone bowls and containers solve that problem by flattening down when not in use.
These flexible containers are perfect for leftovers, prepped ingredients, or even as mixing bowls. They're lightweight, durable, and often microwave-safe, making them a versatile addition to your camper kitchen.
Why Silicone Wins On The Road
Unlike glass or rigid plastic, silicone containers can be squished into tight spaces. They don't crack if you drop them, and they handle hot foods without warping. Plus, they're easy to clean—most are dishwasher safe.
Best Uses In A Camper Pantry
Use them for storing leftover chili, pasta, or cut veggies. They also work great as prep bowls for chopped onions or bell peppers. When empty, stack them flat in a drawer or stand them upright in a cabinet.
What To Look For
Opt for BPA-free, food-grade silicone with a tight-sealing lid. A set with multiple sizes (like 1-cup, 2-cup, and 4-cup) covers most needs. Avoid cheap versions that might leak or retain odors.
9. Store Lids Separately in a Small Bin
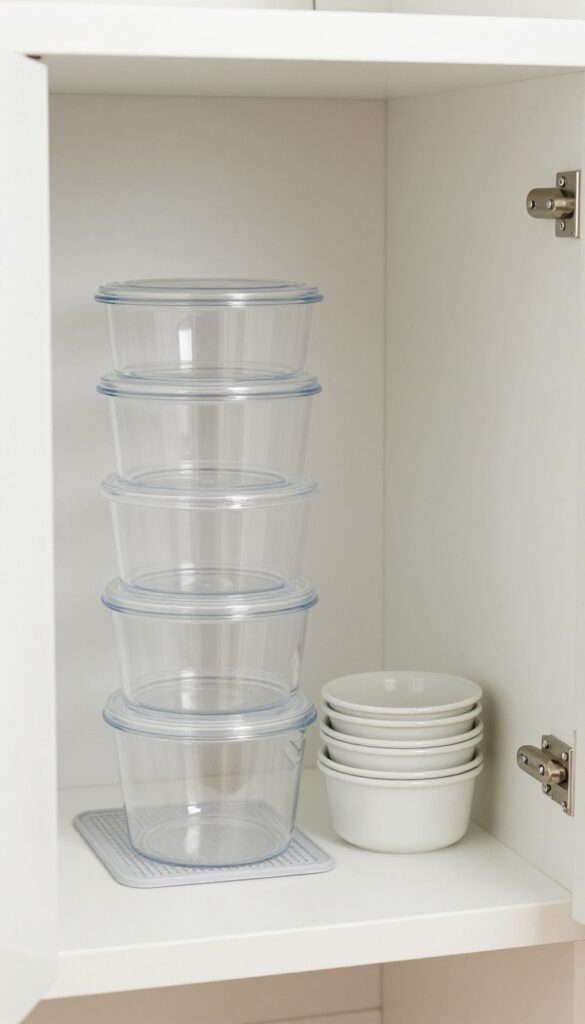
Pot lids, container lids, and cutting boards love to slide around and create a tangled mess in a camper pantry. A simple vertical bin or file organizer changes everything by giving each lid its own slot. No more digging through a pile of mismatched lids to find the one that fits.
A dedicated lid storage system keeps your pantry neat and saves time during meal prep. By separating lids from their pots or containers, you can stack pots inside each other and place lids upright in a bin. This also protects lids from scratches and warping.
Choose The Right Bin
Look for a slim, vertical bin or a magazine file holder that fits your cabinet depth. Clear bins let you see lid sizes at a glance. Adjustable dividers are great for mixing small and large lids.
Sort By Size
Arrange lids from smallest to largest so you can grab the right one instantly. Keep pot lids together and container lids in a separate section. This also helps you see if you're missing a lid.
Secure While Driving
Place a non-slip mat under the bin or use a bungee cord across the front to keep lids from flying out on bumpy roads. A small tension rod inside the cabinet can also hold the bin in place.
10. Mount a Paper Towel Holder Under a Cabinet
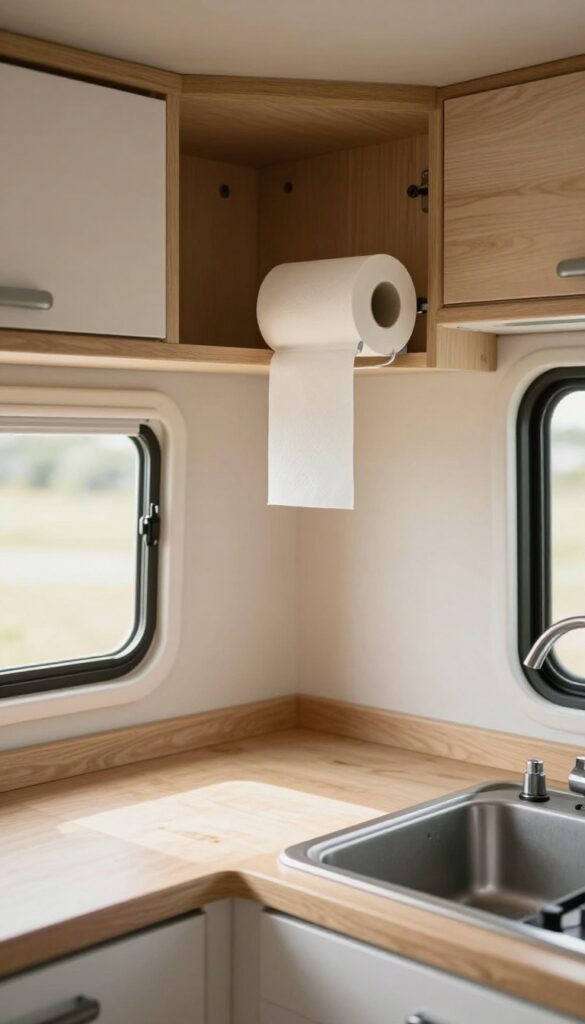
Paper towels are a camper kitchen essential, but finding a spot for the roll can be tricky. Counter space is precious, and a bulky roll sitting out just gets in the way. The fix is simple: mount a spring-loaded paper towel holder underneath an upper cabinet.
It keeps the roll accessible but out of the way, and you can tear off sheets one-handed while cooking.
Why Under-cabinet Works Best
In a camper, every inch of counter space matters. An under-cabinet mount puts the paper towels right where you need them—near the stove or sink—without taking up any workspace. Plus, it keeps the roll clean and dry, away from spills and splatters.
Installation Tips For Rvs
Most spring-loaded holders use adhesive or screws. For campers, heavy-duty adhesive strips work well and won't damage cabinets. Just make sure the surface is clean and dry before sticking.
If you prefer screws, use short ones to avoid piercing through the cabinet.
What To Look For In A Holder
Choose a holder that fits standard paper towel rolls and has a tension spring to prevent unraveling while driving. Some models also have a built-in cutter bar for easy tearing. A compact, all-metal design will hold up better on bumpy roads.
11. Use Binder Clips to Seal Bags and Clip Them to Shelves
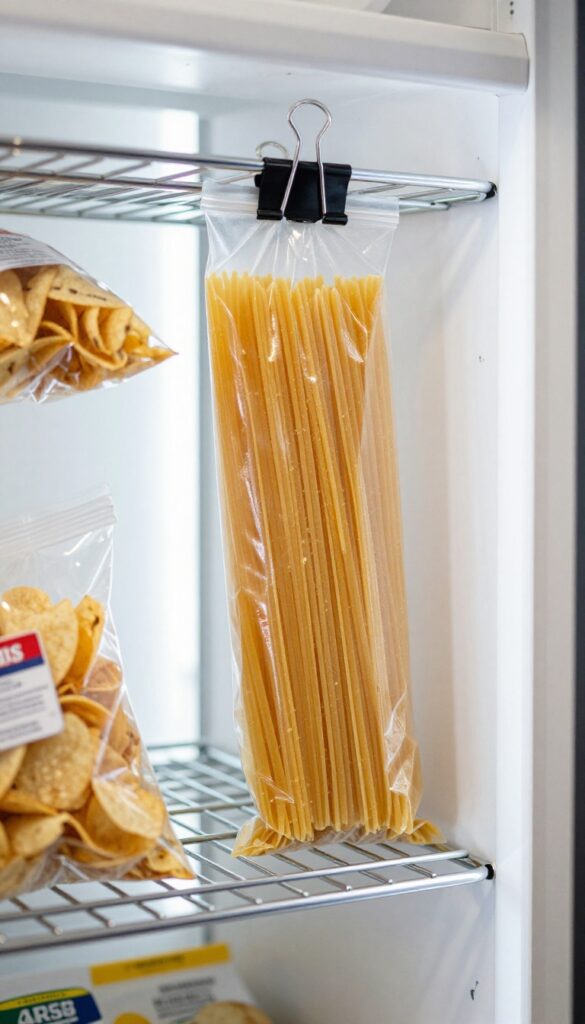
Binder clips are one of those cheap, everyday items that can solve a surprising number of camper pantry problems. They cost pennies each, take up almost no space, and can be used in dozens of ways. The most useful trick?
Using them to seal open bags of chips, pasta, rice, or snacks, then clipping those bags to a wire shelf to keep them upright and organized.
Binder clips are incredibly versatile for camper pantry organization. They can seal bags tightly to keep food fresh, and their strong grip allows you to clip bags to wire shelves, preventing them from tipping over during travel. This simple hack saves space and keeps your pantry tidy.
Seal Bags Tightly
Instead of struggling with twist ties or bag clips that fall off, use a binder clip to seal the open end of a bag. Fold the bag top over a few times, then clip it shut. The strong spring holds even heavy items like rice or flour securely, keeping air out and freshness in.
Clip Bags To Wire Shelves
Once a bag is sealed, clip it directly to a wire shelf in your pantry. The clip holds the bag upright, so it doesn't slide around or spill. This works great for bags of chips, pasta, or dried fruit.
You can also clip multiple bags side by side, making them easy to grab.
Label And Color-code
Binder clips come in various sizes and colors. Use different colors to categorize items—red for snacks, blue for grains, green for baking supplies. You can also write the contents on a small piece of paper and clip it to the bag, making identification quick.
12. Create a 'First In, First Out' System with Canned Goods
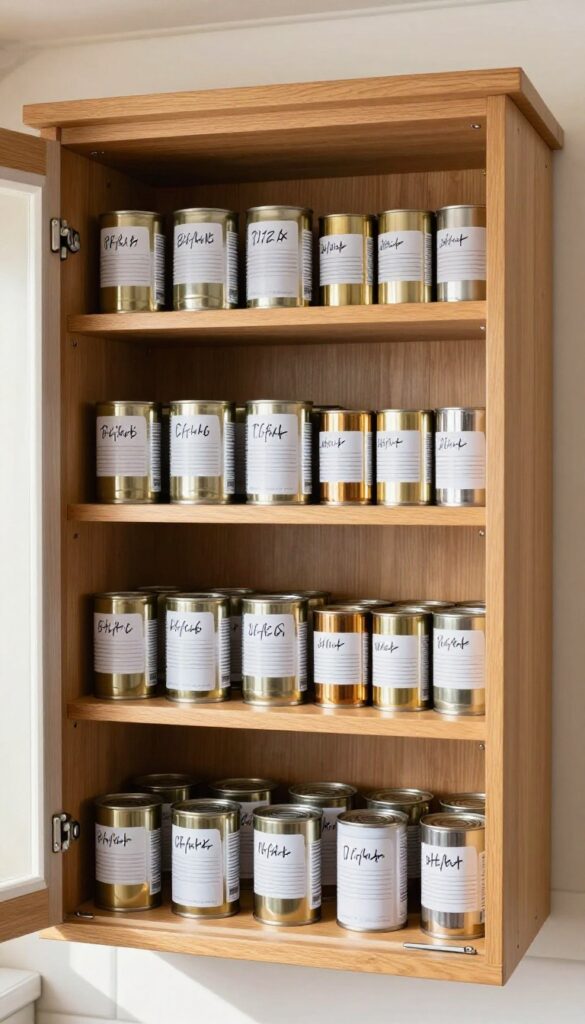
Canned goods are a camper pantry staple, but they tend to pile up and get buried. Before you know it, you're digging through expired beans while fresh ones sit untouched. A simple 'first in, first out' system keeps your rotation on track and your meals waste-free.
The concept is straightforward: use older cans first. But in a cramped camper pantry, that's easier said than done. The trick is to set up your storage so that the oldest items are always at the front, ready to grab.
This not only reduces waste but also saves you from the frustration of discovering a forgotten can of soup at the back of the cabinet after its prime.
Single Row Storage
Instead of stacking cans two or three deep, arrange them in a single row. When you add new cans, place them at the back and pull the older ones forward. This takes a bit of discipline, but it's the simplest way to maintain rotation.
If you have deep cabinets, consider using a shallow shelf or a tension rod to create a single-file lane.
Can Dispensers And Organizers
For a more hands-off approach, invest in a can dispenser. These gravity-fed racks automatically roll the oldest can to the front when you take one out. They come in various sizes to fit standard camper cabinets and work perfectly for soda cans, soup cans, and vegetables.
Some even stack, allowing you to store multiple rows without losing the FIFO benefit.
Label And Date Your Cans
Even with a good system, it's smart to mark your cans with the purchase date. Use a permanent marker or a label maker to write the month and year on the top or bottom. This way, you can quickly check if a can is still good, and you'll know which ones to use first.
It's a small habit that pays off when you're cooking on the road.
13. Dedicate a Small Bin for 'Meal Kits'
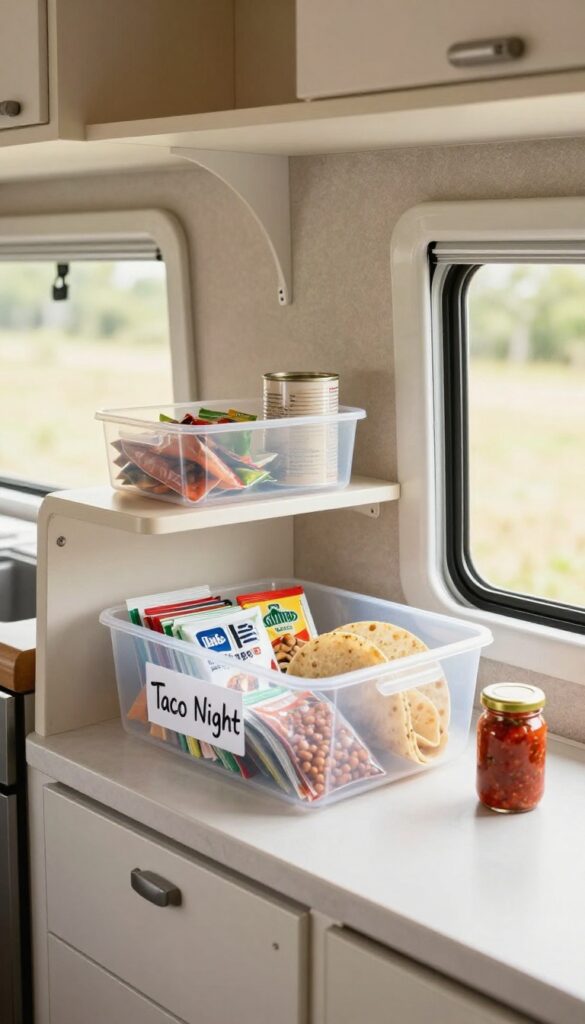
Meal planning on the road can feel like a puzzle, but pre-packed meal kits simplify everything. Instead of digging through the pantry for each ingredient, you grab one bin and you're ready to cook. This idea saves time, reduces stress, and makes camp cooking feel effortless.
The concept is simple: choose a few favorite meals—taco night, pasta with sauce, stir-fry—and pack all non-perishable ingredients into separate bins. Label each bin with the meal name and any cooking instructions. When you're ready to eat, just grab the bin and any fresh items you need.
This system also helps with inventory management; you can see at a glance what meals you have left and restock accordingly.
Choosing The Right Bins
Look for clear, stackable bins with lids so you can see contents and secure them during travel. Size matters: a bin that fits one complete meal without excess space is ideal. Consider using fabric cubes or collapsible containers if space is tight.
What To Include In A Meal Kit
For taco night, include taco seasoning, canned beans, tortillas, and a small jar of salsa. For pasta, pack pasta, a jar of sauce, and a packet of Parmesan. Don't forget any shelf-stable extras like oil or spices that are specific to the meal.
Keeping It Fresh
If a meal requires fresh produce (like lettuce for tacos), store it separately and add a note on the bin. You can also include a small dry-erase board on the bin to list any fresh items needed. This keeps the kit flexible and prevents spoilage.
FAQ
What are the best containers for camper pantry storage?
Clear, airtight, and stackable containers work best. Look for BPA-free plastic or lightweight glass. Square or rectangular shapes maximize space.
How do I keep pantry items from sliding while driving?
Use non-slip shelf liners, tension rods, or small bins with lids. Magnetic strips and over-the-door organizers also secure items in place.
Can I use regular home organizers in a camper?
Yes, but choose lightweight, compact options. Avoid heavy glass or bulky items. Many home organizers like tension rods and wire baskets work perfectly.
How often should I reorganize my camper pantry?
Do a quick refresh after each trip. Restock, check expiration dates, and adjust organization based on what you used most. A seasonal deep clean is also helpful.
What's the most important tip for small camper pantries?
Maximize vertical space. Use stackable containers, over-the-door organizers, and wall-mounted racks. Every inch counts in a tiny pantry.
Conclusion
Clever camper pantry ideas aren't about perfection—they're about making every meal easier, even in tight spaces. Start with one or two tweaks that solve your biggest hassle, like sliding bins for deep cabinets or a door rack for spices. Small changes add up fast.
Before long, you'll spend less time digging and more time enjoying your campsite cooking. Your future self will thank you at every meal.