23 Oven Cleaning Hacks With Baking Soda for Tough Grime
Your oven has seen better days—grease splatters, burnt spills, and that stubborn baked-on grime that laughs at regular cleaners. Baking soda is the affordable hero you need, and these 23 hacks target every type of mess, from cloudy glass doors to caked-on racks. Each method is tested and practical, using ingredients you already have.
No harsh fumes, no endless scrubbing. Just a sparkling oven and a lot less effort.
Ready to tackle the toughest spots? Let's dive into the hacks that actually work.
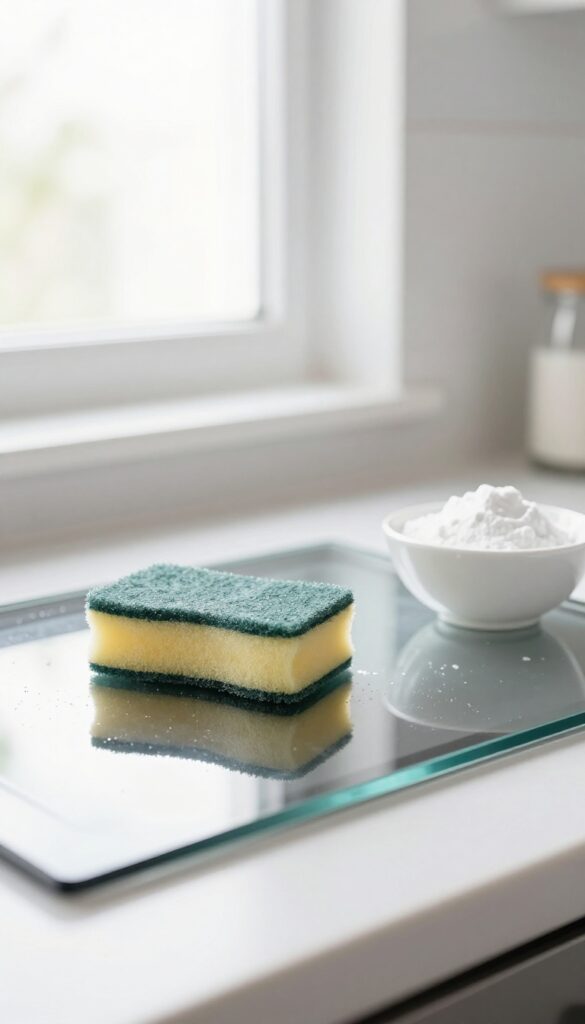
1. Classic Baking Soda Paste for General Grime
Baking soda and water form a paste that cuts through everyday oven grime without scratching surfaces. It's the most straightforward hack in this list and works on light to moderate buildup. You probably have both ingredients in your kitchen right now, so there's no need for a special trip to the store.
Mix three parts baking soda with one part water in a small bowl until it forms a thick, spreadable paste. Apply it generously to the interior oven surfaces, avoiding heating elements. Let the paste sit for at least 15 minutes—longer for tougher spots.
Then scrub with a damp sponge or non-abrasive scrubber, and wipe away residue with a clean, damp cloth. For stubborn areas, add a little white vinegar to the paste before scrubbing; the fizzing action helps lift grime.
Why It Works So Well
Baking soda is mildly alkaline, which helps break down grease and food residues. Its fine grit provides gentle abrasion without scratching enamel or glass. The paste also clings to vertical surfaces, so you can coat the entire oven interior without it dripping.
Pro Tips For Best Results
Warm the oven slightly (around 150°F) before applying the paste—warmth activates the baking soda and softens grime. Avoid using metal scrubbers; they can damage the oven's finish. If the paste dries out, spritz it with water to rehydrate before scrubbing.
When To Use This Method
This hack is ideal for routine cleaning or after a big cooking session. It's gentle enough for weekly maintenance but effective enough for monthly deep cleans. Skip it if you have heavy carbonized buildup—that calls for a stronger approach later in this list.
2. Overnight Soak for Stubborn Baked-On Spots
Some oven messes are just too tough for a quick wipe. Those blackened, carbonized spots on the floor or walls have been through dozens of heating cycles and won't budge with a standard paste. That's where time becomes your best tool—letting baking soda work while you sleep.
For the spots that make you want to give up, this overnight method is a game changer. You'll need a thick paste—about 3 parts baking soda to 1 part water—and a bit of patience. Apply it generously over the stuck-on grime, then cover with a damp cloth or plastic wrap to keep it from drying out.
By morning, the paste will have softened even the hardest crust, so you can scrape it away with a plastic scraper or a damp sponge. No harsh chemicals, no elbow grease—just chemistry doing its thing.
Why It Works
Baking soda is mildly alkaline, which helps break down the bonds in burnt-on grease and food. When left in contact for hours, the paste gradually penetrates the carbonized layer, rehydrating it so it loosens from the surface. The moisture barrier (cloth or wrap) prevents evaporation, giving the baking soda time to do its job.
Best Spots For This Hack
This method shines on the oven floor, walls, and the back panel where spills often bake into a hard crust. It's also great for the inside of the door if you have burnt-on splatters. Avoid using it on heating elements or any electrical components—stick to the enamel surfaces.
Pro Tips For Maximum Effect
For extra stubborn spots, add a splash of white vinegar to the paste before applying—the fizzing action helps lift grime. If the paste dries out overnight, mist it with a little water from a spray bottle before wiping. And always test a small hidden area first to make sure your oven's finish can handle the paste.
3. Vinegar Spray to Activate the Fizz
You've spread your baking soda paste and let it sit. Now comes the fun part: a spray bottle filled with white vinegar. The moment those two meet, a fizzy reaction kicks in that helps dislodge stubborn grease and burnt-on bits.
This isn't just a science trick—it's a practical step that makes wiping away grime almost effortless.
The chemical reaction between baking soda (a base) and vinegar (an acid) produces carbon dioxide gas, which creates bubbles that gently lift grease and debris from surfaces. This fizzing action penetrates baked-on layers, loosening them so you can wipe clean with minimal scrubbing. It's especially effective on oven walls and the bottom where spills tend to char.
How To Apply The Spray
Fill a spray bottle with undiluted white vinegar. After the baking soda paste has sat for at least 15 minutes (or longer for tough grime), spray a generous layer of vinegar over the paste. You'll see immediate fizzing—let it work for 5-10 minutes.
The bubbles will start to break down the grime, turning it into a soft, wipeable residue.
Wiping Technique For Best Results
Use a damp microfiber cloth or sponge to wipe away the loosened grime. Work in small sections, rinsing your cloth frequently to avoid spreading residue. For stubborn spots, spray a little more vinegar and scrub gently with a non-abrasive pad.
Avoid using steel wool, as it can scratch the oven's interior.
When To Avoid This Method
Skip the vinegar spray if your oven has a self-cleaning coating or if you've recently used commercial oven cleaners—mixing chemicals can create harmful fumes. Also, avoid using vinegar on aluminum surfaces, as it can cause pitting. Stick to the baking soda paste alone for those cases.
4. Lemon Juice Boost for Extra Degreasing
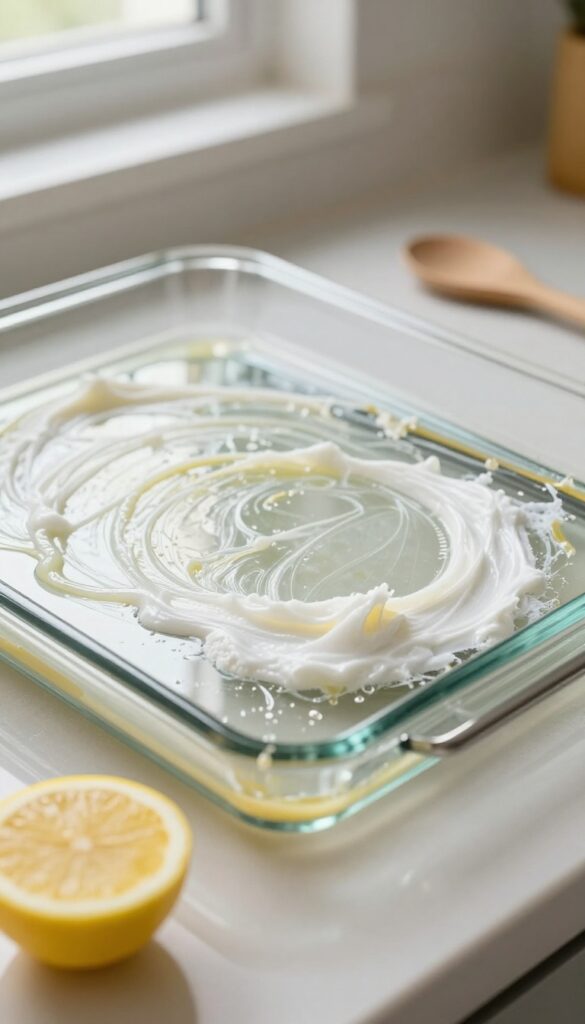
Sometimes baking soda alone needs a little backup, especially when you're facing thick, sticky grease that's been building up for months. Lemon juice steps in as a natural degreaser that works beautifully with baking soda. The acid in lemon juice breaks down grease on contact, while the fresh citrus scent leaves your oven smelling clean, not like a chemistry lab.
To make this boosted paste, mix ½ cup baking soda with 2–3 tablespoons of lemon juice. Add just enough water to form a spreadable consistency. Apply it to greasy areas and let it sit for 15–20 minutes.
The lemon juice will start dissolving the grease while the baking soda scrubs away residue. Wipe off with a damp cloth, and repeat on stubborn spots. For extra tough areas, let the paste sit longer, up to an hour, and scrub gently with a non-abrasive sponge.
Why Lemon Juice Works So Well
Lemon juice contains citric acid, which cuts through grease molecules more effectively than water alone. When combined with the mild abrasiveness of baking soda, you get a powerful cleaning duo that's still gentle on oven surfaces. The acidity also helps neutralize odors, leaving your oven smelling fresh.
Best Uses For The Lemon-baking Soda Paste
This paste is ideal for oven walls, the bottom of the oven, and the inside of the door where grease tends to accumulate. It's also great for cleaning oven racks—just spread the paste on, let it sit, then scrub and rinse. Avoid using it on aluminum surfaces, as the acid can cause discoloration.
Tips For Maximum Effectiveness
For the best results, warm the oven slightly (to about 150°F) before applying the paste—heat helps activate the lemon juice. Wear gloves to protect your hands from the acidity. After cleaning, wipe down with a damp cloth and then a dry one to remove any residue.
5. Dish Soap Addition for Heavy Grease
When baking soda paste alone isn't cutting through that thick, sticky grease, it's time to call in reinforcements. A simple squirt of liquid dish soap transforms your paste into a powerful degreaser that tackles even the most stubborn buildup on oven walls.
Dish soap is designed to break down grease on dishes, so it works wonders on oven grime. The combination of baking soda's gentle abrasiveness and soap's grease-cutting surfactants creates a one-two punch that softens and lifts baked-on residue without harsh chemicals.
How To Mix It
Start with your standard baking soda paste: 1/2 cup baking soda mixed with 2-3 tablespoons of water. Then add a generous squirt (about a tablespoon) of liquid dish soap—Dawn or any grease-fighting brand works best. Stir until you get a spreadable, slightly foamy consistency.
Application Tips
Apply the mixture to greasy oven walls, focusing on areas with heavy buildup. Let it sit for at least 15-20 minutes—longer for caked-on grease. The soap helps the paste cling to vertical surfaces, so it won't drip as much.
After soaking, spray with white vinegar to activate the fizzing action, then wipe clean with a damp cloth.
When To Use This Hack
This method is ideal for monthly deep cleans or when you've had a major spill (like a casserole overflow). It's also great for cleaning the oven door's interior glass, where grease splatters tend to bake on. Avoid using it on self-cleaning oven surfaces if the manufacturer advises against any soap residue.
6. Steam Clean with Baking Soda and Water
If you've got baked-on grime that's stuck like glue, steam is your secret weapon. The heat and moisture work together to soften even the toughest residue, making it easy to wipe away. All you need is water, baking soda, and a little patience.
Place a heat-safe bowl filled with water and 1/4 cup baking soda on the center rack of a cold oven. Close the door and preheat to 250°F (120°C). Once hot, let the steam work for 20 minutes.
Turn off the oven and let it cool slightly, then wipe down the interior with a damp cloth. The grime should come off with minimal effort.
Why Steam Works
Steam penetrates the layers of grease and burnt food, loosening them from the surface. The baking soda adds a mild abrasive boost and helps neutralize odors. This method is especially effective for the oven floor and walls where spills have carbonized.
Best For Light To Moderate Grime
This hack works wonders for everyday buildup and recent spills. For thick, years-old crust, you might need to repeat the process or combine it with a baking soda paste scrub afterward. Always let the oven cool enough to handle safely.
Safety Tips
Use a deep, oven-safe bowl to prevent water from boiling over. Avoid opening the oven while steaming to keep the heat and moisture trapped. Wear gloves when wiping to protect your hands from hot surfaces and loosened grime.
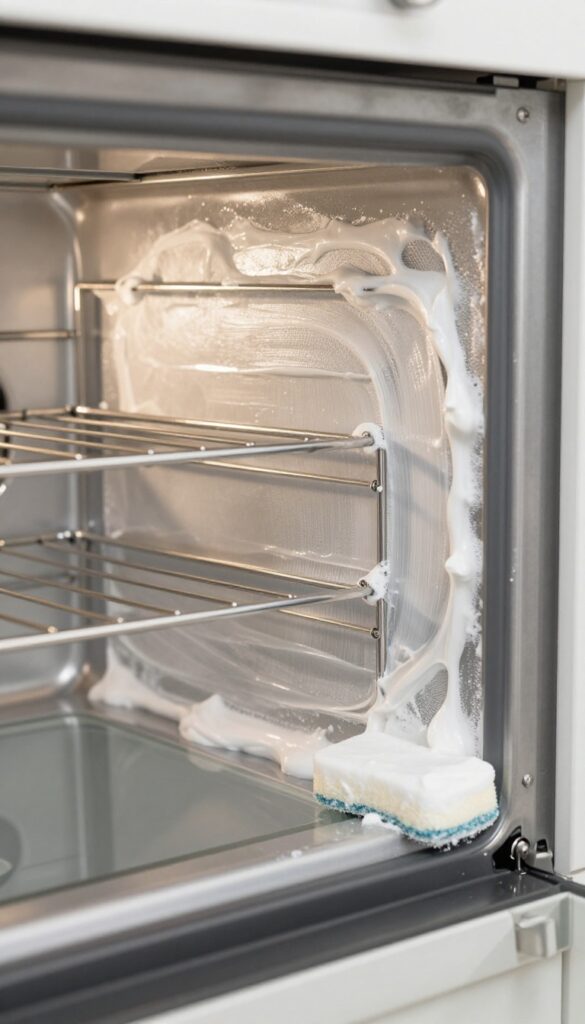
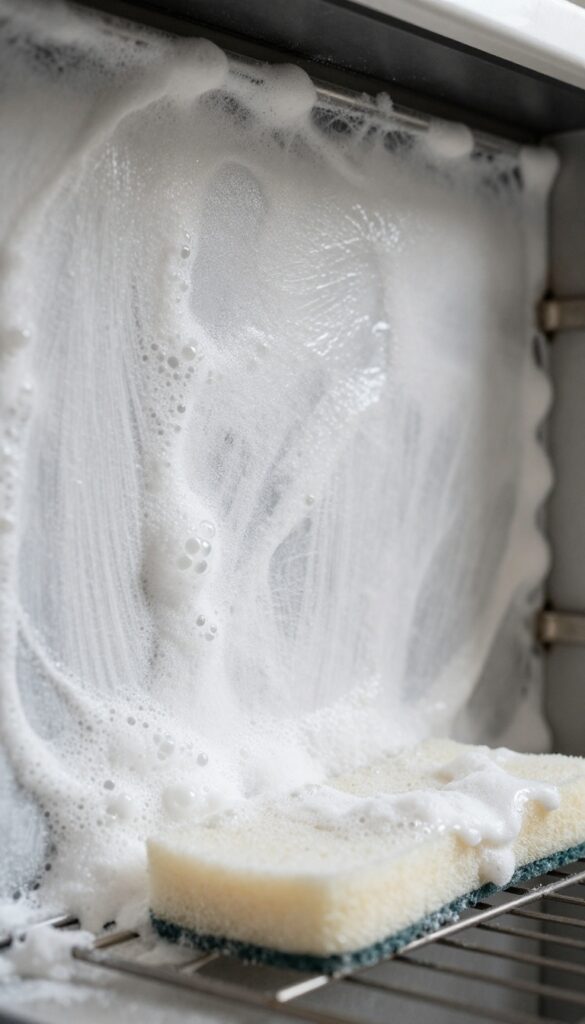
7. Baking Soda Scrub for Glass Oven Doors
A cloudy, splattered oven door is one of the first things guests notice. But you don't need harsh chemicals to get it sparkling again. This simple baking soda scrub cuts through grease and baked-on residue without scratching the glass.
Mix 1/4 cup baking soda with just enough water to form a spreadable paste. Apply it generously to the inside of the glass door, avoiding the edges where it might seep into the seal. Let it sit for 10 minutes to loosen the grime.
Then, using a damp non-abrasive sponge, scrub in circular motions. Wipe away the residue with a clean wet cloth, then buff dry with a microfiber towel for a streak-free shine. For stubborn spots, add a splash of white vinegar to the paste before applying.
Why This Works So Well
Baking soda is mildly abrasive, so it physically lifts stuck-on food and grease without scratching glass. The paste consistency gives it enough cling to work on vertical surfaces. A short dwell time allows the baking soda to start breaking down the grime, making scrubbing much easier.
Pro Tips For Best Results
Always use a non-abrasive sponge—steel wool or rough scrubbers will scratch the glass. If your oven door has a self-cleaning coating, check the manual first; some coatings are sensitive to abrasives. For extra stubborn spots, let the paste sit up to 20 minutes, but don't let it dry completely.
Avoid These Common Mistakes
Don't use too much water—a runny paste will drip and make a mess. Also, avoid getting the paste into the door's hinges or the seal around the glass, as it can cause sticking or damage. Finally, rinse thoroughly; any leftover baking soda residue can leave white streaks when the door heats up.
8. Paste on Oven Racks for Easy Cleaning
Oven racks are often the hardest part to clean because they're awkward to scrub and grease bakes on in layers. But with a simple baking soda paste and a garbage bag, you can get them looking brand new without elbow grease. This method uses time instead of effort—just let the paste do the work overnight.
Coat each oven rack with a thick layer of baking soda paste (3 parts baking soda to 1 part water). Place the racks inside a large garbage bag, tie it shut, and leave them overnight. The next day, rinse the racks with warm water and scrub gently with a brush if needed.
The paste loosens the grime, so most of it slides right off.
Why The Garbage Bag Trick Works
Sealing the racks in a bag keeps the paste moist and active, preventing it from drying out too quickly. The enclosed environment also traps the heat and moisture, which helps break down tough grease. This method is especially effective for racks with heavy buildup.
Dealing With Stubborn Spots
If some spots remain after rinsing, make a fresh paste and apply it directly to those areas. Let it sit for another hour, then scrub with a non-abrasive sponge. For extra stubborn patches, add a splash of white vinegar to the paste to boost its cleaning power.
Rinsing And Drying Tips
After rinsing, dry the racks thoroughly with a clean towel to prevent water spots. If you notice any residue, wipe them down with a damp cloth. Once dry, slide them back into the oven—they'll be ready for your next batch of cookies or roasted veggies.
9. Baking Soda and Hydrogen Peroxide for Burnt Spills

Burnt spills are the worst—they turn into rock-hard crusts that no amount of scrubbing seems to loosen. But a simple mix of baking soda and hydrogen peroxide can break down that charred layer without damaging your oven. The peroxide adds oxygen power, lifting the burnt bits so you can wipe them away easily.
Combine equal parts baking soda and hydrogen peroxide to make a thick, spreadable paste. Apply it generously over the burnt spill, covering it completely. Let it sit for at least 30 minutes—longer for really stubborn spots.
The paste will bubble slightly as it works. After the wait, scrub with a non-abrasive sponge or brush. The burnt residue should come off with minimal effort.
Rinse with a damp cloth and dry.
Why This Combo Works So Well
Baking soda is a mild abrasive that scrubs without scratching, while hydrogen peroxide acts as an oxidizer that helps break down carbonized food. Together, they create a fizzing reaction that lifts grime from the surface. This makes it much easier to remove burnt spills without harsh chemicals or steel wool.
Tips For Stubborn Spills
If the spill is extra thick, apply the paste and cover it with plastic wrap to keep it moist. Let it sit for an hour or even overnight. You can also heat the oven to 150°F before applying the paste—warmth speeds up the reaction.
Just make sure the oven is off and cool enough to touch before scrubbing.
What To Avoid
Don't use hydrogen peroxide on aluminum surfaces—it can cause discoloration. Test on a small hidden area first. Also, avoid letting the paste dry out completely; if it hardens, it becomes harder to remove.
Keep it damp by covering or misting with water if needed.
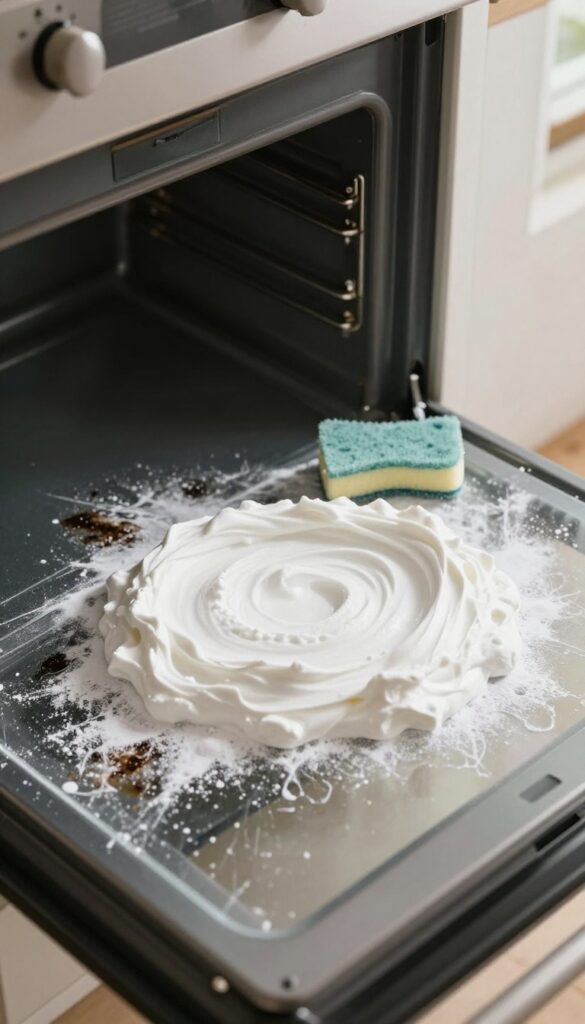
10. Dry Baking Soda for Fresh Spills
Fresh spills don't have to become tomorrow's baked-on nightmare. A quick sprinkle of dry baking soda can stop grease and drips before they harden. This hack is all about timing—catch the mess while it's still wet, and you'll save yourself serious scrubbing later.
Keep a shaker of baking soda near the oven. As soon as a spill happens, cover it generously with the powder. Let it sit for about 15 minutes to absorb the grease and moisture.
Then wipe away with a damp cloth. The mess comes off easily, and any residue rinses clean. This method works best for spills that are still liquid or semi-liquid.
For dried-on spots, you'll need a paste or soak instead. But for fresh drips, dry baking soda is your quickest, mess-free option.
Why Dry Baking Soda Works So Well
Baking soda is a natural absorbent. It pulls grease and liquid into its porous structure, making the spill easier to lift. Unlike wet cleaners that spread the mess around, dry powder traps it.
Plus, it's non-toxic and won't scratch your oven's surface.
Best Spills To Tackle This Way
This hack is perfect for grease splatters, melted cheese drips, and saucy overflow from casseroles. It's also great for catching spills on the oven floor before they burn. Just don't use it on heavy, crusted-on grime—that needs a different approach.
Pro Tip: Keep A Shaker Ready
Fill a clean spice shaker or a small jar with a perforated lid with baking soda. Store it near the oven so you can grab it the second a spill happens. The faster you act, the less scrubbing you'll do.
11. Baking Soda and Salt for Extra Abrasion
Sometimes stubborn grime needs a little extra grit. Baking soda is gentle, but when you pair it with salt, you get a scrub that's tough on messes without damaging your oven's surface. This combo is perfect for those crusty spots that won't budge with baking soda alone.
To make this scrub, mix equal parts baking soda and table salt in a small bowl. Add just enough water to form a thick paste—similar to toothpaste. Apply the paste directly to the tough spots, like baked-on spills on the oven floor or stubborn grease on the door.
Let it sit for 10–15 minutes to soften the grime. Then, scrub gently with a non-abrasive sponge or cloth. The salt crystals provide extra abrasion to lift the gunk, while the baking soda works its magic on grease.
Rinse thoroughly with a damp cloth and wipe dry. Your oven will look noticeably cleaner without any scratches.
Why Salt Works
Salt is a natural abrasive that's harder than baking soda but still safe for enamel and glass. It breaks down crusty residue without the risk of scratching that steel wool or harsh chemicals might cause. Plus, it's cheap and always in your pantry.
Best Uses For This Hack
This paste is ideal for the oven floor where spills bake into hard, dark spots. It also works well on the inside of the door, especially around the edges where grease accumulates. Avoid using it on self-cleaning oven liners or delicate surfaces—stick to the main cavities.
Pro Tip: Rinse Well
After scrubbing, make sure to remove all paste residue. Leftover salt can cause white streaks or attract moisture. Use a clean, damp microfiber cloth to wipe away every trace.
Follow up with a dry cloth to prevent water spots.
12. Cream of Tartar for Stubborn Stains
Some stains just won't budge, even after multiple baking soda scrubs. That's when you need a little extra firepower—without reaching for harsh chemicals. Cream of tartar, that dusty white powder sitting in your spice cabinet, is a gentle acid that boosts baking soda's cleaning power.
Mixed together, they form a paste that tackles the toughest baked-on residue on oven floors and walls.
When baking soda alone isn't cutting it, add cream of tartar to the mix. This dynamic duo creates a slightly acidic paste that breaks down stubborn, polymerized grease—the kind that's been baked on for months. It's safe on enamel surfaces and won't scratch, making it perfect for delicate oven interiors.
How To Make The Paste
Combine 3 tablespoons of baking soda with 1 tablespoon of cream of tartar in a small bowl. Add just enough water (about 1–2 tablespoons) to form a thick, spreadable paste. Stir until smooth—no lumps.
The consistency should be like toothpaste, not runny.
Application And Wait Time
Using a spatula or gloved fingers, spread the paste generously over the stained areas. Focus on the oven floor where spills tend to pool. Let it sit for at least 30 minutes—longer for really old stains.
The paste will dry slightly but stay active. For extra stubborn spots, let it sit overnight.
Scrubbing And Rinsing
After the wait, dampen a non-abrasive sponge or cloth and scrub the paste in circular motions. The stains should lift away easily. Rinse thoroughly with a wet cloth to remove all residue.
If any paste remains, it can leave a white film, so do a final wipe with a vinegar-water solution (1: 1) to neutralize and shine.
13. Baking Soda and Essential Oils for Scent
Cleaning the oven doesn't have to mean harsh chemical smells. By adding a few drops of essential oils to your baking soda paste, you can tackle tough grime while leaving behind a fresh, natural scent. Lemon and tea tree oil are top choices—they mask odors and bring antibacterial power to the mix.
Why Lemon And Tea Tree Work Best
Lemon essential oil cuts through grease with its natural acidity and leaves a bright, clean fragrance. Tea tree oil is a powerful disinfectant that fights bacteria and mold, which can lurk in oven crevices. Together, they transform your cleaning paste into a dual-action grime fighter.
How To Make Scented Baking Soda Paste
Mix 1/2 cup of baking soda with 2-3 tablespoons of water to form a spreadable paste. Add 5-10 drops of lemon or tea tree oil (or a mix of both). Stir well, then apply to oven surfaces.
Let the paste sit for 15-20 minutes before scrubbing with a damp sponge. Rinse thoroughly to avoid any oily residue.
Bonus Tips For Best Results
For extra stubborn spots, let the paste sit longer—up to 30 minutes. Use a microfiber cloth for final wipe-down to prevent streaks. Avoid using too much oil, as it can leave a greasy film.
Store leftover paste in an airtight jar for up to a week.
14. Paste on Oven Thermometer Probe
Your oven thermometer probe takes a beating from heat and grease, and carbon buildup can make it less accurate. A quick baking soda paste treatment restores it without scratching the metal. This hack is fast, gentle, and keeps your probe reading true.
Mix a thick paste of 2 tablespoons baking soda and 1 tablespoon water. Apply a thin, even layer to the probe, avoiding the electrical connection if it's a digital model. Let it sit for 10 minutes to break down carbon deposits.
Rinse under warm water and dry with a soft cloth. For stubborn spots, use a soft toothbrush with the paste before rinsing. Never use abrasive scrubbers that could damage the probe's surface.
Why The Probe Gets Grimy
Oven probes are exposed to high heat and food splatters, which carbonize over time. This buildup can insulate the sensor, leading to inaccurate temperature readings. Regular cleaning with baking soda prevents this without harsh chemicals.
Step-by-step Cleaning
- Unplug or remove the probe if possible. 2.
Apply baking soda paste in a thin layer. 3. Wait 10 minutes.
- Rinse with warm water and dry. 5.
If residue remains, repeat or use a soft brush.
Maintenance Tips
Clean the probe after every few uses to prevent heavy buildup. Store it in a dry place. Avoid submerging the entire probe if it has electronic parts—wipe only the metal stem.
15. Baking Soda and Water for Burner Grates
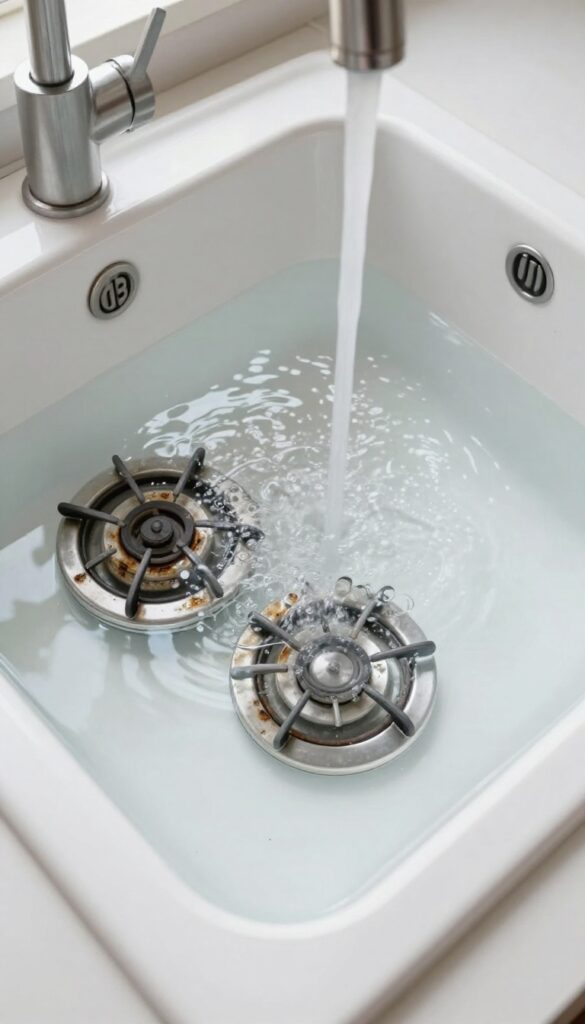
Burner grates take a beating from direct flame and dripping grease, often ending up with a thick, stubborn crust. Soaking them in a simple baking soda solution breaks down that grime without harsh chemicals or excessive scrubbing. It's an easy, hands-off method that works for both gas and electric coil grates.
Start by removing the grates from your stove. Fill a large sink or basin with warm water and add 1/2 cup of baking soda, stirring until mostly dissolved. Submerge the grates fully and let them soak for 30 minutes to an hour.
The baking soda lifts grease and loosens carbon deposits. After soaking, scrub with a stiff brush or nylon pad—most grime will come off easily. Rinse thoroughly with clean water and dry completely before putting them back on the stove.
Why This Soak Works
Baking soda is mildly alkaline, which helps break down acidic grease and food residues. Warm water speeds up the reaction and softens burnt-on bits. No need for commercial degreasers or oven sprays—just a simple chemical reaction that's gentle on metal but tough on grime.
Tips For Stubborn Spots
If some areas remain caked after the initial soak, make a thick paste of baking soda and a few drops of water. Apply it directly to the stubborn spots and let it sit for 15 minutes before scrubbing again. For gas burner caps, a toothbrush helps reach small crevices without damaging the metal.
Rinsing And Drying Matters
Leftover baking soda residue can leave white marks or affect burner performance. Rinse each grate under running water, using your fingers to feel for any slick spots. Dry with a clean towel or let them air dry completely.
Moisture on burner grates can cause rust or uneven heating, so make sure they're bone-dry before reassembling.
16. Paste on Oven Door Gasket
The rubber gasket around your oven door seals in heat but also traps grease and food particles. Over time, that gunk can harden and even cause the seal to fail. Baking soda paste is gentle enough for the rubber but tough on grime.
Mix a thick paste of baking soda and water. Use your fingers or a soft cloth to apply a thin layer directly onto the gasket, avoiding any tears or worn spots. Let it sit for just 5 minutes—any longer and the paste could dry out and be harder to remove.
Wipe away with a damp cloth, using a toothbrush for crevices if needed. Dry thoroughly before closing the door.
Why The Gasket Needs Special Care
The gasket is delicate. Scrubbing too hard or using harsh chemicals can damage the rubber, leading to heat loss and higher energy bills. Baking soda is non-abrasive and safe, making it the ideal cleaner for this sensitive part.
Step-by-step Application
Start with a dry gasket. Apply the paste in a thin, even layer—thick clumps can be messy. Let it sit for exactly 5 minutes.
Then, use a damp microfiber cloth to wipe in one direction, following the gasket's shape. For stubborn spots, a soft-bristled toothbrush works wonders.
Preventing Future Buildup
After cleaning, wipe the gasket with a dry cloth to remove excess moisture. To keep it clean longer, avoid spills near the door and give the gasket a quick wipe after each heavy-use cooking session. A little maintenance goes a long way.
17. Baking Soda and Cornstarch for Polishing
Stainless steel parts on your oven—handles, trim, or the front panel—can end up looking dull or streaky after cleaning. A simple mix of baking soda and cornstarch creates a gentle polishing paste that restores shine without scratching. This hack is perfect for those final touches that make the whole oven look brand new.
Cornstarch adds a mild abrasive quality that buffs away water spots and light residue while leaving a protective film that resists future smudges. The paste is thick enough to stay put on vertical surfaces, so you can work it into crevices around handles and knobs. After a quick wipe, you'll see a streak-free gleam that harsh chemical polishes can't match.
Mixing The Perfect Polish
Combine 2 tablespoons baking soda, 1 tablespoon cornstarch, and enough water to form a smooth paste—about 1 to 2 tablespoons. Stir until it's the consistency of toothpaste. For extra polishing power, add a drop of dish soap to cut through grease.
The cornstarch prevents the baking soda from being too gritty, making it safe for stainless steel.
Application And Buffing Technique
Apply the paste to a soft microfiber cloth, not directly on the oven surface, to control the amount and avoid drips. Rub in the direction of the grain (usually vertical on oven doors) using small circular motions. Let it sit for 2 minutes, then buff off with a clean, dry cloth.
For stubborn streaks, repeat on the spot.
Where To Use This Hack
This polish works best on stainless steel oven handles, control panels, and the trim around the door. Avoid using it on painted or coated surfaces, as the gentle abrasion may dull them. It's also great for polishing the exterior of a toaster oven or microwave if they have stainless steel accents.
18. Baking Soda and Club Soda for Fizz Action
Club soda isn't just for mixing drinks—it can give your cleaning paste a fizzy boost. The carbonation creates tiny bubbles that help lift grime from surfaces, making scrubbing less of a chore. This hack works especially well on baked-on grease that's been sitting for a while.
Skip the tap water and mix your baking soda with club soda instead. The carbonation adds a gentle lifting action that helps break down stubborn deposits. Apply the paste, let it sit for 10–15 minutes, then scrub with a damp sponge.
Rinse thoroughly and dry.
Why Carbonation Helps
The bubbles in club soda are carbon dioxide, which creates a mild effervescent reaction when mixed with baking soda. This helps loosen grime without harsh chemicals. It's especially effective on vertical surfaces like oven walls, where paste tends to slide off.
Best Uses For This Hack
Use this method on oven doors, interior walls, and racks. It's also great for cleaning the stovetop if it has baked-on spills. Avoid using it on aluminum surfaces, as carbonation can cause discoloration.
Pro Tip For Extra Power
For really tough spots, let the paste sit for 20 minutes and then spray a little more club soda on top before scrubbing. The reactivated fizz helps lift the grime again without adding more baking soda.
19. Paste on Oven Light Cover
The light cover inside your oven gets coated with grease and grime, making it harder to see your food. A quick baking soda paste treatment clears it up without removing the cover or using harsh chemicals.
Mix a tablespoon of baking soda with enough water to form a thick paste. Apply it directly to the light cover with your fingers or a soft cloth, spreading it evenly. Let it sit for about 5 minutes to break down the grease.
Then wipe it off with a damp microfiber cloth. For stubborn spots, gently scrub with a soft toothbrush. Finally, buff dry with a clean cloth to restore clarity.
Why This Works
Baking soda is mildly abrasive, so it lifts stuck-on grease without scratching the glass. The paste clings to the vertical surface, giving it time to dissolve the grime. No need for disassembly or harsh oven cleaners.
Pro Tips For Best Results
Make sure the oven is completely cool before starting. If the cover is especially dirty, let the paste sit for up to 10 minutes. Avoid getting paste inside the light socket—use a small amount and wipe carefully around the edges.
20. Baking Soda and Rubbing Alcohol for Quick Evaporation

Rubbing alcohol isn't just for first aid—it's a powerful cleaning ally when mixed with baking soda. The alcohol evaporates fast, which means your paste dries quickly and starts working on sticky residues almost immediately. This combo is perfect for those greasy spots that seem to repel water-based cleaners.
When you mix baking soda with rubbing alcohol, you get a paste that cuts through grease and dries in minutes. The alcohol helps dissolve sticky residues while the baking soda provides gentle abrasion. This hack is especially useful for vertical surfaces where a wet paste would drip.
Why Rubbing Alcohol Works
Rubbing alcohol is a solvent that breaks down grease and sticky residues quickly. It evaporates rapidly, so the paste doesn't stay wet long enough to drip or run. This makes it ideal for cleaning oven walls, doors, and racks without making a mess.
How To Make And Apply The Paste
Mix 1/2 cup baking soda with enough rubbing alcohol (70% or higher) to form a spreadable paste. Apply it to the grimy areas using a sponge or brush. Let it sit for 5-10 minutes until it dries slightly, then scrub with a damp sponge.
Wipe away residue with a clean cloth.
Best Uses For This Hack
This paste is great for baked-on grease on oven walls, sticky spots on glass doors, and residue on oven racks. It also works well on stovetop burners and drip pans. Avoid using it on delicate surfaces like non-stick coatings or aluminum.
21. Paste on Oven Floor for Dried Spills
Dried spills on the oven floor can feel impossible to remove, but a thick baking soda paste makes them surrender. The key is patience—letting the paste sit long enough to soften the crust. After an hour, a plastic scraper lifts the mess without scratching the enamel.
Mix baking soda with just enough water to form a spreadable paste—thicker than toothpaste. Apply a generous layer directly over each dried spill, covering it completely. Let it sit for a full hour; for extra-stubborn spots, leave it overnight.
Use a plastic scraper or an old credit card to gently scrape away the softened grime. Wipe the residue with a damp cloth, then rinse with a vinegar-water spray to remove any baking soda film.
Why Thick Paste Works Best
A thin paste dries out too fast and loses its softening power. A thick layer stays moist longer, penetrating the crusty spill and breaking down the bonds between grime and the oven floor. This method avoids harsh scrubbing that could damage the surface.
Tools To Use
Plastic scrapers are safe for enamel surfaces. Avoid metal scrapers or steel wool, which can leave scratches. If you don't have a scraper, a plastic spatula or even a stiff nylon brush works well for loosening the paste after it sits.
When To Repeat
Some spills may need a second application, especially if they're burnt on for weeks. If the first round doesn't lift everything, reapply the paste and let it sit longer. Patience here saves elbow grease.
22. Baking Soda and Water for Self-Cleaning Cycle Prep
Self-cleaning cycles get hot enough to burn off food residue, but that intense heat can also create a smoky, smelly mess. A simple baking soda pretreatment cuts down on both, making the process far more pleasant. This hack takes just a few minutes but saves you from choking fumes and lingering odors.
Why Pretreat?
When your oven self-cleans, it incinerates leftover grease and food particles. That can release a lot of smoke and a burnt smell that fills your kitchen. A thin layer of baking soda solution helps neutralize acidic residues and absorbs some of the smoke before it gets airborne.
It's like giving your oven a head start.
How To Make The Solution
Mix 1/4 cup of baking soda with 1 cup of water until fully dissolved. Pour the mixture into a spray bottle and spritz a light, even coat over the entire interior—walls, floor, and ceiling. Avoid pooling; you just want a fine mist.
For extra protection, add a few drops of lemon juice to boost odor-fighting power.
Running The Cycle
After spraying, close the oven door and run the self-cleaning cycle as usual. The baking soda will dry into a white film during the heat-up, then help break down grime. Once the cycle finishes and the oven cools, simply wipe away the ash and any remaining baking soda residue with a damp cloth.
Your oven will look cleaner and smell fresher.
23. Baking Soda and Vinegar for Final Rinse
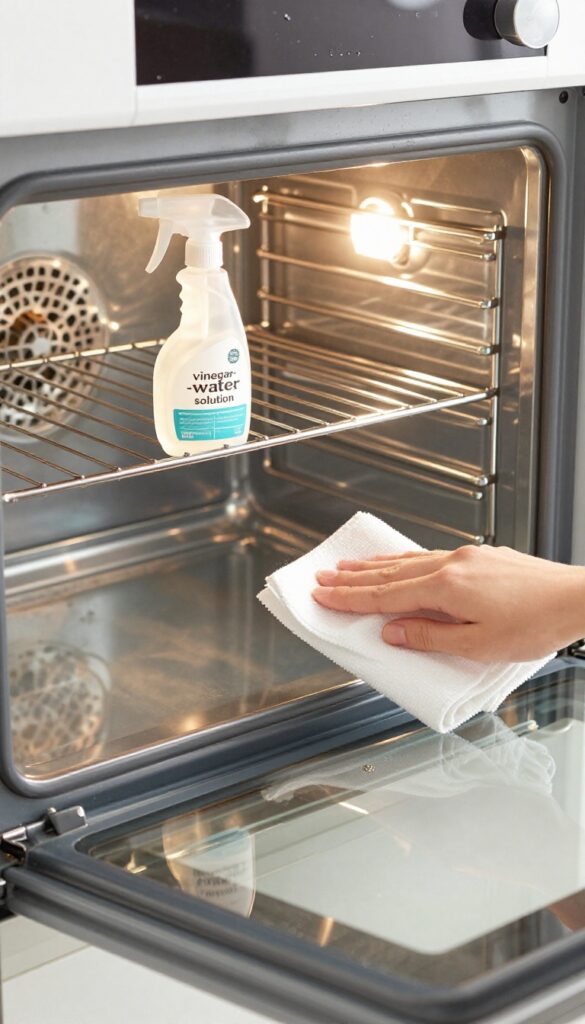
You've scrubbed and scrubbed, and the grime is finally gone. But a chalky baking soda residue can linger, leaving streaks or a dull film. A quick vinegar rinse fixes that.
The acid in vinegar neutralizes the alkaline baking soda, creating a reaction that lifts leftover particles. It's the perfect final step for a truly spotless oven.
After all that elbow grease, don't let residue ruin your shine. A simple vinegar-water spray cuts through baking soda film and leaves surfaces streak-free. This hack works on glass doors, oven walls, and racks.
Just spritz, wipe, and dry for a finish that looks like new.
The Right Ratio
Mix equal parts white vinegar and water in a spray bottle. Too strong and the smell lingers; too weak and it won't neutralize effectively. A 50/50 blend is just right for cutting through residue without overwhelming your nose.
How To Apply
After scrubbing with baking soda paste, spray the vinegar solution generously over all surfaces. Let it sit for a minute—you'll see slight fizzing as it works. Then wipe with a clean, damp cloth.
For glass doors, follow with a dry microfiber cloth to prevent streaks.
Rinse And Dry Thoroughly
Don't skip a final water rinse. Even after vinegar, a tiny bit of residue can remain. Dampen a fresh cloth with plain water and wipe everything down.
Then dry with a soft towel. This step ensures no vinegar smell remains and leaves the oven ready to use.
FAQ
Can baking soda damage my oven's interior?
No, baking soda is non-abrasive and safe for most oven surfaces. Avoid using harsh scrubbers with it on delicate coatings.
How long should I let baking soda paste sit?
For light grime, 15 minutes is enough. For tough buildup, let it sit overnight or up to 12 hours.
Do I need to rinse after using baking soda?
Yes, always wipe away residue with a damp cloth. A vinegar rinse helps remove any remaining powder.
Can I use baking soda on a self-cleaning oven?
Yes, but avoid using it during the self-cleaning cycle. Use it for manual cleaning between cycles.
Will baking soda scratch my oven glass?
Baking soda is gentle, but use a soft sponge or cloth to avoid micro-scratches on glass.
Conclusion
Baking soda is a powerhouse for cutting through tough oven grime without harsh chemicals. These 23 hacks show you how to tackle everything from baked-on grease to stubborn carbon spots using simple ingredients you probably already have. Start with the method that matches your oven's mess level and work your way up.
A little patience and elbow grease will leave your oven looking like new. Try a few of these tricks next time you clean—you'll be amazed at the results.