20 Oven Cleaning Ideas for a Deep Kitchen Reset
Your oven has seen it all—spills, splatters, and baked-on grease that no amount of wiping can fix. But a deep kitchen reset doesn't have to mean hours of scrubbing with harsh chemicals.
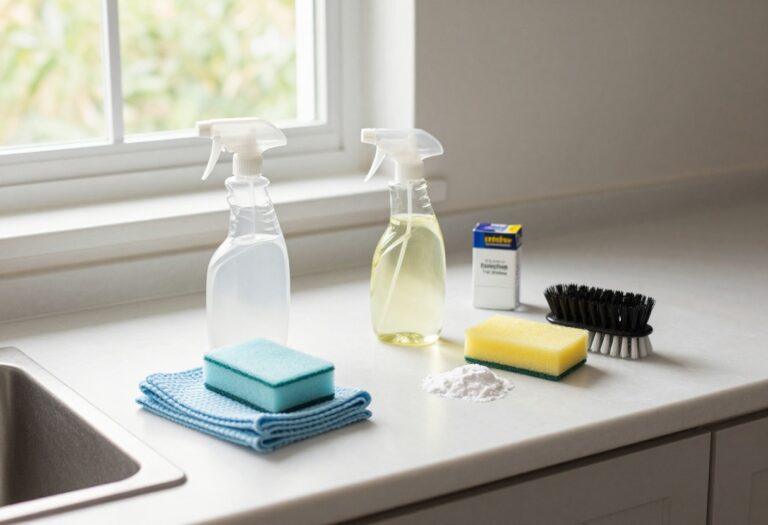
These 20 oven cleaning ideas use everyday ingredients and clever hacks to tackle even the toughest grime. From a simple baking soda paste to the surprising power of a dishwasher tablet, each method is designed to save you time and effort.
No more elbow grease wasted—just practical solutions that restore your oven to sparkling condition. Let's get started.
1. Baking Soda and Vinegar Paste
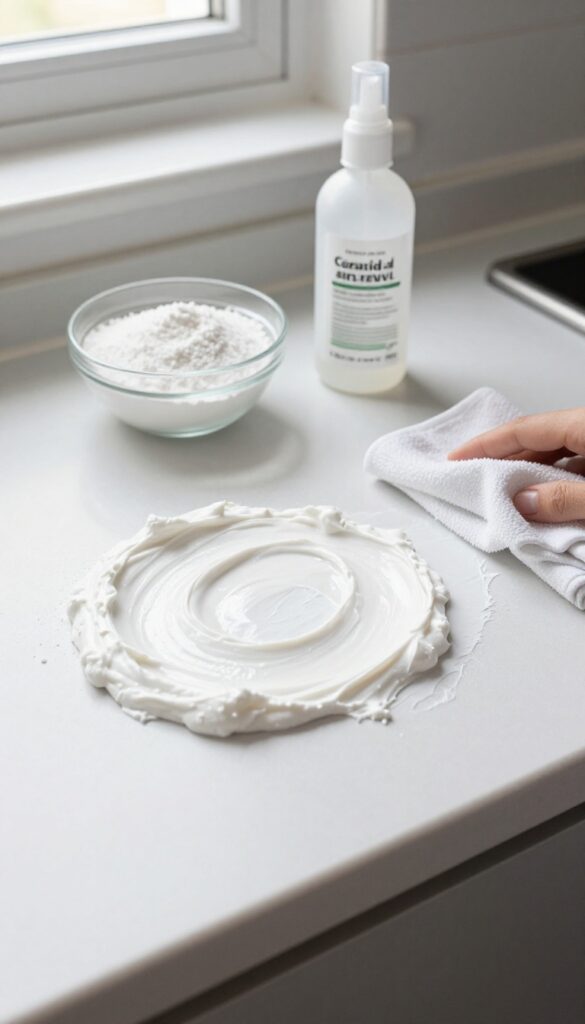
You probably already have baking soda and vinegar in your pantry, which makes this method incredibly convenient. The combination creates a gentle abrasive paste that breaks down baked-on grease without scratching the surface. Plus, the fizzing reaction when vinegar meets baking soda helps lift stubborn residue.
Start by removing the oven racks and any loose debris. Mix half a cup of baking soda with a few tablespoons of water until you get a spreadable paste. Apply the paste to the interior surfaces, avoiding the heating elements.
Let it sit overnight—the longer the better for tough grime. The next day, spray white vinegar over the dried paste. The fizzing action loosens the dirt, making it easy to wipe away with a damp cloth.
For extra stubborn spots, use a non-scratch scrub pad. Rinse thoroughly and dry before using the oven.
Why This Combo Works
Baking soda is mildly alkaline, which helps dissolve organic soils like grease and food residue. Vinegar is acidic, and the reaction between the two creates carbon dioxide bubbles that physically push grime away from surfaces. This chemical reaction is gentle on enamel and glass but tough on dirt.
Tips For Best Results
Apply the paste thickly on heavily soiled areas. If the paste dries too hard before you add vinegar, lightly dampen it with water first. Use a microfiber cloth for final wiping to avoid streaks.
For the oven door, lay the paste on the glass and let it work its magic—avoid getting it on the seal.
Safety Precautions
Never spray vinegar on the oven while the self-cleaning cycle is running or when the oven is hot. Keep the mixture away from heating elements and electrical components. Rinse the oven thoroughly after cleaning to remove any residue that could cause smoke or odors when you bake next.
2. Lemon Juice Steam Clean
Steam is a powerful, chemical-free way to loosen baked-on grime, and lemon adds a fresh, clean scent. This method is especially effective for light to moderate buildup and requires almost no scrubbing.
Fill an oven-safe dish with water, add slices of 2-3 lemons, and place it on the middle rack. Heat the oven to 250°F and let it run for 30 minutes. The steam softens food residue, while the lemon's acidity helps break down grease.
After cooling, simply wipe the interior with a damp cloth. For stubborn spots, use a sponge with a little baking soda.
Why Lemon Works
Lemon juice contains citric acid, a natural degreaser that cuts through oily residues without harsh fumes. It also neutralizes odors, leaving your oven smelling fresh instead of like chemical cleaners.
Best For Light To Moderate Grime
This technique works well for ovens with everyday splatters and spills. For heavy, burnt-on layers, you may need to repeat the process or follow up with a paste of baking soda and water.
Pro Tip: Add Vinegar For Extra Power
For tougher stains, replace half the water with white vinegar. The combination of lemon and vinegar boosts acidity, making steam even more effective at loosening stubborn residue.
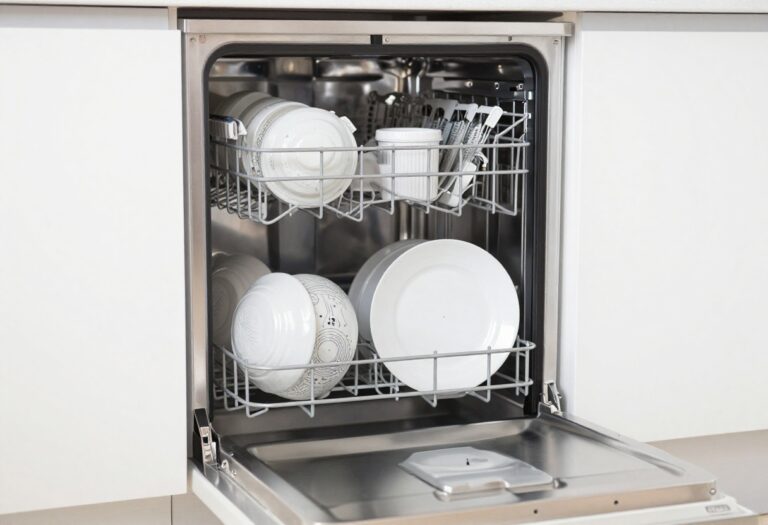
3. Dishwasher Tablet Hack
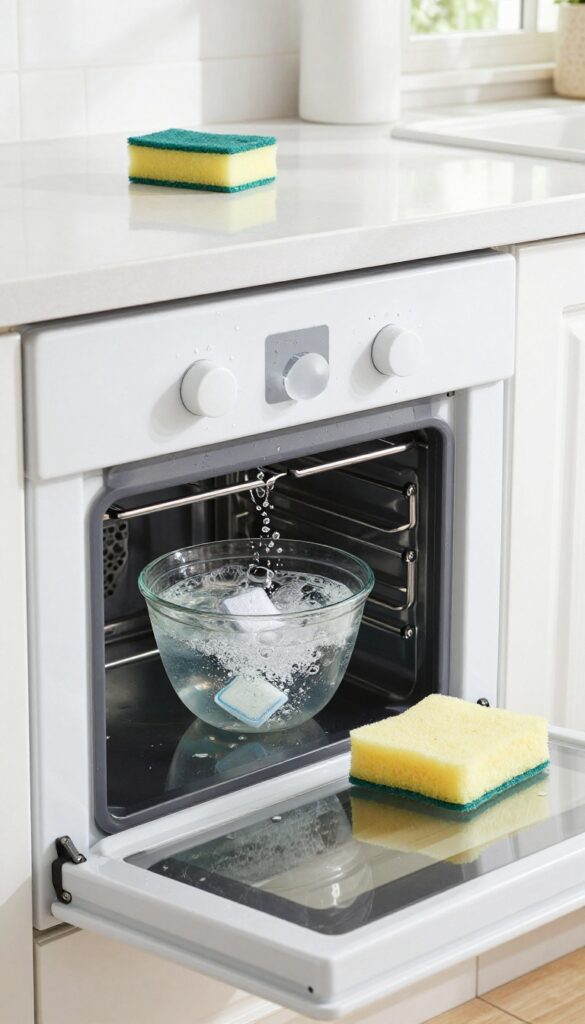
Dishwasher tablets aren't just for your dishwasher. They contain powerful degreasers that cut through baked-on oven grime without harsh scrubbing. This hack turns a single tablet into an effective cleaning solution that's gentle on surfaces but tough on grease.
How It Works
Drop one dishwasher tablet into a bowl of warm water and let it dissolve completely. The tablet's enzymes and surfactants break down grease and food residue on contact. Dip a non-abrasive sponge into the solution, wring it slightly, and wipe down the oven interior.
Best For Glass And Enamel
This method works wonders on oven doors and enamel surfaces because it doesn't scratch. Avoid using it on aluminum or unfinished cast iron, as the chemicals may cause discoloration. Test on a small hidden spot first if you're unsure.
Pro Tips For Stubborn Spots
For caked-on spills, let the solution sit on the area for 5–10 minutes before wiping. Use a soft scrub brush for textured surfaces. Rinse thoroughly with a damp cloth afterward to remove any residue.
4. Salt and Baking Soda Scrub
When baked-on spots refuse to budge, you need something with grit. That's where this simple scrub comes in. Coarse salt and baking soda combine to create an abrasive paste that works wonders on stubborn stains without scratching your oven's interior.
Mix equal parts coarse salt and baking soda with just enough water to form a thick paste. Apply it to the problem areas and let it sit for 10–15 minutes. Then scrub with a damp sponge or cloth—the salt crystals break down the grime while the baking soda deodorizes.
Rinse well and wipe dry.
Why Coarse Salt Works Best
Table salt is too fine and dissolves quickly, losing its scrubbing power. Coarse salt or kosher salt stays granular longer, giving you that extra abrasion needed to lift burnt-on food. It's gentle enough for enamel surfaces but tough on messes.
Where To Use This Scrub
This mixture is perfect for the oven floor, walls, and the back of the door—anywhere you have dark, crusty spots. Avoid using it on glass or delicate surfaces, as the salt can scratch. For the glass door, stick to a baking soda and vinegar solution instead.
Boosting The Cleaning Power
Add a few drops of dish soap to the paste for extra grease-cutting ability. Or swap water for lemon juice to introduce a mild acid that helps dissolve tough residue. The scrub will foam slightly, which is normal and helps lift dirt.
5. Cream of Tartar Paste
Cream of tartar is a kitchen staple that often gets overlooked for cleaning. When mixed with hydrogen peroxide, it creates a gentle but effective paste that tackles burnt-on food without harsh scrubbing. This method is especially good for glass oven doors and enamel surfaces where you want to avoid scratches.
The paste works by combining the mild abrasive power of cream of tartar with the bubbling action of hydrogen peroxide to lift carbonized residue. Unlike baking soda, it dissolves more easily and leaves less white residue behind. It's a smart choice for spot-treating stubborn stains without a full oven clean.
How To Make The Paste
Mix 2 tablespoons of cream of tartar with enough hydrogen peroxide (3% solution) to form a thick, spreadable paste. Start with a teaspoon of peroxide and add more as needed. The consistency should be similar to toothpaste—not too runny, not too stiff.
Application Tips
Apply the paste directly to burnt areas using a sponge or soft cloth. Spread it evenly and let it sit for 10 to 15 minutes. For extra-stubborn spots, let it sit up to 30 minutes.
Then wipe away with a damp cloth. Rinse thoroughly to remove any residue.
Best Uses
This paste works wonders on oven door glass, baking sheets, and the bottom of the oven where spills have baked on. It's also safe for ceramic and enamel surfaces. Avoid using it on aluminum or unfinished cast iron, as hydrogen peroxide can cause discoloration.
6. Steam Clean with Water and Vinegar
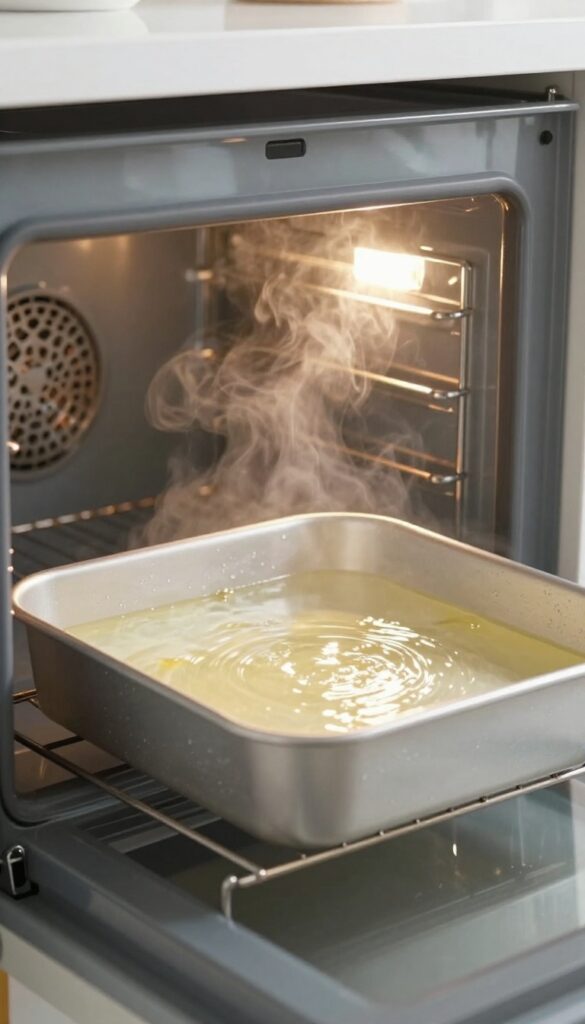
Steam is one of the gentlest yet most effective ways to loosen baked-on grease and grime without scrubbing. Water and vinegar create a powerful steam that softens dirt, making it easy to wipe away. This method is completely natural, so there's no need to worry about harsh chemical fumes or residue.
Fill an oven-safe baking dish with equal parts water and white vinegar. Place it on the bottom rack and heat your oven to 300°F. Let it steam for 20 minutes, then turn off the oven and let it cool slightly.
Open the door and wipe down the interior with a sponge or cloth—the grime should come off with minimal effort.
Why It Works
The combination of heat and acid from vinegar breaks down grease and food particles. Steam penetrates dried-on spills, rehydrating them so they lift away easily. This method is especially good for light to moderate buildup and leaves your oven smelling fresh.
Tips For Best Results
Use a deep dish to prevent the liquid from boiling over. If your oven has heavy buildup, let it steam for an extra 10 minutes. For stubborn spots, dip your sponge in the hot vinegar water and scrub gently.
Always wear oven mitts when handling the hot dish.
7. Bar Keepers Friend for Glass Doors
Glass oven doors take a beating. Grease splatters, baked-on drips, and cloudy residue can make it hard to check on your food without opening the door. Bar Keepers Friend—the classic powder cleanser—is a game-changer for restoring clarity without scratching the surface.
Bar Keepers Friend uses oxalic acid to break down mineral deposits and stubborn stains. It’s gentle enough for glass but tough on grime. Apply a small amount to a damp sponge, rub gently in circular motions, then rinse thoroughly.
Buff with a clean microfiber cloth for a streak-free, crystal-clear finish. Avoid using abrasive pads or scrubbing too hard—the powder does the work for you.
Why Bar Keepers Friend Works
Unlike harsh chemical sprays, Bar Keepers Friend is a mild abrasive that polishes as it cleans. It’s specifically formulated to remove baked-on residue without etching glass. The fine powder dissolves in water, creating a smooth paste that lifts grease and hard water spots.
Step-by-step Application
Start by wiping away loose debris. Sprinkle a small amount of Bar Keepers Friend onto a damp non-scratch sponge. Gently rub the glass in circles, focusing on cloudy areas.
Let it sit for one minute, then rinse with warm water. Dry with a microfiber cloth to prevent streaks.
Pro Tips For Best Results
For extra-stubborn spots, make a thicker paste by mixing the powder with a few drops of water. Apply it directly to the stain and let it sit for five minutes before buffing. Always test on a small hidden area first to ensure compatibility with your oven’s glass coating.
8. Pumice Stone for Burnt Spills
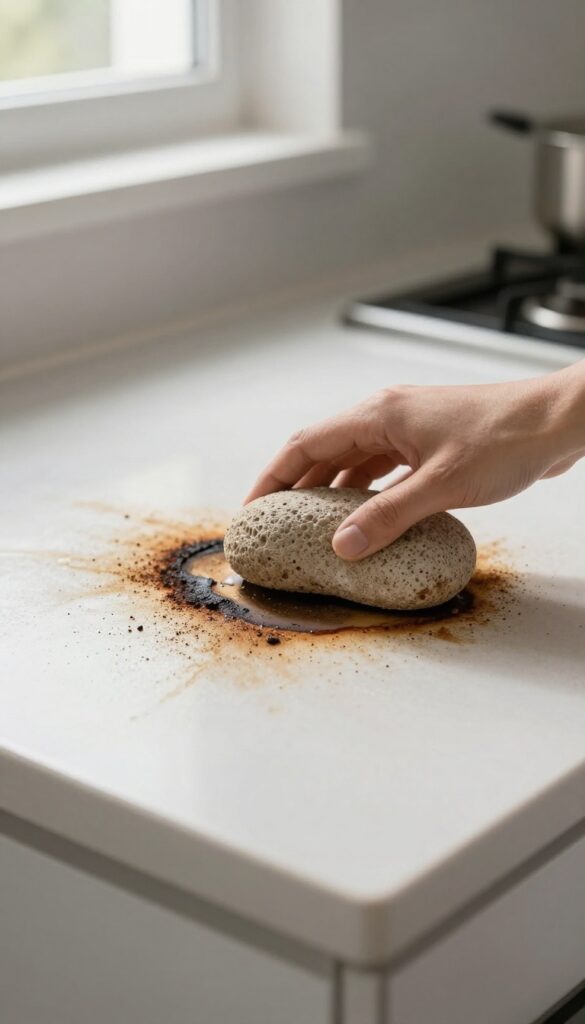
Burnt-on spills on the oven floor can feel impossible to remove, but a pumice stone offers a surprisingly simple solution. This natural volcanic rock works like a gentle eraser, lifting stubborn residue without scratching ceramic or enamel surfaces when used correctly. It's a favorite among professional cleaners for good reason.
Using a pumice stone is straightforward, but technique matters. Start by wetting the stone thoroughly—never use it dry, as that can cause scratches. Gently rub the burnt area in a circular motion with light pressure.
The stone will gradually wear down as it lifts the grime. Rinse the stone and the oven floor periodically to check your progress. This method works best on smooth, non-porous surfaces like ceramic or enamel.
Avoid using it on glass, stainless steel, or painted surfaces, as it can cause damage. For extra stubborn spots, pair the stone with a little dish soap or baking soda paste for added abrasion.
How To Choose The Right Pumice Stone
Not all pumice stones are created equal. Look for a fine-grit stone designed for cleaning, often labeled as a "pumice scouring stick. " Avoid rough, porous stones meant for gardening or foot care, as they may be too abrasive.
A good cleaning stone will have a smooth, uniform texture that glides over surfaces without gouging.
Step-by-step Application Tips
Wet the stone and the oven floor before starting. Rub gently with the grain of the surface if possible. Let the stone do the work—no need to press hard.
As the stone gets clogged with residue, rinse it under water to expose fresh abrasive surface. Wipe away loosened grime with a damp cloth. Repeat until the spill is gone.
When To Avoid This Method
Pumice stones are not for every oven. Avoid them on glass doors, stainless steel interiors, or any surface with a non-stick coating. They can also scratch painted or enamel finishes that are thin or damaged.
Always test on a small, hidden area first. If you see any scratching, stop immediately.
9. Ammonia Fumes Method
Ammonia is a powerful degreaser that works on contact, but the fumes method takes a different approach—letting the vapors do the heavy lifting while you sit back. This technique is ideal for ovens with layers of baked-on grease that resist scrubbing. It requires patience and good ventilation, but the results can be impressive with minimal physical effort.
The ammonia fumes method works by placing a small bowl of household ammonia inside a warm (not hot) oven overnight. The vapors soften the hardened grease and grime, making it easy to wipe away the next morning. This method is especially effective for the oven ceiling and back wall, which are hard to reach.
Always ensure the kitchen is well-ventilated and keep ammonia away from children and pets.
How To Set It Up
Preheat your oven to 150°F (65°C) for about 10 minutes, then turn it off. Place a heat-safe bowl containing ½ cup of ammonia on the top rack. Close the oven door and let it sit overnight—at least 8 to 12 hours.
In the morning, open the oven and let it air out for 15 minutes before wiping down the interior with a damp cloth.
Safety Precautions
Ammonia fumes are strong and can irritate your eyes, nose, and throat. Always work in a well-ventilated area—open windows and turn on the exhaust fan. Wear rubber gloves to protect your skin, and avoid mixing ammonia with bleach or other cleaners.
After the treatment, run the oven on a low heat for 10 minutes to dissipate any lingering fumes.
What To Do If The Smell Lingers
After wiping down the oven, you might notice a faint ammonia odor. To neutralize it, place a bowl of white vinegar or lemon juice inside the oven and let it sit for an hour. Alternatively, wipe the interior with a solution of equal parts water and vinegar.
This will leave your oven smelling fresh and ready to use.
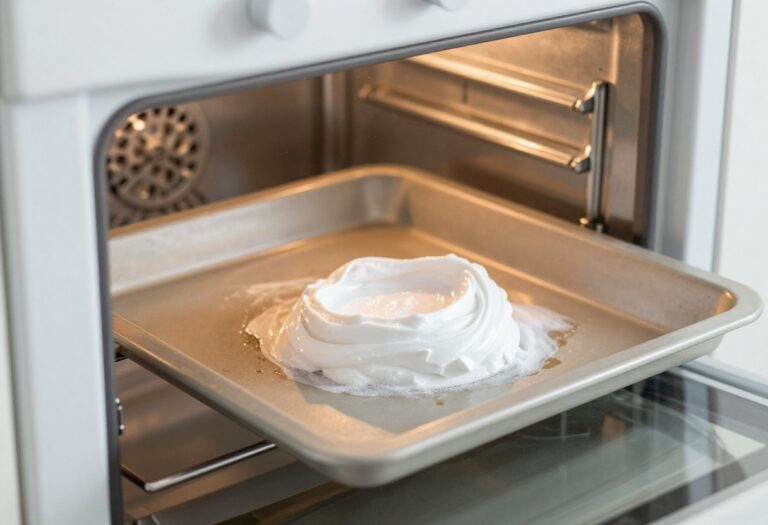
10. Commercial Oven Cleaner (Heavy Duty)
When the grime has built up over months and natural methods aren't cutting it, it's time to bring in the big guns. Commercial oven cleaners like Easy-Off are formulated to dissolve the toughest baked-on grease and carbon deposits with minimal scrubbing. These products contain powerful chemicals that break down residue on contact, but they also require careful handling.
Used correctly, a heavy-duty spray can cut your cleaning time in half and leave your oven looking like new.
For those times when baking soda and vinegar just won't do, a commercial oven cleaner is your best bet. These sprays are designed for serious messes—think burnt-on pie filling, caked-on cheese drips, or months of accumulated grease. The key is following the instructions precisely: spray the interior, close the door, and let the chemicals sit for the recommended time (usually 20 to 30 minutes).
Then wipe away the loosened grime with a damp cloth. Rinse thoroughly to remove any chemical residue before using the oven again.
Safety First
Commercial cleaners contain strong alkalis that can irritate skin and eyes. Always wear rubber gloves and work in a well-ventilated area—open a window or turn on the kitchen exhaust fan. Keep pets and children away until the cleaning is done and the oven is rinsed.
Application Tips
For best results, remove oven racks and clean them separately. Spray the interior surfaces evenly, avoiding heating elements. If your cleaner comes with a foam formula, it clings better to vertical surfaces.
Let it sit without opening the door—peeking releases fumes and reduces effectiveness.
Rinsing Thoroughly
After wiping away the grime, rinse the oven interior with a mixture of water and vinegar to neutralize any leftover chemicals. Wipe down again with plain water, then leave the oven door open to air dry. Run the oven at 200°F for 15 minutes to burn off any remaining fumes before cooking.
11. Self-Cleaning Cycle with a Twist
Your oven's self-cleaning cycle is a powerful tool, but using it wrong can lead to smoke, smells, and even damage. The trick is to prep properly and follow up the right way. Here's how to get the most out of that high-heat scrub without the headache.
Prep Work Matters
Before you hit start, wipe out any loose crumbs or big spills. A dry paper towel works fine. This prevents excessive smoke and makes the final cleanup easier.
Also, remove oven racks unless the manual says otherwise—they can discolor or warp under extreme heat.
The Post-cycle Cleanup
Once the cycle finishes and the oven cools, you'll be left with a layer of ash. Dampen a microfiber cloth and wipe down all interior surfaces. For stubborn spots, a little water on the ash creates a paste that lifts residue.
Rinse and dry thoroughly before using the oven again.
Use It Sparingly
Self-cleaning cycles run at extremely high temperatures, which can stress oven components like seals, thermostats, and control panels. Limit use to once or twice a year, or only when grime is really baked on. For light messes, stick with gentler methods like steam or baking soda.
12. Toothbrush for Crevices
The tight spots around your oven door—hinges, seals, and corners—are magnets for baked-on grime that a sponge can't reach. A simple toothbrush, paired with a baking soda paste, gets into those crevices without scratching surfaces. This method is cheap, gentle, and surprisingly effective for detail work.
Mix a thick paste of baking soda and water, then dip an old toothbrush into it. Scrub along the door hinges, the rubber gasket, and any narrow gaps where grease hides. Let the paste sit for five minutes before wiping with a damp cloth.
For stubborn buildup, repeat or add a drop of dish soap to the paste.
Why A Toothbrush Works Best
A toothbrush's small head and stiff bristles are perfect for precision cleaning. Unlike a scrub brush, it fits into the narrow channels around oven door seals and hinge joints. The bristles dislodge grime without damaging rubber or metal.
Step-by-step: Crevice Cleaning
First, remove loose debris with a dry cloth. Dip the toothbrush in your baking soda paste and scrub each crevice in a circular motion. Focus on the hinge area, where grease collects, and the door seal, where crumbs get trapped.
Wipe away residue with a damp microfiber cloth.
Pro Tips For Stubborn Spots
If the paste dries on, spray it lightly with vinegar to reactivate the fizzing action. For rubber seals, avoid harsh chemicals that can cause cracking. A toothbrush with angled bristles reaches deeper into corners.
Rinse the brush often to avoid spreading grime.
13. Razor Blade Scraper for Glass
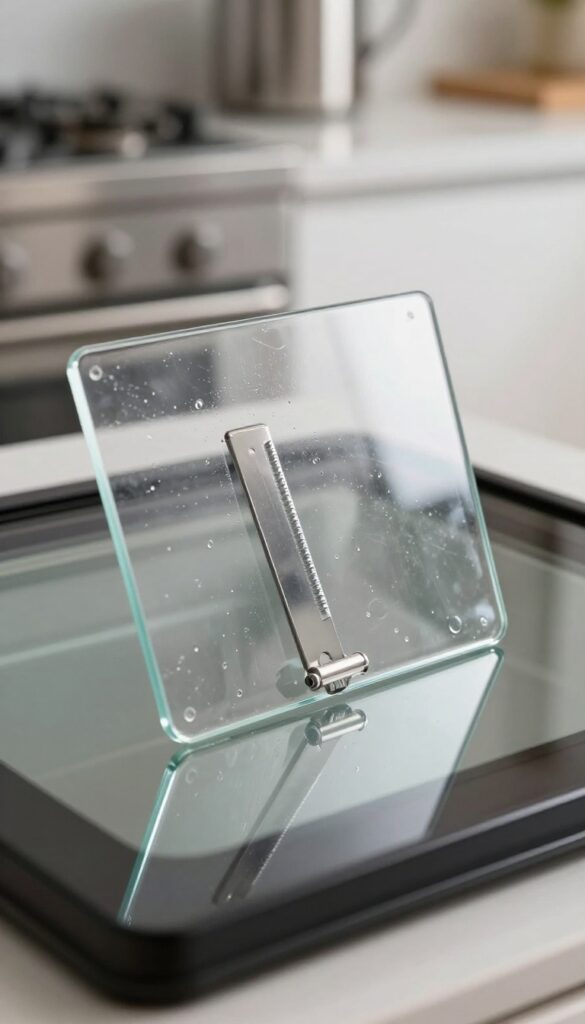
The oven door glass often gets overlooked because it looks clear enough, but up close, it's usually covered in a haze of baked-on splatters and grease. A razor blade scraper is a quick fix that restores that crystal-clear view without any chemicals. You don't need to be a pro to use one safely.
The trick is all in the angle and a light touch. This method works best on flat glass surfaces, so skip it for textured or tinted doors.
Why A Razor Blade Works So Well
Baked-on residue bonds tightly to glass, making it resistant to sponges and scrub brushes. A razor blade cuts right through that bond, lifting off carbonized bits and grease in one smooth pass. It's especially effective for the thick, crusty spots that won't budge with elbow grease alone.
How To Use It Safely
Always use a new, sharp blade to avoid scratches. Hold the scraper at a 45-degree angle to the glass, and pull it toward you in long, steady strokes. Keep the glass wet with a little soapy water or glass cleaner to lubricate the blade and reduce friction.
Never use a dry blade—it can scratch.
When To Skip This Method
Avoid using a razor blade on oven doors with a tinted or coated glass layer, as it can peel or scratch the coating. Also, don't use it on ceramic or enamel surfaces inside the oven—only on the smooth glass door. If you're unsure, test a small hidden corner first.
14. Essential Oil Deodorizer
Even after a deep clean, ovens can hold onto stubborn smells from past meals—burnt cheese, smoky residues, or lingering grease. That's where essential oils come in: they don't just mask odors, they neutralize them while leaving a light, natural scent. Lemon and orange oils are particularly effective because their citrus compounds break down odor molecules and add a fresh, clean aroma without any chemical aftertaste.
To use this method, simply add a few drops of your favorite citrus essential oil to your regular cleaning paste (baking soda and water works great) or to a spray bottle filled with vinegar and water. Scrub as usual, then wipe clean. The oil will help cut through grease while the scent lingers pleasantly.
For a quick refresh between deep cleans, you can also place a small bowl of water with 5–10 drops of essential oil in a cold oven and let it sit overnight—the steam will gently deodorize without any scrubbing.
Why Citrus Oils Work Best
Lemon and orange essential oils contain d-limonene, a natural solvent that dissolves grease and neutralizes acidic odors. They're also antimicrobial, which helps prevent mold and bacteria from causing funky smells. Avoid floral or woodsy oils—they can leave a cloying scent when heated.
How To Apply It Safely
Never apply undiluted essential oil directly to oven surfaces, as it may damage finishes. Always mix with a carrier like water, vinegar, or baking soda paste. For the overnight steam method, use a heat-safe bowl and keep the oven off.
After steaming, wipe down interior surfaces to remove any oil residue.
15. Aluminum Foil Liner for Drip Trays

Drip trays and the oven bottom catch everything—spilled casseroles, bubbling pie fillings, and greasy drips. Without protection, those messes bake into stubborn stains that require serious scrubbing. A simple sheet of aluminum foil can change that.
Lining your oven's bottom with aluminum foil creates a disposable barrier that catches spills before they become permanent. Just make sure the foil never touches the heating elements—that's a fire hazard. Replace the foil when it gets dirty, and your oven stays cleaner with almost no effort.
Why It Works
Aluminum foil is heat-resistant up to 600°F and creates a smooth, non-stick surface. Spills land on the foil instead of the oven floor, so they don't bake on. When the foil gets grimy, you simply ball it up and toss it—no scrubbing required.
How To Do It Right
Tear off a piece of heavy-duty foil large enough to cover the oven bottom. Gently press it into place, making sure it lies flat and doesn't block any vents or touch the heating elements. For electric ovens with exposed coils, leave at least an inch of clearance.
Replace the foil every few weeks or after a major spill.
What To Avoid
Never line the oven walls or racks—that can trap heat and cause uneven cooking. Also avoid using foil on the oven floor during self-cleaning cycles, as the extreme heat can cause it to melt or fuse to the surface. Stick to the bottom only, and keep it away from heat sources.
16. Vinegar Soak for Oven Racks
Oven racks are notorious for trapping grease and burnt-on food in their crevices. Instead of scrubbing for hours, let a vinegar soak do the heavy lifting. This method uses common household ingredients to break down grime without harsh fumes.
Fill your bathtub or a large plastic bin with enough hot water to fully submerge the racks. Add two cups of white vinegar and let the racks soak for at least an hour—overnight for heavily soiled ones. The acid in the vinegar loosens baked-on residue.
After soaking, scrub with a non-abrasive brush or sponge; the grime should slide off easily. Rinse thoroughly and dry before placing back in the oven.
Why Vinegar Works So Well
Vinegar is a mild acid that dissolves grease and mineral deposits without damaging metal. It's safe, cheap, and eco-friendly—no need for chemical sprays. The hot water helps activate the vinegar, speeding up the breakdown of stubborn stains.
Tips For A Successful Soak
Make sure racks are completely covered by the water-vinegar mix. If they're too long, rotate them halfway through. For extra tough spots, sprinkle baking soda on the racks before scrubbing—it adds gentle abrasion.
Protect your bathtub by placing a towel or old sheet underneath to prevent scratches.
After The Soak: Drying And Reinstalling
Once clean, dry racks with a lint-free cloth to prevent water spots. Let them air-dry completely before sliding back into the oven to avoid rust. This method leaves racks looking like new, with minimal effort.
17. Dish Soap and Borax Paste
If you've got stubborn grease that won't budge with regular cleaners, it's time to bring out the big guns—without resorting to toxic chemicals. A paste made from dish soap, Borax, and warm water creates a powerful degreaser that's gentle on surfaces but tough on grime. Borax is a natural mineral that boosts the cleaning power of soap, breaking down baked-on grease and lifting it away.
This method is especially effective on oven walls, the door interior, and any area where grease has built up over time.
To make the paste, mix equal parts dish soap and Borax in a small bowl, then add just enough warm water to form a thick, spreadable consistency. Apply it generously to the greasy areas using a sponge or your fingers (wear gloves if you prefer). Let it sit for 15–20 minutes—longer for really stubborn spots—so the Borax can penetrate and loosen the grime.
Then scrub with a damp sponge or a soft brush, rinsing frequently. You'll see the grease dissolve away with minimal effort. This paste is safe for enamel and stainless steel interiors, but avoid using it on aluminum or nonstick coatings, as Borax can be abrasive.
Why Borax Works So Well
Borax has a high pH that helps saponify fats, turning grease into a soap-like substance that rinses away easily. Combined with dish soap's surfactants, it creates a one-two punch against baked-on residues. It's also a natural deodorizer, so it helps neutralize any lingering food odors in the oven.
Where To Apply This Paste
This paste is ideal for the oven's interior walls, the top interior panel, and the door's inner surface. Avoid using it on heating elements or the oven's glass window, as Borax can scratch glass. For the window, stick to a gentler cleaner like vinegar and water.
Also, steer clear of aluminum surfaces, as Borax can cause discoloration.
Tips For Maximum Effectiveness
For extra-stubborn spots, let the paste sit for up to 30 minutes, or apply a thicker layer. You can also add a few drops of lemon essential oil for a fresh scent. After scrubbing, wipe down the oven with a damp cloth to remove any residue, then dry with a microfiber towel.
This method works best if the oven is cool to the touch.
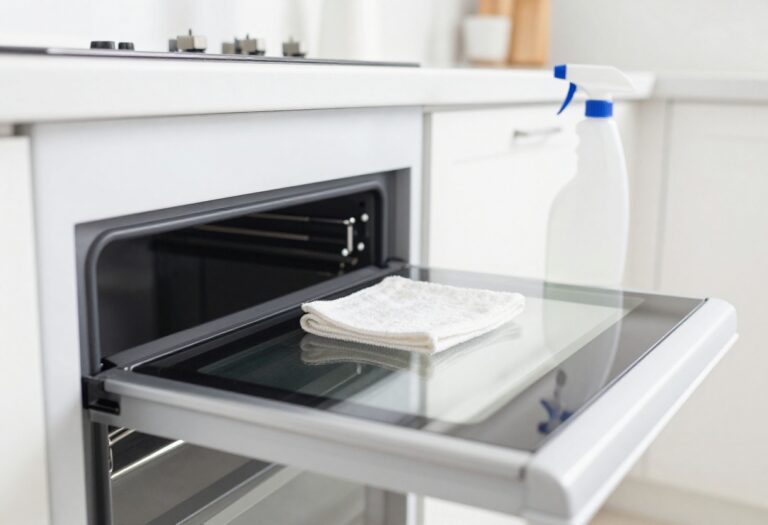
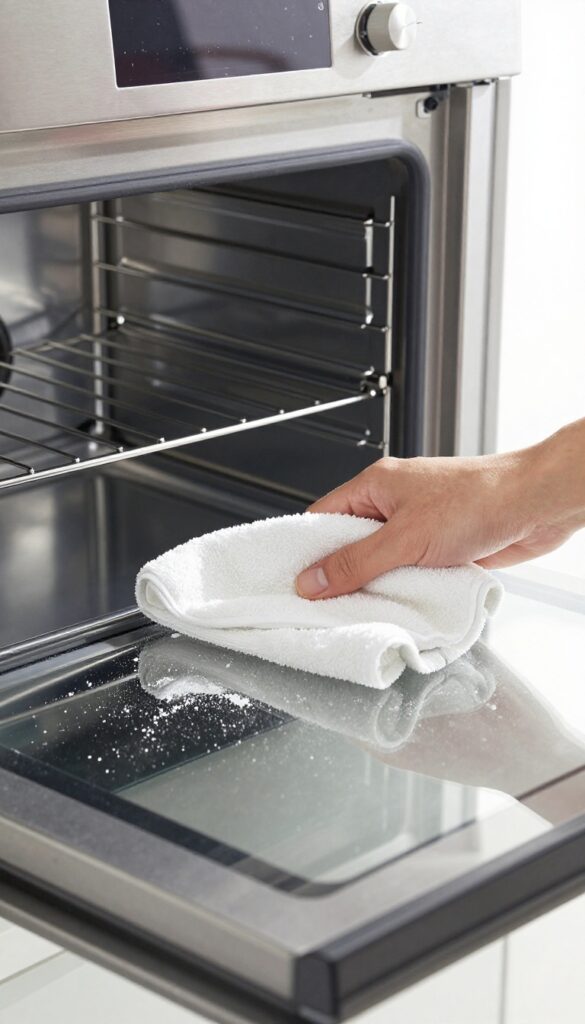
18. Steam Clean with a Wet Towel
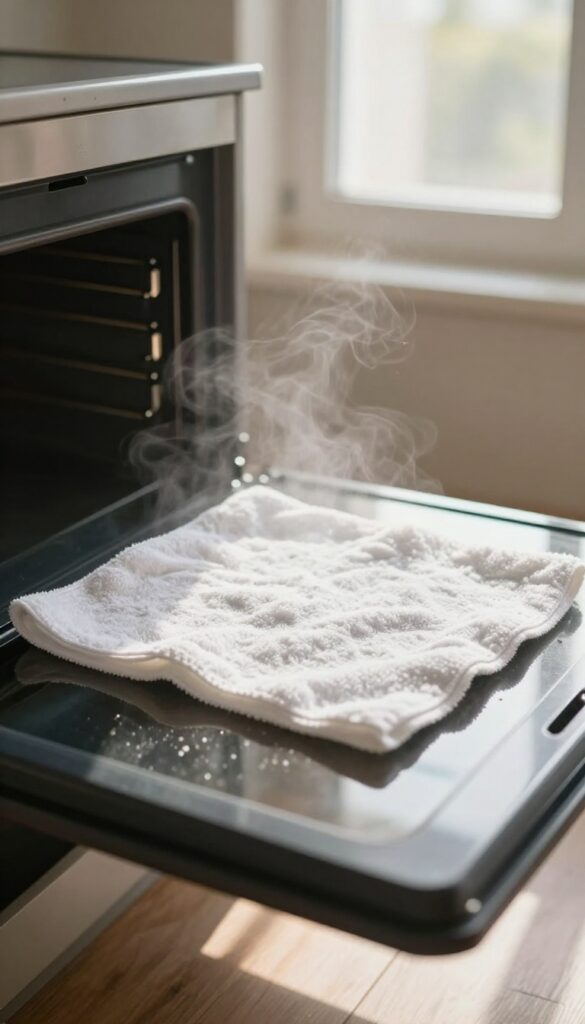
Steam is one of the most effective ways to loosen baked-on grime without scrubbing. This method uses just a wet towel and low heat to create steam inside your oven, softening stubborn residue so it wipes away easily. It's gentle, chemical-free, and works wonders on dried spills.
How It Works
Place a damp (not dripping) towel on the oven floor. Close the door and set the oven to 250°F (120°C). Let it heat for 20-30 minutes.
The moisture turns to steam, which penetrates and softens burnt-on food and grease. After turning off the oven, let it cool slightly, then remove the towel and wipe down the interior with a sponge or cloth.
Best For Light To Moderate Grime
This method is ideal for ovens with dried spills, splatters, or a thin layer of grease. For heavy, caked-on buildup, you may need to repeat the process or combine it with a baking soda paste. It's also great for refreshing the oven between deep cleans.
Safety Tips
Make sure the towel is damp, not soaking wet, to avoid water pooling and damaging the heating element. Never use a synthetic towel that could melt—stick with cotton or microfiber. Always let the oven cool before wiping to prevent burns.
19. Magic Eraser for Stubborn Marks
Scuff marks and light burns on the oven interior can be frustrating, especially after a deep clean. A melamine sponge—commonly known as a Magic Eraser—is a gentle abrasive that lifts these marks without scratching the surface. Just dampen the sponge and lightly rub the affected area.
The foam acts like fine sandpaper, removing discoloration while being safe for enamel and glass. This trick works best on light stains, not heavy baked-on grease.
How To Use A Magic Eraser Safely
Always start with a clean, damp sponge—never dry, as that can scratch. Gently rub the mark in small circles, applying light pressure. Check frequently to avoid over-scrubbing.
Rinse the area with water afterward to remove any residue.
Best Spots For This Method
Magic Erasers excel on the oven door glass, side walls, and the ceiling—places where scuffs from pans or accidental splatters accumulate. Avoid using them on self-cleaning oven liners or any non-stick coating, as they can damage the surface.
When To Skip The Eraser
For deep, baked-on grease or stubborn burnt food, stick with a baking soda paste or a commercial cleaner. The Magic Eraser is a finishing tool, not a heavy-duty degreaser. Use it after your main cleaning to polish away remaining marks.
20. Regular Maintenance Wipe-Down
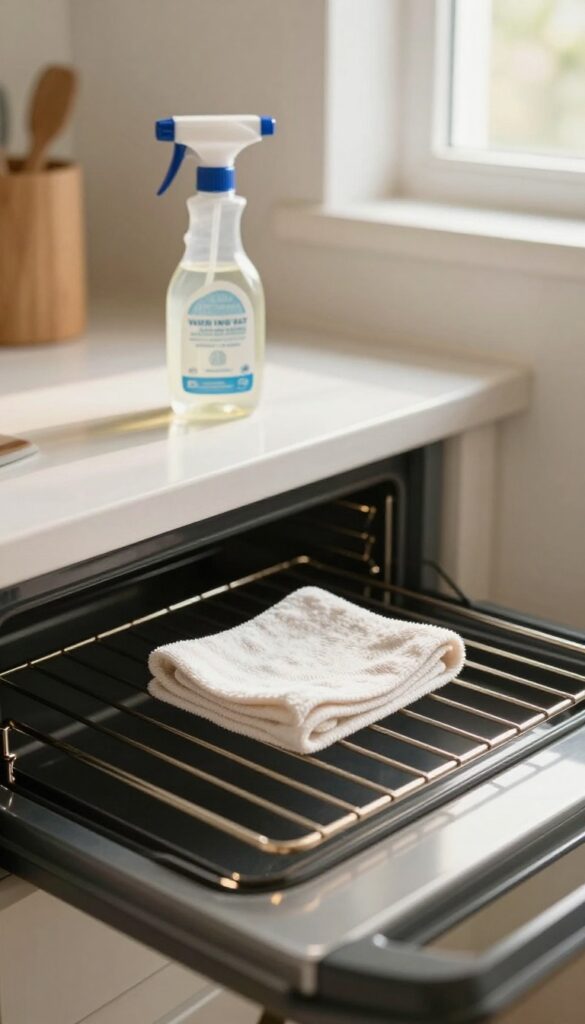
The best deep clean is the one you barely need. A quick wipe-down after each use stops grime from building up in the first place. This habit takes less than a minute but saves you from hours of scrubbing later.
It's the simplest trick in the book, yet it makes the biggest difference. Think of it as a daily reset that keeps your oven looking fresh and functioning well. No harsh chemicals needed—just a damp cloth and a little consistency.
Why It Works
Fresh spills wipe away easily. Once they bake on during the next heating cycle, they turn into stubborn crust. A quick damp cloth right after cooking lifts grease and food particles before they harden.
This also prevents smoke and odors from burnt residue during future uses. Your oven stays cleaner, and your kitchen smells better.
What You Need
Just a soft cloth or sponge and warm water. For greasy spots, add a drop of dish soap. Avoid abrasive scrubbers that can scratch the interior surface.
Keep a microfiber cloth handy near the oven so you remember to do it. Out of sight, out of mind—so make it visible.
When To Do It
Right after the oven cools down enough to touch safely. Usually, that's about 15–20 minutes after you turn it off. Don't wait until the next day.
If you've roasted something particularly messy, give the interior a quick spray with a 50/50 vinegar-water solution before wiping. It cuts grease without leaving residue.
Pro Tip For Stubborn Spots
For dried-on drips, dampen the cloth and lay it over the spot for a minute. The moisture softens the crust, and it wipes right off. No scrubbing required.
This method works especially well on the oven door glass, where splatters tend to bake into a hazy film. A quick wipe after each use keeps the glass crystal clear.
FAQ
How often should I deep clean my oven?
Aim for a deep clean every 3 to 6 months, depending on usage. If you cook frequently or have heavy spills, clean more often.
Can I use oven cleaner on self-cleaning ovens?
Yes, but avoid using harsh chemicals if your oven has a self-cleaning cycle, as they can damage the coating. Stick to natural methods or follow the manufacturer's guidelines.
Is it safe to use ammonia to clean an oven?
Ammonia is effective but must be used with caution. Ensure good ventilation, wear gloves, and never mix it with bleach or other cleaners.
How do I clean the oven door glass without streaks?
Use a mixture of vinegar and water or a glass cleaner, then wipe with a microfiber cloth in circular motions. For stubborn residue, a razor blade scraper works well.
Can I put oven racks in the dishwasher?
Check your oven's manual; some racks are dishwasher-safe, but others may discolor or lose their coating. Hand washing with hot water and dish soap is often safer.
Conclusion
A deep oven clean doesn't have to be a dreaded chore. With the right approach—whether it's a natural paste or a heavy-duty spray—you can restore your oven to like-new condition without spending hours scrubbing. Pick the methods that fit your schedule and cleaning style, and enjoy a kitchen that feels fresh and ready for your next meal.
Remember, regular maintenance is the secret to avoiding major buildup. A quick wipe after each use keeps your oven looking great and performing at its best.